crossmax slr disc 09 - lesrouleuxdewailly - Free
crossmax slr disc 09 - lesrouleuxdewailly - Free
crossmax slr disc 09 - lesrouleuxdewailly - Free

You also want an ePaper? Increase the reach of your titles
YUMPU automatically turns print PDFs into web optimized ePapers that Google loves.
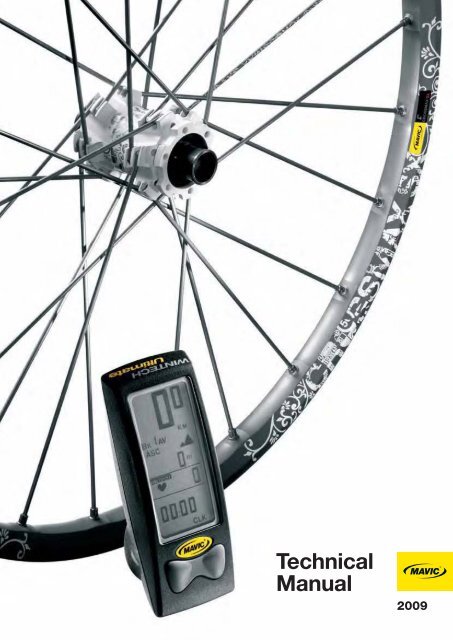
Technical<br />
Manual<br />
20<strong>09</strong>
02<br />
20<strong>09</strong><br />
WWW.TECH-MAVIC.COM<br />
CONTENTS<br />
03.<br />
WWW.TECH-MAVIC.COM<br />
04>36. MAVIC ® WHEELS<br />
04. COSMIC CARBONE SL <strong>09</strong><br />
05. COSMIC CARBONE SLR<br />
06. COMETE ROAD <strong>09</strong><br />
07. KSYRIUM ELITE <strong>09</strong><br />
08. R-SYS PREMIUM<br />
<strong>09</strong>. CROSSMAX SLR DISC <strong>09</strong><br />
10. CROSSMAX SLR DISC <strong>09</strong> CENTER-LOCK<br />
11. CROSSMAX SLR DISC <strong>09</strong> 20MM<br />
12. CROSSMAX SLR DISC <strong>09</strong> LEFTY<br />
13. CROSSRIDE UB/DISC<br />
14. CROSSRIDE DISC<br />
15. CROSSMAX ST DISC <strong>09</strong><br />
16. CROSSMAX ST DISC <strong>09</strong> CENTER-LOCK<br />
17. CROSSLINE<br />
18. CROSSLINE CENTER-LOCK<br />
19. CROSSMAX SX <strong>09</strong><br />
20. CROSSMAX SX <strong>09</strong> CENTER-LOCK<br />
21. DEETRAKS <strong>09</strong> & DEETRAKS <strong>09</strong> 12X150<br />
22. DEEMAX <strong>09</strong> & DEEMAX <strong>09</strong> 12X150<br />
23. DEEMAX <strong>09</strong> SSC<br />
24>45. WHEEL MAINTENANCE<br />
25>30. HUB MAINTENANCE<br />
31>45. WHEEL BUILDING/REPLACING SPOKES AND RIMS<br />
46>48. SYSTEMS & ACCESSORIES<br />
46. WINTECH FS <strong>09</strong><br />
47. WINTECH ULTIMATE<br />
48. TROUBLESHOOTING<br />
49>51.<br />
TOOLS<br />
THIS DOCUMENT ONLY COVERS NEW PRODUCTS FOR 20<strong>09</strong>.<br />
THIS DOCUMENT UPDATES YOUR TECHNICAL INFORMATION AND SHOULD THEREFORE BE KEPT CAREFULLY, WITH NO TIME<br />
LIMITATION, WITH THE MANUALS FROM PREVIOUS YEARS.<br />
ALL INFORMATION ON PRODUCTS ALREADY INCLUDED IN PREVIOUS RANGES CAN BE FOUND IN THE TECHNICAL MANUALS<br />
PUBLISHED SINCE 1997.<br />
PLEASE VISIT THE INTERNET SITE www.tech-mavic.com TO FIND ALL EDITIONS OF THIS MANUAL PUBLISHED SINCE 1997.
www.tech-mavic.com<br />
03<br />
This website (in French, English, German, Spanish, Italian and Japanese) is at your complete disposal. All information about Mavic products released<br />
since 1997 is available in PDF format and downloadable from this site that is both easy to access and simple to use.<br />
Visit: www.tech-mavic.com where you will find all this information. To connect to this website you will need a user name and password:<br />
French User name: mavic-fr<br />
Password: detaillant<br />
Spanish User name: mavic-es<br />
Password: detallista<br />
English User name: mavic-com<br />
Password: dealer<br />
Italian User name: mavic-it<br />
Password: dettaglianti<br />
German User name: mavic-de<br />
Password: haendler<br />
Japanese User name: mavic-jp<br />
Password: dealer<br />
Among other things on the website, you will find:<br />
• Full technical details on all the Mavic products marketed since 1997 - wheels, rims, components - set out by <strong>disc</strong>ipline and by product;<br />
• 4 recap charts of spoke lengths and references for all our wheels, which will help you to manage your spoke stock;<br />
• A program for calculating spoke length: starting with a Mavic rim, select the drilling and lacing pattern and the width of your hub, as well as the<br />
diameter of the flanges and the distances between the flange and the frame or fork support; the spoke length required to build your wheel will be<br />
calculated automatically.<br />
We hope that this tool will meet your needs. Do not hesitate to point out any malfunctions you identify or improvements that you would like to see.
COSMIC CARBONE SL <strong>09</strong><br />
04<br />
USE: use only on a road bike. Any other use (such as on<br />
a tandem, cyclo-cross bike, or off-road use...) is highly<br />
inadvisable, is the sole responsibility of the user and voids<br />
the Mavic warranty.<br />
Recommended maximum weight of the cyclist and his<br />
equipment: 100 kg.<br />
WHEEL WEIGHTS WITHOUT<br />
QUICK-RELEASE SKEWER<br />
Front:<br />
780 g<br />
Rear M10: 975 g<br />
Rear ED10: 960 g<br />
WHEEL REFERENCES<br />
Front: 995 530 10<br />
Rear M10: 996 531 11<br />
Rear ED10: 995 532 12<br />
Pair M10: 995 533 14<br />
Pair ED10: 995 534 14<br />
RIMS<br />
REFERENCES: Front: 996 840 10<br />
Rear: 996 840 13<br />
Ø VALVE HOLE<br />
Ø: 6.5 mm<br />
Length.: 55 mm<br />
RECOMMENDED TIRE WIDTH<br />
Dimensions: ETRTO 622 x 13C<br />
Recommended tire width: 19 to 28 mm<br />
HUBS<br />
When replacing the rear rim:<br />
1. With the valve hole near you, turn the rim so that the “infobloc” label can be seen<br />
2. The first spoke to the right of the valve hole is a non-traction driving spoke and should be inserted in the drive side of the hub<br />
MAINTENANCE: Clean with a dry cloth or soap and water if necessary.<br />
Do not use a high-pressure washer.<br />
M40052<br />
M40078<br />
M40759<br />
M40063<br />
M40075<br />
M40578<br />
M40591 (ED10)<br />
M40592 (M10)<br />
324 130 01<br />
M40676<br />
M40578 995 000 01<br />
323 860 01<br />
M40067<br />
WHEEL BUILDING<br />
REFERENCES AND<br />
LENGTHS:<br />
Front:<br />
Rear drive side:<br />
Rear non-drive side:<br />
996 841 01, length 289 mm (per 8, with nipples)<br />
996 842 01, length 306 mm (per 10, with nipples)<br />
996 843 01, length 288 mm (per 10, with nipples)<br />
FEATURES:<br />
Black steel straight pull spokes with ABS spoke nipples<br />
LACING PATTERN:<br />
Front: radial<br />
Rear: crossed 2 drive side, radial non-drive side<br />
TENSION:<br />
Front: 120 to 140 kg<br />
Rear drive side: 140 to 160 kg<br />
ACCESSORIES<br />
WHEELS SUPPLIED WITH:<br />
• BR 301 front quick-release skewer 996 939 01<br />
• BR 301 rear quick-release skewer 996 940 01<br />
• ED10 12D locking ring M40640 (with rear wheel ED10)<br />
• <strong>Free</strong> play adjustment wrench M40123 (with rear wheel)<br />
• Spoke wrench M40001 (with rear wheel)<br />
• Aerodynamic spoke wrench M40567 (with rear wheel)<br />
• Valve extender M40013<br />
• Rim tape<br />
• User guide<br />
MAINTENANCE<br />
• Replacing the front axle<br />
• Replacing the front bearings<br />
• Replacing the rear axle<br />
• Replacing the free wheel body<br />
• Replacing the rear bearings<br />
• Replacing a spoke<br />
• Replacing the front rim<br />
• Replacing the rear rim<br />
See 2005 TM, page 20<br />
See 2005 TM, page 20<br />
See 2003 TM, page 19<br />
See 2003 TM, page 21<br />
See 2003 TM, page 22<br />
See 2005 TM, page 23<br />
See 2005 TM, page 24<br />
See 2005 TM, page 27<br />
To consult this information quickly in a practical manner, refer to www.tech-mavic.com
COSMIC CARBONE SLR<br />
05<br />
USE: use only on a road bike. Any other use (such as on<br />
a tandem, cyclo-cross bike, or off-road use...) is highly<br />
inadvisable, is the sole responsibility of the user and voids<br />
the Mavic warranty.<br />
Recommended maximum weight of the cyclist and his<br />
equipment: 100 kg.<br />
WHEEL WEIGHTS WITHOUT<br />
QUICK-RELEASE SKEWER<br />
Front:<br />
725 g<br />
Rear M10: 885 g<br />
Rear ED10: 870 g<br />
WHEEL REFERENCES<br />
Front: 995 540 10<br />
Rear M10: 996 541 11<br />
Rear ED10: 995 542 12<br />
Pair M10: 995 543 14<br />
Pair ED10: 995 544 14<br />
RIMS<br />
REFERENCES: Front: 996 834 10<br />
Rear: 996 834 13<br />
Ø VALVE HOLE<br />
Ø: 6.5 mm<br />
Length.: 55 mm<br />
RECOMMENDED TIRE WIDTH<br />
Dimensions: ETRTO 622 x 13C<br />
Recommended tire width: 19 to 28 mm<br />
When replacing the rear rim:<br />
The side of the rim where the spoke holes are the nearest to the leaking edge is the drive side.<br />
HUBS<br />
MAINTENANCE: Clean with a dry cloth or soap and water if necessary.<br />
Do not use a high-pressure washer.<br />
M40078<br />
996 033 01<br />
M40063<br />
996 839 01<br />
996 032 01<br />
996 035 01 996 034 01<br />
M40578<br />
995 000 01<br />
M40592 (M10)<br />
M40591 (ED10)<br />
M40067 324 130 01<br />
M40077<br />
996 839 01<br />
WHEEL BUILDING<br />
REFERENCES AND<br />
LENGTHS:<br />
Front and rear non-drive side:<br />
Drive side:<br />
996 835 01, R2R spokes, (per 5, with ABS nipples)<br />
996 836 01, R2R spokes, (per 5, with ABS nipples)<br />
FEATURES:<br />
Unidirectional R2R carbon spokes (rim to rim), ABS nipples<br />
LACING PATTERN:<br />
Front and rear: crossed 2 on both sides<br />
TENSION:<br />
Front: 80 to 100 kg<br />
Rear drive side: 90 to 110 kg<br />
ACCESSORIES<br />
WHEELS SUPPLIED WITH:<br />
• BR 601 front quick-release M40149<br />
• BR 601 rear quick-release M40150<br />
• Computer magnet 996 245 01 (with front wheel)<br />
• <strong>Free</strong> play adjustment wrench M40123 (with rear wheel)<br />
• Aerodynamic spoke wrench M40567 (with rear wheel)<br />
• Spoke wrench M40001 (with rear wheel)<br />
• Valve extender M40013<br />
• Rim tape<br />
• ED10 12D locking ring M40640 (with rear wheel ED10)<br />
• User guide and warranty card<br />
MAINTENANCE<br />
Replacing the front axle and bearings<br />
Replacing the rear axle<br />
Maintaining and replacing the free wheel mechanism<br />
Replacing the rear bearings<br />
Replacing a spoke<br />
Replacing the front rim<br />
Replacing the rear rim<br />
See 2005 TM, page 20<br />
See 2008 TM, page 23<br />
See 2003 TM, page 21<br />
See 2008 TM, page 24<br />
See page 32<br />
See page 33<br />
See pages 34/35<br />
To consult this information quickly in a practical manner, refer to www.tech-mavic.com
COMETE ROAD <strong>09</strong><br />
06<br />
USE: use only on a road bike. Any other use (such as on<br />
a tandem, cyclo-cross bike, or off-road use...) is highly<br />
inadvisable, is the sole responsibility of the user and voids<br />
the Mavic warranty.<br />
Recommended maximum weight of the cyclist and his<br />
equipment: 100 kg.<br />
WHEEL WEIGHTS WITHOUT<br />
QUICK-RELEASE SKEWER<br />
M10: 1165 g<br />
ED10: 1150 g<br />
WHEEL REFERENCES<br />
M10: 996 216 11<br />
ED10: 996 217 12<br />
RIMS<br />
Ø VALVE HOLE<br />
Ø: 6.5 mm<br />
Length.: 32 mm<br />
RECOMMENDED TIRE WIDTH<br />
Dimensions: ETRTO 622 x 13C<br />
Recommended tire width: 19 to 28 mm<br />
HUBS<br />
MAINTENANCE: Clean with a dry cloth or soap and water if necessary.<br />
Do not use a high-pressure washer.<br />
M40077<br />
995 000 01<br />
M40067<br />
M40592 (M10)<br />
M40591 (ED10)<br />
324 130 01<br />
M40579<br />
996 833 01<br />
ACCESSORIES<br />
WHEEL SUPPLIED WITH:<br />
MAINTENANCE<br />
• BR 601 rear quick-release M40150<br />
• ED10 12D locking ring M40640 (with rear wheel ED10)<br />
• Rim tape<br />
• Valve extender 323 634 01<br />
• User guide<br />
Replacing the rear axle<br />
Maintaining and replacing the free wheel mechanism<br />
Replacing the rear bearings<br />
See 2008 TM, page 23<br />
See 2003 TM, page 21<br />
See 2008 TM, page 24<br />
To consult this information quickly in a practical manner, refer to www.tech-mavic.com
KSYRIUM ELITE <strong>09</strong><br />
07<br />
USE: use only on a road bike. Any other use<br />
(such as on a tandem, cyclo-cross bike, or<br />
off-road use...) is highly inadvisable, is the<br />
sole responsibility of the user and voids<br />
the Mavic warranty.<br />
Recommended maximum weight of the<br />
cyclist and his equipment: 100 kg.<br />
WHEEL WEIGHTS<br />
Ø 700 WITHOUT<br />
QUICK-RELEASE<br />
SKEWER<br />
Front:<br />
675 g<br />
Rear M10: 890 g<br />
Rear ED10: 875 g<br />
WHEEL WEIGHTS<br />
Ø 650 WITHOUT<br />
QUICK-RELEASE<br />
SKEWER<br />
Front:<br />
640 g<br />
Rear M10: 805 g<br />
Rear ED10: 790 g<br />
BLACK WHEEL REFERENCES:<br />
Ø 700 Ø 650<br />
Front: 996 155 10 996 165 10<br />
Rear M10: 996 156 11 996 166 11<br />
Rear ED10: 996 157 12 996 167 12<br />
Pair M10: 996 158 14 996 168 14<br />
Pair ED10: 996 159 14 996 169 14<br />
SILVER WHEEL<br />
REFERENCES:<br />
Front: 996 160 10<br />
Rear M10: 996 161 11<br />
Rear ED10: 996 162 12<br />
Pair M10: 996 163 14<br />
Pair ED10: 996 164 14<br />
RIMS<br />
REFERENCES:<br />
Black: Front: 996 855 10<br />
Rear: 996 855 13<br />
Silver: Front: 996 863 10<br />
Rear: 996 863 13<br />
Ø 650 (Black): Front: 996 869 10<br />
Rear: 996 869 13<br />
Ø VALVE HOLE<br />
RECOMMENDED TIRE WIDTH<br />
Ø: 6.5 mm<br />
Length.: 32 mm<br />
Dimensions: Ø 700: ETRTO 622 x 15C<br />
Ø 650: ETRTO 571 x 15C<br />
Recommended tire width: 19 to 32 mm<br />
HUBS<br />
When replacing the rear rim:<br />
1. With the valve hole near you, the two raised indicator bumps must be to the left of the valve hole<br />
2. The first spoke to the right of the valve hole is a driving spoke and should be inserted in the non-drive side of the hub<br />
MAINTENANCE: Clean with a dry cloth or soap and water if necessary.<br />
Do not use a high-pressure washer.<br />
M40318<br />
996 861 01<br />
M40063<br />
M40063<br />
M40578 995 000 01<br />
M40591 (ED10)<br />
M40592 (M10)<br />
324 130 01<br />
996 862 01<br />
M40660<br />
M40067<br />
As the front hub is made up of three parts, maintenance operations (replacing the axle or bearings) must always be carried out on the assembled wheel (hub,<br />
rim and spokes assembled).<br />
WHEEL BUILDING<br />
REFERENCES<br />
AND LENGTHS:<br />
Black<br />
Silver<br />
Front<br />
Rear drive side<br />
Rear non-drive side<br />
Front<br />
Rear drive side<br />
Rear non-drive side<br />
Ø 650 Black Front<br />
Rear drive side<br />
Rear non-drive side<br />
996 856 01, length 284 mm, (per 9, integrated nipples)<br />
996 857 01, length 276 mm, (per 10, integrated nipples)<br />
996 858 01, length 301 mm, (per 10, integrated nipples)<br />
996 864 01, length 284 mm, (per 9, integrated nipples)<br />
996 865 01, length 276 mm, (per 10, integrated nipples)<br />
996 866 01, length 301 mm, (per 10, integrated nipples)<br />
996 870 01, length 259 mm, (per 9, integrated nipples)<br />
996 871 01, length 251 mm, (per 10, integrated nipples)<br />
996 872 01, length 280 mm, (per 10, integrated nipples)<br />
FEATURES:<br />
Black or silver stainless steel straight pull spokes with integrated, self-locking M7<br />
screws.<br />
ACCESSORIES<br />
WHEELS SUPPLIED WITH:<br />
• BR 301 front quick-release skewer 996 939 01<br />
• BR 301 rear quick-release skewer 996 940 01<br />
• ED10 12D locking ring M40640 (with rear wheel ED10)<br />
• <strong>Free</strong> play adjustment wrench M40123 (with rear wheel)<br />
• Spoke wrench M40494 (with rear wheel)<br />
• User guide<br />
LACING PATTERN:<br />
Front: radial<br />
Rear: Isopulse<br />
MAINTENANCE<br />
Replacing the front axle and bearings<br />
Replacing the rear axle<br />
Maintaining and replacing the free wheel mechanism<br />
Replacing the rear bearings<br />
Replacing a spoke<br />
Replacing the front rim<br />
Replacing the rear rim<br />
TENSION:<br />
Front: 110 to 130 kg<br />
Rear drive side: 125 to 145 kg<br />
See 2005 TM, page 20<br />
See 2007 TM, page 20<br />
See 2003 TM, page 21<br />
See 2004 TM, page 22<br />
See 2008 TM, page 25<br />
See 2008 TM, page 25<br />
See page 31<br />
To consult this information quickly in a practical manner, refer to www.tech-mavic.com
R-SYS PREMIUM<br />
08<br />
USE: use only on a road bike. Any other use (such as on<br />
a tandem, cyclo-cross bike, or off-road use...) is highly<br />
inadvisable, is the sole responsibility of the user and voids<br />
the Mavic warranty.<br />
Recommended maximum weight of the cyclist and his<br />
equipment: 100 kg.<br />
WHEEL WEIGHTS WITHOUT<br />
QUICK-RELEASE SKEWER<br />
Front:<br />
575 g<br />
Rear M10: 800 g<br />
Rear ED10: 785 g<br />
WHEEL REFERENCES<br />
Front: 996 248 10<br />
Rear M10: 996 249 11<br />
Rear ED10: 996 250 12<br />
Pair M10: 996 378 14<br />
Pair ED10: 996 401 14<br />
RIMS<br />
REFERENCES:<br />
Clincher : Front: 996 848 10<br />
Rear: 996 848 13<br />
Ø VALVE HOLE<br />
Ø: 6.5 mm<br />
Length.: 32 mm<br />
RECOMMENDED TIRE WIDTH<br />
Dimensions: ETRTO 622 x 15C<br />
Recommended tire width: 19 to 32 mm<br />
When replacing the rear rim:<br />
1. With the valve hole near you, the two raised indicator bumps must be to the right of the valve hole<br />
2. The spoke in the first hole to the right of the valve hole is a non-driving spoke and should be inserted in the drive side<br />
of the hub<br />
HUBS<br />
MAINTENANCE: Clean with a dry cloth or soap and water if necessary.<br />
Do not use a high-pressure washer.<br />
996 938 01<br />
M40078<br />
M40052<br />
996 853 01<br />
M40063<br />
996 938 01<br />
M40578<br />
996 035 01<br />
995 000 01<br />
M40067<br />
M40591 (ED10)<br />
M40592 (M10)<br />
995 469 01<br />
M40077<br />
996 854 01<br />
WHEEL BUILDING<br />
REFERENCES AND<br />
LENGTHS:<br />
Front:<br />
Drive side:<br />
Non-drive side:<br />
996 849 01, length 285 mm, (per 9, integrated nipples)<br />
996 073 01, length 294.5 mm, (per 10, integrated nipples)<br />
996 850 01, length 284 mm, (per 10, integrated nipples)<br />
FEATURES:<br />
Front and rear non-drive side: carbon tubular spokes<br />
(TraComp)<br />
Rear drive side: black Zicral straight pull spokes with<br />
integrated, self-locking nipples<br />
ACCESSORIES<br />
WHEELS SUPPLIED WITH:<br />
• BR 601 Titanium front quick-release skewer 323 485 01<br />
• BR 601 Titanium rear quick-release skewer 323 486 01<br />
• Computer magnet built in the spoke (front wheel)<br />
• <strong>Free</strong> play adjustment wrench M40123 (with rear wheel)<br />
• Spoke wrench 996 079 01 (with rear wheel)<br />
• Zicral spoke wrench M40567 (with rear wheel)<br />
• TraComp ring tool 996 080 01<br />
• ED10 12D locking ring M40640 (with rear wheel ED10)<br />
• Wheel bags M40135<br />
• User guide<br />
LACING PATTERN:<br />
Front: radial, TraComp system<br />
Rear: crossed 2 drive side, radial non-drive side,<br />
TraComp system<br />
MAINTENANCE<br />
Replacing the front axle and bearings<br />
Replacing the rear axle<br />
Maintaining and replacing the free wheel mechanism<br />
Replacing the rear bearings<br />
Important note for fitting TraComp spokes<br />
Identifying a damaged TraComp carbon spoke<br />
Removing/Refitting the TraComp ring<br />
Truing and replacing a TraComp spoke<br />
Replacing the front rim<br />
Replacing the rear rim<br />
TENSION:<br />
Front: 70 to 100 kg<br />
Rear drive side: 90 to 110 kg<br />
See 2005 TM, page 20<br />
See 2008 TM, page 24<br />
See 2003 TM, page 21<br />
See 2008 TM, page 24<br />
See 2008 TM, page 28<br />
See 2008 TM, page 28<br />
See page 36<br />
See 2008 TM, page 30<br />
See 2008 TM, page 30<br />
See 2008 TM, page 31<br />
To consult this information quickly in a practical manner, refer to www.tech-mavic.com<br />
Never turn a TraComp spoke nipple with having first removed the TraComp rings from the hub, otherwise the spoke may be irreversible damaged.<br />
Never fit a computer magnet other than the one integrated.<br />
Only transport the wheels in the wheel bags supplied. Avoid side shocks to the TraComp spokes.
CROSSMAX SLR DISC <strong>09</strong><br />
STANDARD<br />
INTERNATIONAL<br />
<strong>09</strong><br />
USE: use only on a Cross Country MTB fitted with <strong>disc</strong><br />
brakes. Any other use (such as on a tandem, road bike, cyclocross<br />
bike, free-ride or downhill bike…) is highly inadvisable,<br />
is the sole responsibility of the user and voids the Mavic<br />
warranty.<br />
Recommended maximum weight of the cyclist and his<br />
equipment: 85 kg.<br />
WHEEL WEIGHTS WITHOUT<br />
QUICK-RELEASE SKEWER<br />
Front:<br />
690 g<br />
Rear:<br />
830 g<br />
WHEEL REFERENCES<br />
Front: 996 412 10<br />
Rear: 996 413 13<br />
Pair: 996 414 14<br />
RIMS<br />
REFERENCES: Front: 996 873 10<br />
Rear: 996 873 13<br />
Ø VALVE HOLE<br />
Ø: 6.5 mm<br />
Length.: 32 mm<br />
RECOMMENDED TIRE WIDTH<br />
Dimensions: Ø 26’’<br />
ETRTO 559 x 17C compatible and Tubeless UST.<br />
Recommended tire width: 1.0’’ to 2.1’’<br />
When replacing the front rim:<br />
1. With the valve hole near you, the raised indicator bump must be to the right of the valve hole<br />
2. The spoke in the first hole to the right of the valve hole is a non-braking spoke and should be inserted in the <strong>disc</strong> side<br />
When replacing the rear rim:<br />
1. With the valve hole near you, the two raised indicator bumps must be to the right of the valve hole<br />
2. The spoke in the first hole to the right of the valve hole should be inserted on the drive side in a marked hole on the hub<br />
HUBS<br />
MAINTENANCE: Clean with a dry cloth or soap and water if necessary.<br />
Do not use a high-pressure washer.<br />
996 941 01<br />
996 885 01<br />
996 882 01<br />
M40075<br />
995 470 01<br />
M40457<br />
995 399 01<br />
995 000 01<br />
324 303 01<br />
M40067<br />
M40580<br />
WHEEL BUILDING<br />
REFERENCES AND<br />
LENGTHS:<br />
Front:<br />
Rear drive side:<br />
Rear non-drive side:<br />
995 376 01, length 261 mm, (per 12 + 3 red, integrated nipples)<br />
995 377 01, length 248 mm, (per 12 + 1 red, integrated nipples)<br />
996 874 01, length 263 mm, (per 12 + 2 red, integrated nipples)<br />
FEATURES:<br />
Black Zicral double butted straight pull spokes (including two<br />
decorated per wheel) with integrated, self-locking M7 aluminum<br />
spoke nipples.<br />
LACING PATTERN:<br />
Front: crossed 2 on both sides<br />
Rear: Isopulse<br />
TENSION:<br />
Front <strong>disc</strong> side: 120 to 140 kg<br />
Rear drive side: 120 to 140 kg<br />
ACCESSORIES<br />
WHEELS SUPPLIED WITH:<br />
MAINTENANCE<br />
• BX 601 Titanium front quick-release skewer 995 388 01<br />
• BX 601 Titanium rear quick-release skewer 995 389 01<br />
• Computer magnet M40540 (with front wheel)<br />
• Spoke wrench M40494 (with rear wheel)<br />
• Axle reducers 15=>9 mm 996 941 01 (with front wheel)<br />
• UST valves 995 282 01<br />
• <strong>Free</strong> play bearing adjustment wrench M40123 (with rear wheel)<br />
• User guide<br />
Front hub assembly diameter conversion<br />
Replacing the front axle and bearings<br />
Replacing the rear axle<br />
Maintaining and replacing the free wheel mechanism<br />
Replacing the rear bearings<br />
Replacing a spoke<br />
Replacing the front rim<br />
Replacing the rear rim<br />
See page 25<br />
See page 26<br />
See 2007 TM, page 20<br />
See 2007 TM, page 21<br />
See 2003 TM, page 22<br />
See 2003 TM, page 24<br />
See page 37<br />
See 2006 TM, page 17<br />
To consult this information quickly in a practical manner, refer to www.tech-mavic.com
CROSSMAX SLR DISC <strong>09</strong> Center-Lock<br />
10<br />
CENTER<br />
LOCK<br />
USE: use only on a Cross Country MTB fitted with <strong>disc</strong><br />
brakes. Any other use (such as on a tandem, road bike, cyclocross<br />
bike, free-ride or downhill bike…) is highly inadvisable,<br />
is the sole responsibility of the user and voids the Mavic<br />
warranty.<br />
Recommended maximum weight of the cyclist and his<br />
equipment: 85 kg.<br />
WHEEL WEIGHTS WITHOUT<br />
QUICK-RELEASE SKEWER<br />
Front:<br />
690 g<br />
Rear:<br />
820 g<br />
WHEEL REFERENCES<br />
Front: 996 499 10<br />
Rear: 996 500 13<br />
Pair: 996 501 14<br />
RIMS<br />
REFERENCES: Front: 996 873 10<br />
Rear: 996 873 13<br />
Ø VALVE HOLE<br />
Ø: 6.5 mm<br />
Length.: 32 mm<br />
RECOMMENDED TIRE WIDTH<br />
Dimensions: Ø 26’’<br />
ETRTO 559 x 17C compatible and Tubeless UST.<br />
Recommended tire width: 1.0’’ to 2.1’’<br />
When replacing the front rim:<br />
1. With the valve hole near you, the raised indicator bump must be to the right of the valve hole<br />
2. The spoke in the first hole to the right of the valve hole is a non-braking spoke and should be inserted in the <strong>disc</strong> side.<br />
When replacing the rear rim:<br />
1. With the valve hole near you, the two raised indicator bumps must be to the right of the valve hole<br />
2. The spoke in the first hole to the right of the valve hole should be inserted on the drive side in a marked hole on the hub<br />
HUBS<br />
MAINTENANCE: Clean with a dry cloth or soap and water if necessary.<br />
Do not use a high-pressure washer.<br />
996 941 01<br />
996 883 01<br />
996 886 01<br />
M40075<br />
995 470 01<br />
M40457<br />
995 642 01<br />
324 303 01<br />
995 000 01<br />
M40067<br />
M40580<br />
WHEEL BUILDING<br />
REFERENCES AND<br />
LENGTHS:<br />
Front:<br />
Rear drive side:<br />
Rear non-drive side:<br />
995 376 01, length 261 mm, (per 12 + 3 red, integrated nipples)<br />
995 377 01, length 248 mm, (per 12 + 1 red, integrated nipples)<br />
996 874 01, length 263 mm, (per 12 + 2 red, integrated nipples)<br />
FEATURES:<br />
Black Zicral double butted straight pull spokes (including two<br />
decorated per wheel) with integrated, self-locking M7 aluminum<br />
spoke nipples.<br />
LACING PATTERN:<br />
Front: crossed 2 on both sides<br />
Rear: Isopulse<br />
TENSION:<br />
Front <strong>disc</strong> side: 120 to 140 kg<br />
Rear drive side: 120 to 140 kg<br />
ACCESSORIES<br />
WHEELS SUPPLIED WITH:<br />
MAINTENANCE<br />
• BX 601 Titanium front quick-release skewer 995 388 01<br />
• BX 601 Titanium rear quick-release skewer 995 389 01<br />
• Computer magnet M40540 (with front wheel)<br />
• Spoke wrench M40494 (with rear wheel)<br />
• Axle reducers 15=>9 mm 996 941 01 (with front wheel)<br />
• UST valves 995 282 01<br />
• <strong>Free</strong> play bearing adjustment wrench M40123 (with rear wheel)<br />
• User guide<br />
Front hub assembly diameter conversion<br />
Replacing the front axle and bearings<br />
Replacing the rear axle<br />
Maintaining and replacing the free wheel mechanism<br />
Replacing the rear bearings<br />
Replacing a spoke<br />
Replacing the front rim<br />
Replacing the rear rim<br />
See page 25<br />
See page 26<br />
See 2007 TM, page 20<br />
See 2007 TM, page 21<br />
See 2003 TM, page 22<br />
See 2003 TM, page 24<br />
See page 37<br />
See 2006 TM, page 17<br />
To consult this information quickly in a practical manner, refer to www.tech-mavic.com
CROSSMAX SLR DISC <strong>09</strong> 20 MM<br />
11<br />
STANDARD<br />
INTERNATIONAL<br />
USE: use only on a Cross Country MTB fitted with <strong>disc</strong><br />
brakes. Any other use (such as on a tandem, road bike, cyclocross<br />
bike, free-ride or downhill bike…) is highly inadvisable,<br />
is the sole responsibility of the user and voids the Mavic<br />
warranty.<br />
Recommended maximum weight of the cyclist and his<br />
equipment: 85 kg.<br />
WHEEL WEIGHTS WITHOUT<br />
QUICK-RELEASE SKEWER<br />
Front:<br />
695 g<br />
Rear:<br />
830 g<br />
WHEEL REFERENCES<br />
Front: 996 520 10<br />
Rear: 996 413 13<br />
Pair: 996 521 14<br />
RIMS<br />
REFERENCES: Front: 996 873 10<br />
Rear: 996 873 13<br />
Ø VALVE HOLE<br />
Ø: 6.5 mm<br />
Length.: 32 mm<br />
RECOMMENDED TIRE WIDTH<br />
Dimensions: Ø 26’’<br />
ETRTO 559 x 17C compatible and Tubeless UST.<br />
Recommended tire width: 1.0’’ to 2.1’’<br />
HUBS<br />
When replacing the front rim:<br />
1. With the valve hole near you, the raised indicator bump must be to the right of the valve hole<br />
2. The spoke in the first hole to the right of the valve hole is a non-braking spoke and should be inserted in the <strong>disc</strong> side.<br />
When replacing the rear rim:<br />
1. With the valve hole near you, the two raised indicator bumps must be to the right of the valve hole<br />
2. The spoke in the first hole to the right of the valve hole should be inserted on the drive side in a marked hole on the hub<br />
MAINTENANCE: Clean with a dry cloth or soap and water if necessary.<br />
Do not use a high-pressure washer.<br />
M40179<br />
996 040 01<br />
M40075<br />
995 470 01<br />
M40457<br />
995 000 01<br />
M40067<br />
M40580<br />
995 399 01<br />
324 303 01<br />
WHEEL BUILDING<br />
REFERENCES AND<br />
LENGTHS:<br />
Front:<br />
Rear drive side:<br />
Rear non-drive side:<br />
995 376 01, length 261 mm, (per 12 + 3 red, integrated nipples)<br />
995 377 01, length 248 mm, (per 12 + 1 red, integrated nipples)<br />
996 874 01, length 263 mm, (per 12 + 2 red, integrated nipples)<br />
FEATURES:<br />
Black Zicral double butted straight pull spokes (front and rear nondrive<br />
side) (including two decorated per wheel) with integrated,<br />
self-locking M7 aluminum spoke nipples.<br />
LACING PATTERN:<br />
Front: crossed 2 on both sides<br />
Rear: Isopulse<br />
TENSION:<br />
Front <strong>disc</strong> side: 120 to 140 kg<br />
Rear drive side: 120 to 140 kg<br />
ACCESSORIES<br />
WHEELS SUPPLIED WITH:<br />
MAINTENANCE<br />
• BX 601 Titanium rear quick-release skewer 995 389 01<br />
• Computer magnet M40540<br />
• Spoke wrench M40494 (with rear wheel)<br />
• UST valves 995 282 01<br />
• <strong>Free</strong> play bearing adjustment wrench M40123 (with rear wheel)<br />
• User guide<br />
Replacing the front axle and bearings<br />
Replacing the rear axle<br />
Maintaining and replacing the free wheel mechanism<br />
Replacing the rear bearings<br />
Replacing a spoke<br />
Replacing the front rim<br />
Replacing the rear rim<br />
See 2008 TM, page 24<br />
See 2007 TM, page 20<br />
See 2007 TM, page 21<br />
See 2003 TM, page 22<br />
See 2003 TM, page 24<br />
See page 37<br />
See 2006 TM, page 17<br />
To consult this information quickly in a practical manner, refer to www.tech-mavic.com
CROSSMAX SLR DISC <strong>09</strong> LEFTY<br />
12<br />
STANDARD<br />
INTERNATIONAL<br />
USE: use only on a Cross Country MTB fitted with <strong>disc</strong><br />
brakes. Any other use (such as on a tandem, road bike, cyclocross<br />
bike, free-ride or downhill bike…) is highly inadvisable,<br />
is the sole responsibility of the user and voids the Mavic<br />
warranty.<br />
Recommended maximum weight of the cyclist and his<br />
equipment: 85 kg.<br />
WHEEL WEIGHTS WITHOUT<br />
QUICK-RELEASE SKEWER<br />
Front:<br />
695 g<br />
Rear:<br />
830 g<br />
WHEEL REFERENCES<br />
Front: 996 522 10<br />
Rear: 996 413 13<br />
Pair: 996 523 14<br />
RIMS<br />
REFERENCES: Front: 996 873 10<br />
Rear: 996 873 13<br />
Ø VALVE HOLE<br />
Ø: 6.5 mm<br />
Length.: 32 mm<br />
RECOMMENDED TIRE WIDTH<br />
Dimensions: Ø 26’’<br />
ETRTO 559 x 17C compatible and Tubeless UST.<br />
Recommended tire width: 1.0’’ to 2.1’’<br />
HUBS<br />
When replacing the front rim:<br />
1. With the valve hole near you, the raised indicator bump must be to the right of the valve hole<br />
2. The spoke in the first hole to the right of the valve hole is a non-braking spoke and should be inserted in the <strong>disc</strong> side.<br />
When replacing the rear rim:<br />
1. With the valve hole near you, the two raised indicator bumps must be to the right of the valve hole<br />
2. The spoke in the first hole to the right of the valve hole should be inserted on the drive side in a marked hole on the hub<br />
MAINTENANCE: Clean with a dry cloth or soap and water if necessary.<br />
Do not use a high-pressure washer.<br />
M40777<br />
M40771<br />
M40075<br />
995 470 01<br />
M40457<br />
995 000 01<br />
M40067<br />
M40580<br />
995 399 01<br />
324 303 01<br />
WHEEL BUILDING<br />
REFERENCES AND<br />
LENGTHS:<br />
Front:<br />
Rear drive side:<br />
Rear non-drive side:<br />
995 376 01, length 261 mm, (per 12 + 3 red, integrated nipples)<br />
995 377 01, length 248 mm, (per 12 + 1 red, integrated nipples)<br />
996 874 01, length 263 mm, (per 12 + 2 red, integrated nipples)<br />
FEATURES:<br />
Black Zicral double butted straight pull spokes (including two<br />
decorated per wheel) with integrated, self-locking M7 aluminum<br />
spoke nipples.<br />
LACING PATTERN:<br />
Front: crossed 2 on both sides<br />
Rear: Isopulse<br />
TENSION:<br />
Front <strong>disc</strong> side: 120 to 140 kg<br />
Rear drive side: 120 to 140 kg<br />
ACCESSORIES<br />
WHEELS SUPPLIED WITH:<br />
MAINTENANCE<br />
• BX 601 Titanium rear quick-release skewer 995 389 01<br />
• Lefty assembly accessories M40777 (with front wheel)<br />
• Computer magnet M40540<br />
• Spoke wrench M40494 (with rear wheel)<br />
• UST valves 995 282 01<br />
• <strong>Free</strong> play bearing adjustment wrench M40123 (with rear wheel)<br />
• User guide<br />
Fitting and removing the front wheel on the fork<br />
Replacing the front axle and bearings<br />
Replacing the rear axle<br />
Maintaining and replacing the free wheel mechanism<br />
Replacing the rear bearings<br />
Replacing a spoke<br />
Replacing the front rim<br />
Replacing the rear rim<br />
See 2004 TM, page 18<br />
See page 26<br />
See 2007 TM, page 20<br />
See 2007 TM, page 21<br />
See 2003 TM, page 22<br />
See 2003 TM, page 24<br />
See page 37<br />
See 2006 TM, page 17<br />
To consult this information quickly in a practical manner, refer to www.tech-mavic.com
CROSSRIDE UB/DISC <strong>09</strong><br />
STANDARD<br />
INTERNATIONAL<br />
13<br />
USE: use only on a Cross Country or Cross Mountain MTB<br />
fitted with <strong>disc</strong> brakes. Any other use (such as on a tandem,<br />
road bike, cyclo-cross bike, free-ride or downhill bike…) is<br />
highly inadvisable, is the sole responsibility of the user and<br />
voids the Mavic warranty.<br />
Recommended maximum weight of the cyclist and his<br />
equipment: 100 kg.<br />
WHEEL WEIGHTS WITHOUT<br />
QUICK-RELEASE SKEWER<br />
Front:<br />
900 g<br />
Rear M10: 1040 g<br />
WHEEL REFERENCES<br />
STANDARD INTERNATIONAL<br />
Front: 996 403 10<br />
Rear: 996 404 13<br />
Pair: 996 405 14<br />
RIMS<br />
REFERENCES: Front and rear: 996 891 15<br />
Ø VALVE HOLE<br />
RECOMMENDED TIRE WIDTH<br />
Ø: 8.5 mm with valve adaptor 6.5 mm<br />
Length.: 32 mm<br />
Dimensions: Ø 26’’<br />
ETRTO 559 x 19C<br />
Recommended tire width: 1.1’’ to 2.3’’<br />
HUBS<br />
MAINTENANCE: Clean with a dry cloth or soap and water if necessary.<br />
Do not use a high-pressure washer.<br />
M40318<br />
323 479 01<br />
323 484 01<br />
323 484 01<br />
M40660<br />
324 303 01<br />
995 000 01<br />
M40067<br />
323 480 01<br />
M40592<br />
WHEEL BUILDING<br />
REFERENCES AND<br />
LENGTHS:<br />
Front and rear: 996 892 01, length 261 mm (per 12, with nipples)<br />
FEATURES:<br />
Silver stainless steel straight pull spokes with Self Lock system<br />
and conventional spoke nipples.<br />
LACING PATTERN:<br />
Front and rear: crossed 2 on both sides<br />
TENSION:<br />
Front <strong>disc</strong> side: 100 to 120 kg<br />
Rear drive side: 120 to 140 kg<br />
ACCESSORIES<br />
• BR 101 front quick-release: M40350<br />
• BR 101 rear quick-release: M40351<br />
• Rim tape 559x20x0.6<br />
• User guide<br />
WHEELS SUPPLIED WITH:<br />
MAINTENANCE<br />
Replacing the front axle and bearings<br />
Replacing the rear axle<br />
Maintaining and replacing the free wheel mechanism<br />
Replacing the rear bearings<br />
Replacing a spoke<br />
Replacing the front rim<br />
Replacing the rear rim<br />
See 2004 TM, page 19<br />
See 2004 TM, page 20<br />
See 2007 TM, page 21<br />
See 2004 TM, page 22<br />
See 2004 TM, page 25<br />
See page 38<br />
See page 39<br />
To consult this information quickly in a practical manner, refer to www.tech-mavic.com
CROSSRIDE DISC<br />
STANDARD<br />
INTERNATIONAL<br />
CENTER<br />
LOCK<br />
14<br />
USE: use only on a Cross Country or Cross Mountain MTB<br />
fitted with <strong>disc</strong> brakes. Any other use (such as on a tandem,<br />
road bike, cyclo-cross bike, free-ride or downhill bike…) is<br />
highly inadvisable, is the sole responsibility of the user and<br />
voids the Mavic warranty.<br />
Recommended maximum weight of the cyclist and his<br />
equipment: 100 kg.<br />
WHEEL WEIGHTS WITHOUT<br />
QUICK-RELEASE SKEWER<br />
INT CL<br />
Front: 885 g 880 g<br />
Rear: 1020 g 1015 g<br />
WHEEL REFERENCES<br />
INT<br />
CL<br />
Front: 996 176 10 996 179 10<br />
Rear: 996 177 13 996 180 13<br />
Pair: 996 178 14 996 181 14<br />
RIMS<br />
REFERENCES: Front and rear: 996 890 15<br />
Ø VALVE HOLE<br />
RECOMMENDED TIRE WIDTH<br />
Ø: 8.5 mm with valve adaptor 6.5 mm<br />
Length.: 32 mm<br />
Dimensions: Ø 26’’<br />
ETRTO 559 x 19C<br />
Recommended tire width: 1.1’’ to 2.3’’<br />
HUBS<br />
MAINTENANCE: Clean with a dry cloth or soap and water if necessary.<br />
Do not use a high-pressure washer.<br />
M40318<br />
323 479 01<br />
323 484 01<br />
M40660<br />
324 303 01<br />
323 484 01<br />
995 000 01<br />
M40067<br />
323 480 01<br />
M40592<br />
REFERENCES AND<br />
LENGTHS:<br />
Front and rear: 996 875 01, length 261 mm (per 12, with nipples)<br />
WHEEL BUILDING<br />
FEATURES:<br />
Black steel straight pull spokes with Self Lock system and<br />
conventional spoke nipples.<br />
LACING PATTERN:<br />
Front and rear: crossed 2 on both sides<br />
TENSION:<br />
Front <strong>disc</strong> side: 100 to 120 kg<br />
Rear drive side: 120 to 140 kg<br />
ACCESSORIES<br />
• BR 101 front quick-release: M40350<br />
• BR 101 rear quick-release: M40351<br />
• Rim tape 559x20x0.6<br />
• User guide<br />
WHEELS SUPPLIED WITH:<br />
MAINTENANCE<br />
Replacing the front axle and bearings<br />
Replacing the rear axle<br />
Maintaining and replacing the free wheel mechanism<br />
Replacing the rear bearings<br />
Replacing a spoke<br />
Replacing the front rim<br />
Replacing the rear rim<br />
See 2004 TM, page 19<br />
See 2004 TM, page 20<br />
See 2007 TM, page 21<br />
See 2004 TM, page 22<br />
See 2004 TM, page 25<br />
See page 38<br />
See page 39<br />
To consult this information quickly in a practical manner, refer to www.tech-mavic.com
CROSSMAX ST DISC <strong>09</strong><br />
15<br />
STANDARD<br />
INTERNATIONAL<br />
USE: use only on a Cross Country or Cross Mountain MTB<br />
fitted with <strong>disc</strong> brakes. Any other use (such as on a tandem,<br />
road bike, cyclo-cross bike, free-ride or downhill bike…) is<br />
highly inadvisable, is the sole responsibility of the user and<br />
voids the Mavic warranty.<br />
Recommended maximum weight of the cyclist and his<br />
equipment: 100 kg.<br />
WHEEL WEIGHTS WITHOUT<br />
QUICK-RELEASE SKEWER<br />
Front:<br />
745 g<br />
Rear:<br />
895 g<br />
WHEEL REFERENCES<br />
Front: 996 799 10<br />
Rear: 995 119 13<br />
Pair: 996 801 14<br />
RIMS<br />
REFERENCES: Front: 995 400 10<br />
Rear: 995 400 13<br />
Ø VALVE HOLE<br />
Ø: 6.5 mm<br />
Length.: 32 mm<br />
RECOMMENDED TIRE WIDTH<br />
Dimensions: Ø 26’’<br />
ETRTO 559 x 19C compatible and Tubeless UST.<br />
Recommended tire width: 1.1’’ to 2.3’’<br />
HUBS<br />
When replacing the front rim:<br />
1. With the valve hole near you, the raised indicator bump must be to the left of the valve hole<br />
2. The spoke in the first hole to the right of the valve hole is a non-braking spoke and should be inserted in the <strong>disc</strong> side of the hub<br />
When replacing the rear rim:<br />
1. With the valve hole near you, the two raised indicator bumps must be to the right of the valve hole<br />
2. The spoke in the first hole to the right of the valve hole should be inserted on the drive side in a marked hole on the hub<br />
MAINTENANCE: Clean with a dry cloth or soap and water if necessary.<br />
Do not use a high-pressure washer.<br />
996 941 01<br />
996 885 01<br />
996 882 01<br />
M40075<br />
324 129 01<br />
M40457<br />
M40067<br />
M40580<br />
M40576<br />
995 000 01<br />
324 303 01<br />
WHEEL BUILDING<br />
REFERENCES AND<br />
LENGTHS:<br />
Front:<br />
Rear drive side:<br />
Rear non-drive side:<br />
995 401 01, length 261 mm, (per 12 + 1 decorated, integrated nipples)<br />
995 402 01, length 248 mm, (per 12, integrated nipples)<br />
995 403 01, length 263 mm, (per 12 + 1 decorated, integrated nipples)<br />
FEATURES:<br />
Black Zicral round straight pull spokes (with one decorated per<br />
wheel) with integrated, self-locking M7 aluminum spoke nipples.<br />
LACING PATTERN:<br />
Front: crossed 2 on both sides<br />
Rear: Isopulse<br />
TENSION:<br />
Front <strong>disc</strong> side: 110 to 130 kg<br />
Rear drive side: 110 to 130 kg<br />
ACCESSORIES<br />
WHEELS SUPPLIED WITH:<br />
MAINTENANCE<br />
• BX 601 front quick-release M40140<br />
• BX 601 rear quick-release M40141<br />
• UST valves 995 282 01<br />
• Computer magnet M40540 (with front wheel)<br />
• Axle reducers 15 => 9 mm 996 941 01 (with front wheel)<br />
• M7 spoke wrench M40494 (with rear wheel)<br />
• Anti-ejection plugs 996 065 01 (with rear wheel)<br />
• <strong>Free</strong> play bearing adjustment wrench M40123 (with rear wheel)<br />
• User guide<br />
Front hub assembly diameter conversion<br />
Replacing the front axle and bearings<br />
Replacing the rear axle<br />
Maintaining and replacing the free wheel mechanism<br />
Replacing the rear bearings<br />
Replacing a spoke<br />
Replacing the front rim<br />
Replacing the rear rim<br />
See page 25<br />
See page 26<br />
See 2007 TM, page 20<br />
See 2007 TM, page 21<br />
See 2003 TM, page 22<br />
See 2003 TM, page 24<br />
See 2007 TM, page 22<br />
See 2006 TM, page 17<br />
To consult this information quickly in a practical manner, refer to www.tech-mavic.com
CROSSMAX ST DISC <strong>09</strong> Center-Lock<br />
CENTER<br />
LOCK<br />
16<br />
USE: use only on a Cross Country or Cross Mountain MTB<br />
fitted with <strong>disc</strong> brakes. Any other use (such as on a tandem,<br />
road bike, cyclo-cross bike, free-ride or downhill bike…) is<br />
highly inadvisable, is the sole responsibility of the user and<br />
voids the Mavic warranty.<br />
Recommended maximum weight of the cyclist and his<br />
equipment: 100 kg.<br />
WHEEL WEIGHTS WITHOUT<br />
QUICK-RELEASE SKEWER<br />
Front:<br />
745 g<br />
Rear:<br />
890 g<br />
WHEEL REFERENCES<br />
Front: 996 800 10<br />
Rear: 995 145 13<br />
Pair: 996 802 14<br />
RIMS<br />
REFERENCES: Front: 995 400 10<br />
Rear: 995 400 13<br />
Ø VALVE HOLE<br />
Ø: 6.5 mm<br />
Length.: 32 mm<br />
RECOMMENDED TIRE WIDTH<br />
Dimensions: Ø 26’’<br />
ETRTO 559 x 19C compatible and Tubeless UST.<br />
Recommended tire width: 1.1’’ to 2.3’’<br />
HUBS<br />
When replacing the front rim:<br />
1. With the valve hole near you, the raised indicator bump must be to the left of the valve hole<br />
2. The spoke in the first hole to the right of the valve hole is a non-braking spoke and should be inserted in the <strong>disc</strong> side of the hub<br />
When replacing the rear rim:<br />
1. With the valve hole near you, the two raised indicator bumps must be to the right of the valve hole<br />
2. The spoke in the first hole to the right of the valve hole should be inserted on the drive side in a marked hole on the hub<br />
MAINTENANCE: Clean with a dry cloth or soap and water if necessary.<br />
Do not use a high-pressure washer.<br />
996 941 01<br />
996 883 01<br />
996 886 01<br />
M40075<br />
324 129 01<br />
M40457<br />
323 863 01<br />
M40067<br />
995 000 01<br />
324 303 01<br />
M40580<br />
WHEEL BUILDING<br />
REFERENCES AND<br />
LENGTHS:<br />
Front:<br />
Rear drive side:<br />
Rear non-drive side:<br />
995 401 01, length 261 mm, (per 12 + 1 decorated, integrated nipples)<br />
995 402 01, length 248 mm, (per 12, integrated nipples)<br />
995 403 01, length 263 mm, (per 12 + 1 decorated, integrated nipples)<br />
FEATURES:<br />
Black Zicral round straight pull spokes (with one decorated per<br />
wheel) with integrated, self-locking M7 aluminum spoke nipples.<br />
LACING PATTERN:<br />
Front: crossed 2 on both sides<br />
Rear: Isopulse<br />
TENSION:<br />
Front <strong>disc</strong> side: 120 to 140 kg<br />
Rear drive side: 120 to 140 kg<br />
ACCESSORIES<br />
WHEELS SUPPLIED WITH:<br />
MAINTENANCE<br />
• BX 601 front quick-release M40140<br />
• BX 601 rear quick-release M40141<br />
• UST valves 995 282 01<br />
• Computer magnet M40540 (with front wheel)<br />
• Axle reducers 15 => 9 mm 996 941 01 (with front wheel)<br />
• M7 spoke wrench M40494 (with rear wheel)<br />
• Anti-ejection plugs 996 065 01 (with rear wheel)<br />
• <strong>Free</strong> play bearing adjustment wrench M40123 (with rear wheel)<br />
• User guide<br />
Front hub assembly diameter conversion<br />
Replacing the front axle and bearings on the CL model<br />
Replacing the rear axle<br />
Maintaining and replacing the free wheel mechanism<br />
Replacing the rear bearings<br />
Replacing a spoke<br />
Replacing the front rim<br />
Replacing the rear rim<br />
See page 25<br />
See page 26<br />
See 2007 TM, page 20<br />
See 2007 TM, page 21<br />
See 2003 TM, page 22<br />
See 2003 TM, page 24<br />
See 2007 TM, page 22<br />
See 2006 TM, page 17<br />
To consult this information quickly in a practical manner, refer to www.tech-mavic.com
CROSSLINE<br />
STANDARD<br />
INTERNATIONAL<br />
17<br />
USE: use only on a Enduro-<strong>Free</strong>ride MTB fitted with <strong>disc</strong><br />
brakes. Any other use (such as on a tandem, road bike, cyclocross<br />
bike, downhill bike…) is highly inadvisable, is the sole<br />
responsibility of the user and voids the Mavic warranty.<br />
Recommended maximum weight of the cyclist and his<br />
equipment: 100 kg.<br />
WHEEL WEIGHTS WITHOUT<br />
QUICK-RELEASE SKEWER<br />
Front: 970 g<br />
Rear: 1085 g<br />
WHEEL REFERENCES<br />
Front: 995 566 10<br />
Rear: 995 567 13<br />
Pair: 995 568 14<br />
RIMS<br />
REFERENCES: Front and rear: 996 902 15<br />
Ø VALVE HOLE<br />
RECOMMENDED TIRE WIDTH<br />
Ø: 8.5 mm<br />
Length.: 32 mm<br />
Dimensions: Ø 26’’<br />
ETRTO 559 x 21C compatible<br />
Recommended tire width: 2.1’’ to 2.5’’<br />
HUBS<br />
MAINTENANCE: Clean with a dry cloth or soap and water if necessary.<br />
Do not use a high-pressure washer.<br />
996 908 01<br />
M40179<br />
996 994 01<br />
996 104 01<br />
996 203 01<br />
996 106 01<br />
M40076<br />
996 942 01<br />
996 107 01<br />
996 105 01<br />
WHEEL BUILDING<br />
REFERENCES AND<br />
LENGTHS:<br />
Front and rear: 996 903 01, length 273 mm, (per 14, with nipples)<br />
FEATURES:<br />
Black steel round straight pull spokes with Self Lock system and<br />
conventional spoke nipples.<br />
LACING PATTERN:<br />
Front and rear: crossed 2 on both sides<br />
TENSION:<br />
Front <strong>disc</strong> side: 110 to 130 kg<br />
Rear drive side: 110 to 130 kg<br />
ACCESSORIES<br />
WHEELS SUPPLIED WITH:<br />
MAINTENANCE<br />
• BX 101 rear quick-release M40351<br />
• Fork support kit 20 mm 996 994 01<br />
• Axle reducers 12=>9 mm 996 942 01<br />
• Rim tape<br />
• <strong>Free</strong> play bearing adjustment wrench M40123 (with rear wheel)<br />
• User guide<br />
Replacing the front axle and bearings in the INT model<br />
Rear wheel assembly diameter conversion<br />
Maintaining and replacing the free wheel mechanism<br />
Replacing the rear axle and bearings<br />
Replacing a spoke<br />
Replacing the front rim<br />
Replacing the rear rim<br />
See 2003 TM, page 18<br />
See page 30<br />
See page 29<br />
See page 30<br />
See 2004 TM, page 25<br />
See 2004 TM, page 28<br />
See 2004 TM, page 29<br />
To consult this information quickly in a practical manner, refer to www.tech-mavic.com
CROSSLINE Center-Lock<br />
CENTER<br />
LOCK<br />
18<br />
USE: use only on a Enduro-<strong>Free</strong>ride MTB fitted with <strong>disc</strong><br />
brakes. Any other use (such as on a tandem, road bike, cyclocross<br />
bike, downhill bike…) is highly inadvisable, is the sole<br />
responsibility of the user and voids the Mavic warranty.<br />
Recommended maximum weight of the cyclist and his<br />
equipment: 100 kg.<br />
WHEEL WEIGHTS WITHOUT<br />
QUICK-RELEASE SKEWER<br />
Front: 965 g<br />
Rear: 1080 g<br />
WHEEL REFERENCES<br />
Front: 996 230 10<br />
Rear: 996 231 13<br />
Pair: 996 232 14<br />
RIMS<br />
REFERENCES: Front: 996 902 15<br />
Ø VALVE HOLE<br />
RECOMMENDED TIRE WIDTH<br />
Ø: 8.5 mm<br />
Length.: 32 mm<br />
Dimensions: Ø 26’’<br />
ETRTO 559 x 21C compatible<br />
Recommended tire width: 2.1’’ to 2.5’’<br />
HUBS<br />
MAINTENANCE: Clean with a dry cloth or soap and water if necessary.<br />
Do not use a high-pressure washer.<br />
996 9<strong>09</strong> 01<br />
M40179<br />
996 994 01<br />
996 900 01<br />
996 203 01<br />
996 106 01<br />
M40076<br />
996 942 01<br />
996 107 01<br />
996 105 01<br />
WHEEL BUILDING<br />
REFERENCES AND<br />
LENGTHS:<br />
Front and rear: 996 903 01, length 273 mm, (per 14, with nipples)<br />
FEATURES:<br />
Black steel round straight pull spokes with Self Lock system and<br />
conventional spoke nipples.<br />
LACING PATTERN:<br />
Front and rear: crossed 2 on both sides<br />
TENSION:<br />
Front <strong>disc</strong> side: 110 to 130 kg<br />
Rear drive side: 110 to 130 kg<br />
ACCESSORIES<br />
WHEELS SUPPLIED WITH:<br />
MAINTENANCE<br />
• BX 101 rear quick-release M40351<br />
• Fork support kit 20 mm 996 994 01<br />
• Axle reducers 12=>9 mm 996 942 01<br />
• Rim tape<br />
• <strong>Free</strong> play bearing adjustment wrench M40123 (with rear wheel)<br />
• User guide<br />
Replacing the front axle and bearings in the CL model<br />
Rear wheel assembly diameter conversion<br />
Maintaining and replacing the free wheel mechanism<br />
Replacing the rear axle and bearings<br />
Replacing a spoke<br />
Replacing the front rim<br />
Replacing the rear rim<br />
See page 28<br />
See page 25<br />
See page 29<br />
See page 30<br />
See 2004 TM, page 25<br />
See 2004 TM, page 28<br />
See 2004 TM, page 29<br />
To consult this information quickly in a practical manner, refer to www.tech-mavic.com
CROSSMAX SX <strong>09</strong><br />
STANDARD<br />
INTERNATIONAL<br />
19<br />
USE: use only on a Enduro-<strong>Free</strong>ride MTB fitted with <strong>disc</strong><br />
brakes. Any other use (such as on a tandem, road bike, cyclocross<br />
bike, downhill bike…) is highly inadvisable, is the sole<br />
responsibility of the user and voids the Mavic warranty.<br />
Recommended maximum weight of the cyclist and his<br />
equipment: 100 kg.<br />
WHEEL WEIGHTS WITHOUT<br />
QUICK-RELEASE SKEWER<br />
Front:<br />
825 g<br />
Rear:<br />
930 g<br />
WHEEL REFERENCES<br />
Front: 996 223 10<br />
Rear: 996 224 13<br />
Pair: 996 225 14<br />
RIMS<br />
REFERENCES: Front: 996 893 10<br />
Rear: 996 893 13<br />
Ø VALVE HOLE<br />
Ø: 6.5 mm<br />
Length.: 32 mm<br />
RECOMMENDED TIRE WIDTH<br />
Dimensions: Ø 26’’<br />
ETRTO 559 x 21C compatible and Tubeless UST<br />
Recommended tire width: 2.1’’ to 2.5’’<br />
HUBS<br />
When replacing the front rim:<br />
1. With the valve hole near you, the raised indicator bump must be to the left of the valve hole<br />
2. The spoke in the first hole to the right of the valve hole is a non-braking spoke and should be inserted in the <strong>disc</strong> side of the hub<br />
When replacing the rear rim:<br />
1. With the valve hole near you, the two raised indicator bumps must be to the right of the valve hole<br />
2. The spoke in the first hole to the right of the valve hole is a non-driving spoke and should be inserted in the drive side of the hub<br />
MAINTENANCE: Clean with a dry cloth or soap and water if necessary.<br />
Do not use a high-pressure washer.<br />
M40179<br />
996 040 01<br />
996 104 01<br />
996 203 01<br />
996 106 01<br />
M40076<br />
996 942 01<br />
996 107 01<br />
996 105 01<br />
WHEEL BUILDING<br />
REFERENCES AND<br />
LENGTHS:<br />
Front and rear non-drive side:<br />
Rear drive side:<br />
995 437 01, length 255 mm, (per 12 + 2 pad-printed, integrated nipples)<br />
995 438 01, length 247 mm, (per 12, integrated nipples)<br />
FEATURES:<br />
Gray Zicral round straight pull spokes with integrated, self-locking<br />
M7 aluminum spoke nipples.<br />
LACING PATTERN:<br />
Front and rear: crossed 2 on both sides<br />
TENSION:<br />
Front <strong>disc</strong> side: 110 to 130 kg<br />
Rear drive side: 110 to 130 kg<br />
ACCESSORIES<br />
WHEELS SUPPLIED WITH:<br />
MAINTENANCE<br />
• BX 601 rear quick-release M40141<br />
• Axle reducers 12=>9 mm 996 942 01<br />
• UST valves 995 282 01<br />
• Computer magnet M40540 (with front wheel)<br />
• M7 spoke wrench M40494 (with rear wheel)<br />
• <strong>Free</strong> play bearing adjustment wrench M40123 (with rear wheel)<br />
• User guide<br />
Replacing the front axle and bearings in the INT model<br />
Rear wheel assembly diameter conversion<br />
Maintaining and replacing the free wheel mechanism<br />
Replacing the rear axle and bearings<br />
Replacing a spoke<br />
Replacing the front rim<br />
Replacing the rear rim<br />
See 2008 TM, page 24<br />
See page 25<br />
See page 29<br />
See page 30<br />
See 2003 TM, page 24<br />
See 2003 TM, page 29<br />
See 2003 TM, page 30<br />
To consult this information quickly in a practical manner, refer to www.tech-mavic.com
CROSSMAX SX <strong>09</strong> Center-Lock<br />
CENTER<br />
LOCK<br />
20<br />
USE: use only on a Enduro-<strong>Free</strong>ride MTB fitted with <strong>disc</strong><br />
brakes. Any other use (such as on a tandem, road bike, cyclocross<br />
bike, downhill bike…) is highly inadvisable, is the sole<br />
responsibility of the user and voids the Mavic warranty.<br />
Recommended maximum weight of the cyclist and his<br />
equipment: 100 kg.<br />
WHEEL WEIGHTS WITHOUT<br />
QUICK-RELEASE SKEWER<br />
Front:<br />
825 g<br />
Rear:<br />
920 g<br />
WHEEL REFERENCES<br />
Front: 996 507 10<br />
Rear: 996 508 13<br />
Pair: 996 5<strong>09</strong> 14<br />
RIMS<br />
REFERENCES: Front: 996 893 10<br />
Rear: 996 893 13<br />
Ø VALVE HOLE<br />
Ø: 6.5 mm<br />
Length.: 32 mm<br />
RECOMMENDED TIRE WIDTH<br />
Dimensions: Ø 26’’<br />
ETRTO 559 x 21C compatible and Tubeless UST<br />
Recommended tire width: 2.1’’ to 2.5’’<br />
HUBS<br />
When replacing the front rim:<br />
1. With the valve hole near you, the raised indicator bump must be to the left of the valve hole<br />
2. The spoke in the first hole to the right of the valve hole is a non-braking spoke and should be inserted in the <strong>disc</strong> side of the hub<br />
When replacing the rear rim:<br />
1. With the valve hole near you, the two raised indicator bumps must be to the right of the valve hole<br />
2. The spoke in the first hole to the right of the valve hole is a non-driving spoke and should be inserted in the drive side of the hub<br />
MAINTENANCE: Clean with a dry cloth or soap and water if necessary.<br />
Do not use a high-pressure washer.<br />
996 898 01<br />
103 310 01<br />
103 261 01<br />
M40179<br />
996 900 01<br />
996 203 01<br />
996 106 01<br />
M40076<br />
996 942 01<br />
996 107 01<br />
996 105 01<br />
WHEEL BUILDING<br />
REFERENCES AND<br />
LENGTHS:<br />
Front and rear non-drive side:<br />
Rear drive side:<br />
995 437 01, length 255 mm, (per 12 + 2 pad-printed, integrated nipples)<br />
995 438 01, length 247 mm, (per 12, integrated nipples)<br />
FEATURES:<br />
Gray Zicral round straight pull spokes with integrated, self-locking<br />
M7 aluminum spoke nipples.<br />
LACING PATTERN:<br />
Front and rear: crossed 2 on both sides<br />
TENSION:<br />
Front <strong>disc</strong> side: 110 to 130 kg<br />
Rear drive side: 110 to 130 kg<br />
ACCESSORIES<br />
WHEELS SUPPLIED WITH:<br />
MAINTENANCE<br />
• BX 601 rear quick-release M40141<br />
• Axle reducers 12=>9 mm 996 942 01<br />
• UST valves 995 282 01<br />
• Computer magnet M40540 (with front wheel)<br />
• M7 spoke wrench M40494 (with rear wheel)<br />
• <strong>Free</strong> play bearing adjustment wrench M40123 (with rear wheel)<br />
• User guide<br />
Replacing the front axle and bearings in the CL model<br />
Rear wheel assembly diameter conversion<br />
Maintaining and replacing the free wheel mechanism<br />
Replacing the rear axle and bearings<br />
Replacing a spoke<br />
Replacing the front rim<br />
Replacing the rear rim<br />
See page 28<br />
See page 25<br />
See page 29<br />
See page 30<br />
See 2003 TM, page 24<br />
See 2003 TM, page 29<br />
See 2003 TM, page 30<br />
To consult this information quickly in a practical manner, refer to www.tech-mavic.com
DEETRAKS <strong>09</strong> and DEETRAKS <strong>09</strong> 12x150<br />
USE: use only on a Cross Country or Cross Mountain MTB<br />
fitted with <strong>disc</strong> or rim brakes. Any other use (such as on a<br />
tandem, road bike, cyclo-cross bike, …) is highly inadvisable,<br />
is the sole responsibility of the user and voids the Mavic<br />
warranty.<br />
Recommended maximum weight of the cyclist and his<br />
equipment: 115 kg.<br />
WHEEL WEIGHTS WITHOUT<br />
QUICK-RELEASE SKEWER<br />
9.5x135 12x150<br />
Front: 1085 g 1085 g<br />
Rear: 1170 g 1175 g<br />
WHEEL REFERENCES<br />
9.5x135 12x150<br />
Front: 996 197 10 996 197 10<br />
Rear: 996 198 13 996 221 13<br />
Pair: 996 199 14 996 222 14<br />
21<br />
STANDARD<br />
INTERNATIONAL<br />
RIMS<br />
REFERENCES: Front and rear: 996 925 15<br />
Ø VALVE HOLE<br />
RECOMMENDED TIRE WIDTH<br />
Ø: 8.5 mm<br />
Length.: 32 mm<br />
Dimensions: Ø 26’’<br />
ETRTO 559 x 25C compatible<br />
Recommended tire width: 2.3’’ to 3.0’’<br />
HUBS<br />
MAINTENANCE: Clean with a dry cloth or soap and water if necessary.<br />
Do not use a high-pressure washer.<br />
M40179<br />
99690801<br />
99699401<br />
996 942 01<br />
996 104 01 (OLD : 135 mm) / 996 918 01 (OLD : 150 mm)<br />
996 107 01<br />
996 105 01<br />
M40076<br />
996 203 01<br />
996 106 01<br />
WHEEL BUILDING<br />
REFERENCES AND<br />
LENGTHS:<br />
Front non-<strong>disc</strong> side and rear non-drive side:<br />
Front <strong>disc</strong> side and rear drive side:<br />
996 926 01, length 263 mm (per 16, with nipples)<br />
996 927 01, length 261 mm (per 16, with nipples)<br />
FEATURES:<br />
Black steel round J-bent spokes with Self Lock system and<br />
conventional spoke nipples.<br />
LACING PATTERN:<br />
Front and rear: crossed 3 on 2 sides, hot lacing.<br />
TENSION:<br />
Front <strong>disc</strong> side: 110 to 130 kg<br />
Rear drive side: 120 to 140 kg<br />
ACCESSORIES<br />
WHEELS SUPPLIED WITH:<br />
MAINTENANCE<br />
• BR 101 rear quick-release skewer M40351 (with 135 mm rear wheel<br />
only)<br />
• Fork support kit 20 mm 996 994 01<br />
• Axle reducers =>9 mm 996 942 01 (with 135 mm rear wheel only)<br />
• Rim tape<br />
• <strong>Free</strong> play bearing adjustment wrench M40123 (with rear wheel)<br />
• User guide<br />
Replacing the front axle and bearings<br />
Rear wheel assembly diameter conversion<br />
Maintaining and replacing the free wheel mechanism<br />
Replacing the rear axle and bearings<br />
Replacing one spoke, front or rear rim<br />
See 2008 TM, page 24<br />
See page 25<br />
See page 29<br />
See page 30<br />
See page 40<br />
To consult this information quickly in a practical manner, refer to www.tech-mavic.com
DEEMAX <strong>09</strong> and DEEMAX <strong>09</strong> 12x150<br />
22<br />
STANDARD<br />
INTERNATIONAL<br />
USE: use only on a Cross Country or Cross Mountain MTB<br />
fitted with <strong>disc</strong> or rim brakes. Any other use (such as on a<br />
tandem, road bike, cyclo-cross bike, …) is highly inadvisable,<br />
is the sole responsibility of the user and voids the Mavic<br />
warranty.<br />
Recommended maximum weight of the cyclist and his<br />
equipment: 115 kg.<br />
WHEEL WEIGHTS WITHOUT<br />
QUICK-RELEASE SKEWER<br />
9.5x135 12x150<br />
Front: 1010 g 1010 g<br />
Rear: 1150 g 1160 g<br />
WHEEL REFERENCES<br />
9.5x135 12x150<br />
Front: 996 192 10 996 192 10<br />
Rear: 996 193 13 996 195 13<br />
Pair: 996 194 14 996 196 14<br />
RIMS<br />
REFERENCES: Front: 996 910 10<br />
Rear: 996 910 13<br />
Ø VALVE HOLE<br />
Ø: 6.5 mm<br />
Length.: 32 mm<br />
RECOMMENDED TIRE WIDTH<br />
Dimensions: Ø 26’’<br />
ETRTO 559 x 23C compatible and Tubeless UST.<br />
Recommended tire width: 2.3’’ to 3.0’’<br />
HUBS<br />
When replacing the front rim:<br />
1. With the valve hole near you, the raised indicator bump must be to the left of the valve hole<br />
2. The spoke in the first hole to the right of the valve hole is a non-braking spoke and should be inserted in the <strong>disc</strong> side of the hub<br />
When replacing the rear rim:<br />
1. With the valve hole near you, the two raised indicator bumps must be to the right of the valve hole<br />
2. The spoke in the first hole to the right of the valve hole is a non-driving spoke and should be inserted in the drive side of the hub<br />
MAINTENANCE: Clean with a dry cloth or soap and water if necessary.<br />
Do not use a high-pressure washer.<br />
M40179<br />
996 917 01<br />
996 104 01 (OLD : 135 mm) / 996 918 01 (OLD : 150 mm)<br />
996 203 01 996 105 01<br />
M40076<br />
996 942 01<br />
996 107 01 996 106 01<br />
WHEEL BUILDING<br />
REFERENCES AND<br />
LENGTHS:<br />
Front:<br />
Rear drive side:<br />
Rear non-drive side:<br />
996 911 01, length 270 mm (per 14, integrated nipples)<br />
996 912 01, length 264.5 mm (per 16, integrated nipples)<br />
996 913 01, length 267.5 mm (per 16 integrated nipples)<br />
FEATURES:<br />
Black stainless steel round straight pull spokes with integrated,<br />
self-locking M7 aluminum spoke nipples.<br />
LACING PATTERN:<br />
Front and rear: crossed 3 on both sides<br />
TENSION:<br />
Front <strong>disc</strong> side: 100 to 120 kg<br />
Rear drive side: 110 to 130 kg<br />
ACCESSORIES<br />
WHEELS SUPPLIED WITH:<br />
MAINTENANCE<br />
• BX 601 rear quick-release M40141 (with 135 mm rear wheel only)<br />
• Axle reducers 12=>9 mm 996 942 01 (with 135 mm rear wheel only)<br />
• UST valves 995 282 01<br />
• M7 spoke wrench M40494 (with rear wheel)<br />
• <strong>Free</strong> play bearing adjustment wrench M40123 (with rear wheel)<br />
• User guide<br />
Replacing the front axle and bearings<br />
Rear wheel assembly diameter conversion<br />
Maintaining and replacing the free wheel mechanism<br />
Replacing the rear axle and bearings<br />
Replacing a spoke<br />
Replacing the front rim<br />
Replacing the rear rim<br />
See 2008 TM, page 24<br />
See page 25<br />
See page 29<br />
See page 30<br />
See page 41<br />
See pages 42/43<br />
See pages 44/45<br />
To consult this information quickly in a practical manner, refer to www.tech-mavic.com
24<br />
WHEEL MAINTENANCE<br />
WARRANTY REMINDER<br />
Before any repair of a Mavic wheel (or any other Mavic product), please note that it is guaranteed against manufacturing or material defects for a period of two<br />
years from the date of purchase by the original buyer.<br />
This means that:<br />
• During the warranty period and when it is clearly covered by the warranty (first contact your MSC), you must return the Mavic wheel (or any other Mavic product)<br />
directly to your MSC to benefit in full from the Mavic warranty.<br />
However, if you decide to repair the wheel (or any other Mavic product) yourself, your customer will lose the Mavic warranty.<br />
• For repairs after the warranty period has expired, we advise you to refer to the following pages before carrying out work on the Mavic wheel. When replacing<br />
the rim, please note the new serial number of the rim on the original warranty card and the date of replacement.<br />
Your customer’s new rim will only be covered by the Mavic warranty if this procedure is followed.<br />
REPAIRS<br />
The following pages will help you maintain the wheels in the 20<strong>09</strong> range and are laid out as follows:<br />
HUBS ........................................................................................................................................................................................................................... Page 25 - 30<br />
Hub assembly diameter conversion, front 15 mm and rear 12 mm ............................................................................................................................ Page 25<br />
Replacing bearings on the Crossmax SL Disc <strong>09</strong> Lefty wheel ..................................................................................................................................... Page 25<br />
Replacing the front axle and bearings on the Crossmax SLR Disc <strong>09</strong> and Crossmax ST Disc <strong>09</strong> Standard International model wheels ................ Page 26<br />
Replacing the front axle and bearings on the Crossmax SLR Disc <strong>09</strong> and Crossmax ST Disc <strong>09</strong> Center Lock model wheels ................................ Page 27<br />
Replacing the front axle and bearings on the Crossmax SX <strong>09</strong> and Crossline in Center Lock model wheels ............................................................ Page 28<br />
Maintaining and replacing the ITS4 free wheel mechanism ........................................................................................................................................ Page 29<br />
Replacing the rear axle and bearings on the ITS4 free wheel mechanism wheels ..................................................................................................... Page 30<br />
WHEEL BUILDING ......................................................................................................................................................................................................... Page 31 - 45<br />
Replacing the rear rim on the Ksyrium Elite <strong>09</strong> wheel ................................................................................................................................................. Page 31<br />
Replacing a spoke on the Cosmic Carbone SLR wheel ............................................................................................................................................... Page 32<br />
Replacing the front rim on the Cosmic Carbone SLR wheel ........................................................................................................................................ Page 33<br />
Replacing the rear rim on the Cosmic Carbone SLR wheel .................................................................................................................................... Page 34/35<br />
Removing and refitting the TraComp ring .................................................................................................................................................................... Page 36<br />
Replacing the front rim on the Crossmax SLR Disc <strong>09</strong>, Crossmax SLR Disc <strong>09</strong> 20 mm and Crossmax SLR Disc <strong>09</strong> Lefty wheels ........................ Page 37<br />
Replacing the front rim on the Crossride UB/Disc <strong>09</strong> and Crossride Disc <strong>09</strong> wheel .................................................................................................. Page 38<br />
Replacing the rear rim on the Crossride UB/<strong>disc</strong> <strong>09</strong> and Crossride Disc <strong>09</strong> wheel .................................................................................................... Page 39<br />
Replacing a spoke, front and rear rim on the Deetraks <strong>09</strong> wheels .............................................................................................................................. Page 40<br />
Replacing a spoke on the Deemax <strong>09</strong> and Deemax <strong>09</strong> SSC wheels .......................................................................................................................... Page 41<br />
Replacing the front rim on the Deemax <strong>09</strong> and Deemax <strong>09</strong> SSC wheels ............................................................................................................ Page 42 / 43<br />
Replacing the rear rim on the Deemax <strong>09</strong> and Deemax <strong>09</strong> SSC wheels ............................................................................................................. Page 44 / 45<br />
Any maintenance operation not detailed in the following pages can be found in the technical manuals from previous years. Refer to the product<br />
sheets (pages 4 to 23 of this manual) for further details.<br />
All these procedures can all be found at www.tech-mavic.com<br />
Before any operation, we recommend removing:<br />
• the wheel from the bike by releasing the quick-release skewer<br />
• the skewer, the tire<br />
• the cassette and chain-<strong>disc</strong> (if necessary) for the rear wheel<br />
• the brake <strong>disc</strong> (if necessary)
25<br />
HUBS<br />
WHEEL ASSEMBLY DIAMETER CONVERSION, FRONT 15 MM AND REAR 12 MM<br />
Tools needed<br />
• None<br />
The front 9 mm and rear 9.5 mm fork supports are clipped to the 15 mm and 12 mm axles respectively.<br />
To unclip them, push them in turn via<br />
the inside of the hub using a quickrelease<br />
rod.<br />
Put a drop of oil on their O-ring before<br />
clipping them back on to make them<br />
easier to remove.<br />
REPLACING BEARINGS ON THE CROSSMAX SLR DISC <strong>09</strong> LEFTY WHEEL<br />
Tools needed<br />
• 1 clamp hub wrench<br />
• 1 bearing press kit 323 945 01 for the non-<strong>disc</strong> side bearing<br />
• 1 bearing press kit M40218 for the <strong>disc</strong> side bearing<br />
Loosen the non-<strong>disc</strong> side bearing<br />
protection cap with the hub wrench.<br />
Remove the spacer and the wheel<br />
tightening screw on the fork.<br />
Use the bearing press kit to remove the<br />
bearings.<br />
Refit the bearings using the bearing<br />
press kit 323 945 01 (non-<strong>disc</strong> side) and<br />
M40218 (<strong>disc</strong> side).<br />
OK<br />
KO<br />
Clip the tightening screw to the spacer at the flat-bottomed side (see photo)<br />
Refit the bearing protection cap with the<br />
hub wrench (9 Nm torque).
26<br />
REPLACING THE FRONT AXLE AND BEARINGS ON THE CROSSMAX SLR DISC <strong>09</strong> AND CROSSMAX ST DISC <strong>09</strong><br />
STANDARD INTERNATIONAL MODEL WHEELS<br />
Tools needed<br />
• 1 hub wrench M40123<br />
• Bearing press kit 996 887 01<br />
The operations below can be carried out whether or not the 9 mm axle reducers are fitted.<br />
Unclip the non-<strong>disc</strong> side fork support.<br />
Hold wrench M40123 in place and<br />
loosen the axle with your fingers via the<br />
<strong>disc</strong> side.<br />
Remove the axle.<br />
Use a bearing press kit to remove the<br />
bearings.<br />
Fit the new bearings with press kit<br />
996 887 01.<br />
Refit the axle by inserting it in the hub<br />
via the <strong>disc</strong> side and retighten the<br />
adjustment nut with the hub wrench<br />
with your fingers.<br />
Reclip the non-<strong>disc</strong> side fork support.<br />
Fit the wheel in the fork and adjust the bearing play.
27<br />
REPLACING THE FRONT AXLE AND BEARINGS ON THE CENTER LOCK MODELS OF THE CROSSMAX SLR DISC <strong>09</strong> AND<br />
CROSSMAX ST DISC <strong>09</strong> WHEELS<br />
Tools needed<br />
• 1 hub wrench M40123<br />
• Bearing press kit 996 887 01 for the <strong>disc</strong> side bearing<br />
• Bearing press kit M40218 for the non-<strong>disc</strong> side bearing<br />
• Straight internal circlip clamp<br />
The operations below can be carried out whether or not the 9 mm axle reducers are fitted.<br />
The <strong>disc</strong> side and non-<strong>disc</strong> side bearings are not the same size. The <strong>disc</strong> side bearing is smaller in diameter than the non-<strong>disc</strong> side.<br />
Unclip the <strong>disc</strong> side fork support.<br />
Hold the adjustment nut in place with<br />
wrench M40123 and loosen the axle<br />
with your fingers via the non-<strong>disc</strong> side.<br />
Remove the axle.<br />
Remove the non-<strong>disc</strong> side bearing, then<br />
the circlip via the non-<strong>disc</strong> side using<br />
the circlip clamp.<br />
33333333333333333333 from outside<br />
the hub with a press kit to extract the<br />
bearing from the other side.<br />
Insert the new <strong>disc</strong> side bearing (the<br />
smaller of the two) via the non-<strong>disc</strong><br />
side and push it home with press kit<br />
996 887 01.<br />
Refit the circlip via the non-<strong>disc</strong> side<br />
with the circlip clamp.<br />
Fit the new non-<strong>disc</strong> side bearing with<br />
press kit M40218.<br />
Refit the axle to the hub via the non<strong>disc</strong><br />
side, retighten the adjustment nut<br />
with the hub wrench until contact is<br />
made with the bearing and loosen it<br />
again by a quarter turn.<br />
Reclip the non-<strong>disc</strong> side fork support.<br />
Fit the wheel in the fork and adjust the bearing play.
28<br />
REPLACING THE FRONT AXLE AND BEARINGS ON THE CROSSMAX SX <strong>09</strong> AND CROSSLINE CENTER LOCK MODEL<br />
WHEELS<br />
Tools needed<br />
• 1 hub wrench M40123<br />
• Bearing press kit M40218<br />
• Straight internal circlip clamp<br />
The operations detailed below must be carried out on the Crossline wheel without the 9 mm axle reducerss or the 20 mm adaptors.<br />
Insert the end lugs of hub wrench<br />
M40123 in two offset holes in the<br />
adjustment nut on the non-<strong>disc</strong> side.<br />
Hold wrench M40123 in place and<br />
loosen the axle via the <strong>disc</strong> side with<br />
your fingers (Crossmax SX) or the<br />
handle of a second wrench M40123<br />
inserted in the axle slits (Crossline).<br />
Remove the axle. Take care on the<br />
Crossmax SX not to mislay the bearing<br />
shim washer slid onto the axle.<br />
Remove the non-<strong>disc</strong> side bearing. As<br />
the bearing is fitted in a spacer, this<br />
could be removed with the bearing. You<br />
must therefore separate the spacer from<br />
the bearing.<br />
Remove the circlip via the non-<strong>disc</strong> side<br />
with the circlip clamp.<br />
Remove the <strong>disc</strong> side bearing by<br />
pushing it from outside the hub with a<br />
press kit to extract the bearing from the<br />
other side.<br />
Insert the new <strong>disc</strong> side bearing via the<br />
non-<strong>disc</strong> side and push it home with<br />
press kit M40218 and an additional<br />
tube.<br />
Refit the circlip via the non-<strong>disc</strong> side<br />
with the circlip clamp.<br />
If the non-<strong>disc</strong> side spacer has come<br />
out of the hub during removal, start by<br />
fitting the new bearing to the spacer<br />
with press kit M40218.<br />
Refit the bearings-spacer assembly in<br />
the non-<strong>disc</strong> side hub, pushing it home<br />
with press kit M40218.<br />
Insert the axle in the hub via the <strong>disc</strong><br />
side. For the Crossmax SX <strong>09</strong>, make<br />
sure that the shim washer is fitted.<br />
Retighten the adjustment nut with the<br />
hub wrench, holding the axle by hand<br />
(Crossmax SX) or with the handle of<br />
a second wrench M40123 inserted in<br />
the axle slits (Crossline) until contact<br />
is made with the bearing and loosen it<br />
again by a quarter turn.<br />
Fit the wheel in the fork and adjust the bearing play.
29<br />
MAINTAINING AND REPLACING THE ITS4 FREE WHEEL MECHANISM<br />
Tools needed<br />
• 14 mm open-end wrench<br />
• 17 mm open-end wrench<br />
• Hub wrench M40123<br />
There is no need to remove the axle from the hub for this operation. Do not remove the 9 mm reducing gears if they are already in place.<br />
Start by loosening the bearing adjustment nut by two turns with hub wrench M40123; this will avoid damaging the bearings during refitting.<br />
Unclip the non-drive side frame support.<br />
Holding the axle with the 14 mm openend<br />
wrench via the non-drive side,<br />
loosen the drive side lock nut with the<br />
17 mm open end wrench.<br />
Pull the free wheel body by rotating it<br />
counter-clockwise and remove it.<br />
Slide the pawls in their groove to<br />
separate them from the free wheel<br />
body. Take care not to lose or damage<br />
the springs.<br />
OK<br />
KO<br />
Remove the lip seal to clean or replace it, then refit it. Its lip must not come in<br />
contact with the free wheel body. Check that the base of the seal is flat against<br />
the entire free wheel body circumference.<br />
Grip the pawl-spring assembly between<br />
your thumb and left forefinger and<br />
slide it in the throat of the free wheel<br />
body. Check that the spring is housed<br />
correctly.<br />
Clean the hub body and fill three ratchet<br />
teeth with oil M40122.<br />
Check that the ITS4 spacer is in place<br />
before refitting the free wheel body.<br />
Center the internal spacer of the free<br />
wheel body, then slide the assembly<br />
onto the hub axle.<br />
Push the free wheel body gently,<br />
rotating it counter-clockwise.<br />
Reclip the non-drive side frame support;<br />
Fix the wheel in its frame and check the bearing play;<br />
If there is any play, gently tighten the adjustment nut with hub wrench M40123 to make the play disappear.<br />
Holding the axle with the 14 mm openend<br />
wrench via the non-drive side,<br />
tighten the drive side lock nut with<br />
the 17 mm open end wrench. (torque:<br />
15 Nm maximum).
30<br />
REPLACING THE REAR AXLE AND BEARINGS ON THE HUB BODY OF WHEELS OF THE ITS4 FREE WHEEL SYSTEM<br />
Tools needed<br />
• 14 mm open-end wrench<br />
• 17 mm open-end wrench<br />
• 1 mallet<br />
• 1 press kit 996 901 01<br />
• 1 press kit M40119<br />
• Hub wrench M40123<br />
Do not remove the 9 mm reducing gears if they are already in place for this operation.<br />
Remove the free wheel body-pawl assembly following the appropriate procedure (refer to www.tech-mavic.com or the technical manuals from previous years);<br />
Loosen the adjustment nut fully with<br />
hub wrench M40123, holding the axle<br />
with your hand.<br />
Tap the non-drive side of the axle with<br />
the mallet to extract the drive side<br />
bearing and the axle.<br />
Remove the non-drive side bearing.<br />
Fit the new non-drive side bearing with<br />
press kit M40119.<br />
Fit the new axle to the hub via the drive<br />
side, first inserting the side with the two<br />
spring pads.<br />
Place the hub in a vice on the non-drive<br />
side so that the end of the axle slides<br />
freely in the hub.<br />
Refit the non-drive side bearing with<br />
press kit 996 901 01.<br />
Retighten the adjustment nut with<br />
wrench M40123, holding the axle with<br />
your fingers.<br />
Refit the free wheel body, axle and non-drive side frame support following the appropriate procedure (refer to www.tech-mavic.com or the technical manuals from<br />
previous years);<br />
Fix the wheel in its frame and check the bearing play;<br />
If there is any play, gently tighten the adjustment nut with hub wrench M40123 to make the play disappear.
31<br />
WHEEL BUILDING<br />
REPLACING THE REAR RIM ON THE KSYRIUM ELITE <strong>09</strong> WHEEL<br />
Tools needed<br />
• Spoke wrench<br />
• Aerodynamic spoke wrench M40567<br />
• Mavic tensiometer 995 643 01 + tension-reading conversion chart supplied<br />
The spoke reference and length to be used are indicated on pages 4 to 23.<br />
These wheels must be fitted as follows:<br />
- The spokes are fitted radially on the drive side and crossed 2 on the non-drive side.<br />
- On the non-drive side, the spokes are hot laced and crossed (going from the hub to the rim, the driving spokes pass above then below the nondriving<br />
spokes).<br />
Start with the non-drive side (longest spokes);<br />
Start by placing a drop of Mavic thread<br />
lock M40315 in each threaded hole on<br />
the rim.<br />
Turn the rim so that the two raised<br />
indicator bumps are to the left of the<br />
valve hole when this is near you.<br />
Screw a spoke in the third hole to the<br />
right of the valve hole until the nipple<br />
locks. Repeat this step for all the<br />
spokes, one hole in four on the rim.<br />
Insert the heads of these spokes in the<br />
slots on the non-drive side hub. These<br />
spokes are non-driving spokes.<br />
Offer up the head of a driving spoke<br />
passing underneath the rim, underneath<br />
the first non-driving spoke then over the<br />
second non-driving spoke. Insert the<br />
head of this spoke in the notch in the<br />
corresponding slot.<br />
Tighten the nipple on this spoke in the<br />
corresponding hole on the rim, then<br />
do the same for all the non-drive side<br />
driving spokes.<br />
Turn the wheel over, screw a (short)<br />
spoke in all the remaining holes in the<br />
rim then push their heads in the slots on<br />
the drive side hub.<br />
Tension the wheel gradually: only one turn at a time on each nipple until the recommended tension is achieved.
32<br />
REPLACING A SPOKE ON THE COSMIC CARBONE SLR WHEEL<br />
Tools needed<br />
• Spoke wrench M40001<br />
• R2R 101 295 01 spoke head wrench<br />
• Mavic tensiometer 995 643 01 + tension-reading conversion chart supplied<br />
CAUTION: tightening a spoke nipple affects the two half-spokes. When tensioning, one turn of the spoke nipple to tension the spoke is the<br />
equivalent of two turns on a normal wheel.<br />
Mark the spoke pair you wish to replace<br />
and loosen both ends of the spoke pair<br />
which passes over the spoke pair to be<br />
replaced in the hub flange perimeter.<br />
Remove the old spoke pair and fit the<br />
new one in place in the hub, respecting<br />
the original lacing.<br />
Retension the two spoke pairs involved,<br />
holding the spoke heads with the thumb<br />
across the carbon rim flange.<br />
Adjust the wheel definitively by holding<br />
the spoke heads inside the carbon rim<br />
flange with holding tool 101 295 01.<br />
This tool should be offered up via the<br />
side with the most space and must<br />
enter without forcing.<br />
No thread lock is necessary as the spoke nipples are ABS.
33<br />
REPLACING THE FRONT RIM ON THE COSMIC CARBONE SLR WHEEL<br />
Tools needed<br />
• Spoke wrench M40001<br />
• R2R 101 295 01 spoke head wrench<br />
• Mavic tensiometer 995 643 01 + tension-reading conversion chart supplied<br />
Colored dots are stuck to the metal plates in the center of the spokes. These dots must always be visible when the spokes are assembled.<br />
- The red dots mark the front spokes.<br />
CAUTION: tightening a spoke nipple affects the two half-spokes. When tensioning, one turn of the spoke nipple to tension the spoke is the<br />
equivalent of two turns on a normal wheel.<br />
2<br />
4<br />
1<br />
3<br />
3<br />
4<br />
2<br />
1<br />
With the valve hole near you, screw a<br />
spoke in the first hole to the right of<br />
the valve hole and its other end in the<br />
eleventh hole when counting clockwise.<br />
Fit the second spoke in the fifth hole<br />
to the right of the valve hole, counting<br />
counter-clockwise. The other end of this<br />
spoke is inserted in the fifteenth hole.<br />
Fit the third spoke in the ninth hole to<br />
the right of the valve hole, counting<br />
counter-clockwise. The other end of this<br />
spoke is inserted in the nineteenth hole.<br />
The fourth spoke is inserted in the<br />
thirteenth hole and must pass above<br />
the second and third spokes then<br />
underneath the first. Its other end is<br />
inserted in the third hole.<br />
2<br />
4<br />
1<br />
3<br />
3<br />
5<br />
5<br />
2<br />
1<br />
4<br />
The fifth spoke is inserted in the<br />
seventeenth hole and must pass<br />
above the third and fourth spokes then<br />
underneath the first and second. Its<br />
other end is inserted in the seventh<br />
hole.<br />
Turn the wheel over and repeat the<br />
steps above. Tighten all nipples until<br />
the threaded rods are just brushing the<br />
nipples.<br />
Offer up the hub in the middle of the<br />
spokes and position the two hub<br />
flanges between the two layers of<br />
spokes.<br />
Position the plates in the housing on<br />
one side of the hub then the other.<br />
KO<br />
OK<br />
Adjust the wheel definitively by holding<br />
the spoke heads inside the carbon rim<br />
flange with holding tool 101 295 01.<br />
This tool should be offered up via the<br />
side with the most space and must<br />
enter without forcing.<br />
Check that that the plates are flat against the hub body. If not, tap them lightly<br />
with a mallet to push them home.<br />
Clip the hub caps by bending their<br />
internal diameter downwards to position<br />
the fixing tabs one by one. Check that<br />
the hub cap returns are positioned<br />
correctly above each plate.<br />
Adjust the spoke flat alignment by turning the nipples gently with the spoke wrench without holding the spoke head and so that the nipple is not loosened.
34<br />
REPLACING THE REAR RIM ON THE COSMIC CARBONE SLR WHEEL<br />
Tools needed<br />
• Spoke wrench M40001<br />
• R2R 101 295 01 spoke head wrench<br />
• Mavic tensiometer 995 643 01 + tension-reading conversion chart supplied<br />
Colored dots are stuck to the metal plates in the center of the spokes. These dots must always be visible when the spokes are assembled.<br />
- The green dots mark the drive-side spokes.<br />
- The red dots mark the front and non-drive side spokes.<br />
CAUTION: tightening a spoke nipple affects the two half-spokes. When tensioning, one turn of the spoke nipple to tension the spoke is the<br />
equivalent of two turns on a normal wheel.<br />
DRIVE SIDE<br />
NON DRIVE SIDE<br />
Mark the rim fitting direction: the side of the rim where the spoke holes are the<br />
nearest to the leaking edge is the drive side.<br />
Start with the non-drive side. With the<br />
valve hole near you, screw a spoke into<br />
the first hole to the right of the valve<br />
hole and its other end into the eleventh<br />
hole when counting counter-clockwise.<br />
Fit the second spoke in the fifth hole<br />
to the right of the valve hole, counting<br />
counter-clockwise. The other end of this<br />
spoke is inserted in the fifteenth hole, to<br />
the right of the valve hole.<br />
2<br />
4<br />
1<br />
3<br />
2<br />
4<br />
1<br />
3<br />
3<br />
2<br />
5<br />
3<br />
5<br />
2<br />
1<br />
4<br />
1<br />
4<br />
Fit the third spoke in the ninth hole to<br />
the right of the valve hole, counting<br />
counter-clockwise. The other end of this<br />
spoke is inserted in the nineteenth hole,<br />
to the right of the valve hole.<br />
The fourth spoke is inserted in the<br />
thirteenth hole to the right of the valve<br />
hole and must pass over the second<br />
and third spokes then underneath the<br />
first. Its other end is inserted in the third<br />
hole to the right of the valve hole.<br />
The fifth spoke is inserted in the<br />
seventeenth hole to the right of the<br />
valve hole and must pass over the third<br />
and fourth spokes then underneath<br />
the first and second. Its other end is<br />
inserted in the seventh hole to the right<br />
of the valve hole.<br />
3 3<br />
5<br />
Turn the wheel over. Insert a spoke in<br />
the first hole to the right of the valve<br />
hole. The other end of this spoke is<br />
inserted in the eleventh hole, counting<br />
counter-clockwise.<br />
1<br />
4<br />
1<br />
4<br />
4<br />
2<br />
4<br />
2<br />
2<br />
3 3<br />
1 1<br />
2<br />
5<br />
Fit the second spoke in the fourth hole<br />
to the left of the valve hole, counting<br />
clockwise. The other end of this spoke<br />
is inserted in the fourteenth hole, to the<br />
left of the valve hole.<br />
Fit the third spoke in the eighth hole<br />
to the left of the valve hole, counting<br />
clockwise. The other end of this spoke<br />
is inserted in the eighteenth hole, to the<br />
left of the valve hole.<br />
The fourth spoke is inserted in the<br />
twelfth hole to the left of the valve hole<br />
and must pass underneath the first<br />
spoke then over the third and second<br />
spokes. Its other end is inserted in the<br />
second hole to the left of the valve<br />
hole.<br />
The fifth spoke is inserted in the<br />
sixteenth hole to the left of the valve<br />
hole and must pass underneath the<br />
second and first spokes, then over the<br />
fourth and third. Its other end is inserted<br />
in the sixth hole to the left of the valve<br />
hole.
35<br />
Tighten all nipples until the threaded<br />
rods are just brushing the nipples.<br />
Offer up the hub in the middle of the<br />
spokes and position the two hub<br />
flanges between the two layers of<br />
spokes.<br />
Position the plates in the housing on<br />
one side of the hub then the other.<br />
Adjust the wheel definitively by holding<br />
the spoke heads inside the carbon rim<br />
flange with holding tool 101 295 01.<br />
This tool should be offered up via the<br />
side with the most space and must<br />
enter without forcing.<br />
KO<br />
OK<br />
Check that that the plates are flat against the hub body. If not, tap them lightly<br />
with a mallet to push them home.<br />
Clip the hub caps by bending their<br />
internal diameter downwards to position<br />
the fixing tabs one by one. Check that<br />
the hub cap returns are positioned<br />
correctly above each plate.<br />
Tension the wheel and center it definitively respecting the spoke tension indicated on page 5.<br />
No thread lock is necessary as the spoke nipples are ABS.
36<br />
FITTING/REMOVING THE TRACOMP RING AND ITS CLIPS<br />
Tools needed<br />
• TraComp ring tool 996 080 01<br />
• 4 to 5 mm flat screwdriver<br />
• Mallet<br />
To remove the TraComp ring:<br />
Remove the axle following the procedures specific to each hub (refer to www.tech-mavic.com or the technical manuals from previous years);<br />
Place the TraComp ring tool 996 080<br />
01 in the hub so that the illustrated<br />
screwdriver on the tool is visible.<br />
Thread the screwdriver head through<br />
the TraComp ring tool hole.<br />
Insert the screwdriver head through<br />
the slit in the TraComp ring tool in the<br />
TraComp ring groove, exactly between<br />
two clips.<br />
Push the screwdriver handle<br />
downwards to lever out the TraComp<br />
ring.<br />
The spokes can now turn freely and be extracted.<br />
A new ring and clips must be used when refitting:<br />
OK<br />
KO<br />
OK<br />
KO<br />
Position the two clips on two opposite spoke heads with the split part upwards.<br />
Offer the TraComp ring up to the spoke heads with the conical side facing<br />
downwards and the inside groove facing upwards, taking care to slide two clips<br />
between each one<br />
OK<br />
KO<br />
Place the TraComp ring tool 996 080 01<br />
against the ring so that the illustrated<br />
mallet on the tool is visible.<br />
Forcefully fit the TraComp ring into the hub with the mallet. The entire bottom<br />
surface of the TraComp ring must be in contact with the hub body.<br />
Refit the axle following the procedures specific to each hub (refer to www.tech-mavic.com or the technical manuals from previous years).
37<br />
REPLACING THE FRONT RIM ON THE CROSSMAX SLR DISC <strong>09</strong> WHEELS (MODELS: STANDARD INTERNATIONAL AND<br />
CENTER LOCK ® , CROSSMAX SLR DISC <strong>09</strong> 20MM AND CROSSMAX SLR DISC <strong>09</strong> LEFTY)<br />
Tools needed<br />
• Spoke wrench M40652<br />
• Aerodynamic spoke wrench M40567 (for Crossmax SLR Disc and Crossmax SL Disc 07 wheels)<br />
• Mavic tensiometer 995 643 01 + tension-reading conversion chart supplied<br />
These wheels must be fitted as follows:<br />
• The spokes are crossed 2 on both sides.<br />
• The braking spokes are inserted in the notches of the slots farthest away from the hub, on both sides.<br />
• The braking spokes pass over the non-braking spokes, along their full length and without touching.<br />
Start with the <strong>disc</strong> side;<br />
With the valve hole near you, position<br />
the rim so that the raised indicator<br />
bump is to the right of the valve hole.<br />
Screw a spoke two turns into the first<br />
hole to the right of the valve hole.<br />
Repeat this step for the six spokes, one<br />
hole in four on the rim.<br />
Insert the head of these spokes in the<br />
hub notches nearest the inside: these<br />
spokes are non-braking spokes.<br />
Screw a spoke two turns into the third<br />
hole to the right of the valve hole.<br />
Repeat this step for the six spokes, one<br />
hole in four on the rim.<br />
Insert the head of these spokes in the<br />
hub notches nearest the outside: these<br />
spokes are braking spokes.<br />
Turn the wheel over and screw a spoke<br />
into the third hole to the right of the<br />
valve hole. Repeat this step for the six<br />
spokes, one hole in four on the rim.<br />
Insert the head of these spokes in the<br />
hub notches nearest the inside: these<br />
spokes are non-braking spokes.<br />
Screw a spoke two turns into the first<br />
hole to the right of the valve hole.<br />
Repeat this step for the six spokes, one<br />
hole in four on the rim.<br />
Insert the head of these spokes in the<br />
hub notches nearest the outside: these<br />
spokes are braking spokes.<br />
Tighten each nipple equally to tension the wheel.<br />
Tension the wheel and center it definitively (refer to the product pages for the appropriate tension for each wheel).
38<br />
REPLACING THE FRONT RIM ON THE CROSSRIDE DISC <strong>09</strong> AND CROSSRIDE UB/DISC <strong>09</strong> WHEELS<br />
Tools needed<br />
• Conventional spoke wrench<br />
Basic wheel building principle for Crossride Disc <strong>09</strong> and Crossride UB/Disc <strong>09</strong> front wheels: the non-braking spokes are positioned underneath the<br />
braking spokes, <strong>disc</strong> side and non-<strong>disc</strong> side.<br />
Start with the <strong>disc</strong> side;<br />
Insert the head of a spoke in a slot on<br />
the hub so that the spoke is a nonbraking<br />
spoke.<br />
With the valve hole near you, insert this<br />
spoke in the first hole to the right of the<br />
valve hole and tighten its nipple two<br />
turns. Repeat these steps for the six<br />
non-braking spokes, <strong>disc</strong> side.<br />
Insert the head of a spoke in a slot on<br />
the hub so that the spoke is a braking<br />
spoke.<br />
With the valve hole near you, insert this<br />
spoke in the third hole to the right of<br />
the valve hole and tighten its nipple two<br />
turns. Repeat these steps for the six<br />
braking spokes, <strong>disc</strong> side.<br />
Turn the wheel over. Insert the head of<br />
a spoke in a slot on the hub so that the<br />
spoke is a non-braking spoke.<br />
With the valve hole near you, insert this<br />
spoke in the third hole to the right of<br />
the valve hole and tighten its nipple two<br />
turns. Repeat these steps for the six<br />
non-braking spokes, non-<strong>disc</strong> side.<br />
Insert the head of a spoke in a slot on<br />
the hub so that the spoke is a braking<br />
spoke.<br />
With the valve hole near you, insert this<br />
spoke in the first hole to the right of the<br />
valve hole and tighten its nipple two<br />
turns. Repeat these steps for the six<br />
braking spokes, non-<strong>disc</strong> side.<br />
Tighten each nipple equally to tension the wheel.<br />
Tension the wheel and center it definitively (refer to the product pages for the appropriate tension for each wheel).
39<br />
REPLACING THE REAR RIM ON THE CROSSRIDE UB/DISC <strong>09</strong> AND CROSSRIDE DISC <strong>09</strong> WHEELS<br />
Tools needed<br />
• Conventional spoke wrench<br />
Basic wheel building principles for Crossride Disc <strong>09</strong> and Crossride UB/Disc <strong>09</strong> rear wheels:<br />
- Drive side: the non-driving spokes are positioned underneath the driving spokes.<br />
- Non-drive side: the driving spokes are positioned underneath the non-driving spokes.<br />
Start with the drive side;<br />
Insert the head of a spoke in a slot on<br />
the hub so that the spoke is a nondriving<br />
spoke.<br />
With the valve hole near you, insert this<br />
spoke in the first hole to the right of the<br />
valve hole and tighten its nipple two<br />
turns. Repeat these steps for the six<br />
non-driving spokes, drive side.<br />
Insert the head of a spoke in a slot on<br />
the hub so that the spoke is a driving<br />
spoke.<br />
With the valve hole near you, insert this<br />
spoke in the third hole to the right of<br />
the valve hole and tighten its nipple two<br />
turns. Repeat these steps for the six<br />
driving spokes, drive side.<br />
Turn the wheel over. Insert the head of<br />
a spoke in a slot on the hub so that the<br />
spoke is a driving spoke.<br />
With the valve hole near you, insert this<br />
spoke in the first hole to the right of the<br />
valve hole and tighten its nipple two<br />
turns. Repeat these steps for the six<br />
driving spokes, non-drive side.<br />
Insert the head of a spoke in a slot on<br />
the hub so that the spoke is a nondriving<br />
spoke.<br />
With the valve hole near you, insert this<br />
spoke in the third hole to the right of<br />
the valve hole and tighten its nipple two<br />
turns. Repeat these steps for the six<br />
non-driving spokes, non-drive side.<br />
Tighten each nipple equally to tension the wheel.<br />
Tension the wheel and center it definitively (refer to the product pages for the appropriate tension for each wheel).
40<br />
REPLACING A SPOKE, FRONT AND REAR RIM ON THE DEETRAKS <strong>09</strong> AND DEETRAKS <strong>09</strong> 12X150 WHEELS<br />
Tools needed<br />
• Spoke wrench<br />
• Mavic tensiometer 995 643 01 + tension-reading conversion chart supplied<br />
The Deetraks <strong>09</strong> wheels were primarily designed to make it easy for dealers to repair them, with standard parts and procedures.<br />
Thus:<br />
- The flanged hubs house dogleg J-bent spokes with a constant 2 mm section.<br />
- Wheel building follows the conventional method: hot lacing of spokes in 3s.<br />
However, to keep the dynamic qualities of these wheels intact, we recommend:<br />
- Using the spokes specified by Mavic under part numbers 996 926 01 (front non-<strong>disc</strong> side and rear non-drive side) and 996 927 01 (front <strong>disc</strong> side and<br />
rear drive side).<br />
- Complying with the appropriate spoke tensions: 110 to 130 kg for the <strong>disc</strong> side of the front wheel and 120 to 140 kg for the drive side of the rear wheel,<br />
using the Mavic tensiometer 995 643 01.<br />
- Respecting the spoke fitting direction as follows:<br />
The doglegs on the braking spokes on<br />
both sides of the front wheel must be<br />
facing towards the outside of the hub<br />
flanges.<br />
The doglegs on the driving spokes on<br />
the drive side of the rear wheel must be<br />
facing towards the outside of the hub<br />
flange.<br />
The doglegs on the driving spokes on<br />
the non-drive side of the rear wheel<br />
must be facing towards the inside of the<br />
hub flange.
41<br />
REPLACING A SPOKE ON THE DEEMAX <strong>09</strong>, DEEMAX <strong>09</strong> 12X150 AND DEEMAX <strong>09</strong> SSC WHEELS.<br />
Tools needed<br />
• Spoke wrench M40494<br />
• Mavic tensiometer 995 643 01 + tension-reading conversion chart supplied<br />
The Deemax <strong>09</strong> and Deemax <strong>09</strong> SSC hubs incorporate the SRS (Spoke Retention System) design which prevents the spokes from being ejected when subject<br />
to major shocks.<br />
Consequently, the spokes must be assembled on the hub using a special method. When you have to replace a spoke, therefore, it may prove necessary to<br />
remove or release others.<br />
Proceed as follows to assemble the head of a spoke in its slot:<br />
For a spoke located in an inside slot,<br />
offer its head up to the slot, keeping it<br />
parallel to the hub axle, via the outside<br />
of the wheel.<br />
For a spoke located in an outside slot,<br />
offer its head up to the slot, keeping it<br />
parallel to the hub axle, via the inside of<br />
the wheel.<br />
Raise the spoke towards the rim.<br />
The spoke head is now locked inside the slot as long as you do not direct the spoke towards the outside of the wheel.<br />
Then put the spoke back in place while making sure that the lacing is correct:<br />
• on the front and rear non-drive side, the non-braking spokes are inserted in the inside hub slots and pass underneath the braking spokes for their entire length.<br />
• on the rear drive side, the non-driving spokes are inserted in the inside hub slots and pass underneath the driving spokes for their entire length;<br />
Tighten each nipple equally to tension the wheel.<br />
Tension the wheel and center it definitively (refer to the product pages for the appropriate tension for each wheel).
42<br />
REPLACING THE FRONT RIM ON THE DEEMAX <strong>09</strong> AND DEEMAX <strong>09</strong> SSC WHEELS<br />
Tools needed<br />
• TraComp spoke wrench M40494<br />
• Mavic tensiometer 995 643 01 + tension-reading conversion chart supplied<br />
These wheels must be fitted as follows:<br />
- The braking spokes are fitted to the inside section of the hub slots on both sides<br />
- The non-braking spokes are fitted to the outside section of the hub slots on both sides<br />
- The non-braking spokes pass underneath the braking spokes, over their entire length and without touching, on both sides<br />
Start with the <strong>disc</strong> side.<br />
Offer up the head of a spoke to a slot,<br />
keeping it parallel to the hub axle, via<br />
the outside of the wheel.<br />
Raise the spoke towards the rim.<br />
Slide this spoke in the outside section<br />
of the slot and lower it tangentially to<br />
the hub.<br />
Repeat the operation with a new spoke<br />
in the same slot, but this time for the<br />
inside section of the slot.<br />
Fit all the <strong>disc</strong> side spokes in this way.<br />
Turning them all in the same direction<br />
will make it easier to fit the remaining<br />
spokes.<br />
With the valve hole near you, turn the<br />
rim so that the raised indicator bump<br />
is to the left of the valve hole.<br />
Tighten the nipple on a non-braking<br />
spoke (inside section of a slot to the<br />
right of the hub axle) until it locks in the<br />
first hole to the right of the valve hole.<br />
Repeat these steps for all the nonbraking<br />
spokes inserted in the inside<br />
sections of slots, one hole in four in<br />
the rim.<br />
Tighten the nipple on a braking spoke<br />
(outside section of a slot to the left of<br />
the hub axle) until it locks in the third<br />
hole to the right of the valve hole.<br />
Repeat these steps for all the braking<br />
spokes inserted in the outside sections<br />
of slots, one hole in four in the rim.<br />
Turn the wheel over and insert all<br />
the non-<strong>disc</strong> side spokes using the<br />
procedures detailed in the first four<br />
steps above.<br />
Tighten the nipple on a non-braking<br />
spoke (inside section of a slot to the left<br />
of the hub axle) until it locks in the third<br />
hole to the right of the valve hole.
43<br />
Repeat these steps for all the non-braking spokes inserted in the inside sections of slots, one hole in four in the rim.<br />
Tighten the nipple on a braking spoke<br />
(outside section of a slot to the right<br />
of the hub axle) until it locks in the first<br />
hole to the right of the valve hole.<br />
Repeat these steps for all the braking spokes inserted in the outside sections of slots, one hole in four in the rim.<br />
Tighten each nipple equally to tension the wheel.<br />
Tension the wheel and center it definitively (refer to the product pages for the appropriate tension for each wheel).
44<br />
REPLACING THE REAR RIM ON THE DEEMAX <strong>09</strong> AND DEEMAX <strong>09</strong> SSC WHEELS<br />
Tools needed<br />
• TraComp spoke wrench M40494<br />
• Mavic tensiometer 995 643 01 + tension-reading conversion chart supplied<br />
These wheels must be fitted as follows:<br />
- Drive side, the driving spokes are fitted to the outside section of the hub slots and the non-driving spokes to the inside section of the hub slots. The<br />
non-traction spokes pass underneath the driving spokes, over their entire length and without touching.<br />
- Non-drive side, the driving spokes are fitted to the inside section of the hub slots and the non-driving spokes to the outside section of the hub slots.<br />
The driving spokes pass underneath the non-driving spokes, over their entire length and without touching.<br />
Start with the drive side.<br />
Offer up the head of a spoke to a slot,<br />
keeping it parallel to the hub axle, via<br />
the outside of the wheel.<br />
Raise the spoke towards the rim.<br />
Slide this spoke in the outside section<br />
of the slot and lower it tangentially to<br />
the hub.<br />
Repeat the operation with a new spoke<br />
in the same slot, but this time for the<br />
inside section of the slot.<br />
Fit all the drive side spokes in this way.<br />
Turning them all in the same direction<br />
will make it easier to fit the remaining<br />
spokes.<br />
With the valve hole near you, turn the<br />
rim so that the raised indicator bumps<br />
are to the right of the valve hole.<br />
Tighten the nipple on a non-driving<br />
spoke (inside section of a slot to the<br />
right of the hub axle) until it locks in the<br />
first hole to the right of the valve hole.<br />
Repeat these steps for all the nondriving<br />
spokes inserted in the inside<br />
sections of slots, one hole in four in<br />
the rim.<br />
Tighten the nipple on a driving spoke<br />
(outside section of a slot to the left of<br />
the hub axle) until it locks in the third<br />
hole to the right of the valve hole.<br />
Repeat these steps for all the driving<br />
spokes inserted in the outside sections<br />
of slots, one hole in four in the rim.<br />
Turn the wheel over and insert all<br />
the non-drive side spokes using the<br />
procedures detailed in the first four<br />
steps above.<br />
Tighten the nipple on a driving spoke<br />
(inside section of a slot to the right of<br />
the hub axle) until it locks in the first<br />
hole to the right of the valve hole.
45<br />
Repeat these steps for all the driving spokes inserted in the inside sections of slots, one hole in four in the rim.<br />
Tighten the nipple on a non-driving<br />
spoke (outside section of a slot to the<br />
left of the hub axle) until it locks in the<br />
third hole to the right of the valve hole.<br />
Repeat these steps for all the non-driving spokes inserted in the outside sections of slots, one hole in four in the rim.<br />
Tighten each nipple equally to tension the wheel.<br />
Tension the wheel and center it definitively (refer to the product pages for the appropriate tension for each wheel).
WINTECH FS <strong>09</strong><br />
46<br />
USE: use only on a road bike, tandem, all road bike or a crosscountry<br />
or Cross Mountain MTB. Any other use (such as on an<br />
Extrême MTB, cyclo-cross bike, …) is highly inadvisable, is the<br />
sole responsibility of the user and voids the Mavic warranty.<br />
WEIGHT:<br />
Computer: 32 g<br />
Computer bracket: 13 g<br />
Fork-sensor: 18 g<br />
REFERENCES:<br />
Wintech FS <strong>09</strong>: 996 812 01<br />
Wintech FS <strong>09</strong> + Cadence: 996 813 01<br />
SPARE PARTS<br />
323 512 01<br />
995 443 01<br />
M40412<br />
+<br />
996 936 01<br />
M40540<br />
MAINTENANCE: Clean with a dry cloth, or soap and water if necessary.<br />
Do not use a high-pressure washer.<br />
Avoid extended storage behind a window exposed to direct sunlight.<br />
ACCESSORY PART NUMBERS<br />
Computer and sensor battery cover kit<br />
10-battery kit CR2032:<br />
Adjustment magnets kit<br />
995 441 01<br />
M40412<br />
996 102 01<br />
OPERATING SCOPE<br />
Power supply:<br />
Circumference:<br />
Unit:<br />
Time format:<br />
Water resistance:<br />
Operating temperature range<br />
Computer and sensor:<br />
battery CR2032<br />
Minimum: 1500 mm, Maximum: 2500 mm<br />
Kilometers or miles<br />
24 hours only<br />
Resistant to rainwater. Do not<br />
submerge electronic components totally<br />
and do not use use a high-pressure<br />
washer.<br />
0 to 50°C/25 to 122°F<br />
Maximum transmission distances:<br />
Cumulative odometer:<br />
Trip distance:<br />
Stopwatch:<br />
Speed:<br />
Rate (optional):<br />
Speed: 2 meters<br />
Rate: 2 meters<br />
Up to 99,999 km or miles<br />
Up to 999.99 km or miles<br />
Up to <strong>09</strong>:59:59<br />
Up to 99 km/h or mph<br />
Up to 180 rpm<br />
After fitting the computer, it MUST be synchronized digitally before using it for the first time, as described in<br />
the instructions supplied with the computer. Failure to do this will result in no communication between the<br />
computer and the various sensors and your system will not function.
WINTECH ULTIMATE<br />
47<br />
USE: use only on a road bike, tandem, all road bike or a crosscountry<br />
or Cross Mountain MTB. Any other use (such as on an<br />
Extrême MTB, cyclo-cross bike, …) is highly inadvisable, is the<br />
sole responsibility of the user and voids the Mavic warranty.<br />
WEIGHT:<br />
Computer: 35 g<br />
Computer bracket: 16 g<br />
Sensor-nut: 28 g<br />
Heart belt: 54 g<br />
REFERENCES:<br />
Wintech Ultimate: 996 646 01<br />
Wintech Ultimate + Cadence: 996 647 01<br />
SPARE PARTS<br />
995 025 01 995 443 01<br />
995 444 01<br />
MAINTENANCE: Clean with a dry cloth, or soap and water if necessary.<br />
Do not use a high-pressure washer.<br />
Avoid extended storage behind a window exposed to direct sunlight.<br />
ACCESSORY PART NUMBERS<br />
Alti computer battery cover kit<br />
Heart belt battery cover kit<br />
Sensor battery cover kit:<br />
996 100 01<br />
995 442 01<br />
995 441 01<br />
One battery kit CR2430 (Alti computer)<br />
10-battery kit CR2032:<br />
Adjustment magnets kit<br />
996 <strong>09</strong>9 01<br />
M40412<br />
996 102 01<br />
OPERATING SCOPE<br />
Power supply:<br />
Circumference:<br />
Unit:<br />
Time format:<br />
Water resistance:<br />
Operating temperature range<br />
Computer: battery CR2430<br />
Sensor: battery CR2032<br />
Minimum: 1500 mm, Maximum: 2500 mm<br />
Kilometers or miles<br />
24 hours only<br />
Resistant to rainwater.<br />
Do not submerge the electronic<br />
components totally and do not use a<br />
high-pressure washer.<br />
0 to 50°C/25 to 122°F<br />
Maximum transmission distances:<br />
Cumulative odometer:<br />
Trip distance:<br />
Stopwatch:<br />
Speed:<br />
Rate (optional):<br />
Altitude unit:<br />
Altitude:<br />
Heart rate:<br />
Speed: 2 meters<br />
Rate: 2 meters<br />
Up to to 99,999 km or miles<br />
Up to 999.99 km or miles<br />
Up to <strong>09</strong>:59:59<br />
Up to 99 km/h or mph<br />
Up to 180 rpm<br />
Meters or feet<br />
Up to 9,999 m or ft<br />
Up to 240 beats/minute<br />
After fitting the computer, it MUST be synchronized digitally before using it for the first time, as described in<br />
the instructions supplied with the computer. Failure to do this will result in no communication between the<br />
computer and the various sensors and your system will not function.
48<br />
RESET<br />
The computer can be reset on the Wintech ES 07, FS <strong>09</strong>, HR, Alti and Ultimate.<br />
This can solve certain computer operating difficulties, such as:<br />
- Inconsistent display of distance, speed, altitude, heart values, etc.<br />
- Display locked on a screen (buttons not working)<br />
This means that all recorded information is lost once and for all. Remember to make a note of it in advance and to synchronize digitally<br />
once the operation is ended.<br />
Open the battery cover and remove the<br />
battery.<br />
Press the contact switch set back from<br />
the base of the battery with a metal tip.<br />
Refit the battery with the + side visible<br />
and close the battery cover.<br />
Digitally synchronize all the sensors you use and set the time and the wheel circumference of the bikes you use following the procedures detailed in<br />
the product guide or at www.tech-mavic.com
TOOLS<br />
49<br />
REFERENCE<br />
DESCRIPTION<br />
PRODUCT<br />
323 477 01 Multifunction tool:<br />
Removing the UST Tubeless rim tape (A)<br />
Fitting the UST rim tape (C)<br />
Adjusting the front axles on the Cosmos, Ksyrium Équipe, Crossland, Crossmax Enduro Crossmax Enduro Disc,<br />
Cosmic Élite 05 and Speedcity 05, Aksium, Crossride 06 wheels<br />
Crossride Disc, Crosstrail, Crosstrail Disc, Aksium 08, Ksyrium Equipe 08, Crossride UB/Disc 08, Crossride UB (B)<br />
C<br />
B<br />
A<br />
M40119<br />
Bearing press kits for bearings:<br />
M40075<br />
M40076<br />
D<br />
A<br />
C<br />
B<br />
M40120<br />
Bearing press kits for bearings:<br />
M40077<br />
M40078<br />
D<br />
C<br />
A<br />
B<br />
M40631<br />
Bearing press kits for bearings:<br />
M40632<br />
M40373<br />
Guide ring and bearing press kit for bearings:<br />
M40318<br />
M40660<br />
D<br />
F<br />
A<br />
M40218<br />
Bearing press kit for bearings:<br />
M40179<br />
323 945 01<br />
Bearing press kit for bearings:<br />
M40771<br />
324 300 01<br />
Bearing press kit for bearings:<br />
324 170 01<br />
996 887 01<br />
Bearing press kit for hub bearings 9/15:<br />
996 885 01 and 996 886 01.<br />
996 901 01<br />
Bearing press kit for bearings M40076 used in ITS4 free wheel system hubs.<br />
A+B: Press kit for the front wheel.<br />
A+C: Press kit for the rear wheel.<br />
D: Press kits for the front and rear wheels.<br />
E: Press kits for the front and rear wheel bearings.<br />
F: Guide ring for the 12 mm hex key required to remove the free wheel from Crossroc UST, Crossroc UST Disc, Crossride, Crossride Céramic, Cosmos and<br />
Cosmic Élite wheels.
50<br />
REFERENCE DESCRIPTION PRODUCT<br />
996 080 01 TraComp ring tool<br />
995 643 01<br />
Mavic tensiometer for all Mavic wheels<br />
M40001<br />
Spoke adjustment wrench for Cosmic Carbone, Cosmic Carbone SSC and Cosmic Carbone SL wheels<br />
101 295 01<br />
R2R spoke head tool<br />
323 908 01<br />
Cosmic Carbone Pro spoke wrench + spoke wrench for aerodynamic spokes<br />
M40567<br />
Aerodynamic spoke wrench kit.<br />
996 079 01<br />
TraComp spoke wrench kit<br />
M40652<br />
Zamak spoke tightening wrench for Fore M7 pierced wheels (except R-Sys)<br />
M40630<br />
Screw-in eye tightening wrench kit for Fore M9 pierced wheels and rims.<br />
996 220 01<br />
Cosmic Carbone Ultimate spoke wrench kit
51<br />
REFERENCE DESCRIPTION PRODUCT<br />
M40123<br />
Hub wrench for adjusting the play on Mavic QRM+ hubs.<br />
99613601<br />
Mavic mineral oil for lubricating FTS, FTS-L, FTS-X and ITS4 free wheel bodies.<br />
Contents 60 ml.<br />
Use this oil only for lubricating FTS, FTS-L, FTS-X and ITS4 free wheel bodies.<br />
99620401<br />
Mavic thread lock<br />
Contents 5 ml.<br />
M40410<br />
Mavic abrasive soft stone for cleaning the braking surface of the rim, Céramic or UB Control.
AUSTRALIA<br />
Groupe Sportif PTY Ltd<br />
27 Ceylon street<br />
3131 Nunawading victoria<br />
Tel.: (+61) 388 781 000<br />
Fax: (+61) 388 781 001<br />
DENMARK / SWEDEN<br />
Biketoyz Aps.<br />
Sletten 6<br />
8543 Hornslet<br />
Tel.: (+45) 86 99 00 58<br />
Fax: (+45) 87 49 00 51<br />
clausb@biketoyz.dk<br />
JAPAN<br />
Amer Sports Japan, Inc.<br />
Mavic ® Division<br />
TOC Ariake West Tower 8F 2-5-7,<br />
Ariake, Koutou-ku<br />
Tokyo 135-0063 JAPAN<br />
Tel.: (+81) 3-3527-8718<br />
Fax: (+81) 3-3527-8738<br />
SWITZERLAND<br />
Mavic ® Vertretung<br />
Geigelsteinstr. 10<br />
D-83080 Oberaudorf<br />
Tel.: (+41) 041 7841 274<br />
Fax: (+41) 041 7841 275<br />
AUSTRIA<br />
Mavic ® Vertretung<br />
Geigelsteinstr. 10<br />
D-83080 Oberaudorf<br />
Tel.: (+43) 0463 298 144<br />
Fax: (+43) 0463 298 146<br />
FINLAND<br />
Raul Hellberg Oy<br />
Riihimiehentie 8<br />
01720 Vantaa<br />
Tel.: (+358) 9 417 88 400<br />
Fax: (+358) 9 417 88 425<br />
hellberg@raulhellberg.fi<br />
NORWAY<br />
Deler AS<br />
PO BOX 1004<br />
1442 Drobak<br />
Tel.: (+47) 64 98 99 50<br />
Fax: (+47) 64 989 961<br />
support@deler.no<br />
UK<br />
Amer Sports UK Ltd<br />
Mavic ®<br />
Theta Building<br />
Lyon Way<br />
Frimley / Surrrey<br />
GU16 7ER<br />
Tel.: (+44) 01276 404870<br />
BENELUX<br />
Codagex<br />
Zandbergen, 10<br />
B-2480 Dessel<br />
Tel.: (+32) 014 34 74 74<br />
Fax: (+32) 014 32 39 04<br />
FRANCE<br />
Salomon S.A.<br />
Mavic ®<br />
Metz Tessy<br />
74996 Annecy Cedex 9<br />
Tel.: (+33) 04 50 65 71 71<br />
Fax: (+33) 04 50 65 71 96<br />
NEW-ZEALAND<br />
Cycles Etc<br />
151 Neilson Street<br />
Onehunga - Auckland<br />
Tel.: (+64) 4 528 3608<br />
Fax: (+64) 4 528 3601<br />
USA<br />
Mavic ® Inc.<br />
17 Parkridge Road<br />
Haverhill, MA 01835<br />
Tel.: (+1) 978 469 8400<br />
Fax: (+1) 978 373 1113<br />
CANADA<br />
OGC<br />
2708, Rue Diab<br />
H4S1E8 St. Laurent<br />
Quebec<br />
Tel.: (+1) 5143 321 320<br />
Fax: (+1) 5143 351 691<br />
info@ogc.ca<br />
GERMANY<br />
Mavic ® Vertretung<br />
Geigelsteinstr. 10<br />
D-83080 Oberaudorf<br />
Tel.: (+49) 08033 305 200<br />
Fax: (+49) 08033 305 299<br />
POLAND<br />
Harfa-harryson<br />
ul. Robotnicza 52a<br />
53-608 Wroclaw<br />
Tel.: (+48) 071 372 15 70<br />
Fax: (+48) 071 327 80 92<br />
harfa-harryson@harfa-harryson.<br />
com.pl<br />
CHINA<br />
Holybrother Commercial<br />
Co., Ltd<br />
North Road Workers’ Stadium<br />
Chaoyang District, 100027<br />
Beijing<br />
Tel.: (+86) 10 6551 5770 ext.12<br />
Fax: (+86) 10 6551 2052<br />
IRELAND<br />
McQuaid Cycles Wicklow Ltd<br />
T/A DMC Sports Ireland<br />
9 Cobblers Walk,<br />
Lusk Village<br />
Dublin<br />
Tel.: (+353) 87 204 37<strong>09</strong><br />
Fax: (+353) 18 7<strong>09</strong> 815<br />
info@dmcsports.ie<br />
SOUTH AFRICA<br />
Dragons Sports (Pty) Ltd<br />
15 Solan Road<br />
Cape Town 8001<br />
Tel.: (+27) 21 461 6252<br />
Fax: (+27) 21 461 9273<br />
CZECH REPUBLIC / SLOVAKIA<br />
Kastar<br />
Brodska 10<br />
CS 59101 Zdar Nad<br />
Savazou<br />
Tel.: (+420) 566 624 336<br />
Fax: (+420) 566 626 240<br />
ITALY<br />
Vittoria Spa<br />
Via Papa Giovanni XXIII, 1<br />
24040 Madone<br />
Tel.: (+39) 035 499 39 11<br />
Fax: (+39) 035 499 39 12<br />
SPAIN / PORTUGAL<br />
Salomon s.a.<br />
Mavic ®<br />
Ctra. de Rubi 72-74<br />
Edificio Horizon 3°<br />
08190 Sant Cugat Del Valles<br />
Barcelona<br />
Tel.: (+34) 93 590 16 15<br />
Fax.: (+34) 93 590 16 31<br />
www.mavic.com<br />
Printed in France in June 2008 © SALOMON S.A. Limited Liability Company with Board of Directors and Capital of: € 23,5<strong>09</strong>,981.50. Registered Office: the location known as “Les Croiselets”, 74370 Metz-Tessy.<br />
RCS Annecy 325 820 751 - 00080 - A.P.E. 364 Z. Intracommunity VAT No: FR 55 325 820 751. Head Office Fax: 33 (0)4 50 65 71 96. Postal address and telephone number for all sites: Salomon S.A.<br />
Mavic 74996 Annecy Cedex 9 - France. Tel. 33 (0)4 50 65 71 71.<br />
This document is not legally binding. SALOMON S.A. reserves the right not to sell all products in certain countries and to effect any useful or necessary changes.<br />
All rights reserved. Reproduction prohibited. Indicated wheel weights +/- 5%, without rim tape, and without quick-release skewer. Rim weight +/- 10%. MAVIC ® is a registered brand of SALOMON S.A.<br />
Please read carefully the recommendations for rim use in this document.<br />
Photos: Didier Brandelet/Blue, Christian Chaize.<br />
Graphic design: ericleprince.com / Realisation: blue-down.com / Printer: Imprimerie Férreol.