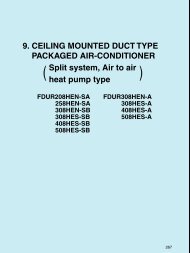
4. INVERTER MULTI-SPLIT SYSTEM ROOM AIR-CONDITIONER ...
4. INVERTER MULTI-SPLIT SYSTEM ROOM AIR-CONDITIONER ...
4. INVERTER MULTI-SPLIT SYSTEM ROOM AIR-CONDITIONER ...

Create successful ePaper yourself
Turn your PDF publications into a flip-book with our unique Google optimized e-Paper software.
(5) Heat insulation for joint<br />
Heat insulation for joints<br />
Finish and fixing<br />
Vinyl tape<br />
Cover the joint with<br />
insulation material<br />
for the indoor unit<br />
and tape it.<br />
Position so<br />
the slit<br />
comes on top.<br />
Pipe clamp<br />
Pipes<br />
Crossover wires<br />
Exterior tape<br />
Drain hose<br />
Tapping screw<br />
Apply exterior tape and shape along<br />
the place where the pipes will be routed.<br />
Secure to the wall with a pipe<br />
clamp. Be careful not to damage the<br />
pipes and the wires.<br />
<strong>4.</strong>5.7 Test run and handling instruction<br />
(1) Inspection<br />
Check according to the following check items.<br />
(2) Test run<br />
(1) Conduct the test run after turning on the power for 20 minutes.<br />
(Run electricity for 20 minutes with a hot stand-by to prevent compression of the compressor liquid.)<br />
(2) If the compressor does not operate after the operation has started, wait for 5 ~ 10 minutes.<br />
(This may be due to a delayed start.)<br />
(3) Carry out the test run for each unit individually. (If 2 or 3 units are tested at the same time, wrong wiring and wrong pipe<br />
connections cannot be checked.)<br />
(4) After each individual test, run the units in all the rooms simultaneously and check the units.<br />
(5) Test both the cooler and the heater.<br />
(Three-minute restart preventive timer)<br />
When the air conditioner is restarted or when changing the operation, the unit will not start operating for approximately 3<br />
minutes. This is to protect the unit and it is not a malfunction.<br />
Installation test check points<br />
Check the following points again after completion of the installation, and before turning on the power. Conduct a test<br />
run again and ensure that the unit operates properly. At the same time, explain to the customer how to use the unit and<br />
how to take care of the unit following the instruction manual.<br />
After installation<br />
□ The power supply voltage is correct as the rating.<br />
□ No gas leaks from the joints of the service valve.<br />
□ Power cables and crossover wires are securely inserted and fixed<br />
to the terminal board.<br />
□ Each indoor and outdoor unit is properly connected (no wrong<br />
wiring or piping).<br />
□ Service valve is fully open.<br />
□ Refrigerant has been additionally charged (when the total pipe<br />
length exceeds the refrigerant charged pipe length).<br />
□ The pipe joints for indoor and outdoor pipes have been insulated.<br />
□ Earthing work has been conducted properly.<br />
Test run<br />
□ Air conditioning and heating are normal.<br />
□ No abnormal noise.<br />
□ Water drains smoothly.<br />
□ Protective functions are not working.<br />
□ Operation of the unit has been explained<br />
to the customer.<br />
Beware of wrong connections in refrigerant piping and wiring<br />
●<br />
●<br />
Make sure to match the piping and wiring from each unit to the outdoor unit.<br />
Be careful because if connections are wrong, normal operation cannot be achieved and may damage the compressor.<br />
[Correct connections]<br />
[Example of wrong connections]<br />
Indoor unit<br />
Piping<br />
Wiring<br />
Indoor unit<br />
A unit<br />
B unit<br />
A<br />
B<br />
C<br />
Outdoor<br />
unit<br />
A unit<br />
B unit<br />
A<br />
B<br />
C<br />
Outdoor<br />
unit<br />
C unit<br />
C unit<br />
158