Section C - Components, cont’d.Models 39115.601, 39115.602, 39115.616 & 39115.626The thermostat is a 12V DC controlled system and is abimetal type. It has three (3) switches on the face of thethermostat. On the left side there is a SYSTEM switch andon the right side there are two FAN switches. The top switchis for HI or LOW FAN and the bottom one is for ON orAUTO. This thermostat will operate and air conditioner anda furnace.FIG. C50FIG. C49There are four low voltage wires in the electric box of theair conditioner. They are black, yellow, blue and orange.The black wire goes to negative (-) DC volt power source.The yellow goes to thermostat Y terminal. The blue goes tothermostat H terminal and the orange goes to thermostatG terminal. The DC volt positive (+) from the power sourcegoes to thermostat RC terminal. If a furnace is wired to theheat-cool thermostat, one furnace thermostat wire goes toterminal RH on the thermostat. The other furnace thermostatwire goes to terminal W on the thermostat.Verify the wiring is correct.A 2-conductor cable, 18 to 22 AWG is required for the 12VDC power source. This can be routed into the system ateither the unit of the thermostat.Select the shortest direct route between the power supplyand the system. A negative wire must be supplied. Framework grounding is not adequate.At the unit, route both leads from the 12V DC supply andthe four wires from the thermostat up through the plasticbushing in the bottom left of the electric box for connection.Or at the thermostat, route both leads fro the 12V DC supplythrough the wall and behind the thermostat. Route thefour wires from the thermostat up through the plastic bushingin the bottom left of the electric box for connection.For furnace hookup or use of another thermostat, consultthe installation instructions provided with the furnace and/or the thermostat. Normally, the furnace will connect to theRH and W terminals of the thermostat.ACHEATT’statTerminalRC— —Y, H, GRH & WUnit WireColor— —BlackYellowBlueOrange(FurnaceOption)PowerSource+12V DC-12V DCFieldSupplyWiresTo check the thermostat remove all wires. Next, using anohm meter, with the SYSTEM switch in the COOL positionand the FAN switches in AUTO and HI and the room temperatureabove the setpoint temperature, continuity shouldexist between RC to G, RC to Y and RC to H. No continuityshould exist between RH to W. With room temperaturebelow setpoint temperature, no continuity would exist betweenRC to G, RC to Y and RC to H, and RH to W. WithFAN switches in AUTO and LOW, and room temperatureabove setpoint temperature, continuity should exist betweenRC to G and RC to Y. No continuity should exist betweenRC to H and RH to W. With the FAN switches in ON andLOW and the room temperature above the setpoint temperature,continuity should exist between RC to G and RCto Y. No continuity should exist between RC to H and RH toW.48
Section C - Components, cont’d.With the room temperature below the setpoint temperature,continuity should exist between RC to G. No continuityshould exist between RC to Y, RC to H and RH to W.With the FAN switches in ON and HI and the room temperatureabove the setpoint temperature, continuity shouldexist between RC to G and RC to Y and RC to H. Thereshould be no continuity between RH and W. With roomtemperature below setpoint temperature, continuity shouldexist between RC to G and RC to H; and no continuityshould exist between RC to Y and RH to W.With the SYSTEM switch to OFF and FAN switches toAUTO and HI or LOW and room temperature above orbelow setpoint temperature, no continuity should exist betweenRC to G, RC to Y, RC to H and RH to W. With FANswitches to ON and LOW and room temperature above orbelow setpoint temperature, continuity should exist betweenRC to G and no continuity between RC to Y, RC to H andRH to W. With FAN switches to ON and HI and room temperatureabove or below setpoint temperature. Continuityshould exist between RC to G and RC to H and RH to W.With FAN switches to ON and HI and room temperatureabove or below setpoint temperature. Continuity shouldexist between RC and G and RC to H and no continuitybetween RC to Y and RH to W.With the SYSTEM switch HEAT position, FAN switches toAUTO and HI or LOW positions, and room temperatureabove setpoint temperature. No continuity would exist betweenRC to G, RC to Y, RC to H and RH to W. With roomtemperature below setpoint temperature continuity wouldexist between RC to G, RC to Y and RC to H. With FANswitches to ON and LOW and room temperature abovesetpoint temperature, continuity would exist between RCto Y, RC to H, and RH to W. With room temperature belowsetpoint temperature, continuity should exist between RCto G and RH to W. No continuity would exist between RC toY and RC to H. With FAN switches to ON and HI and roomtemperature above setpoint temperature, continuity shouldexist between RC to G and RC to H and no continuity betweenRC to Y and RH to W. With room temperature belowsetpoint temperature, continuity should exist between RCto G, RC to H and RH to W. No continuity would exist betweenRC to Y.To check ACTIVE (ON) terminals, place on lead from ohmmeter to RC or RH terminal and the other lead from themeter to the ACTIVE terminal.With room temperature BELOW setpoint temperature, youshould NOT have continuity between red wire to violet,white, black, yellow or blue wires.With System Switch in COOL, Fan Switch in LOW AUTOand room temperature ABOVE setpoint temperature, youshould have continuity between red wire (Pin 2) to blackwire (Pin 4) and yellow wire (Pin 5). You should NOT havecontinuity between red wire to violet, white or blue wires.With room temperature BELOW setpoint temperatures, youSWITCHCOMBINATIONSYSTEM FANSWITCH SWITCHCOOLHEAT OFFHI AUTOLO AUTOLO ONHI ONHI AUTOLO AUTOLO ONHI ONHI AUTOLO AUTOLO ONHI ONIF ROOM TEMP.IS ABOVE/BELOWSETPOINT TEMP.ABOVEBELOWABOVEBELOWABOVEBELOWABOVEBELOWABOVEBELOWABOVEBELOWABOVEBELOWABOVEBELOWABOVEBELOWABOVEBELOWABOVEBELOWABOVEBELOWTERMINALS THATARE “ON”G Y H WX X XXXX XXX X XX XX XXXXXXXXXXXXX XX X Xshould NOT have continuity between red wire to violet,white, black, yellow or blue wires.With system switch in COOL, Fan Switch in LOW ON androom temperature ABOVE setpoint temperature you shouldhave continuity between red wire (Pin 2) to black wire (Pin4) and yellow wire (Pin 5). You should NOT have continuitybetween red wire to violet, white or blue wires. With roomtemperature BELOW setpoint temperature, you shouldhave continuity between red wire (Pin 2) to black wire (Pin4). You should NOT have continuity between red wire toviolet, white, yellow or blue wires.With System Switch in COOL, Fan Switch in HI ON androom temperature ABOVE setpoint temperature you shouldhave continuity between red wire (Pin 2) to black wire (Pin4), yellow wire (Pin 5) and blue wire (Pin 6). You shouldNOT have continuity between red wire to violet or whitewires. With room temperature BELOW setpoint temperature,you should have continuity between red wire (Pin 2)to black wire (Pin 4) and blue wire (Pin 6). You should NOThave continuity between red wire to violet, white or yellowwires.With System Switch in OFF, Fan Switch in HI AUTO orLOW AUTO and room temperature ABOVE or BELOWsetpoint temperature, you should NOT have continuity betweenred wire to violet, white, black, yellow or blue wires.49
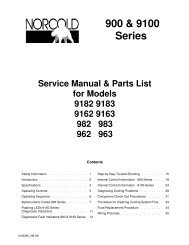
- Page 1 and 2: AIR CONDITIONER & HEAT PUMPSERVICE
- Page 3: A1. AC VoltageThe unit is a 115VAC,
- Page 6: Section A - Installation, cont’d.
- Page 9 and 10: A6a. Roof Top UnitsSection A - Inst
- Page 11 and 12: A6b. Basement Unitswill have the
- Page 13 and 14: A6b. Basement UnitsFREE AREA - is t
- Page 15 and 16: Section A - Installation, cont’d.
- Page 17 and 18: B1b. Bimetal Relay ControlsCooling
- Page 19 and 20: B1d. Comfort Control CenterON/OFF S
- Page 21 and 22: B1d. Comfort Control CenterHeat Pum
- Page 23 and 24: B1d. Comfort Control CenterFIG. B11
- Page 25 and 26: B2. Heat Pumpleaves the outside coi
- Page 27 and 28: B2. Heat PumpFIG. B18 13Wait at lea
- Page 29 and 30: C1. MotorsRoof Top Units - To check
- Page 31 and 32: Section C - Components, cont’d.Th
- Page 33 and 34: Section C - Components, cont’d.C9
- Page 35 and 36: Section C - Components, cont’d.Fo
- Page 37 and 38: Section C - Components, cont’d.C1
- Page 39 and 40: Section C - Components, cont’d.Th
- Page 41 and 42: Section C - Components, cont’d.RC
- Page 43 and 44: Section C - Components, cont’d.FI
- Page 45 and 46: Section C - Components, cont’d.Be
- Page 47 and 48: Section C - Components, cont’d.FI
- Page 49: Section C - Components, cont’d.Mo
- Page 53 and 54: Section C - Components, cont’d.Ea
- Page 55 and 56: Section C - Components, cont’d.Tw
- Page 57 and 58: Section C - Components, cont’d.C2
- Page 60 and 61: Section C - Components, cont’d.21
- Page 62 and 63: Section D - ConfigurationDucted Ins
- Page 64 and 65: Section D - Configuration, cont’d
- Page 66 and 67: Section D - Configuration, cont’d
- Page 68 and 69: Section D - Configuration, cont’d
- Page 70 and 71: Section D - Configuration, cont’d
- Page 72 and 73: Section D - Configuration, cont’d
- Page 74 and 75: Section D - Configuration, cont’d
- Page 76 and 77: Section D - Configuration, cont’d
- Page 78 and 79: Section D - Configuration, cont’d
- Page 80 and 81: Section D - Configuration, cont’d
- Page 82 and 83: Section E - Symptom/Cause ChartDUO-
- Page 84 and 85: Section E - Symptom/Cause Chart, co
- Page 86 and 87: Section E - Symptom/Cause Chart, co
- Page 88 and 89: Section E - Symptom/Cause Chart, co
- Page 90 and 91: Section E - Symptom/Cause Chart, co
- Page 92 and 93: Section E - Symptom/Cause Chart, co
- Page 94 and 95: Section E - Symptom/Cause Chart, co
- Page 96 and 97: Section E - Symptom/Cause Chart, co
- Page 98 and 99: Section E - Symptom/Cause Chart, co
- Page 100 and 101:
Section E - Symptom/Cause Chart, co
- Page 102 and 103:
Section E - Symptom/Cause Chart, co
- Page 104 and 105:
Section E - Symptom/Cause Chart, co
- Page 106 and 107:
Section E - Symptom/Cause Chart, co
- Page 108 and 109:
Section E - Symptom/Cause Chart, co
- Page 110 and 111:
Section E - Symptom/Cause Chart, co
- Page 112 and 113:
Section E - Symptom/Cause Chart, co
- Page 114 and 115:
Section E - Symptom/Cause Chart, co
- Page 116 and 117:
Section E - Symptom/Cause Chart, co
- Page 118 and 119:
Section E - Symptom/Cause Chart, co
- Page 120 and 121:
Section E - Symptom/Cause Chart, co
- Page 122 and 123:
Section E - Symptom/Cause Chart, co
- Page 124 and 125:
Section E - Symptom/Cause Chart, co
- Page 126:
Section E - Symptom/Cause Chart, co