

UP LS2 LS3 L99 w/4L65E 4L70E 4L80E 4L85E Fuel Injection ...
UP LS2 LS3 L99 w/4L65E 4L70E 4L80E 4L85E Fuel Injection ...
UP LS2 LS3 L99 w/4L65E 4L70E 4L80E 4L85E Fuel Injection ...

Create successful ePaper yourself
Turn your PDF publications into a flip-book with our unique Google optimized e-Paper software.
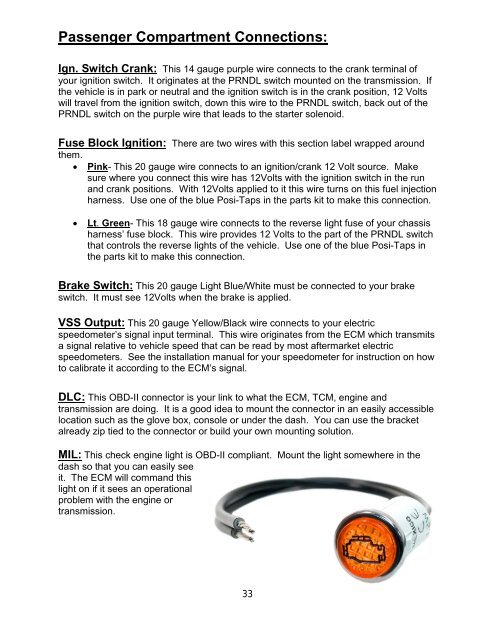
Passenger Compartment Connections:Ign. Switch Crank: This 14 gauge purple wire connects to the crank terminal ofyour ignition switch. It originates at the PRNDL switch mounted on the transmission. Ifthe vehicle is in park or neutral and the ignition switch is in the crank position, 12 Voltswill travel from the ignition switch, down this wire to the PRNDL switch, back out of thePRNDL switch on the purple wire that leads to the starter solenoid.Fuse Block Ignition: There are two wires with this section label wrapped aroundthem.• Pink- This 20 gauge wire connects to an ignition/crank 12 Volt source. Makesure where you connect this wire has 12Volts with the ignition switch in the runand crank positions. With 12Volts applied to it this wire turns on this fuel injectionharness. Use one of the blue Posi-Taps in the parts kit to make this connection.• Lt. Green- This 18 gauge wire connects to the reverse light fuse of your chassisharness’ fuse block. This wire provides 12 Volts to the part of the PRNDL switchthat controls the reverse lights of the vehicle. Use one of the blue Posi-Taps inthe parts kit to make this connection.Brake Switch: This 20 gauge Light Blue/White must be connected to your brakeswitch. It must see 12Volts when the brake is applied.VSS Output: This 20 gauge Yellow/Black wire connects to your electricspeedometer’s signal input terminal. This wire originates from the ECM which transmitsa signal relative to vehicle speed that can be read by most aftermarket electricspeedometers. See the installation manual for your speedometer for instruction on howto calibrate it according to the ECM’s signal.DLC: This OBD-II connector is your link to what the ECM, TCM, engine andtransmission are doing. It is a good idea to mount the connector in an easily accessiblelocation such as the glove box, console or under the dash. You can use the bracketalready zip tied to the connector or build your own mounting solution.MIL: This check engine light is OBD-II compliant. Mount the light somewhere in thedash so that you can easily seeit. The ECM will command thislight on if it sees an operationalproblem with the engine ortransmission.33


