Opal-RAD Mini Manual - Viztek
Opal-RAD Mini Manual - Viztek
Opal-RAD Mini Manual - Viztek

You also want an ePaper? Increase the reach of your titles
YUMPU automatically turns print PDFs into web optimized ePapers that Google loves.
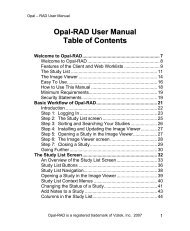
<strong>Opal</strong> – <strong>RAD</strong> User <strong>Manual</strong><strong>Opal</strong> – <strong>RAD</strong> <strong>Mini</strong> <strong>Manual</strong>Table of ContentsBasic Workflow of <strong>Opal</strong> – <strong>RAD</strong> .................................................... 3Introduction.................................................................................. 4Logging On .................................................................................. 5The Study List screen .................................................................. 6Searching and Sorting Your Studies............................................ 7Installing and Updating the Image Viewer ................................... 8The Image Viewer screen............................................................ 9Image Viewing Tools................................................................... 11Width & Center .......................................................................... 12Annotations: Introduction .......................................................... 13Annotations: Editing and Deleting............................................. 14Annotations: Saving.................................................................. 16Webserver and Image Viewer Settings...................................... 17Webserver Settings Overview ................................................... 18Image Viewer Settings Overview............................................... 19Settings: Modality Options Tab.................................................. 20Settings: Local Tab.................................................................... 21<strong>Opal</strong> – <strong>RAD</strong> is a registered trademark of <strong>Viztek</strong>, Inc. 2006 1
<strong>Opal</strong> – <strong>RAD</strong> User <strong>Manual</strong><strong>Viztek</strong>, Inc.6491 Powers AvenueJacksonville, FL 32217904-730-0446800-366-5343<strong>Opal</strong>-<strong>RAD</strong> User <strong>Manual</strong>3rd EditionJanuary 2007Author: Kristen Tabone and Douglas Bretton<strong>Opal</strong> – <strong>RAD</strong> is a registered trademark of <strong>Viztek</strong>, Inc. 2006 2
<strong>Opal</strong> – <strong>RAD</strong> User <strong>Manual</strong>Chapter OneBasic Workflow of <strong>Opal</strong> – <strong>RAD</strong>This chapter offers a walkthrough for typical usage of theWebserver. The walkthrough includes locating a study in theStudy List screen, viewing and basic manipulation of thestudy’s images in the Image Viewer screen, and returning tothe Study List.<strong>Opal</strong> – <strong>RAD</strong> is a registered trademark of <strong>Viztek</strong>, Inc. 2006 3
<strong>Opal</strong> – <strong>RAD</strong> User <strong>Manual</strong>Introduction<strong>Opal</strong>-<strong>RAD</strong> Webserver Viewer (a.k.a. “Viewer” for brevity) is aweb application that allows users to view and manipulatevast amounts of DICOM and patient information.The basic functionality of the Webserver alternates betweenfinding a study and viewing the images it contains. Thus, theWebserver have been divided into two different screens, theStudy List and the Image Viewer. The Study List is used forsearching and managing your studies, while the ImageViewer is used for viewing and manipulating the imagescontained in the study.In this chapter we will look at a sample user session of theViewer. This session includes the following steps: Logging In Study List screen Searching and Sorting your studies Opening a study to view Image Viewing screen Manipulating study images<strong>Opal</strong> – <strong>RAD</strong> is a registered trademark of <strong>Viztek</strong>, Inc. 2006 4
<strong>Opal</strong> – <strong>RAD</strong> User <strong>Manual</strong>Logging OnIn order to begin using either the Professional Workstation orWebserver applications you must first log on to the system.Logging in will allow you access to the database of patientstudies.To log on to the Webserver:1. Open Internet Explorer.2. Type the web address to the <strong>Opal</strong>-<strong>RAD</strong> web serverinto the address bar and press Enter.3. Now, you will see the Log-In Screen. (Shown on nextpage).Type in your user name and password in the provided fieldsand Left-Click on the “LOG IN” button. Remember that theyare both user name and password are case sensitive.The Log-In Screen<strong>Opal</strong> – <strong>RAD</strong> is a registered trademark of <strong>Viztek</strong>, Inc. 2006 5
<strong>Opal</strong> – <strong>RAD</strong> User <strong>Manual</strong>The Study List screenAs stated earlier, <strong>Opal</strong>-<strong>RAD</strong> Professional Workstation andWebserver consists of two interfaces (screens), each with aseparate function. The first interface you will see afterlogging on to Professional Workstation or the Webserver willbe the Study List screen. This interface is used for searchingand selecting patient studies and sending studies to otherusers.The Webserver Study List ScreenAbove the study list, are tabs separating the study list fromthe settings and admin sections. Below the list is the PatientStudies window, which shows a patient’s previous studies. Atthe very bottom of the screen you will find your toolbar andpage navigation controls.<strong>Opal</strong> – <strong>RAD</strong> is a registered trademark of <strong>Viztek</strong>, Inc. 2006 6
<strong>Opal</strong> – <strong>RAD</strong> User <strong>Manual</strong>Searching and Sorting Your StudiesThis study list window is divided into columns such asStatus, Modality, Patient Name, etc. The data containedunder these columns can be both sorted and searched.To sort the listing by one of your columns:1. Left-Click on either the up or down arrows next to thecolumn name.To search by any field in this study listing:1. Type in the white space directly below the columnheading. For example, you might enter “Smith” underthe column header labeled “Patient Name.”Whenever a search is performed on one, or more, columns,the Patient listing is updated to display only the patients thatmatch the search criteria.To open a study in the Image Viewer:1. Double-click on a study in the study list.<strong>Opal</strong> – <strong>RAD</strong> is a registered trademark of <strong>Viztek</strong>, Inc. 2006 7
<strong>Opal</strong> – <strong>RAD</strong> User <strong>Manual</strong>Installing and Updating the Image ViewerThe <strong>Opal</strong>-<strong>RAD</strong> Image Viewer is continually being modified toadd or enhance the features of the software, such as addinga new annotation. In order for you to take advantage of thesemodifications, it will be necessary for you to install the latestversion of the <strong>Opal</strong>-<strong>RAD</strong> Image Viewer.To Install or Update your Image Viewer:1. Left-Click on the “Download Viewer” link (see below).2. Click the “Open” button to begin the Image Viewerinstaller (see below).3. When it’s completed, simply click the “Ok” to return tothe Study List<strong>Opal</strong> – <strong>RAD</strong> is a registered trademark of <strong>Viztek</strong>, Inc. 2006 8
<strong>Opal</strong> – <strong>RAD</strong> User <strong>Manual</strong>The Image Viewer screenAfter opening the selected study you are whisked away tothe Image Viewer screen. Leftmost is the Series Window,which displays thumbnails of each series in the study.The largest window in the workspace is the actual viewingwindow, where the image(s) are displayed. To display animage in the viewing window, double click on the thumbnailor drag and drop thumbnail to the viewing window.<strong>Opal</strong> – <strong>RAD</strong> is a registered trademark of <strong>Viztek</strong>, Inc. 2006 9
<strong>Opal</strong> – <strong>RAD</strong> User <strong>Manual</strong>Changing Your LayoutThe images are displayed in rows and columns according toyour selected layout.To change your viewers layout:1. Left Click on the View men and select layout.2. From the pop-out menu select a layout (i.e. 1x1 or2x2).Closing a StudyWhen viewing is complete, there are two methods of closingthe study to return to the Study List screen.1. Go to the File menu and Left-Click on the Exit optionor Left-Click on the X in the upper right corner of theImage Viewing Screen.<strong>Opal</strong> – <strong>RAD</strong> is a registered trademark of <strong>Viztek</strong>, Inc. 2006 10
<strong>Opal</strong> – <strong>RAD</strong> User <strong>Manual</strong>Chapter TwoImage Viewing Tools<strong>Opal</strong>-<strong>RAD</strong> Professional Workstation features a vast array ofimage manipulation tools to assist in diagnostic interpretationof medical images.Most of the tools available within the Image Viewer have aneasy, one-click toolbar button to activate them. These toolsare also available from the menu bar.From left to right our tools are as follows:• Reset• Invert Contrast• Rotate Left• Rotate Right• Flip Vertically• Flip Horizontally• 1:1 View• Fit Image to Window• Magnify• Zoom• Pan<strong>Opal</strong> – <strong>RAD</strong> is a registered trademark of <strong>Viztek</strong>, Inc. 2006 11
<strong>Opal</strong> – <strong>RAD</strong> User <strong>Manual</strong>Width & CenterWidth & Center toolThis is the most basic and yet most important tool available,as it adjusts the width and center (also known as “windowand level”, or simply brightness and contrast) of an image.Adjusting the width and center of an image allows for viewingdifferent “levels” of an image, e.g., moving from bone to softtissue. Any changes to the Width & Center will apply to allimages in the series.To perform the Width & Center:1. Place the mouse cursor over the image.2. Hold down the right mouse button.3. Move the mouse horizontally and/or vertically; theimage is adjusted as you do so.4. When satisfied with the image, release the rightmouse button.Horizontal movement of the mouse adjusts “center”; verticalmovement adjusts “width.”☼ The Width & Center tool is not available from the menusor toolbars, and can only be accessed using the methoddescribed above.<strong>Opal</strong> – <strong>RAD</strong> is a registered trademark of <strong>Viztek</strong>, Inc. 2006 12
<strong>Opal</strong> – <strong>RAD</strong> User <strong>Manual</strong>Annotations: IntroductionAnnotation buttonsAnnotating in <strong>Opal</strong>-<strong>RAD</strong> Image Viewerconsists of adding text and graphicalobjects to enhance or isolate regions ofinterest within an image. Annotations donot permanently alter the image, but arestored separately from the image data,and are held in a transparent layer atopthe image. (Think of a transparencysheet with writing that is placed over apicture.) It is not possible for annotationsto damage the original image data, andthey can be hidden at any time to allowfull analysis of the image. Most of theannotation tools described over the nextseveral pages have easy, one-clicktoolbar buttons to activate them and arealso available from the Annotation menuin the menu bar. Each topic belownames an image annotation tool, lists theways to activate it (toolbar button, menu entry, etc.), andexplores its usage.<strong>Opal</strong> – <strong>RAD</strong> is a registered trademark of <strong>Viztek</strong>, Inc. 2006 13
<strong>Opal</strong> – <strong>RAD</strong> User <strong>Manual</strong>Annotations: Editing and DeletingAnnotation Edit Mode buttonThe Professional Workstation and Webserver include theability to edit and delete previously created annotations.When in Annotation Edit Mode, you can select, edit, anddelete annotations.To perform either of these operations, you must be in“Annotation Edit Mode,” accomplished by clicking theAnnotations Edit Mode button on the toolbar or by choosingEdit from the Annotation menu. Click this button again to exitAnnotation mode.Selecting AnnotationsYou must first select an annotation before you can edit ordelete it.1. Enter Annotation Mode (explained above)2. Move the mouse over an annotation. Also observethe annotation will light up.3. Left-Click the annotation to select it. It will changecolors and several little filled boxes (called “handles”)will appear on the annotation.The annotation is now selected.<strong>Opal</strong> – <strong>RAD</strong> is a registered trademark of <strong>Viztek</strong>, Inc. 2006 14
<strong>Opal</strong> – <strong>RAD</strong> User <strong>Manual</strong>Editing AnnotationsTo edit an annotation, you must first select the annotation.Once selected, the editing process depends on the type ofannotation. There are two types of editing cursors. Whenthe cursor has four arrows pointing in all directions, the usercan move the annotation. When the cursor is an upwardpointing arrow, the user can resize the annotation.Deleting AnnotationsTo delete an annotation, you must first select the annotation.Once selected, Right-Click anywhere on the image andchoose “Delete Current Annotation” from the context menuor press the “Delete” key.Deleting All AnnotationsThis function provides a quick method of removing allannotations from an image. To use this function:1. Right-Click on the image.2. Select “Delete All Annotations” from the contextmenu.☼ The Delete All Annotations option is available from thecontext menu only after annotations have been drawn.<strong>Opal</strong> – <strong>RAD</strong> is a registered trademark of <strong>Viztek</strong>, Inc. 2006 15
<strong>Opal</strong> – <strong>RAD</strong> User <strong>Manual</strong>Annotations: SavingIn order to save any additions, deletions, or alterations toyour image’s annotations, you must “Save” them to thedatabase. There are two options for accomplishing this.You can use the auto-save feature of the viewer (see the“Viewer Settings” section of this manual for more details) oryou can manually save your changes by Left-Clicking the“Save” option from the Annotation s menu.☼ If the auto-save feature is disabled, and you do notmanually save your annotations, all of your changes will belost upon closing the study.<strong>Opal</strong> – <strong>RAD</strong> is a registered trademark of <strong>Viztek</strong>, Inc. 2006 16
<strong>Opal</strong> – <strong>RAD</strong> User <strong>Manual</strong>Chapter ThreeWebserver and Image ViewerSettingsThis chapter will explain how to modify your WebserverStudy List settings. These settings include adjusting thecolumn order and visibility, number of displayed rows, defaultsort column. Additionally, through the Settings tab we canalso change the user’s password.We will also discuss your Image Viewer’s Settings windowand how to access it.<strong>Opal</strong> – <strong>RAD</strong> is a registered trademark of <strong>Viztek</strong>, Inc. 2006 17
<strong>Opal</strong> – <strong>RAD</strong> User <strong>Manual</strong>Webserver Settings OverviewThe Webserver Settings tab contains a number a editableoptions.• Column Order: This control panel will allow you toenable, disable, and sort the columns on your studylist.• Rows to Display: This is the number of records thatwill be displayed per page on your study list.• Change Password: The user may change his or herpassword using• Default Sort Column: This is the column that will beused to sort the study list by.☼ After any of these options have been changed, it isimportant to remember to Left-Click on the Save button.<strong>Opal</strong> – <strong>RAD</strong> is a registered trademark of <strong>Viztek</strong>, Inc. 2006 18
<strong>Opal</strong> – <strong>RAD</strong> User <strong>Manual</strong>Image Viewer Settings OverviewThe <strong>Opal</strong>-<strong>RAD</strong> Image Viewer (<strong>Opal</strong>Viewer) contains aspecial section for the configuring your image viewer’ssettings. Through the Image Viewer’s Settings window theend-user can:• Add and edit presets.• Modify the default screen layout.• Configure the workstations display settings.• Modify the magnifier’s window size and zoom factor.• Modify your auto-save options• Configure any external tools for integration with<strong>Opal</strong>ViewerTo modify the Image Viewer’s Settings:1. Left-Click on the Settings menu and select “Edit.”2. Make your changes as needed.3. Left Click on the “OK” button to exit.Unless they are saved, any changes you make to yourImage Viewer’s settings will only be temporary.To permanently save your Image Viewer settings:1. Left-Click on the Settings menu and select “Save.”<strong>Opal</strong> – <strong>RAD</strong> is a registered trademark of <strong>Viztek</strong>, Inc. 2006 19
<strong>Opal</strong> – <strong>RAD</strong> User <strong>Manual</strong>Settings: Modality Options TabOn the Modality Option Tab you will find the fields foradjusting you Modality Presets, Screen Layout, and SeriesLayout defaults. Both the presets and layout options aremodality dependent, which means that you can configuredifferent settings for each modality in your Modality list.<strong>Opal</strong> – <strong>RAD</strong> is a registered trademark of <strong>Viztek</strong>, Inc. 2006 20
<strong>Opal</strong> – <strong>RAD</strong> User <strong>Manual</strong>Settings: Local TabOn the Locals Tab you will find the fields for adjusting yourDisplay, Auto-Save, Interface, and External Tools Integrationoptions.<strong>Opal</strong> – <strong>RAD</strong> is a registered trademark of <strong>Viztek</strong>, Inc. 2006 21
<strong>Opal</strong> – <strong>RAD</strong> User <strong>Manual</strong><strong>Opal</strong> – <strong>RAD</strong> is a registered trademark of <strong>Viztek</strong>, Inc. 2006 22