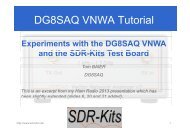
DG8SAQ VNWA 2.x Self Installer Manual - SDR-Kits
DG8SAQ VNWA 2.x Self Installer Manual - SDR-Kits
DG8SAQ VNWA 2.x Self Installer Manual - SDR-Kits
- No tags were found...

You also want an ePaper? Increase the reach of your titles
YUMPU automatically turns print PDFs into web optimized ePapers that Google loves.
<strong>SDR</strong>-<strong>Kits</strong>, 14 Ragleth Grove, Trowbridge Wilts, BA14-7LE, United Kingdom sdrkits@gmail.com<strong>DG8SAQ</strong> <strong>VNWA</strong> <strong>2.x</strong> <strong>Self</strong> <strong>Installer</strong> <strong>Manual</strong>1. Introduction:This document describes the <strong>DG8SAQ</strong> Installation process using the <strong>VNWA</strong> <strong>Self</strong> <strong>Installer</strong>. The <strong>VNWA</strong><strong>Self</strong> installer is an executable file which contains the <strong>VNWA</strong> Driver, the <strong>VNWA</strong> Application and the<strong>VNWA</strong> helpfile and assists <strong>VNWA</strong> <strong>2.x</strong> users with easy installation option.The <strong>Self</strong> <strong>Installer</strong> installs <strong>VNWA</strong> Application 35.x upwards.2. Important InformationCopyright noticeThe design of the is copyright by Thomas Baier <strong>DG8SAQ</strong> & <strong>SDR</strong>-<strong>Kits</strong> - all right reserved -2.1 Caution - Safety Information:1. <strong>VNWA</strong> <strong>2.x</strong> is powered and controlled through the USB-cable supplied. The USB-cableshould be connected to the USB port of a Personal Computer capable of supplying +5V DCat 500mA maximum.2. The maximum safe input voltage into the TX-out and Rx-in ports is an RF Voltage of 0dBm(225mV RMS with a frequency between 1 kHz up to 1300 MHz). Exceeding this value maycause damage to the <strong>VNWA</strong> and may invalidate product warranty.3. Always check the <strong>SDR</strong>-<strong>Kits</strong> Website for current Product information including SafetyInformation and latest Product Updates.http://www.sdr-kits.net/<strong>VNWA</strong>/<strong>VNWA</strong>_Documentation.html<strong>SDR</strong>-<strong>Kits</strong> – <strong>VNWA</strong> <strong>2.x</strong> <strong>Self</strong> <strong>Installer</strong> <strong>Manual</strong> 1.2 - copyright 2011 by <strong>SDR</strong>-<strong>Kits</strong> Page 1 of 32
2.2 Product Documentation:The documentation of this product is supplied as a <strong>VNWA</strong> Application Helpfile, through the <strong>VNWA</strong><strong>Installer</strong> or may be downloaded from the Internet fromhttp://sdr-kits.net/<strong>DG8SAQ</strong>/<strong>VNWA</strong>/<strong>VNWA</strong>_HELP.pdf2.3 Requirements:The <strong>Self</strong> <strong>Installer</strong> is available from <strong>VNWA</strong> Application 35.0 upwards. After <strong>VNWA</strong> Application 35.x isinstalled it is important that <strong>VNWA</strong> <strong>2.x</strong> is firmware is manually upgraded to the latest firmware. Thelatest firmware can be found in the <strong>VNWA</strong> Application folder used by the <strong>Self</strong> <strong>Installer</strong>.Note: Firmware version 4.14 comes after version 4.9 and 4.10!!2.4 <strong>VNWA</strong> License code:Make sure you have the <strong>VNWA</strong> License code which was supplied with the <strong>VNWA</strong> available prior tothe installation. It will be required for the upgrade.3. <strong>VNWA</strong> <strong>Self</strong> <strong>Installer</strong>: Driver - Software and Helpfile InstallationCaution: Although the installation package is provided for easy installation, it is recommended that theappropriate installation procedure for your Operating System is reviewed before starting the installer.The procedure below assumes that <strong>VNWA</strong> package has NOT been installed previously on theComputer in question.3.1 Windows 7 & Vista 64 bit and 32 bit InstallationThis section shows installation procedure for Windows 7 (64 or 32 bits)Note: For Installation on Windows XP refer to section 3.4IMPORTANT: Information for Windows 7 and Vista users:If you are installing the <strong>VNWA</strong> application for the first time, the <strong>VNWA</strong> Setup program will guide youto install an application Winhlp32.exe from the Microsoft website. The Winhlp32.exe program isrequired to display the <strong>VNWA</strong> help file. However Microsoft license conditions does not allowtheWinhelp32.exe to be distributed as part of the <strong>VNWA</strong> setup program.<strong>VNWA</strong> installation is easier and friendlier if Winhlp32.exe application is already installed beforehand.It is therefore recommend to install Winhlp32.exe from the linkhttp://support.microsoft.com/kb/917607 prior to starting the <strong>VNWA</strong> installation program in step3.1.1. You can always check if Winhlp32.exe is already installed by inspecting the file size of this filein C:\windows. If file size of Winhlp32.exe is 290 KBytes then the application is already installed. Ifthis file is present but it is only 9Kbytes in size then Winhlp32.exe should be installed first:3.1.1 Download and save the Installation Package from the following location to your desktophttp://www.sdr-kits.net/<strong>DG8SAQ</strong>/<strong>VNWA</strong>-installer.exe3.1.2 Make sure the <strong>VNWA</strong> is NOT connected to the PCDouble Click on the <strong>VNWA</strong>-installer Icon to start the <strong>VNWA</strong> installation process.<strong>SDR</strong>-<strong>Kits</strong> – <strong>VNWA</strong> <strong>2.x</strong> <strong>Self</strong> <strong>Installer</strong> <strong>Manual</strong> 1.2 - copyright 2011 by <strong>SDR</strong>-<strong>Kits</strong> Page 2 of 32
Confirm the <strong>VNWA</strong>-installer can make changes to your Computer, then screen below is shown.Press "Next"3.1.3 If the file Winhlp32.exe is NOT installed on the Computer than the screen below is shown.Winhlp32.exe file should be installed otherwise <strong>VNWA</strong> helpfile will not be displayed. If youclick the box the Web browser will be launched. Follow the instructions on the MicrosoftWebsite to download winhlp32.exe. Note: For 64 bit Operating Systems the filename ending in-x64.msu should be downloaded and -x86.msu for 32 bit Operating Systems.Note: The link to the microsoft winhlp32.exe support is:http://support.microsoft.com/kb/917607<strong>SDR</strong>-<strong>Kits</strong> – <strong>VNWA</strong> <strong>2.x</strong> <strong>Self</strong> <strong>Installer</strong> <strong>Manual</strong> 1.2 - copyright 2011 by <strong>SDR</strong>-<strong>Kits</strong> Page 3 of 32
3.1.4 Press "Next" – The default location where <strong>VNWA</strong> will be installed will be shown:Note: Select a different Destination Location (ie C:\<strong>VNWA</strong>_2) if you s to install a second <strong>VNWA</strong>application on the same PC to prevent overwriting the setup files of your first <strong>VNWA</strong> application.3.1.5 Press "Next" – Default where program shortcuts will be installed3.1.6 Press "Next" – Screen to enter <strong>VNWA</strong> license key is now displayed as shown below:There are two options to enter the <strong>VNWA</strong> license key for your <strong>VNWA</strong>:<strong>SDR</strong>-<strong>Kits</strong> – <strong>VNWA</strong> <strong>2.x</strong> <strong>Self</strong> <strong>Installer</strong> <strong>Manual</strong> 1.2 - copyright 2011 by <strong>SDR</strong>-<strong>Kits</strong> Page 4 of 32
Directly enter the <strong>VNWA</strong> license code exactly as shown in the <strong>Manual</strong> supplied with the <strong>VNWA</strong><strong>2.x</strong> hardware. The <strong>VNWA</strong> license code is also specified in the <strong>VNWA</strong> shipping advice emailNote: the last colon is the last character and must also be entered.Note: A Screen (not shown in this manual) is now displayed with option to create a Desktop Icon for:A) All users or B) For Current User only. Make your selection and press "Next"3.1.7 Press "Next" – Information on Audio Configuration is displayed<strong>SDR</strong>-<strong>Kits</strong> – <strong>VNWA</strong> <strong>2.x</strong> <strong>Self</strong> <strong>Installer</strong> <strong>Manual</strong> 1.2 - copyright 2011 by <strong>SDR</strong>-<strong>Kits</strong> Page 5 of 32
3.1.8 Press "Next" and Ready to Install screen is displayed3.1.9 Press "Install" – <strong>VNWA</strong> Application and helpfile are now installed and Driver Installationwindow is displayed. Note: Do NOT plug-in <strong>VNWA</strong> at this time<strong>SDR</strong>-<strong>Kits</strong> – <strong>VNWA</strong> <strong>2.x</strong> <strong>Self</strong> <strong>Installer</strong> <strong>Manual</strong> 1.2 - copyright 2011 by <strong>SDR</strong>-<strong>Kits</strong> Page 6 of 32
3.1.10 Press "Next" – Following screen may be displayed – Select “Install this driver softwareanyway”3.1.11 Press "Next" – Driver installation will take from 10-30 seconds<strong>SDR</strong>-<strong>Kits</strong> – <strong>VNWA</strong> <strong>2.x</strong> <strong>Self</strong> <strong>Installer</strong> <strong>Manual</strong> 1.2 - copyright 2011 by <strong>SDR</strong>-<strong>Kits</strong> Page 7 of 32
3.1.12 Press "Finish" -3.1.13 If you have selected to view the “Show Vista/Windows 7 Audio setup help” in point 3.1.5 readthe information and close the window prior to next step3.1.14 Press “Finish” to complete installation.END OF <strong>VNWA</strong> Installation3.2 Windows 7 & Vista 64 bit and 32 bit Application Configuration:3.2.1 Plug in the <strong>VNWA</strong> USB cable into USB Port of your Computer. Note: It is recommended toconnect the <strong>VNWA</strong> same Computer USB Port next time you use the <strong>VNWA</strong>.When connecting the <strong>VNWA</strong> for the first time after Driver installation, the <strong>VNWA</strong> will be recognizedand device driver installation should complete automatically.<strong>SDR</strong>-<strong>Kits</strong> – <strong>VNWA</strong> <strong>2.x</strong> <strong>Self</strong> <strong>Installer</strong> <strong>Manual</strong> 1.2 - copyright 2011 by <strong>SDR</strong>-<strong>Kits</strong> Page 8 of 32
3.2.2 Click “Start” “All Programs” “<strong>VNWA</strong>” and <strong>VNWA</strong> Icon to start the application or use theShortcut created on the Desktop.3.2.3 Overclocking Warning may be displayed when you run <strong>VNWA</strong> Application software forthe first time. Select "ok" to allow overclocking of the DDS chips beyond 400 MHz. Note:<strong>VNWA</strong> performance over 500 MHz will be worse affected if overclocking of the DDS is notpermitted.<strong>SDR</strong>-<strong>Kits</strong> – <strong>VNWA</strong> <strong>2.x</strong> <strong>Self</strong> <strong>Installer</strong> <strong>Manual</strong> 1.2 - copyright 2011 by <strong>SDR</strong>-<strong>Kits</strong> Page 9 of 32
3.2.4 <strong>VNWA</strong> Application starts: Click “OK” to enter <strong>VNWA</strong> setup information3.2.5 The tab "USB Setting" should now displayed. If not click on the USB-Setting TabCheck whether <strong>VNWA</strong> license code is shown, In event this information is missing then enterthe <strong>VNWA</strong> license code again. Now press “Rescan USB Bus” and “Test USB Interface”Check bottom line for message “Test passed without errors”<strong>SDR</strong>-<strong>Kits</strong> – <strong>VNWA</strong> <strong>2.x</strong> <strong>Self</strong> <strong>Installer</strong> <strong>Manual</strong> 1.2 - copyright 2011 by <strong>SDR</strong>-<strong>Kits</strong> Page 10 of 32
3.2.6 Select Tab “Audio Settings” and set “Audio Capture Device” to “USB Audio Codec”Note: Variants of the USB Audio Codec” may be shown insteadFor Factory <strong>VNWA</strong><strong>2.x</strong> check Reference = Right Channel has been selected. (Note: some<strong>VNWA</strong> <strong>2.x</strong> built from a Kit may use "Left Channel" depending on wiring of the 3.5mm audioconnectors) Now press “Test Audio”3.2.7 Click on Tab “Audio Level” and check whether two sine waves are present as showbelow in “Reflect” mode. (100% Reflection with TX Port unterminated)If sine waves are distorted then USB Audio Codec needs to be configured as shown insection 3.3.When the Audio level adjust is performed according to point 3.4 click on Tab "Calibrate SampleRate"Note: when the THRU Mode is active the Audio levels min and max are higher than when inREFL Mode<strong>SDR</strong>-<strong>Kits</strong> – <strong>VNWA</strong> <strong>2.x</strong> <strong>Self</strong> <strong>Installer</strong> <strong>Manual</strong> 1.2 - copyright 2011 by <strong>SDR</strong>-<strong>Kits</strong> Page 11 of 32
3.2.7 Connect the TX port and RX port with SMA cable and check that the Reflect (Left Channel)sine wave has now disappeared. (TX port now sees 50 Ohms and no reflection)Next select “Thru” and check that the Left Channel "sine wave is displayed.3.2.8 Click “Stop“ cease the Audio test. Next click on Instrument Settings” and check whether clockis set to “auto" as shown below. Note: for <strong>VNWA</strong> 2, the clock is generally a little below 36MHz, somewhere between 35.855 MHz and 36.000 MHz depending on Crystal fitted.When performing Audio test press ++ / + or -- / - buttons until the sinewaves are almoststationary on the screen. If you have a frequency counter perform Calibrate DDS Clockcalibration as described in the <strong>VNWA</strong> helpfile.<strong>SDR</strong>-<strong>Kits</strong> – <strong>VNWA</strong> <strong>2.x</strong> <strong>Self</strong> <strong>Installer</strong> <strong>Manual</strong> 1.2 - copyright 2011 by <strong>SDR</strong>-<strong>Kits</strong> Page 12 of 32
3.2.9 Press the top right button to close the <strong>VNWA</strong> Setup screen. Next we test whether the <strong>VNWA</strong>helpfile is available. Press “Help” and select “Help” again. The screen below may be shown.Press “Yes” and “Browse” to select the location where the Helpfile is located. If standard<strong>VNWA</strong> installation defaults were selected then the default path will be:My Computer C:\<strong>VNWA</strong>\<strong>VNWA</strong>.hlp3.2.10 IMPORTANT: To save the <strong>VNWA</strong> configuration (after any changes are made) exit the Setup<strong>VNWA</strong> application. This saves the <strong>VNWA</strong> configuration files for the next time the <strong>VNWA</strong> applicationis started.End of <strong>VNWA</strong> Configuration3.3 Windows 7 - 64 bit and 32 bit Audio Codec Configuration3.3.1 Windows 7 configures the USB Audio Codec as a mono application with levels set too high asshown below. This prevents <strong>VNWA</strong> application from functioning.<strong>SDR</strong>-<strong>Kits</strong> – <strong>VNWA</strong> <strong>2.x</strong> <strong>Self</strong> <strong>Installer</strong> <strong>Manual</strong> 1.2 - copyright 2011 by <strong>SDR</strong>-<strong>Kits</strong> Page 13 of 32
3.3.2 Start the <strong>VNWA</strong> Application and select Audio Test as shown in 3.2.7Now to configure USB Codec properties select “Start”, “Control Panel”3.3.3 Select “Hardware and Sound” and click on "Manage Audio Devices"<strong>SDR</strong>-<strong>Kits</strong> – <strong>VNWA</strong> <strong>2.x</strong> <strong>Self</strong> <strong>Installer</strong> <strong>Manual</strong> 1.2 - copyright 2011 by <strong>SDR</strong>-<strong>Kits</strong> Page 14 of 32
3.3.4 and click on tab “Recording”3.3.5 Click on “Microphone USB Audio Codec” and select “Advanced”Ensure that Default Format is set to “2 channel, 16 bit, 48000 Hz”<strong>SDR</strong>-<strong>Kits</strong> – <strong>VNWA</strong> <strong>2.x</strong> <strong>Self</strong> <strong>Installer</strong> <strong>Manual</strong> 1.2 - copyright 2011 by <strong>SDR</strong>-<strong>Kits</strong> Page 15 of 32
3.3.6 Next select “Levels” and adjust Microphone level to value of between 3 and 5, (typically 4)and press OKNote: If 4 is not selectable e.g. the displayed number jumps from 3 to 5 then use the left and rightarrow keys and count you way. You will find whilst only 5 is shown both the setting for 4 and 5is available.3.3.7 Check on <strong>VNWA</strong> Setup Screen that sinewave covers approx 50% to 60% as shown in step 3.3.6and 3.3.7. If necessary adjust Microphone level until this is achieved.End of Audio Codec Configuration<strong>SDR</strong>-<strong>Kits</strong> – <strong>VNWA</strong> <strong>2.x</strong> <strong>Self</strong> <strong>Installer</strong> <strong>Manual</strong> 1.2 - copyright 2011 by <strong>SDR</strong>-<strong>Kits</strong> Page 16 of 32
3.4 Windows XP InstallationNote: For Installation on Windows 7 and Vista refer to section 3.1This section shows installation procedure for Windows XP Operating System.3.4.1 Download and save the Installation Package from the following location to your desktophttp://www.sdr-kits.net/<strong>DG8SAQ</strong>/<strong>VNWA</strong>-installer.exe3.4.2 Make sure the <strong>VNWA</strong> is NOT connected to the PCDouble Click on the <strong>VNWA</strong>-installer Icon to start the <strong>VNWA</strong> installation process.Confirm that the <strong>VNWA</strong>-installer can make changes to your Computer3.4.3 Press Next – The default location where <strong>VNWA</strong> will be installed will be shown:Note: Select a different Destination Location (ie C:\<strong>VNWA</strong>_2) if you want to install a second <strong>VNWA</strong>application on the same PC. This prevents overwriting the setup files of your first <strong>VNWA</strong> application<strong>SDR</strong>-<strong>Kits</strong> – <strong>VNWA</strong> <strong>2.x</strong> <strong>Self</strong> <strong>Installer</strong> <strong>Manual</strong> 1.2 - copyright 2011 by <strong>SDR</strong>-<strong>Kits</strong> Page 17 of 32
3.4.4 Press Next – Default Location where <strong>VNWA</strong> program shortcuts will be installed3.4.5 Press Next – Screen to enter <strong>VNWA</strong> license key is now displayed as shown below:There are two options to enter the <strong>VNWA</strong> license key for your <strong>VNWA</strong>:Directly enter the <strong>VNWA</strong> license code exactly as shown in the <strong>Manual</strong> supplied with the <strong>VNWA</strong><strong>2.x</strong> hardwareThe <strong>VNWA</strong> license code is also specified in the <strong>VNWA</strong> shipping advice emailNote: the last colon is the last character and must also be entered.<strong>SDR</strong>-<strong>Kits</strong> – <strong>VNWA</strong> <strong>2.x</strong> <strong>Self</strong> <strong>Installer</strong> <strong>Manual</strong> 1.2 - copyright 2011 by <strong>SDR</strong>-<strong>Kits</strong> Page 18 of 32
Note: A Screen (not shown in this manual) is now displayed with option to create a Desktop Icon for:A) All users or B) For Current User only. Make your selection and press "Next"3.4.6 Press "Next" - Read and execute the instructions displayed on the screen below:Note: The <strong>VNWA</strong> hardware must be connected in this step otherwise driver installation mayfail.<strong>SDR</strong>-<strong>Kits</strong> – <strong>VNWA</strong> <strong>2.x</strong> <strong>Self</strong> <strong>Installer</strong> <strong>Manual</strong> 1.2 - copyright 2011 by <strong>SDR</strong>-<strong>Kits</strong> Page 19 of 32
3.4.7 If the screen below is displayed after plugging in <strong>VNWA</strong> then press "Cancel button on thisscreen3.4.8 Press "Install" on Screen below. The Installation of <strong>VNWA</strong> Application and Driver should nowstart and screen below is shown.<strong>SDR</strong>-<strong>Kits</strong> – <strong>VNWA</strong> <strong>2.x</strong> <strong>Self</strong> <strong>Installer</strong> <strong>Manual</strong> 1.2 - copyright 2011 by <strong>SDR</strong>-<strong>Kits</strong> Page 20 of 32
3.4.9 The Installation of <strong>VNWA</strong> Application and Driver now start and screen below is displayed.press "Next"3.4.10 Driver installation now completes - Press "Finish"<strong>SDR</strong>-<strong>Kits</strong> – <strong>VNWA</strong> <strong>2.x</strong> <strong>Self</strong> <strong>Installer</strong> <strong>Manual</strong> 1.2 - copyright 2011 by <strong>SDR</strong>-<strong>Kits</strong> Page 21 of 32
3.4.11 Press "Finish" - to exit the <strong>VNWA</strong> installation routine.END of Windows XP Installation3.5 Windows XP <strong>VNWA</strong> Application Configuration3.5.1 Ensure the <strong>VNWA</strong> USB cable into USB Port of your Computer.3.5.2. Click “Start” “All Programs” “<strong>VNWA</strong>” and "<strong>VNWA</strong>" to start the <strong>VNWA</strong> application or use theShortcut created on the Desktop.3.5.3 <strong>VNWA</strong> Application is started. The following Notice is displayed when <strong>VNWA</strong> application isstarted for the first time:Note: To allow for <strong>VNWA</strong> operation above 500 MHz auto clock multipliers must be selected.<strong>SDR</strong>-<strong>Kits</strong> – <strong>VNWA</strong> <strong>2.x</strong> <strong>Self</strong> <strong>Installer</strong> <strong>Manual</strong> 1.2 - copyright 2011 by <strong>SDR</strong>-<strong>Kits</strong> Page 22 of 32
3.5.4 <strong>VNWA</strong> Application starts: Click “OK” to acknowledge that <strong>VNWA</strong> setup information needs tobe entered.<strong>SDR</strong>-<strong>Kits</strong> – <strong>VNWA</strong> <strong>2.x</strong> <strong>Self</strong> <strong>Installer</strong> <strong>Manual</strong> 1.2 - copyright 2011 by <strong>SDR</strong>-<strong>Kits</strong> Page 23 of 32
3.5.5 Now click on Tab "USB Setting"Check whether <strong>VNWA</strong> license code is shown, In event this information is missing then enterthe <strong>VNWA</strong> license code shown on page 2, 2.4 again. Now press “Rescan USB Bus” and “TestUSB Interface” Check bottom line for message “Test passed without errors”3.5.6 Select “Audio Settings” and set “Audio Capture Device” to “USB Audio Codec”Set Recording Mode to "Capture" and Recoding Device to "Microphone"For Factory assembled <strong>VNWA</strong> <strong>2.x</strong> check Reference = Right Channel has been selected.(Note: Older <strong>VNWA</strong> <strong>2.x</strong> built from a Kit may use "Left Channel" depending on wiring ofthe 3.5mm audio connectors) Now press “Test Audio”<strong>SDR</strong>-<strong>Kits</strong> – <strong>VNWA</strong> <strong>2.x</strong> <strong>Self</strong> <strong>Installer</strong> <strong>Manual</strong> 1.2 - copyright 2011 by <strong>SDR</strong>-<strong>Kits</strong> Page 24 of 32
3.5.7 Select “Audio Level” and ensure whether Reflect Mode is selected. The sinewave levels shouldbe as displayed below (100% Reflection as TX port is not terminated)Note: If screen display is different from shown below (for instance when Volume Sliders areshown) then return to previous step 2.6.5 and change Recording Mode and Recording Device.3.5.8 Connect the TX port and RX port with an SMA cable and check that Left Channel sinewavehas disappeared (No signal reflected) . Now select “Thru” (by pressing on softbutton "Reflect"and check that the Left Channel sinewave is displayed as shown in screenshot below.Note: when the THRU Mode is active the Audio levels min and max are a little higher than when inREFL Mode<strong>SDR</strong>-<strong>Kits</strong> – <strong>VNWA</strong> <strong>2.x</strong> <strong>Self</strong> <strong>Installer</strong> <strong>Manual</strong> 1.2 - copyright 2011 by <strong>SDR</strong>-<strong>Kits</strong> Page 25 of 32
3.5.9 Click “Stop“ cease the Audio test. Next click on "Instrument Settings” and check whether clockis set to “auto”. Note that for <strong>VNWA</strong> 2, the clock is generally a little below 36 MHz,somewhere between 35.855 MHz and 36.000 MHz depending on Crystal fitted.When performing Audio test press ++ / + or -- / - buttons until the sinewaves are almoststationary on the screen. If you have a frequency counter perform Calibrate DDS Clockcalibration as described in the <strong>VNWA</strong> helpfile3.5.10 Press the top right button to close the <strong>VNWA</strong> Setup screen. Next we test whether the <strong>VNWA</strong>helpfile is available. Press “Help” and select “Help” again. The screen below may be shown.Press “Yes” and “Browse” to select the location where the Helpfile is located. If standard<strong>VNWA</strong> installation defaults were selected then the default path will be:My Computer C:\<strong>VNWA</strong>\<strong>VNWA</strong>.hlp3.5.11 IMPORTANT: To save the <strong>VNWA</strong> configuration (after any changes are made) exit the <strong>VNWA</strong>Application. This saves the <strong>VNWA</strong> setup for the next time the <strong>VNWA</strong> application is started.End of <strong>VNWA</strong> Configuration for Windows XP4. <strong>VNWA</strong> Master CalibrationPrior to taking <strong>VNWA</strong> measurements the <strong>VNWA</strong> needs to be calibrated - Calibration uses SOLT -Short - Open - Load and Through Method. Ideal Calibration standards are used by default. For Highprecision measurements in VHF and UHF range you need to specify more precise model of thecalibration standards used - please consult the <strong>VNWA</strong> helpfileTo calibrate the TX port (One Port) you need an SMA Short connector and and a SMA 50 OhmTermination. For RX port (Two Port) calibration a short SMA to SMA cable is also required.4.1 Master Calibration procedure<strong>SDR</strong>-<strong>Kits</strong> – <strong>VNWA</strong> <strong>2.x</strong> <strong>Self</strong> <strong>Installer</strong> <strong>Manual</strong> 1.2 - copyright 2011 by <strong>SDR</strong>-<strong>Kits</strong> Page 26 of 32
1. Set frequency range for Master Calibration (for instance 0 MHz - 500 MHz). Click on"Center=" and "Span=" and specify Start and Stop frequency of the Master Calibration2. From <strong>VNWA</strong> top menu select "Setting" and select "Sweep"Specify: 8192 pointstime per sample: 3.3 mS3. From <strong>VNWA</strong> top menu select "Measure" and "Calibrate" and select Short - Open - Load forTX calibration and follow the instructions shown on screen. For 2 Port Thru calibration"Crosstalk Cal - Thru Cal - Thru Match Cal" steps also need to be done using a short cable.4. Once Calibration has been done, save the results in a Master Cal file: for instance withfilename: Master Cal 0-500Mhz. Note: you may save any number of cal files.4.2 Reloading saved Master Calibration FileTo load a previously save Master Calibration File:<strong>SDR</strong>-<strong>Kits</strong> – <strong>VNWA</strong> <strong>2.x</strong> <strong>Self</strong> <strong>Installer</strong> <strong>Manual</strong> 1.2 - copyright 2011 by <strong>SDR</strong>-<strong>Kits</strong> Page 27 of 32
1. From Top Menu select "Options" and "Setup" and "Misc. Settings"2. Now select the required Calibration file for loadingEnd of <strong>VNWA</strong> Master Calibration5. Some Practical <strong>VNWA</strong> Measurements5.1 Antenna VSWR and Impedance (S11 - 1 Port Device)Antenna VSWR or Impedance measurements are typical examples of <strong>VNWA</strong> "One PortMeasurements" The example below illustrates how VSWR measurement is obtained of an (144 MHz)Antenna from 400MHz to 450MHz (2 Meter Antenna used on 70 cm Band)Method: (assume <strong>VNWA</strong> has been calibrated before)Connect Device Under Test (DUT) ie Antenna to the <strong>VNWA</strong> TX Socket1. Set Frequency Start and Stop frequency2. Set Measurements - select measurements to be displayed(S11, dB), (S11, Real Z), (S11, Imag Z)Press "Single Sweep" results are now displayed3. Adjust the measurement scale if required to improve the graph appearanceAdd Marker (Right Mouse Click and select "Normal Marker") and place on point of interestIn the example the Marker displays: Frequency = 434 MHz, VSWR = 1.61 Real Z = 78.75 Ohm andImag Z = 10.43 Ohm (Inductive)5.2 <strong>VNWA</strong> Transmission Line Measurements (2 Port Measurement)Filter Attenuation measurement is an example of <strong>VNWA</strong> "Two Port Measurements"<strong>SDR</strong>-<strong>Kits</strong> – <strong>VNWA</strong> <strong>2.x</strong> <strong>Self</strong> <strong>Installer</strong> <strong>Manual</strong> 1.2 - copyright 2011 by <strong>SDR</strong>-<strong>Kits</strong> Page 28 of 32
The measurements of attenuation (S21 dB) and input impedance (S11 Z) of a 400 MHz SurfaceAcoustic Wave (SAW filter)Method: (assume <strong>VNWA</strong> has been calibrated before)Connect Device Under Test (DUT) input to <strong>VNWA</strong> TX port and Device output to <strong>VNWA</strong> RX port1. Set Start and Stop frequency2 Select measurements to be displayed (S21, dB), (S11, Real Z), (S11, ImagZ)Press "Single Sweep" Results should be displayed3 You can change the measurement scale if required to improve graph appearance4 Add Marker (Right Mouse Click and select "Normal Marker") and place on point ofinterest5 Graph position may be adjusted by placing curser here and dragging graph up or down.In the example Marker 1 displays: Frequency = 400.09 MHz Attenuation = -12.05dB Input RealZ =22.28 Ohm and Input imagZ = -5.76 Ohm (capacitive). Note: SAW filter is not matched to 50 Ohmimpedance of <strong>VNWA</strong> TX and RX port.5.3 Time Domain Reflectometry Measurement (T D R)Below is an example of using the TDR capability of the <strong>VNWA</strong> to determine the characteristic impedance (andlength) of a coaxial cable.<strong>SDR</strong>-<strong>Kits</strong> – <strong>VNWA</strong> <strong>2.x</strong> <strong>Self</strong> <strong>Installer</strong> <strong>Manual</strong> 1.2 - copyright 2011 by <strong>SDR</strong>-<strong>Kits</strong> Page 29 of 32
Method:1. Calibrate <strong>VNWA</strong> between 0 kHz and 1300 MHz with sweep of 2000 points and 4mS2. Connect the Coax cable to <strong>VNWA</strong> TX port. Other end of Coax is left unconnected.3. Perform S11 dB measurement as (shown as Trace 1)4. Add Trace 2 as |Z| and Time - (Use right hand mouse click and select "Trace Options")5. Move curser over Trace 2 (shown as S11 |Z|), Next do right hand mouse click and select"Other" and "Time Domain. Time domain Setting window now appears as in picture.6. Change the settings as shown in the example, - Select "Stop Time" to be a little longerthan the length of your coax cable. (10ns shown - for measuring cable length up to 1m)In the example Marker 1 displays: the characteristic impedance as 49.78 Ohm (each division is 1Ohm!). The total length of the coax cable is actually 0.63m. Accuracy of this measurements dependson correct Velocity Factor of the cable type to be entered6. <strong>VNWA</strong> Help fileCheck you can open and read the <strong>VNWA</strong> HELPFILE. Open the <strong>VNWA</strong> Helpfile and take out time tofamiliarize yourself with the <strong>VNWA</strong> application: particularly with sections such as:- Installation & Configuration- Calibration- Known Issues- Verification of Proper Operation (Troubleshooting section)<strong>SDR</strong>-<strong>Kits</strong> – <strong>VNWA</strong> <strong>2.x</strong> <strong>Self</strong> <strong>Installer</strong> <strong>Manual</strong> 1.2 - copyright 2011 by <strong>SDR</strong>-<strong>Kits</strong> Page 30 of 32
Note: a PDF version of the latest helpfile may be downloaded from:http://sdr-kits.net/<strong>DG8SAQ</strong>/<strong>VNWA</strong>/<strong>VNWA</strong>_HELP.pdf7. <strong>VNWA</strong> User Support7.1 <strong>VNWA</strong> User groupIt is recommended you become a member of the <strong>DG8SAQ</strong> <strong>VNWA</strong> Forum on Yahoo where <strong>VNWA</strong>announcements and <strong>VNWA</strong> user experiences are shared. You will have the benefit of useful informationincluding advice when new software and helpfile updates are available for download.http://groups.yahoo.com/group/<strong>VNWA</strong>/Please use the <strong>DG8SAQ</strong> <strong>VNWA</strong> Forum to check for important announcements, documentation updates and toshare your experiences building and using the <strong>DG8SAQ</strong> Vector Network Analyser.7.2 AcknowledgementsAcknowledgements and thanks to all the <strong>VNWA</strong> <strong>2.x</strong> owners who tested 34.x and 35.x releases and patientlyreported issues via the <strong>VNWA</strong> reflector. A special thanks for Kurt Poulsen OZ7OU for his diligent review of thethis manual and for his sterling work on the <strong>VNWA</strong> Calibration Standards supplied by <strong>SDR</strong>-<strong>Kits</strong>.Tom Baier and I acknowledge the contribution of Alan Rowe M0PUB for his expertise and efforts in providing the<strong>Installer</strong> package.15th June 2011Jan VerduynProprietor <strong>SDR</strong>-<strong>Kits</strong><strong>SDR</strong>-<strong>Kits</strong> – <strong>VNWA</strong> <strong>2.x</strong> <strong>Self</strong> <strong>Installer</strong> <strong>Manual</strong> 1.2 - copyright 2011 by <strong>SDR</strong>-<strong>Kits</strong> Page 31 of 32
9.8 Contact adress<strong>SDR</strong>-<strong>Kits</strong> (Internet & mail order only)14 Ragleth GroveTrowbridge, Wilts BA14-7LEUnited Kingdomemail: sdrkits@gmail.comwww.<strong>SDR</strong>-<strong>Kits</strong>.net<strong>SDR</strong>-<strong>Kits</strong> – <strong>VNWA</strong> <strong>2.x</strong> <strong>Self</strong> <strong>Installer</strong> <strong>Manual</strong> 1.2 - copyright 2011 by <strong>SDR</strong>-<strong>Kits</strong> Page 32 of 32