Scan Secure GTS Software user manual 1 - Scan Secure AS
Scan Secure GTS Software user manual 1 - Scan Secure AS
Scan Secure GTS Software user manual 1 - Scan Secure AS

Create successful ePaper yourself
Turn your PDF publications into a flip-book with our unique Google optimized e-Paper software.
<strong>Scan</strong> <strong>Secure</strong> <strong>GTS</strong> 5.1User <strong>manual</strong>Issue 2(Based upon V5.0.11)<strong>Scan</strong> <strong>Secure</strong> <strong>GTS</strong>5 User <strong>manual</strong> Issue 1 22.06.2009 Page 1 of 60
SCAN SECURE <strong>GTS</strong> 5 B .............................................................................. 11 INTRODUCTION ................................................................................. 42 SYSTEM REQUIREMENTS. BOTH FOR SERVER AND LOCAL PC. ............ 43 IMPORTANT! ...................................................................................... 64 HOW TO SET UP A NEW INSTALLATION OF <strong>GTS</strong>5 – RECOMMENDED ... 74.1 STARTING THE <strong>GTS</strong>5 FOR THE FIRST TIME. ............................................. 74.1 PREPARATIONS ................................................................................ 94.2 REGISTER USERS, CONTROL POINTS, EVENTS GUARDS, OBJECTS ETC. .......... 105 MENU CHOICES. ............................................................................... 115.1 FILE. ........................................................................................... 115.2 MAPS. .......................................................................................... 115.3 SECURITY. .................................................................................... 135.4 HELP. ........................................................................................... 146 ICONS AND THEIR FUNCTIONS ........................................................ 156.1 DELETE PEN ........................................................................ 156.2 PEN INFORMATION. .............................................................. 156.3 TAGS INFORMATION .............................................................. 166.4 GUARD .............................................................................. 186.5 ROUNDS INFORMATION ......................................................... 196.6 OBJECTS ............................................................................. 206.7 READ PEN .......................................................................... 206.8 FINISHED ROUNDS ................................................................ 216.9 REPORTS ........................................................................ 216.10 CUSTOM REPORTS ............................................................... 226.11 P<strong>AS</strong> ...................................................................... 227 SELECTABLE FUNCTIONS IN THE <strong>GTS</strong> ............................................... 237.1 PEN FUNCTIONALITY SETTINGS .......................................................... 237.2 GUARD TAG FUNCTIONALITY SETTINGS ............................................... 248 USING THE SYSTEM. ......................................................................... 258.1 GUARD - NEW. ............................................................................... 258.2 PEN - NEW. ................................................................................... 268.3 TAGS – NEW CONTROL POINT. .......................................................... 278.3.1. ADD TAG FUNCTION ON A MAP - RECOMMENDED .................................. 278.3.2. NEW CONTROL POINT TAG IN A ROUND. ........................................ 278.3.3. NEW TAG IN THE TAG INFORMATION DIALOG BOX. ............................ 288.4 EVENT TAG - NEW. ........................................................................ 29<strong>Scan</strong> <strong>Secure</strong> <strong>GTS</strong>5 User <strong>manual</strong> Issue 1 22.06.2009 Page 2 of 60
8.5 ROUND - NEW WITH ONLY NEW CONTROL POINTS. ................................. 318.6 ROUND - NEW BY INCLUDING ALREADY REGISTERED TAGS ...................... 348.7 BATTERY – CHANGE. ....................................................................... 368.8 DATE & TIME ADJUSTMENT OF THE PEN. .............................................. 378.9 PROXI PEN - OUT OF THE BOOT MODE. ................................................ 378.10 SECTION MAPS - ADD MORE: .......................................................... 388.11 SECTION MAP - MOVE TO THE APPROPRIATE POSITION: ........................ 398.12 CONTROL POINTS – EDITING DESCRIPTION. ...................................... 408.12.1. TAG - EDITING IN THE ROUNDS REGISTERED DIALOG BOX ................. 408.12.2. TAG INFORMATION - EDITING IN THE DIALOG BOX. ......................... 418.13 TAG – <strong>AS</strong>SIGNING TO A MAP. ........................................................ 428.14 TAG - MOVING ON THE SECTION MAP. .............................................. 438.15 TAG - ALLOCATING A CONTROL TAG TO A ROUND ............................... 448.16 TAG – ACTIVATING AND DE-ACTIVATING. ......................................... 458.17 OBJECTS - CREATE NEW (DEPENDANT ON YOUR LICENSE) .................... 468.18 OBJECTS - EDITING (DEPENDANT ON YOUR LICENSE) .......................... 478.19 OBJECTS – LIST (DEPENDANT ON YOUR LICENCE) .............................. 479 USERS AND DATA MAINTENANCE ..................................................... 489.1 USER – ADDING NEW ...................................................................... 489.2 DATA – MAINTENANCE & BACK-UP. .................................................... 4910 OTHER INFORMATION ABOUT THE <strong>GTS</strong> SOFTWAREFUNCTIONALITY. .................................................................................... 5010.1 DATES. ...................................................................................... 5010.2 DIALOG BOXES ............................................................................ 5010.3 COM PORT SELECTION ................................................................... 5010.4 PEN SELECTION ........................................................................... 5011 DAILY USAGE OF THE <strong>GTS</strong>5 ........................................................... 5111.1 ROUTINES FOR THE GUARD ............................................................ 51ROUTINES FOR THE SUPERVISOR ................................................................. 5212 TROUBLE SHOOTING ..................................................................... 5312.1 THE PROXIPEN DOES NOT REGISTER THE TAGS. ................................. 5312.2 BLUECARD DOES NOT REGISTER TAGS ............................................. 5312.3 NO COMMUNICATION BETWEEN PEN AND COMPUTER ........................... 5412.4 CONTACT SCAN SECURE .................................................................. 5413 CUSTOM REPORTS ......................................................................... 5513.1 HOW TO USE THE COLUMNS – GUARDING COMPANY EXAMPLE ................. 5513.2 REPORT GENERATOR ..................................................................... 5614 P<strong>AS</strong> ............................................................................................... 5714.1 NEW: ........................................................................................ 5714.2 DELETE: .................................................................................... 5714.3 READ MODE: ............................................................................... 5714.4 ID CARDS: ................................................................................. 5814.5 IMPORTANT BUTTONS AND COLUMNS: ............................................... 58<strong>Scan</strong> <strong>Secure</strong> <strong>GTS</strong>5 User <strong>manual</strong> Issue 1 22.06.2009 Page 3 of 60
1 IntroductionThis User Manual will describe how to use and operate the Guard Tour System(<strong>GTS</strong>) from <strong>Scan</strong> <strong>Secure</strong>. Please note that the most common or recommendedways to use and maintain the system is described, additional functionality may beavailable!An Installation Manual is also available, if you want to study the aspects of acomplete new installation of the <strong>GTS</strong>.The <strong>GTS</strong> <strong>Software</strong> is a program for use with RFID Tags and readers. Theprogram`s task is to register the Guard Tour data from the Pen, and present thedata in reports and windows.A lot of work has been put in to make the use of the software as easy as possible.<strong>GTS</strong> <strong>Software</strong> can be used on a variety of installations, including cruise ships,office buildings, hotels, industrial sites, factory buildings, prisons, military campusand so on.This User Manual describes all versions and modules of the <strong>GTS</strong> <strong>Software</strong>. SS-<strong>GTS</strong>5 L ~ Light version without maps and graphical functionality SS-<strong>GTS</strong>5 B ~ Standard version for network and 1 <strong>user</strong> SS-<strong>GTS</strong>5 W ~ Workstation module for multiple <strong>user</strong>s/workstations SS-<strong>GTS</strong>5 C ~Objects/Clients module to handle multiple objects/clients. SS-<strong>GTS</strong>5 CR ~ Custom Reports module SS-<strong>GTS</strong>5 CRA ~ Custom Reports Advanced module SS-<strong>GTS</strong>5 P<strong>AS</strong> ~ Personnel Attendance System & ID-Badging module2 System requirements. Both for Server and local PC.The following table lists the prerequisite software and minimum hardware andsoftware requirements for running Microsoft SQL Server 2005 Express Edition(SQL Server Express). To determine if the computer meets the systemrequirements, from the Start menu, right-click My Computer, and then clickProperties. The General tab displays the CPU type and speed, and the amountof installed memory (RAM).PrerequisitesoftwareRAMMicrosoft .NET FrameworkMicrosoft Internet Explorer 6.0 Service Pack 1 (SP1) or later(prerequisite for .NET Framework)Minimum: 192 MBRecommended: 512 MB or higherHard Disk space 600 MB free spacePentium III Compatible or higherProcessorMinimum: 500 MHzRecommended: 1 GHz or higher<strong>Scan</strong> <strong>Secure</strong> <strong>GTS</strong>5 User <strong>manual</strong> Issue 1 22.06.2009 Page 4 of 60
Windows Server 2003 SP1Windows Server 2003 Enterprise Edition SP1Windows Server 2003 Datacenter Edition SP1Windows Server 2003 Web Edition SP1Windows Small Business Server 2003 Standard Edition SP1Windows Small Business Server 2003 Premium Edition SP1Windows XP Professional SP2Windows XP Home Edition SP2OperatingSystemWindows XP Tablet Edition SP2Windows XP Media Edition SP2Windows 2000 Professional Edition SP4Windows 2000 Server Edition SP4Windows 2000 Advanced Edition SP4Windows 2000 Datacenter Server Edition SP4Virtual PCVirtual ServerNote:There is no support in this release for Windows XP EmbeddedEdition.Full Administrator access to the server and PC is required during theinstallation of the <strong>GTS</strong> <strong>Software</strong>! Please also see the Installation <strong>manual</strong>for all details.The above requirements are to be considered as minimum requirements to havethe <strong>GTS</strong> working to your satisfaction.If these requirements are not met, the result may be a very slow application, toolittle disk space for data, reports etc., and may even cause the application or thecomputer to malfunction.The higher the processor speed, the quicker the <strong>GTS</strong> <strong>Software</strong> will perform as it isa relatively capacity consuming application.<strong>Scan</strong> <strong>Secure</strong> <strong>GTS</strong>5 User <strong>manual</strong> Issue 1 22.06.2009 Page 5 of 60
3 IMPORTANT!Below are some important notes for the use and understanding of this program:Try to avoid mounting the Tag on aluminium surfaces as this will disturb thereading of the TAG. If mounting on aluminium can not be avoided, the TAGMUST be lifted at least 5mm from the surface. Use a self adhesive spacer.(Can be obtained from <strong>Scan</strong> <strong>Secure</strong> as)• A start Tag is unique and can only be used once and to identify that roundonly. If deleted, it can never be reused. (For <strong>GTS</strong>5 CR & CRA no Start Tag isrequired)• When you register data into system during the installation, make sure todelete all data in the pen/DAU prior to and between each operation.• We also recommend to take a backup prior to and between each operation.Go to “Security – Database maintenance – Backup now”• Syncronize the date & time in the pen with the computer by using “ SYNC”• When adding new TAGs to the system, place them on a double sidedtape, and ALWAYS FIRST give the TAGs a number corresponding tolist - written ON the TAG itself, then read them by using the Pen.This is to avoid mixing the TAGs at a later stage.• The Com. station, must be connected to a USB port.• BC 2002S – use COM 3. ProxiPen – use COM 9• NB! If you are using a GCS Proxi-Pen DAU, the unit must not be leftwithout battery for more than 2 minutes!If so, the unit goes into boot mode as a safety precaution and must be resetby a service facility. (Security -> Manage -> Sync. When the program isrunning and you are logged in as an Administrator)<strong>Scan</strong> <strong>Secure</strong> <strong>GTS</strong>5 User <strong>manual</strong> Issue 1 22.06.2009 Page 6 of 60
4 How to set up a new installation of <strong>GTS</strong>5 – recommendedIn this section, we will give you a step by step procedure on how to set up a newinstallation of the <strong>GTS</strong>5. References are made to later Chapters of this <strong>manual</strong>.We base this procedure on the fact that the <strong>GTS</strong>5 has been installed inaccordance with the Installation Manual, and that the installation was successful.NB! The graphical functionality, the Client/Objects, Custom Reports, CustomReports Advanced and the P<strong>AS</strong>, requires an additional licensed module to bepurchased. The installation files of the <strong>GTS</strong>5 will install the full version. After 30downloads of the Pen/DAU, your <strong>GTS</strong>5 installation will start acting according toyour purchased license. Meaning that if you have the SS-<strong>GTS</strong>5 L (Light version)or this is a Demo version, all graphical functionality and the Client/Objectfunctions, are disabled. All your work will however be saved and available assoon as you have purchased the applicable license.If you have the SS-<strong>GTS</strong>5 B license, the graphical functionality will be available,but not the Client/Objects, CR, CRA or P<strong>AS</strong>.4.1 Starting the <strong>GTS</strong>5 for the first time.• Click the <strong>GTS</strong>5 Icon on your desktop• This will bring up the below Login dialog box. Enter Administrator both asUser and Password.• The <strong>GTS</strong>5 will start and you will be promted:• If Demo License is pending – please see Installation Manual<strong>Scan</strong> <strong>Secure</strong> <strong>GTS</strong>5 User <strong>manual</strong> Issue 1 22.06.2009 Page 7 of 60
• Select OK and enter your Profile map following the instructions given inthe dialog box.• Then you will be given the following warning:• Select OK and follow the instructions in the next dialog box, to enter yourfirst section map.• Continue until all section maps are registered and described by using AddMap. Chapter 8.10 Section maps - Add more:<strong>Scan</strong> <strong>Secure</strong> <strong>GTS</strong>5 User <strong>manual</strong> Issue 1 22.06.2009 Page 8 of 60
You should now have the following on your desktop:Move all registered section maps by following the instructions in Chapter8.11<strong>Scan</strong> <strong>Secure</strong> <strong>GTS</strong>5 User <strong>manual</strong> Issue 1 22.06.2009 Page 9 of 60
Section map - move to the appropriate position:4.1 PreparationsYou should prepare the following before you proceed from here:• Guard Tags should be prepared and marked.• Events should be defined.• Guard tours should be planned and number of Control Points determined,including the description and position of each Control Point.• Control point TAGs should be numbered i.e. starting from 001 forthe first round and 101 for the second round etc..• Place the control points on a double sided tape and give each point anumber corresponding with your list, using a red permanent speedmarker.• All Pens should be available.• Open “Security & Manage” to set the COM port.o Blue Card is normaly COM 3 & choose Blue Card oro ProxiPen is COM 9 & Choose ProxiPen• Synchronize the time & date in the peno Sync• Take a backup “ Database Maintenance”o Backup now• Delete the pen - 6.1<strong>Scan</strong> <strong>Secure</strong> <strong>GTS</strong>5 User <strong>manual</strong> Issue 1 22.06.2009 Page 10 of 60
4.2 Register <strong>user</strong>s, control points, events guards, objects etc.We strongly recommend that you follow the order below:• Place the Pen in the Com. Unit and press• Register the Pen by selecting New Penn. Ref. Chapter 8.2 Pen - New.• If you have more Pens to register, register these now.• Select and open each of the pre-registered Event TAG and enter thedescription. Ref. Chapter 8.12.2 Control points – Editingdescription. It is recommended to enter by using the Caps Lock, as theevents then will be far more visible in the reports!• If you have more Event TAG to be registered, do this now. Ref. Chapter8.4 Event TAG - New.• Now, register the Guards into the system by selecting and registeras described in Chapter 8.1 Guard - New.• Place all the numbered and marked Control point TAGs for your firstround, including the Start TAG, press and follow the proceduredescribed in Chapter 8.5 Round - New with only new control points.• It is HIGHLY recommended to complete one round and finish registering itincluding all descriptions for the Control points etc., before you registerthe next round.• If you have more rounds, follow Chapter 8.5 Round - New with onlynew control points. If no of the Control points from the previous roundregistered is to be used, or follow the instructions in Chapter 8.6 Round- New by including already registered TAGs• All TAGs should now be registered, and it is time to place the Controlpoints on section maps etc. Select and follow the instructions givenin Chapter 8.13 TAG – Assigning to a map. and 8.14 TAG - Movingon the section map.• If your license includes Client/Objects, register objects and assign theapplicable Control points and Events to the Clients/Objects by followingthe instructions in Chapter 8.17 Objects - Create new (Dependant onyour License) and 8.18<strong>Scan</strong> <strong>Secure</strong> <strong>GTS</strong>5 User <strong>manual</strong> Issue 1 22.06.2009 Page 11 of 60
Objects - Editing (Dependant on your License)• If several <strong>user</strong>s or <strong>user</strong> levels are to be included in your installation, selectSecurity -> Maintenance and follow the instructions given inChapter 9.1 User – Adding new Please also seeChapter 11.1 Routines for the Guard• Functionality settings for the Pen and the Guard TAG, may be changed.Ref. Chapter 7 Selectable functions in the <strong>GTS</strong>• The last thing to do, is to create a back-up of your work. Please seeChapter 9.2 Data – Maintenance & Back-up.<strong>Scan</strong> <strong>Secure</strong> <strong>GTS</strong>5 User <strong>manual</strong> Issue 1 22.06.2009 Page 12 of 60
5 Menu Choices.In this section, you will find the description of all the Menu Choices in the <strong>GTS</strong>.Availability of these choices will be dependant on your security level.5.1 File.Exit. Exits the program without asking. Data that you are currently working on,will be saved.Print. You can choose whether to print the Profile Map or the Active map window.5.2 Maps.This menu is used to administrate all maps used in the program.Information.Brings up a window with all the map information.<strong>Scan</strong> <strong>Secure</strong> <strong>GTS</strong>5 User <strong>manual</strong> Issue 1 22.06.2009 Page 13 of 60
Buttons.View map: Brings up the picture of the map selected.Delete map: Deletes the map that you have selected.Change map: Changes the picture/path for this map.Add map: A new map may be added to the system. Opens a separatewindows.Close: Closes the window and saves the changesAdd map.Adds a new map to the system by letting you choose a picture for the new map.Main profile map.Lets you choose/change the name of the profile map, and its picture.Open main map.Opens the profile map if it is closed.Open.Opens any of the section maps that are registered in the system.Arrange.Arranges the windows any which way you prefer.<strong>Scan</strong> <strong>Secure</strong> <strong>GTS</strong>5 User <strong>manual</strong> Issue 1 22.06.2009 Page 14 of 60
5.3 Security.Manage.The following dialog box will appear:Here you can add <strong>user</strong>s with different security levels. The program comes withone Administrator, which has the highest security level.If you add a <strong>user</strong> with <strong>user</strong> level 3, he will not get access to the features withlevel 2 or 1. You can also change the security level for any of the type listed inthe Security features section.NOTE: Make sure at least one <strong>user</strong> has security level 1, because only a <strong>user</strong> withlevel 1 get access to the security management features.In this dialog box, you will also be able to select the correct COM port and thetype of DAU.In the upper right corner of this dialog box, you will find a button named Sync.By pressing this button, the time and date of your computer is transferred to theDAU.This will also bring any Proxy Pen out of the boot mode.<strong>Scan</strong> <strong>Secure</strong> <strong>GTS</strong>5 User <strong>manual</strong> Issue 1 22.06.2009 Page 15 of 60
Pressing the Database Maintenance, will bring up the following dialog box:Here you may Back-up your database by pressing Back-up now. (The back-upwill be named automatically with the current date. If more back-ups are done onthe same day, the old back-up will be over written by the new back-up)You may also restore the database from the selected back-up file.Old data may be deleted by entering a date and the pressing Delete. You will beasked if you want to back-up the database first, and in any case, a htm documentof the deleted data will be stored automatically.NB! You must type in the date in the format selected on your computer –Regional Settings!5.4 Help.Get HelpWill bring up the User Manual.Choose LanguageSelection of language for the <strong>GTS</strong> application.<strong>Scan</strong> <strong>Secure</strong> <strong>GTS</strong>5 User <strong>manual</strong> Issue 1 22.06.2009 Page 16 of 60
6 Icons and their functionsThe Icons shown above, are available when logged in as administrator. For othersecurity levels, only some of the Icons may be available.6.1 Delete PenPressing this Icon, will bring up the following box.Selecting Yes/Ja, will delete all registrations in the Pen.6.2 Pen Information.This will bring up a window that contains information about the Pens registered inthe system.<strong>Scan</strong> <strong>Secure</strong> <strong>GTS</strong>5 User <strong>manual</strong> Issue 1 22.06.2009 Page 17 of 60
Buttons.Delete Pen: Deletes the selected Pen.New Pen: Adds a Pen to the system. The Pen in the reader will be read,and the unique number for this Pen will be registered in the system. Thenew Pen must have at least one valid TAG registered and NOT bein boot mode.Selection of the Pen performance after download of data is described inchapter 7.16.3 Tags informationThis icon will bring up a dialog box where all TAGS in the system is registered andmanaged.At the top of the dialog box, you may select to view all valid TAGs (Not deleted)or all deleted TAGs registered in the system.In the main window, you may select either main type of TAG to be viewed andalso select the individual TAG. The information and registrations for this TAG isthen shown in the lower part of the dialog box.<strong>Scan</strong> <strong>Secure</strong> <strong>GTS</strong>5 User <strong>manual</strong> Issue 1 22.06.2009 Page 18 of 60
Areas and buttons have the following functionality or meaning:Left Corner: Unique alpha numeric TA-ID. Read-only.Status: The current status of the TAG. Red means that it has not been read on around, yellow means that it is an event on a round. Read-only. If you have highenough security level, you can double-click in this box to change the status of thisTAG to white, e.g. 0.Active: By deselecting this, you can temporarily deactivate the TAG. The TAG willnot be a part of the round until you activate it again. Not applicable to Start TAGStart TAG: If the TAG is a start TAG, e.g. denotes the beginning of a round, thisbox will be checked. Read-only.Related to Object(s): Here you may select object and/or create new objects.(Depending on license)Description: General description about the TAG and its function. Shown onreports etc.Notes: Here you can type in additional information about the TAG.TAG Type: The type of the TAG, it can be Control Point, Event, Guard orProgramming TAG.Creation date: The date the TAG was added to the system. Read-only.Date removed: The date the TAG was deleted from the system.Map: The name of the section map this TAG belongs to.Available Round: Available rounds in the systemSelected Round: The name of the round that the TAG belongs to. Here multiplerounds may be selected by selecting more rounds whilst pressing the Ctrl key. Tounselect, just do not select any round and click OK.# Checked: The number of time this TAG has been read on the round that itbelongs to.# Not checked: The number of times this TAG have not been read when itshould, e.g. a round has been performed but the TAG have not been read.Buttons.New: Add new TAGs. You can here register any number of either newevent or new control point TAG.Delete: Delete the current TAG.Report: Gives you a report of every registration of this TAG, stored in thedatabase.Close: Closes this dialog box and saves all changes done.<strong>Scan</strong> <strong>Secure</strong> <strong>GTS</strong>5 User <strong>manual</strong> Issue 1 22.06.2009 Page 19 of 60
6.4 GuardThis icon will bring up the dialog box showing all guards and guard informationregistered.Information about the guards can be entered here.Buttons.New: Adds a new guard. Se above.Delete: Deletes the selected guard.Print List: Prints the list of registered GuardsRead behaviour: Sets the functionality of the Guard TAG. Described inchapter 7.2 Guard TAG functionality settings<strong>Scan</strong> <strong>Secure</strong> <strong>GTS</strong>5 User <strong>manual</strong> Issue 1 22.06.2009 Page 20 of 60
6.5 Rounds informationNB! Not available when the Custom Reports is enabled.Brings up information about all rounds registered in the system, including allTAGS in the round..New round: Will start a routine to register a completely new roundDelete round: Will delete a registered round.Report: Will print a report showing all TAG1 in the selected round.Active (tick off box): Will set the TAG active/de-active for this round only.Both the Round name, description and TAG description may be edited in thisdialog box.<strong>Scan</strong> <strong>Secure</strong> <strong>GTS</strong>5 User <strong>manual</strong> Issue 1 22.06.2009 Page 21 of 60
6.6 ObjectsBrings up a window showing all objects (if any) registered.NB! Objects may ONLY BE ADDED in the TAGs information dialog box!6.7 Read PenStarts the downloading of data from the Pen placed in the Com.Unit.Perform battery check: Checks the battery during download and gives you thebattery voltage reading. ( ProxyPen Only )Start reading: Starts the downloading from the Pen.<strong>Scan</strong> <strong>Secure</strong> <strong>GTS</strong>5 User <strong>manual</strong> Issue 1 22.06.2009 Page 22 of 60
6.8 Finished roundsNB! Not available when the Custom Reports is enabled.Brings up a complete list of all rounds carried out and registered in the system.Each round can be opened, showing all details of guard, control TAGs, Events etc.Report: Will generate a printable version of the selected round report.6.9 ReportsA wide selection of reports are available.By selecting one of the report types, you will have the possibility to select thedate and time for the report, and object, if applicable to your selected report.<strong>Scan</strong> <strong>Secure</strong> <strong>GTS</strong>5 User <strong>manual</strong> Issue 1 22.06.2009 Page 23 of 60
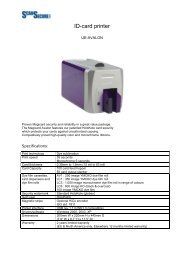
6.10 Custom ReportsReport generator available when the License for CR or CRA is purchased. SeeChapter 13 Custom reports where the use and setup is described further.Custom reports may look like the below image.6.11 P<strong>AS</strong>P<strong>AS</strong> (Personnel Attendant System), is a separate module in the <strong>GTS</strong> software foradministration of personnel, designing and printing of ID-cards and logging ofwho`s onboard and who`s onshore. See Chapter 14 P<strong>AS</strong> where the use andsetup is described further<strong>Scan</strong> <strong>Secure</strong> <strong>GTS</strong>5 User <strong>manual</strong> Issue 1 22.06.2009 Page 24 of 60
7 Selectable functions in the <strong>GTS</strong>There are several selectable functions in the <strong>GTS</strong> that you may select:7.1 Pen functionality settingsIt is possible to select the way the Pen is functioning related to deletingregistered data.Ask after download.You will always be asked after downloading data from the Pen, if you want todelete the data in the Pen. This is regardless whether you have <strong>user</strong> level for thisor not. The Pen will be deleted if you select Yes.Always delete after download - RecommendedThe Pen will always be deleted after downloading the data. No questions asked.Manually delete.Deleting the Pen is controlled by the <strong>user</strong> level settings under Security ->Manage. Ref. Chapter 9.1 User – Adding new<strong>Scan</strong> <strong>Secure</strong> <strong>GTS</strong>5 User <strong>manual</strong> Issue 1 22.06.2009 Page 25 of 60
7.2 Guard TAG functionality settingsIn the Guard dialog box shown above, three different functionality settings arepossible.Must read Guard TAG. RecomendedRequires the Guard TAG to be registered prior to every round.Must read & Inherit.A Guard TAG must be read once into the system. After this, all rounds registeredwill be related to this Guard until a new Guard TAG is registered.No read. Use default.No Guard TAG is required to be registered when performing rounds.<strong>Scan</strong> <strong>Secure</strong> <strong>GTS</strong>5 User <strong>manual</strong> Issue 1 22.06.2009 Page 26 of 60
8 Using the system.Please note that the below description requires that you are logged in as anAdministrator.8.1 Guard - New.Make sure all readings are deleted in the Pen by selecting• Read one or more guard TAG into the Pen.• Press the Guard Icon .• The following dialog box will appear:• Press New Guard and the new Guard TAG registered in the Pen, will beregistered in the <strong>GTS</strong> <strong>Software</strong>.• Name the guard.• Fill in the appropriate information for this guard in the table displayed.• Delete all readings in the Pen by selecting<strong>Scan</strong> <strong>Secure</strong> <strong>GTS</strong>5 User <strong>manual</strong> Issue 1 22.06.2009 Page 27 of 60
8.2 Pen - New.• Select the Icon for the Pen• The following dialog box will appear:• Press New Pen and follow the instructions. After the Pen is registered, theDescription field may be edited.• Continue until all new Pens have been registered.<strong>Scan</strong> <strong>Secure</strong> <strong>GTS</strong>5 User <strong>manual</strong> Issue 1 22.06.2009 Page 28 of 60
8.3 TAGs – New Control point.When adding new TAGs to the system, ALWAYS FIRST give the TAG a numberwritten ON the TAG itself, place them on a tape and then read them by using thePen. This is to avoid mixing the TAGs at a later stage.There are three ways to include a new control point TAG.8.3.1. Add TAG function on a map - recommended• Delete all readings in the Pen by selecting• Register the control point TAG in the Pen and place the Pen the ComUnit.• Select the appropriate detail map, move the mouse to the position ofthe new control point and right click. Select Add TAGs.• The new control point TAG must be the only TAG registered inthe Pen• The new TAG will now be read and placed on the detail map where themouse was placed when you right clicked. Double click the newcontrol point and allocate it to one of the rounds in the dialog box thatappears. Ref. chapter 8.15 TAG - Allocating a control TAG to around. Enter a description and other relevant details, ref. chapter8.12 Control points – Editing description.. Close all dialog boxesand maps.8.3.2. New control point TAG in a round.• Include the new control point TAG in the appropriate round whenperforming the patrol round.• When the round is read into the system, the program will ask you ifthe new TAG is to be included and what type it should be. SelectNo/Nei as this is to be a Control point.• Confirm and after all rounds are read properly, you must register thedescription of the new control point, allocate it to a map and place it ona local map. Ref. chapters 8.12 Control points – Editingdescription. 8.13 TAG – Assigning to a map. 8.14 TAG - Movingon the section map.<strong>Scan</strong> <strong>Secure</strong> <strong>GTS</strong>5 User <strong>manual</strong> Issue 1 22.06.2009 Page 29 of 60
8.3.3. New TAG in the TAG Information dialog box.• Select ,• New and continue by reading the new control TAG from the Pen.NB! The new TAG must then be the only one contained in the Pen.• If several new data TAGs are to be included, all these may be read atthe same time.• The new data TAGs should then be allocated to a map, a round etc.Ref. chapters 8.12 Control points – Editing description. 8.13TAG – Assigning to a map. 8.14 TAG - Moving on the sectionmap.<strong>Scan</strong> <strong>Secure</strong> <strong>GTS</strong>5 User <strong>manual</strong> Issue 1 22.06.2009 Page 30 of 60
8.4 Event TAG - New.When adding new TAGs to the system, ALWAYS FIRST give the TAGs a numberwritten ON the TAG itself, place them on a tape and then read them by using thePen. This is to avoid mixing the TAGs at a later stage.An event book containing 12/20 standard event TAGs is normally supplied withthe system. These event TAGs are already registered in the system, butare not given any description. In addition, any data TAG may be registered asan event. To register these, please continue as follows:• Delete all readings in the Pen by selecting• Click the TAG Information and a dialog box showing all registeredTAGs will appear. Click on the + to the left of Event, to show all eventTAGs already registered in the system.• Register the new event TAG into the Pen. Make sure that you write downthe intended meaning of each individual event TAG.• Select New and the following selection box will pop up:<strong>Scan</strong> <strong>Secure</strong> <strong>GTS</strong>5 User <strong>manual</strong> Issue 1 22.06.2009 Page 31 of 60
• Select Event as type and then Read Pen.• The Event TAG read into the Pen will now be presented at the bottom ofthe list. Type the intended meaning of the event strips in the Descriptionfield and continue to the next event strips.• Repeat the above until all event strips have been registered and described.• Finish by closing the dialog box. This will save all changes and new TAGs.<strong>Scan</strong> <strong>Secure</strong> <strong>GTS</strong>5 User <strong>manual</strong> Issue 1 22.06.2009 Page 32 of 60
8.5 Round - New with only new control points.When adding new TAGs to the system, ALWAYS FIRST give the TAGs a numberwritten ON the TAG itself, place them on a tape and then read them by using thePen. This is to avoid mixing the TAGs at a later stage.Be aware that the START TAG of each round is unique and cannot be used forother purposes as a unique start strips in the system. Once used, it cannot bereused. (Custom Report can be used without START TAG)To prepare each new round, determine how many control points/round data TAGsare to be in the round, where they are to be placed and what number/name/description you want to give each control point in the round.Mark each control point TAG with its name and position and then proceedas described below. After the below operation, you mount the controlpoints TAGs according to their marking.• Delete all readings in the Pen by selecting• Register all the control point TAGs into the Pen. Make sure to start withthe “START TAG” of this round. This TAG will forever identify thestart of this round, and can’t be changed.• Select the Rounds Icon and then New Round.• The following dialog box will appear:• Enter a name and a description for the new round to be registered.• Press Read Pen.<strong>Scan</strong> <strong>Secure</strong> <strong>GTS</strong>5 User <strong>manual</strong> Issue 1 22.06.2009 Page 33 of 60
• The new round will appear in the left hand area of the dialog box.• The first TAG in the column is the START TAG. All the strips are shownin the order they where registered in the Pen. When you select Save, thefollowing dialog box will appear:• When all control points / TAGs are named and the round is OK, press Saveand the round will be saved.• If more rounds are to be registered, select Yes when prompted as shownbelow.<strong>Scan</strong> <strong>Secure</strong> <strong>GTS</strong>5 User <strong>manual</strong> Issue 1 22.06.2009 Page 34 of 60
• The Pen will now be cleared and ready for registering of the newround/data strips.• Repeat ALL above steps if further rounds are to be registered.• After the last round is registered, select No. The following dialog box willthen appear, maybe without details for each round. Use the + to showthe details:• Click in the Description field of each new control point and enter adescription. The TAGs are shown in the order they where read into thePen, with the start TAG on top.• Repeat this for all new rounds registered and then select Close.• Then you must allocate the new control points to a map and then positionthe new control point on that map. Ref. chapters 8.13 TAG –Assigning to a map. 8.14 TAG - Moving on the section map.<strong>Scan</strong> <strong>Secure</strong> <strong>GTS</strong>5 User <strong>manual</strong> Issue 1 22.06.2009 Page 35 of 60
8.6 Round - New by including already registered TAGsWhen adding new TAGs to the system, ALWAYS FIRST give the TAGs a numberwritten ON the TAG itself, place them on a tape and then read them by using thePen. This is to avoid mixing the TAGs at a later stage.A round may also be established by using TAGs already registered in the systemand used by other rounds. The only unique TAG really needed is the STARTTAG. It is recommended to perform this only when all other data TAGs havebeen properly named and placed on the section maps to avoidmisunderstandings.• Delete all readings in the Pen by selecting• Register the new start TAG and the NEW Control point TAGs (that are notalready registered in the system), into the Pen• Select the Rounds Icon and then New Round.• The following dialog box will appear:All the control strips already registered and named in the system will bedisplayed in the right section of this dialog box.• Enter a name and a description for the new round to be registered.• Press Read Pen• The new START TAG and possible other NEW TAG, will now appear in theleft area of the dialog box.<strong>Scan</strong> <strong>Secure</strong> <strong>GTS</strong>5 User <strong>manual</strong> Issue 1 22.06.2009 Page 36 of 60
• Use your mouse and drag all relevant control TAGs that you also want tobe part of this new round, from the right window to the left window toestablish the new round. All other control points/TAGs registered in thesystem already are available, except those used as START TAG, GuardTAG or Event TAG.• When the round is OK, press Save and the round will be saved and youwill get the following. Select No:• After the last round is registered, select No. The following dialog box willthen appear, maybe without details for each round. Use the + to showthe details:<strong>Scan</strong> <strong>Secure</strong> <strong>GTS</strong>5 User <strong>manual</strong> Issue 1 22.06.2009 Page 37 of 60
• Click in the Description field of each new control point and enter adescription. The TAGs are shown in the order they where read into thePen, with the start TAG on top.• Then you must allocate the new control points to a map and then positionthe new control point on that map. Ref. chapters 8.13 TAG –Assigning to a map. 8.14 TAG - Moving on the section map.•8.7 Battery – Change.ProxiPen - the battery may be replaced by any NON-RECHARGEABLE 1,5V AAsize battery. When getting the message to replace battery whilst downloadingfrom the DAU, perform the battery replacement as soon as possible after themessage in order to maintain uninterrupted functionality.NB! The unit must not be left without battery for more than 2 minutes!If so, the unit goes into boot mode as a safety precaution and must be reset byAdministrator by syncronizing the pen. See chapter 8.8 Date & Timeadjustment of the Pen. or Ref. chapters 12.1 Trouble ShootingBlueCard Pen, - the battery may be replaced by a NON-RECHARGEABLECR123A 3v Lithiumbattery which can be obtained from <strong>Scan</strong> <strong>Secure</strong> togetherwith seals and labels needed. The battery is easily replaced by using a specialtool.<strong>Scan</strong> <strong>Secure</strong> <strong>GTS</strong>5 User <strong>manual</strong> Issue 1 22.06.2009 Page 38 of 60
8.8 Date & Time adjustment of the Pen.To enable setting or adjustment of the Pen time and date, you must be logged inas an administrator.Then select Security -> Manage and press the button Sync. This will synchronizeyour Pen with the date and time of your computer. Also to be used for changingbetween “ Daylight Saving Time” & Standard time8.9 Proxi Pen - out of the Boot mode.Whenever the Proxi Pen is left without battery for a while, or you receive a newunit, the Proxi Pen is in a safety mode called “Boot mode”. The Proxi Pen will inthis mode, not read data strips nor function properly.To get the Proxi Pen out of the Boot Mode, log in as an Administrator and performthe following:Select Security -> Manage and press the button Sync. This will synchronize yourProxi Pen with the date and time of your computer. Ref. Above picture.<strong>Scan</strong> <strong>Secure</strong> <strong>GTS</strong>5 User <strong>manual</strong> Issue 1 22.06.2009 Page 39 of 60
8.10 Section maps - Add more:• Select Map -> Information• The following dialog box will appear:• Select Add Map and get the map file and enter a name for the new map inthe dialog box shown below..• Repeat this procedure until all relevant maps are registered.<strong>Scan</strong> <strong>Secure</strong> <strong>GTS</strong>5 User <strong>manual</strong> Issue 1 22.06.2009 Page 40 of 60
8.11 Section map - move to the appropriate position:The section maps are to be placed on the main profile map as a graphical area.When you select the main profile map, you will see a grey area in the uppersection of this map.Do as follows:• Right click with your mouse on the grey area in upper left corner, andselect move to enable moving of all the section maps.• Point on the grey area with your mouse. The name of the map willappear. Left click and keep pressed while moving the grey area to thecorrect position. Drag the moved grey area until it gets the size andshape of the area on the main profile map that this section map covers.• Move your mouse back to the grey area in the upper section of the mainprofile map and repeat the above procedure for this new section map.• Repeat until all section maps are positioned on the main profile map. (Nomore grey areas in the upper section of the main profile map)• Point your mouse on any grey area and right click. Select Move again todisable the move function for all the new section maps.<strong>Scan</strong> <strong>Secure</strong> <strong>GTS</strong>5 User <strong>manual</strong> Issue 1 22.06.2009 Page 41 of 60
8.12 Control points – Editing description.The Control Point description may be edited in two ways. By entering the roundsdetail, in which the control point is included, see below, or in the TAG informationdialog box.8.12.1. TAG - Editing in the Rounds registered dialog box• Select the Rounds Icon . The below dialog box will appear:• Press + for the round you want to work with, to get details.• Click in the Description field of the applicable Control Point, and theDescription may now be altered.<strong>Scan</strong> <strong>Secure</strong> <strong>GTS</strong>5 User <strong>manual</strong> Issue 1 22.06.2009 Page 42 of 60
8.12.2. TAG Information - Editing in the dialog box.• Select the TAG Information Icon and the following dialog box willappear.• Click in the Description field and enter or alter the description.<strong>Scan</strong> <strong>Secure</strong> <strong>GTS</strong>5 User <strong>manual</strong> Issue 1 22.06.2009 Page 43 of 60
8.13 TAG – Assigning to a map.When all new data TAGs have been registered into the system, they must bepositioned on a section map.• Select the TAG Information and then select the TAG.The following dialog box and tree will appear:• Press the arrow to the right of the Map area. A list of registered Maps willbe displayed. Please see the picture above.• Select the appropriate section map for this control point.• Select the next control strips and do the same as above.• When all new data TAGs are attached to a section map, close the Roundsinfo window. This will save all changes.<strong>Scan</strong> <strong>Secure</strong> <strong>GTS</strong>5 User <strong>manual</strong> Issue 1 22.06.2009 Page 44 of 60
8.14 TAG - Moving on the section map.• Select a section map on the main profile map.• All new control points relevant to this map will be placed in the upper leftcorner of this section map.• By pointing on the green square, the description of this control point willappear.• Right click on the control point and select Move.• Move the control point to the appropriate position.• Right click again and deselect Move.• Repeat the last 4 above steps until all control points for this section maphave been repositioned.• Repeat all the above steps until all control points have been positioned onall the section maps.<strong>Scan</strong> <strong>Secure</strong> <strong>GTS</strong>5 User <strong>manual</strong> Issue 1 22.06.2009 Page 45 of 60
8.15 TAG - Allocating a control TAG to a roundWhen one or more new control TAGs have been registered in the system,described and positioned on a section map, it is time to allocate it to one or morerounds. (This may have been done when registered, depending on the way youregistered the new Tag)• Select the TAG Information and select one of the TAGs in the list.The following dialog box will appear:• Click the arrow in the “Rounds” area. A list of registered rounds willappear.• Select one or more rounds in which this TAG shall be included.• Repeat for all TAGs to be allocated to a round, then Close. This will saveall changes.<strong>Scan</strong> <strong>Secure</strong> <strong>GTS</strong>5 User <strong>manual</strong> Issue 1 22.06.2009 Page 46 of 60
8.16 TAG – Activating and de-activating.In <strong>GTS</strong>5, activating and deactivating of the different control points has beenmade very easy. It may be done via the TAG Information Icon andthereby ticked on/off in the dialog box directly, or you may select the RoundsRegistered Iconup as shown below., and a list of all rounds registered in the system will popSelect the appropriate round and a detailed list of all the control points allocatedto this round will appear. In this list, simply unselect the control point to make itin-active or vice versa if the control point already is de-activated. See theexample below:Please observe the following:The rounds downloaded from the Pen will always be compared with thecurrent list of active control points in a round and reports generatedaccordingly.A de-activated control point will not be shown on the detail map.If a control point which is already flashing red, is set in-active, the controlpoint will not be shown on the detail map, but the map itself will still beflashing red!• NB! Remember that a control point may be part of several rounds. If setin-active, this will be applicable for all the rounds where this control pointis included.<strong>Scan</strong> <strong>Secure</strong> <strong>GTS</strong>5 User <strong>manual</strong> Issue 1 22.06.2009 Page 47 of 60
8.17 Objects - Create new (Dependant on your License)In the <strong>GTS</strong>5 C Edition, it is possible to have multiple objects. Each control pointTAG and event TAG may be assigned to a Client or Object.It is only possible to create new objects from the TAGs Information box!How to create an object:• Select to get the below dialog box, and select the TAG you want toassign or allocate to a client or object. The following dialog box willappear:• Click the arrow in the “Related to Object” area. (None) will appear.• Write in your Object name by replacing (None)• If you want to create another object, repeat the procedure above. Thismay be done on any other control point or event TAG, or it may be doneon the same control point/event TAG.• The control point is now assigned to the object you just last registered.• All other control points or event TAGs may be assigned to any of theregistered objects by clicking the arrow in the “Related to Object” area andselecting from the list that appears.<strong>Scan</strong> <strong>Secure</strong> <strong>GTS</strong>5 User <strong>manual</strong> Issue 1 22.06.2009 Page 48 of 60
8.18 Objects - Editing (Dependant on your License)All objects are related to each marker TAG. If you want to edit an object name,you must proceed as follows:• Edit the object in one of the markers where it is used.• A new object is now generated with the edited name, the old object is stillin the list.• Go to all other markers using the old object name and select the editedobject.• When all the markers are assigned to the new object, the old object willdisappear.8.19 Objects – List (Dependant on your Licence)A list of all objects currently registered and in use in the system, is available by:• Press the Objects Icon• The below dialog box will appear:• From this box you may only print the list. Editing, creating new objectsand other functions may only be done from the TAG Information dialogbox.<strong>Scan</strong> <strong>Secure</strong> <strong>GTS</strong>5 User <strong>manual</strong> Issue 1 22.06.2009 Page 49 of 60
9 USERS AND DATA MAINTENANCE9.1 User – Adding newTo be able to maintain the <strong>user</strong> database, back-up and restore your data, somefacilities are built into the <strong>GTS</strong> <strong>Software</strong>. To access these, select Security ->Manage.The following dialog box will appear:Here you can add <strong>user</strong>s with different security levels. The program comes withone Administrator, which has the highest security level.If you add a <strong>user</strong> with <strong>user</strong> level 3, he will not get access to the features withlevel 2 or 1. You can also change the security level for any of the type listed inthe Security features section.NOTE: Make sure at least one <strong>user</strong> has security level 1, because only a <strong>user</strong> withlevel 1 get access to the security management features.In this dialog box, you will also be able to select the correct COM port and thetype of DAU.In the upper right corner of this dialog box, you will find a button named Sync.By pressing this button, the time and date of your computer is transferred to theDAU.This will also bring any Proxy Pen out of the boot mode.<strong>Scan</strong> <strong>Secure</strong> <strong>GTS</strong>5 User <strong>manual</strong> Issue 1 22.06.2009 Page 50 of 60
9.2 Data – Maintenance & Back-up.Pressing the Database Maintenance, will bring up the following dialog box:Here you may Back-up your database by pressing Back-up now. (The back-upwill be named automatically with the current date. If more back-ups are done onthe same day, the old back-up will be over written by the new back-up)There will be automatic back-ups generated for every hour, day, week andmonth.You may also restore the database from the selected back-up file.Old data may be deleted by entering a date and the pressing Delete. You will beasked if you want to back-up the database first, and in any case, a HTMdocument of the deleted data will be stored automatically.NB! If you want to delete a significant amount of old data, it isrecommended to do this in steps. Otherwise the HTM document will behuge!!The date format must be written in the same format as set on yourcomputer in Regional Settings!<strong>Scan</strong> <strong>Secure</strong> <strong>GTS</strong>5 User <strong>manual</strong> Issue 1 22.06.2009 Page 51 of 60
10 Other information about the <strong>GTS</strong> software functionality.10.1 Dates.All finished rounds and the control points included, will be with the correct timeand dates.10.2 Dialog boxesWhen reading the DAU, a status boxes will indicate what is going on and whattasks the program is performing.10.3 Com port selectionThe correct COM port may be selected by Security -> Manage and then selectingthe appropriate COM port.10.4 Pen selectionThe correct type of Pen may be selected by Security -> Manage and thenselecting the appropriate Pen type. Please note that some versions of Windowsrequire the PC to be restarted before change of Pen type is effective.<strong>Scan</strong> <strong>Secure</strong> <strong>GTS</strong>5 User <strong>manual</strong> Issue 1 22.06.2009 Page 52 of 60
11 Daily usage of the <strong>GTS</strong>511.1 Routines for the GuardMost daily <strong>user</strong>s does only need to be able to download the Pen, delete thedownloaded data and to see the status and the reports. If you create Users inthe <strong>GTS</strong> with a security level lower than the top (i.e. 2 or 3), the will only havethe following soft keys to operate:The daily use will the consist of the following routine:1. For every Guard Tour. Register the Guard TAGs (If applicable. Ref.Chapter 7.2Guard TAG functionality settings), the Start TAG andthen all control points.2. Repeat the above for all Guard Tours to be performed beforeregistering the data in the PC.3. Make sure the rounds are as complete as possible.4. Put the Pen in the Com. Unit and select the Read Pen soft key.5. Select ”Start reading” and pay attention to the PC screen..6. If the download was successful, select ”Yes” to delete the data in thePen if asked (Ref. Chapter 7.1 Pen functionality settings).7. When the readings have been registered in the database, areas whereall control points have been registered on all rounds will remain grey.8. Areas including one or more unregistered control points in one or moreof the guard tours, will start flashing red.9. If you have this access, double click on that area.10. Unread control points will now flash red.11. Right click this control point and reset the red status by selectingAccept.12. It is recommended to write a comment a report after each time around is finished. Open Finished Roundscomment in details events and missing Tags.last round on top. Then<strong>Scan</strong> <strong>Secure</strong> <strong>GTS</strong>5 User <strong>manual</strong> Issue 1 22.06.2009 Page 53 of 60
Routines for the SupervisorDaily usage of the <strong>GTS</strong>, when installed and configurated correctly, should be verysimple. Below you will find some hints about configuration and daily use:• Guards using the system should not have Administrator access to thesystem. Do instead create a new <strong>user</strong> level for these guards, if the defaultone does not match your wishes.• Back-up the database file on a regular basis. SEE CHAPTER 9.2 Data– Maintenance & Back-up.1 Open every Section map that is flashing RED.2 Right click on the flashing red control point and Accept it or…3 Click the flashing red control point, select More in the dialog box and studythe control point history in the Marker dialog box. You may Accept thestatus by double clicking in the status field if you have the access to thisfunction.4 Look at all Finished Rounds, look for details and/or print the reports.IT IS ADVISED NOT TO HAVE TOO MANY ROUNDS REGISTERED IN THEPEN BEFORE DOWNLOADING.THE SYSTEM CAN TAKE IT, BUT IT MAY TAKE SOME TIME TO PROCESSALL ROUNDS, ESPECIALLY ON COMPUTERS WITH A LOWCLOCK/PROCESSOR FREQUENCY OR WITH A SMALL RAM CAPACITY.<strong>Scan</strong> <strong>Secure</strong> <strong>GTS</strong>5 User <strong>manual</strong> Issue 1 22.06.2009 Page 54 of 60
12 Trouble Shooting12.1 The ProxiPen does not register the TAGs.Whenever the Proxi Pen is left without battery for a while, or you receive a newunit, the Proxi Pen is in a safety mode called “Boot mode”. The Pen will in thismode, not read data strips nor function properly.To get the Proxi Pen out of the Boot Mode, log in as an Administrator and performthe following:Select Security -> Manage and press the button Sync. This will synchronize yourDAU with the date and time of your computer. Ref. Below picture.12.2 BlueCard Does not register TAGsPlease Se Blue card <strong>manual</strong>…….<strong>Scan</strong> <strong>Secure</strong> <strong>GTS</strong>5 User <strong>manual</strong> Issue 1 22.06.2009 Page 55 of 60
12.3 No Communication between Pen and ComputerThere may be several reasons why the <strong>GTS</strong> software does not communicate withthe PenProxyPen - Please always check the following: Does the Pen indicate reading with both LEDs and sound?o If NO, change battery With the Pen in the Communication unit, which LEDs are lit?o No Power LED. - Check the mains connection and the adapter.o No Online LED. - Check the cable between the Com. Unit and theUSB/RS232 port of your computero No Pen LED – Check position of pen / Battery voltage of Pen is toolow. Replace. If both Power – Online & Pen LED is lit, try to read from the Pen andobserve the DATA LED.o If flashing, note down the error message and contact <strong>Scan</strong> <strong>Secure</strong>aso If not flashing, check COM port connection, the selection of COMports as shown above in 12.1BlueCard - Please always check the following: Does the Pen indicate reading with both LEDs and sound?o If NO, change battery With the Pen in the Communication unit, which LEDs are lit?o Red LED upper left – Power / OnLineo Green LEDs flashing – Transfering Data If Red LED is not lit –o Check cableo Check COM port connectiono Is driver installed? If the green LEDs is not flashingo Check cableo Check COM port connectiono Is driver installed?o Check position of Pen Se Blue card <strong>manual</strong> for more information12.4 Contact <strong>Scan</strong> <strong>Secure</strong>If support is needed from <strong>Scan</strong> <strong>Secure</strong>, please prepare the following first: A short report of what is wrong and what you have done Copy the errlog.txt file from C:\Programfiles/<strong>Scan</strong> <strong>Secure</strong> <strong>GTS</strong>5…\ andhave it ready to be mailed. Copy the last back-up file from C:\Programfiles/<strong>Scan</strong> <strong>Secure</strong> <strong>GTS</strong>5…\ orfor network versions, -Server location-/<strong>Scan</strong> <strong>Secure</strong> <strong>GTS</strong>…\Database\ andhave it ready to be mailed. (Zipping down this file before mailing ispreferred)Contact <strong>Scan</strong> <strong>Secure</strong> as on:Tel: +47 3303 0550Fax: +47 3303 0558E-mail: scan@secure.no<strong>Scan</strong> <strong>Secure</strong> <strong>GTS</strong>5 User <strong>manual</strong> Issue 1 22.06.2009 Page 56 of 60
13 Custom ReportsCustom Reports is an additional module in the <strong>GTS</strong>, developed to give increasedflexibility. With the Custom Reports module, you may customize your recordedreadings and data, according to your company, application, customers and needs.Columns may be added, re-arranged, re-named etc. This also applies for thereport generator.Typical applications for the Custom Reports, are: Guarding companies, HMStasks, technical inspections, fire and safety tours etc…The setup may be customized for your company, but default templates will beavailable to get you started. (At the moment, only a Gurading company templateis available)13.1 How to use the columns – Guarding company examplePress TAGs Information, and the below window will be opened. (The column textmay be different for each application, so the header text is for guidance only):1. Rounds: Here you may describe the type of tour you are to perform. I.e.Night tour, Shopping center, Emergency lights, Fire dampers, Emergencyexits etc…2. Customers: The name of the customer for this tour3. Object: In this column, you type in the various objects related to acustomer. It may be a building, or a shop in a shopping center. Acustomer may have several objects.4. Details: Detailed description of the object. I.e. where the TAG ispositioned.5. Read frequency: In this column, the expected read frequency for theTAG can be set. Blank is no expectations, 1 is every day, 2 is everysecond day and so on.Setupexample12This forms a basis setup in <strong>GTS</strong> Custom Reports. It is possible to create morecolumns, if you want to include more information. To add more columns, rightclick in the Description field of the column (1) and select ”Column chooser” (2)Click and drag the columns you want over to the column area and name it asdesired. To remove a column, click it and drag it out of the column area.<strong>Scan</strong> <strong>Secure</strong> <strong>GTS</strong>5 User <strong>manual</strong> Issue 1 22.06.2009 Page 57 of 60
When you have a suitable setup, you may store this setup by selecting the Savebutton and name the setup as you want. Several setups may be created andstored.NB! What is created on Administrator level, can not be changed by alower level <strong>user</strong>.13.2 Report generatorBy clicking the CustomReport button you will find a similar setup as underTAGS Information. This is the report module in <strong>GTS</strong> when you have the CustomReports module, and is used to generate reports based upon the recordedreadings and data.PS! You need to have readings in the database to create a report.Example:15234The report generator enables filtering of data and information, so that only thewanted and applicable information, is contained in the report.In the upper right corner of each column description (1) you will find a small pulldown menu (2) that shows the filtering possibilities for that column. I.e., under”Vakt” you will find a list of all the guards registered in the <strong>GTS</strong>. By ticking off inthe box adjacent to the applicable guards (3), the report will only show theselected guards.The same applies for all columns, and you may create reports based upon andsorted/filtered on all data contained in all columns. A very flexible solution.If you filter too much, or are unable to get back to the standard setup, you mayselect the red cross in the lower left corner (4) This will undo all filteringselections and you are back to default.Once you have finished your report setup, you may store this setup for later use.Press the Save button (5) and name the report setup. Several setups may bestored and recalled later.NB! What is created on Administrator level, can not be changed by alower level <strong>user</strong>.<strong>Scan</strong> <strong>Secure</strong> <strong>GTS</strong>5 User <strong>manual</strong> Issue 1 22.06.2009 Page 58 of 60
14 P<strong>AS</strong>P<strong>AS</strong> (Personnel Attendance System) is a module in the <strong>GTS</strong> software, foradministration and handling of personnel. It may be used as a separateapplication, or as an addition to the existing <strong>GTS</strong> solution.Example5 231 4The main window in P<strong>AS</strong>, shows a list of all personnel registered in the system.14.1 New:To create a new registration of a person, select ”New” (1) og inputs relevantinformation in the new row. In the column “State” (2) input the current state ofthe person. (In or out) A personal photo may be entered by clicking the pictureIcon in the Photo column (3) and the right click for the appropriate selection.14.2 Delete:To delete a registered person, select the applicable row and click ”Delete” (4) Theperson will now change status from active to deleted, and will no longer be visiblein the main window.Persons deleted in the system, will not be permanently deleted from thedatabase, but will be saved as inactive. They may be activated again at anytime. Just click the “Deleted” (5) button and select the applicable person andchange the status back to active.14.3 Read mode:This function brings up and displays information connected to the ID-card that isbeing read. In addition to the name and a photo, this window gives a list of thelatest readings.ExampleThis information may be used to control that the information (and person on thephoto) is the same as the person passing..<strong>Scan</strong> <strong>Secure</strong> <strong>GTS</strong>5 User <strong>manual</strong> Issue 1 22.06.2009 Page 59 of 60
14.4 ID Cards:This button opens the ID-card designer. Here you may easily create new <strong>user</strong>s inthe system.Example52164 3Insert the necessary information in the white fields (1) To add a photo, right clickin the photo frame (2) and select the applicable function.Fonts and size, may be changed by right clicking in the appropriate area (1) andselecting ”Fonts”. This menue also gives access to other functions for that area.To change the background image, click Set (3) and select the wantedbackground.In addition, you may add additional fields and areas. I.e. company logo etc. Byclicking “Customize cardlayout” (4) you get access to a window with availablefunctions. Click and drag the wanted function to the main window to add.When the card layout is as you want it, you may save it for later use (5) To printthe card, you need to have an ID-card printer installed and connected. Click“Print” (6) and the ID-card is previewed. Click the printer Icon to print on theID-card printer.14.5 Important buttons and columns:New: Used to create a new entry.Delete: Sets the selected as inactive.Last read: Shows when the person was last registered by the system.Checked: Number of times the person has been registered by the system.Refresh: Updates the window with the latest registrations.Read Mode: Shows information related to the card being read.ID Cards: Opens the ID-card designer.<strong>Scan</strong> <strong>Secure</strong> <strong>GTS</strong>5 User <strong>manual</strong> Issue 1 22.06.2009 Page 60 of 60