Siemens Gigaset C475IP - C47 User Manual (PDF) - VoIPon.co.uk
Siemens Gigaset C475IP - C47 User Manual (PDF) - VoIPon.co.uk
Siemens Gigaset C475IP - C47 User Manual (PDF) - VoIPon.co.uk

Create successful ePaper yourself
Turn your PDF publications into a flip-book with our unique Google optimized e-Paper software.
Issued by<br />
<strong>Siemens</strong> Home and Offi ce Communication Devices GmbH & Co. KG<br />
Schlavenhorst 66<br />
D-46395 Bocholt<br />
© <strong>Siemens</strong> Home and Offi ce Communication Devices GmbH & Co. KG 2007<br />
All rights reserved. Subject to availability.<br />
Rights of modifi cation reserved.<br />
www.siemens.<strong>co</strong>m/gigaset<br />
s<br />
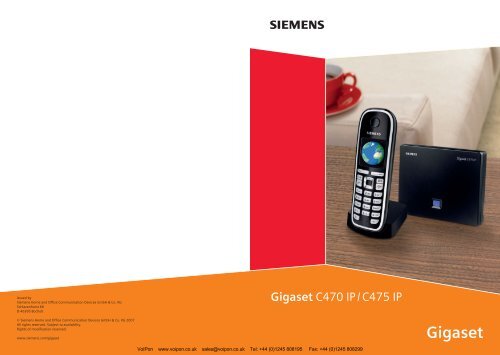
<strong>Gigaset</strong> <strong>C47</strong>0 IP / <strong>C47</strong>5 IP<br />
<strong>VoIPon</strong> www.voipon.<strong>co</strong>.<strong>uk</strong> sales@voipon.<strong>co</strong>.<strong>uk</strong> Tel: +44 (0)1245 808195 Fax: +44 (0)1245 808299<br />
<strong>Gigaset</strong>
The handset at a glance<br />
17<br />
16<br />
15<br />
14<br />
13<br />
12<br />
11<br />
10<br />
9<br />
8<br />
Ð Ã V<br />
INT 1<br />
15.11.07 09:45<br />
INT SMS<br />
1<br />
2<br />
Handset keys<br />
1 Display in idle status (example)<br />
2 Charge status of the batteries<br />
e V U (1/3 charged to fully charged)<br />
= flashes: batteries almost flat<br />
e V U flashes: batteries charging<br />
3 Display keys (page 33)<br />
4 Message key<br />
Opens calls and message lists<br />
Flashes: new message or new call<br />
5 End call key, On/Off key<br />
End call, cancel function, go back one menu<br />
level (press briefly), back to idle status (press<br />
and hold), activate/deactivate handset<br />
(press and hold in idle status)<br />
3<br />
4<br />
5<br />
6<br />
7<br />
The handset at a glance<br />
6 Hash key<br />
Keypad lock on/off (press and hold,<br />
page 31)<br />
Switch between upper/lower case letters<br />
and digitsfor text input (page 160)<br />
7 Call-by-call list key (not for VoIP)<br />
Open call-by-call list<br />
8 Microphone<br />
9 Recall key<br />
Fixed line network:<br />
enter flash (press briefly)<br />
insert a pause (press and hold)<br />
VoIP: enter Flash (adjustable, page 133)<br />
10 Star key<br />
Idle status: ringer tones on/off (press and<br />
hold)<br />
Fixed line network: switch between dial<br />
pulsing/touch tone dialling<br />
Editor: open special characters table<br />
11 Connection socket for headset (page 21)<br />
12 Key 1 (press and hold)<br />
Answer machine (<strong>Gigaset</strong> <strong>C47</strong>5 IP only)/<br />
call network mailbox<br />
13 Talk key<br />
Accept call, open last number redial list<br />
(press briefly in idle status), select <strong>co</strong>nnection<br />
type and start dialling (press briefly/<br />
press and hold after entering the number,<br />
page 26)<br />
SMS editor: send SMS<br />
14 Handsfree key<br />
Change between speaker/handsfree mode<br />
Lights up: handsfree talking activated<br />
Flashes: in<strong>co</strong>ming call<br />
15 Control key (page 32)<br />
16 Answer machine i<strong>co</strong>n<br />
(<strong>Gigaset</strong> <strong>C47</strong>5 IP)<br />
Answer machine switched on;<br />
Flashes: answer machine is re<strong>co</strong>rding a message<br />
or is being operated by another internal<br />
party<br />
17 Signal strength<br />
Ò Ñ i (low to high)<br />
| flashes: no reception<br />
<strong>VoIPon</strong> www.voipon.<strong>co</strong>.<strong>uk</strong> sales@voipon.<strong>co</strong>.<strong>uk</strong> Tel: +44 (0)1245 808195 Fax: +44 (0)1245 808299<br />
1
The base station at a glance<br />
The base station at a glance<br />
1<br />
Base station key<br />
1 Paging key<br />
Lights up:<br />
LAN <strong>co</strong>nnection active (phone is <strong>co</strong>nnected<br />
to router)<br />
Flashes:<br />
data transfer to LAN <strong>co</strong>nnection<br />
Press briefly:<br />
start paging (page 89), display IP address on<br />
handset<br />
Press and hold:<br />
set base station to registration mode<br />
(page 88)<br />
2<br />
<strong>VoIPon</strong> www.voipon.<strong>co</strong>.<strong>uk</strong> sales@voipon.<strong>co</strong>.<strong>uk</strong> Tel: +44 (0)1245 808195 Fax: +44 (0)1245 808299
Contents<br />
The handset at a glance . . . . . . . . 1<br />
The base station at a glance . . . . 2<br />
Safety precautions . . . . . . . . . . . . 6<br />
<strong>Gigaset</strong> <strong>C47</strong>0 IP/<strong>C47</strong>5 IP –<br />
More than just a telephone . . . . . 8<br />
VoIP –<br />
making calls via the Internet . . . . 9<br />
First steps . . . . . . . . . . . . . . . . . . . 10<br />
Pack <strong>co</strong>ntents . . . . . . . . . . . . . . . . . . . 10<br />
Setting up the handset for use . . . . . . 10<br />
Installing the base station . . . . . . . . . 13<br />
Connecting the base station . . . . . . . 14<br />
Making settings for VoIP telephony . . 16<br />
Belt clip and headset . . . . . . . . . . . . . 21<br />
Menu trees . . . . . . . . . . . . . . . . . . 22<br />
Phone menu . . . . . . . . . . . . . . . . . . . . 22<br />
Web <strong>co</strong>nfigurator menu . . . . . . . . . . . 25<br />
Making calls with VoIP and the<br />
fixed line network . . . . . . . . . . . . 26<br />
Making an external call . . . . . . . . . . . 26<br />
Ending a call . . . . . . . . . . . . . . . . . . . . 28<br />
Accepting a call . . . . . . . . . . . . . . . . . 29<br />
Calling Line Identification . . . . . . . . . 29<br />
Handsfree talking . . . . . . . . . . . . . . . . 30<br />
Muting the handset . . . . . . . . . . . . . . 31<br />
Operating the handset . . . . . . . . 31<br />
Activating/deactivating the handset . 31<br />
Activating/deactivating the<br />
keypad lock . . . . . . . . . . . . . . . . . . . . . 31<br />
Control key . . . . . . . . . . . . . . . . . . . . . 32<br />
Display keys . . . . . . . . . . . . . . . . . . . . 33<br />
Reverting to idle status . . . . . . . . . . . . 33<br />
Menu guidance . . . . . . . . . . . . . . . . . 34<br />
Correcting in<strong>co</strong>rrect entries . . . . . . . . 34<br />
VoIP telephony via <strong>Gigaset</strong>.net . 35<br />
Search for subscribers in the <strong>Gigaset</strong>.net<br />
directory . . . . . . . . . . . . . . . . . . . . . . . 36<br />
Entering, editing and deleting<br />
own entry . . . . . . . . . . . . . . . . . . . . . . 38<br />
Calling a <strong>Gigaset</strong>.net subscriber . . . . . 38<br />
Contents<br />
Network services – fixed line . . 39<br />
Settings for all calls . . . . . . . . . . . . . . . 39<br />
Functions during a call . . . . . . . . . . . . 40<br />
Network services – VoIP . . . . . . 41<br />
Settings for all calls . . . . . . . . . . . . . . . 41<br />
Functions during a call . . . . . . . . . . . . 42<br />
Using the directory and lists . . 43<br />
Directory/call-by-call list . . . . . . . . . . . 43<br />
Last number redial list . . . . . . . . . . . . 47<br />
Opening lists with the message key . . 48<br />
Making <strong>co</strong>st-effective calls . . . . 51<br />
SMS (text messages) . . . . . . . . . 52<br />
Writing/sending an SMS . . . . . . . . . . . 53<br />
Receiving an SMS . . . . . . . . . . . . . . . . 56<br />
Notification by SMS . . . . . . . . . . . . . . . 58<br />
SMS mailboxes . . . . . . . . . . . . . . . . . . 59<br />
Setting SMS centres . . . . . . . . . . . . . . 61<br />
SMS on a PABX . . . . . . . . . . . . . . . . . . 62<br />
Activating/deactivating SMS function . 62<br />
SMS troubleshooting . . . . . . . . . . . . . 62<br />
Operating the base station answer<br />
machine . . . . . . . . . . . . . . . . . . . 64<br />
Operation via the handset . . . . . . . . . 64<br />
Activating/deactivating call screening 69<br />
Setting up the answer machine . . . . . 70<br />
Resetting fast access for the<br />
answer machine using key 1 . . . . . . . 71<br />
Operating when on the move<br />
(remote operation) . . . . . . . . . . . . . . . 71<br />
E-mail notifications . . . . . . . . . . 73<br />
Opening the in<strong>co</strong>ming mail list . . . . . 73<br />
View the message header of<br />
an e-mail . . . . . . . . . . . . . . . . . . . . . . . 75<br />
View e-mail sender's address . . . . . . . 75<br />
Messenger . . . . . . . . . . . . . . . . . 76<br />
Establishing a <strong>co</strong>nnection,<br />
going online . . . . . . . . . . . . . . . . . . . . 77<br />
Changing/checking your personal status,<br />
going offline . . . . . . . . . . . . . . . . . . . . 78<br />
Opening the buddy list . . . . . . . . . . . . 79<br />
Receiving messages . . . . . . . . . . . . . . 81<br />
Writing and sending messages . . . . . . 83<br />
Calling a buddy . . . . . . . . . . . . . . . . . . 84<br />
Self-help with errors . . . . . . . . . . . . . . 85<br />
3<br />
<strong>VoIPon</strong> www.voipon.<strong>co</strong>.<strong>uk</strong> sales@voipon.<strong>co</strong>.<strong>uk</strong> Tel: +44 (0)1245 808195 Fax: +44 (0)1245 808299
Contents<br />
Using the network mailbox . . . . 86<br />
Configuring fast access for the network<br />
mailbox . . . . . . . . . . . . . . . . . . . . . . . . 86<br />
Network mailbox message . . . . . . . . . 87<br />
Using several handsets . . . . . . . . 88<br />
Registering handsets . . . . . . . . . . . . . 88<br />
De-registering handsets . . . . . . . . . . . 89<br />
Locating a handset ("paging") . . . . . . 89<br />
Changing a handset's internal number 90<br />
Changing the name of a handset . . . . 90<br />
Making internal calls . . . . . . . . . . . . . 91<br />
Using a handset as a room monitor . . 93<br />
Handset settings . . . . . . . . . . . . . 95<br />
Changing the display language . . . . . 95<br />
Setting the display . . . . . . . . . . . . . . . 95<br />
Setting the screen picture . . . . . . . . . 96<br />
Setting the display backlight . . . . . . . 96<br />
Quick access to functions . . . . . . . . . . 97<br />
Activating/deactivating<br />
auto answer . . . . . . . . . . . . . . . . . . . . 97<br />
Changing the handsfree/earpiece<br />
volume . . . . . . . . . . . . . . . . . . . . . . . . 98<br />
Changing ringer tones . . . . . . . . . . . . 99<br />
Activating/deactivating advisory<br />
tones . . . . . . . . . . . . . . . . . . . . . . . . . 100<br />
Setting the alarm clock . . . . . . . . . . . 101<br />
Restoring the handset to the factory<br />
settings . . . . . . . . . . . . . . . . . . . . . . . 102<br />
Base station settings . . . . . . . . 103<br />
Protecting against unauthorised<br />
access . . . . . . . . . . . . . . . . . . . . . . . . 103<br />
Restoring the base station to the<br />
factory settings . . . . . . . . . . . . . . . . . 103<br />
Activating/deactivating music<br />
on hold . . . . . . . . . . . . . . . . . . . . . . . 104<br />
Activating/deactivating repeater<br />
mode . . . . . . . . . . . . . . . . . . . . . . . . 104<br />
Setting the default <strong>co</strong>nnection . . . . 105<br />
Updating the base station firmware 105<br />
Making VoIP settings . . . . . . . 106<br />
Using the <strong>co</strong>nnection assistant . . . . 107<br />
Changing settings without the<br />
<strong>co</strong>nnection assistant . . . . . . . . . . . . . 107<br />
Setting the phone's IP address<br />
in LAN . . . . . . . . . . . . . . . . . . . . . . . . 109<br />
Activating/deactivating display of<br />
VoIP status messages . . . . . . . . . . . . 110<br />
Checking the base station MAC<br />
address . . . . . . . . . . . . . . . . . . . . . . . 110<br />
Operating the base station<br />
on the PABX . . . . . . . . . . . . . . . 111<br />
Changing the dialling mode . . . . . . . 111<br />
Setting recall . . . . . . . . . . . . . . . . . . . 111<br />
Setting pauses . . . . . . . . . . . . . . . . . . 111<br />
Switching temporarily to touch tone<br />
dialling (DTMF) . . . . . . . . . . . . . . . . . 112<br />
Web <strong>co</strong>nfigurator . . . . . . . . . . . 113<br />
Configuring the phone via your PC . . 113<br />
Connecting PC with Web<br />
<strong>co</strong>nfigurator . . . . . . . . . . . . . . . . . . . 113<br />
Logging in, setting the Web <strong>co</strong>nfigurator<br />
language . . . . . . . . . . . . . . . . . . . . . . 114<br />
Logging off . . . . . . . . . . . . . . . . . . . . 114<br />
Structure of the Web pages . . . . . . . 115<br />
Opening Web pages . . . . . . . . . . . . . 117<br />
Setting phone with<br />
Web <strong>co</strong>nfigurator . . . . . . . . . . . . . . . 117<br />
IP Configuration . . . . . . . . . . . . . . . . 118<br />
Configuring telephone <strong>co</strong>nnections . 120<br />
Optimising voice quality for<br />
VoIP <strong>co</strong>nnections . . . . . . . . . . . . . . . . 127<br />
Assigning send and receive numbers to<br />
handsets . . . . . . . . . . . . . . . . . . . . . . 130<br />
Assigning answer machine receive<br />
numbers (<strong>Gigaset</strong> <strong>C47</strong>5 IP) . . . . . . . . 131<br />
Call Forwarding to activate<br />
VoIP <strong>co</strong>nnections . . . . . . . . . . . . . . . . 132<br />
Setting DTMF signalling for VoIP . . . 132<br />
Defining recall key functions for VoIP<br />
(hook flash) . . . . . . . . . . . . . . . . . . . . 133<br />
Defining local <strong>co</strong>mmunication ports<br />
for VoIP . . . . . . . . . . . . . . . . . . . . . . . 133<br />
Configuring call forwarding via VoIP 134<br />
Setting Area Code Predialling . . . . . . 134<br />
Defining dialling plans –<br />
<strong>co</strong>st <strong>co</strong>ntrol . . . . . . . . . . . . . . . . . . . . 135<br />
Loading and deleting directories to/<br />
from the PC . . . . . . . . . . . . . . . . . . . . 137<br />
Saving messenger access data . . . . . 139<br />
Making e-mail settings . . . . . . . . . . . 141<br />
4<br />
<strong>VoIPon</strong> www.voipon.<strong>co</strong>.<strong>uk</strong> sales@voipon.<strong>co</strong>.<strong>uk</strong> Tel: +44 (0)1245 808195 Fax: +44 (0)1245 808299
Activating/deactivating info services 142<br />
Defining the server for firmware updates,<br />
starting the update . . . . . . . . . . . . . . 142<br />
Activating/deactivating the automatic<br />
version check . . . . . . . . . . . . . . . . . . 143<br />
Activating VoIP status message<br />
display . . . . . . . . . . . . . . . . . . . . . . . . 144<br />
Copy date and time from time server 144<br />
Querying the phone status . . . . . . . 145<br />
Appendix . . . . . . . . . . . . . . . . . 146<br />
Care . . . . . . . . . . . . . . . . . . . . . . . . . 146<br />
Contact with liquid . . . . . . . . . . . . . 146<br />
Questions and answers . . . . . . . . . . 146<br />
Checking service information . . . . . 153<br />
Service (Customer Care) . . . . . . . . . 154<br />
Authorisation . . . . . . . . . . . . . . . . . . 155<br />
Warranty certificate . . . . . . . . . . . . . 155<br />
Specifications . . . . . . . . . . . . . . . . . . 156<br />
I<strong>co</strong>ns . . . . . . . . . . . . . . . . . . . . . . . . . 157<br />
Example of a menu input . . . . . . . . . 158<br />
Example of multiple line input . . . . . 159<br />
Writing and editing text . . . . . . . . . . 160<br />
<strong>Gigaset</strong> <strong>C47</strong>0 IP/<strong>C47</strong>5 IP –<br />
Free software . . . . . . . . . . . . . . . . . . 162<br />
Accessories . . . . . . . . . . . . . . . 169<br />
Glossary . . . . . . . . . . . . . . . . . . 172<br />
Index . . . . . . . . . . . . . . . . . . . . . 184<br />
Contents<br />
5<br />
<strong>VoIPon</strong> www.voipon.<strong>co</strong>.<strong>uk</strong> sales@voipon.<strong>co</strong>.<strong>uk</strong> Tel: +44 (0)1245 808195 Fax: +44 (0)1245 808299
Safety precautions<br />
Safety precautions<br />
Warning:<br />
Read the safety precautions and the user guide before use.<br />
Explain their <strong>co</strong>ntents and the potential hazards associated with using the telephone to your children.<br />
$<br />
ƒ<br />
Only use the mains adapter supplied, as indicated on the underside of the base<br />
station or charging cradle.<br />
Only use the re<strong>co</strong>mmended, rechargeable batteries (page 156), i.e. never<br />
use a <strong>co</strong>nventional (non-rechargeable) battery or other battery types as this<br />
<strong>co</strong>uld result in significant health risks and personal injury.<br />
Batteries should not be disposed of in general household waste. Observe the<br />
local waste disposal regulations, details of which can be obtained from your<br />
local authority or the dealer you purchased the product from.<br />
The operation of medical appliances may be affected. Be aware of the technical<br />
<strong>co</strong>nditions in your particular environment, e.g. doctor's surgery.<br />
Do not hold the rear of the handset to your ear when it is ringing or when the<br />
handsfree function is activated. Otherwise you risk serious and permanent damage<br />
to your hearing.<br />
The handset may cause an unpleasant humming noise in hearing aids.<br />
Do not install the base station or charging cradle in bathrooms or shower rooms.<br />
The handset, base station and charging cradle are not splashproof (page 146).<br />
Do not use the phone in environments with a potential explosion hazard,<br />
e.g. paint shops.<br />
If you give your <strong>Gigaset</strong> to someone else, make sure you also give them the user<br />
guide.<br />
Please remove faulty base stations from use or have them repaired by <strong>Siemens</strong><br />
Service, as they <strong>co</strong>uld interfere with other wireless services.<br />
All electrical and electronic equipment must be disposed of separately from general<br />
household waste using the sites designated by local authorities.<br />
If a product displays this symbol of a crossed-out rubbish bin, the product is subject<br />
to European Directive 2002/96/EC.<br />
The appropriate disposal and separate <strong>co</strong>llection of used equipment serve to<br />
prevent potential harm to the environment and to health. They are a requirement<br />
for the re-use and recycling of used electrical and electronic equipment.<br />
For further information on disposing of your used equipment, please <strong>co</strong>ntact<br />
your local authority, your refuse <strong>co</strong>llection service or the dealer you purchased<br />
the product from.<br />
6<br />
<strong>VoIPon</strong> www.voipon.<strong>co</strong>.<strong>uk</strong> sales@voipon.<strong>co</strong>.<strong>uk</strong> Tel: +44 (0)1245 808195 Fax: +44 (0)1245 808299
Warning:<br />
When the keypad lock is active, you cannot call emergency numbers.<br />
Please note:<br />
Not all of the functions described in this user guide are available in all <strong>co</strong>untries.<br />
Safety precautions<br />
<strong>VoIPon</strong> www.voipon.<strong>co</strong>.<strong>uk</strong> sales@voipon.<strong>co</strong>.<strong>uk</strong> Tel: +44 (0)1245 808195 Fax: +44 (0)1245 808299<br />
7
<strong>Gigaset</strong> <strong>C47</strong>0 IP/<strong>C47</strong>5 IP – More than just a telephone<br />
<strong>Gigaset</strong> <strong>C47</strong>0 IP/<strong>C47</strong>5 IP – More than just a telephone<br />
Your phone lets you make calls both via the fixed line network and (<strong>co</strong>st effectively) via the<br />
Internet (VoIP) without using a PC. – Your phone can do much more besides:<br />
u Press a button each time you make a call to indicate whether you want to call via the<br />
fixed line network or the Internet (page 26).<br />
u Register up to six handsets on your base station. With your base station, you can simultaneously<br />
<strong>co</strong>nduct two calls via VoIP and one call via the fixed line network.<br />
u Multiline: Create up to six VoIP ac<strong>co</strong>unts with different VoIP providers. Together with<br />
your fixed line number and the <strong>Gigaset</strong>.net number, your phone can then be reached<br />
via up to eight different phone numbers.<br />
u Assign each handset its own VoIP number as a send and receive number. If a member<br />
of your family is called on their VoIP number, only their handset will ring (page 130).<br />
u You can also use the VoIP ac<strong>co</strong>unts with different providers for <strong>co</strong>st <strong>co</strong>ntrol purposes.<br />
When dialling, specify the VoIP <strong>co</strong>nnection/the VoIP ac<strong>co</strong>unt you want to use for its<br />
lower rates (page 27).<br />
u Setting dialling plans for phone numbers or area <strong>co</strong>des enables you to automate the<br />
selection of the most <strong>co</strong>st-effective VoIP <strong>co</strong>nnection (page 135).<br />
u Determine which of your phone numbers should be answered by the <strong>Gigaset</strong> <strong>C47</strong>5 IP<br />
answer machine (page 131).<br />
u Use <strong>Gigaset</strong>.net for VoIP calls. Connect your phone to the mains power supply and the<br />
Internet, and enjoy free phone calls on <strong>Gigaset</strong>.net – without making any further settings<br />
(page 35).<br />
u Configure the phone <strong>co</strong>nnection for VoIP without a PC. Your phone's <strong>co</strong>nnection assistant<br />
downloads general data about your VoIP provider from the Internet and guides you<br />
through entering your personal data (VoIP/SIP ac<strong>co</strong>unt). This makes it easy for you to<br />
start using VoIP (page 16).<br />
u If necessary, make any further VoIP settings on a PC. The phone features a Web interface<br />
(Web <strong>co</strong>nfigurator) that can be accessed via your PC's Web browser (page 113).<br />
u Use instant messaging on your handset. Go online and see which of your messenger<br />
<strong>co</strong>ntacts (buddies) are also online. Exchange SMS messages with your buddies or simply<br />
give them a call (page 76). A free messenger ac<strong>co</strong>unt is already set up for you on the<br />
<strong>Gigaset</strong>.net Jabber server (page 140).<br />
u Let your phone tell you, without requiring a PC, about new e-mail messages in your<br />
mailbox (page 73). Use your handset to delete old e-mail messages from your mailbox.<br />
u Make sure your phone is always up-to-date. Keep yourself informed about firmware<br />
updates on the Internet and download them onto your phone (page 105).<br />
Your <strong>Gigaset</strong> <strong>C47</strong>0 IP/<strong>C47</strong>5 IP has a protected operating system that offers increased security<br />
against viruses from the Internet.<br />
Enjoy using your new phone!<br />
8<br />
<strong>VoIPon</strong> www.voipon.<strong>co</strong>.<strong>uk</strong> sales@voipon.<strong>co</strong>.<strong>uk</strong> Tel: +44 (0)1245 808195 Fax: +44 (0)1245 808299
VoIP –<br />
making calls via the Internet<br />
VoIP – making calls via the Internet<br />
With VoIP (Voice over Internet Proto<strong>co</strong>l), your calls are not made via a fixed <strong>co</strong>nnection as<br />
in the telephone network, but rather they are transmitted via the Internet in the form of<br />
data packets.<br />
You can take advantage of all the benefits of VoIP with your phone:<br />
u You can make <strong>co</strong>st-effective calls in high voice quality with callers on the Internet, the<br />
fixed line network or the mobile phone network.<br />
u VoIP providers will give you personal numbers, with which you can be reached from the<br />
Internet, the fixed line network and any mobile phone network.<br />
To be able to use VoIP, you need the following:<br />
u A broadband Internet <strong>co</strong>nnection (e.g. DSL) with flat rate (re<strong>co</strong>mmended) or volumebased<br />
price.<br />
u Internet access, i.e. you need a router that will <strong>co</strong>nnect your phone to the Internet.<br />
You can find a list of re<strong>co</strong>mmended routers on the Internet at:<br />
www.siemens.<strong>co</strong>m/gigasetcustomercare<br />
Once you are on the Web page, open the FAQ page and select "<strong>Gigaset</strong> <strong>C47</strong>0 IP" or<br />
"<strong>Gigaset</strong> <strong>C47</strong>5 IP". Search for "Router", for example.<br />
u Access to the services of a VoIP provider. You can open up to six ac<strong>co</strong>unts with different<br />
VoIP providers.<br />
9<br />
<strong>VoIPon</strong> www.voipon.<strong>co</strong>.<strong>uk</strong> sales@voipon.<strong>co</strong>.<strong>uk</strong> Tel: +44 (0)1245 808195 Fax: +44 (0)1245 808299
First steps Pack <strong>co</strong>ntents<br />
First steps<br />
Pack <strong>co</strong>ntents<br />
The pack <strong>co</strong>ntains:<br />
u one <strong>Gigaset</strong> <strong>C47</strong>0 IP/<strong>C47</strong>5 IP base station<br />
u one <strong>Gigaset</strong> <strong>C47</strong>H handset<br />
u one mains adapter for the base station<br />
u one charging cradle incl. mains adapter<br />
u one phone cable<br />
u one Ethernet cable (LAN cable)<br />
u two batteries<br />
u one battery <strong>co</strong>ver<br />
u one belt clip<br />
u one quick guide<br />
Firmware updates:<br />
Whenever there are new or improved functions for your <strong>Gigaset</strong> <strong>C47</strong>0 IP/<strong>C47</strong>5, base station firmware<br />
updates will be made available for you to download to your phone (page 105). If this results in operational<br />
changes to your phone, a new version of this user guide will be published on the Internet at<br />
www.siemens.<strong>co</strong>m/gigaset<br />
Setting up the handset for use<br />
Inserting the batteries<br />
The display is protected by a plastic film. Please remove the protective film!<br />
Warning:<br />
Only use rechargeable batteries (page 156) re<strong>co</strong>mmended by <strong>Siemens</strong> Home and Office Communication<br />
Devices GmbH & Co. KG. Never use a <strong>co</strong>nventional (non-rechargeable) battery or other battery<br />
types as this <strong>co</strong>uld result in significant health risks and personal injury. For example, the batteries<br />
<strong>co</strong>uld explode. The phone <strong>co</strong>uld also malfunction or be damaged as a result of using batteries that<br />
are not of the re<strong>co</strong>mmended type.<br />
10<br />
<strong>VoIPon</strong> www.voipon.<strong>co</strong>.<strong>uk</strong> sales@voipon.<strong>co</strong>.<strong>uk</strong> Tel: +44 (0)1245 808195 Fax: +44 (0)1245 808299
Setting up the handset for use First steps<br />
¤ Insert the batteries the right way round (see figure).<br />
The polarity is indicated in/on the battery <strong>co</strong>mpartment.<br />
The handset switches on automatically. You will hear a <strong>co</strong>nfirmation tone.<br />
Closing the battery <strong>co</strong>ver<br />
¤ First insert the battery <strong>co</strong>ver at the top.<br />
¤ Then press the <strong>co</strong>ver until it clicks into place.<br />
Opening the battery <strong>co</strong>ver<br />
¤ Place your fingertip in the cavity on the casing and pull the battery <strong>co</strong>ver upwards.<br />
Connecting the charging cradle<br />
The charging cradle is designed to be operated in enclosed, dry areas at temperatures<br />
ranging from +5 °C to +45 °C.<br />
Instructions on how to <strong>co</strong>nnect the charging cradle and mount it on the wall (if required)<br />
can be found at the end of this user guide.<br />
¤ To charge the batteries, leave the handset in the charging cradle.<br />
Please note:<br />
– Only place the handset in the charging cradle that is intended for it.<br />
– If the handset has turned itself off because the batteries are flat and is then placed in the charging<br />
cradle, it will turn itself on automatically.<br />
For questions and problems see page 146.<br />
11<br />
<strong>VoIPon</strong> www.voipon.<strong>co</strong>.<strong>uk</strong> sales@voipon.<strong>co</strong>.<strong>uk</strong> Tel: +44 (0)1245 808195 Fax: +44 (0)1245 808299
First steps Setting up the handset for use<br />
Initial charging and discharging of batteries<br />
If the handset is activated, the flashing battery i<strong>co</strong>n e in the top right of the display indicates<br />
that the batteries are being charged.<br />
During handset operation, the battery i<strong>co</strong>n indicates the charge status of the batteries<br />
(page 1).<br />
The <strong>co</strong>rrect charge status can only be displayed if the batteries are first fully charged and<br />
discharged through use.<br />
¤ To do this, leave the handset in the charging cradle without interruption until the battery<br />
i<strong>co</strong>n stops flashing in the display (around 5 hours).<br />
¤ Once the batteries are fully charged, remove the handset from the charging cradle and<br />
do not put it back again until the batteries are fully discharged.<br />
Please note:<br />
After the first battery charge and discharge, you may place your handset in the charging cradle after<br />
every call.<br />
Please note:<br />
u Always repeat the charging and discharging procedure if you remove the batteries from<br />
the handset and reinsert them.<br />
u The batteries may warm up during charging. This is not dangerous.<br />
u After a while the charge capacity of the batteries will decrease for technical reasons.<br />
Please note:<br />
You will find explanations for the symbols and typographical <strong>co</strong>nventions used in this user guide in<br />
the appendix, page 157.<br />
Setting the date and time<br />
The date and time must be set in order to have the <strong>co</strong>rrect time for in<strong>co</strong>ming calls and to<br />
be able to use the alarm clock and calendar.<br />
Please note:<br />
The address of a time server on the Internet is stored on your telephone. The date and time are taken<br />
from this time server provided that the base station is <strong>co</strong>nnected to the Internet and synchronisation<br />
with the time server is activated (page 144). <strong>Manual</strong> settings are overwritten in this case.<br />
If the date and time on the phone have not yet been set, the §Time§ display key will appear.<br />
12<br />
<strong>VoIPon</strong> www.voipon.<strong>co</strong>.<strong>uk</strong> sales@voipon.<strong>co</strong>.<strong>uk</strong> Tel: +44 (0)1245 808195 Fax: +44 (0)1245 808299
Installing the base station First steps<br />
<strong>Manual</strong> setting:<br />
You can use the menu at a later point to enter the date and time.<br />
¤ Press §Time§ or open the v ¢ Ð Settings ¢ Date/Time menu.<br />
¤ Change multiple line input:<br />
Date:<br />
Enter the day, month and year in 6-digit format, e.g. Q M Q QM for<br />
7/10/2007.<br />
Time:<br />
Enter hours and minutes as 4 digits, e.g. Q M 5 for 07:15 a.m.<br />
§Save§ Press the display key<br />
The date and time are shown in the handset's idle display (page 1).<br />
Registering the handset to the base station<br />
Your handset is registered to the base station by default.<br />
Instructions on how to register additional handsets with the base station and make free<br />
internal calls can be found from page 88.<br />
Installing the base station<br />
The base station is designed for use in closed, dry rooms with a temperature range of +5 °C<br />
to +45 °C.<br />
¤ Place or hang the base station in a central position in your flat or house.<br />
You can find instructions on how to mount the base station on the wall at the end of this<br />
user guide.<br />
Please note:<br />
u Never expose the telephone to heat sources, direct sunlight or other electrical appliances.<br />
u Protect your <strong>Gigaset</strong> from moisture, dust, <strong>co</strong>rrosive liquids and vapours.<br />
13<br />
<strong>VoIPon</strong> www.voipon.<strong>co</strong>.<strong>uk</strong> sales@voipon.<strong>co</strong>.<strong>uk</strong> Tel: +44 (0)1245 808195 Fax: +44 (0)1245 808299
First steps Connecting the base station<br />
Connecting the base station<br />
In order to be able to make calls with your phone via the fixed line network and via VoIP,<br />
you must <strong>co</strong>nnect the base station to the fixed line and the Internet, see Figure 1.<br />
Figure 1 Connecting the phone to the fixed line and the Internet<br />
1 Internet <strong>co</strong>nnection:<br />
Router and modem (shown here) or router with integrated modem.<br />
2 <strong>Gigaset</strong> <strong>C47</strong>0 IP or <strong>C47</strong>5 IP base station<br />
3 <strong>Gigaset</strong> <strong>C47</strong>H handset<br />
4PC in LAN<br />
Follow the steps in the order given below:<br />
1. Connect the base station to the fixed line phone port<br />
2. Connect the base station to the mains power supply<br />
3. Connect the base station to the router<br />
14<br />
4<br />
LAN<br />
3<br />
1<br />
1<br />
2<br />
Internet<br />
Fixed line network<br />
<strong>VoIPon</strong> www.voipon.<strong>co</strong>.<strong>uk</strong> sales@voipon.<strong>co</strong>.<strong>uk</strong> Tel: +44 (0)1245 808195 Fax: +44 (0)1245 808299
Connecting the base station First steps<br />
Connecting the base station to the fixed line and the mains power supply<br />
¤ Please first <strong>co</strong>nnect the phone jack and then the mains adapter, as shown below.<br />
Push the cables into the cable duct.<br />
2<br />
1 Rear view of base station.<br />
2 Phone jack with phone <strong>co</strong>rd<br />
3 Mains adapter 230 V<br />
Please note:<br />
u Keep the mains adapter plugged in at all times for operation, as the phone does not<br />
work without mains <strong>co</strong>nnection.<br />
u Only use the mains adapter and phone <strong>co</strong>rd supplied.<br />
u If you buy a replacement phone <strong>co</strong>rd from a retailer, pay attention to the wiring of the<br />
phone jack.<br />
Correct phone jack assignment<br />
3<br />
2<br />
1<br />
1<br />
4<br />
5<br />
6<br />
1unused<br />
2unused<br />
3a<br />
4b<br />
5unused<br />
6unused<br />
You can now use your phone to make calls via the fixed line network and can be reached<br />
on your fixed line number.<br />
The answer machine on the <strong>Gigaset</strong> <strong>C47</strong>5 IP has a standard announcementwhen re<strong>co</strong>rding<br />
mode is active (page 64).<br />
15<br />
<strong>VoIPon</strong> www.voipon.<strong>co</strong>.<strong>uk</strong> sales@voipon.<strong>co</strong>.<strong>uk</strong> Tel: +44 (0)1245 808195 Fax: +44 (0)1245 808299<br />
3
First steps Making settings for VoIP telephony<br />
Connecting the base station to the router<br />
For Internet access you need a router <strong>co</strong>nnected to the Internet via a modem (this may be<br />
integrated in the router).<br />
1<br />
2<br />
1 Side view of the base station<br />
2 Network plug (LAN) with network cable<br />
3 Network plug on the router<br />
As soon as the cable <strong>co</strong>nnecting the phone and router is plugged in, the paging key lights<br />
up on the front of the base station (page 2).<br />
You can now establish VoIP <strong>co</strong>nnections within <strong>Gigaset</strong>.net (page 35).<br />
Making settings for VoIP telephony<br />
Before you can use the Internet (VoIP) to phone any other numbers on the Internet, the<br />
fixed line network or the mobile phone network, you need the services of a VoIP provider<br />
who supports the VoIP SIP standard.<br />
Pre<strong>co</strong>ndition: You have registered with such a VoIP provider (e.g. via your PC) and set up<br />
at least one VoIP ac<strong>co</strong>unt.<br />
The following phone settings are necessary in order for you to use VoIP. You can obtain the<br />
following information from your VoIP provider:<br />
u Your user name with the VoIP provider, if this is required by the VoIP provider<br />
u Your registration name<br />
u Your password with the VoIP provider<br />
u VoIP provider general settings<br />
The <strong>co</strong>nnection assistant will help you with the settings.<br />
Starting the <strong>co</strong>nnection assistant<br />
3<br />
Pre<strong>co</strong>ndition: The base station is <strong>co</strong>nnected to the mains power supply and a router. Your<br />
router is <strong>co</strong>nnected to the Internet (page 16).<br />
Tip: Leave VoIP activated as the default <strong>co</strong>nnection for your telephone (default setting,<br />
page 105). The telephone then attempts to establish a <strong>co</strong>nnection directly to your VoIP provider's<br />
server after the <strong>co</strong>nnection assistant is closed. If in<strong>co</strong>rrect/in<strong>co</strong>mplete information<br />
means that the <strong>co</strong>nnection cannot be established, messages will be displayed (page 19).<br />
16<br />
<strong>VoIPon</strong> www.voipon.<strong>co</strong>.<strong>uk</strong> sales@voipon.<strong>co</strong>.<strong>uk</strong> Tel: +44 (0)1245 808195 Fax: +44 (0)1245 808299
Making settings for VoIP telephony First steps<br />
Please note:<br />
Your phone is pre<strong>co</strong>nfigured for dynamic assignment of the IP address. In order for your router to "re<strong>co</strong>gnise"<br />
the phone, dynamic IP address assignment must also be activated on the router, i.e. the<br />
router's DHCP server is activated. Turn to page 109 to find out how to assign your phone a static IP<br />
address if necessary.<br />
As soon as the handset battery is sufficiently charged, the message key f on the handset<br />
will flash (approx. 20 minutes after you have put the handset in the charging cradle). Press<br />
the message key f to start the <strong>co</strong>nnection assistant.<br />
You will see the following display:<br />
Connection Assist.<br />
Start assistant<br />
for entry of VoIP<br />
<strong>co</strong>nnection data?<br />
No Yes<br />
§Yes§ Press the display key to start the <strong>co</strong>nnection assistant.<br />
~ Enter the system PIN (default is 0000) and press §OK§.<br />
If you press §No§, the procedure that follows is described under "Entering your name in the<br />
<strong>Gigaset</strong>.net directory" on page 18.<br />
Please note:<br />
The <strong>co</strong>nnection assistant will also start automatically if you try to establish a <strong>co</strong>nnection via the Internet<br />
before you have made the necessary settings.<br />
You can also call up the <strong>co</strong>nnection assistant at any time via the menu (page 107).<br />
Downloading VoIP provider data<br />
The phone establishes a <strong>co</strong>nnection with the <strong>Siemens</strong> server on the Internet. Various profiles<br />
with general access data for different VoIP providers can be downloaded here.<br />
After a brief period you will see the following display:<br />
Select Country<br />
Germany<br />
England<br />
France<br />
Netherlands, the<br />
Ý OK<br />
q Select <strong>co</strong>untry (press up/down on the <strong>co</strong>ntrol key) and press §OK§. VoIP providers<br />
for which VoIP profiles are available will be displayed.<br />
q Select your VoIP provider and press §OK§.<br />
17<br />
<strong>VoIPon</strong> www.voipon.<strong>co</strong>.<strong>uk</strong> sales@voipon.<strong>co</strong>.<strong>uk</strong> Tel: +44 (0)1245 808195 Fax: +44 (0)1245 808299
First steps Making settings for VoIP telephony<br />
The necessary general access data for your VoIP provider will be downloaded and saved on<br />
the phone.<br />
If the data for your VoIP provider is not available for download, press the ” display key twice. You<br />
can then carry out the following steps with the <strong>co</strong>nnection assistant.<br />
You must then make the settings needed for the VoIP provider using the Web <strong>co</strong>nfigurator<br />
(page 121). Your VoIP provider will supply you with this data.<br />
Entering user data for your first VoIP ac<strong>co</strong>unt<br />
Enter the VoIP user data for the first VoIP ac<strong>co</strong>unt. Your VoIP provider will supply you with<br />
this data.<br />
You can enter five additional VoIP ac<strong>co</strong>unts (VoIP phone numbers) via the Web <strong>co</strong>nfigurator at a later<br />
stage (page 120). Your phone (together with your fixed line number) can then be reached on up to<br />
seven different phone numbers. You can assign the phone numbers to the individual handsets that<br />
are registered with the base station as send and receive numbers (page 130).<br />
<strong>User</strong>name:<br />
Enter the user name and press §OK§ if this is required by your provider.<br />
Authent. Name:<br />
Enter the registration name and press §OK§.<br />
Authent. Password:<br />
Enter password and press §OK§.<br />
Please note:<br />
When making these entries, please remember the VoIP user data is case sensitive. When you enter<br />
text, the first letter is capitalised by default. If necessary, press and hold the # key to switch<br />
between upper and lower case and numbers.<br />
If you have made all the required entries, the message "Connection data <strong>co</strong>mplete" will appear<br />
on the display.<br />
Then the <strong>Gigaset</strong>.net assistant is started.<br />
Entering your name in the <strong>Gigaset</strong>.net directory<br />
With <strong>Gigaset</strong>.net you can call other <strong>Gigaset</strong>.net users directly over the Internet free of<br />
charge, without setting up an ac<strong>co</strong>unt with a VoIP provider and without making any further<br />
settings. You can find <strong>Gigaset</strong>.net subscribers by carrying out a name search in the<br />
<strong>Gigaset</strong>.net directory (page 36).<br />
The following appears in the handset's display:<br />
Connection Assist.<br />
Start assistant<br />
for <strong>Gigaset</strong>.net?<br />
No Yes<br />
18<br />
<strong>VoIPon</strong> www.voipon.<strong>co</strong>.<strong>uk</strong> sales@voipon.<strong>co</strong>.<strong>uk</strong> Tel: +44 (0)1245 808195 Fax: +44 (0)1245 808299
Making settings for VoIP telephony First steps<br />
§Yes§ Press the display key.<br />
Enter your <strong>Gigaset</strong>.net name:<br />
Enter the name that you would like to be listed under in the <strong>Gigaset</strong>.net directory<br />
and press §OK§. The name may <strong>co</strong>ntain up to 25 characters.<br />
A <strong>co</strong>nnection to the <strong>Gigaset</strong>.net server is established.<br />
If there is already an entry under this name, you will receive a message to this effect and<br />
you will be asked to enter a name again.<br />
If an entry in the <strong>Gigaset</strong>.net directory is successful, the message "Your user name is successfully<br />
added to <strong>Gigaset</strong>.net!" is displayed briefly.<br />
If the attempt to create the entry fails (e.g. because the phone is not <strong>co</strong>nnected to the Internet), a<br />
message to this effect is displayed briefly (see page 20). You can then create the entry later via the<br />
<strong>Gigaset</strong>.net directory (see page 38).<br />
Completing the VoIP settings<br />
After the entries have been <strong>co</strong>mpleted, the handset reverts to idle status.<br />
If all the settings are <strong>co</strong>rrect and if the phone can establish a <strong>co</strong>nnection to the VoIP server,<br />
then the internal name of the handset will be displayed (example):<br />
Ð Ã V<br />
INT 1<br />
INT SMS<br />
You can now use your phone to make calls via the fixed line network and the Internet.<br />
Callers can reach you on your fixed line number and your VoIP number.<br />
Please note:<br />
To ensure that you can always be reached via the Internet, the router must be permanently <strong>co</strong>nnected<br />
to the Internet.<br />
No <strong>co</strong>nnection to the Internet/VoIP server<br />
If one of the following messages is displayed instead of the internal name after the <strong>co</strong>nnection<br />
assistant is closed, errors have occurred:<br />
u Server not accessible!<br />
u Provider registration failed!<br />
Below you will find possible causes and measures you can take.<br />
19<br />
<strong>VoIPon</strong> www.voipon.<strong>co</strong>.<strong>uk</strong> sales@voipon.<strong>co</strong>.<strong>uk</strong> Tel: +44 (0)1245 808195 Fax: +44 (0)1245 808299
First steps Making settings for VoIP telephony<br />
Server not accessible!<br />
The phone has no <strong>co</strong>nnection to the Internet.<br />
¤ Check the cable <strong>co</strong>nnection between the base station and the router (the LED on the<br />
base station must light up) and the <strong>co</strong>nnection between the router and the Internet <strong>co</strong>nnection.<br />
¤ Check whether the phone is <strong>co</strong>nnected to the LAN.<br />
– It may not have been possible to dynamically assign an IP address to the phone<br />
or<br />
– You have assigned a static IP address to the phone that has either already been<br />
assigned to another LAN subscriber or does not belong to the router's address block.<br />
¤ Press the paging key on the base station. The IP address appears on the handset display.<br />
¤ Press the talk key on the handset to end paging call.<br />
¤ Start the Web <strong>co</strong>nfigurator with the IP address.<br />
¤ If no <strong>co</strong>nnection can be established, change the settings on the router (activate DHCP<br />
server) or the phone's IP address.<br />
Provider registration failed!<br />
u Your personal data for registering with the VoIP provider may have been entered in<strong>co</strong>mpletely<br />
or in<strong>co</strong>rrectly.<br />
¤ Check your entries for <strong>User</strong>name, Authent. Name and Authent. Password. In particular,<br />
check your use of upper and lower case.<br />
To do this, open the following menu on your handset:<br />
v ¢ Ð Settings ¢ Telephony ¢ VoIP (Enter system PIN) ¢ Provider Registr.<br />
(see page 108)<br />
u The server address for the VoIP server has not yet been entered, or has been entered<br />
in<strong>co</strong>rrectly.<br />
¤ Start the Web <strong>co</strong>nfigurator.<br />
¤ Open the following Web page: Settings ¢ Telephony ¢ Connections.<br />
¤ Click the Edit button next to the first VoIP <strong>co</strong>nnection.<br />
¤ Edit the server address where necessary.<br />
Please note:<br />
If port forwarding is activated on your router for the ports that have been registered as the SIP port<br />
(Standard 5060) and the RTP port (Standard 5004), it is advisable to deactivate DHCP and assign the<br />
phone a static IP address (otherwise you may not be able to hear the other party during VoIP calls):<br />
– Assign IP address via the handset menu:<br />
v £ Ð Settings £ Base £ Local Network<br />
Or<br />
– Assign IP address via the Web <strong>co</strong>nfigurator:<br />
¥ Open the following Web page: Settings £ IP Configuration.<br />
¥ Select IP address type.<br />
Please note that the IP address and subnet mask depend on the router's address block.<br />
You must also enter the standard gateway and DNS server. The IP address for the router is generally<br />
entered here.<br />
20<br />
<strong>VoIPon</strong> www.voipon.<strong>co</strong>.<strong>uk</strong> sales@voipon.<strong>co</strong>.<strong>uk</strong> Tel: +44 (0)1245 808195 Fax: +44 (0)1245 808299
Belt clip and headset First steps<br />
Belt clip and headset<br />
By using a belt clip and headset (optional) you can easily make your handset a <strong>co</strong>nstant<br />
<strong>co</strong>mpanion both inside the building and in its immediate vicinity.<br />
Attaching the belt clip<br />
The handset has notches at the top and on each side (level with the loudspeaker) for<br />
attaching the belt clip.<br />
¤ Press the belt clip onto the back of the handset so that the protrusions on the belt clip<br />
engage with the notches.<br />
Connection socket for headset<br />
You can <strong>co</strong>nnect various headset types (with 2.5 mm jack <strong>co</strong>nnector), including HAMA<br />
Plantronics M40, MX100 and MX150.<br />
A <strong>co</strong>mpatibility list of tested headsets is available on the Internet at:<br />
www.plantronics.<strong>co</strong>m/productfinder<br />
21<br />
<strong>VoIPon</strong> www.voipon.<strong>co</strong>.<strong>uk</strong> sales@voipon.<strong>co</strong>.<strong>uk</strong> Tel: +44 (0)1245 808195 Fax: +44 (0)1245 808299
Menu trees Phone menu<br />
Menu trees<br />
Phone menu<br />
Open the main menu on your phone by right-clicking the <strong>co</strong>ntrol key when the handset is<br />
in idle status: v.<br />
There are two ways to select a function:<br />
Using number <strong>co</strong>mbinations ("shortcut")<br />
¤ Enter the number <strong>co</strong>mbination that is in front of the function in the menu tree.<br />
Example: v 5 4 for "Set handset language".<br />
Scrolling through the menus<br />
¤ Scroll to the function with the <strong>co</strong>ntrol key q (press up or down) and press §OK§.<br />
1 î Messaging<br />
1-1 SMS An SMS mailbox (general or private) activated without page 52<br />
a PIN<br />
1-1-1 New SMS page 53<br />
1-1-2 In<strong>co</strong>ming (0) page 56<br />
1-1-3 Outgoing (0) page 53<br />
An SMS mailbox activated with a PIN or 2-3 mailboxes<br />
1-1-1 Mailbox 1-1-1-1 New SMS page 53<br />
1-1-2<br />
to<br />
1-1-4<br />
Mailbox 1<br />
Mailbox 2<br />
Mailbox 3<br />
1-1-1-2 In<strong>co</strong>ming (0) page 56<br />
1-1-1-3 Outgoing (0) page 53<br />
1-1-2-1 New SMS page 53<br />
to<br />
1-1-4-1<br />
1-1-2-2 In<strong>co</strong>ming (0) page 56<br />
to<br />
1-1-4-2<br />
1-1-2-3 Outgoing (0) page 53<br />
to<br />
1-1-4-3<br />
22<br />
<strong>VoIPon</strong> www.voipon.<strong>co</strong>.<strong>uk</strong> sales@voipon.<strong>co</strong>.<strong>uk</strong> Tel: +44 (0)1245 808195 Fax: +44 (0)1245 808299
Phone menu Menu trees<br />
1-1-6 Settings 1-1-6-1 Service Centres page 61<br />
1-1-6-2 SMS Mailboxes page 60<br />
1-1-6-3 Notify Number page 58<br />
1-1-6-4 Notify Type page 59<br />
1-2 E-mail page 73<br />
1-3 Messenger 1-3-1 Buddies page 79<br />
2 ê Sel. Services<br />
1-3-2 <strong>User</strong> Status 1-3-2-1 Change Status page 79<br />
1-3-2-2 Info page 79<br />
1-3-3 Messages page 81<br />
2-1 VoIP 2-1-6 Call Divert page 41<br />
2-1-7 Call Waiting page 41<br />
2-2 Fixed Line 2-2-6 Call Divert page 39<br />
2-2-7 Call Waiting page 39<br />
3 ì Alarm Clock page 101<br />
4 í Add. Features<br />
4-3 Room Monitor page 93<br />
5 Ð Settings<br />
5-1 Date/Time page 12<br />
5-2 Audio Settings 5-2-1 Handset Volume<br />
5-2-2 Ringer Settings 5-2-2-1 Ext. Calls page 99<br />
5-2-2-2 Internal Calls<br />
5-2-2-3 All<br />
5-2-3 Advisory Tones page 100<br />
5-3 Display 5-3-1 Screen Picture page 96<br />
5-3-2 Colour Scheme page 95<br />
5-3-3 Contrast page 95<br />
5-3-4 Backlight page 96<br />
<strong>VoIPon</strong> www.voipon.<strong>co</strong>.<strong>uk</strong> sales@voipon.<strong>co</strong>.<strong>uk</strong> Tel: +44 (0)1245 808195 Fax: +44 (0)1245 808299<br />
23
Menu trees Phone menu<br />
5-4 Handset 5-4-1 Language page 95<br />
5-4-2 Auto Answer page 97<br />
5-4-3 Register H/Set page 88<br />
5-4-4 Reset Handset page 102<br />
5-5 Base 5-5-1 Calls List Type 5-5-1-1 Missed Calls page 49<br />
5-5-1-2 All Calls<br />
5-5-2 Music on hold page 104<br />
5-5-3 System PIN page 103<br />
5-5-4 Base Reset page 103<br />
5-5-5 Add. Features 5-5-5-1 Repeater Mode page 104<br />
5-5-6 Local Network page 109<br />
5-5-8 Software Update page 105<br />
5-6 Voice Mail 5-6-1 Set Key 1 5-6-1-1 Network Mailb. page 86<br />
Only on <strong>C47</strong>5 IP<br />
base station:<br />
5-6-1-2 Answer Machine page 71<br />
5-6-2 Ans Machine page 64<br />
5-6-3 Call Screening page 69<br />
5-6-4 Announcements 5-6-4-1 Re<strong>co</strong>rd Announce page 66<br />
5-6-4-2 Play Announce<br />
5-6-4-3 Del Announce<br />
5-6-4-4 Re<strong>co</strong>rd Anc Only<br />
5-6-4-5 Play Anc Only<br />
5-6-4-6 Del Anc Only<br />
5-6-4-7 Set Ans. Mode<br />
5-6-5 Message Length page 70<br />
5-6-6 Re<strong>co</strong>rd Quality page 70<br />
5-6-7 Ring Delay page 70<br />
5-7 Telephony 5-7-1 Default Line 5-7-1-1 VoIP page 105<br />
5-7-1-2 Fixed Line<br />
24<br />
<strong>VoIPon</strong> www.voipon.<strong>co</strong>.<strong>uk</strong> sales@voipon.<strong>co</strong>.<strong>uk</strong> Tel: +44 (0)1245 808195 Fax: +44 (0)1245 808299
Web <strong>co</strong>nfigurator menu Menu trees<br />
Web <strong>co</strong>nfigurator menu<br />
5-7-2 Connection Assist. page 107<br />
5-7-6 Fixed Line 5-7-6-1 Dialling Mode page 111<br />
5-7-7 VoIP Enter<br />
system<br />
PIN.<br />
5-7-6-2 Recall page 111<br />
Show Stat. on HS page 110<br />
Select Provider page 107<br />
Provider Registr. page 108<br />
Home<br />
Settings<br />
page 113<br />
IP Configuration<br />
Telephony<br />
page 118<br />
Connections page 120<br />
Audio page 127<br />
Number Assignment page 130<br />
Call Forwarding page 132<br />
Dialling Plans page 135<br />
Directory page 137<br />
Advanced Settings page 132<br />
Messaging<br />
Messenger page 139<br />
E-Mail page 141<br />
Info Services page 142<br />
Miscellaneous page 142 to<br />
page 144<br />
Status<br />
Device page 145<br />
25<br />
<strong>VoIPon</strong> www.voipon.<strong>co</strong>.<strong>uk</strong> sales@voipon.<strong>co</strong>.<strong>uk</strong> Tel: +44 (0)1245 808195 Fax: +44 (0)1245 808299
Making calls with VoIP and the fixed line network Making an external call<br />
Making calls with VoIP and the fixed line network<br />
Making an external call<br />
External calls are calls made via the public telephone network (fixed line network) or via<br />
the Internet (VoIP). You generally decide which <strong>co</strong>nnection type you want to use for a specific<br />
call when you dial the number.<br />
Please note:<br />
– You can <strong>co</strong>nduct up to three separate external calls via your base station (using different handsets):<br />
two calls via VoIP and one via the fixed line network.<br />
– You can define dialling plans for certain numbers or area <strong>co</strong>des by determining the <strong>co</strong>nnection<br />
and therefore the billing method to be used (<strong>co</strong>st <strong>co</strong>ntrol, see page 135) when these numbers are<br />
dialled.<br />
– Dialling with the directory (page 43), quick dial keys (page 97) or last number redial list (page 47)<br />
saves repeated keying of phone numbers. You can modify or add to these numbers on a call-tocall<br />
basis.<br />
– If you use VoIP to make a call to the fixed line network, you may also have to dial the area <strong>co</strong>de for<br />
local calls (depending on the VoIP provider). You can avoid having to dial your own area <strong>co</strong>de by<br />
entering it into the <strong>co</strong>nfiguration (page 134). Your area <strong>co</strong>de is then added automatically when<br />
you make local calls.<br />
Use the talk key to select the type of <strong>co</strong>nnection and make the call<br />
By briefly pressing or pressing and holding the call key c, you can determine the type of<br />
<strong>co</strong>nnection for the call you want to make (fixed line network or VoIP).<br />
Pre<strong>co</strong>ndition: You enter the number without a line suffix (page 27) and have not defined<br />
any dialling plans for this number.<br />
~c Enter number (without suffix) and briefly press/press and hold the talk key.<br />
A default <strong>co</strong>nnection is established on your phone (fixed line network or VoIP, page 105).<br />
¤ Briefly press the talk key c if you want to make a call via this default <strong>co</strong>nnection.<br />
¤ Press and hold the talk key c if you want to make the call via the other <strong>co</strong>nnection<br />
type.<br />
If you have assigned a number of VoIP numbers to your phone, you can define which VoIP<br />
number (VoIP ac<strong>co</strong>unt) is used for external calls from each specific handset (handset send<br />
number, page 130).<br />
Please note:<br />
If you are using a GAP <strong>co</strong>mpatible handset other than the <strong>Gigaset</strong> handsets <strong>C47</strong>H, S67H, S68H,<br />
SL37H, S45 and C45, every call will be made via the standard <strong>co</strong>nnection, even if you press and hold<br />
the call key. If you want to use the non-default <strong>co</strong>nnection to make a call, enter a star (*) at the end<br />
of the number.<br />
26<br />
<strong>VoIPon</strong> www.voipon.<strong>co</strong>.<strong>uk</strong> sales@voipon.<strong>co</strong>.<strong>uk</strong> Tel: +44 (0)1245 808195 Fax: +44 (0)1245 808299
Making an external call Making calls with VoIP and the fixed line network<br />
Selecting the <strong>co</strong>nnection type using display keys and making a call<br />
Pre<strong>co</strong>ndition: The display keys on your handset have been assigned §FixedLine§ and/or §IP§<br />
(page 97).<br />
§FixedLine§ / §IP§<br />
Press the display key to select the <strong>co</strong>nnection type.<br />
~s Enter the number or select from the directory.<br />
c / d Press the talk or handsfree key.<br />
The number will always be called via the selected <strong>co</strong>nnection type.<br />
Please note:<br />
If you have dialled a number with a suffix #1 to #6 via VoIP (§IP§), your call will be made through the<br />
VoIP ac<strong>co</strong>unt assigned to the suffix. If you have entered #0, no suffix or an invalid suffix, your call will<br />
be made through the handset's VoIP send number. Suffixes are ignored for calls made through the<br />
fixed line network (§FixedLine§).<br />
Select and dial a <strong>co</strong>nnection via your line suffix<br />
You can <strong>co</strong>nfigure up to six VoIP numbers on your phone in addition to the fixed line network<br />
number and the <strong>Gigaset</strong>.net number. A (line) suffix is assigned to each number (line)<br />
of your phone:<br />
u the fixed line number has the suffix #0<br />
u VoIP numbers have the suffixes #1 to #6 (page 121)<br />
u and the <strong>Gigaset</strong>.net number has the suffix #9<br />
~ Enter the number of the party you wish to call (e.g. 1234567).<br />
~ Add the suffix for the <strong>co</strong>nnection (your phone number) through which you<br />
wish to make and pay for the call, e.g. # for the 1st VoIP number in your<br />
<strong>co</strong>nfiguration.<br />
c Press the talk key.<br />
The <strong>co</strong>nnection is always made via the line with the assigned suffix, regardless of whether<br />
you press the call key c briefly or press and hold.<br />
Please note:<br />
– If you enter a suffix that is not <strong>co</strong>nfigured in your phone, your call will be made via the handset's<br />
send number (page 130).<br />
– If you press the display key §FixedLine§ before dialling the number, your call will be made via the<br />
fixed line network – irrespective of the line suffix.<br />
– If you press the display key §IP§ before dialling the number, your call will be made via VoIP, even if<br />
you enter the suffix #0 (fixed line network).<br />
Entering an IP address<br />
You can also dial an IP address instead of a phone number using VoIP.<br />
¤ Press the star key * to separate the sections of the IP address<br />
(e.g. 149*246*122*28).<br />
¤ If necessary press the hash # key to attach the SIP port number of the person you are<br />
calling to the IP address (e.g. 149*246*122*28#5060).<br />
You cannot dial IP addresses using a line suffix.<br />
27<br />
<strong>VoIPon</strong> www.voipon.<strong>co</strong>.<strong>uk</strong> sales@voipon.<strong>co</strong>.<strong>uk</strong> Tel: +44 (0)1245 808195 Fax: +44 (0)1245 808299
Making calls with VoIP and the fixed line network Ending a call<br />
Cancelling the dialling operation<br />
You can cancel the dialling operation with the end call key a.<br />
Dialling emergency numbers – defining dialling plans<br />
You can use the Web <strong>co</strong>nfigurator to block certain numbers or to define which of your<br />
numbers (fixed line network, VoIP) should be used to call specific numbers (Dialling Plans,<br />
see page 135).<br />
If you enter a number that has a defined dialling plan, the call will be made via the line<br />
defined in the dialling plan – regardless of whether the call key is pressed briefly or pressed<br />
and held. Any automatic area <strong>co</strong>de will not be prefixed to the number.<br />
Emergency numbers<br />
Dialling plans for emergency numbers (e.g. the local emergency service number) are factory-set<br />
for certain <strong>co</strong>untries. Emergency calls are then always made via the fixed line network.<br />
You cannot delete or deactivate these dialling plans. However, you can change the <strong>co</strong>nnection<br />
through which each emergency number should be called (e.g. if the phone is not <strong>co</strong>nnected<br />
to the fixed line network). You must make sure that the VoIP provider for the<br />
selected <strong>co</strong>nnection supports emergency calls.<br />
If your phone does not have default dialling plans for emergency calls, you should define<br />
the rules yourself (page 135). Assign them to a <strong>co</strong>nnection that you know supports emergency<br />
calls. Emergency calls are always supported by fixed line networks.<br />
Please note: If no rules are defined for emergency numbers and you have programmed an<br />
automatic local area <strong>co</strong>de (page 134), the <strong>co</strong>de will be prefixed to emergency numbers as<br />
soon as they are dialled via a VoIP <strong>co</strong>nnection.<br />
Please note:<br />
Emergency numbers cannot be dialled if the keypad lock is activated. Before dialling, press and hold<br />
the hash key #, to release the keypad lock.<br />
Ending a call<br />
a Press the end call key.<br />
28<br />
<strong>VoIPon</strong> www.voipon.<strong>co</strong>.<strong>uk</strong> sales@voipon.<strong>co</strong>.<strong>uk</strong> Tel: +44 (0)1245 808195 Fax: +44 (0)1245 808299
Accepting a call Making calls with VoIP and the fixed line network<br />
Accepting a call<br />
The handset indicates an in<strong>co</strong>ming call in three ways: by ringing, by a display on the screen<br />
and by the flashing handsfree key d.<br />
Please note:<br />
Only calls to receive numbers that are assigned to your handset will be signalled (page 130).<br />
If a phone number is not assigned to any handset as a receive number, the calls will be signalled on<br />
all handsets.<br />
You can accept the call by:<br />
¤ Pressing the talk key c.<br />
¤ Pressing the handsfree key d.<br />
¤ <strong>Gigaset</strong> <strong>C47</strong>5 IP: Press the display key Ÿ to forward the call to the answer machine<br />
(page 69).<br />
If the handset is in the charging cradle and the Auto Answer function is activated (page 97),<br />
the handset will take a call automatically when you lift it out of the cradle.<br />
If the ringer tone is intrusive, press the §Silence§ display key. You can accept the call so long<br />
as it is displayed on the screen.<br />
Please note:<br />
You can reject VoIP calls by pressing the end call key a. The caller receives an appropriate message<br />
(depending on the provider).<br />
Pressing the end call key on an in<strong>co</strong>ming call from the fixed line network will cancel the ringer tone<br />
(same as §Silence§).<br />
Calling Line Identification<br />
When you receive a call from the Internet, the caller's number and/or the name they have<br />
specified is displayed on the screen.<br />
When you receive a call from the fixed line network, the caller's number is displayed on the<br />
screen if the following <strong>co</strong>nditions are met:<br />
u Your fixed line network provider supports CLIP, CLI:<br />
– CLI (Calling Line Identification): number of the caller is transmitted<br />
– CLIP (Calling Line Identification Presentation): the caller's number is displayed.<br />
u You have arranged CLIP with your network provider.<br />
u The caller has arranged CLI with the network provider.<br />
If the phone number is identified and the caller's number is saved in your directory, the<br />
name will be displayed from the directory. A CLIP image allocated to the name will also<br />
appear in the display.<br />
29<br />
<strong>VoIPon</strong> www.voipon.<strong>co</strong>.<strong>uk</strong> sales@voipon.<strong>co</strong>.<strong>uk</strong> Tel: +44 (0)1245 808195 Fax: +44 (0)1245 808299
Making calls with VoIP and the fixed line network Handsfree talking<br />
Call display<br />
You can use the display to determine whether the call is for your fixed line network number<br />
or one of your VoIP numbers.<br />
Calls to your fixed line number Calls to one of your VoIP numbers<br />
Å<br />
1234567890<br />
for Fixed Line<br />
Accept Silence<br />
1 Ringer tone i<strong>co</strong>n<br />
2 Number or name of caller<br />
3 Receive number: indicates which of your phone numbers the caller has dialled. Assign the name<br />
when you are <strong>co</strong>nfiguring the phone with the Web <strong>co</strong>nfigurator (page 122/page 126). For calls<br />
from <strong>Gigaset</strong>.net, for <strong>Gigaset</strong>.net is displayed.<br />
Instead of §Accept§ you may see the i<strong>co</strong>n Ÿ (forward call to integrated answer<br />
machine, see page 69) above the left display key on the <strong>Gigaset</strong> <strong>C47</strong>5 IP.<br />
Display when Calling Line Identification is withheld<br />
For calls from the fixed line network, the caller can withhold calling line identification or<br />
not request it. In this case the number is not displayed. The following is displayed in place<br />
of the number:<br />
u External, if no number is transmitted.<br />
u Withheld, if the caller has withheld Calling Line Identification.<br />
u Unavailable, if the caller has not arranged Calling Line Identification.<br />
Handsfree talking<br />
In handsfree mode, instead of holding the handset to your ear you can put it down, for<br />
example on the table in front of you. This allows others to participate in the call.<br />
Activating/deactivating handsfree mode<br />
1<br />
2<br />
3<br />
Å<br />
IP: 1234567890<br />
for Anna<br />
Accept Silence<br />
Activating while dialling<br />
~d Enter number and press briefly/press and hold the handsfree key to select the<br />
<strong>co</strong>nnection type (page 26).<br />
¤ You should inform your caller before you use the handsfree function so that they know<br />
someone else is listening.<br />
Switching between earpiece and handsfree mode<br />
¤ Press the handsfree key d to activate/deactivate the handsfree function during a call<br />
and when listening to the answer machine (<strong>Gigaset</strong> <strong>C47</strong>5 IP).<br />
30<br />
<strong>VoIPon</strong> www.voipon.<strong>co</strong>.<strong>uk</strong> sales@voipon.<strong>co</strong>.<strong>uk</strong> Tel: +44 (0)1245 808195 Fax: +44 (0)1245 808299<br />
1<br />
2<br />
3
Muting the handset Operating the handset<br />
If you wish to place the handset in the charging cradle during a call:<br />
¤ Press and hold the handsfree key d while placing the handset in the charging cradle.<br />
¤ If the handsfree key d does not light up, press the key again.<br />
For how to adjust the loudspeaker volume, see page 98.<br />
Muting the handset<br />
You can deactivate the microphone in your handset during an external call. Your caller will<br />
hear hold music, if activated (page 104).<br />
Muting the handset<br />
u Press the <strong>co</strong>ntrol key on the left to mute the handset.<br />
Cancelling muting<br />
” / a Press the display key or the end call key to cancel the muting.<br />
Operating the handset<br />
Activating/deactivating the handset<br />
a In idle status, press and hold the end call key.<br />
You will hear the <strong>co</strong>nfirmation tone.<br />
Activating/deactivating the<br />
keypad lock<br />
# Press and hold the hash key.<br />
You will hear the <strong>co</strong>nfirmation tone. The Ø i<strong>co</strong>n appears in the display when the keypad<br />
lock is activated.<br />
The keypad lock deactivates automatically when you receive a call and activates again after<br />
the call.<br />
Please note:<br />
The handset displays an advisory message if you press a key by accident while the keypad lock is on.<br />
To deactivate the keypad lock, press and hold the hash key #.<br />
31<br />
<strong>VoIPon</strong> www.voipon.<strong>co</strong>.<strong>uk</strong> sales@voipon.<strong>co</strong>.<strong>uk</strong> Tel: +44 (0)1245 808195 Fax: +44 (0)1245 808299
Operating the handset Control key<br />
Control key<br />
In this user guide, the side/position of the <strong>co</strong>ntrol key that you must press in the given operating<br />
situation is shown in black (top, bottom, right, left). Example: t for "press up on the<br />
<strong>co</strong>ntrol key".<br />
The <strong>co</strong>ntrol key has a number of different functions:<br />
When the handset is in idle status<br />
s Press and release to open the handset directory.<br />
Press and hold to open the list of available online directories (e.g. <strong>Gigaset</strong>.net<br />
directory).<br />
v Open the main menu.<br />
u Open the list of handsets.<br />
t Call up the menu for setting the handset's call volume (page 98), ringer tones<br />
(page 99) and advisory tones (page 100).<br />
In input fields<br />
You can use the <strong>co</strong>ntrol key to move the cursor up t, down s, right v or left u.<br />
In lists and menus<br />
t / s Scroll up/down line by line.<br />
v Open the submenu or <strong>co</strong>nfirm the selection.<br />
u Go back one menu level or cancel.<br />
During an external call<br />
s Press and release to open the handset directory.<br />
Press and hold to open the list of available online directories (e.g. <strong>Gigaset</strong>.net<br />
directory).<br />
u Initiate an internal <strong>co</strong>nsultation call.<br />
t Adjust the loudspeaker volume for earpiece and handsfree mode.<br />
32<br />
<strong>VoIPon</strong> www.voipon.<strong>co</strong>.<strong>uk</strong> sales@voipon.<strong>co</strong>.<strong>uk</strong> Tel: +44 (0)1245 808195 Fax: +44 (0)1245 808299
Display keys Operating the handset<br />
Display keys<br />
The current display functions are shown in the bottom display line in reversed highlights.<br />
The function of the display keys changes depending on the particular operating situation.<br />
Example:<br />
INT SMS<br />
1 Current display key functions are shown in the bottom display line.<br />
2 Display keys<br />
The most important display i<strong>co</strong>ns are:<br />
§Options§ Open a situation-dependent menu (<strong>co</strong>ntext menu).<br />
W Delete key: deletes one character at a time from right to left.<br />
Î Go back one menu level or cancel operation.<br />
ΠFetch e-mail address from the directory.<br />
Ó Copy number into directory.<br />
Ÿ Forward external call to the answer machine (<strong>Gigaset</strong> <strong>C47</strong>5 IP).<br />
Reverting to idle status<br />
1<br />
2<br />
You can revert to idle status from anywhere in the menu as follows:<br />
¤ Press and hold the end call key a.<br />
Or:<br />
¤ Do not press any key: after 2 minutes the display will automatically revert to idle status.<br />
Changes that you have not <strong>co</strong>nfirmed or saved by pressing §OK§, §Yes§, §Save§, §Send§ or Save<br />
Entry §OK§ will be lost.<br />
You can find an example of the display in idle status on page 1.<br />
33<br />
<strong>VoIPon</strong> www.voipon.<strong>co</strong>.<strong>uk</strong> sales@voipon.<strong>co</strong>.<strong>uk</strong> Tel: +44 (0)1245 808195 Fax: +44 (0)1245 808299
Operating the handset Menu guidance<br />
Menu guidance<br />
Your telephone's functions are accessed using a menu that has a number of levels.<br />
Main menu (first menu level)<br />
¤ To open the main menu, press v with the handset in idle status.<br />
The main menu functions are shown in the display as a list with <strong>co</strong>lour i<strong>co</strong>ns.<br />
Accessing a function<br />
¤ Navigate to the function using the <strong>co</strong>ntrol key q/r. The name of the function is displayed<br />
in the display header. Press the display key §OK§.<br />
Or:<br />
¤ Enter the number that is in front of the function in the menu tree (page 22) (shortcut).<br />
The <strong>co</strong>rresponding submenu (the next menu level) is opened.<br />
Submenus<br />
The functions in the submenus are displayed as lists.<br />
To access a function:<br />
¤ Scroll to the function with the <strong>co</strong>ntrol key q and press §OK§.<br />
Or:<br />
¤ Enter the number <strong>co</strong>mbination that is in front of the function in the menu tree<br />
(page 22) (shortcut).<br />
Briefly press the end call key a once to return to the previous menu level/cancel the operation.<br />
Correcting in<strong>co</strong>rrect entries<br />
You can <strong>co</strong>rrect in<strong>co</strong>rrect characters in the text by navigating to the in<strong>co</strong>rrect entry using<br />
the <strong>co</strong>ntrol key. You can then:<br />
u Press X to delete the character to the left of the cursor.<br />
u Insert a new character to the left of the cursor.<br />
u Overwrite the flashing character when entering time and date, IP addresses etc.<br />
You will find examples of i<strong>co</strong>ns used, menu entries and multiple line input in the appendix<br />
to this user guide, page 157.<br />
34<br />
<strong>VoIPon</strong> www.voipon.<strong>co</strong>.<strong>uk</strong> sales@voipon.<strong>co</strong>.<strong>uk</strong> Tel: +44 (0)1245 808195 Fax: +44 (0)1245 808299
Correcting in<strong>co</strong>rrect entries VoIP telephony via <strong>Gigaset</strong>.net<br />
VoIP telephony via <strong>Gigaset</strong>.net<br />
You can use <strong>Gigaset</strong>.net to make free phone calls via the Internet directly to other<br />
<strong>Gigaset</strong>.net users, without having to set up an ac<strong>co</strong>unt with a VoIP provider or make any<br />
further settings. You simply have to <strong>co</strong>nnect your phone to the power supply and the Internet<br />
<strong>co</strong>nnection and, if necessary, enter yourself in the <strong>Gigaset</strong>.net online directory under a<br />
name of your choice (page 18/page 38).<br />
<strong>Gigaset</strong> net is a VoIP service provided by <strong>Siemens</strong> Home and Office Communication<br />
Devices GmbH und Co KG, which is available to all users with a <strong>Gigaset</strong> VoIP device.<br />
You can call other subscribers to <strong>Gigaset</strong>.net free of charge, i.e. there are no telephone<br />
charges other than the <strong>co</strong>sts for your Internet <strong>co</strong>nnection. Connections to/from other networks<br />
are not possible.<br />
Every <strong>Gigaset</strong> VoIP device is assigned a <strong>Gigaset</strong>.net phone number by default (page 153).<br />
All registered subscribers are included in the <strong>Gigaset</strong>.net directory, which you are able to<br />
access.<br />
You can use an echo service provided by the telephone number on the <strong>Gigaset</strong>.net Web<br />
page to test your VoIP <strong>co</strong>nnection.<br />
u 12341#9 (English)<br />
After an announcement, the echo service sends back the voice data you have received<br />
immediately in the form of an echo.<br />
Exclusion of liability<br />
<strong>Gigaset</strong>.net is a voluntary service provided by <strong>Siemens</strong> Home and Office Communication GmbH & Co<br />
KG with no liability or guarantee for the availability of the network. This service can be terminated at<br />
any time with a notice period of three months.<br />
Please note:<br />
If you do not use your <strong>Gigaset</strong>.net <strong>co</strong>nnection for six weeks, it is automatically deactivated. You cannot<br />
be reached for calls from <strong>Gigaset</strong>.net.<br />
The <strong>co</strong>nnection is reactivated:<br />
– as soon as you start a search in the <strong>Gigaset</strong>.net directory or<br />
– make a call via <strong>Gigaset</strong>.net (dial a number with #9 at the end) or<br />
– activate the <strong>co</strong>nnection via the Web <strong>co</strong>nfigurator (page 127).<br />
35<br />
<strong>VoIPon</strong> www.voipon.<strong>co</strong>.<strong>uk</strong> sales@voipon.<strong>co</strong>.<strong>uk</strong> Tel: +44 (0)1245 808195 Fax: +44 (0)1245 808299
VoIP telephony via <strong>Gigaset</strong>.net Search for subscribers in the <strong>Gigaset</strong>.net directory<br />
Search for subscribers in the <strong>Gigaset</strong>.net directory<br />
Your handset is in idle status.<br />
s Press and hold.<br />
q If necessary, select <strong>Gigaset</strong>.net from the list of available online directories and<br />
press §OK§.<br />
Please note:<br />
– Calls to the <strong>Gigaset</strong>.net directory are always free of charge.<br />
– You can also open the <strong>Gigaset</strong>.net directory by dialling 1188#9 (phone number of the <strong>Gigaset</strong>.net<br />
directory) and pressing the talk key c.<br />
If no <strong>co</strong>nnection can be made to the <strong>Gigaset</strong>.net directory, an error message will be sent<br />
and the handset will go into idle status.<br />
Once the <strong>co</strong>nnection has been established, you will be asked to enter a name that you<br />
want to search for.<br />
Nickname search:<br />
Enter the name or part of a name (max. 25 characters).<br />
§Options§ Press the display key.<br />
Start search<br />
Select and press §OK§.<br />
If the search has been successful, a hit list will be displayed of all the names that begin with<br />
the specified character string.<br />
Example:<br />
<strong>Gigaset</strong>.net 3/50<br />
Saal, Franz<br />
Sailor, Ben<br />
Sand, Anna<br />
Sand, Marie Elisabe...<br />
View Options<br />
1. 3/50: Entry number/number of hits<br />
2. Name of an entry, possibly abbreviated<br />
You can scroll through the hit list with q.<br />
1<br />
2<br />
If it has not been possible to find a matching entry, a <strong>co</strong>rresponding message is displayed.<br />
You have the following options:<br />
¤ Press the display key §New§ to start a new search.<br />
Or<br />
¤ Press the display key §Change§ to change the search criteria. The previously entered name<br />
is <strong>co</strong>pied and can be edited.<br />
36<br />
<strong>VoIPon</strong> www.voipon.<strong>co</strong>.<strong>uk</strong> sales@voipon.<strong>co</strong>.<strong>uk</strong> Tel: +44 (0)1245 808195 Fax: +44 (0)1245 808299
Search for subscribers in the <strong>Gigaset</strong>.net directory VoIP telephony via <strong>Gigaset</strong>.net<br />
If there are too many matching entries in the <strong>Gigaset</strong>.net directory, the message Too many<br />
entries found! is displayed instead of a hit list.<br />
¤ Press the display key §Detail§ to start a refined search. The previously entered name is <strong>co</strong>pied<br />
and can be edited/expanded.<br />
Calling subscribers<br />
qc Select the subscriber from the hit list and press the talk key.<br />
Viewing the subscriber's number<br />
q Select the subscriber from the hit list.<br />
§View§ Press the display key.<br />
The display shows the <strong>Gigaset</strong>.net number and the subscriber's name, whereby the name<br />
may appear over a number of lines.<br />
Please note:<br />
– Connections to <strong>Gigaset</strong>.net are always established via the Internet irrespective of which default<br />
<strong>co</strong>nnection is set on your phone. Pressing and holding c or pressing it briefly and a "*" at the<br />
end of the number have no effect.<br />
– You can open the <strong>Gigaset</strong>.net directory and establish <strong>co</strong>nnections, even if you have not entered<br />
yourself in the <strong>Gigaset</strong>.net directory.<br />
Using other functions<br />
Pre<strong>co</strong>ndition: The hit list is displayed.<br />
q (select entry) ¢ §Options§<br />
The following functions can be selected with q:<br />
Add to directory<br />
Copy the number to the handset directory. The number and name (where appropriate<br />
abbreviated, max. 16 characters) are <strong>co</strong>pied to the directory.<br />
¤ Edit and save entry where appropriate (page 44).<br />
The hit list is displayed again.<br />
New search<br />
Start a search with a new name (page 36).<br />
Own details<br />
See "Entering, editing and deleting own entry" on page 38.<br />
Please note:<br />
If you select a <strong>Gigaset</strong>.net number from the local directory, the <strong>co</strong>nnection is automatically established<br />
via the <strong>Gigaset</strong>.net (Internet).<br />
37<br />
<strong>VoIPon</strong> www.voipon.<strong>co</strong>.<strong>uk</strong> sales@voipon.<strong>co</strong>.<strong>uk</strong> Tel: +44 (0)1245 808195 Fax: +44 (0)1245 808299
VoIP telephony via <strong>Gigaset</strong>.net Entering, editing and deleting own entry<br />
Entering, editing and deleting<br />
own entry<br />
You have the following options:<br />
u Edit the name of your entry in the <strong>Gigaset</strong>.net directory<br />
u Delete your entry from the <strong>Gigaset</strong>.net directory<br />
u If you did not enter a name when using the phone for the first time (page 18), specify<br />
a name and enter yourself in the directory.<br />
Viewing own entry<br />
You are <strong>co</strong>nnected to the <strong>Gigaset</strong>.net directory:<br />
¤ Select §Options§ ¢ Own details and press §OK§.<br />
Your <strong>Gigaset</strong>.net number and, where applicable, your currently entered name are displayed.<br />
Entering/editing a name<br />
§Edit§ Press the display key.<br />
~ Edit name or enter new name (max. 25 characters) and press §OK§.<br />
You can delete the name with X.<br />
If there is not yet an entry with this name in the <strong>Gigaset</strong>.net directory, the name is saved.<br />
A message to this effect is displayed. The handset switches to idle status.<br />
If there is already an entry with this name, or the entered name <strong>co</strong>ntains impermissible<br />
characters, you will be requested to enter a different name.<br />
Please note:<br />
If you delete the name, your entry will be deleted from the directory. You are no longer "visible" to<br />
other <strong>Gigaset</strong>.net subscribers. However, you can still be reached via your <strong>Gigaset</strong>.net number. For<br />
information on how to display the number, see page 153.<br />
Calling a <strong>Gigaset</strong>.net subscriber<br />
You can call a <strong>Gigaset</strong>.net subscriber directly via the <strong>Gigaset</strong>.net directory (see above) or<br />
via their <strong>Gigaset</strong>.net number:<br />
~ /s Enter the <strong>Gigaset</strong>.net number (including the #9) or select from the handset<br />
directory.<br />
c Press the talk key.<br />
Every number ending with #9 is dialled via <strong>Gigaset</strong>.net.<br />
38<br />
<strong>VoIPon</strong> www.voipon.<strong>co</strong>.<strong>uk</strong> sales@voipon.<strong>co</strong>.<strong>uk</strong> Tel: +44 (0)1245 808195 Fax: +44 (0)1245 808299
Settings for all calls Network services – fixed line<br />
Network services – fixed line<br />
The following network services can only be used for making calls via the fixed line network.<br />
Network services are functions that your network provider makes available to you. You<br />
have to request these services from your network provider.<br />
¤ If you require assistance, please <strong>co</strong>ntact your network provider.<br />
Settings for all calls<br />
If you have <strong>co</strong>mpleted one of the following procedures, a <strong>co</strong>de is sent.<br />
¤ After <strong>co</strong>nfirmation from the telephone network, press the end call key a.<br />
You can set the following features:<br />
General call forwarding<br />
v ¢ ê Sel. Services ¢ Fixed Line ¢ Call Divert<br />
¤ Change multiple line input:<br />
When:<br />
Select All Calls.<br />
Call No.:<br />
Press the display key §Edit§. Enter the number to which the call is to be forwarded, and<br />
press §Save§. You can enter a fixed line, VoIP or mobile number.<br />
Status:<br />
Activate/deactivate call forwarding.<br />
¤ Press the display key §Send§.<br />
¤ Press the end call key a after the announcement from the telephone network.<br />
Activating/deactivating call waiting<br />
If call waiting is activated, a caller on the fixed line network will hear the ringing tone if you<br />
are already <strong>co</strong>nducting a phone <strong>co</strong>nversation using your fixed line <strong>co</strong>nnection. This call is<br />
announced a<strong>co</strong>ustically and visually on your handset screen.<br />
Calls on the VoIP <strong>co</strong>nnection are not shown as call waiting. They are signalled on other registered<br />
handsets. If no other handset is available, the caller will hear the busy tone.<br />
v ¢ ê Sel. Services ¢ Fixed Line ¢ Call Waiting<br />
Status: Activate/deactivate.<br />
¤ Press the display key §Send§.<br />
¤ Press the end call key a after the announcement from the telephone network.<br />
Please note:<br />
The setting does not affect the procedure for call waiting on the VoIP <strong>co</strong>nnection. For how to activate/<br />
deactivate call waiting for the VoIP <strong>co</strong>nnection, see page 41.<br />
39<br />
<strong>VoIPon</strong> www.voipon.<strong>co</strong>.<strong>uk</strong> sales@voipon.<strong>co</strong>.<strong>uk</strong> Tel: +44 (0)1245 808195 Fax: +44 (0)1245 808299
Network services – fixed line Functions during a call<br />
Functions during a call<br />
Consultation call<br />
During a call:<br />
§Ext.Call§ Press the display key.<br />
~ Enter a number or <strong>co</strong>py it from the directory and press §OK§.<br />
The number will be dialled via the fixed line <strong>co</strong>nnection.<br />
Please note:<br />
After a few se<strong>co</strong>nds, the number selected for a <strong>co</strong>nsultation call is saved in the last number redial list.<br />
u Conference call:<br />
– Call both participants: press the display key §Conf.§.<br />
– End call with both participants: press the end call key a.<br />
40<br />
<strong>VoIPon</strong> www.voipon.<strong>co</strong>.<strong>uk</strong> sales@voipon.<strong>co</strong>.<strong>uk</strong> Tel: +44 (0)1245 808195 Fax: +44 (0)1245 808299
Settings for all calls Network services – VoIP<br />
Network services – VoIP<br />
You can use the following network services to make calls via the VoIP <strong>co</strong>nnection.<br />
Settings for all calls<br />
General call forwarding<br />
Pre<strong>co</strong>ndition: The VoIP provider supports call forwarding.<br />
v ¢ ê Sel. Services ¢ VoIP ¢ Call Divert<br />
A list of your phone's <strong>co</strong>nfigured and activated VoIP phone numbers will be displayed. VoIP<br />
phone numbers for which call forwarding is activated are marked with ‰ .<br />
¤ Select the VoIP phone number for which you want to activate or deactivate call forwarding,<br />
and press §OK§.<br />
¤ Change multiple line input:<br />
When:<br />
Select All Calls / No Answer / When Busy.<br />
Call No.:<br />
Press the display key §Edit§. Enter the number to which the call is to be forwarded, and<br />
press §Save§. You can enter a fixed line, VoIP or mobile number.<br />
Status:<br />
Activate/deactivate call forwarding.<br />
¤ Press the display key §Save§.<br />
Please note that call forwarding may incur additional <strong>co</strong>sts. Ask your VoIP provider.<br />
Activating/deactivating call waiting<br />
Pre<strong>co</strong>ndition: Your phone will permit two parallel VoIP <strong>co</strong>nnections (s. Allow 1 VoIP call only<br />
on page 128).<br />
If call waiting is activated, a caller on one of your VoIP <strong>co</strong>nnections will hear the ringer tone<br />
if you are already on a call using this VoIP <strong>co</strong>nnection. This call is announced a<strong>co</strong>ustically<br />
and visually on your handset screen.<br />
Calls on the fixed line <strong>co</strong>nnection are not signalled as call waiting. They are signalled on<br />
other registered handsets to which the fixed line number has been allocated as a receive<br />
number. If no other handset is available, the caller will hear the busy tone.<br />
Accepting/rejecting a waiting call, see page 42.<br />
v ¢ ê Sel. Services ¢ VoIP ¢ Call Waiting<br />
Status: Activate/deactivate.<br />
¤ Press the display key §Save§.<br />
Please note:<br />
The setting applies to all VoIP phone numbers. It does not affect the procedure for call waiting on the<br />
fixed line <strong>co</strong>nnection. For how to activate/deactivate call waiting for the fixed line <strong>co</strong>nnection, see<br />
page 39.<br />
41<br />
<strong>VoIPon</strong> www.voipon.<strong>co</strong>.<strong>uk</strong> sales@voipon.<strong>co</strong>.<strong>uk</strong> Tel: +44 (0)1245 808195 Fax: +44 (0)1245 808299
Network services – VoIP Functions during a call<br />
Functions during a call<br />
Pre<strong>co</strong>ndition: Your phone will permit two parallel VoIP <strong>co</strong>nnections (s. Allow 1 VoIP call only<br />
on page 128).<br />
Consultation call<br />
During a call:<br />
§Ext.Call§ Press the display key.<br />
~c Enter the number or <strong>co</strong>py from the directory and press and release/press and<br />
hold c.<br />
The number must be dialled via VoIP.<br />
.<br />
Please note:<br />
After a few se<strong>co</strong>nds, the number selected for a <strong>co</strong>nsultation call is saved in the last number redial list.<br />
If the participant answers, you have the following options:<br />
u Toggling:<br />
¤ Use q to toggle between the participants.<br />
¤ End call with active participant: §Options§ End Active Call.<br />
u Conference call:<br />
¤ Call both participants: press the display key §Conf.§.<br />
¤ End the <strong>co</strong>nference call (toggling): press display key §EndConf§.<br />
¤ End call with both participants: press the end call key a.<br />
u Forwarding (provider dependent):<br />
Pre<strong>co</strong>ndition: You are toggling calls and you phoned the currently active participant<br />
yourself.<br />
¤ To <strong>co</strong>nnect the two external participants: §Options§ Call Transfer<br />
If call forwarding was successful, a message will appear to this effect. The handset will<br />
then switch to idle.<br />
Accepting a waiting call<br />
Pre<strong>co</strong>ndition: Call waiting is activated (page 41).<br />
§Accept§ Press the display key.<br />
You have the option of toggling or holding a <strong>co</strong>nference call.<br />
Please note:<br />
– If the first call was an internal call, the internal <strong>co</strong>nnection is ended.<br />
– An internal call waiting is shown on the display. You can neither accept the internal call nor reject<br />
it.<br />
42<br />
<strong>VoIPon</strong> www.voipon.<strong>co</strong>.<strong>uk</strong> sales@voipon.<strong>co</strong>.<strong>uk</strong> Tel: +44 (0)1245 808195 Fax: +44 (0)1245 808299
Directory/call-by-call list Using the directory and lists<br />
Using the directory and lists<br />
The options are:<br />
u Directory<br />
u Call-by-call list<br />
u If applicable, online directories<br />
u Last number redial list<br />
u E-mail, SMS and messenger list<br />
u Calls list<br />
u Answer machine list (for <strong>Gigaset</strong> <strong>C47</strong>5 IP)<br />
You can store a maximum of 250 entries in the directory and call-by-call list (the actual<br />
number depends on the size of the individual entries).<br />
You create the directory and call-by-call list for your own individual handset. However, you<br />
can send the lists or individual entries to other handsets (page 46).<br />
Directory/call-by-call list<br />
Please note:<br />
For quick access to a number from the directory or the call-by-call list (quick dial), you can assign the<br />
number to a key (page 46).<br />
Directory<br />
In the directory you can store numbers and <strong>co</strong>rresponding names.<br />
¤ With the handset in idle status, open the directory by pressing the s key.<br />
Length of entries<br />
Number: max. 32 digits<br />
Name: max. 16 characters<br />
Please note:<br />
Some VoIP providers do not support local calls for calls to the fixed line network. In this case, always<br />
enter the fixed line number with the area <strong>co</strong>de in your directory. Alternatively, you can also use the<br />
Web <strong>co</strong>nfigurator to define an area <strong>co</strong>de, which is automatically prefixed to all numbers that are<br />
dialled via VoIP without an area <strong>co</strong>de (page 134).<br />
Call-by-call list<br />
The call-by-call list is used to store access <strong>co</strong>des for network providers (called "call-by-call<br />
numbers"), that can be put ahead of the numbers when dialling via the fixed line network.<br />
¤ Open the call-by-call list in idle status by pressing the C key.<br />
Length of entries<br />
Number: max. 32 digits<br />
Name: max. 16 characters<br />
43<br />
<strong>VoIPon</strong> www.voipon.<strong>co</strong>.<strong>uk</strong> sales@voipon.<strong>co</strong>.<strong>uk</strong> Tel: +44 (0)1245 808195 Fax: +44 (0)1245 808299
Using the directory and lists Directory/call-by-call list<br />
Storing a number in the directory<br />
s ¢ New Entry<br />
¤ Change multiple line input:<br />
Number<br />
Enter the number.<br />
Name<br />
Enter name.<br />
Quick Dial:<br />
Select number key for quick dial.<br />
¤ Save the changes.<br />
Please note:<br />
– To find out how to enter IP addresses, turn to page 27.<br />
– If you want to dial a certain number using the same line <strong>co</strong>nnection each time, you can add the<br />
relevant line suffix to the number in question (page 27).<br />
– If you add a star (*) at the end of the number, the number will be dialled via the non-standard<br />
<strong>co</strong>nnection (page 105), even if you press and release the c talk key. On <strong>co</strong>ndition that no dialling<br />
plan has been defined for the number (page 135).<br />
– You can use the Web <strong>co</strong>nfigurator to save the directory to a file on your PC, where it can be edited<br />
and then sent back to the handset (page 137). Or you can transfer Outlook <strong>co</strong>ntacts from the PC<br />
to the handset's directory.<br />
Storing a number in the call-by-call list<br />
C ¢ New Entry<br />
¤ Change multiple line input:<br />
Number:<br />
Enter the number.<br />
Name:<br />
Enter name.<br />
Order of directory entries<br />
The directory entries are usually sorted in alphabetical order. Spaces and digits take first<br />
priority. The sort order is as follows:<br />
1. Space<br />
2. Digits (0–9)<br />
3. Letters (alphabetical)<br />
4. Other characters<br />
To get round the alphabetical order of the entries, insert a space or a digit in front of the<br />
name. These entries will then move to the beginning of the directory. Names that you have<br />
prefixed with a star will move to the end of the directory.<br />
44<br />
<strong>VoIPon</strong> www.voipon.<strong>co</strong>.<strong>uk</strong> sales@voipon.<strong>co</strong>.<strong>uk</strong> Tel: +44 (0)1245 808195 Fax: +44 (0)1245 808299
Directory/call-by-call list Using the directory and lists<br />
Selecting entries in the directory and call-by-call list<br />
s / C Open the directory or call-by-call list.<br />
You have the following options:<br />
u Use q to scroll to the entry until the required name is selected.<br />
u Enter the first character of the name, or scroll to the entry using s if required.<br />
Dialling with the directory/call-by-call list<br />
s / C ¢ q (Select entry; page 45)<br />
c Briefly press/press and hold the talk key. The number is dialled using the<br />
selected <strong>co</strong>nnection type (page 26).<br />
Please note:<br />
You can only dial IP addresses via VoIP.<br />
Managing directory/call-by-call list entries<br />
s / C ¢ q (Select entry; page 45)<br />
Viewing entries<br />
§View§ Press the display key. The entry is displayed.<br />
Back with §OK§.<br />
Editing entries<br />
§View§ §Edit§ Press the display keys one after the other.<br />
¤ Carry out changes and save.<br />
Using other functions<br />
s / C ¢ q (Select entry; page 45)<br />
§Options§ Open menu.<br />
The following functions can be selected with q:<br />
Display Number<br />
Change or add to a saved number and then dial it (press talk key c) or save it as a new<br />
entry; to do so, press Ó after the number is displayed.<br />
Edit Entry<br />
Edit selected entry.<br />
Delete Entry<br />
Delete selected entry.<br />
VIP Entry (directory only)<br />
Mark a directory entry as a VIP (Very Important Person) and assign a specific ringer tone<br />
to it. You can then re<strong>co</strong>gnise VIP calls from the ringer tone.<br />
Pre<strong>co</strong>ndition: Calling Line Identification (page 29).<br />
Copy Entry<br />
Send a single entry to a handset (page 46).<br />
Delete List<br />
Delete all entries in the directory or in the call-by-call list.<br />
45<br />
<strong>VoIPon</strong> www.voipon.<strong>co</strong>.<strong>uk</strong> sales@voipon.<strong>co</strong>.<strong>uk</strong> Tel: +44 (0)1245 808195 Fax: +44 (0)1245 808299
Using the directory and lists Directory/call-by-call list<br />
Copy List<br />
Send <strong>co</strong>mplete list to a handset (page 46).<br />
Available Memory<br />
Display the available entries in the directory and call-by-call list.<br />
Using quick dial keys<br />
How to assign phone numbers to the keypad on your handset is described on page 44.<br />
¤ Press and hold the required quick dial key.<br />
A number with a line suffix at the end (#0 to #6 or #9) will be dialled via the <strong>co</strong>nnection<br />
belonging to the suffix (page 121).<br />
A number with a hash key (#) at the end will be dialled via the standard <strong>co</strong>nnection<br />
(page 105).<br />
A number with no suffix will be dialled via the non-standard <strong>co</strong>nnection. Exception: a dialling<br />
plan has been defined for the number (page 135).<br />
Sending the directory/call-by-call list to another handset<br />
Pre<strong>co</strong>nditions:<br />
u The sending and receiving handsets must both be registered to the same base station.<br />
u The other handset can send and receive directory entries.<br />
s / C ¢ q (Select entry; page 45) ¢ §Options§ ¢ Copy Entry / Copy List<br />
s Select the internal number of the receiving handset and press §OK§.<br />
A successful transfer is <strong>co</strong>nfirmed by a message and <strong>co</strong>nfirmation tone on the receiving<br />
handset.<br />
You can transfer several individual entries one after the other by responding §Yes§ to the<br />
Copy next entry? prompt.<br />
Please note:<br />
u Entries with identical numbers are not overwritten in the receiver handset.<br />
u The transfer is cancelled if the phone rings or if the memory of the receiving handset is<br />
full.<br />
Copying a displayed number to the directory<br />
You can <strong>co</strong>py numbers to the directory that are displayed in a list, e.g. the calls list or the<br />
last number redial list, in an SMS or during a call.<br />
A number is displayed:<br />
§Options§ ¢ Copy to Directory<br />
Or:<br />
Ó Press the display key.<br />
¤ Complete entry, see page 44.<br />
<strong>Gigaset</strong> <strong>C47</strong>5 IP: The message playback is interrupted during the number transfer from the<br />
answer machine list.<br />
46<br />
<strong>VoIPon</strong> www.voipon.<strong>co</strong>.<strong>uk</strong> sales@voipon.<strong>co</strong>.<strong>uk</strong> Tel: +44 (0)1245 808195 Fax: +44 (0)1245 808299
Last number redial list Using the directory and lists<br />
Copying a number from the directory<br />
In many operating situations you can open the directory to <strong>co</strong>py a number, for example.<br />
Your handset need not be in idle status.<br />
¤ Depending on the operating situation, open the directory with s or Ò or §Options§<br />
Directory.<br />
q Select an entry (page 45).<br />
Last number redial list<br />
The last number redial list <strong>co</strong>ntains the 20 numbers last dialled with the handset (max. 32<br />
digits). If a number is in the directory or the call-by-call list, then the appropriate name will<br />
be displayed.<br />
Dialling from the last number redial list<br />
c Press the key briefly.<br />
q Select an entry.<br />
c Briefly press/press and hold the talk key. The number is dialled using the<br />
selected <strong>co</strong>nnection type (page 26).<br />
When a name is displayed, you can display the <strong>co</strong>rresponding phone number by pressing<br />
the display key §View§.<br />
Managing entries in the last number redial list<br />
c Press the key briefly.<br />
q Select an entry.<br />
§Options§ Open menu.<br />
The following functions can be selected with q:<br />
Display Number<br />
(as in the directory, page 45)<br />
Copy to Directory<br />
Copying a displayed number to the directory (page 46).<br />
Delete Entry<br />
Delete selected entry.<br />
Delete List<br />
Delete <strong>co</strong>mplete list.<br />
47<br />
<strong>VoIPon</strong> www.voipon.<strong>co</strong>.<strong>uk</strong> sales@voipon.<strong>co</strong>.<strong>uk</strong> Tel: +44 (0)1245 808195 Fax: +44 (0)1245 808299
Using the directory and lists Opening lists with the message key<br />
Opening lists with the message key<br />
You can use the message key f to open the following lists:<br />
u Answer machine list (<strong>Gigaset</strong> <strong>C47</strong>5 IP only)<br />
u Configuring the network mailbox<br />
If a network mailbox is <strong>co</strong>nfigured for fast access and the network provider supports this<br />
function (page 87).<br />
u SMS list, see page 56<br />
If several mailboxes are set up (page 59), several lists will be displayed, if required.<br />
u In<strong>co</strong>ming e-mail list, see page 73<br />
The list is only shown if new messages have arrived in the mailbox from the in<strong>co</strong>ming<br />
e-mail server.<br />
u Calls list<br />
u Messenger message list, see page 81<br />
The list is only shown on the handset that is online.<br />
An advisory tone sounds as soon as a new message arrives in a list. The f key flashes<br />
(it goes off when the key is pressed). In idle status, the display shows an i<strong>co</strong>n for the new<br />
message:<br />
I<strong>co</strong>n New message...<br />
à ... in answer machine list (<strong>Gigaset</strong> <strong>C47</strong>5 IP) or on the network mailbox<br />
Á ... in calls list<br />
À ... in the SMS, messenger or e-mail list<br />
The number of new entries is shown beneath the <strong>co</strong>rresponding i<strong>co</strong>n.<br />
List selection<br />
Pressing the f button will only display lists that <strong>co</strong>ntain messages (with the exception of<br />
the network Mailbox). Lists with new messages are shown first and identified in bold. The<br />
number of messages received in each are shown in brackets. If a list <strong>co</strong>ntains no new messages,<br />
the number of old messages will be shown.<br />
Example:<br />
Messages & Calls<br />
Calls List: (4)<br />
Mailbox (2)<br />
SMS: (1)<br />
Ans M.: (2)<br />
Ý OK<br />
¤ Select a list with q and press §OK§.<br />
Please note:<br />
If calls are saved in the network mailbox you will receive a message if the appropriate settings have<br />
been set (see your network provider's network mailbox instructions).<br />
48<br />
<strong>VoIPon</strong> www.voipon.<strong>co</strong>.<strong>uk</strong> sales@voipon.<strong>co</strong>.<strong>uk</strong> Tel: +44 (0)1245 808195 Fax: +44 (0)1245 808299
Opening lists with the message key Using the directory and lists<br />
Calls list<br />
Pre<strong>co</strong>ndition: Calling Line Identification (CLIP, page 29).<br />
Depending on the type of list set, the calls list <strong>co</strong>ntains<br />
u missed calls<br />
u received calls (marked with ‰ )<br />
u on the <strong>Gigaset</strong> <strong>C47</strong>5 IP:<br />
calls received by the integrated answer machine (marked with Ã)<br />
The numbers of the last 30 calls are saved.<br />
Multiple calls from the same number will be stored once in the list of missed calls (the latest<br />
call). The number of calls from this number is shown in brackets after the entry.<br />
Multiple calls from the same number are stored several times in the list of answered calls.<br />
Please note:<br />
Only calls to the receive numbers assigned to your handset are stored in the calls list (page 130).<br />
If no receive numbers are assigned, all calls will be stored in the calls list for all handsets.<br />
Setting the calls list type<br />
v ¢ Ð Settings ¢ Base ¢ Calls List Type<br />
Missed Calls / All Calls<br />
Select and press §OK§ ( ‰ = on).<br />
a Press and hold (idle status).<br />
The calls list entries are retained when you change the list type.<br />
Entries in the calls list<br />
New messages are displayed at the top.<br />
Example of list entries:<br />
All Calls<br />
Susi Sorglos<br />
29.11.07 12:20 ‰<br />
Louise Miller<br />
29/11/07 11:15 Ã<br />
Delete Options<br />
u List type in header: Missed Calls, All Calls<br />
u Status of entry<br />
Bold: new entry<br />
u Number or name of caller<br />
You can add the caller's number to the directory (page 46).<br />
u Date and time of call (if set, page 12)<br />
49<br />
<strong>VoIPon</strong> www.voipon.<strong>co</strong>.<strong>uk</strong> sales@voipon.<strong>co</strong>.<strong>uk</strong> Tel: +44 (0)1245 808195 Fax: +44 (0)1245 808299
Using the directory and lists Opening lists with the message key<br />
u Type of entry:<br />
– accepted calls ( ‰ )<br />
– missed calls<br />
– calls re<strong>co</strong>rded by the answer machine (Ã, <strong>Gigaset</strong> <strong>C47</strong>5 IP only)<br />
Managing entries in the calls list<br />
Pressing the display key §Delete§ deletes the marked entry.<br />
After pressing the display key §Options§ you can select more functions with q:<br />
Copy to Directory<br />
Copying a displayed number to the directory.<br />
Information<br />
If a URI was received and stored for a VoIP call, this will be shown. The URI is dialled if<br />
you press the talk key c. The URI is not entered on the last number redial list.<br />
Delete List<br />
Delete <strong>co</strong>mplete list.<br />
When you quit the call history, all entries are set to the status "old", i.e. the next time you<br />
call the list up they will no longer be shown in bold.<br />
Answer machine list (<strong>Gigaset</strong> <strong>C47</strong>5 IP)<br />
The answer machine list Ans M.: is only displayed on handsets that have at least one receive<br />
number in <strong>co</strong>mmon with the answer machine.<br />
You can use the answer machine list to listen to the messages that are on the answer<br />
machine.<br />
The first new message received is displayed in the answer machine list. Playback starts<br />
when the list is opened.<br />
New messages are placed after old messages when they have been played back.<br />
All messages are played back irrespective of the associated receive number.<br />
Old messages are played back if the list does not <strong>co</strong>ntain any new messages.<br />
How to manage messages in the answer machine list is described on page 67.<br />
Select from caller list/answer machine list<br />
f ¢ Calls List: (2) / Ans M.: (1)<br />
q Select entry.<br />
c Briefly press/press and hold the talk key. The number is dialled using the<br />
selected <strong>co</strong>nnection type (page 26).<br />
50<br />
<strong>VoIPon</strong> www.voipon.<strong>co</strong>.<strong>uk</strong> sales@voipon.<strong>co</strong>.<strong>uk</strong> Tel: +44 (0)1245 808195 Fax: +44 (0)1245 808299
Opening lists with the message key Making <strong>co</strong>st-effective calls<br />
Making <strong>co</strong>st-effective calls<br />
Using the Internet (VoIP) is the preferred <strong>co</strong>st-effective way of making calls.<br />
You can also use your phone's <strong>co</strong>st <strong>co</strong>ntrol function for calls to fixed line or mobile phone<br />
networks. Open ac<strong>co</strong>unts with various VoIP providers who offer favourable rates for calls<br />
to other networks. In the phone <strong>co</strong>nfiguration, define the best VoIP <strong>co</strong>nnections (ac<strong>co</strong>unt),<br />
e.g. for specific regional, national and mobile network prefixes, to be used when calls are<br />
made (Dialling Plans, page 135). Or define the VoIP <strong>co</strong>nnection to be used when dialling the<br />
number (dialling with line suffix, page 27).<br />
If you are using your fixed line network to make a call, choose a network provider that<br />
offers particularly favourable rates (call-by-call). You can manage call-by-call numbers in<br />
the call-by-call list<br />
Linking call-by-call numbers with a number<br />
You can prefix a network provider's number ("chaining") to numbers dialled via a fixed line<br />
network<br />
C Open call-by-call list.<br />
s Select entry (call-by-call number).<br />
§Options§ Press the display key.<br />
Display Number<br />
Select and press §OK§.<br />
~ / s Enter number or dial number from the directory (page 47).<br />
c Briefly press/press and hold the talk key so that the number is dialled via the<br />
fixed line network. Both numbers are dialled.<br />
Please note:<br />
You can also dial "chained" numbers via a fixed line network by adding the line suffix #0 (for the fixed<br />
line network) to the end of the number. Alternatively, you can define appropriate rules for call-by-call<br />
numbers (page 135).<br />
Displaying the call duration<br />
The duration of each call appears in the display for calls made via a fixed line network and<br />
VoIP<br />
u during the <strong>co</strong>nversation,<br />
u until about three se<strong>co</strong>nds after the call has ended if you do not replace the handset in<br />
the charging cradle.<br />
Please note:<br />
The actual duration of the call can vary from that shown by a few se<strong>co</strong>nds.<br />
51<br />
<strong>VoIPon</strong> www.voipon.<strong>co</strong>.<strong>uk</strong> sales@voipon.<strong>co</strong>.<strong>uk</strong> Tel: +44 (0)1245 808195 Fax: +44 (0)1245 808299
SMS (text messages)<br />
SMS (text messages)<br />
You can only send and receive SMS messages via the fixed line network.<br />
When an SMS is sent, the base station automatically establishes a <strong>co</strong>nnection via the fixed<br />
line network.<br />
Your phone is supplied ready for sending SMS messages immediately.<br />
Pre<strong>co</strong>nditions:<br />
u Calling Line Identification is enabled for your fixed line network <strong>co</strong>nnection.<br />
u Your network provider supports SMS in the fixed line network (information on this can<br />
be obtained from your network provider).<br />
u You are registered with your service provider to send and receive SMS.<br />
SMS messages are exchanged between SMS centres operated by service providers. You<br />
must enter the SMS centre through which you wish to send and receive SMS messages into<br />
your phone. You can receive SMS messages from every SMS centre that is entered, provided<br />
you have registered with your service provider.<br />
Your SMS messages are sent via the Service Centr. that is entered as the active send service<br />
centre. However, you can activate any other SMS centre as the active send service centre<br />
to send a current message (page 61).<br />
If no SMS service centre is entered, the SMS menu only <strong>co</strong>ntains the entry Settings. Enter<br />
an SMS service centre (page 61).<br />
Information on writing an SMS can be found in the appendix (page 160).<br />
Rules<br />
u An SMS can be up to 612 characters.<br />
u For more than 160 characters, the SMS will be sent as a linked SMS (up to four SMS<br />
messages each <strong>co</strong>ntaining 152 or 153 characters, depending on the length of the linking<br />
information).<br />
The following will be shown on the top right in the header when an SMS is being written<br />
(example):<br />
1<br />
SMS 596(1) 2<br />
1 Maximum number of characters you can still write or attach.<br />
2 Number of SMS messages that need to be linked for the text written so far.<br />
Please note that linking SMS messages usually incurs higher charges.<br />
Please note:<br />
u If your phone is <strong>co</strong>nnected to a PABX, see page 62.<br />
u To receive SMS messages you must be registered with your service provider.<br />
52<br />
<strong>VoIPon</strong> www.voipon.<strong>co</strong>.<strong>uk</strong> sales@voipon.<strong>co</strong>.<strong>uk</strong> Tel: +44 (0)1245 808195 Fax: +44 (0)1245 808299
Writing/sending an SMS SMS (text messages)<br />
Writing/sending an SMS<br />
Writing an SMS<br />
v ¢ î Messaging ¢ SMS<br />
Mailbox 2 Select mailbox if necessary and press §OK§ (page 59).<br />
~ Enter mailbox PIN if necessary and press §OK§.<br />
New SMS Select and press §OK§.<br />
~ Write an SMS.<br />
Sending an SMS<br />
c Press the talk key<br />
or:<br />
§Options§ Press the display key.<br />
Send Select and press §OK§.<br />
Then:<br />
SMS Select and press §OK§.<br />
s / C / ~<br />
Select number with area <strong>co</strong>de (even if you are in that area) from the directory<br />
or call-by-call list, or enter number directly. For sending SMS to an SMS mailbox:<br />
add the mailbox ID to the end of the number.<br />
§Send§ Press the display key.<br />
The SMS will be sent as soon as your phone's fixed line <strong>co</strong>nnection is free.<br />
Please note:<br />
– If you are interrupted by an external call while writing an SMS, the text is automatically saved in<br />
the draft message list.<br />
– If the memory is full, or if the SMS function on the base station is being used by another handset,<br />
the operation is cancelled. An appropriate message appears in the display. Delete SMS messages<br />
you no longer require or send the SMS later.<br />
Draft message list<br />
You can save an SMS in the draft message list and edit and send it later.<br />
Saving an SMS in the draft message list<br />
¤ Write an SMS (page 53).<br />
§Options§ Press the display key.<br />
Save Select and press §OK§.<br />
Please note:<br />
After saving, the SMS editor with your SMS will be displayed again. You can <strong>co</strong>ntinue writing the text<br />
and save it again. The SMS that was saved previously will be overwritten.<br />
53<br />
<strong>VoIPon</strong> www.voipon.<strong>co</strong>.<strong>uk</strong> sales@voipon.<strong>co</strong>.<strong>uk</strong> Tel: +44 (0)1245 808195 Fax: +44 (0)1245 808299
SMS (text messages) Writing/sending an SMS<br />
Opening the draft message list<br />
v ¢ î Messaging ¢ SMS ¢ (mailbox, mailbox PIN)<br />
Outgoing (3)<br />
Select and press §OK§. The number of SMS messages in the list will be shown in<br />
brackets (e.g. (3)).<br />
The first list entry is displayed, e.g.<br />
1234567890<br />
29.11.07 12:20<br />
Reading or deleting SMS messages<br />
¤ Open the draft message list and then:<br />
q Select SMS.<br />
§Read§ Press the display key. The entry will be displayed. Scroll line by line using q.<br />
Or:<br />
§Options§ Open menu.<br />
Delete Entry Press §OK§. The selected SMS message is deleted.<br />
You can use §Options§ ¢ Delete all to delete every SMS in the draft message list.<br />
Writing/changing an SMS<br />
¤ You are reading an SMS in the draft message list.<br />
§Options§ Open menu.<br />
You have the following options:<br />
New SMS<br />
Write a new SMS and then send (page 53) or save it.<br />
Edit<br />
Edit the text of the saved SMS and then send it (page 53).<br />
Character Set<br />
Text is shown in the selected character set.<br />
54<br />
<strong>VoIPon</strong> www.voipon.<strong>co</strong>.<strong>uk</strong> sales@voipon.<strong>co</strong>.<strong>uk</strong> Tel: +44 (0)1245 808195 Fax: +44 (0)1245 808299
Writing/sending an SMS SMS (text messages)<br />
Sending SMS messages to an e-mail address<br />
If your service provider supports the "SMS to e-mail" feature, you can also send your SMS<br />
messages to e-mail addresses.<br />
The e-mail address must be at the beginning of the text. You must send the SMS to the email<br />
service of your SMS send centre.<br />
v ¢ î Messaging ¢ SMS ¢ (mailbox, mailbox PIN) ¢ New SMS<br />
~ Enter the e-mail address. End the entry with a space or <strong>co</strong>lon (depending on<br />
the service provider).<br />
~ Enter the SMS text.<br />
§Options§ Press the display key.<br />
Send Select and press §OK§.<br />
E-mail Select and press §OK§ If the number of the e-mail service is not entered<br />
(page 61), enter the number of the e-mail service.<br />
§Send§ Press the display key.<br />
The SMS will be sent as soon as your phone's fixed line <strong>co</strong>nnection is free.<br />
Sending SMS messages as a fax<br />
You can also send an SMS to a fax machine.<br />
Pre<strong>co</strong>ndition: Your network provider supports this feature.<br />
¤ Write an SMS (page 53).<br />
§Options§ Press the display key.<br />
Send Select and press §OK§.<br />
Fax Select and press §OK§.<br />
s / ~ Select the number from the directory or enter it manually. Enter the number<br />
with area <strong>co</strong>de (even if you are in the same area).<br />
§Send§ Press the display key.<br />
The SMS will be sent as soon as your phone's fixed line <strong>co</strong>nnection is free.<br />
55<br />
<strong>VoIPon</strong> www.voipon.<strong>co</strong>.<strong>uk</strong> sales@voipon.<strong>co</strong>.<strong>uk</strong> Tel: +44 (0)1245 808195 Fax: +44 (0)1245 808299
SMS (text messages) Receiving an SMS<br />
Receiving an SMS<br />
All received SMS messages are saved in the in<strong>co</strong>ming message list. Linked SMS messages<br />
are displayed as one message. If this is too long (it <strong>co</strong>nsists of too many linked individual<br />
SMS messages) or if it was not fully transmitted, it will be split into several individual SMS<br />
messages.<br />
Since an SMS remains in the list even after it has been read, you should regularly delete<br />
SMS messages from the list.<br />
The display tells you if the SMS memory is full.<br />
¤ Delete SMS messages you no longer require (page 56).<br />
In<strong>co</strong>ming message list<br />
The in<strong>co</strong>ming message list <strong>co</strong>ntains:<br />
u All received SMS messages, starting with the most recent.<br />
u SMS messages that <strong>co</strong>uld not be sent due to an error.<br />
New SMS messages are signalled on all <strong>Gigaset</strong> <strong>C47</strong>H handsets by the À i<strong>co</strong>n in the display,<br />
the flashing message key f and an advisory tone.<br />
Opening the in<strong>co</strong>ming message list with the f key<br />
f Press.<br />
Select a mailbox if necessary and enter mailbox PIN.<br />
The in<strong>co</strong>ming message list is displayed as follows (example):<br />
SMS: (2) 1<br />
2<br />
1 Bold: number of new entries<br />
Regular: number of read entries<br />
2 Name of mailbox, here: general mailbox<br />
Open list with §OK§.<br />
An entry in the list is displayed as in the following example:<br />
1234567890<br />
1<br />
21.09.07 09:45 2<br />
1 Number of the sender or name of the directory entry<br />
2 SMS status:<br />
Bold: new unread SMS messages<br />
Regular: old read SMS messages<br />
Opening the in<strong>co</strong>ming message list via the SMS menu<br />
v ¢ î Messaging ¢ SMS ¢ (mailbox, mailbox PIN) ¢ In<strong>co</strong>ming (2)<br />
Reading or deleting SMS messages<br />
¤ Open the in<strong>co</strong>ming message list.<br />
¤ Continue as described in "Reading or deleting SMS messages", page 54.<br />
After you have read a new SMS, it is given the status "Old" (it is no longer shown in bold).<br />
56<br />
<strong>VoIPon</strong> www.voipon.<strong>co</strong>.<strong>uk</strong> sales@voipon.<strong>co</strong>.<strong>uk</strong> Tel: +44 (0)1245 808195 Fax: +44 (0)1245 808299
Receiving an SMS SMS (text messages)<br />
Deleting the in<strong>co</strong>ming message list<br />
All new and old SMS messages in the list are deleted.<br />
¤ Open the in<strong>co</strong>ming message list.<br />
§Options§ Open menu.<br />
Delete all Select, press §OK§ and <strong>co</strong>nfirm with §Yes§. The list is cleared.<br />
Replying to or forwarding SMS messages<br />
¤ Read the SMS (page 56):<br />
§Options§ Press the display key.<br />
You have the following options:<br />
Reply<br />
Write and send a reply SMS directly (page 53).<br />
Edit<br />
Edit the text in the SMS and then send it (page 53).<br />
Forwarding an SMS<br />
¤ You are reading an SMS (page 56):<br />
§Options§ Press the display key.<br />
Forward Select and press §OK§. For further information, see page 53.<br />
Copying the number to the directory<br />
Copying the sender's number<br />
¤ Open the in<strong>co</strong>ming message list and select entry (page 56).<br />
§Options§ Press the display key. For further information, see page 46.<br />
Please note:<br />
– You can create a special directory for SMS messages within your main directory by putting a star<br />
(*) before the names.<br />
– An attached mailbox identifier is added to the directory. It must be deleted for 'normal calls'.<br />
57<br />
<strong>VoIPon</strong> www.voipon.<strong>co</strong>.<strong>uk</strong> sales@voipon.<strong>co</strong>.<strong>uk</strong> Tel: +44 (0)1245 808195 Fax: +44 (0)1245 808299
SMS (text messages) Notification by SMS<br />
Dialling numbers from SMS texts/transferring to the directory<br />
¤ Read the SMS (page 56) and scroll to the telephone number.<br />
The digits are reverse-highlighted.<br />
c Briefly press/press and hold the talk key to dial the number.<br />
Or:<br />
Ó Press the display key to transfer the number to the directory. For further information,<br />
see page 46.<br />
Please note:<br />
– The + symbol is not transferred for international area <strong>co</strong>des.<br />
¥ You should then enter '00' at the start of the number.<br />
– If an SMS <strong>co</strong>ntains several numbers, the next number will be highlighted if you scroll down until<br />
the first number disappears from the display.<br />
If you wish to use the number to send an SMS:<br />
¤ Save the number with the local area <strong>co</strong>de (dialling <strong>co</strong>de) in the directory.<br />
Notification by SMS<br />
You can be notified about missed calls or new answer machine messages (with the <strong>Gigaset</strong><br />
<strong>C47</strong>5 IP) via SMS.<br />
Pre<strong>co</strong>ndition: For missed calls, the caller's number (CLI) must have been transmitted.<br />
Notification is sent to your mobile phone or another phone with SMS functionality.<br />
You only need to set the phone number to which notification should be sent (notification<br />
number) and the notification type.<br />
Please note that your network provider will usually charge for SMS notifications.<br />
Saving the notification number<br />
v ¢ î Messaging ¢ SMS ¢ Settings ¢ Notify Number<br />
~ Enter the number (including area <strong>co</strong>de) to which the SMS is to be sent.<br />
§Save§ Press the display key.<br />
a Press and hold (idle status).<br />
Warning:<br />
Do not enter your own fixed line number for the notification of missed calls. This can lead to chargeable<br />
endless looping.<br />
58<br />
<strong>VoIPon</strong> www.voipon.<strong>co</strong>.<strong>uk</strong> sales@voipon.<strong>co</strong>.<strong>uk</strong> Tel: +44 (0)1245 808195 Fax: +44 (0)1245 808299
SMS mailboxes SMS (text messages)<br />
Setting the notification type<br />
v ¢ î Messaging ¢ SMS ¢ Settings ¢ Notify Type<br />
¤ Change multiple line input if necessary:<br />
Missed Calls:<br />
Select On if you require SMS notification.<br />
Ans Machine: (<strong>Gigaset</strong> <strong>C47</strong>5 IP)<br />
Select On if you require SMS notification.<br />
¤ Save changes (page 159).<br />
SMS mailboxes<br />
The general mailbox is the default setting. Anyone can access this mailbox and it cannot<br />
be protected by a PIN. You can additionally set up three personal mailboxes and protect<br />
these with a PIN. Each mailbox is identified by a name and a "mailbox ID" (a kind of extension<br />
number).<br />
Please note:<br />
u If you operate a number of devices (base stations) with SMS functionality on a single<br />
phone line, then each SMS mailbox ID may only occur once. In this case you must also<br />
change the preset ID of the general mailbox ("0").<br />
u You can only use personal mailboxes if your service provider supports this function. You<br />
can tell whether this is the case by the addition of a star (*) to the number of a (preset)<br />
SMS centre.<br />
u If you have forgotten your mailbox PIN, you can reset it by restoring the base station's<br />
default settings. This will delete all SMS messages from all mailboxes.<br />
59<br />
<strong>VoIPon</strong> www.voipon.<strong>co</strong>.<strong>uk</strong> sales@voipon.<strong>co</strong>.<strong>uk</strong> Tel: +44 (0)1245 808195 Fax: +44 (0)1245 808299
SMS (text messages) SMS mailboxes<br />
Setting up and changing a personal mailbox<br />
Setting up a personal mailbox<br />
v ¢ î Messaging ¢ SMS ¢ Settings ¢ SMS Mailboxes<br />
s Select mailbox, e.g. Mailbox 2, and press §OK§.<br />
¤ Change multiple line input:<br />
On/Off:<br />
Activate or deactivate mailbox.<br />
ID:<br />
Select mailbox ID (0–9). You can only select the available numbers.<br />
Protection:<br />
Activate/deactivate PIN protection.<br />
PIN:<br />
If necessary, enter 4-digit PIN.<br />
¤ Save changes (page 159).<br />
Active mailboxes are marked with ‰ in the mailbox list. They are shown in the SMS list and<br />
can, if necessary, be displayed by pressing the message key f.<br />
Deactivating a mailbox<br />
¤ Set On/Off: to Off. Confirm message with §Yes§ if necessary.<br />
All SMS messages saved in this mailbox will be deleted.<br />
Deactivating PIN protection<br />
¤ Set Protection: to Off.<br />
The mailbox PIN is reset to "0000".<br />
Changing the name of a mailbox<br />
v ¢ î Messaging ¢ SMS ¢ Settings ¢ SMS Mailboxes ¢ s (Select mailbox)<br />
§Edit§ Press the display key.<br />
~ Enter new name.<br />
§Save§ Press the display key.<br />
a Press and hold (idle status).<br />
Changing a mailbox's PIN and ID<br />
v ¢ î Messaging ¢ SMS ¢ Settings ¢ SMS Mailboxes ¢ s (Select mailbox)<br />
~ Enter mailbox PIN if required and press §OK§.<br />
¤ Set ID:, Protection: and PIN (page 60).<br />
60<br />
<strong>VoIPon</strong> www.voipon.<strong>co</strong>.<strong>uk</strong> sales@voipon.<strong>co</strong>.<strong>uk</strong> Tel: +44 (0)1245 808195 Fax: +44 (0)1245 808299
Setting SMS centres SMS (text messages)<br />
Sending an SMS to a personal mailbox<br />
To send an SMS to a personal mailbox, the sender must know your ID and enter it after your<br />
number.<br />
¤ You can send your SMS <strong>co</strong>ntact an SMS via your personal mailbox.<br />
Your SMS <strong>co</strong>ntact will then receive your SMS number with current ID and can save it in their<br />
directory. If the ID is invalid, the SMS will not be delivered.<br />
Setting SMS centres<br />
Entering/changing SMS centres<br />
¤ You should find out about the services and special functions offered by your service provider<br />
before you make a new application and/or before you delete pre-<strong>co</strong>nfigured call<br />
numbers.<br />
v ¢ î Messaging ¢ SMS ¢ Settings ¢ Service Centres<br />
s Select SMS centre (e.g. Service Centr. 1) and press §OK§.<br />
¤ Change multiple line input:<br />
Active Send:<br />
Select Yes if SMS messages are to be sent via the SMS centre. For the SMS centres 2 to<br />
4, the setting only applies to the next SMS.<br />
SMS:<br />
Press the display key §Edit§. Enter the number of the SMS service and insert a star if your<br />
service provider supports personal mailboxes.<br />
E-mail:<br />
Press the display key §Edit§. Enter the number of the e-mail service.<br />
¤ Save changes (page 159).<br />
Please note:<br />
Ask your service provider for details on how to enter service numbers if you wish to use personal mailboxes<br />
(pre<strong>co</strong>ndition: your service provider supports this function).<br />
Sending an SMS through another SMS centre<br />
¤ Activate the SMS centre (2 to 4) as the active send service centre.<br />
¤ Send the SMS.<br />
This setting only applies to the next SMS to be sent. Thereafter, the setting returns to<br />
Service Centr. 1.<br />
61<br />
<strong>VoIPon</strong> www.voipon.<strong>co</strong>.<strong>uk</strong> sales@voipon.<strong>co</strong>.<strong>uk</strong> Tel: +44 (0)1245 808195 Fax: +44 (0)1245 808299
SMS (text messages) SMS on a PABX<br />
SMS on a PABX<br />
u You can only receive an SMS when the Calling Line Identification is forwarded to the<br />
extension of the PABX (CLIP). The CLIP evaluation of the phone number for the SMS centre<br />
takes place in your <strong>Gigaset</strong>.<br />
u If required, you must prefix the number for the SMS centre with the access <strong>co</strong>de<br />
(depending on your PABX).<br />
If in doubt, test your PABX, e.g. by sending an SMS to your own number: once with and<br />
once without the access <strong>co</strong>de.<br />
u When you send SMS messages, your sender number may be sent without your extension<br />
number. In this case the recipient cannot reply to you directly.<br />
Sending and receiving SMS messages on ISDN PABXs is only possible via the MSN number<br />
assigned to your base station.<br />
Activating/deactivating SMS function<br />
If you deactivate the SMS function, you cannot send or receive any SMS messages with<br />
your phone.<br />
The settings you have made for sending and receiving SMS messages (e.g. the call numbers<br />
of the SMS centres) and the entries in the in<strong>co</strong>ming and draft message lists are saved<br />
even after you turn off your phone.<br />
v Open menu.<br />
55O2L<br />
Enter the digits.<br />
Q §OK§ Deactivate SMS function.<br />
Or:<br />
§OK§ Activate SMS function (default setting).<br />
SMS troubleshooting<br />
Error <strong>co</strong>des when sending<br />
E0 Calling Line Identification permanently withheld (CLIR) or Calling Line Identification not activated.<br />
FE Error occurred during SMS transfer.<br />
FD Connection to SMS centre failed; see self-help.<br />
62<br />
<strong>VoIPon</strong> www.voipon.<strong>co</strong>.<strong>uk</strong> sales@voipon.<strong>co</strong>.<strong>uk</strong> Tel: +44 (0)1245 808195 Fax: +44 (0)1245 808299
SMS troubleshooting SMS (text messages)<br />
Self-help with errors<br />
The following table lists error situations and possible causes and provides notes on troubleshooting.<br />
You cannot send messages.<br />
1. You have not requested the CLIP service (Calling Line Identification Presentation).<br />
¥ Ask your service provider to enable this service.<br />
2. SMS transmission has been interrupted (e.g. by a call).<br />
¥ Re-send the SMS.<br />
3. Network provider does not support this feature.<br />
4. No number or an invalid number is entered for the SMS centre set as the active send service centre.<br />
¥ Enter the number (page 61).<br />
You receive an in<strong>co</strong>mplete SMS.<br />
1. Your phone's memory is full.<br />
¥ Delete old SMS messages (page 56).<br />
2. The service provider has not yet sent the rest of the SMS.<br />
You have stopped receiving SMS messages.<br />
1. You have changed the ID of your mailbox.<br />
¥ Give your SMS <strong>co</strong>ntacts your new ID or undo the change (page 60).<br />
2. You have not activated your mailbox.<br />
¥ Activate your mailbox (page 60).<br />
3. Call forwarding is activated with When: All Calls for a fixed line <strong>co</strong>nnection, and with All Calls for the<br />
network mailbox.<br />
¥ Change the call forwarding.<br />
The SMS message is played back.<br />
1. The "display call number" service is not activated.<br />
¥ Ask your service provider to activate this function (chargeable).<br />
2. Your mobile phone operator and your fixed line network SMS service provider have not agreed on<br />
a <strong>co</strong>-operation.<br />
¥ Obtain information from your fixed line network SMS service provider.<br />
3. Your end device has been re<strong>co</strong>rded by your SMS provider as having no fixed line network SMS functionality,<br />
i.e. you are no longer registered with the provider.<br />
¥ Have the device (re-)registered to receive SMS messages.<br />
Messages are only received during the day.<br />
1. The terminal is re<strong>co</strong>rded in your SMS provider's database as having no fixed line network SMS functionality,<br />
i.e. you are no longer registered with the provider.<br />
¥ Obtain information from your fixed line network SMS service provider.<br />
¥ Register the terminal (again) for SMS reception (see above).<br />
63<br />
<strong>VoIPon</strong> www.voipon.<strong>co</strong>.<strong>uk</strong> sales@voipon.<strong>co</strong>.<strong>uk</strong> Tel: +44 (0)1245 808195 Fax: +44 (0)1245 808299
Operating the base station answer machine Operation via the handset<br />
Operating the base station answer machine<br />
You can operate the answer machine that is integrated in the base station via the handset<br />
or via remote operation (other phone/mobile phone). You can re<strong>co</strong>rd your own announcement<br />
message or advisory message via the handset.<br />
Receive numbers<br />
You can use your phone's Web <strong>co</strong>nfigurator to set which of your phone numbers your<br />
answer machine is to accept as soon as it is switched on (page 131). You can assign your<br />
phone any amount of phone numbers as receive numbers (VoIP, fixed line network,<br />
<strong>Gigaset</strong>.net).<br />
All calls accepted by the answer machine are stored in sequence in the answer machine<br />
independently of the receive number and displayed in the same answer machine list.<br />
Any registered handset to which at least one receive number from the answer machine has<br />
been assigned as a send or receive number can access the answer machine list (page 130).<br />
After a new phone number is <strong>co</strong>nfigured (a new VoIP ac<strong>co</strong>unt), it is first assigned to the<br />
answer machine as a receive number.<br />
Parallel calls<br />
If a caller is <strong>co</strong>nnected to the answer machine and a se<strong>co</strong>nd call for the answer machine<br />
<strong>co</strong>mes in on a different line (fixed line network or VoIP), the se<strong>co</strong>nd caller hears the dialling<br />
tone until the <strong>co</strong>nnection to the first caller has ended. The answer machine will then accept<br />
the se<strong>co</strong>nd call.<br />
Announce only/answer and re<strong>co</strong>rd mode<br />
You can use the answer machine in two different modes.<br />
u In Ans. & Re<strong>co</strong>rd mode, the caller hears the announcement and can then leave a message.<br />
u In Announce Only mode, the caller hears your announcement but cannot leave a message.<br />
Operation via the handset<br />
The handset loudspeaker activates automatically if you receive an a<strong>co</strong>ustic prompt or<br />
message while operating. You can switch it off with the handsfree key d.<br />
Activating/deactivating the answer machine<br />
v ¢ Ð Settings ¢ Voice Mail ¢ Ans Machine ( ‰ = on)<br />
When the answer machine is activated, the remaining memory time is announced. If the<br />
time has not yet been set (page 12), an appropriate announcement is made. The × i<strong>co</strong>n<br />
appears in the display.<br />
The answer machine accepts calls for all the receive numbers assigned to it (page 131).<br />
64<br />
<strong>VoIPon</strong> www.voipon.<strong>co</strong>.<strong>uk</strong> sales@voipon.<strong>co</strong>.<strong>uk</strong> Tel: +44 (0)1245 808195 Fax: +44 (0)1245 808299
Operation via the handset Operating the base station answer machine<br />
In answer and re<strong>co</strong>rd mode<br />
If the memory is full the answer machine automatically switches to announce only mode.<br />
¤ Delete old messages.<br />
The answer machine reverts automatically to answer and re<strong>co</strong>rd mode.<br />
Selecting announcement mode<br />
You can choose between Ans. & Re<strong>co</strong>rd and Announce Only.<br />
v ¢ Ð Settings ¢ Voice Mail ¢ Announcements ¢ Set Ans. Mode ¢ Ans. & Re<strong>co</strong>rd /<br />
Announce Only ( ‰ = on)<br />
a Press and hold (idle status).<br />
The selected mode is saved even after the answer machine is deactivated.<br />
The selection process will be cancelled if the message memory is already full when you<br />
change to Ans. & Re<strong>co</strong>rd mode. You will be requested to delete old messages. The answer<br />
machine stays in announce only mode Announce Only.<br />
¤ Delete old messages.<br />
Only after messages have been deleted can you switch the answer machine to answer and<br />
re<strong>co</strong>rd mode.<br />
Setting "Answer & Re<strong>co</strong>rd" or "Announce Only" by toggling<br />
You can use the Ans Mode Time setting to change over the announcement mode for a specific<br />
period.<br />
Example: Ans. & Re<strong>co</strong>rd mode is set. If you activate Ans Mode Time and set the time period<br />
From: 18.00, Until: 08:00 the answer machine will switch to Announce Only mode every day<br />
at 18:00 (if it is switched on). It will switch back to Ans. & Re<strong>co</strong>rd mode at 08:00 the next<br />
day.<br />
v ¢ Ð Settings ¢ Voice Mail ¢ Announcements ¢ Set Ans. Mode ¢ Ans Mode Time<br />
( ‰ = on)<br />
¤ Change multiple line input:<br />
From:<br />
Enter hours/minutes for the start of the period in 4-digit format.<br />
Until:<br />
Enter hours/minutes for the end of the period in 4-digit format.<br />
Activation:<br />
Select On or Off.<br />
¤ Save changes with §Save§.<br />
If the messages memory is full and Activation: On has been selected, saving is interrupted<br />
and you will receive an instruction to delete old messages.<br />
¤ Delete old messages and repeat the setting.<br />
As soon as you change the announcement mode (page 65), the Ans Mode Time function is<br />
automatically deactivated. You may have to reactivate it if required.<br />
If you do not enter a time for From: / Until:, Ans Mode Time will still be activated but the<br />
machine will not switch to announcement mode.<br />
65<br />
<strong>VoIPon</strong> www.voipon.<strong>co</strong>.<strong>uk</strong> sales@voipon.<strong>co</strong>.<strong>uk</strong> Tel: +44 (0)1245 808195 Fax: +44 (0)1245 808299
Operating the base station answer machine Operation via the handset<br />
Re<strong>co</strong>rding a personal announcement/notification<br />
Pre-re<strong>co</strong>rded announcements are stored in your telephone for both announcement modes.<br />
The pre-re<strong>co</strong>rded announcements are used if there is no personal announcement for the<br />
mode <strong>co</strong>ncerned.<br />
v ¢ Ð Settings ¢ Voice Mail ¢ Announcements ¢ Re<strong>co</strong>rd Announce / Re<strong>co</strong>rd Anc Only<br />
§OK§ Press the display key to start the re<strong>co</strong>rding.<br />
When the re<strong>co</strong>rding starts, the handset changes to handsfree mode. You hear the ready<br />
tone (short tone).<br />
¤ Now speak your announcement (at least 3 secs.).<br />
Use a or ” to cancel re<strong>co</strong>rding and §OK§ to restart the re<strong>co</strong>rding process.<br />
The re<strong>co</strong>rding is cancelled if the answer machine memory is full.<br />
¤ Delete old messages and repeat re<strong>co</strong>rding if required.<br />
Stop re<strong>co</strong>rding:<br />
§End§ Press the display key.<br />
After re<strong>co</strong>rding, the announcement is played back for you to check.<br />
You can re-re<strong>co</strong>rd the announcement with §New§.<br />
You can cancel the playback by pressing a or ”.<br />
Please note:<br />
u Re<strong>co</strong>rding ends automatically if the maximum re<strong>co</strong>rding time of 170 se<strong>co</strong>nds is<br />
exceeded or there is a break in speech for more than 2 se<strong>co</strong>nds.<br />
u If you cancel the re<strong>co</strong>rding, the previously re<strong>co</strong>rded announcement will be deleted. The<br />
pre-re<strong>co</strong>rded announcement will be used again.<br />
u The re<strong>co</strong>rding is cancelled if the answer machine memory is full.<br />
¤ Delete old messages and repeat re<strong>co</strong>rding if required.<br />
u If an external call is received during a re<strong>co</strong>rding for one of the handset's receive numbers,<br />
the re<strong>co</strong>rding is interrupted and the call is signalled on the handset.<br />
Playing back announcements<br />
v ¢ Ð Settings ¢ Voice Mail ¢ Announcements ¢ Play Announce / Play Anc Only<br />
If you have not re<strong>co</strong>rded a personal announcement, the relevant pre-re<strong>co</strong>rded announcement<br />
is played.<br />
Re<strong>co</strong>rd a new announcement while playing back the announcement:<br />
§New§ Press the display key. For further information, page 66.<br />
Deleting announcements/announce only<br />
v ¢ Ð Settings ¢ Voice Mail ¢ Announcements ¢ Del Announce / Del Anc Only<br />
§Yes§ Press the display key to <strong>co</strong>nfirm the prompt.<br />
a Press and hold (idle status).<br />
Once you have deleted your announcement, the relevant pre-re<strong>co</strong>rded announcement will<br />
be used again. You cannot delete the pre-re<strong>co</strong>rded announcements.<br />
66<br />
<strong>VoIPon</strong> www.voipon.<strong>co</strong>.<strong>uk</strong> sales@voipon.<strong>co</strong>.<strong>uk</strong> Tel: +44 (0)1245 808195 Fax: +44 (0)1245 808299
Operation via the handset Operating the base station answer machine<br />
Playing back messages<br />
New messages that have not yet been heard are indicated by the à i<strong>co</strong>n in the display and<br />
by the f key flashing on the handset.<br />
You can start to play back the messages in two ways:<br />
u Open the answer machine list with the message key.<br />
u If the answer machine is set for fast access: press and hold key .<br />
Please note:<br />
All messages are played back irrespective of their receive number.<br />
Listening to messages via the answer machine list<br />
Pre<strong>co</strong>ndition: At least one of your handset's send/receive numbers matches the receive<br />
number of a stored message.<br />
The date and time of each message is logged in the answer machine list (provided it has<br />
been set, page 12) and displayed during the playback. If Calling Line Identification is activated,<br />
the caller's number is displayed. If the caller's number is saved in the directory, their<br />
name is displayed.<br />
f Press the message key.<br />
Ans M.: Select and press §OK§.<br />
An announcement informs you if there are new or old messages.<br />
If there are new messages, playback begins with the first new message. If the message has<br />
been saved with the date and time, you will hear an appropriate announcement before<br />
playback begins. All messages are played back irrespective of the receive number.<br />
After the last new message you will hear the end tone and an announcement about how<br />
much re<strong>co</strong>rding time remains.<br />
You can listen to old messages if there are no more new messages. Begin playback as<br />
described above.<br />
Listening to messages via key<br />
Pre<strong>co</strong>nditions: The answer machine has been set to fast access. At least one of your handset's<br />
send/receive numbers matches the receive number of a stored message (page 131).<br />
¤ Press and hold key .<br />
The stored messages are now played back.<br />
Pausing and <strong>co</strong>ntrolling playback<br />
During message playback:<br />
2 Pause playback. Press 2 again to resume.<br />
t or<br />
Skip to the previous message.<br />
s or 3<br />
Skip to the next message.<br />
2 x s Skip to next-but-one message.<br />
If playback is interrupted for over a minute, the answer machine returns to idle status.<br />
67<br />
<strong>VoIPon</strong> www.voipon.<strong>co</strong>.<strong>uk</strong> sales@voipon.<strong>co</strong>.<strong>uk</strong> Tel: +44 (0)1245 808195 Fax: +44 (0)1245 808299
Operating the base station answer machine Operation via the handset<br />
Marking a message as "new"<br />
A previously played back "old" message is displayed as a "new" message again.<br />
During message playback or pause:<br />
* Press the star key.<br />
Or:<br />
§Options§ Open menu.<br />
Mark as New<br />
Select and press §OK§.<br />
Playback of the current message is cancelled. Playback of next message starts, if applicable.<br />
The f key on the handset flashes.<br />
Copying the phone number of a message to the directory<br />
See "Copying a displayed number to the directory", page 46.<br />
Deleting messages<br />
You can either delete all old messages together or individually.<br />
Deleting all old messages<br />
During playback or pause:<br />
§Options§ Press the display key.<br />
Del All Old Msgs<br />
Select and press §OK§.<br />
§Yes§ Press the display key to <strong>co</strong>nfirm the prompt.<br />
All the old messages are deleted – regardless of the receive number.<br />
Deleting individual old messages<br />
During playback or pause:<br />
§Delete§ / Q<br />
Press the display key or Q key.<br />
Please note:<br />
You can delete a new message as soon as playback has started.<br />
Picking up a call from the answer machine<br />
You can pick up a call while the answer machine is re<strong>co</strong>rding or is being operated via<br />
remote operation:<br />
c / §Accept§<br />
Press the talk or display key.<br />
Re<strong>co</strong>rding stops and you can speak to the caller.<br />
If 3 se<strong>co</strong>nds of the call have already been re<strong>co</strong>rded when you pick it up, the call will be displayed<br />
as a new message. The f key on the handset flashes.<br />
68<br />
<strong>VoIPon</strong> www.voipon.<strong>co</strong>.<strong>uk</strong> sales@voipon.<strong>co</strong>.<strong>uk</strong> Tel: +44 (0)1245 808195 Fax: +44 (0)1245 808299
Activating/deactivating call screening Operating the base station answer machine<br />
Forwarding an external call to the answer machine<br />
You can forward an in<strong>co</strong>ming external call to the answer machine.<br />
Pre<strong>co</strong>nditions: There is sufficient free memory space. One of your handset's send/receive<br />
numbers matches a receive number of the answer machine.<br />
An external call is signalled on the handset:<br />
Ÿ Press the display key.<br />
The answer machine starts immediately in re<strong>co</strong>rding mode and re<strong>co</strong>rds the call. The set<br />
time for the call acceptance (page 70) is ignored.<br />
The display key Ÿ will not be displayed if the memory is full.<br />
Activating/deactivating two-way re<strong>co</strong>rding<br />
You can re<strong>co</strong>rd an external call with the answer machine.<br />
Pre<strong>co</strong>ndition: You are <strong>co</strong>nducting an external call. At least one of the handset's send/<br />
receive numbers is assigned to the answer machine as a receive number (page 131).<br />
¤ Inform the caller that the call is being re<strong>co</strong>rded.<br />
§Options§ Press the display key.<br />
Two Way Re<strong>co</strong>rd<br />
Select and press §OK§.<br />
The two-way re<strong>co</strong>rding is indicated on the display by an advisory text and is added to the<br />
answer machine list as a new message.<br />
§End§ Press the display key to stop the two-way re<strong>co</strong>rding.<br />
The maximum re<strong>co</strong>rding time depends on the memory available on the answer machine.<br />
If the memory is full, you will hear an end tone and the re<strong>co</strong>rding is aborted. The <strong>co</strong>nversation<br />
re<strong>co</strong>rded up to the end tone is then allocated to the answer machine list as a new<br />
message.<br />
Please note:<br />
You can activate two-way re<strong>co</strong>rding for <strong>co</strong>nference calls and toggling when making calls via a fixed<br />
line network.<br />
Activating/deactivating call screening<br />
During re<strong>co</strong>rding of a message you can screen a call via the handset loudspeaker.<br />
Pre<strong>co</strong>ndition: The number called is assigned to the handset as a receive number<br />
(page 130).<br />
Permanently activating/deactivating call screening<br />
v ¢ Ð Settings ¢ Voice Mail<br />
Call Screening<br />
Select and press §OK§ ( ‰ = on)<br />
a Press and hold (idle status).<br />
69<br />
<strong>VoIPon</strong> www.voipon.<strong>co</strong>.<strong>uk</strong> sales@voipon.<strong>co</strong>.<strong>uk</strong> Tel: +44 (0)1245 808195 Fax: +44 (0)1245 808299
Operating the base station answer machine Setting up the answer machine<br />
Deactivating call screening for the current re<strong>co</strong>rding<br />
You can deactivate the Call Screening function for the current call during re<strong>co</strong>rding via the<br />
handset.<br />
a Briefly press the end call key.<br />
Setting up the answer machine<br />
The answer machine has already been preset at the factory. Make individual settings using<br />
the handset.<br />
Call acceptance/charge saving function for remote operation<br />
You can set when you want the answer machine to accept a call.<br />
The options are: 0 sec., after 10 sec., 18 sec. or 30 sec. and the <strong>co</strong>st-saving setting Automatic.<br />
In Automatic mode, the following applies for call acceptance:<br />
u If there are no new messages, the answer machine accepts a call after 18 se<strong>co</strong>nds.<br />
u If new messages are present, the answer machine accepts a call after 10 se<strong>co</strong>nds.<br />
When operating remotely you can tell after approx. 15 se<strong>co</strong>nds that there are no new messages<br />
(otherwise the answer machine would already have accepted your call). There will<br />
be no call charges if you hang up now.<br />
v ¢ Ð Settings ¢ Voice Mail ¢ Ring Delay<br />
r Select 0 sec. / 10 sec. / 18 sec. / 30 sec. / Automatic.<br />
§Save§ Press the display key.<br />
a Press and hold (idle status).<br />
Setting the re<strong>co</strong>rding time<br />
You can set the maximum re<strong>co</strong>rding time of a message. You can choose between: 60 Sec,<br />
120 Sec, 180 Sec or Maximum.<br />
v ¢ Ð Settings ¢ Voice Mail ¢ Message Length<br />
r Select the re<strong>co</strong>rding time.<br />
§Save§ Press the display key.<br />
Setting the re<strong>co</strong>rding quality<br />
Set the quality you require for your re<strong>co</strong>rdings. The options are: Standard, High, Excellent.<br />
If the quality is higher, the maximum re<strong>co</strong>rding time is reduced.<br />
v ¢ Ð Settings ¢ Voice Mail ¢ Re<strong>co</strong>rd Quality<br />
r Select the re<strong>co</strong>rding quality.<br />
§Save§ Press the display key.<br />
Please note:<br />
Your announcements are always re<strong>co</strong>rded in best quality.<br />
70<br />
<strong>VoIPon</strong> www.voipon.<strong>co</strong>.<strong>uk</strong> sales@voipon.<strong>co</strong>.<strong>uk</strong> Tel: +44 (0)1245 808195 Fax: +44 (0)1245 808299
Resetting fast access for the answer machine using key 1 Operating the base station answer<br />
Changing the language for voice prompt and pre-re<strong>co</strong>rded announcement<br />
vN5O2<br />
Enter digits and press<br />
§OK§ To set Czech (short).<br />
2 §OK§ To set Slovene (short).<br />
3 §OK§ To set Croatian (short).<br />
4 §OK§ To set English (short).<br />
Resetting fast access for the answer machine using key 1<br />
The integrated answer machine has already been preset for fast access at the factory. However,<br />
if you have set the network mailbox for fast access (page 86), you can reset this setting.<br />
v ¢ Ð Settings ¢ Voice Mail ¢ Set Key 1<br />
Answer Machine<br />
Select and press §OK§.<br />
a Press and hold (idle status).<br />
The setting for fast access applies to all registered handsets. At least one of the handset's<br />
send/receive numbers must match a receive number of the answer machine to enable<br />
access to the answer machine via fast access.<br />
Operating when on the move (remote operation)<br />
You can check and activate your answer machine from any other telephone (hotel, pay<br />
phone etc.), or initiate ringback from the answer machine with an SMS.<br />
Pre<strong>co</strong>nditions:<br />
u You have set a system PIN other than 0000 (page 103).<br />
u The phone you are using for remote operation has touch tone dialling (DTMF), i.e. you<br />
hear different tones when you press the keys. Alternatively, you can use a <strong>co</strong>de transmitter<br />
(available from your mobile phone retailer).<br />
Please note:<br />
Remote operation via VoIP <strong>co</strong>nnections is possible as long as DTMF signals are transmitted (depending<br />
on the provider) as SIP info messages, audible signals in the voice channel (inband or audio) or<br />
as special RTP data packets (pursuant to RFC2833).<br />
Calling the answer machine and playing back messages<br />
Pre<strong>co</strong>ndition: Your answer machine is activated.<br />
~ Dial your own number that is assigned to the answer machine as a receive<br />
number.<br />
9~ When you hear your announcement, press 9 and enter the system PIN.<br />
71<br />
<strong>VoIPon</strong> www.voipon.<strong>co</strong>.<strong>uk</strong> sales@voipon.<strong>co</strong>.<strong>uk</strong> Tel: +44 (0)1245 808195 Fax: +44 (0)1245 808299
Operating the base station answer machine Operating when on the move (remote operation)<br />
You will be informed whether any new messages have been re<strong>co</strong>rded. The messages are<br />
now played back. All messages are played back irrespective of their receive number. After<br />
the new messages, the old messages are played back. Finally, the remaining memory time<br />
is given.<br />
You can <strong>co</strong>ntrol message playback by means of the keypad.<br />
Please note:<br />
The answer machine will terminate the <strong>co</strong>nnection under the following circumstances:<br />
– an in<strong>co</strong>rrect system PIN has been entered.<br />
– there are no messages in the answer machine<br />
– after the remaining memory announcement<br />
Operating the answer machine via the keypad<br />
The following keys are used for operation:<br />
A Previous:<br />
Go to the start of the current message. Press repeatedly to go to the previous<br />
messages.<br />
B Stop/resume:<br />
Stop playback: Press again to resume.<br />
If there is a pause lasting longer than one minute, the <strong>co</strong>nnection to the answer<br />
machine is terminated.<br />
3 Next:<br />
Skip to next message. Press several times to go to the following messages.<br />
: New:<br />
Mark current message as "new". Start playback of the following message.<br />
0 Delete:<br />
Delete current message.<br />
Cancelling remote operation<br />
¤ Press the end call key or replace the receiver.<br />
Activating the answer machine<br />
¤ Phone home and allow to ring for around a minute. Use a phone number that has been<br />
assigned to the answer machine as a receive number.<br />
You hear: "Please enter PIN".<br />
~ Enter system PIN.<br />
Your answer machine will be activated in the set mode (page 65). It tells you how much<br />
memory time is left.<br />
The messages are now played back.<br />
The answer machine cannot be deactivated remotely.<br />
72<br />
<strong>VoIPon</strong> www.voipon.<strong>co</strong>.<strong>uk</strong> sales@voipon.<strong>co</strong>.<strong>uk</strong> Tel: +44 (0)1245 808195 Fax: +44 (0)1245 808299
Opening the in<strong>co</strong>ming mail list E-mail notifications<br />
E-mail notifications<br />
Your phone will notify you when new e-mail messages have been received on your in<strong>co</strong>ming<br />
e-mail server.<br />
You can set your phone to periodically <strong>co</strong>nnect to your in<strong>co</strong>ming e-mail server and check<br />
whether you have new e-mail.<br />
Any new messages that have been received are displayed on all <strong>Gigaset</strong> <strong>C47</strong>H handsets<br />
that have been registered: you will hear an advisory tone, the message key f will flash<br />
and the À i<strong>co</strong>n will be displayed in the idle display.<br />
Please note:<br />
The À i<strong>co</strong>n is also displayed if new SMS messages or messenger messages have been received.<br />
If new e-mail messages have been received, pressing the message key f will display them in list<br />
E-mail:.<br />
You can use your phone to <strong>co</strong>nnect to the in<strong>co</strong>ming e-mail server and display the sender,<br />
date and time of receipt and subject for every e-mail message in the list of in<strong>co</strong>ming mail<br />
(page 73).<br />
Pre<strong>co</strong>nditions:<br />
u You have set up an e-mail ac<strong>co</strong>unt with an Internet provider.<br />
u The in<strong>co</strong>ming e-mail server uses the POP3 proto<strong>co</strong>l.<br />
u You have stored the name of the in<strong>co</strong>ming e-mail server and your personal access data<br />
(ac<strong>co</strong>unt name, password) in the phone (page 141).<br />
Opening the in<strong>co</strong>ming mail list<br />
v ¢ î Messaging ¢ E-mail<br />
Or if new e-mail messages have been received (the message key f is flashing):<br />
f ¢ E-mail:<br />
The telephone establishes a <strong>co</strong>nnection to the in<strong>co</strong>ming e-mail server. A list of e-mail messages<br />
that are stored there will be displayed.<br />
New unread messages appear above old read messages. The most recent entry is at the<br />
head of the list.<br />
The following details are displayed for each e-mail: name or e-mail address of the sender<br />
(one line, abbreviated if necessary) and date and time (date and time will only display <strong>co</strong>rrect<br />
values if sender and recipient are located in the same time zone).<br />
73<br />
<strong>VoIPon</strong> www.voipon.<strong>co</strong>.<strong>uk</strong> sales@voipon.<strong>co</strong>.<strong>uk</strong> Tel: +44 (0)1245 808195 Fax: +44 (0)1245 808299
E-mail notifications Opening the in<strong>co</strong>ming mail list<br />
Example display:<br />
Inbox<br />
Susi Sorglos<br />
29.11.07 12:20<br />
Louise Miller<br />
29.11.07 11:15<br />
Ý Options<br />
1 E-mail address or name transmitted by the sender<br />
Bold: New message.<br />
2 Date and time of receipt of e-mail message<br />
If the in<strong>co</strong>ming message list on the in<strong>co</strong>ming e-mail server is empty, No entries will appear<br />
in the display.<br />
Please note:<br />
Many e-mail providers operate standard spam protection measures. E-mail messages classified as<br />
spam are stored in a separate folder and are therefore not shown on the list of in<strong>co</strong>ming mail.<br />
Some e-mail providers allow you to deactivate spam protection or show spam e-mails on the list of<br />
in<strong>co</strong>ming mail.<br />
Other e-mail providers may send a message to the Inbox when a new spam e-mail is received. This is<br />
to inform you that a suspected spam e-mail has been received.<br />
Date and sender of this mail are repeatedly updated, so that it is always displayed as a new message.<br />
Messages when establishing a <strong>co</strong>nnection<br />
1<br />
2<br />
The following problems may occur when <strong>co</strong>nnecting to the in<strong>co</strong>ming e-mail server. The<br />
messages are displayed in the handset's display for a few se<strong>co</strong>nds.<br />
Server not accessible!<br />
The <strong>co</strong>nnection to the in<strong>co</strong>ming e-mail server <strong>co</strong>uld not be established. This may have<br />
the following causes:<br />
– In<strong>co</strong>rrect entry for name of in<strong>co</strong>ming e-mail server.<br />
– Temporary problems with the in<strong>co</strong>ming e-mail server (server is down or is not <strong>co</strong>nnected<br />
to the Internet).<br />
¤ Check settings (page 141).<br />
¤ Try again later.<br />
Currently not possible!<br />
The resources your phone requires to make the <strong>co</strong>nnection are busy, e.g.:<br />
– Two VoIP <strong>co</strong>nnections have already been made<br />
– Another handset is currently <strong>co</strong>nnected to the in<strong>co</strong>ming e-mail server.<br />
¤ Try again later.<br />
Log-in failed!<br />
Error when logging in to the in<strong>co</strong>ming e-mail server. This may have the following cause:<br />
– In<strong>co</strong>rrect entries for name of in<strong>co</strong>ming e-mail server, user name and/or password.<br />
¤ Check settings (page 141).<br />
74<br />
<strong>VoIPon</strong> www.voipon.<strong>co</strong>.<strong>uk</strong> sales@voipon.<strong>co</strong>.<strong>uk</strong> Tel: +44 (0)1245 808195 Fax: +44 (0)1245 808299
View the message header of an e-mail E-mail notifications<br />
Mailbox settings in<strong>co</strong>mplete!<br />
In<strong>co</strong>mplete entries for name of in<strong>co</strong>ming e-mail server, user name and/or password.<br />
¤ Check settings and <strong>co</strong>mplete if necessary (page 141).<br />
View the message header of<br />
an e-mail<br />
Pre<strong>co</strong>ndition: You have opened the in<strong>co</strong>ming mail list (page 73).<br />
q Select e-mail entry.<br />
§Subject§ Press the display key.<br />
The subject of the e-mail message will be displayed (max. 120 characters).<br />
” Press the display key to return to the in<strong>co</strong>ming message list.<br />
View e-mail sender's address<br />
Pre<strong>co</strong>ndition: You have opened the in<strong>co</strong>ming mail list (page 73).<br />
q Select e-mail entry.<br />
§From§ Press the display key.<br />
The sender's e-mail address is shown in full.<br />
” Press the display key to return to the in<strong>co</strong>ming message list.<br />
Example:<br />
From<br />
Susi.Sorglos@mailp<br />
rov.<strong>co</strong>m<br />
Ý Options<br />
Deleting an e-mail<br />
Pre<strong>co</strong>ndition: You have viewed the message header or the sender's address of an e-mail<br />
(page 75).<br />
¤ Select §Options§ ¢ Delete E-mail and press §OK§.<br />
The e-mail is deleted from the in<strong>co</strong>ming e-mail server.<br />
75<br />
<strong>VoIPon</strong> www.voipon.<strong>co</strong>.<strong>uk</strong> sales@voipon.<strong>co</strong>.<strong>uk</strong> Tel: +44 (0)1245 808195 Fax: +44 (0)1245 808299
Messenger<br />
Messenger<br />
The messenger on your phone makes instant messaging possible (immediate message<br />
transfer, chatting). The phone supports the XMPP Messenger (Jabber).<br />
Instant messaging refers to <strong>co</strong>mmunication between "friends" on the Internet. Subscribers<br />
exchange short messages, which are forwarded immediately. This gives rise to a flowing<br />
"<strong>co</strong>nversation" similar to chatting.<br />
The pre<strong>co</strong>ndition for this form of <strong>co</strong>mmunication is that both subscribers have a <strong>co</strong>nnection<br />
to the messenger server of the same instant messaging provider. Therefore, both<br />
subscribers must be "online". The messenger server forwards the messages to the recipient.<br />
The subscribers to instant messaging are called buddies.<br />
Most messenger servers allow you to create what are known as buddy lists. You can store<br />
the buddies you want to chat to in the buddy list.<br />
The messenger server informs you as soon as one of your buddies <strong>co</strong>mes online or goes<br />
offline. Offline means that the buddy has dis<strong>co</strong>nnected from the messenger server.<br />
In addition to this, each buddy can determine their own (<strong>co</strong>mmunication) status (state of<br />
presence, see page 79), from which buddies can tell whether they are in the mood to chat<br />
or wish to remain undisturbed.<br />
The Web <strong>co</strong>nfigurator on your phone gives you the following options:<br />
u Go online (page 77).<br />
u Display the list of your <strong>co</strong>ntacts (buddies) on the handset that you previously created<br />
on the PC. This will indicate for each buddy whether they are available (online) and<br />
ready to chat (state of presence, see page 79).<br />
u Exchange messages with your buddies. Your handset notifies you about new messages<br />
with a flashing message key f and a beep.<br />
u Call your buddies directly from your buddy list (page 84).<br />
Pre<strong>co</strong>nditions for instant messaging:<br />
u You have registered with an instant messaging provider via the Web browser on your PC<br />
and (optionally) agreed a Web name (nickname).<br />
u You have created a buddy list via the messenger client on the PC.<br />
u You have saved the messenger server address and your access data for the messenger<br />
server (user ID, password) in the phone using the Web <strong>co</strong>nfigurator (page 139). The<br />
phone needs the data to establish a <strong>co</strong>nnection with the messenger server.<br />
Please note:<br />
If your instant messaging provider doesn't support the phone's messenger client, then you can open<br />
an ac<strong>co</strong>unt with an open Jabber server and use the Web <strong>co</strong>nfigurator to enter its address in your<br />
phone. Many of these Jabber servers offer gateways to other messenger servers (e.g. AOL, ICQ, MSN,<br />
Yahoo!).<br />
You can find a list of Jabber servers and an overview of the gateways to other messenger servers on<br />
the Internet at<br />
http://www.jabber.org.<br />
You can find information on setting up a Jabber ac<strong>co</strong>unt with <strong>co</strong>nnections from ICQ, MSN or Yahoo<br />
on the Internet, e.g. at: http://web.swissjabber.ch<br />
76<br />
<strong>VoIPon</strong> www.voipon.<strong>co</strong>.<strong>uk</strong> sales@voipon.<strong>co</strong>.<strong>uk</strong> Tel: +44 (0)1245 808195 Fax: +44 (0)1245 808299
Establishing a <strong>co</strong>nnection, going online Messenger<br />
Establishing a <strong>co</strong>nnection,<br />
going online<br />
When you go online, your buddy list will be displayed on the handset and you will receive<br />
messages from your buddies.<br />
Only one of the handsets <strong>co</strong>nnected to the base station can <strong>co</strong>nnect to the messenger<br />
server. You can then only "chat" on this handset.<br />
An external call will interrupt the "chat", but you will still be online. You can <strong>co</strong>ntinue your<br />
chat after you end or reject the call.<br />
Pre<strong>co</strong>ndition: You have saved the messenger server address and your access data for the<br />
messenger server (user ID and password) in the phone using the Web <strong>co</strong>nfigurator<br />
(page 139).<br />
v ¢ î Messaging ¢ Messenger<br />
§Yes§ Press the display key to <strong>co</strong>nfirm the prompt.<br />
The phone attempts to establish a <strong>co</strong>nnection. You are informed about the status of the<br />
<strong>co</strong>nnection by messages on the display.<br />
If the <strong>co</strong>nnection can be established, you are Online. The display will show the submenu for<br />
your messenger. You can open your buddy list, send and receive messages and call your<br />
buddies.<br />
The following is displayed when the handset is in idle status:<br />
Ð V<br />
INT 1<br />
%<br />
INT SMS<br />
You remain online until you set your status to Offline (page 78) or the <strong>co</strong>nnection to the<br />
messenger server is terminated (page 85).<br />
You also remain online if you press the end call key a.<br />
If the <strong>co</strong>nnection cannot be established, you will receive an appropriate message. Please<br />
try again later (page 85).<br />
Please note:<br />
You can also assign the messenger to one of the display keys on your handset (page 97). The <strong>co</strong>nnection<br />
is established when you press the display key.<br />
77<br />
<strong>VoIPon</strong> www.voipon.<strong>co</strong>.<strong>uk</strong> sales@voipon.<strong>co</strong>.<strong>uk</strong> Tel: +44 (0)1245 808195 Fax: +44 (0)1245 808299
Messenger Changing/checking your personal status, going offline<br />
Lost <strong>co</strong>nnection<br />
If your phone loses its <strong>co</strong>nnection to the messenger server, the display key f will flash<br />
on the handset that had been <strong>co</strong>nnected to the messenger. In idle status it will display<br />
"Messenger <strong>co</strong>nnection failed!". All messages that you had previously received, as well as any<br />
message you were currently writing, will be saved.<br />
Re<strong>co</strong>nnecting:<br />
f Press the message key.<br />
§Yes§ Press the display key to <strong>co</strong>nfirm the prompt.<br />
The phone will attempt to re<strong>co</strong>nnect. You are informed about the status of the <strong>co</strong>nnection<br />
by messages on the display.<br />
If you reply to the request with §No§ the phone will behave as during regular dis<strong>co</strong>nnection.<br />
All messenger messages will be deleted. The phone is offline.<br />
Changing/checking your personal status, going offline<br />
You want to log off (go offline) or let your buddies know whether you wish to chat or would<br />
prefer to remain undisturbed.<br />
You have the following options:<br />
Offline<br />
You log off from the messenger server. The messenger server informs your buddies that<br />
you are no longer available.<br />
The handset switches to idle status. You can neither send nor receive messages.<br />
Online<br />
(Setting after successful <strong>co</strong>nnection)<br />
You are logged on to the messenger server and can send and receive messages.<br />
Ready for chat<br />
You are Online and can send and receive messages.<br />
You invite your buddies to "chat" with you.<br />
Away / Extended Away / Do not disturb<br />
You are Online and can send and receive messages. You inform your buddies that you<br />
currently cannot/do not wish to "chat", i.e. will not reply to their messages immediately.<br />
Invisible<br />
You are Online and can send and receive messages.<br />
However, the messenger server indicates to your buddies that you are Offline.<br />
Please note:<br />
All status settings apart from Offline only inform other buddies about your <strong>co</strong>mmunication status.<br />
Whether this information is passed on to your buddies depends on the provider.<br />
78<br />
<strong>VoIPon</strong> www.voipon.<strong>co</strong>.<strong>uk</strong> sales@voipon.<strong>co</strong>.<strong>uk</strong> Tel: +44 (0)1245 808195 Fax: +44 (0)1245 808299
Opening the buddy list Messenger<br />
Changing status<br />
v ¢ î Messaging ¢ Messenger ¢ <strong>User</strong> Status ¢ Change Status<br />
s Select status and press §OK§ ( ‰ = on).<br />
a Press and hold if necessary (idle status).<br />
Dis<strong>co</strong>nnect, go offline<br />
¤ Select Offline status, and respond §Yes§ to the security prompt.<br />
The <strong>co</strong>nnection to the messenger server will be terminated. The handset returns to idle status.<br />
New messenger messages are no longer sent to you. The messenger message list is<br />
deleted. The buddy list is no longer available.<br />
Please note:<br />
Whether messages directed to you are deleted or stored in the messenger server depends on the provider.<br />
Stored messages are sent to you when you go online again.<br />
Checking your status and user ID<br />
v ¢ î Messaging ¢ Messenger ¢ <strong>User</strong> Status ¢ Info<br />
If you are online, the following information may be displayed (depending on your provider):<br />
u Your Web name (nickname, abbreviated if necessary)<br />
u Your current status<br />
u Your user ID (format: userid@provider-domain; abbreviated if necessary)<br />
Only Offline will be displayed if you are offline.<br />
Opening the buddy list<br />
Pre<strong>co</strong>ndition: You are Online and have already created a buddy list (using the PC) on your<br />
provider's messenger server.<br />
v ¢ î Messaging ¢ Messenger ¢ Buddies<br />
Only the first 20 (maximum) buddies on the buddy list will be read by the messenger server<br />
and displayed on the handset. The number depends on the available memory space.<br />
The buddies that are displayed depend on which buddies were transferred from the messenger<br />
server first.<br />
Please note:<br />
You can also receive and respond to messages from buddies who are not on the list displayed on the<br />
handset.<br />
79<br />
<strong>VoIPon</strong> www.voipon.<strong>co</strong>.<strong>uk</strong> sales@voipon.<strong>co</strong>.<strong>uk</strong> Tel: +44 (0)1245 808195 Fax: +44 (0)1245 808299
Messenger Opening the buddy list<br />
Example:<br />
Buddies<br />
Mark %<br />
Julian %<br />
Lisa &<br />
Herbert &<br />
Chat Info<br />
The Web names (nicknames) of your buddies are displayed on the list. If they do not have<br />
a Web name, the user ID is displayed.<br />
If the name of a buddy is longer than one line, it will be abbreviated. You can navigate the<br />
list with the <strong>co</strong>ntrol key q.<br />
The buddies appear on the list in the following order. You can interpret their status<br />
(page 78) by means of the <strong>co</strong>lour of the % i<strong>co</strong>n next to the buddies :<br />
1. Buddies with Online status or Ready for chat in alphabetical order. The % i<strong>co</strong>n is green.<br />
2. Buddies with Away, Extended Away or Do not disturb status in alphabetical order.<br />
The % i<strong>co</strong>n is orange.<br />
3. Buddies with Offline or Invisible status in alphabetical order. The % i<strong>co</strong>n is red.<br />
Please note:<br />
The buddy list will remain open until you exit it (press and release or press and hold a).<br />
The handset will not automatically return to idle status.<br />
Changes in the status of buddies<br />
You have opened the buddy list and one of the buddies changes their status. The following<br />
distinctions are made:<br />
u A buddy changes to status Online / Ready for chat :<br />
You are informed via a message on the display. The buddy list is updated.<br />
u In the event of another status change, the buddy list is updated. No message is displayed.<br />
Please note:<br />
If the buddy changes to Offline status, your messages are no longer sent to them. Whether the messenger<br />
server stores the messages until the buddy is Online again or deletes them depends on the provider.<br />
80<br />
<strong>VoIPon</strong> www.voipon.<strong>co</strong>.<strong>uk</strong> sales@voipon.<strong>co</strong>.<strong>uk</strong> Tel: +44 (0)1245 808195 Fax: +44 (0)1245 808299
Receiving messages Messenger<br />
Requesting information about buddies<br />
You have opened the buddy list (page 79).<br />
q Select buddy.<br />
§Info§ Press the display key.<br />
The display depends on the provider.<br />
Example:<br />
Info<br />
Julian<br />
Online<br />
Julian.Reeves@jabbe<br />
r.<strong>co</strong>m<br />
Ý Chat<br />
1 Web name (nickname, abbreviated if necessary)<br />
2Status<br />
3 <strong>User</strong> ID (format: userid@provider-domain; abbreviated if necessary). (Resource names are not displayed)<br />
If the buddy changes their status the entry is updated.<br />
Press ” to return to your buddy list. Press §Chat§ if you want to "chat" with the buddy.<br />
Chatting to buddies<br />
You want to "chat" to a buddy, i.e. send a message.<br />
Pre<strong>co</strong>ndition: You have opened the buddy list (page 79) and selected a buddy with q.<br />
¤ Press the display key §Chat§. The text editor is opened.<br />
¤ Write and send your message (page 83).<br />
The buddy list is shown again.<br />
Receiving messages<br />
Pre<strong>co</strong>ndition: You are online.<br />
Newly arrived buddy or info messages (page 82) are indicated by a flashing message key<br />
f and a beep, even if you are in a messenger menu or text editor.<br />
The messages are stored in the Messenger: list.<br />
Please note:<br />
The Messenger list is only displayed if you are online.<br />
1<br />
2<br />
3<br />
81<br />
<strong>VoIPon</strong> www.voipon.<strong>co</strong>.<strong>uk</strong> sales@voipon.<strong>co</strong>.<strong>uk</strong> Tel: +44 (0)1245 808195 Fax: +44 (0)1245 808299
Messenger Receiving messages<br />
Opening the message list using the f key<br />
The message key flashes.<br />
¤ Press the message key f.<br />
¤ Select Messenger: (2) list if required and press §OK§. The number in brackets indicates the<br />
number of new messages.<br />
Please note:<br />
If you are in the messenger menu or one of its submenus/text editors and you press the flashing message<br />
key f, this will open the Messenger list directly.<br />
To open the message list from the menu:<br />
In the handset idle status:<br />
v ¢ î Messaging ¢ Messenger ¢ Messages<br />
Select and press §OK§.<br />
Message list<br />
The messages on the list are sorted chronologically, with the oldest message at the head<br />
of the list.<br />
Example of a list display:<br />
Messenger<br />
Julian<br />
29.11.07 12:20<br />
INFO message<br />
29.11.07 11:15<br />
Delete Read<br />
1 Sender's Web name/user ID<br />
Bold: new/unread message<br />
2 Date and time of message<br />
3 Message from the messenger server (page 82)<br />
If the memory is full and new messages arrive, the oldest message(s) will be overwritten.<br />
If there are no old (read) messages, the oldest (unread) messages will be overwritten.<br />
Message types<br />
1<br />
2<br />
3<br />
In instant messaging, a distinction is made between the following types of message:<br />
u Buddy messages are the "instant messages" you receive from your buddies. You can<br />
answer the messages.<br />
u Info messages are special information from the provider. They are forwarded to you,<br />
but you cannot reply to them.<br />
Example: With some messaging providers you receive an info message when another<br />
subscriber tries to add you to their buddy list. You are prompted to check the messages<br />
on the messenger client on your PC.<br />
Via the messenger client on your PC you can agree to the action or refuse permission.<br />
Without your agreement, the other subscriber cannot add you to their buddy list.<br />
82<br />
<strong>VoIPon</strong> www.voipon.<strong>co</strong>.<strong>uk</strong> sales@voipon.<strong>co</strong>.<strong>uk</strong> Tel: +44 (0)1245 808195 Fax: +44 (0)1245 808299
Writing and sending messages Messenger<br />
Reading messages<br />
Pre<strong>co</strong>ndition: You have opened the message list and selected a message with q.<br />
¤ Press the display key §Read§.<br />
The message is opened for you to read.<br />
You have the following options:<br />
§Delete§ Delete a message from the list You will return to the message list.<br />
Or:<br />
§Answer§ (for buddy messages only)<br />
Reply to message. The text editor is opened. You can write a reply (see "Writing<br />
and sending messages" on page 83).<br />
Or:<br />
a Back to the message list.<br />
Delete message<br />
Pre<strong>co</strong>ndition: You have opened the message list and selected a message with q.<br />
¤ Press the display key §Delete§.<br />
Writing and sending messages<br />
Pre<strong>co</strong>ndition:<br />
u You are reading a buddy's message and press the display key §Answer§ or<br />
u You have pressed the display key §Chat§ in the buddy list or the buddy profiles.<br />
A text editor is opened.<br />
¤ Use the handset keys to enter a message (max. 612 characters).<br />
¤ Select §Menu§ ¢ Send and press §OK§.<br />
The message is sent to the buddy.<br />
If the messenger server is unable to send the message to the buddy, a message will be displayed.<br />
¤ Confirm the message by clicking §OK§.<br />
The text-editor will re-open with your message. You can then retry sending the message.<br />
83<br />
<strong>VoIPon</strong> www.voipon.<strong>co</strong>.<strong>uk</strong> sales@voipon.<strong>co</strong>.<strong>uk</strong> Tel: +44 (0)1245 808195 Fax: +44 (0)1245 808299
Messenger Calling a buddy<br />
Interruption while writing<br />
If you receive a call while you are writing a message or the <strong>co</strong>nnection to the messenger<br />
server is interrupted, the text editor is terminated. Your message is stored temporarily<br />
until ...<br />
u ... you start up a chat with the same buddy (page 81). The text editor is opened with the<br />
stored text. You can finish writing the message and send it.<br />
u ... you wish to write a message to another buddy. The stored text is deleted. The text<br />
editor is empty.<br />
u ... you go offline. The text is deleted.<br />
Menu options for the text editor<br />
By pressing §Menu§ within the text editor you have the following options:<br />
Send<br />
Send message to buddy.<br />
Delete Text<br />
Delete the whole text.<br />
Calling a buddy<br />
You can call a buddy directly.<br />
Pre<strong>co</strong>ndition: The messenger server supports calls using vCard and your buddy's vCard<br />
<strong>co</strong>ntains a phone number.<br />
Pre<strong>co</strong>nditions:<br />
u You have opened the buddy list and selected a buddy<br />
or<br />
u You have opened the buddy's profile<br />
or<br />
u You have opened the Messenger: list and selected a buddy<br />
or<br />
u You are reading a message from a buddy<br />
c / d Press and release/hold the talk or handsfree key.<br />
The phone will try to establish a VoIP/fixed line <strong>co</strong>nnection.<br />
The first number that is found on the vCard will be dialled.<br />
Ending a call<br />
a Press the end call key.<br />
84<br />
<strong>VoIPon</strong> www.voipon.<strong>co</strong>.<strong>uk</strong> sales@voipon.<strong>co</strong>.<strong>uk</strong> Tel: +44 (0)1245 808195 Fax: +44 (0)1245 808299
Self-help with errors Messenger<br />
Self-help with errors<br />
While establishing a <strong>co</strong>nnection to the messenger server, during <strong>co</strong>nnection and when<br />
sending messages the following errors may occur.<br />
Behaviour when the <strong>co</strong>nnection is lost<br />
If the <strong>co</strong>nnection to the messenger server is interrupted, an appropriate message is shown<br />
in the display. You are Offline.<br />
If you are in a submenu of the messenger, the handset switches to the messenger menu.<br />
¤ Try to re-establish the <strong>co</strong>nnection (page 77).<br />
Errors when sending<br />
If it is not possible to send a message, a distinction is made between the following situations:<br />
u The <strong>co</strong>nnection to the messenger server is interrupted:<br />
A message is shown in the display to indicate that the <strong>co</strong>nnection to the messenger<br />
server has been interrupted.<br />
The message is stored temporarily (page 84).<br />
¤ Try to re-establish the <strong>co</strong>nnection (page 77) and send the message again.<br />
u The server is unable to send the message:<br />
A message is shown in the display to indicate that the message <strong>co</strong>uld not be sent. If, for<br />
example, the buddy is not available, the message you have sent will also be displayed.<br />
The message is stored temporarily (page 84).<br />
¤ If necessary, check the buddy's user ID and send the message again later.<br />
85<br />
<strong>VoIPon</strong> www.voipon.<strong>co</strong>.<strong>uk</strong> sales@voipon.<strong>co</strong>.<strong>uk</strong> Tel: +44 (0)1245 808195 Fax: +44 (0)1245 808299
Using the network mailbox Configuring fast access for the network mailbox<br />
Using the network mailbox<br />
Some fixed line network providers and VoIP providers offer answer machines on the network<br />
– network mailboxes.<br />
You can use the relevant network mailbox if you have requested it from your fixed line network<br />
or VoIP provider.<br />
The network mailbox only accepts in<strong>co</strong>ming calls made via the relevant line (fixed line network<br />
or <strong>co</strong>rresponding VoIP phone number). To re<strong>co</strong>rd all calls, you should therefore set up<br />
network mailboxes for both the fixed line network and for your VoIP <strong>co</strong>nnections.<br />
Please note:<br />
You can only set up fast access to one of the network mailboxes.<br />
You can assign different quick dial numbers (e.g. the keys 2, 3 etc.) to the numbers for additional<br />
network mailboxes (page 97). You must assign the quick dial numbers to every handset that is<br />
registered.<br />
Configuring fast access for the network mailbox<br />
You can use fast access to make direct calls to a network mailbox or the integrated <strong>Gigaset</strong><br />
<strong>C47</strong>5 IP answer machine.<br />
<strong>Gigaset</strong> <strong>C47</strong>0 IP: Fast access is set for the network mailbox. You only need to enter the<br />
number of a network mailbox.<br />
<strong>Gigaset</strong> <strong>C47</strong>5 IP: Fast access is set for the integrated answer machine. You can <strong>co</strong>nfigure a<br />
network mailbox instead. Ask your network provider about this.<br />
The number is usually dialled via the default <strong>co</strong>nnection.<br />
Tip: A fixed line network mailbox should always be <strong>co</strong>ntrolled via the fixed line network<br />
<strong>co</strong>nnection. If VoIP is set as the default <strong>co</strong>nnection on your phone, you have the following<br />
options:<br />
u Add a star (*) to the end of the number for the network mailbox. The <strong>co</strong>nnection is then<br />
established via the fixed line network.<br />
u Enter the number with line suffix #0 for the fixed line network.<br />
u Define a <strong>co</strong>rresponding dialling plan (page 135).<br />
86<br />
<strong>VoIPon</strong> www.voipon.<strong>co</strong>.<strong>uk</strong> sales@voipon.<strong>co</strong>.<strong>uk</strong> Tel: +44 (0)1245 808195 Fax: +44 (0)1245 808299
Network mailbox message Using the network mailbox<br />
Configuring the network mailbox for fast access and entering the network mailbox number<br />
v ¢ Ð Settings ¢ Voice Mail ¢ Set Key 1<br />
Network Mailb.<br />
Select and press §OK§ ( ‰ = on).<br />
~ Enter the number for the network mailbox. Add a line suffix if necessary<br />
(e.g. #0 for the fixed line network).<br />
§Save§ Press the display key.<br />
a Press and hold (idle status).<br />
Fast access is automatically activated.<br />
The setting for fast access applies to all <strong>Gigaset</strong> <strong>C47</strong>H handsets.<br />
Please note:<br />
– If no number has been entered: press and hold to enter the number.<br />
– To deactivate fast access, you must delete the number.<br />
Calling the network mailbox<br />
Press and hold. You are <strong>co</strong>nnected straight to the network mailbox.<br />
d If necessary, press the handsfree key. You hear the network mailbox announcement.<br />
Please note:<br />
If you have set an automatic area <strong>co</strong>de (page 134), the area <strong>co</strong>de is also prefixed to the number of<br />
the network mailbox if it does not start with 0 and is dialled via VoIP.<br />
If the number does not begin with 0, please ask your VoIP provider. A network mailbox can frequently<br />
be accessed via an alternative phone number (with area <strong>co</strong>de) too.<br />
Network mailbox message<br />
The way in which you are informed of new messages in the network mailbox depends on<br />
the relevant fixed line network or VoIP provider.<br />
See user guide for each network mailbox.<br />
87<br />
<strong>VoIPon</strong> www.voipon.<strong>co</strong>.<strong>uk</strong> sales@voipon.<strong>co</strong>.<strong>uk</strong> Tel: +44 (0)1245 808195 Fax: +44 (0)1245 808299
Using several handsets Registering handsets<br />
Using several handsets<br />
Registering handsets<br />
You can register up to six handsets to your base station.<br />
Please note:<br />
– If a number of handsets are registered on your base station, you can simultaneously make two<br />
calls via the Internet and one via the fixed line network Up to two additional internal <strong>co</strong>nnections<br />
are also possible.<br />
– Selecting the <strong>co</strong>nnection via the talk key (page 26) is not supported on GAP handsets. Therefore,<br />
if you enter a number without a line suffix and without defining a dialling plan for the phone<br />
number, it will be dialled via Default Line (page 105). If you enter a "*" (star) at the end of the phone<br />
number, it will be dialled via the non-default <strong>co</strong>nnection.<br />
– After registration, all the phone numbers for the phone will be assigned to the handset as receive<br />
numbers. It will use the fixed line network number and the first VoIP number as send numbers.<br />
For how to change the assignments, see page 130.<br />
Registering another <strong>Gigaset</strong> <strong>C47</strong>H handset on the <strong>Gigaset</strong> <strong>C47</strong>0 IP/<strong>C47</strong>5 IP<br />
Before you can use your handset, you must register it to a base station.<br />
You must initiate handset registration on the handset and on the base station.<br />
The handset will change to idle status if registration was successful. The handset's internal<br />
number is shown in the display e.g. Int 1. If not, repeat the procedure. Registration can take<br />
up to one minute.<br />
On the handset<br />
v ¢ Ð Settings ¢ Handset ¢ Register H/Set<br />
~ Enter the system PIN of the base station (the default is 0000) and press §OK§.<br />
Display shows e.g. Base 1 and flashes.<br />
On the base station<br />
¤ Within 60 sec. press and hold the registration/paging key on the base station (page 2)<br />
(approx. 3 sec.).<br />
The handset is assigned the lowest available internal number (1-6). If a number of handsets<br />
are registered on the base station, the internal number appears in the display after registration,<br />
e.g. INT 2. This means that the internal number 2 was assigned to the handset.<br />
Please note:<br />
If six handsets are already registered to the base station, there are two options:<br />
– The handset with the internal number 6 is in idle status: the handset you wish to register is<br />
assigned the number 6. The handset that was previously number 6 is de-registered.<br />
– The handset with the internal number 6 is being used: the handset you wish to register cannot be<br />
registered.<br />
88<br />
<strong>VoIPon</strong> www.voipon.<strong>co</strong>.<strong>uk</strong> sales@voipon.<strong>co</strong>.<strong>uk</strong> Tel: +44 (0)1245 808195 Fax: +44 (0)1245 808299
De-registering handsets Using several handsets<br />
Registering other handsets with <strong>Gigaset</strong> <strong>C47</strong>0 IP/<strong>C47</strong>5 IP<br />
You can register other <strong>Gigaset</strong> handsets and handsets for other devices with GAP functionality<br />
as follows.<br />
On the handset<br />
¤ Start to register the handset as described in its user guide.<br />
On the base station<br />
¤ Press and hold the registration/paging key on the base station (page 2) (approx. 3 sec.).<br />
Please note:<br />
You can also make changes on the base station with a <strong>Gigaset</strong> S45 or S67H handset.<br />
De-registering handsets<br />
You can de-register any registered handset from any registered <strong>Gigaset</strong> <strong>C47</strong>H handset.<br />
u Open list of internal parties.<br />
The handset which you are using is marked with
Using several handsets Changing a handset's internal number<br />
Changing a handset's internal number<br />
A handset is automatically assigned the lowest free number on registration. In the list of<br />
internal parties, the handsets are sorted ac<strong>co</strong>rding to their internal number.<br />
You can change the internal number of all registered handsets (1–6). Numbers 1-6 can<br />
only be assigned once each.<br />
u Open list of handsets. Your own handset is indicated by
Making internal calls Using several handsets<br />
Making internal calls<br />
Internal calls to other handsets registered on the same base station are free.<br />
Calling a specific handset<br />
u Initiate internal call.<br />
~ Enter the number of the handset.<br />
Or:<br />
u Initiate internal call.<br />
s Select handset.<br />
c Press the talk key.<br />
Calling all handsets ("group call")<br />
u Initiate internal call.<br />
* Press the star key. All handsets are called.<br />
Ending a call<br />
a Press the end call key.<br />
Please note:<br />
You can reject an internal call by pressing the end call key a.<br />
Other handsets will <strong>co</strong>ntinue to signal an internal "group call".<br />
Transferring a call to another handset<br />
You can forward (<strong>co</strong>nnect) an external call, made via fixed line network or VoIP, to another<br />
handset.<br />
u Open the list of handsets.<br />
The external participant hears hold music if activated (page 104).<br />
s Select a handset or Call All and press §OK§.<br />
When the internal participant answers:<br />
¤ If necessary announce the external call.<br />
a Press the end call key.<br />
The external call is transferred to the other handset.<br />
If the internal participant does not answer or the line is busy, press the display key §End§ to<br />
return to the external call.<br />
When transferring a call you can also press the end call key a before the internal participant<br />
answers.<br />
Then, if the internal participant does not answer or the line is busy, the call will automatically<br />
return to you (the display will show Recall).<br />
91<br />
<strong>VoIPon</strong> www.voipon.<strong>co</strong>.<strong>uk</strong> sales@voipon.<strong>co</strong>.<strong>uk</strong> Tel: +44 (0)1245 808195 Fax: +44 (0)1245 808299
Using several handsets Making internal calls<br />
Initiating internal <strong>co</strong>nsultation call, <strong>co</strong>nference call<br />
You are talking to an external participant (via fixed line network or VoIP) and can call an<br />
internal participant at the same time to hold a <strong>co</strong>nsultation call.<br />
u Open the list of handsets.<br />
The external participant hears hold music if activated (page 104).<br />
s Select handset and press §OK§.<br />
When an internal participant answers you can speak to them.<br />
You have the following options:<br />
Ending a <strong>co</strong>nsultation call<br />
§End§ Press the display key.<br />
You are re<strong>co</strong>nnected with the external participant.<br />
Initiating a <strong>co</strong>nference call<br />
§Conf.§ Press the display key.<br />
You are in a three-way <strong>co</strong>nference call with the external participant and the internal participant.<br />
If the internal participant who has been called ends the call (press end call key a), you<br />
will be <strong>co</strong>nnected with the external participant. If you press end call key a, the external<br />
call will be transferred to the internal participant.<br />
Accepting/rejecting call waiting during an internal call<br />
If you receive an external call during an internal call, you will hear the call waiting tone<br />
(short tone). With Calling Line Identification, the caller's number will appear in the display.<br />
Ending an internal call, accepting an external call<br />
§Accept§ Press the display key.<br />
The internal call is ended. You are <strong>co</strong>nnected to the external caller.<br />
Rejecting the external call<br />
§Reject§ Press the display key.<br />
The call waiting tone is turned off. You remain <strong>co</strong>nnected with the internal participant. The<br />
ringer tone can still be heard on other registered handsets.<br />
92<br />
<strong>VoIPon</strong> www.voipon.<strong>co</strong>.<strong>uk</strong> sales@voipon.<strong>co</strong>.<strong>uk</strong> Tel: +44 (0)1245 808195 Fax: +44 (0)1245 808299
Using a handset as a room monitor Using several handsets<br />
Using a handset as a room monitor<br />
If the room monitor is activated, a previously stored destination number is called as soon<br />
as a set noise level is reached in the room.<br />
You can save an internal or external number in your handset as the destination number.<br />
The room monitor call to an external number stops after around 90 se<strong>co</strong>nds. The room<br />
monitor call to an internal number (handset) stops after approx. 3 minutes (depending on<br />
the base station). During use as a room monitor, all keys are barred except for the end call<br />
key a. The speaker of the handset is muted.<br />
When the room monitor is activated, in<strong>co</strong>ming calls to the handset are indicated without<br />
a ringer tone and are only shown on the screen. The display and keypad are not illuminated<br />
and advisory tones are also turned off.<br />
If you accept an in<strong>co</strong>ming call, the room monitor is suspended for the duration of the call,<br />
but the function remains activated.<br />
If you deactivate then reactivate the handset, the room monitor remains activated.<br />
Warning!<br />
– You should always check the operation of the room monitor before use. For example, test<br />
its sensitivity. Check the <strong>co</strong>nnection if you are forwarding the room monitor to an external<br />
number.<br />
– When the function is switched on, the handset's operating time is severely reduced. If necessary,<br />
place the handset in the charging cradle. This ensures that the batteries do not run down.<br />
– Ideally the handset should be positioned 1 to 2 metres away from the baby. The microphone must<br />
be directed towards the baby.<br />
– The <strong>co</strong>nnection to which the room monitor is forwarded must not be blocked by an activated<br />
answer machine.<br />
Activating the room monitor and entering the number to be called<br />
v ¢ í ¢ Room Monitor<br />
¤ Change multiple line input:<br />
Room M.:<br />
Select On to activate.<br />
Call to:<br />
Press the display key §Edit§ and enter destination number.<br />
External number:<br />
¤ Enter number directly or press<br />
s and select number from directory.<br />
Only the last 4 digits are displayed.<br />
¤ Save number with §Save§.<br />
Internal number:<br />
¤ Press the display key §INT§.<br />
¤ Select handset with s or Call All (if you want to call all registered handsets) and<br />
press §OK§.<br />
93<br />
<strong>VoIPon</strong> www.voipon.<strong>co</strong>.<strong>uk</strong> sales@voipon.<strong>co</strong>.<strong>uk</strong> Tel: +44 (0)1245 808195 Fax: +44 (0)1245 808299
Using several handsets Using a handset as a room monitor<br />
Level:<br />
Set noise level sensitivity (Low or High).<br />
¤ Press the display key §Save§ to save the entry.<br />
The function is now activated. With §Options§, you can switch directly to the settings.<br />
Please note:<br />
An external number will be dialled via the default <strong>co</strong>nnection (VoIP or fixed line network) if you do<br />
not enter a line suffix (page 27) and have not defined any dialling plans for the number (page 135).<br />
Changing the set destination number<br />
v ¢ í ¢ Room Monitor<br />
s Scroll to the Call to: line.<br />
X or §Delete<br />
Delete existing number.<br />
¤ Enter number as described in "Activating the room monitor and entering the number to<br />
be called" (page 93).<br />
Deactivating the room monitor remotely<br />
Pre<strong>co</strong>nditions: The room monitor call is sent to an external destination number. The telephone<br />
called supports touch tone dialling.<br />
¤ Accept the call from the room monitor and press keys 9 ;.<br />
Your base station sends a <strong>co</strong>nfirmation tone and ends the <strong>co</strong>nnection.<br />
Please note:<br />
Remote deactivation via VoIP <strong>co</strong>nnections is possible if DTMF signals are transmitted either as SIP info<br />
messages, as audible signals via the voice channel (inband or audio) or as special RTP data packets<br />
pursuant to RFC2833 (provider-dependent).<br />
Room monitor function deactivated on handset. There will be no further room monitor<br />
calls. The other room monitor settings (e.g. no ringer tone) on the handset will remain activated<br />
until you press the display key §OFF§ on the handset.<br />
To reactivate the room function with the same phone number:<br />
¤ Turn on the activation again and save with §Save§ (page 93).<br />
94<br />
<strong>VoIPon</strong> www.voipon.<strong>co</strong>.<strong>uk</strong> sales@voipon.<strong>co</strong>.<strong>uk</strong> Tel: +44 (0)1245 808195 Fax: +44 (0)1245 808299
Changing the display language Handset settings<br />
Handset settings<br />
Your handset is pre<strong>co</strong>nfigured, but you can change the settings to suit your individual<br />
requirements.<br />
Changing the display language<br />
You can view the display texts in different languages.<br />
v ¢ Ð Settings ¢ Handset ¢ Language<br />
The current language is indicated by ‰ .<br />
s Select a language and press §OK§.<br />
a Press and hold (idle status).<br />
If you accidentally choose a language you do not understand:<br />
v 5 4<br />
Press keys in sequence.<br />
s Select the <strong>co</strong>rrect language and press §OK§.<br />
Setting the display<br />
You have a choice of four <strong>co</strong>lour schemes and several different <strong>co</strong>ntrasts.<br />
v ¢ Ð Settings ¢ Display<br />
Colour Scheme<br />
Select and press §OK§.<br />
s Select a <strong>co</strong>lour scheme and press §OK§ ( ‰ = current <strong>co</strong>lour).<br />
a Press briefly.<br />
s Scroll to the Contrast line.<br />
Contrast Select and press §OK§.<br />
r Select <strong>co</strong>ntrast.<br />
§Save§ Press the display key.<br />
a Press and hold (idle status).<br />
95<br />
<strong>VoIPon</strong> www.voipon.<strong>co</strong>.<strong>uk</strong> sales@voipon.<strong>co</strong>.<strong>uk</strong> Tel: +44 (0)1245 808195 Fax: +44 (0)1245 808299
Handset settings Setting the screen picture<br />
Setting the screen picture<br />
You can display a picture or a screen picture (picture or digital clock) when the handset is<br />
in idle status. This will replace the idle status display. It may <strong>co</strong>nceal the date, time and<br />
name.<br />
The screen picture is not displayed in certain situations, e.g. during a call or when the handset<br />
has been de-registered.<br />
If a screen picture has been activated, the menu item Screen Picture is marked with ‰ .<br />
v ¢ Ð Settings ¢ Display ¢ Screen Picture<br />
The current setting is displayed.<br />
¤ Change multiple line input:<br />
Activation:<br />
Select On (screen picture is displayed) or Off (no screen picture).<br />
Selection:<br />
Change screen picture if necessary (see below).<br />
¤ Press the display key §Save§.<br />
If the screen picture <strong>co</strong>nceals the display, press the end call key a briefly to show the idle<br />
display with time and date.<br />
Changing the screen picture<br />
v ¢ Ð Settings ¢ Display ¢ Screen Picture<br />
s Scroll to the Selection line.<br />
§View§ Press the display key. The active screen picture is displayed<br />
s Select screen picture and press §Change§.<br />
¤ Press the display key §Save§.<br />
Setting the display backlight<br />
Depending on whether or not the handset is in the charging cradle you can set different<br />
levels of display illumination. If it is activated, the display is permanently dimmed.<br />
v ¢ Ð Settings ¢ Display ¢ Backlight<br />
The current setting is displayed.<br />
¤ Change multiple line input:<br />
In Charger<br />
Select On or Off.<br />
Without Charger<br />
Select On or Off.<br />
§Save§ Press the display key.<br />
a Press and hold (idle status).<br />
Please note:<br />
The handset's standby time can be significantly reduced if the display backlight (On) is activated.<br />
96<br />
<strong>VoIPon</strong> www.voipon.<strong>co</strong>.<strong>uk</strong> sales@voipon.<strong>co</strong>.<strong>uk</strong> Tel: +44 (0)1245 808195 Fax: +44 (0)1245 808299
Quick access to functions Handset settings<br />
Quick access to functions<br />
The display keys on your handset are preset to fulfil certain functions. You can change the<br />
<strong>co</strong>nfiguration, i.e. assign other functions to the display keys.<br />
To start the function, you then simply need to press the button.<br />
Changing display key assignments<br />
¤ Press and hold the left or right display key.<br />
The list of possible key assignments is opened.<br />
¤ Select a function and press §OK§.<br />
The following features are available:<br />
u INT (§INT§)<br />
Opens the list of internal parties.<br />
u SMS (§SMS§)<br />
Opens the SMS submenu for writing, sending and reading SMS messages (page 53):<br />
î Messaging ¢ SMS<br />
u SMS Notific. (§Notif.§)<br />
Opens the menu for activating SMS notification (page 58):<br />
î Messaging ¢ SMS ¢ Settings ¢ Notify Type<br />
u E-mail (§EMail§)<br />
Opens the e-mail submenu for receiving and reading e-mail notifications (page 73):<br />
î Messaging ¢ E-mail<br />
u Messenger (§Messgr.§)<br />
Opens the Messenger submenu for chatting with friends on the Internet (page 76):<br />
î Messaging ¢ Messenger<br />
u Fixed Line Call (§FixedLine§)<br />
Opens the pre-dialling option for making a call via the fixed line network.<br />
u IP Call (§IP§)<br />
Opens the pre-dialling option for making a call via VoIP.<br />
The current display key <strong>co</strong>nfiguration is shown on the bottom display line above each key.<br />
Starting a function<br />
With the handset in idle status, press the display key briefly.<br />
The function menu is opened.<br />
Activating/deactivating<br />
auto answer<br />
If you activate this function, when you receive a call you can simply lift the handset out of<br />
the charging cradle without having to press the talk key c.<br />
v ¢ Ð Settings ¢ Handset<br />
97<br />
<strong>VoIPon</strong> www.voipon.<strong>co</strong>.<strong>uk</strong> sales@voipon.<strong>co</strong>.<strong>uk</strong> Tel: +44 (0)1245 808195 Fax: +44 (0)1245 808299
Handset settings Changing the handsfree/earpiece volume<br />
Auto Answer<br />
Select and press §OK§ ( ‰ = on).<br />
a Press and hold (idle status).<br />
Changing the handsfree/earpiece volume<br />
You can set the loudspeaker volume for handsfree talking to five different levels and the<br />
earpiece volume to three different levels.<br />
In the handset idle status:<br />
t Press the <strong>co</strong>ntrol key at the top.<br />
Handset Volume<br />
Select and press §OK§.<br />
r Set the earpiece volume.<br />
s Jump to the Speaker: line.<br />
r Set the handsfree volume.<br />
§Save§ Press display key if necessary to save the setting permanently.<br />
Please note:<br />
You can also adjust the call volume via Ð Settings £ Audio Settings £ Handset Volume in the menu.<br />
Setting the volume during a call:<br />
t Press the <strong>co</strong>ntrol key at the top.<br />
r Select volume.<br />
The setting will automatically be saved after approx. 3 se<strong>co</strong>nds, if not then press the display<br />
key §Save§.<br />
If t is assigned with another function:<br />
§Options§ Open menu.<br />
Volume Select and press §OK§.<br />
Configure setting (see above).<br />
98<br />
<strong>VoIPon</strong> www.voipon.<strong>co</strong>.<strong>uk</strong> sales@voipon.<strong>co</strong>.<strong>uk</strong> Tel: +44 (0)1245 808195 Fax: +44 (0)1245 808299
Changing ringer tones Handset settings<br />
Changing ringer tones<br />
u Volume:<br />
You can choose between five volumes (1–5; e.g. volume 2 = ˆ) and the "crescendo"<br />
ring (6; volume increases with each ring = ‰).<br />
u Ringer tones:<br />
You can select various ringer tones.<br />
You can set different ringer tones for the following functions:<br />
u Ext. Calls: for external calls<br />
u Internal Calls: for internal calls<br />
u All: the same ringer tone for all functions<br />
Settings for individual functions<br />
Set the volume and melody depending on the type of signalling required.<br />
In the handset idle status:<br />
t Press the <strong>co</strong>ntrol key at the top.<br />
Ringer Settings<br />
Select and press §OK§.<br />
Ext. Calls / Internal Calls<br />
Select and press §OK§.<br />
¤ Change multiple line input:<br />
r Set volume (1–6).<br />
s Scroll to the next line.<br />
r Select melody.<br />
§Save§ Press the display key to save the setting.<br />
a Press and hold (idle status).<br />
Same ringer tone for all functions<br />
In the handset idle status:<br />
t ¢ Ringer Settings ¢ All<br />
¤ Set volume and ringer tone (see "Settings for individual functions").<br />
§Save§ Press the display key to <strong>co</strong>nfirm the prompt.<br />
a Press and hold (idle status).<br />
Please note:<br />
You can also adjust the ringer tones via Ð Settings £ Audio Settings £ Ringer Settings in the menu.<br />
99<br />
<strong>VoIPon</strong> www.voipon.<strong>co</strong>.<strong>uk</strong> sales@voipon.<strong>co</strong>.<strong>uk</strong> Tel: +44 (0)1245 808195 Fax: +44 (0)1245 808299
Handset settings Activating/deactivating advisory tones<br />
Activating/deactivating the ringer tone<br />
You can deactivate the ringer tone on your handset before you answer a call or when the<br />
handset is in idle status; the ringer tone can be deactivated permanently or just for the current<br />
call. The ringer tone cannot be reactivated while an external call is in progress.<br />
Deactivating the ringer tone permanently<br />
* Press and hold the star key.<br />
The Ú i<strong>co</strong>n appears in the display.<br />
Reactivating the ringer tone<br />
* Press and hold the star key.<br />
Deactivating the ringer tone for the current call<br />
§Silence§ Press the display key.<br />
Activating/deactivating the alert tone<br />
In place of the ringer tone you can activate an alert tone. When you get a call, you will hear<br />
a short tone ("Beep") instead of the ringer tone.<br />
* Press and hold the star key and within 3 se<strong>co</strong>nds:<br />
§Beep§§ Press the display key. A call will now be signalled by one short alert tone. º<br />
appears in the display.<br />
Activating/deactivating advisory tones<br />
Your handset uses "advisory tones" to tell you about different activities and statuses. The<br />
following advisory tones can be activated/deactivated independently of each other:<br />
u Key click: every key press is <strong>co</strong>nfirmed.<br />
u Acknowledge tones:<br />
– Confirmation tone (ascending tone sequence): at the end of an entry/setting and<br />
when an SMS or a new entry arrives in the answer machine list (<strong>Gigaset</strong> <strong>C47</strong>5 IP) or<br />
call history<br />
– Error tone (descending tone sequence): when you make an in<strong>co</strong>rrect entry<br />
– Menu end tone: when scrolling at the end of a menu<br />
u Battery tone: the batteries need to be charged.<br />
In the handset idle status:<br />
t Press the <strong>co</strong>ntrol key at the top.<br />
Advisory Tones<br />
Select and press §OK§.<br />
100<br />
<strong>VoIPon</strong> www.voipon.<strong>co</strong>.<strong>uk</strong> sales@voipon.<strong>co</strong>.<strong>uk</strong> Tel: +44 (0)1245 808195 Fax: +44 (0)1245 808299
Setting the alarm clock Handset settings<br />
¤ Change multiple line input:<br />
Key Tones:<br />
Select On or Off.<br />
Confirm.:<br />
Select On or Off.<br />
Battery:<br />
Select On, Off or In Call. The battery warning tone is only activated/deactivated and only<br />
sounds during a call.<br />
§Save§ Press the display key to save the setting.<br />
You cannot deactivate the <strong>co</strong>nfirmation tone for placing the handset in the charging cradle.<br />
Please note:<br />
You can also adjust the ringer tones via Ð Settings £ Audio Settings £ Advisory Tones in the menu.<br />
Setting the alarm clock<br />
Pre<strong>co</strong>ndition: The date and time have already been set (page 12).<br />
Activating/deactivating the alarm clock and setting the wake-up time<br />
v ¢ ì Alarm Clock<br />
¤ Change multiple line input:<br />
Activation:<br />
Select On or Off.<br />
Time:<br />
Enter the wake-up time in 4-digit format.<br />
Melody:<br />
Select melody.<br />
Volume:<br />
Set the volume (1–6).<br />
§Save§ Press the display key to save the setting.<br />
The ì i<strong>co</strong>n is displayed in the idle display.<br />
A wake-up call with the selected ringer melody is signalled on the handset. The wake-up<br />
call sounds for 60 se<strong>co</strong>nds. ì is shown in the display. If no key is pressed, the wake-up call<br />
is repeated twice at five minute intervals and then turned off.<br />
During a call, the wake-up call is signalled by a short tone.<br />
101<br />
<strong>VoIPon</strong> www.voipon.<strong>co</strong>.<strong>uk</strong> sales@voipon.<strong>co</strong>.<strong>uk</strong> Tel: +44 (0)1245 808195 Fax: +44 (0)1245 808299
Handset settings Restoring the handset to the factory settings<br />
Deactivating the wake-up call/repeating after a pause (snooze mode)<br />
Pre<strong>co</strong>ndition: A wake-up call is sounding.<br />
§OFF§ Press the display key. The wake-up call is deactivated.<br />
Or<br />
§Snooze§ Press the display key or any key. The wake-up call is deactivated and then<br />
repeated after 5 minutes. After the se<strong>co</strong>nd repetition the wake-up call is deactivated<br />
<strong>co</strong>mpletely.<br />
Restoring the handset to the factory settings<br />
Each individual handset setting is reset, in particular the language, display, volume, ringer<br />
tone and alarm clock settings (see from page 95 onwards). The last number redial list is<br />
cleared.<br />
This will not affect entries in the directory, call-by-call list, call history, SMS lists or the handset's<br />
registration to the base station.<br />
v ¢ Ð Settings ¢ Handset ¢ Reset Handset<br />
§Yes§ Press the display key.<br />
You can cancel the factory reset by pressing a or the display key §No§.<br />
a Press and hold (idle status).<br />
102<br />
<strong>VoIPon</strong> www.voipon.<strong>co</strong>.<strong>uk</strong> sales@voipon.<strong>co</strong>.<strong>uk</strong> Tel: +44 (0)1245 808195 Fax: +44 (0)1245 808299
Protecting against unauthorised access Base station settings<br />
Base station settings<br />
The base station settings are carried out using a registered <strong>Gigaset</strong> <strong>C47</strong>H handset.<br />
Protecting against unauthorised<br />
access<br />
Protect the system settings of the base station with a system PIN known only to yourself.<br />
You have to enter the system PIN if, among other things, you register and de-register a<br />
handset, change VoIP settings or reset the phone to factory settings.<br />
Changing the system PIN<br />
You have to enter the system pin when, for example, you register a handset with the base<br />
station, change VoIP settings or start the Web <strong>co</strong>nfigurator.<br />
You can change the base station's 4-digit default system PIN ("0000") to a 4-digit system<br />
PIN known only to yourself.<br />
v ¢ Ð Settings ¢ Base ¢ System PIN<br />
~ Enter the current system PIN and press §OK§.<br />
~ Enter new system PIN.<br />
s Scroll to the Re-enter PIN: line.<br />
~ Now re-enter the new system PIN and press §OK§.<br />
For security reasons, " **** " is displayed instead of the system PIN.<br />
a Press and hold (idle status).<br />
Restoring the base station to the factory settings<br />
Resetting the base station via the menu<br />
Each individual setting is reset, in particular:<br />
u VoIP settings such as VoIP provider and ac<strong>co</strong>unt data and DTMF settings (page 107,<br />
page 120, page 132)<br />
u Settings for the local network (page 109, page 118)<br />
u Default <strong>co</strong>nnection (page 105)<br />
u The names of the handsets (page 90)<br />
u SMS settings (e.g. SMS centres, page 52)<br />
u PABX <strong>co</strong>nnection settings (page 111)<br />
u On the <strong>Gigaset</strong> <strong>C47</strong> IP:<br />
Answer machine settings (page 70), and own announcements are deleted<br />
u On the <strong>Gigaset</strong> <strong>C47</strong> IP:<br />
Answer machine settings (page 76), and own announcements are deleted<br />
SMS lists, the answer machine list and calls list are deleted.<br />
103<br />
<strong>VoIPon</strong> www.voipon.<strong>co</strong>.<strong>uk</strong> sales@voipon.<strong>co</strong>.<strong>uk</strong> Tel: +44 (0)1245 808195 Fax: +44 (0)1245 808299
Base station settings Activating/deactivating music on hold<br />
The following are not reset:<br />
u Date and time<br />
u System PIN<br />
u SMS info services<br />
The handsets are still registered.<br />
v ¢ Ð Settings ¢ Base ¢ Base Reset<br />
~ Enter the system PIN and press §OK§.<br />
§Yes§ Press the display key to <strong>co</strong>nfirm.<br />
Resetting the base station using a key on the base station<br />
As with resetting the base station via the menu, all individual settings are reset. The system<br />
PIN will also be reset to "0000" and all handsets registered above and beyond the<br />
s<strong>co</strong>pe of delivery will be de-registered.<br />
Please note:<br />
For how to reregister the handsets after resetting, if necessary, see page 88.<br />
¤ Remove the cable <strong>co</strong>nnections from the base station to the router (page 16) and fixed<br />
line network (page 15).<br />
¤ Remove the base station mains adapter from the socket (page 15).<br />
¤ Press and hold the registration/paging key (page 2).<br />
¤ Plug the mains adapter back into the power socket.<br />
¤ Continue to press and hold the registration/paging key (at least 2 sec.).<br />
¤ Release the registration/paging key. The base station has now been reset.<br />
Activating/deactivating music on hold<br />
v ¢ Ð Settings ¢ Base<br />
Music on hold<br />
Select and press §OK§ to activate or deactivate music on hold ( ‰ = on).<br />
Activating/deactivating repeater mode<br />
With a repeater you can increase the range and reception strength of your base station. You<br />
will need to activate repeater mode. This will terminate any calls being made via the base<br />
station at that time.<br />
Pre<strong>co</strong>ndition: A repeater is registered with the base station.<br />
v ¢ Ð Settings ¢ Base ¢ Add. Features<br />
Repeater Mode<br />
Select and press §OK§ ( ‰ = on).<br />
§Yes§ Press the display key to <strong>co</strong>nfirm the security prompt.<br />
104<br />
<strong>VoIPon</strong> www.voipon.<strong>co</strong>.<strong>uk</strong> sales@voipon.<strong>co</strong>.<strong>uk</strong> Tel: +44 (0)1245 808195 Fax: +44 (0)1245 808299
Setting the default <strong>co</strong>nnection Base station settings<br />
Setting the default <strong>co</strong>nnection<br />
You can make settings ac<strong>co</strong>rding to whether you want to make calls via VoIP or the fixed<br />
line network by default.<br />
Please note:<br />
The standard <strong>co</strong>nnection is only relevant when dialling numbers that are not subject to dialling plans<br />
(page 135) and are entered without a line suffix (page 27).<br />
v ¢ Ð Settings ¢ Telephony ¢ Default Line<br />
VoIP / Fixed Line<br />
Select and press §OK§ ( ‰ = on).<br />
When making calls:<br />
¤ Press the talk key c briefly if you want to make the call via the default <strong>co</strong>nnection.<br />
¤ Press and hold the talk key c if you want to make the call via the other <strong>co</strong>nnection<br />
type.<br />
Updating the base station firmware<br />
If necessary, you can update your base station firmware.<br />
The firmware update is downloaded directly from the Internet by default. The relevant Web<br />
page is pre<strong>co</strong>nfigured in your phone.<br />
As an alternative to uploading the firmware via the Internet, it can also be loaded from a<br />
local PC. You can specify the PC via the Web <strong>co</strong>nfigurator (page 142). This setting applies<br />
only to the following firmware update.<br />
Pre<strong>co</strong>ndition:<br />
The base station is in idle status, i.e.:<br />
u No calls are being made via the fixed line network or VoIP.<br />
u There is no internal <strong>co</strong>nnection between the registered handsets.<br />
u No other handset has opened the base station menu.<br />
Starting the firmware update manually<br />
v ¢ Ð Settings ¢ Base<br />
Software Update<br />
Select and press §OK§.<br />
~ Enter the system PIN and press §OK§.<br />
The base station establishes a <strong>co</strong>nnection to the Internet or to the local PC.<br />
§Yes§ Press the display key to start the firmware update.<br />
105<br />
<strong>VoIPon</strong> www.voipon.<strong>co</strong>.<strong>uk</strong> sales@voipon.<strong>co</strong>.<strong>uk</strong> Tel: +44 (0)1245 808195 Fax: +44 (0)1245 808299
Making VoIP settings Updating the base station firmware<br />
Please note:<br />
– The firmware update can last up to 3 minutes.<br />
– When updating from the Internet, checks are made to ensure that no newer version of the<br />
firmware exists. If this is not the case, the operation is terminated and a message is issued to that<br />
effect.<br />
– If an error arises during a firmware update from a local PC, the most recent version of the firmware<br />
is automatically downloaded from the Internet. Your phone should therefore be <strong>co</strong>nnected to the<br />
Internet during every firmware update.<br />
Automatic firmware update<br />
Your phone will check daily whether a newer firmware update is available via the Internet<br />
on the <strong>Siemens</strong> <strong>co</strong>nfiguration server. If this is the case, the message New firmware available<br />
will be displayed when the handset is in idle status, and the message key f flashes.<br />
f Press the message key.<br />
§Yes§ Press the display key to <strong>co</strong>nfirm the prompt.<br />
The firmware will be loaded onto your phone.<br />
Please note:<br />
– If you reply to the request with §No§, the display will not be repeated. The message New firmware<br />
available will only be shown again if a newer version of the firmware than the one rejected is available.<br />
– You can deactivate the automatic version check via the Web <strong>co</strong>nfigurator (page 143).<br />
Making VoIP settings<br />
In order to be able to use VoIP, you must set a few parameters for your phone.<br />
You can make the following settings using your handset.<br />
u Download the general access data for your VoIP provider from the <strong>Siemens</strong> <strong>co</strong>nfiguration<br />
server and store them on your phone.<br />
u Enter your personal access data for your first VoIP ac<strong>co</strong>unt (first VoIP phone number).<br />
You can <strong>co</strong>nfigure the access data for five further VoIP ac<strong>co</strong>unts via the phone's Web<br />
<strong>co</strong>nfigurator.<br />
u Set the phone's IP address in the LAN.<br />
Please note:<br />
You can set these and other parameters <strong>co</strong>nveniently via the Web <strong>co</strong>nfigurator on a PC <strong>co</strong>nnected to<br />
your local network (see page 113).<br />
The <strong>co</strong>nnection assistant on your phone can help you make the settings.<br />
106<br />
<strong>VoIPon</strong> www.voipon.<strong>co</strong>.<strong>uk</strong> sales@voipon.<strong>co</strong>.<strong>uk</strong> Tel: +44 (0)1245 808195 Fax: +44 (0)1245 808299
Using the <strong>co</strong>nnection assistant Making VoIP settings<br />
Using the <strong>co</strong>nnection assistant<br />
The <strong>co</strong>nnection assistant starts automatically when you set the handset and base station<br />
up for the first time, or when you try to <strong>co</strong>nnect to the Internet before making the necessary<br />
settings.<br />
You can also start the <strong>co</strong>nnection assistant via the menu:<br />
v ¢ Ð Settings ¢ Telephony<br />
Connection Assist.<br />
Select and press §OK§.<br />
~ Enter the system PIN and press §OK§.<br />
For how to enter VoIP settings using the <strong>co</strong>nnection assistant, see page 16.<br />
Changing settings without the <strong>co</strong>nnection assistant<br />
You can change your provider's VoIP settings and the VoIP user data via the menu without<br />
starting the <strong>co</strong>nnection assistant.<br />
Downloading your VoIP provider's settings<br />
The general settings for various VoIP providers are available for download on the Internet.<br />
The relevant Web page is pre<strong>co</strong>nfigured in your phone.<br />
Pre<strong>co</strong>ndition: Your phone is <strong>co</strong>nnected to the Internet.<br />
v ¢ Ð Settings ¢ Telephony ¢ VoIP<br />
~ Enter the system PIN and press §OK§.<br />
Select Provider<br />
Select and press §OK§.<br />
The phone establishes a <strong>co</strong>nnection to the Internet.<br />
q Select <strong>co</strong>untry and press §OK§.<br />
q Select your VoIP provider and press §OK§.<br />
Your VoIP provider data is downloaded and saved in your phone.<br />
Please note:<br />
– If an error occurs during the download, an error message will be displayed. You can find possible<br />
messages and measures in the table on page 146.<br />
– You can make and adapt the general settings for your VoIP provider manually via your phone's<br />
Web <strong>co</strong>nfigurator, see page 121.<br />
107<br />
<strong>VoIPon</strong> www.voipon.<strong>co</strong>.<strong>uk</strong> sales@voipon.<strong>co</strong>.<strong>uk</strong> Tel: +44 (0)1245 808195 Fax: +44 (0)1245 808299
Making VoIP settings Changing settings without the <strong>co</strong>nnection assistant<br />
Automatic update for the VoIP provider settings<br />
After the first download of the VoIP provider settings, your phone will check daily whether<br />
a newer version of the file for your VoIP provider is available via the Internet on the <strong>Siemens</strong><br />
<strong>co</strong>nfiguration server. If this is the case, when the handset is in idle status the message New<br />
profile available will be displayed, and the message key f flashes.<br />
f Press the message key.<br />
§Yes§ Press the display key to <strong>co</strong>nfirm the prompt.<br />
~ Enter the system PIN and press §OK§.<br />
The new data for your VoIP provider will be downloaded and saved on the phone.<br />
Please note:<br />
– If you reply to the prompt with §No§, the display will not be repeated. The message New profile available<br />
will only be shown again if a newer version of the VoIP settings than the one rejected is available.<br />
– You can deactivate the automatic version check via the Web <strong>co</strong>nfigurator (page 143).<br />
Entering/changing VoIP user data<br />
The VoIP settings must also be extended for your personal data. You will receive all necessary<br />
data from your VoIP provider.<br />
Please note:<br />
When making these entries, please remember the VoIP user data is case sensitive. To enter text see<br />
page 160.<br />
v ¢ Ð Settings ¢ Telephony ¢ VoIP (Enter system PIN) ¢ Provider Registr.<br />
¤ Change multiple line input:<br />
<strong>User</strong>name:<br />
Enter the user name (caller ID) for your VoIP provider ac<strong>co</strong>unt. <strong>User</strong>name is often identical<br />
to your Internet telephone number (the first part of your SIP address, see page 123).<br />
Authent. Name: / Authent. Password:<br />
Enter the provider-dependent access data that has to be transferred by the phone to the<br />
SIP service at registration.<br />
¤ Click §Save§ to save the settings.<br />
108<br />
<strong>VoIPon</strong> www.voipon.<strong>co</strong>.<strong>uk</strong> sales@voipon.<strong>co</strong>.<strong>uk</strong> Tel: +44 (0)1245 808195 Fax: +44 (0)1245 808299
Setting the phone's IP address in LAN Making VoIP settings<br />
Setting the phone's IP address in LAN<br />
The base station requires an IP address in order to be "re<strong>co</strong>gnised" by the LAN.<br />
The IP address can be assigned to the base station automatically (by the router) or manually.<br />
u If performed dynamically, the router's DHCP server automatically assigns the base station<br />
an IP address. The base station's IP address can be changed ac<strong>co</strong>rding to router settings.<br />
u If performed manually/statically, you assign the base station a static IP address. This<br />
may be necessary depending on your network <strong>co</strong>nfiguration.<br />
Please note:<br />
– For how to make the local network settings on the Web <strong>co</strong>nfigurator, turn to page 118.<br />
– To assign the IP address dynamically, the DHCP server on the router must be activated. Please also<br />
read the user guide for your router.<br />
v ¢ Ð Settings ¢ Base ¢ Local Network<br />
~ Enter the system PIN and press §OK§.<br />
¤ Change multiple line input:<br />
IP Address Type:<br />
Select Static or Dynamic.<br />
If you select Static, you must manually define the IP address and the subnet mask for the<br />
base station in the next lines, as well as the standard gateway and DNS server.<br />
IP Address:<br />
For IP Address Type = Dynamic:<br />
The IP address that is currently assigned to the base station will be displayed. It cannot<br />
be amended.<br />
For IP Address Type = Static:<br />
Enter the IP address that is to be assigned to the base station (overwriting the current<br />
settings).<br />
192.168.2.2 has been preset.<br />
For the IP address see also page 177.<br />
Subnet Mask:<br />
For IP Address Type = Dynamic:<br />
The subnet mask that is currently assigned to the base station will be displayed. It cannot<br />
be amended.<br />
For IP Address Type = Static:<br />
Enter the IP address that is to be assigned to the base station (overwriting the current<br />
settings).<br />
The default setting is 255.255.255.0<br />
For the subnet mask see also page 182.<br />
109<br />
<strong>VoIPon</strong> www.voipon.<strong>co</strong>.<strong>uk</strong> sales@voipon.<strong>co</strong>.<strong>uk</strong> Tel: +44 (0)1245 808195 Fax: +44 (0)1245 808299
Making VoIP settings Activating/deactivating display of VoIP status messages<br />
DNS Server:<br />
For IP Address Type = Static:<br />
Enter the IP address for the preferred DNS server. The DNS server (Domain Name System)<br />
<strong>co</strong>nverts the symbolic name of a server (DNS name) into the public IP address for<br />
the server when the <strong>co</strong>nnection is made.<br />
You can specify your router's IP address here. The router forwards phone address<br />
requests to its DNS server.<br />
192.168.2.1 has been preset.<br />
Default Gateway:<br />
For IP Address Type = Static:<br />
Enter the IP address for the standard gateway, by means of which the local network is<br />
<strong>co</strong>nnected with the Internet. This is generally the local (private) IP address for your<br />
router (e.g. 192.168.2.1). Your phone requires this information to be able to access the<br />
Internet.<br />
192.168.2.1 has been preset.<br />
¤ Click §Save§ to save the settings.<br />
Please note:<br />
You can find notes on the IP address and the subnet mask on page 118 and in the glossary on<br />
page 177/page 182.<br />
Activating/deactivating display of VoIP status messages<br />
If the function is activated, a VoIP status <strong>co</strong>de for your service provider is displayed.<br />
Activate the function if, for example, you have problems with VoIP <strong>co</strong>nnections. You will<br />
receive a provider-specific status <strong>co</strong>de, which supports the service when the problem is<br />
analysed. You will find a table with the possible status screens in the appendix (page 150).<br />
v ¢ Ð Settings ¢ Telephony ¢ VoIP<br />
~ Enter the system PIN and press §OK§.<br />
Show Stat. on HS<br />
Select and press §OK§ ( ‰ = on).<br />
Please note:<br />
For how to make the setting on the Web <strong>co</strong>nfigurator, see page 145.<br />
Checking the base station MAC address<br />
Depending on your network <strong>co</strong>nfiguration, you may have to enter your base station MAC<br />
address, for example, into your router's access <strong>co</strong>ntrol list. You can check your base station<br />
MAC address:<br />
v 55O2Q<br />
The base station MAC address is displayed.<br />
a Press and hold (idle status).<br />
110<br />
<strong>VoIPon</strong> www.voipon.<strong>co</strong>.<strong>uk</strong> sales@voipon.<strong>co</strong>.<strong>uk</strong> Tel: +44 (0)1245 808195 Fax: +44 (0)1245 808299
Changing the dialling mode Operating the base station on the PABX<br />
Operating the base station on the PABX<br />
The following settings are only necessary when your PABX requires them; see the PABX<br />
user guide. The settings only <strong>co</strong>ncern fixed line network <strong>co</strong>nnections.<br />
You cannot send or receive SMS messages on PABXs that do not support Calling Line Identification.<br />
Changing the dialling mode<br />
You can set the dialling mode.<br />
v ¢ Ð Settings ¢ Telephony ¢ Fixed Line ¢ Dialling Mode<br />
Tone / Pulse Select and press §OK§ ( ‰ = on).<br />
a Press and hold (idle status).<br />
Setting recall<br />
You can set the recall option.<br />
v ¢ Ð Settings ¢ Telephony ¢ Fixed Line ¢ Recall<br />
q Select recall and press §OK§.<br />
The current setting is indicated by ‰ .<br />
a Press and hold (idle status).<br />
Setting pauses<br />
Changing pause after line seizure<br />
You can set the length of the pause inserted between pressing the talk key c and sending<br />
the phone number.<br />
v55O L<br />
~ Enter a number for the length of the pause (1 = 1 sec.; 2 =3sec.; 3 =7sec.)<br />
and press §OK§.<br />
a Press and hold (idle status).<br />
Changing the pause after the recall key<br />
You can change the length of the pause if your PABX requires this (refer to the user guide<br />
for your PABX).<br />
v55O<br />
~ Enter a number for the length of the pause (1 = 1 sec.; 2 = 2 sec.; 3 = 3 sec.;<br />
4 = 6 sec.) and press §OK§.<br />
a Press and hold (idle status).<br />
111<br />
<strong>VoIPon</strong> www.voipon.<strong>co</strong>.<strong>uk</strong> sales@voipon.<strong>co</strong>.<strong>uk</strong> Tel: +44 (0)1245 808195 Fax: +44 (0)1245 808299
Operating the base station on the PABX Switching temporarily to touch tone dialling (DTMF)<br />
Switching temporarily to touch tone dialling (DTMF)<br />
If your PABX still operates with dial pulsing (DP), but you need touch tone dialling for a <strong>co</strong>nnection<br />
(e.g. to listen to the network mailbox) you must switch to touch tone dialling for<br />
the call.<br />
Pre<strong>co</strong>ndition: You are currently <strong>co</strong>nducting an external call via the fixed line network or<br />
you have dialled an external fixed line network number or an external call is signalled.<br />
§Options§ Open menu.<br />
Tone Dialing Select and press §OK§.<br />
Touch tone dialling is now activated for this call only.<br />
112<br />
<strong>VoIPon</strong> www.voipon.<strong>co</strong>.<strong>uk</strong> sales@voipon.<strong>co</strong>.<strong>uk</strong> Tel: +44 (0)1245 808195 Fax: +44 (0)1245 808299
Configuring the phone via your PC Web <strong>co</strong>nfigurator<br />
Web <strong>co</strong>nfigurator<br />
The Web <strong>co</strong>nfigurator is the Web interface for your phone. It allows you to make the settings<br />
for your phone's base station via your PC's Web browser.<br />
Please note:<br />
Depending on your VoIP provider, it is possible that you will be unable to change individual settings<br />
in the Web <strong>co</strong>nfigurator.<br />
Configuring the phone via your PC<br />
Pre<strong>co</strong>nditions:<br />
u A standard Web browser is installed on the PC, e.g. Internet Explorer version 6.0 or<br />
higher, or Firefox version 1.0.4 or higher.<br />
u The phone and PC are <strong>co</strong>nnected with each other via a router.<br />
Please note:<br />
– The phone is not blocked while you make your settings in the Web <strong>co</strong>nfigurator. You can also use<br />
your phone to make calls or change base station or handset settings on your handset at the same<br />
time.<br />
– While you are <strong>co</strong>nnected to the Web <strong>co</strong>nfigurator, it is blocked to other users. It cannot be<br />
accessed by more than one user at any time.<br />
With the Web <strong>co</strong>nfigurator on your phone you have the following options:<br />
u Configure your phone access to the local network (IP address, gateway to the Internet).<br />
u Configure your phone for VoIP.<br />
u Define the data server for firmware updates and load new firmware onto the phone if<br />
necessary.<br />
u Copy <strong>co</strong>ntacts from the Outlook address book on your PC into the handset directories or<br />
back up your handsets' directories on your PC.<br />
u Obtain information about your phone's status (firmware version, MAC address, etc.).<br />
Connecting PC with Web <strong>co</strong>nfigurator<br />
¤ Launch the Web browser on your PC.<br />
Pre<strong>co</strong>ndition: The settings of an available Firewall allow the PC and phone to <strong>co</strong>mmunicate<br />
with each other.<br />
¤ Enter the phone's IP address into the address field of the Web browser, e.g.<br />
http://192.168.2.2.<br />
You can see the phone's current IP address in the handset display by briefly pressing the<br />
paging key on the base station.<br />
Your phone's IP address can change if you have activated dynamic IP address assignment<br />
(page 118).<br />
¤ Press the return key.<br />
A <strong>co</strong>nnection is established to the phone's Web <strong>co</strong>nfigurator.<br />
113<br />
<strong>VoIPon</strong> www.voipon.<strong>co</strong>.<strong>uk</strong> sales@voipon.<strong>co</strong>.<strong>uk</strong> Tel: +44 (0)1245 808195 Fax: +44 (0)1245 808299
Web <strong>co</strong>nfigurator Logging in, setting the Web <strong>co</strong>nfigurator language<br />
Logging in, setting the Web <strong>co</strong>nfigurator language<br />
Once you have successfully established the <strong>co</strong>nnection, the Login Web page will be<br />
displayed in the Web browser.<br />
You can select the language you want the menus and Web <strong>co</strong>nfigurator dialogues to be<br />
displayed in. The language that is currently selected is displayed in the top field of the<br />
Web page.<br />
¤ If necessary, click to open the list of available languages.<br />
¤ Select the language.<br />
¤ In the bottom field of the Web page, enter your phone's system PIN (default setting:<br />
0000) to access the Web <strong>co</strong>nfigurator functions.<br />
¤ Click OK.<br />
Once you have successfully logged in, a Home screen opens with general information on<br />
the Web <strong>co</strong>nfigurator.<br />
Please note:<br />
– If you have forgotten your system PIN, you must restore your device's factory settings. Please note<br />
that this will restore all other settings too (page 104).<br />
– If you do not make any entries for a lengthy period (around 10 minutes), you will be automatically<br />
logged off. The next time you try to make an entry or open a Web page, the Login Web page will<br />
be displayed. Enter the system PIN again to log in again.<br />
– Any entries that you did not save on the phone before automatic log-off will be lost.<br />
Logging off<br />
In the menu bar (page 115) at the top right of every Web page in the Web <strong>co</strong>nfigurator,<br />
you will see the Log Off <strong>co</strong>mmand. Click Log Off to log off from the Web <strong>co</strong>nfigurator.<br />
Warning:<br />
Always use the Log Off <strong>co</strong>mmand to end the <strong>co</strong>nnection to the Web <strong>co</strong>nfigurator. If, for example, you<br />
close the Web browser without logging off beforehand, it is possible that access to the Web <strong>co</strong>nfigurator<br />
will be blocked for a few minutes.<br />
114<br />
<strong>VoIPon</strong> www.voipon.<strong>co</strong>.<strong>uk</strong> sales@voipon.<strong>co</strong>.<strong>uk</strong> Tel: +44 (0)1245 808195 Fax: +44 (0)1245 808299
Structure of the Web pages Web <strong>co</strong>nfigurator<br />
Structure of the Web pages<br />
The Web pages <strong>co</strong>ntain the UI elements displayed in Figure 2.<br />
Navigation area Working area Buttons<br />
Menu bar<br />
Figure 2 Example of the structure of a Web page<br />
Menu bar<br />
In the menu bar, the Web <strong>co</strong>nfigurator menus are offered in the form of tab pages.<br />
The following menus are available:<br />
u Home<br />
The start screen is opened once you have registered with the Web <strong>co</strong>nfigurator. It <strong>co</strong>ntains<br />
information on the Web <strong>co</strong>nfigurator functions.<br />
u Settings (page 117)<br />
This menu allows you to make settings on your phone.<br />
u Status (page 145)<br />
This menu gives you information about your phone.<br />
If you click the Settings menu, a list with this menu's functions is displayed in the navigation<br />
area (see below).<br />
You will find the Log Off function to the right of the menu bar on every Web page<br />
(page 114).<br />
<strong>VoIPon</strong> www.voipon.<strong>co</strong>.<strong>uk</strong> sales@voipon.<strong>co</strong>.<strong>uk</strong> Tel: +44 (0)1245 808195 Fax: +44 (0)1245 808299<br />
115
Web <strong>co</strong>nfigurator Structure of the Web pages<br />
Please note:<br />
You will find an overview of the Web <strong>co</strong>nfigurator menu on page 25.<br />
Navigation area<br />
In the navigation area, the functions of the menu selected in the menu bar (page 115) are<br />
listed.<br />
If you click a function, the associated page opens in the working area with information and/<br />
or fields for your inputs.<br />
If a function is assigned subfunctions, these are displayed with the function as soon as you<br />
click the function. The relevant page for the first subfunction is displayed in the working<br />
area.<br />
Working area<br />
Depending on the function selected, information or dialogue boxes are displayed in the<br />
working area, which allow you to make or change your phone settings.<br />
Making changes<br />
Make settings for entry fields, lists or options.<br />
u There may be restrictions regarding the possible values for a field, e.g. entering special<br />
characters or certain value ranges.<br />
u To open a list, click . You can choose between default values.<br />
u There are two kinds of options:<br />
– Options in a list, from which you can activate one or several options. Active, i.e.<br />
selected options are highlighted with , non-active options with . You can activate<br />
an option by clicking . The status of the other options in the list does not<br />
change. You can deactivate an option by clicking .<br />
– Alternative options. The active option in the list is highlighted with , and the nonactive<br />
option with . You can activate an option by clicking . The previously activated<br />
option is deactivated. You can only deactivate an option by activating another<br />
option.<br />
Applying changes<br />
As soon as you have made your change on a page, activate the new setting on the phone<br />
by clicking Set.<br />
If your input in a field does not <strong>co</strong>mply with the rules for this field, an appropriate error<br />
message will be displayed. You can then repeat the input.<br />
Warning:<br />
Changes that have not been saved on your phone are lost if you move to another Web page or if the<br />
Web <strong>co</strong>nfigurator is terminated, e.g. due to the time limit (page 114).<br />
116<br />
<strong>VoIPon</strong> www.voipon.<strong>co</strong>.<strong>uk</strong> sales@voipon.<strong>co</strong>.<strong>uk</strong> Tel: +44 (0)1245 808195 Fax: +44 (0)1245 808299
Opening Web pages Web <strong>co</strong>nfigurator<br />
Buttons<br />
Buttons are displayed in the bottom section of the working area.<br />
Set<br />
Save entries on the phone.<br />
Cancel<br />
Reject changes made on the Web page and reload the settings that are currently saved<br />
in your phone to the Web page.<br />
Opening Web pages<br />
A brief outline of the navigation to the individual Web <strong>co</strong>nfigurator functions is given<br />
below.<br />
Example:<br />
Setting DTMF signalling<br />
Settings ¢ Telephony ¢ Advanced Settings<br />
To open the Web page, carry out the following steps after registration:<br />
¤ Click the Settings menu in the menu bar.<br />
¤ Click the Telephony function in the navigation area.<br />
The subfunctions of Telephony are displayed in the navigation tree.<br />
¤ Click the Advanced Settings subfunction.<br />
The Web page from Figure 2 will be shown in the Web browser.<br />
Setting phone with<br />
Web <strong>co</strong>nfigurator<br />
You can make the following settings using the Web <strong>co</strong>nfigurator:<br />
u Connecting your phone to the local network (page 118)<br />
u Configuring for telephony<br />
– Configure VoIP provider settings and VoIP ac<strong>co</strong>unts (page 121)<br />
– Specify the name of the fixed line network (page 126)<br />
– Activate/deactivate the <strong>Gigaset</strong>.net <strong>co</strong>nnection (page 127)<br />
– Activate/deactivate call forwarding for calls to your VoIP numbers (page 132)<br />
– Configure settings to improve voice quality for the VoIP <strong>co</strong>nnections (page 127)<br />
– Assign VoIP phone numbers to individual handsets and the answer machine<br />
(page 130)<br />
– Define user-specific dialling plans for emergency numbers and for <strong>co</strong>st <strong>co</strong>ntrol purposes<br />
(page 135)<br />
– Define the type of DTMF signalling (e.g. for remote operation of a network mailbox)<br />
and the recall key function for VoIP (page 132)<br />
– Transfer entries from directory or handset to the PC and from the PC to the handset<br />
(page 137)<br />
117<br />
<strong>VoIPon</strong> www.voipon.<strong>co</strong>.<strong>uk</strong> sales@voipon.<strong>co</strong>.<strong>uk</strong> Tel: +44 (0)1245 808195 Fax: +44 (0)1245 808299
Web <strong>co</strong>nfigurator IP Configuration<br />
u Output of information from an IP info service on the handset (page 142)<br />
u Synchronisation of date and time on the base station with a time server on the Internet<br />
(page 144)<br />
u Data server for firmware update downloads (page 142)<br />
u Displaying VoIP status messages on your handset (page 144)<br />
IP Configuration<br />
Assigning the IP address<br />
Make the necessary settings for operating your phone in your local network and to <strong>co</strong>nnect<br />
it to the Internet. For more detailed explanations of the individual <strong>co</strong>mponents/terms, see<br />
the glossary (page 172).<br />
¤ Open the following Web page: Settings ¢ IP Configuration.<br />
¤ In the Address Assignment area, select the IP address type.<br />
Select Obtained automatically if you want your phone to be assigned a dynamic IP address by<br />
a DHCP server in your local network. No further settings are necessary for the local network.<br />
Select Static if you would like to set up a static IP address for your phone. A static IP address<br />
is useful, for example, if port forwarding or a DMZ is set up on the router for the phone.<br />
The following fields are displayed when you select IP address type = Static:<br />
IP address<br />
Enter an IP address for your phone. This IP address allows your phone to be reached by<br />
other subscribers in your local network (e.g. PC).<br />
192.168.2.2 has been preset.<br />
Please note the following:<br />
– The IP address must be from the address block for private use that is used in the<br />
router. This is generally in the range 192.168.0.1 – 192.168.255.254 with Subnet<br />
mask 255.255.255.0. The subnet mask determines that the first three parts of the IP<br />
address must be identical for all subscribers in your LAN.<br />
– The static IP address must not belong to the address block (IP pool range) that is<br />
reserved for the DHCP server of the router. It must also not be used by another device<br />
on the router.<br />
If necessary, check the settings on the router.<br />
Subnet mask<br />
Enter the subnet mask for your device's IP address. For addresses from the address block<br />
192.168.0.1 – 192.168.255.254, the subnet mask 255.255.255.0 is generally used.<br />
This is pre<strong>co</strong>nfigured when the phone is supplied.<br />
Default gateway<br />
Enter the IP address for the standard gateway, by means of which the local network is<br />
<strong>co</strong>nnected with the Internet. This is generally the local (private) IP address for your<br />
router (e.g. 192.168.2.1). Your phone requires this information to be able to access the<br />
Internet.<br />
192.168.2.1 has been preset.<br />
118<br />
<strong>VoIPon</strong> www.voipon.<strong>co</strong>.<strong>uk</strong> sales@voipon.<strong>co</strong>.<strong>uk</strong> Tel: +44 (0)1245 808195 Fax: +44 (0)1245 808299
IP Configuration Web <strong>co</strong>nfigurator<br />
Preferred DNS server<br />
Enter the IP address for the preferred DNS server. DNS (Domain Name System) allows<br />
you to assign public IP addresses to symbolic names. The DNS server is required to <strong>co</strong>nvert<br />
the DNS name into the IP address when <strong>co</strong>nnection is being established to a server.<br />
You can specify your router's IP address here. The router forwards phone address<br />
requests to its DNS server.<br />
192.168.2.1 has been preset.<br />
Alternate DNS server (optional)<br />
Enter the IP address for the alternative DNS server that should be used in situations<br />
where the preferred DNS server cannot be reached.<br />
Click Set to save the changes.<br />
Click Cancel to reject the changes.<br />
Allowing access from other networks<br />
The default setting for your phone is set such that you can only access your phone's Web<br />
<strong>co</strong>nfigurator via a PC that is in the same local network as your phone. The subnet mask of<br />
the PC must match that of the phone.<br />
You can also allow access from PCs in other networks.<br />
Warning:<br />
Expansion of access entitlement to other networks increases the risk of unauthorised access.<br />
It is therefore re<strong>co</strong>mmended that you deactivate remote access again if you no longer require it.<br />
¤ Open the following Web page: Settings ¢ IP Configuration.<br />
¤ In the Remote Management area, activate the Yes option to permit access from other networks.<br />
To deactivate remote access, click No. Access is then limited to PCs in your own local network.<br />
Access to the Web <strong>co</strong>nfigurator services from other networks is only possible if your router<br />
is set ac<strong>co</strong>rdingly. The router must pass on the service requests from "outside" to Port 80<br />
(default port) of the phone. Please also read the user guide for your router.<br />
To establish a <strong>co</strong>nnection, the public IP address or the DNS name of the router and, where<br />
applicable, the port number on the router must be indicated in the Web browser of the<br />
remote PC.<br />
119<br />
<strong>VoIPon</strong> www.voipon.<strong>co</strong>.<strong>uk</strong> sales@voipon.<strong>co</strong>.<strong>uk</strong> Tel: +44 (0)1245 808195 Fax: +44 (0)1245 808299
Web <strong>co</strong>nfigurator Configuring telephone <strong>co</strong>nnections<br />
Configuring telephone <strong>co</strong>nnections<br />
You can <strong>co</strong>nfigure up to eight numbers on your phone: your fixed line network number,<br />
your <strong>Gigaset</strong>.net number and six VoIP numbers.<br />
You need to set up a VoIP ac<strong>co</strong>unt with a VoIP provider for each VoIP phone number. You<br />
must save the access data for each ac<strong>co</strong>unt and for the relevant VoIP provider in the phone.<br />
You can assign a name to each <strong>co</strong>nnection (VoIP and fixed line network).<br />
To <strong>co</strong>nfigure the <strong>co</strong>nnections:<br />
¤ Open the following Web page: Settings ¢ Telephony ¢ Connections.<br />
A list (see Figure 3) will be shown with all possible <strong>co</strong>nnections that you can <strong>co</strong>nfigure, or<br />
have already <strong>co</strong>nfigured, for your phone.<br />
Figure 3 List of possible <strong>co</strong>nnections<br />
The list will show the following:<br />
Name / Provider<br />
Name of the <strong>co</strong>nnection. This will show the name that you have defined for the <strong>co</strong>nnection<br />
(page 122, page 126) or the default name (IP1 to IP6 for VoIP <strong>co</strong>nnections, Fixed Line<br />
for the fixed line network <strong>co</strong>nnection and <strong>Gigaset</strong>.net).<br />
VoIP <strong>co</strong>nnections also display the name of the VoIP provider with which you have<br />
opened the ac<strong>co</strong>unt. If the name is unknown the display will show Other Provider.<br />
120<br />
<strong>VoIPon</strong> www.voipon.<strong>co</strong>.<strong>uk</strong> sales@voipon.<strong>co</strong>.<strong>uk</strong> Tel: +44 (0)1245 808195 Fax: +44 (0)1245 808299
Configuring telephone <strong>co</strong>nnections Web <strong>co</strong>nfigurator<br />
Suffix<br />
Line suffix that you have to add to the phone number of an outgoing call to allow the<br />
ac<strong>co</strong>unt assigned to the suffix to be used as the sending ac<strong>co</strong>unt.<br />
Example: if you dial 123456765#1, the <strong>co</strong>nnection will be made and billed through the<br />
first VoIP ac<strong>co</strong>unt, regardless of the number you have assigned to your handset as the<br />
send number and whether you press briefly/press and hold the talk key.<br />
If you dial 123456765#0, the <strong>co</strong>nnection will be made via the fixed line network.<br />
Status<br />
The status of the <strong>co</strong>nnection will be shown for VoIP <strong>co</strong>nnections:<br />
registered<br />
The <strong>co</strong>nnection is activated. The phone has been successfully registered. You can use<br />
the <strong>co</strong>nnection to make calls.<br />
Disabled<br />
The <strong>co</strong>nnection is deactivated. The phone is not registering with the <strong>co</strong>rresponding<br />
ac<strong>co</strong>unt with the VoIP service. You cannot use the <strong>co</strong>nnection to make or receive calls.<br />
Registration failed / Server not accessible<br />
Your phone was unable to register with the VoIP service, e.g. because the VoIP access<br />
data is in<strong>co</strong>rrect or in<strong>co</strong>mplete or the phone is not <strong>co</strong>nnected to the Internet. There is<br />
information about this in the section "Questions and answers" from page 146 onwards.<br />
Active<br />
You can use the option in the Active <strong>co</strong>lumn to activate ( ) and deactivate ( ) VoIP<br />
<strong>co</strong>nnections. If a <strong>co</strong>nnection is deactivated, the phone will not register for this <strong>co</strong>nnection.<br />
The <strong>co</strong>nnection can be activated/deactivated by clicking directly on the option. The<br />
change does not need to be saved.<br />
To <strong>co</strong>nfigure a <strong>co</strong>nnection or to change the <strong>co</strong>nfiguration of a <strong>co</strong>nnection:<br />
¤ Click Edit next to the <strong>co</strong>nnection.<br />
This will open a Web page where you can make the settings needed. More information is<br />
available<br />
u in the section "Configuring the VoIP <strong>co</strong>nnection" on page 121 and<br />
u in the section "Configuring the fixed line <strong>co</strong>nnection" on page 126.<br />
Configuring the VoIP <strong>co</strong>nnection<br />
Open the Web page:<br />
¤ Open the following Web page: Settings ¢ Telephony ¢ Connections.<br />
¤ Click Edit next to the VoIP <strong>co</strong>nnection that you want to <strong>co</strong>nfigure or the <strong>co</strong>nfiguration of<br />
which you want to change.<br />
This will open a Web page where you can make the settings that your phone needs to<br />
access your provider's VoIP server.<br />
The Web page always displays the following areas:<br />
u IP Connection (page 122),<br />
u Personal Provider Data (page 122).<br />
121<br />
<strong>VoIPon</strong> www.voipon.<strong>co</strong>.<strong>uk</strong> sales@voipon.<strong>co</strong>.<strong>uk</strong> Tel: +44 (0)1245 808195 Fax: +44 (0)1245 808299
Web <strong>co</strong>nfigurator Configuring telephone <strong>co</strong>nnections<br />
The areas<br />
u General Provider Data (page 123) and<br />
u Network (page 124)<br />
can be shown and hidden by clicking the Show Advanced Settings and Hide Advanced Settings<br />
buttons.<br />
You must enter the VoIP provider's general access data in these areas. You can download<br />
the general access data for many VoIP providers from the Internet (page 126).<br />
¤ Make the settings on the Web page.<br />
¤ Save them in the phone, see page 125.<br />
¤ Activate the <strong>co</strong>nnection if necessary, see page 126.<br />
Area: IP Connection<br />
Connection Name or Number<br />
Enter a name for the VoIP <strong>co</strong>nnection or the VoIP phone number (max. 16 characters).<br />
This name is used to display the <strong>co</strong>nnection on the handset and the Web <strong>co</strong>nfigurator<br />
interface, e.g. during allocation of send and receive numbers (page 130), for the call<br />
display (page 30).<br />
Provider<br />
The name of your VoIP provider will be shown if you have already selected it.<br />
Click the Select VoIP Provider button to select your provider and to start downloading the<br />
general data for the VoIP provider from the Internet if required. To find out how to do<br />
this, please read "Selecting the VoIP provider and downloading the VoIP provider data"<br />
on page 126.<br />
Please note:<br />
– If you click the Select VoIP Provider button, any changes that have been made to the Web page will<br />
be saved and checked. Values may need to be <strong>co</strong>rrected before the Select VoIP Provider operation<br />
is started.<br />
– The downloaded VoIP provider data will be entered in the General Provider Data (page 123) and Network<br />
(page 124) areas, so that, generally speaking, no further settings need to be made in these<br />
areas.<br />
If the general data for your VoIP provider is not available for download, you will need to make<br />
these settings yourself as described below.<br />
Area: Personal Provider Data<br />
Enter the <strong>co</strong>nfiguration data that is necessary for accessing your VoIP provider's SIP service.<br />
You will receive this data from the VoIP provider.<br />
Authentication Name<br />
Specify the registration or authentication ID agreed with your VoIP provider. The registration<br />
ID serves as the access ID that your phone must specify when registering with<br />
the SIP proxy/registrar server. The Authentication Name is mainly identical to the <strong>User</strong>name,<br />
i.e. to your Internet phone number.<br />
Authentication password<br />
Enter the password that you have agreed with your VoIP provider in the Authentication<br />
password field. The phone needs the password when registering with the SIP proxy/registrar<br />
server.<br />
122<br />
<strong>VoIPon</strong> www.voipon.<strong>co</strong>.<strong>uk</strong> sales@voipon.<strong>co</strong>.<strong>uk</strong> Tel: +44 (0)1245 808195 Fax: +44 (0)1245 808299
Configuring telephone <strong>co</strong>nnections Web <strong>co</strong>nfigurator<br />
<strong>User</strong>name<br />
Enter the caller ID for your VoIP provider ac<strong>co</strong>unt. This ID is usually identical to the first<br />
part of your SIP address (URI, your Internet phone number).<br />
Example: If your SIP address is "987654321@provider.<strong>co</strong>m", enter "987654321" in <strong>User</strong>name.<br />
Display name (optional)<br />
Enter any name that should be shown in the other caller's display when you call them<br />
via the Internet (example: Anna Sand). All characters in the UTF8 character set (Uni<strong>co</strong>de)<br />
are permitted. The name must not exceed 32 characters.<br />
If you do not enter a name, your <strong>User</strong>name VoIP phone number will be displayed.<br />
Ask your VoIP provider if this feature is supported.<br />
Area: General Provider Data<br />
If you have downloaded the general settings for the VoIP provider from the <strong>Siemens</strong> <strong>co</strong>nfiguration<br />
server (page 126), then the fields in this area will be preset with the data from<br />
the download. Generally speaking, you do not need to <strong>co</strong>nfigure any settings in this area.<br />
Domain<br />
Specify the last part of your SIP address (URI) here.<br />
Example: For the SIP address "987654321@provider.<strong>co</strong>m", enter "provider.<strong>co</strong>m" in<br />
Domain.<br />
Proxy server address<br />
The SIP proxy is your VoIP provider's gateway server. Enter the IP address or the (fullyqualified)<br />
DNS name of your SIP proxy server. Example: myprovider.<strong>co</strong>m.<br />
Proxy server port<br />
Enter the number of the <strong>co</strong>mmunication port that the SIP proxy uses to send and receive<br />
signalling data (SIP port).<br />
Port 5060 is used by most VoIP providers.<br />
Registrar server<br />
Enter the (fully-qualified) DNS name or the IP address of the registrar server.<br />
The registrar is needed when the phone is registered. It assigns the public IP address/<br />
port number to your SIP address (<strong>User</strong>name@Domain) that were used by the phone at registration.<br />
With most VoIP providers, the registrar server is identical to the SIP server.<br />
Example: reg.myprovider.<strong>co</strong>m.<br />
Registrar server port<br />
Enter the <strong>co</strong>mmunication port used in the registrar. It is mainly port 5060 that is used.<br />
Registration refresh time<br />
Enter the time intervals at which the phone should repeat the registration with the VoIP<br />
server (SIP proxy) (a request will be sent to establish a session). The repeat is required<br />
so that the entry of the phone in the tables of the SIP proxy is retained and the phone<br />
can therefore be reached. The repeat will be carried out for all activated VoIP phone<br />
numbers.<br />
The default is 180 se<strong>co</strong>nds.<br />
If you enter 0 se<strong>co</strong>nds, the registration will not be repeated periodically.<br />
123<br />
<strong>VoIPon</strong> www.voipon.<strong>co</strong>.<strong>uk</strong> sales@voipon.<strong>co</strong>.<strong>uk</strong> Tel: +44 (0)1245 808195 Fax: +44 (0)1245 808299
Web <strong>co</strong>nfigurator Configuring telephone <strong>co</strong>nnections<br />
Area: Network<br />
Please note:<br />
If you have downloaded the general settings for your VoIP provider from the <strong>Siemens</strong> <strong>co</strong>nfiguration<br />
server (page 126), then some fields in this area will be preset with the data from the download (e.g.<br />
the settings for the STUN server and outbound proxy).<br />
If your phone is <strong>co</strong>nnected to a router with NAT (Network Address Translation) and/or a firewall,<br />
you must make some settings in this area so that your phone can be reached from the<br />
Internet (i.e. can be addressed).<br />
Through NAT, the IP addresses of subscribers in the LAN are <strong>co</strong>ncealed behind the public IP<br />
address of the router.<br />
For in<strong>co</strong>ming calls<br />
If port forwarding is activated or a DMZ is set up for the phone on the router, no special<br />
settings are required for in<strong>co</strong>ming calls.<br />
If this is not the case, an entry in the NAT routing table (in the router) is necessary in order<br />
for the phone to be reached. This entry is created when the phone is registered with the<br />
SIP service. In the interest of security, this entry is automatically deleted at certain intervals<br />
(session timeout). The phone must therefore <strong>co</strong>nfirm its registration at certain intervals<br />
(see NAT refresh time, page 125), so that the entry stays in the routing table.<br />
For outgoing calls<br />
The phone needs its public address in order to receive caller voice data.<br />
There are two possibilities:<br />
u The phone requests the public address from a STUN server on the Internet (Simple<br />
Transversal of UDP over NAT). STUN can only be used with asymmetric NATs and nonblocking<br />
firewalls.<br />
u The phone does not direct the <strong>co</strong>nnection request to the SIP proxy but to an outbound<br />
proxy on the Internet that supplies the data packets along with the public address.<br />
The STUN server and outbound proxy are used alternately to work around the NAT/firewall<br />
in the router.<br />
STUN enabled<br />
Click Yes if you want your phone to use STUN as soon as it is used on a router with asymmetric<br />
NAT.<br />
STUN server<br />
Enter the (fully-qualified) DNS name or the IP address of the STUN server on the Internet.<br />
If you selected Yes in the STUN enabled field, you must enter a STUN server here.<br />
STUN port<br />
Enter the number of the <strong>co</strong>mmunication port on the STUN server. The default port is<br />
3478.<br />
124<br />
<strong>VoIPon</strong> www.voipon.<strong>co</strong>.<strong>uk</strong> sales@voipon.<strong>co</strong>.<strong>uk</strong> Tel: +44 (0)1245 808195 Fax: +44 (0)1245 808299
Configuring telephone <strong>co</strong>nnections Web <strong>co</strong>nfigurator<br />
STUN refresh time<br />
Enter the time intervals at which the phone should repeat the registration with the<br />
STUN server. The repeat is required so that the entry of the phone in the tables of the<br />
STUN server is retained. The repeat will be carried out for all activated VoIP phone numbers.<br />
Ask your VoIP provider for the STUN refresh time.<br />
The default is 240 se<strong>co</strong>nds.<br />
If you enter 0 se<strong>co</strong>nds, the registration will not be repeated periodically.<br />
NAT refresh time<br />
Specify the intervals at which you want the phone to update its entry in the NAT routing<br />
table. Specify an interval in se<strong>co</strong>nds that is a little smaller than the NAT session timeout.<br />
As a rule you should not change the pre<strong>co</strong>nfigured value for the NAT refresh time.<br />
Outbound proxy mode<br />
Specify when the outbound proxy should be used.<br />
Always<br />
All signalling and voice data sent by the phone is sent to the outbound proxy.<br />
Auto<br />
Data sent by the phone is only sent to the outbound proxy when the phone is <strong>co</strong>nnected<br />
to a router with symmetric NAT or blocking firewall. If the phone is behind an asymmetric<br />
NAT, the STUN server is used.<br />
If you have set STUN enabled = No or have not entered a STUN server, the outbound proxy<br />
is always used.<br />
Never<br />
The outbound proxy is not used.<br />
If you do not make an entry in the Outbound proxy field, the phone behaves independently<br />
of the selected mode, as with Never.<br />
Outbound proxy<br />
Enter the (fully qualified) DNS name or the IP address of your provider's outbound proxy.<br />
Please note:<br />
With many providers, the outbound proxy is identical to the SIP proxy.<br />
Outbound proxy port<br />
Enter the number of the <strong>co</strong>mmunication port used by the outbound proxy.<br />
The default port is 5060.<br />
Saving settings on the phone<br />
¤ Click Set to save the changes.<br />
The Connections list will be shown after saving (see Figure 3 on page 120).<br />
If you want to reject the changes that have been made, click Cancel.<br />
Clicking Delete will reset all the values back to their default settings. Fields with default settings<br />
are empty.<br />
Please note: If you do not make any entries for a lengthy period, the <strong>co</strong>nnection to the Web<br />
<strong>co</strong>nfigurator is automatically terminated. Unsaved entries are lost. If necessary, implement<br />
temporary security measures. You can subsequently <strong>co</strong>ntinue the entry and make changes<br />
if necessary.<br />
125<br />
<strong>VoIPon</strong> www.voipon.<strong>co</strong>.<strong>uk</strong> sales@voipon.<strong>co</strong>.<strong>uk</strong> Tel: +44 (0)1245 808195 Fax: +44 (0)1245 808299
Web <strong>co</strong>nfigurator Configuring telephone <strong>co</strong>nnections<br />
Activating a new <strong>co</strong>nnection<br />
If you have <strong>co</strong>nfigured a new VoIP <strong>co</strong>nnection, you must also activate it.<br />
In the Connections list:<br />
¤ Activate the relevant option in the Active <strong>co</strong>lumn ( = activated).<br />
Your phone will register itself with the VoIP provider using the relevant access data. Update<br />
the Web page (e.g. by pressing F5). The Status registered <strong>co</strong>lumn will appear if registration<br />
was successful. You can now be reached on this VoIP phone number.<br />
Please note:<br />
Once the new entry has been made, the VoIP phone number is assigned to each handset and the integrated<br />
answer machine (<strong>Gigaset</strong> <strong>C47</strong> IP) is assigned as a receive number. For how to adjust the<br />
assignment, see page 130.<br />
Selecting the VoIP provider and downloading the VoIP provider data<br />
Profile files of the most important VoIP providers are available on the <strong>Siemens</strong> Internet<br />
server for downloading. The address for the server is stored in your phone (page 142).<br />
Navigation:<br />
¤ Open the following Web page: Settings ¢ Telephony ¢ Connections.<br />
¤ Click Edit next to the VoIP <strong>co</strong>nnection for which you wish to download the provider data.<br />
¤ In the IP Connection area, click the Select VoIP Provider button.<br />
This will display information on the download procedure.<br />
The phone establishes a <strong>co</strong>nnection with the <strong>Siemens</strong> server on the Internet. The download<br />
procedure has several steps:<br />
¤ Click Next.<br />
¤ From the list, select the <strong>co</strong>untry for which the list of VoIP providers is to be loaded.<br />
¤ Click Next.<br />
¤ Select a VoIP provider from the list. If your provider is not included in the list, select Other<br />
Provider. You will then have to enter all the VoIP data manually (page 121).<br />
¤ Click Finish.<br />
The data for the provider selected will be loaded onto your phone.<br />
Configuring the fixed line <strong>co</strong>nnection<br />
You can assign a name to your fixed line <strong>co</strong>nnection. This name is used to display the <strong>co</strong>nnection<br />
on the handset and the Web <strong>co</strong>nfigurator interface, e.g. during allocation of send<br />
and receive numbers (page 130), for the call display (page 30).<br />
¤ Open the following Web page: Settings ¢ Telephony ¢ Connections.<br />
¤ In the Fixed Line Connection area, click Edit.<br />
¤ Enter your fixed line network number or the name of your choice (max. 16 characters)<br />
for your fixed line <strong>co</strong>nnection in the Connection Name or Number field. The default is "Fixed<br />
Line".<br />
126<br />
<strong>VoIPon</strong> www.voipon.<strong>co</strong>.<strong>uk</strong> sales@voipon.<strong>co</strong>.<strong>uk</strong> Tel: +44 (0)1245 808195 Fax: +44 (0)1245 808299
Optimising voice quality for VoIP <strong>co</strong>nnections Web <strong>co</strong>nfigurator<br />
Activating/deactivating the <strong>Gigaset</strong>.net <strong>co</strong>nnection<br />
Your phone is assigned a <strong>Gigaset</strong>.net phone number on delivery. As soon as you have <strong>co</strong>nnected<br />
your phone to the Internet, you can make calls using the <strong>Gigaset</strong>.net and receive<br />
calls from other <strong>Gigaset</strong>.net subscribers, provided that your <strong>Gigaset</strong>.net <strong>co</strong>nnection has<br />
been activated. You can deactivate the <strong>Gigaset</strong>.net <strong>co</strong>nnection.<br />
¤ Open the following Web page: Settings ¢ Telephony ¢ Connections. The list of <strong>co</strong>nnections<br />
will be displayed (see Figure 3 on page 120).<br />
¤ In the <strong>Gigaset</strong>.net area: use the option in the Active <strong>co</strong>lumn to activate ( ) or deactivate<br />
( ) the <strong>Gigaset</strong>.net <strong>co</strong>nnection.<br />
Please note:<br />
If you do not use your <strong>Gigaset</strong>.net <strong>co</strong>nnection for six weeks, it is automatically deactivated. You cannot<br />
be reached for calls from the <strong>Gigaset</strong>.net.<br />
The <strong>co</strong>nnection is reactivated:<br />
– as soon as you start a search in the <strong>Gigaset</strong>.net directory (page 36) or<br />
– make a call via <strong>Gigaset</strong>.net, i.e. dial a number ending in #9 (two attempts may be necessary) or<br />
– activate the <strong>co</strong>nnection via the Web <strong>co</strong>nfigurator as described above.<br />
Optimising voice quality for VoIP <strong>co</strong>nnections<br />
You can make general and <strong>co</strong>nnection-specific settings to improve the voice quality for<br />
VoIP telephony.<br />
¤ Open the following Web page: Settings ¢ Telephony ¢ Audio.<br />
The voice quality for VoIP <strong>co</strong>nnections is mainly determined by the voice <strong>co</strong>dec used for<br />
transferring the data and the available bandwidth of your DSL <strong>co</strong>nnection.<br />
In the case of the voice <strong>co</strong>dec, the voice data is digitalised (<strong>co</strong>ded / de<strong>co</strong>ded) and <strong>co</strong>mpressed.<br />
A "better" <strong>co</strong>dec (better voice quality) means more data needs to be transferred,<br />
i.e. perfect voice data transfer requires a DSL <strong>co</strong>nnection with a larger bandwidth.<br />
The following voice <strong>co</strong>decs are supported by your phone:<br />
G.722<br />
If you register an HDSP capable handset (HDSP= High Definition Sound Performance)<br />
with your base station, the calls you make using the handset via G.722 VoIP <strong>co</strong>nnections<br />
will have a fantastic sound quality. <strong>Gigaset</strong> handsets S67H and SL37H, for e.g., are HDSP<br />
capable.<br />
The broadband speech <strong>co</strong>dec G.722 works at the same bit rate as G.711 (64 kbit/s per<br />
speech <strong>co</strong>nnection) but with a higher sampling rate.<br />
G.711 a law / G.711 µ law<br />
Excellent voice quality (<strong>co</strong>mparable with ISDN). The necessary bandwidth is 64 kbit/s<br />
per voice <strong>co</strong>nnection.<br />
G.726<br />
Good voice quality (inferior to that with G.711 but better than with G.729).<br />
Your phone supports G.726 with a transmission rate of 32 kbit/s per voice <strong>co</strong>nnection.<br />
G.729<br />
Average voice quality. The necessary bandwidth is less than 8 kbit/s per voice <strong>co</strong>nnection.<br />
127<br />
<strong>VoIPon</strong> www.voipon.<strong>co</strong>.<strong>uk</strong> sales@voipon.<strong>co</strong>.<strong>uk</strong> Tel: +44 (0)1245 808195 Fax: +44 (0)1245 808299
Web <strong>co</strong>nfigurator Optimising voice quality for VoIP <strong>co</strong>nnections<br />
Both sides of a phone <strong>co</strong>nnection (caller/sender side and receiver side) must use the same<br />
voice <strong>co</strong>dec. The voice <strong>co</strong>dec is negotiated between the sender and the recipient when<br />
establishing a <strong>co</strong>nnection.<br />
You can influence the voice quality by selecting (bearing in mind the bandwidth of your<br />
DSL <strong>co</strong>nnection) the voice <strong>co</strong>decs your phone is to use, and specifying the order in which<br />
the <strong>co</strong>decs are to be suggested when a VoIP <strong>co</strong>nnection is established.<br />
Area: Settings for Bandwidth<br />
The settings in this area influence all VoIP <strong>co</strong>nnections (VoIP phone numbers).<br />
Allow 1 VoIP call only<br />
Generally speaking you can make two VoIP calls at the same time on your phone. If,<br />
however, your DSL <strong>co</strong>nnection has a narrow bandwidth, there may be problems if two<br />
VoIP calls are made at the same time. The data is no longer transferred properly (long<br />
voice delay, data losses etc.).<br />
¤ Activate Yes next to Allow 1 VoIP call only to prevent any further parallel VoIP phone<br />
<strong>co</strong>nnections being established.<br />
¤ If you wish to permit two VoIP <strong>co</strong>nnections, activate the No option.<br />
Please note: If only one VoIP <strong>co</strong>nnection is permitted, the following VoIP network services are no<br />
longer available:<br />
– Call waiting<br />
Call waiting is not displayed during a call via VoIP<br />
– External <strong>co</strong>nsultation call from a VoIP call<br />
– Toggling and initiating a <strong>co</strong>nference call via VoIP<br />
Voice Quality<br />
Default settings for the <strong>co</strong>decs used are stored in your phone: one setting optimised for<br />
narrow and one for wide bandwidths.<br />
¤ Activate one of the options Optimized for low bandwidth / Optimized for high bandwidth if<br />
you wish to accept a default setting for all VoIP <strong>co</strong>nnections. The settings are shown<br />
in the Settings for Connections area and cannot be changed.<br />
¤ Activate the Own Codec preference option if you wish to select and set <strong>co</strong>nnection-specific<br />
voice <strong>co</strong>decs yourself (see "Area: Settings for Connections").<br />
Area: Settings for Connections<br />
In this area you can make specific settings for each of your VoIP phone numbers.<br />
You can make the following settings for each VoIP phone number <strong>co</strong>nfigured on your<br />
phone:<br />
Volume for VoIP Calls<br />
Depending on the VoIP provider, it is possible that the received voice/earpiece volume is<br />
too low or too high, so that adjusting the volume via the handset is not adequate.<br />
Specify whether the received volume range is too high or too low. The following options<br />
are available:<br />
Low<br />
Voice/earpiece volume is too high. Activate this option to reduce the volume by 6 dB.<br />
Normal<br />
The voice/earpiece volume does not need to be raised/lowered.<br />
128<br />
<strong>VoIPon</strong> www.voipon.<strong>co</strong>.<strong>uk</strong> sales@voipon.<strong>co</strong>.<strong>uk</strong> Tel: +44 (0)1245 808195 Fax: +44 (0)1245 808299
Optimising voice quality for VoIP <strong>co</strong>nnections Web <strong>co</strong>nfigurator<br />
High<br />
Voice/earpiece volume is too low. Activate this option to increase the volume by 6 dB.<br />
Voice <strong>co</strong>decs<br />
Pre<strong>co</strong>ndition: The Own Codec preference option is activated for the Voice Quality in the<br />
Settings for Bandwidth area.<br />
Select the voice <strong>co</strong>decs your phone is to use, and specify the order in which the <strong>co</strong>decs<br />
are to be suggested when a VoIP <strong>co</strong>nnection is established via this VoIP phone number.<br />
¤ Apply the voice <strong>co</strong>decs that your phone is to suggest with outgoing calls into the<br />
Selected <strong>co</strong>decs list.<br />
To do this, in the Available <strong>co</strong>decs list click the voice <strong>co</strong>dec that you want to apply (you<br />
can mark several entries using the Shift key or the Ctrl key). Click .<br />
¤ Sort the voice <strong>co</strong>decs in the Selected <strong>co</strong>decs list into the order in which they should be<br />
suggested to the receiving device when a <strong>co</strong>nnection is established. To do this, use<br />
the Up and Down buttons.<br />
When establishing a VoIP <strong>co</strong>nnection, the phone suggests the 1st voice <strong>co</strong>dec in the<br />
Selected <strong>co</strong>decs list to the receiving device to begin with. If the receiving device does not<br />
accept the <strong>co</strong>dec (e.g. because it is not supported), the 2nd voice <strong>co</strong>dec on the list is<br />
suggested, and so on.<br />
If the receiving device does not accept any of the voice <strong>co</strong>decs in the Selected <strong>co</strong>decs list,<br />
the <strong>co</strong>nnection is not established. An appropriate message will be displayed on the<br />
handset.<br />
Please note:<br />
– You should only deactivate <strong>co</strong>decs (put them in the Available <strong>co</strong>decs list) if there is a particular reason.<br />
The more <strong>co</strong>decs that are deactivated, the greater the danger that calls will not be able to be<br />
established due to unsuccessful <strong>co</strong>dec negotiations.<br />
– With in<strong>co</strong>ming calls, all supported voice <strong>co</strong>decs are always permitted.<br />
Area: Settings for Codecs<br />
To save additional bandwidth and transmission capacity, on VoIP <strong>co</strong>nnections that use<br />
<strong>co</strong>dec G.729 you can suppress the transmission of voice packets in pauses ("Silence Suppression").<br />
Then, instead of the background noises in your environment, your caller hears<br />
a synthetic noise generated in the receiver.<br />
Please note: "Silence Suppression" can sometimes lead to deterioration in the voice quality.<br />
¤ In the Enable Annex B for <strong>co</strong>dec G.729 field, state whether the transmission of data packets<br />
during pauses should be suppressed when using the G.729 <strong>co</strong>dec, (activate Yes).<br />
Saving settings on the phone<br />
¤ Click Set to save the settings for the voice quality.<br />
129<br />
<strong>VoIPon</strong> www.voipon.<strong>co</strong>.<strong>uk</strong> sales@voipon.<strong>co</strong>.<strong>uk</strong> Tel: +44 (0)1245 808195 Fax: +44 (0)1245 808299
Web <strong>co</strong>nfigurator Assigning send and receive numbers to handsets<br />
Please note:<br />
You should observe the following for good voice quality:<br />
– When making calls using VoIP, avoid performing other Internet activities (e.g. surfing the Internet).<br />
– Irrespective of the <strong>co</strong>dec used and the network capacity utilisation, please note that voice delays<br />
can occur.<br />
Voice quality and infrastructure<br />
A <strong>Gigaset</strong> <strong>C47</strong>0 IP or <strong>C47</strong>5 IP will allow you to make calls with good voice quality via the<br />
Internet.<br />
However, your phone's performance with VoIP – and therefore the voice quality – also<br />
depends on the properties of the entire infrastructure.<br />
The following VoIP provider <strong>co</strong>mponents are just some of the things that can influence performance<br />
:<br />
u Router<br />
u DSLAM<br />
u DSL transmission line and speed<br />
u Connection paths over the Internet<br />
u If necessary, other applications that also use the DSL <strong>co</strong>nnection<br />
In VoIP networks, voice quality is affected by various things including the "quality of service"<br />
(QoS). If the entire infrastructure demonstrates QoS, voice quality is better (fewer<br />
delays, less echoing, less crackling etc.).<br />
If, for example, the router does not have QoS, then the voice quality is not as good. Please<br />
see the specialist documentation for further information.<br />
Assigning send and receive numbers to handsets<br />
You can assign up to eight numbers on your phone: your fixed line network number, your<br />
<strong>Gigaset</strong>.net number and six VoIP numbers.<br />
You can assign as many of these numbers as you like to each handset as receive numbers.<br />
Receive numbers determine which handset(s) will ring when a call is received.<br />
You can assign one of your VoIP numbers to each handset as a (VoIP) send number. Send<br />
numbers define which VoIP ac<strong>co</strong>unt should be used in general to make and pay for outgoing<br />
VoIP calls. Exceptions:<br />
u a phone number is dialled with a line suffix (page 121) or<br />
u a dialling plan has been defined for the phone number (page 135).<br />
The <strong>Gigaset</strong>.net number and fixed line network number are permanently assigned to each<br />
registered handset as send numbers.<br />
Please note:<br />
A handset is assigned the following numbers after it is registered on the base station:<br />
– Receive numbers: all phone numbers assigned to the phone (fixed line network, <strong>Gigaset</strong>.net and<br />
VoIP).<br />
– Send numbers: the fixed line network number and the VoIP phone number that you entered at the<br />
start of the phone <strong>co</strong>nfiguration.<br />
130<br />
<strong>VoIPon</strong> www.voipon.<strong>co</strong>.<strong>uk</strong> sales@voipon.<strong>co</strong>.<strong>uk</strong> Tel: +44 (0)1245 808195 Fax: +44 (0)1245 808299
Assigning answer machine receive numbers (<strong>Gigaset</strong> <strong>C47</strong>5 IP) Web <strong>co</strong>nfigurator<br />
¤ Open the following Web page: Settings ¢ Telephony ¢ Number Assignment.<br />
The display shows all registered handsets. A list is displayed for each handset showing the<br />
phone numbers that are <strong>co</strong>nfigured and activated for the phone. The <strong>co</strong>nnection names<br />
are shown in the Connections <strong>co</strong>lumn. The fixed line network <strong>co</strong>nnection is always at the<br />
end of the list.<br />
¤ Define a VoIP phone number as the send number for each handset. To do this, click the<br />
option following the phone number in the Send <strong>co</strong>lumn. The previous assignment will<br />
automatically be deactivated.<br />
Please note:<br />
The fixed line network number is permanently assigned to each handset as a send number. This<br />
assignment cannot be deactivated. It ensures that emergency calls can be made from every handset.<br />
The <strong>Gigaset</strong>.net number is also permanently assigned to each handset.<br />
¤ Select the phone numbers for each handset (fixed line network, VoIP) that are to be<br />
assigned to the handset as receive numbers. To do this, click the option following the<br />
phone number in the Receive <strong>co</strong>lumn. Every handset can be assigned several phone<br />
numbers or no phone number ( = assigned).<br />
¤ Now click Set to save your settings.<br />
Please note:<br />
– If a VoIP phone number that has been assigned to a handset as a send number is deleted/deactivated,<br />
then the handset will automatically be assigned the first <strong>co</strong>nfigured VoIP phone number.<br />
– If a phone number is not assigned to any handset as a receive number, calls to this number will be<br />
signalled on all handsets.<br />
– If you have not assigned receive numbers to any of the handsets, calls to all <strong>co</strong>nnections will be<br />
signalled on all handsets.<br />
Assigning answer machine receive numbers (<strong>Gigaset</strong> <strong>C47</strong>5 IP)<br />
You can specify for which of your phone numbers your telephone's answer machine is to<br />
accept the calls. To do this, assign receive numbers to the answer machine.<br />
Please note:<br />
– Once the new entry has been made, each VoIP phone number is assigned to the integrated<br />
answer machine as a receive number.<br />
– If no receive number is assigned to the answer machine it will not accept any calls even if it is activated.<br />
– For how to set and operate the answer machine, see page 64.<br />
¤ Open the following Web page: Settings ¢ Telephony ¢ Number Assignment.<br />
¤ In the Answering machine area, select the phone numbers (fixed line network, VoIP) for<br />
which the answer machine is to accept calls (if it is activated, see page 64). To do this,<br />
click the option following the phone number in the Receive <strong>co</strong>lumn. You can assign as<br />
many numbers as you wish to the answer machine ( = assigned).<br />
¤ Now click Set to save your settings.<br />
131<br />
<strong>VoIPon</strong> www.voipon.<strong>co</strong>.<strong>uk</strong> sales@voipon.<strong>co</strong>.<strong>uk</strong> Tel: +44 (0)1245 808195 Fax: +44 (0)1245 808299
Web <strong>co</strong>nfigurator Call Forwarding to activate VoIP <strong>co</strong>nnections<br />
Call Forwarding to activate VoIP <strong>co</strong>nnections<br />
You can also forward calls for your VoIP numbers to another external number (VoIP, fixed<br />
line network or mobile phone). The forwarding is done via a VoIP <strong>co</strong>nnection.<br />
For each of your VoIP numbers (VoIP ac<strong>co</strong>unts) you can define if and when calls to this VoIP<br />
number should be forwarded to a different phone number.<br />
You can also use the handset to set the forwarding and activate/deactivate it, see page 41.<br />
¤ Open the following Web page: Settings ¢ Telephony ¢ Call Forwarding.<br />
The display shows a list of all the VoIP <strong>co</strong>nnections you have <strong>co</strong>nfigured.<br />
Connections<br />
Name you have assigned to the VoIP number.<br />
When<br />
Select when a call to this VoIP number should be forwarded: When busy / No reply / Always.<br />
Select Off to deactivate call forwarding.<br />
Call number<br />
Enter the phone number to which the calls should be forwarded. Please note that you<br />
may have to enter the area <strong>co</strong>de when forwarding to a fixed line network number in the<br />
same area (depending on your VoIP provider and the setting for the automatic area<br />
<strong>co</strong>de, see page 134).<br />
The settings only affect the selected VoIP phone number.<br />
Please note:<br />
– You cannot forward your <strong>Gigaset</strong>.net number.<br />
– How to forward your fixed line network number, see page 39.<br />
Setting DTMF signalling for VoIP<br />
DTMF signalling is required, for example, for querying and <strong>co</strong>ntrolling certain network<br />
mailboxes via digit <strong>co</strong>des or for remote operation of the integrated answer machine<br />
(<strong>Gigaset</strong> <strong>C47</strong>5 IP).<br />
To send DTMF signals via VoIP you must first define how key <strong>co</strong>des should be <strong>co</strong>nverted<br />
into and sent as DTMF signals: as audible information via the speech channel or as "SIP Info"<br />
message.<br />
Ask your VoIP provider which type of DTMF transmission it supports.<br />
¤ Open the following Web page: Settings ¢ Telephony ¢ Advanced Settings.<br />
In the DTMF over VoIP <strong>co</strong>nnections area, make the required settings for sending DTMF signals.<br />
¤ Activate Audio or RFC 2833, if DTMF signals are to be transmitted a<strong>co</strong>ustically (in voice<br />
packets).<br />
¤ Activate SIP Info if DTMF signals are to be transmitted as <strong>co</strong>de.<br />
¤ Now click Set to save your settings.<br />
Please note:<br />
The settings for DTMF signalling apply to all VoIP <strong>co</strong>nnections (VoIP ac<strong>co</strong>unts).<br />
132<br />
<strong>VoIPon</strong> www.voipon.<strong>co</strong>.<strong>uk</strong> sales@voipon.<strong>co</strong>.<strong>uk</strong> Tel: +44 (0)1245 808195 Fax: +44 (0)1245 808299
Defining recall key functions for VoIP (hook flash) Web <strong>co</strong>nfigurator<br />
Defining recall key functions for VoIP (hook flash)<br />
Your VoIP provider may support special performance features. To make use of these features,<br />
your phone needs to send a specific signal (data packet) to the SIP server. You can<br />
assign this "signal" to your phone's recall key.<br />
If you press the recall key during a VoIP call the signal will be sent to the server.<br />
¤ Open the following Web page: Settings ¢ Telephony ¢ Advanced Settings.<br />
¤ Enter the data you received from your VoIP provider into the fields Application Type and<br />
Application Signal in the Hook Flash area.<br />
¤ Now click Set to save your settings.<br />
The setting for the recall key applies to all registered handsets.<br />
Defining local <strong>co</strong>mmunication ports for VoIP<br />
¤ Open the following Web page: Settings ¢ Telephony ¢ Advanced Settings.<br />
In the Listen ports for VoIP <strong>co</strong>nnections area, specify which local ports the telephone is to use<br />
for VoIP telephony. The ports must not be used by any other subscriber in the LAN.<br />
SIP port<br />
Specify the local <strong>co</strong>mmunication port that the phone should use to send and receive signalling<br />
data. Specify a number between 1024 and 49152. The default port number for<br />
SIP signalling is 5060.<br />
RTP port<br />
Specify the local <strong>co</strong>mmunication port that the phone should use to receive voice data.<br />
Enter an even number between 1024 and 49152. The port number must not be the<br />
same as the port number in the SIP port field. If you enter an odd number, the next lowest<br />
even number will be selected automatically (e.g. you enter 5003, then 5002 is set<br />
automatically). The default port number for voice transmission is 5004.<br />
Use random ports<br />
Click Yes if you do not want the phone to use fixed ports for SIP port and RTP port, but<br />
rather to use any free ports.<br />
The use of random ports makes sense if you want several phones to be operated on the<br />
same router with NAT. The phones must then use different ports so that the router's NAT<br />
is only able to forward in<strong>co</strong>ming calls and voice data to one (the intended) phone.<br />
If you click No, the phone will use the ports specified in SIP port and RTP port.<br />
¤ Now click Set to save your settings.<br />
133<br />
<strong>VoIPon</strong> www.voipon.<strong>co</strong>.<strong>uk</strong> sales@voipon.<strong>co</strong>.<strong>uk</strong> Tel: +44 (0)1245 808195 Fax: +44 (0)1245 808299
Web <strong>co</strong>nfigurator Configuring call forwarding via VoIP<br />
Configuring call forwarding via VoIP<br />
If you are toggling calls via VoIP <strong>co</strong>nnections, you can <strong>co</strong>nnect the two external callers (provider-dependent).<br />
You can <strong>co</strong>nfigure settings for this type of call forwarding.<br />
¤ Open the following Web page: Settings ¢ Telephony ¢ Advanced Settings.<br />
¤ Configure the following settings in the Call Transfer area for call forwarding via VoIP:<br />
Transfer Call by On-Hook<br />
If you have activated Yes, the external parties you are toggling between will be <strong>co</strong>nnected<br />
when you press the end call key a. Your <strong>co</strong>nnections with the parties will be<br />
terminated.<br />
To learn how to forward a call when you have activated No, please see page 42.<br />
Preferred Refer To<br />
Define the proto<strong>co</strong>l (the <strong>co</strong>ntents of the "Refer To" information) that should be used with<br />
preference when forwarding calls:<br />
Target's <strong>co</strong>ntact info<br />
This proto<strong>co</strong>l is re<strong>co</strong>mmended for "closed" networks (internal <strong>co</strong>mpany and business<br />
networks).<br />
Original URL<br />
This proto<strong>co</strong>l is re<strong>co</strong>mmended when the base station is <strong>co</strong>nnected to the Internet via a<br />
router with NAT.<br />
Automatic Refer To<br />
If you activate Yes, the base station will attempt to determine the best proto<strong>co</strong>l automatically.<br />
If the base station cannot determine the best proto<strong>co</strong>l, it will use the proto<strong>co</strong>l defined<br />
in Preferred Refer To.<br />
¤ Now click Set to save your settings.<br />
Setting Area Code Predialling<br />
In VoIP calls you must generally always dial the area <strong>co</strong>de – even for local calls.<br />
You can save the need to dial the area <strong>co</strong>de for local calls by activating the Area Code Predialling<br />
function. In VoIP calls, the area <strong>co</strong>de entered is then prefixed to all numbers that do<br />
not start with 0 – even when dialling numbers from the directory and other lists. Exceptions:<br />
Numbers for which you have defined dialling plans (page 135). The area <strong>co</strong>de is not<br />
added as an area <strong>co</strong>de to these numbers.<br />
¤ Open the following Web page: Settings ¢ Telephony ¢ Dialling Plans.<br />
Configure the following settings in the Area Code Predialling area:<br />
¤ Enter your area <strong>co</strong>de in the Area Code field (max. 10 digits), e.g. 020.<br />
¤ Click Yes next to Predial area <strong>co</strong>de for local calls through VoIP to activate the function.<br />
Click No to deactivate the function. You will then need to enter the area <strong>co</strong>de for local<br />
calls made via VoIP. Numbers in the directory must always <strong>co</strong>ntain the area <strong>co</strong>de for dialling<br />
via VoIP.<br />
¤ Click Set to save the settings.<br />
134<br />
<strong>VoIPon</strong> www.voipon.<strong>co</strong>.<strong>uk</strong> sales@voipon.<strong>co</strong>.<strong>uk</strong> Tel: +44 (0)1245 808195 Fax: +44 (0)1245 808299
Defining dialling plans – <strong>co</strong>st <strong>co</strong>ntrol Web <strong>co</strong>nfigurator<br />
Please note:<br />
The area <strong>co</strong>de will also be prefixed to VoIP calls made to the network mailbox (page 86) and emergency<br />
numbers if there are no defined dialling plans for these numbers.<br />
Defining dialling plans –<br />
<strong>co</strong>st <strong>co</strong>ntrol<br />
You can define dialling plans to reduce <strong>co</strong>sts:<br />
u You can define the <strong>co</strong>nnection (one of your VoIP ac<strong>co</strong>unts, the fixed line network)<br />
through which calls to specific numbers should be made and paid for.<br />
If you enter just a few digits (e.g. local area, national or mobile network <strong>co</strong>de) any call<br />
to a number beginning with these digits will be made via the elected <strong>co</strong>nnection.<br />
u You can block specific numbers, i.e. your phone will not establish a <strong>co</strong>nnection to these<br />
numbers (e.g. 0900 numbers).<br />
These dialling plans apply to all registered handsets. The settings for the default <strong>co</strong>nnection<br />
(briefly press/press and hold c) and the send numbers of handsets do not apply to<br />
numbers governed by a dialling plan.<br />
Please note:<br />
You can override dialling plans, with the exception of blocks, as follows:<br />
– Dial the number with a line suffix (e.g. 123456789#3, see page 27).<br />
– Before you enter the number, define a different <strong>co</strong>nnection type by pressing the display keys<br />
§FixedLine§ / §IP§ (page 97).<br />
If, for example, you press §FixedLine§, the number will be dialled via the fixed line network, even if<br />
the dialling plan states that a VoIP <strong>co</strong>nnection should be used.<br />
Area Code Predialling is not prefixed to numbers governed by a dialling plan (page 134).<br />
Tips:<br />
u Compare the rates for long-distance calls (especially for international calls) offered by<br />
your fixed line network and VoIP providers, and determine which <strong>co</strong>nnection should be<br />
used specifically for these <strong>co</strong>untries/locations, e.g. a dialling plan for the Phone Number<br />
"0033" would apply to every call made to France.<br />
u Use dialling plans to define that numbers starting with a call-by-call number are always<br />
made via your fixed line network <strong>co</strong>nnection. To do so, enter the call-by-call number in<br />
the Phone Number field.<br />
u For your network mailboxes, define that you should always be called on the number for<br />
which you accept calls.<br />
135<br />
<strong>VoIPon</strong> www.voipon.<strong>co</strong>.<strong>uk</strong> sales@voipon.<strong>co</strong>.<strong>uk</strong> Tel: +44 (0)1245 808195 Fax: +44 (0)1245 808299
Web <strong>co</strong>nfigurator Defining dialling plans – <strong>co</strong>st <strong>co</strong>ntrol<br />
Defining dialling plans<br />
¤ Open the following Web page: Settings ¢ Telephony ¢ Dialling Plans.<br />
You can define dialling plans for your telephone in the Dialling Plans area. Specify the following:<br />
Phone Number<br />
Enter the number or the first digits of the phone number (e.g. an area <strong>co</strong>de) to which<br />
the dialling plan should apply (max. 15 digits).<br />
Enter each phone number and the area <strong>co</strong>de, even if you have activated the Area Code<br />
Predialling (page 134) function.<br />
Connection Type<br />
The list shows all the VoIP <strong>co</strong>nnections that you have <strong>co</strong>nfigured as well as your fixed<br />
line network <strong>co</strong>nnection. It also displays the name assigned to each <strong>co</strong>nnection.<br />
¤ From the list, select the <strong>co</strong>nnection via which the number or numbers that start with<br />
the sequence of digits should be dialled.<br />
Or:<br />
¤ Select Block if the number or numbers that start with the sequence of digits should<br />
be blocked.<br />
The display will show Not possible! if an attempt is made to dial a blocked number.<br />
Comment (optional)<br />
You can enter a description of up to 20 characters for the dialling plan here.<br />
¤ Click Add.<br />
The dialling plan is activated immediately.<br />
A new empty line for a new dialling plan will appear if your phone still has enough space.<br />
Please note:<br />
If dialling plans overlap, the one with the greatest <strong>co</strong>n<strong>co</strong>rdance will apply.<br />
Example: There is a dialling plan for the number "02" and one for the number "023". If you dial<br />
"0231..." the se<strong>co</strong>nd rule will apply; if you dial "0208..." the first rule will apply.<br />
Examples:<br />
u You want to block your phone for all 0900 numbers.<br />
Dialling plan:<br />
Phone Number = 0900 Connection Type = Block<br />
u All calls to the mobile phone network shall be made via your VoIP <strong>co</strong>nnection with<br />
provider B.<br />
Dialling plans:<br />
Phone Number = 017 Connection Type = IP3, providerB<br />
and the <strong>co</strong>rresponding entries for "015" and "016".<br />
Activating/deactivating dialling plans<br />
¤ Click the option in the Active <strong>co</strong>lumn to activate/deactivate the <strong>co</strong>rresponding dialling<br />
plan ( = activated).<br />
A deactivated dialling plan will not take effect until it is reactivated.<br />
136<br />
<strong>VoIPon</strong> www.voipon.<strong>co</strong>.<strong>uk</strong> sales@voipon.<strong>co</strong>.<strong>uk</strong> Tel: +44 (0)1245 808195 Fax: +44 (0)1245 808299
Loading and deleting directories to/from the PC Web <strong>co</strong>nfigurator<br />
Deleting dialling plans<br />
¤ Click Delete next to the dialling plan you wish to delete.<br />
The dialling plan is deleted from the list immediately. The space in the list is released.<br />
Please note:<br />
Predefined dialling plans set as defaults (for emergency numbers cannot be deactivated and cannot<br />
be deleted.<br />
Emergency numbers<br />
Dialling plans for emergency numbers (e.g. the local emergency service number) are factory-set<br />
for certain <strong>co</strong>untries. The fixed line network is determined as the Connection Type.<br />
These dialling plans cannot be deleted, deactivated or blocked. However, you can change<br />
the Connection Type.<br />
This should only be changed if the phone is not <strong>co</strong>nnected to the fixed line network. If you<br />
choose a VoIP <strong>co</strong>nnection, please make sure the VoIP provider supports emergency calls.<br />
If no emergency numbers are set by default, you should define dialling plans for emergency<br />
numbers yourself and assign them to a <strong>co</strong>nnection of which you know that it supports<br />
emergency calls. Emergency calls are always supported by fixed line networks.<br />
Warning:<br />
– Emergency numbers cannot be dialled if the keypad lock is activated. Before dialling, press and<br />
hold the hash key #, to release the keypad lock.<br />
– If you have activated an automatic area <strong>co</strong>de (page 134) and if no dialling plan for emergency calls<br />
is defined, the area <strong>co</strong>de will also be prefixed to emergency calls made via VoIP.<br />
Loading and deleting directories to/from the PC<br />
The Web <strong>co</strong>nfigurator has the following options for editing the directories of the registered<br />
handsets.<br />
u Store the handset directories on a PC. Entries are stored in vCard format in a vcf file on<br />
the PC. You can edit these files with an ASCII editor (e.g. Notepad/Editor in Windows<br />
Accessories) and load them onto any handset. You can also transfer directory entries to<br />
your PC address book (e.g. Outlook Express address book).<br />
u Transfer <strong>co</strong>ntact details from your PC address book to handset directories. Export the<br />
<strong>co</strong>ntacts, e.g. with Outlook Express to vcf files (vCards) and transfer them to handset<br />
directories using the Web <strong>co</strong>nfigurator.<br />
u Delete the directory on the handset. If you have edited the directory file (vcf file) on the<br />
PC and would like to use this modified directory on the handset, you can delete the current<br />
directory from the handset first.<br />
Tip: Back up the current directory on your PC before deleting it. You can then load it back<br />
onto the handset if the modified directory is affected by formatting errors and some, or<br />
all, of it cannot be loaded onto the handset.<br />
Please note:<br />
You can find information on the vCard format (vcf) on the Internet, e.g. under:<br />
http://en.wikipedia.org/wiki/VCard<br />
137<br />
<strong>VoIPon</strong> www.voipon.<strong>co</strong>.<strong>uk</strong> sales@voipon.<strong>co</strong>.<strong>uk</strong> Tel: +44 (0)1245 808195 Fax: +44 (0)1245 808299
Web <strong>co</strong>nfigurator Loading and deleting directories to/from the PC<br />
Pre<strong>co</strong>nditions:<br />
u The handset can send and receive directory entries.<br />
u The handset is activated and is in idle status.<br />
¤ Open the following Web page: Settings ¢ Telephony ¢ Directory.<br />
The names of all registered handsets are displayed in the Handset area.<br />
¤ Select the handset for which you want to save or edit the directory. To do this, click the<br />
option before the handset.<br />
Loading the directory file from the PC to the handset<br />
¤ In the Transfer directory to handset area, enter the vcf file you want to load on to the handset<br />
(<strong>co</strong>mplete path name), or click Browse... and navigate your way to the file.<br />
¤ Click the Transfer button to start the transfer.<br />
The display will show how many of the entries from the vcf file are being transferred to the<br />
directory.<br />
Transfer rules<br />
The directory entries from a vcf file that are loaded onto the handset will be added to the<br />
directory. If an entry already exists for a name, it will either be supplemented or a new<br />
entry for the name will be created. The process will not overwrite or delete any phone numbers.<br />
Please note:<br />
Depending on your handset, up to 3 entries with the same name will be created in the handset directory<br />
for each vCard – one entry per entered number.<br />
Loading the directory from the handset to the PC<br />
¤ In the Handset Directory area click Save. A Windows dialogue will be shown to save the<br />
file.<br />
¤ Enter the directory on the PC (<strong>co</strong>mplete path name) in which the directory file is to be<br />
stored. Click Save or OK.<br />
Deleting the directory<br />
¤ In the Handset Directory area, click Delete.<br />
¤ Confirm the security prompt Telephone directory of the selected handset will be deleted. Continue?<br />
with OK.<br />
All directory entries will be deleted.<br />
Please note:<br />
For how to delete the directory on the handset, see page 45.<br />
138<br />
<strong>VoIPon</strong> www.voipon.<strong>co</strong>.<strong>uk</strong> sales@voipon.<strong>co</strong>.<strong>uk</strong> Tel: +44 (0)1245 808195 Fax: +44 (0)1245 808299
Saving messenger access data Web <strong>co</strong>nfigurator<br />
Telephone directory <strong>co</strong>ntent (vcf file)<br />
The following data (if available) is written into the vcf file for entry into the directory or<br />
transferred from a vcf file into the handset directory.<br />
1. Name<br />
2. First name<br />
3. Number<br />
4. Number (office)<br />
5. Number (mobile)<br />
6. E-mail address<br />
7. Date (YYYY-MM-DD) and time of the reminder call (HH:MM) separated by a "T"<br />
(example: 2007-06-22T11:00).<br />
8. Identification as VIP (X-SIEMENS-VIP:1)<br />
Other information that a vCard may <strong>co</strong>ntain is not entered into the handset directory.<br />
Example for an entry in vCard format:<br />
BEGIN:VCARD<br />
VERSION:2.1<br />
N:Smith;Anna<br />
TEL;HOME:1234567890<br />
TEL;WORK:0299123456<br />
TEL;CELL:0175987654321<br />
EMAIL:anna@smith.<strong>co</strong>m<br />
BDAY:1975-05-04T11:00<br />
X-SIEMENS-VIP:1<br />
END:VCARD<br />
Saving messenger access data<br />
The messenger client in your base station enables instant messaging (immediate message<br />
transfer, chatting). The phone supports the XMPP messenger (Jabber).<br />
In order for you to use your phone's messenger to "go online" and "chat" on the Internet,<br />
the access data of a messenger server must be saved on your phone.<br />
Your phone is already registered with the <strong>Gigaset</strong>.net Jabber server. An ac<strong>co</strong>unt has been<br />
assigned to your phone. You can chat to other <strong>Gigaset</strong>.net subscribers via this ac<strong>co</strong>unt. To<br />
do this you need to create a buddy list on the PC (see "Setting up <strong>Gigaset</strong>.net Jabber<br />
ac<strong>co</strong>unt" on page 140).<br />
You can also register with another instant messaging provider that supports XMPP Messenger<br />
(Jabber). You must then save the messenger server address and your access data on<br />
your phone.<br />
You can define a Resource name and a Priority for your phone. Both are required if you are<br />
logged in (online) with the messenger server with several devices (phone, desktop PC and<br />
laptop) at the same time using the same Jabber ID.<br />
The Resource name is used to distinguish between these devices. The phone cannot log in<br />
with the messenger server if it does not have a resource name.<br />
139<br />
<strong>VoIPon</strong> www.voipon.<strong>co</strong>.<strong>uk</strong> sales@voipon.<strong>co</strong>.<strong>uk</strong> Tel: +44 (0)1245 808195 Fax: +44 (0)1245 808299
Web <strong>co</strong>nfigurator Saving messenger access data<br />
You should assign a Priority as each message will only be sent to one device for each Jabber<br />
ID. The Priority determines which of the devices receives the message.<br />
Example: You are online using one of your phone's handsets and your PC both at the same<br />
time. You have assigned your phone (Resource name "phone") Priority 5 and your PC<br />
(Resource name "PC") Priority 10. In this case, any message addressed to your Jabber ID will<br />
be sent to your phone.<br />
¤ Open the following Web page: Settings ¢ Messaging ¢ Messenger.<br />
¤ In the Messenger Ac<strong>co</strong>unt field, select whether you wish to use the <strong>Gigaset</strong>.net Jabber<br />
server or another provider's messenger server (Other).<br />
The access data for <strong>Gigaset</strong>.net is already stored in the base station. It is displayed in Jabber<br />
ID, Authentication password and Jabber server. With this data you can also register with<br />
the <strong>Gigaset</strong>.net Jabber server through your PC.<br />
¤ Enter the user ID (max. 50 characters) and password (max. 20 characters) that you used<br />
to register with the messenger server in the Jabber ID and Authentication password fields.<br />
If you have selected Messenger Ac<strong>co</strong>unt = <strong>Gigaset</strong>.net, the fields are pre<strong>co</strong>nfigured with<br />
your <strong>Gigaset</strong>.net ac<strong>co</strong>unt.<br />
¤ In the Jabber server field, enter the IP address or the DNS name of the messenger server<br />
with which you are registered for instant messaging.<br />
Max. 74 alphanumeric characters.<br />
If you have selected Messenger Ac<strong>co</strong>unt = <strong>Gigaset</strong>.net, the field is pre<strong>co</strong>nfigured with the<br />
name of the <strong>Gigaset</strong>.net server.<br />
¤ Enter the number of the <strong>co</strong>mmunication port on the Jabber server in the Jabber server<br />
port field. The default port is 5222.<br />
If you have selected Messenger Ac<strong>co</strong>unt = <strong>Gigaset</strong>.net, the port number is pre<strong>co</strong>nfigured.<br />
¤ Enter a resource name (max. 20 characters) in the Resource field.<br />
The default is: phone.<br />
¤ Enter the priority for your phone in the Priority field. Select a number between -128<br />
(highest priority) and 127 (lowest priority) for the priority.<br />
The default is: 5<br />
¤ Click Set.<br />
Setting up <strong>Gigaset</strong>.net Jabber ac<strong>co</strong>unt<br />
Your phone is already registered with the <strong>Gigaset</strong>.net Jabber server. An ac<strong>co</strong>unt has been<br />
assigned to your phone.<br />
In order to chat with other <strong>Gigaset</strong>.net subscribers via this ac<strong>co</strong>unt, you must transfer the<br />
required <strong>Gigaset</strong>.net subscribers to a <strong>co</strong>ntact list (buddy list) on your PC. You can use any<br />
<strong>co</strong>nventional Jabber client for this (e.g. PSI, Miranda; see e.g. http://www.swissjabber.ch).<br />
In order to use the <strong>Gigaset</strong>.net Jabber ac<strong>co</strong>unt, proceed as follows:<br />
¤ Start the Web <strong>co</strong>nfigurator, open the Settings ¢ Messaging ¢ Messenger Web page and<br />
select the Messenger Ac<strong>co</strong>unt <strong>Gigaset</strong>.net field. Your ac<strong>co</strong>unt data is displayed in Jabber ID<br />
and Authentication password. You will need these to create a buddy list via the Jabber client<br />
on the PC.<br />
¤ Start your Jabber client on the PC.<br />
140<br />
<strong>VoIPon</strong> www.voipon.<strong>co</strong>.<strong>uk</strong> sales@voipon.<strong>co</strong>.<strong>uk</strong> Tel: +44 (0)1245 808195 Fax: +44 (0)1245 808299
Making e-mail settings Web <strong>co</strong>nfigurator<br />
¤ Enter your <strong>Gigaset</strong>.net Jabber ID on the Jabber client as a new ac<strong>co</strong>unt. The Jabber ID <strong>co</strong>nsists<br />
of your <strong>Gigaset</strong>.net number and "@jabber.gigaset.net"<br />
Example: 12345678901#9@jabber.gigaset.net<br />
¤ Then enter your Authentication password.<br />
Please note:<br />
– Do not select the option "Create new ac<strong>co</strong>unt". Your <strong>Gigaset</strong>.net Jabber ac<strong>co</strong>unt has already been<br />
created in <strong>Gigaset</strong>.net.<br />
– The option "SSL <strong>co</strong>nnection" must be deactivated in the Jabber client.<br />
¤ Now you can enter <strong>Gigaset</strong>.net subscribers as <strong>co</strong>ntacts (buddies).<br />
For the Jabber ID of each subscriber, enter the subscriber's <strong>Gigaset</strong>.net number with<br />
"@jabber.gigaset.net" (example: 2141524901#9@jabber.gigaset.net).<br />
A request to "Add to <strong>co</strong>ntact list" will be sent to the subscriber.<br />
If the subscriber accepts this request, they will be added to your buddy list. This updated<br />
buddy list will be displayed on the handset the next time the messenger is rebooted. To<br />
restart: If necessary, close your <strong>co</strong>nnection to the messenger server (page 79) and then go<br />
back online (page 77).<br />
Please note:<br />
For how to use your handset to go online and chat with or call buddies, see page 76.<br />
Making e-mail settings<br />
You can use your phone to be notified about new e-mail messages on your in<strong>co</strong>ming e-mail<br />
server (page 73).<br />
You must store the address/DNS name of your in<strong>co</strong>ming e-mail server and your personal<br />
access data in the phone and activate the e-mail check with the in<strong>co</strong>ming e-mail server, so<br />
that the phone can <strong>co</strong>nnect to the in<strong>co</strong>ming e-mail server and your mailbox.<br />
¤ Open the following Web page: Settings ¢ Messaging ¢ E-Mail.<br />
¤ Enter the user name (ac<strong>co</strong>unt name) agreed with the Internet provider (max. 50 characters)<br />
in the Authentication Name field.<br />
¤ Enter the password agreed with the provider for accessing the in<strong>co</strong>ming e-mail server<br />
(max. 32 characters; case sensitive) in the Authentication password field.<br />
¤ Enter the name of the in<strong>co</strong>ming e-mail server (POP3 server) (max. 74 characters) in the<br />
POP3 Server field. Example: pop.theserver.<strong>co</strong>m.<br />
¤ From the Check for new e-mail list select the time interval at which your phone should<br />
check if new e-mail messages have arrived in your in<strong>co</strong>ming e-mail server. Select Never<br />
to deactivate the prompt. Select one of the other values to activate the prompt for new<br />
e-mail messages.<br />
¤ Click Set to save the settings in your phone.<br />
Please note:<br />
For how to show the messages from your mailbox on your handset, see page 73.<br />
141<br />
<strong>VoIPon</strong> www.voipon.<strong>co</strong>.<strong>uk</strong> sales@voipon.<strong>co</strong>.<strong>uk</strong> Tel: +44 (0)1245 808195 Fax: +44 (0)1245 808299
Web <strong>co</strong>nfigurator Activating/deactivating info services<br />
Activating/deactivating info services<br />
You can <strong>co</strong>nfigure your registered <strong>Gigaset</strong> <strong>C47</strong>H handsets to display customised text information<br />
on the idle display.<br />
Pre<strong>co</strong>ndition: The Clock is set as a screen picture on the handset (page 96).<br />
In<strong>co</strong>ming text information will overwrite the screen picture.<br />
You can activate and deactivate the display of text information for every handset.<br />
¤ Open the following Web page: Settings ¢ Info services on screensaver.<br />
¤ Activate Yes / No to switch the display of text information on or off.<br />
¤ Click Set to save the settings in your phone.<br />
Configuring info services<br />
¤ Click the link<br />
www.gigaset.net/myac<strong>co</strong>unt<br />
or enter the URL into the address field of a different browser window.<br />
¤ Enter the ac<strong>co</strong>unt data shown on the Info services on screensaver Web page into the fields<br />
for the user ac<strong>co</strong>unt.<br />
This will open a Web page where you can <strong>co</strong>mpile your info service.<br />
¤ Define which information should be sent regularly to your handset.<br />
Defining the server for firmware updates, starting the update<br />
If necessary, you can load updates of the base station firmware onto your phone. You can<br />
either download the updates directly from the Internet or from a PC in your local network.<br />
Using the Web <strong>co</strong>nfigurator you can specify from where the firmware should be loaded.<br />
¤ Open the following Web page: Settings ¢ Miscellaneous.<br />
Downloading the firmware update directly from the Internet<br />
The server on which <strong>Siemens</strong> makes new firmware versions available for your base station<br />
is set by default. The URL of the Internet server is displayed in the Data server field.<br />
The firmware is loaded from the Internet if you do not enter a local file in the <strong>User</strong> defined<br />
firmware file field before this update.<br />
Please note:<br />
– When updating from the Internet, checks are made to ensure that no newer version of the<br />
firmware exists. If this is not the case, the operation is terminated.<br />
– You should not change the URL for the Internet server because this address is also used to load<br />
provider information from the Internet. If you have entered another URL, you can re-activate the<br />
default URL by restoring the base station default settings (page 103).<br />
142<br />
<strong>VoIPon</strong> www.voipon.<strong>co</strong>.<strong>uk</strong> sales@voipon.<strong>co</strong>.<strong>uk</strong> Tel: +44 (0)1245 808195 Fax: +44 (0)1245 808299
Activating/deactivating the automatic version check Web <strong>co</strong>nfigurator<br />
Conducting the firmware update locally<br />
Pre<strong>co</strong>ndition: A Web server is running on the local PC (e.g. Apache).<br />
¤ First, load the desired version of the firmware from the Internet onto a local PC.<br />
¤ In the <strong>User</strong> defined firmware file field enter the IP address of the PC in your local network<br />
and the <strong>co</strong>mplete path and name of the firmware file on the PC. Example:<br />
192.168.2.105/<strong>C47</strong>0IP/FW_file.bin.<br />
¤ Click Set to save the changes.<br />
This setting is automatically used for the subsequent firmware update. The Internet server<br />
URL stays saved and is re-used for further firmware updates. If you want to use a local PC<br />
again for another update, then you have to re-enter the IP address and file name.<br />
Please note:<br />
If an error arises during a firmware update from a local PC, the most recent version of the firmware<br />
is automatically downloaded from the Internet.<br />
Starting a firmware update<br />
Pre<strong>co</strong>nditions:<br />
u No calls are being made via the fixed line network or VoIP.<br />
u There is no internal <strong>co</strong>nnection between the registered handsets.<br />
u The base station menu is not open in any of the handsets.<br />
¤ Click Update Firmware.<br />
The firmware is updated. This process can take up to 3 minutes.<br />
Please note:<br />
You can also start the firmware update on the handset (page 105).<br />
Activating/deactivating the automatic version check<br />
When the version check is activated, the phone checks on a daily basis whether the <strong>Siemens</strong><br />
<strong>co</strong>nfiguration server is carrying a new version of the phone firmware or of the file<br />
with the general settings for your VoIP provider.<br />
If a new version is available, a notification is sent to the handset and the message key<br />
flashes. You can then carry out an automatic update of the firmware (page 106) or of the<br />
VoIP provider settings (page 108).<br />
¤ Open the following Web page: Settings ¢ Miscellaneous.<br />
¤ Click Yes next to Automatic check for software/profile updates to activate the automatic version<br />
check.<br />
Click No if you do not want a version check to be carried out.<br />
¤ Click Set to save the changes.<br />
143<br />
<strong>VoIPon</strong> www.voipon.<strong>co</strong>.<strong>uk</strong> sales@voipon.<strong>co</strong>.<strong>uk</strong> Tel: +44 (0)1245 808195 Fax: +44 (0)1245 808299
Web <strong>co</strong>nfigurator Activating VoIP status message display<br />
Activating VoIP status message display<br />
Display VoIP status messages on your handset when there are VoIP <strong>co</strong>nnection problems.<br />
These messages give you information on the status of a <strong>co</strong>nnection and <strong>co</strong>ntain a providerspecific<br />
status <strong>co</strong>de that helps the service team when they are analysing the problem.<br />
¤ Open the following Web page: Settings ¢ Miscellaneous.<br />
¤ Click Yes next to Show VoIP status on handset to activate the status message display.<br />
If you click No, no VoIP status messages are displayed.<br />
¤ Click Set to save the changes.<br />
Please note:<br />
A table with possible status <strong>co</strong>des and their meaning can be found in the appendix on page 150.<br />
Copy date and time from time server<br />
The date and time are shown in the idle display of registered handsets. They are important,<br />
for example, for stating the <strong>co</strong>rrect time in the calls list and for the "alarm clock" function.<br />
There are two methods for updating the time and date on your base station: manually with<br />
one of the registered handsets (page 12) or automatically by synchronisation with a time<br />
server on the Internet.<br />
Activate/deactivate synchronisation with a time server as follows:<br />
¤ Open the following Web page: Settings ¢ Miscellaneous.<br />
¤ In the Automatic adjustment of System Time with Time Server field select Yes to activate synchronisation<br />
between base station and a time server. If you select No the base station<br />
will not adopt time settings from a time server. In this case you should set the time and<br />
date manually using a handset.<br />
¤ The Last synchronisation with time server field shows the last time when the base station<br />
<strong>co</strong>mpared time and date settings with a time server.<br />
¤ In the Time Server field, enter the Internet address or name of the time server from which<br />
the base station should adopt its time and date settings. The time server<br />
"europe.pool.ntp.org" is set as default on the base station. You can overwrite the setting.<br />
¤ From the Country list, select the <strong>co</strong>untry in which your base station is being operated.<br />
¤ The Time Zone field shows the valid time zone for the Country. It shows the deviation<br />
between local time (not summer time) and Greenwich Mean Time (GMT).<br />
If a <strong>co</strong>untry is divided into various time zones, they will all appear in the list. Select the<br />
appropriate Time Zone for the base station from the list.<br />
¤ The Automatically adjust clock to summer-time changes field will be displayed if your time<br />
zone differentiates between summer time and winter time.<br />
Activate On if you want the time to change automatically to summer time or winter time<br />
when summer time begins and ends respectively.<br />
Activate Off if you do not want to change to summer time.<br />
Please note: If the date and time are updated by a time server that automatically<br />
switches between summer time and standard time, you must always activate Off here.<br />
144<br />
<strong>VoIPon</strong> www.voipon.<strong>co</strong>.<strong>uk</strong> sales@voipon.<strong>co</strong>.<strong>uk</strong> Tel: +44 (0)1245 808195 Fax: +44 (0)1245 808299
Querying the phone status Web <strong>co</strong>nfigurator<br />
¤ Click Set to save the settings in your phone.<br />
Once you have activated synchronisation, the time and date will be <strong>co</strong>mpared with a time<br />
server as soon as an Internet <strong>co</strong>nnection is established.<br />
Synchronisation will usually occur once a day (at night) when synchronisation is activated.<br />
A further synchronisation is made<br />
u at every new system start of the base station (e.g. after a firmware update or a power<br />
cut),<br />
u when time settings are changed, e.g. because you have registered a new handset with<br />
its own time settings on the base station.<br />
Date and time settings are transferred to every handset after synchronisation.<br />
Please note:<br />
– The default time server "europe.pool.ntp.org" will remain stored in the base station even if you<br />
overwrite it. If you delete your time server from the Time Server field and synchronisation is still<br />
activated, the base station will return to synchronisation with the default time server. However, it<br />
will no longer appear in the Time Server field.<br />
– The base station will return to synchronisation with the default time server if you have entered<br />
your own time server in the Time Server field and the base station is unable to synchronise time<br />
and date for ten <strong>co</strong>nsecutive attempts.<br />
– If you have deactivated synchronisation with a time server, and if the date and time are not set on<br />
any handset, then the base station will attempt to reference date and time settings from the CLIP<br />
information of an in<strong>co</strong>ming call.<br />
Querying the phone status<br />
General information about your phone is displayed.<br />
¤ In the menu list, click the Status tab.<br />
The following information is displayed:<br />
IP Configuration<br />
IP address<br />
The phone's current IP address within the local network. For assigning the IP address,<br />
see page 118.<br />
MAC address<br />
The phone's device address.<br />
Software<br />
Firmware version<br />
Version of the firmware currently downloaded. You can download updates of the<br />
firmware on your phone (page 105). Firmware updates are available on the Internet.<br />
EEPROM version<br />
Version of your phone's EEPROM storage chip (page 175).<br />
145<br />
<strong>VoIPon</strong> www.voipon.<strong>co</strong>.<strong>uk</strong> sales@voipon.<strong>co</strong>.<strong>uk</strong> Tel: +44 (0)1245 808195 Fax: +44 (0)1245 808299
Appendix Care<br />
Appendix<br />
Care<br />
¤ Wipe down the base station and handset with a damp cloth (no solvents) or an antistatic<br />
cloth.<br />
Never use a dry cloth. This can cause a build up of static.<br />
Contact with liquid<br />
If the handset should <strong>co</strong>me into <strong>co</strong>ntact with liquid:<br />
¤ Switch the handset off and remove the batteries immediately.<br />
¤ Allow the liquid to drain from the handset.<br />
¤ Pat all parts dry, then with the battery <strong>co</strong>mpartment open and the keypad facing down<br />
place the handset in a dry, warm place for at least 72 hours (not in a microwave, oven<br />
etc.).<br />
¤ Do not switch on the handset again until it is <strong>co</strong>mpletely dry.<br />
When it has fully dried out, you will normally be able to use it again.<br />
Questions and answers<br />
If you have any questions about using your phone, visit us a<br />
t www.siemens.<strong>co</strong>m/gigasetcustomercare at any time. The table below <strong>co</strong>ntains a list of<br />
<strong>co</strong>mmon problems and possible solutions.<br />
Please note:<br />
To support the service team, it can be helpful if you have the following information to hand:<br />
– Version of firmware, EEPROM and your phone's MAC address<br />
You can check this information with the Web <strong>co</strong>nfigurator (page 145). For how to display the MAC<br />
address on your handset, turn to page 110.<br />
– VoIP status <strong>co</strong>de (page 150)<br />
For problems with VoIP <strong>co</strong>nnections, you should set VoIP status messages to be displayed on your<br />
handset. (page 108, page 144). These messages <strong>co</strong>ntain a status <strong>co</strong>de that helps when the problem<br />
is analysed.<br />
The display is blank.<br />
1. The handset is not switched on.<br />
¥ Press and hold the end call key a.<br />
2. The battery is flat.<br />
¥ Charge the battery or replace it (page 10).<br />
The keys of a handset do not respond when pressed.<br />
The keypad lock is activated.<br />
¥ Press and hold the hash key # (page 31).<br />
!<br />
146<br />
<strong>VoIPon</strong> www.voipon.<strong>co</strong>.<strong>uk</strong> sales@voipon.<strong>co</strong>.<strong>uk</strong> Tel: +44 (0)1245 808195 Fax: +44 (0)1245 808299
Questions and answers Appendix<br />
Base "X" flashes on the display.<br />
1. The handset is out of range of the base station.<br />
¥ Move the handset closer to the base station.<br />
2. The handset has been de-registered.<br />
¥ Register the handset (page 88).<br />
3. The base station is not turned on.<br />
¥ Check the base station's mains adapter (page 14).<br />
4. An update of the base station firmware is currently being <strong>co</strong>nducted (page 105/page 142).<br />
¥ Pease wait until the update is <strong>co</strong>mplete.<br />
Base Search flashes in the display.<br />
The base station is out of range or switched off.<br />
¥ Move the handset closer to the base station.<br />
¥ Check the base station mains adapter.<br />
Handset does not ring.<br />
1. The ringer tone is switched off.<br />
¥ Activate the ringer tone (page 100).<br />
2. Call forwarding set to All Calls.<br />
¥ Deactivate call forwarding (fixed line network page 39; VoIP page 41/page 132).<br />
You cannot hear a ringer/dialling tone from the fixed line network.<br />
The phone <strong>co</strong>rd supplied has not been used or has been replaced by a new <strong>co</strong>rd with the wrong jack<br />
pin <strong>co</strong>nnections.<br />
¥ When purchasing a new <strong>co</strong>rd, ensure that it has the <strong>co</strong>rrect pin <strong>co</strong>nnections (page 15).<br />
Error tone sounds after system PIN prompt.<br />
You have entered the wrong system PIN.<br />
¥ Enter system PIN if required.<br />
Have you forgotten the system PIN?<br />
¥ Carry out a reset on the base station to set the system PIN back to 0000 (page 104).<br />
The other party cannot hear you.<br />
You have pressed the u (INT) key. The handset is "muted".<br />
¥ Activate the microphone again (page 31).<br />
When making calls from the fixed line network, the caller's phone number is not displayed<br />
although CLIP (page 29) is set.<br />
Calling Line Identification is not enabled.<br />
¥ The caller should ask his network provider to enable Calling Line Identification (CLI).<br />
You hear an error tone when keying an input (a descending tone sequence).<br />
Action has failed/invalid input.<br />
¥ Repeat the operation.<br />
Watch the display and refer to the user guide if necessary.<br />
You cannot <strong>co</strong>nnect to the router and the phone is assigned a static IP address.<br />
¥ Check on the router whether the IP address is already being used by another device in the LAN or<br />
belongs to the block of IP addresses that is reserved on the router for dynamic address assignment.<br />
¥ If necessary, change the phone's IP address (page 109).<br />
You have made a call via VoIP but cannot hear the other caller.<br />
147<br />
<strong>VoIPon</strong> www.voipon.<strong>co</strong>.<strong>uk</strong> sales@voipon.<strong>co</strong>.<strong>uk</strong> Tel: +44 (0)1245 808195 Fax: +44 (0)1245 808299
Appendix Questions and answers<br />
Your phone is <strong>co</strong>nnected to a router with NAT/firewall.<br />
¥ Your STUN server (page 124) or outbound proxy (page 125) settings are in<strong>co</strong>mplete or in<strong>co</strong>rrect.<br />
Check the settings.<br />
¥ No outbound proxy is entered or the outbound proxy mode Never is activated (page 125) and your<br />
phone is <strong>co</strong>nnected to a router with symmetric NAT or a blocking firewall.<br />
¥ Port forwarding is activated on your router, but no permanent IP address has been assigned to<br />
your phone.<br />
You cannot make calls via VoIP. Server not accessible! is displayed.<br />
¥ First wait a few minutes. This is often a short-term event that <strong>co</strong>rrects itself after a short time.<br />
If the message is still displayed, proceed as follows:<br />
¥ Check whether your phone's Ethernet cable is <strong>co</strong>rrectly <strong>co</strong>nnected to the router.<br />
¥ Check your router's cable <strong>co</strong>nnection to the Internet.<br />
¥ Check whether the phone is <strong>co</strong>nnected to the LAN. Send a ping <strong>co</strong>mmand, e.g. from your PC, to<br />
the phone (ping s ). It may be that no IP address <strong>co</strong>uld be assigned<br />
to the phone or a permanently set IP address is already assigned to another LAN subscriber. Check<br />
the settings on the router, you may have to activate the DHCP server.<br />
You cannot make calls via VoIP. Either Provider registration failed! or Registration failed is shown.<br />
¥ First wait a few minutes. This is often a short-term event that <strong>co</strong>rrects itself after a short time.<br />
The message may still be displayed for the following reasons:<br />
1. The personal VoIP access data (<strong>User</strong>name, Authent. Name and Authent. Password) you have entered<br />
may be in<strong>co</strong>mplete or wrong.<br />
¥ Check your information. In particular, check your use of upper and lower case.<br />
2. The general settings for your VoIP provider are in<strong>co</strong>mplete or in<strong>co</strong>rrect (in<strong>co</strong>rrect server address).<br />
¥ Start the Web <strong>co</strong>nfigurator and check the settings.<br />
The phone does not dial an entered number. The display shows Not possible!.<br />
The number may be blocked (dial rule).<br />
¥ Open the Dialling Plans Web page of the Web <strong>co</strong>nfigurator and delete or deactivate the block.<br />
You cannot establish a <strong>co</strong>nnection to the phone with your PC's Web browser.<br />
¥ When establishing a <strong>co</strong>nnection, check the phone's local IP address that has been entered. You can<br />
check the IP address on your handset.<br />
¥ Check the LAN <strong>co</strong>nnections for the PC and phone.<br />
¥ Check that your phone can be reached. Send a ping <strong>co</strong>mmand, e.g. from your PC, to the phone<br />
(ping s ).<br />
¥ You have tried to reach the phone via a secure http (https://...). Try again with http://....<br />
You cannot be reached for calls from the Internet.<br />
¥ There is no entry for your phone in your router's routing table. Check the settings for the NAT<br />
refresh time (page 125).<br />
¥ Your phone is not registered with the VoIP provider.<br />
¥ You have entered the wrong user ID or an in<strong>co</strong>rrect domain (page 123).<br />
No firmware update or VoIP profile download is carried out.<br />
1. If Currently not possible! is displayed, the VoIP <strong>co</strong>nnections may be busy or a download/update is<br />
already being carried out.<br />
¥ Repeat the process at a later time.<br />
2. If File <strong>co</strong>rrupted! is displayed, the firmware or profile file may be invalid.<br />
¥ Please only use firmware and downloads that are made available on the pre<strong>co</strong>nfigured <strong>Siemens</strong><br />
server (page 142) or at www.siemens.<strong>co</strong>m/gigasetcustomercare.<br />
148<br />
<strong>VoIPon</strong> www.voipon.<strong>co</strong>.<strong>uk</strong> sales@voipon.<strong>co</strong>.<strong>uk</strong> Tel: +44 (0)1245 808195 Fax: +44 (0)1245 808299
Questions and answers Appendix<br />
3. If Server not accessible! is displayed, the download server may not be accessible.<br />
¥ The server is currently not accessible. Repeat the process at a later time.<br />
¥ You have changed the pre<strong>co</strong>nfigured server address (page 142). Correct the address. If necessary,<br />
reset the base station.<br />
4. If Transmission Error XXX is displayed, an error has occurred in the transmission of the file. An HTTP<br />
error <strong>co</strong>de is displayed for XXX.<br />
¥ Repeat the process. If the error occurs again, <strong>co</strong>nsult the Service department.<br />
5. If Check IP settings! is displayed, your phone may not be <strong>co</strong>nnected to the Internet.<br />
¥ Check the cable <strong>co</strong>nnections between the phone and router and between the router and the<br />
Internet.<br />
¥ Check whether the phone is <strong>co</strong>nnected to the LAN, i.e. it can be reached at its IP address.<br />
You cannot listen to or <strong>co</strong>ntrol the network mailbox.<br />
VoIP:<br />
Your VoIP provider does not support the type of DTMF signalling set up on your phone.<br />
¥ Ask your VoIP provider which signalling it supports and change the settings on your phone<br />
(page 132) if necessary.<br />
Operating the base station within a PABX:<br />
Your PABX is set for dial pulsing.<br />
¥ Set your PABX to touch tone dialling.<br />
No time is specified for a message in the call history.<br />
Date/time is not set.<br />
¥ Set date/time (page 12) or<br />
¥ Activate base station synchronisation with a time server on the Internet (page 144).<br />
The integrated answer machine of your <strong>Gigaset</strong> <strong>C47</strong>5 IP reports "Invalid PIN" on remote operation.<br />
1. You have entered the wrong system PIN.<br />
¥ Enter the system PIN again.<br />
2. The system PIN is still set to 0000.<br />
¥ Change the system PIN (page 103).<br />
The answer machine of your <strong>Gigaset</strong> <strong>C47</strong>5 IP does not re<strong>co</strong>rd messages/has switched to notification<br />
announcement.<br />
Its memory is full.<br />
¥ Delete old messages.<br />
¥ Play back new messages and delete.<br />
The answer machine of your <strong>Gigaset</strong> <strong>C47</strong>5 IP will not re<strong>co</strong>rd a <strong>co</strong>nversation or interrupts the<br />
re<strong>co</strong>rding.<br />
The display shows Delete messages.<br />
The answer machine's memory is full.<br />
¥ Use a different handset to delete messages from the answer machine and restart two-way re<strong>co</strong>rding.<br />
Or:<br />
¥ Finish the call, delete old messages from the answer machine and re-establish the <strong>co</strong>nnection.<br />
149<br />
<strong>VoIPon</strong> www.voipon.<strong>co</strong>.<strong>uk</strong> sales@voipon.<strong>co</strong>.<strong>uk</strong> Tel: +44 (0)1245 808195 Fax: +44 (0)1245 808299
Appendix Questions and answers<br />
VoIP status <strong>co</strong>des<br />
If you have problems with your VoIP <strong>co</strong>nnections, activate the Show Stat. on HS function<br />
(page 108, page 144). You will then receive a VoIP status <strong>co</strong>de that will support you in<br />
problem analysis. Also enter the <strong>co</strong>de during problem analysis by the Service department.<br />
In the following tables you will find the meanings of the most important status <strong>co</strong>des and<br />
messages.<br />
Status<br />
<strong>co</strong>de<br />
Meaning<br />
0x300 The called party can be reached under several phone numbers. If the VoIP provider supports<br />
this, a list of the phone numbers is transmitted as well as the status <strong>co</strong>de. The caller can<br />
select to which number he wants to make the <strong>co</strong>nnection.<br />
0x301 Permanently redirected.<br />
The called party can no longer be reached under this number. The new number is transferred<br />
to the phone together with the status <strong>co</strong>de, and the phone then no longer accesses<br />
the old number but dials the new address immediately.<br />
0x302 Temporarily redirected.<br />
The phone is informed that the called party cannot be reached under the number dialled.<br />
The duration of redirecting is time-limited. The phone is also notified of the duration of<br />
redirecting.<br />
0x305 The query is sent to a different "proxy server", e.g. to balance out in<strong>co</strong>ming queries. The<br />
phone will make the same query once again to another proxy server. This is not a redirection<br />
of the address per se.<br />
0x380 Other service:<br />
The query or the call <strong>co</strong>uld not be made. But the phone is notified what other options there<br />
are to be able to <strong>co</strong>nnect the call.<br />
0x400 Wrong call<br />
0x401 Not authorised<br />
0x403 The requested service is not supported by the VoIP provider.<br />
0x404 Wrong phone number.<br />
No caller on this number.<br />
Example: In a local call you have not dialled the area <strong>co</strong>de although your VoIP provider does<br />
not support local calls.<br />
0x405 Method not permitted.<br />
0x406 Not acceptable.<br />
The requested service cannot be provided.<br />
0x407 Proxy authentication required.<br />
0x408 The party cannot be reached (e.g. ac<strong>co</strong>unt has been deleted).<br />
0x410 The requested service is not available from the VoIP provider.<br />
0x413 Message is too long.<br />
0x414 URI is too long.<br />
0x415 Query format is not supported.<br />
0x416 URI is faulty.<br />
0x420 In<strong>co</strong>rrect ending<br />
150<br />
<strong>VoIPon</strong> www.voipon.<strong>co</strong>.<strong>uk</strong> sales@voipon.<strong>co</strong>.<strong>uk</strong> Tel: +44 (0)1245 808195 Fax: +44 (0)1245 808299
Questions and answers Appendix<br />
Status<br />
<strong>co</strong>de<br />
Meaning<br />
0x421 In<strong>co</strong>rrect ending<br />
0x423 The requested service is not supported by the VoIP provider.<br />
0x480 The dialled number is temporarily unavailable.<br />
0x481 The recipient is not available.<br />
0x482 Double service query<br />
0x483 Too many "hops":<br />
The query was rejected because the service server (proxy) has decided that this query has<br />
already passed through too many service servers. The maximum number was previously<br />
specified by the original sender of the query.<br />
0x484 Wrong number:<br />
In most cases this response means that you have simply omitted one or more digits in the<br />
phone number.<br />
0x485 The URI dialled is not unique and cannot be processed by the VoIP provider.<br />
0x486 The called party is busy.<br />
0x487 General faults:<br />
The call was interrupted before a call was established. The status <strong>co</strong>de <strong>co</strong>nfirms receipt of<br />
the interruption signal.<br />
0x488 The server cannot process the query because the data entered in the media description is<br />
not <strong>co</strong>mpatible.<br />
0x491 The server notifies that the query will be processed as soon as a previous query has been<br />
<strong>co</strong>mpleted.<br />
0x493 The server rejects the query because the phone cannot decrypt the message. The sender<br />
has used an encryption method that neither the server nor the receiver phone can decrypt.<br />
0x500 The proxy or the receiving device has dis<strong>co</strong>vered a fault while executing the query, which<br />
makes further execution of the query impossible. In this case, the caller or the phone displays<br />
the fault and repeats the query after a few se<strong>co</strong>nds. The number of se<strong>co</strong>nds after<br />
which the query can be repeated may be transmitted to the caller or phone by the receiving<br />
device.<br />
0x501 The query cannot be processed by the recipient because the recipient does not have the<br />
functionality that the caller requires. If the recipient understands the query but does not<br />
process it because the sender does not have the necessary rights or the query is not permitted<br />
in the current <strong>co</strong>ntext, a 405 is sent instead of 501.<br />
0x502 In this case, the receiving device that transmits this error <strong>co</strong>de is a proxy or a gateway and<br />
has received an invalid response from its gateway via which this query is to be processed.<br />
0x503 The query cannot currently be processed by the receiving device or the proxy because the<br />
server is either overloaded or is being serviced. If it is possible for the query to be repeated<br />
in the foreseeable future, the server informs the caller or the phone of this.<br />
0x504 Time limit at the gateway<br />
0x505 The server rejects the query because the indicated version number of the SIP proto<strong>co</strong>l does<br />
not at least <strong>co</strong>ncur with the version that is used by server or the SIP device involved in this<br />
query.<br />
0x515 The server rejects the query because the message exceeds the maximum permitted size.<br />
0x600 The called party is busy.<br />
151<br />
<strong>VoIPon</strong> www.voipon.<strong>co</strong>.<strong>uk</strong> sales@voipon.<strong>co</strong>.<strong>uk</strong> Tel: +44 (0)1245 808195 Fax: +44 (0)1245 808299
Appendix Questions and answers<br />
Status<br />
<strong>co</strong>de<br />
Meaning<br />
0x603 The called party has rejected the call.<br />
0x604 The called URI does not exist.<br />
0x606 The <strong>co</strong>mmunication settings are not acceptable.<br />
0x701 The called party has hung up.<br />
0x703 Connection interrupted because of time-out.<br />
0x704 Connection interrupted because of a SIP error.<br />
0x705 Wrong dialling tone<br />
0x706 No <strong>co</strong>nnection established<br />
0x751 Busy tone:<br />
No <strong>co</strong>dec match between the calling and called party.<br />
0x810 General socket layer error: <strong>User</strong> is not authorised.<br />
0x811 General socket layer error:<br />
Wrong socket number<br />
0x812 General socket layer error: Socket is not <strong>co</strong>nnected.<br />
0x813 General socket layer error:<br />
Memory error.<br />
0x814 General socket layer error: Socket not available – check IP settings / <strong>co</strong>nnection problem /<br />
VoIP setting in<strong>co</strong>rrect.<br />
0x815 General socket layer error:<br />
Illegal application on the socket interface.<br />
152<br />
<strong>VoIPon</strong> www.voipon.<strong>co</strong>.<strong>uk</strong> sales@voipon.<strong>co</strong>.<strong>uk</strong> Tel: +44 (0)1245 808195 Fax: +44 (0)1245 808299
Checking service information Appendix<br />
Checking service information<br />
You may need the service information of your phone (base station and handset) for Customer<br />
Services.<br />
Base station service information<br />
Pre<strong>co</strong>ndition: You are <strong>co</strong>nducting an external call. The <strong>co</strong>nnection has been established<br />
for at least 8 sec.<br />
§Options§ ¢ Service Info<br />
Confirm selection with §OK§.<br />
The following information is displayed:<br />
1: Serial number of the base station (RFPI)<br />
2: Serial number of your handset (IPUI)<br />
3: Informs the service employees of the base station settings (in hex diagram), e.g. the<br />
number of registered handsets, repeater mode. The last 4 digits indicate the number of<br />
operating hours (hexadecimal).<br />
4: Variant, version of the firmware (digits 3 to 5).<br />
5: <strong>Gigaset</strong>.net number of your phone. With this number you can call a service employee<br />
over the Internet without needing to be registered with a VoIP provider. This means that<br />
the employee can test online <strong>co</strong>nnections and VoIP telephony irrespective of the VoIP provider.<br />
Service information of the handset<br />
In the handset idle status:<br />
Open the menu by pressing v.<br />
¤ Press the following keys one after the other: *#QL#<br />
The following information is displayed via the handset:<br />
1: Serial number (IPUI)<br />
2: Number of operating hours<br />
3: Variant, version of handset software<br />
153<br />
<strong>VoIPon</strong> www.voipon.<strong>co</strong>.<strong>uk</strong> sales@voipon.<strong>co</strong>.<strong>uk</strong> Tel: +44 (0)1245 808195 Fax: +44 (0)1245 808299
Appendix Service (Customer Care)<br />
Service (Customer Care)<br />
You can get assistance easily when you have technical questions or questions about how<br />
to use your device by using our online support service on the Internet at:<br />
http://www.siemens.<strong>co</strong>m/gigasetcustomercare<br />
This site can be accessed at any time wherever you are. It will give you 24/7 support for all<br />
our products. It also a list of FAQs and answers plus user guides for you to download. You<br />
will also find frequently asked questions and answers in the Questions and Answers section<br />
of this user guide in the appendix.<br />
If the device needs to be repaired, please <strong>co</strong>ntact one of our Customer Care Centers:<br />
Abu Dhabi. . . . . . . . . . . . .97 12 62 23 800<br />
Argentina . . . . . . . . . . . . . 0800-888-9878<br />
Australia . . . . . . . . . . . . . . . .1300 665 366<br />
Austria . 05 17 07 50 04 (0,065 Euro/Min.)<br />
Bahrain . . . . . . . . . . . . . . .97 31 73 11 173<br />
Belgium . . . . . . . . . . . . . . . . 0 78 15 66 79<br />
Bosnia Herzegovina . . . . . . . .033 276 649<br />
Brazil. . . . . . . . . . . . . . . . . . . . . . . . . . . . . .<br />
Grande Capitais e Regiões Metropolitanas:<br />
. . . . . . . . . . . . . . . . . . . . . . . . . 4003 3020<br />
. . . . . . . . . . . . . . . . . . . . . . . . . (US$ 0,59)<br />
Demais localidades: . . . . . 0800 707 1248<br />
. . . . . . . . . . . . . . . . . . . . . . . . . (US$ 0,59)<br />
Bulgaria. . . . . . . . . . . . . . . . . 02 873 94 88<br />
Canada . . . . . . . . . . . . . . . . 701-355-3984<br />
China . . . . . . . . . . . . . 0 21 400 670 6007<br />
Croatia . . . . . . . . 016 10 53 81 (0,23 Kun)<br />
Czech Republic . . . . . . . . . . . .233 032 727<br />
Denmark. . . . . . . . . . . . . . . . . 35 25 86 00<br />
Dubai . . . . . . . . . . . . . . . .97 14 39 69 944<br />
Egypt. . . . . . . . . . . . . . . . . . . 202 7623441<br />
Finland . . . . . . . . . . . . . . . .09 23 11 34 25<br />
France. . . . . . . . . . . . . . . . .01 56 38 42 00<br />
Germany.01805 333 222 (0,14 Euro/Min.)<br />
Greece . . . . . . . . . . . . . . . . .801 1000 500<br />
Hungary . . . . . . . . .06 14 71 24 44 (27 Ft)<br />
Ireland . . . . . . . . . . . . . . . .18 50 77 72 77<br />
Italy. . . . . . . . . . . . . . . . . . . . 199 15 11 15<br />
Kuwait . . . . . . . . . . . . . . . . 96 52 44 4200<br />
Latvia . . . . . . . . . . . . . . . . . . . . 7 50 11 18<br />
Lebanon. . . . . . . Digital Technologies SARL<br />
. . . . . . . . . . . . . . . . . . . . . 00961-1240259<br />
Luxembourg . . . . . . . . . . . 40 66 61 56 40<br />
Malaysia. . . . . . . . . . . . . . . .603 77124304<br />
Malta . . . . . . . . . . . . . . +353 21 4940 632<br />
Mexi<strong>co</strong> . . . . . . . . . . . . . .01 80 07 11 00 03<br />
Netherlands<br />
. . . . . . . . .0900-3333102 (0,25 Euro/min.)<br />
New Zealand . . . . . . . . . . . 08 00 27 43 63<br />
Norway . . . . . . . . . . . . . . . . . . 22 70 84 00<br />
Oman. . . . . . . . . . . . . . . . 96 82 47 09 281<br />
Poland . . . . . . . . . . . . . . . . .0 801 140 160<br />
Portugal . . . . . . . . . . . . . . . . . . 808781223<br />
Romania . . . . . . . . . . . . . . 02 12 04 60 00<br />
Russia. . . . . . . . . . . . . . . 8 (495) 228 1312<br />
Serbia. . . . . . . . . . . . . . . . . 01 13 07 00 80<br />
Singapore . . . . . . . . . . . . . . . . 62 27 11 18<br />
Slovak Republic<br />
. . . . . . . . . . . . . . . . . . . . . . 02 59 68 22 66<br />
Slovenija . . . . . 0 14 74 63 36 (6,30 Tolar)<br />
South Africa. . . . . . . . . . . . 08 60 10 11 57<br />
Spain . . . . . . . . . . . . . . . . . . . .902 103935<br />
Sweden . . . . . . . . . . . . . . . . . 08 750 99 11<br />
Switzerland<br />
. . . . . . . . . . 0848 212 000 (0,08 SFr./Min.)<br />
Taiwan . . . . . . . . . . . . . . . . 02 23 96 10 06<br />
Thailand. . . . . . . . . . . . . . . . . 02 722 1118<br />
Turkey . . . . . . . . . . . . . . .0 21 64 59 98 59<br />
Ukraine . . . . . . . . . . . .+380-44-451-71-72<br />
United Arab Emirates . . . . . 0 43 66 03 86<br />
United Kingdom . . . . . . .0 84 53 67 08 12<br />
Please address any questions about DSL access and VoIP access to the respective service<br />
provider.<br />
Please have your re<strong>co</strong>rd of purchase ready when calling.<br />
Replacement or repair services are not offered in <strong>co</strong>untries where our product is not sold by<br />
authorised dealers.<br />
154<br />
<strong>VoIPon</strong> www.voipon.<strong>co</strong>.<strong>uk</strong> sales@voipon.<strong>co</strong>.<strong>uk</strong> Tel: +44 (0)1245 808195 Fax: +44 (0)1245 808299
Authorisation Appendix<br />
Authorisation<br />
This device is intended for analogue phone lines in your network.<br />
Voice over IP telephony is possible with an additional modem via the LAN interface.<br />
Country-specific requirements have been taken into <strong>co</strong>nsideration.<br />
We, <strong>Siemens</strong> Home and Office Communication Devices GmbH & Co. KG, declare that this<br />
device meets the essential requirements and other relevant regulations laid down in<br />
Directive 1999/5/EC.<br />
A <strong>co</strong>py of the 1999/5/EC Declaration of Conformity is available at this Internet address:<br />
http://www.siemens.<strong>co</strong>m/gigasetdocs.<br />
Warranty certificate<br />
Please look into the special user guide <strong>co</strong>ncerning your <strong>co</strong>untry on this CD (Slovakia,<br />
Czechia). We are sorry to say, that the slovenien and croatian user guide have not been<br />
ready when this CD was burnt.<br />
155<br />
<strong>VoIPon</strong> www.voipon.<strong>co</strong>.<strong>uk</strong> sales@voipon.<strong>co</strong>.<strong>uk</strong> Tel: +44 (0)1245 808195 Fax: +44 (0)1245 808299
Appendix Specifications<br />
Specifications<br />
Re<strong>co</strong>mmended batteries<br />
Technology:<br />
Nickel-metal-hydride (NiMH)<br />
Size: AAA (Micro, HR03)<br />
Voltage: 1.2 V<br />
Capacity: 600–1200 mAh<br />
We re<strong>co</strong>mmend the following battery types, because these are the only ones that guarantee<br />
the specified operating times, full functionality and long service life:<br />
u Sanyo Twicell 650<br />
u Sanyo Twicell 700<br />
u Panasonic 700 mAh "for DECT"<br />
u GP 700mAh<br />
u Yuasa AAA Phone 700<br />
u Varta Phone Power AAA 700mAh<br />
u GP 850 mAh<br />
u Sanyo NiMH 800<br />
u Yuasa AAA 800<br />
The device is supplied with two re<strong>co</strong>mmended batteries.<br />
Handset operating times/charging times<br />
The operating time of your <strong>Gigaset</strong> depends on the capacity and age of the batteries and<br />
the way they are used. (All times are maximum possible times and apply when the display<br />
backlight is switched off).<br />
Capacity (mAh)<br />
500 700 900 1100<br />
Standby time (hours) 180 250 320 395<br />
Talktime (hours) 9 12 16 19<br />
Operating time for 1.5 hrs of calls per day<br />
(hours)<br />
80 115 150 180<br />
Charging time, charging cradle (hours) 5 7 9 11<br />
At the time of going to print, batteries up to 900 mAh were available and had been tested<br />
in the system. Due to the <strong>co</strong>nstant progression in battery development, the list of re<strong>co</strong>mmended<br />
batteries in the FAQ section of the <strong>Gigaset</strong> Customer Care pages is regularly<br />
updated:<br />
www.siemens.<strong>co</strong>m/gigasetcustomercare<br />
156<br />
<strong>VoIPon</strong> www.voipon.<strong>co</strong>.<strong>uk</strong> sales@voipon.<strong>co</strong>.<strong>uk</strong> Tel: +44 (0)1245 808195 Fax: +44 (0)1245 808299
I<strong>co</strong>ns Appendix<br />
Power <strong>co</strong>nsumption for base station and charger<br />
The power <strong>co</strong>nsumption for the base station is approx. 1.3 watt.<br />
The power <strong>co</strong>nsumption for the charging cradle is approx. 1.2 watt.<br />
General specifications<br />
Interfaces Fixed line network, Ethernet<br />
No. of channels 60 duplex channels<br />
Radio frequency range 1880–1900 MHz<br />
Duplex method Time multiplex, 10 ms frame length<br />
Channel grid 1728 kHz<br />
Bit rate 1152 kbit/s<br />
Modulation GFSK<br />
Language <strong>co</strong>de 32 kbit/s<br />
Transmission power 10 mW, average power per channel<br />
Range up to 300 m outdoors, up to 50 m indoors<br />
Base station power supply 230 V ~/50 Hz<br />
Environmental <strong>co</strong>nditions in operation +5 °C to +45 °C;<br />
20% to 75% relative humidity<br />
Codecs G.711, G.726, G.729AB with VAD/CNG, G.722<br />
Quality of Service TOS, DiffServ<br />
Proto<strong>co</strong>ls DECT, GAP, SIP, RTP, DHCP, NAT Traversal (STUN), HTTP<br />
I<strong>co</strong>ns<br />
This section explains the meaning of certain i<strong>co</strong>ns and typographical <strong>co</strong>nventions that are<br />
used in this user guide.<br />
Copy Entry / Copy List (example)<br />
Select one of the two specified menu functions.<br />
~ Enter digits or letters.<br />
§Save§ The display keys' current functions are shown reverse highlighted in the bottom<br />
display line. Press the display key below to launch the function.<br />
q Press the <strong>co</strong>ntrol key at the top or bottom: scroll up or down.<br />
r Press the <strong>co</strong>ntrol key on the right or left: e.g. select setting.<br />
c / Q / * etc.<br />
Press the matching key on the handset.<br />
157<br />
<strong>VoIPon</strong> www.voipon.<strong>co</strong>.<strong>uk</strong> sales@voipon.<strong>co</strong>.<strong>uk</strong> Tel: +44 (0)1245 808195 Fax: +44 (0)1245 808299
Appendix Example of a menu input<br />
Example of a menu input<br />
The steps you need to perform are shown in abbreviated form in the user guide. This is<br />
illustrated below using the example of "Setting the <strong>co</strong>ntrast for the display". The things you<br />
have to do are explained in the boxes.<br />
v ¢ Ð Settings ¢ Display<br />
¤ With the handset in idle status, press on the right of the <strong>co</strong>ntrol key to open the main<br />
menu.<br />
¤ Use the <strong>co</strong>ntrol key to select the Ð Settings line – by pressing up or down on the <strong>co</strong>ntrol<br />
key repeatedly until the menu function is selected.<br />
¤ Press the display key §OK§ to <strong>co</strong>nfirm the selection.<br />
The Settings submenu is displayed.<br />
¤ Press up or down on the <strong>co</strong>ntrol key repeatedly until the Display menu function is<br />
selected.<br />
¤ Press the display key §OK§ to <strong>co</strong>nfirm the selection.<br />
Contrast Select and press §OK§.<br />
¤ Press down on the <strong>co</strong>ntrol key repeatedly until the Contrast menu function is selected.<br />
¤ Press the display key §OK§ or on the right of the <strong>co</strong>ntrol key to <strong>co</strong>nfirm your selection.<br />
r Select <strong>co</strong>ntrast.<br />
¤ Press on the right or left of the <strong>co</strong>ntrol key to set the <strong>co</strong>ntrast.<br />
§Save§ Press the display key.<br />
¤ Press the display key §Save§ to save the setting.<br />
a Press and hold (idle status).<br />
¤ Press and hold the end call key until the handset returns to idle status.<br />
158<br />
<strong>VoIPon</strong> www.voipon.<strong>co</strong>.<strong>uk</strong> sales@voipon.<strong>co</strong>.<strong>uk</strong> Tel: +44 (0)1245 808195 Fax: +44 (0)1245 808299
Example of multiple line input Appendix<br />
Example of multiple line input<br />
In many situations you can change settings or enter data in several lines of a display.<br />
In this user guide, i<strong>co</strong>ns are used to guide you step by step through multiple line input. This<br />
is illustrated below using the example of "Setting the date and time". The things you have<br />
to do are explained in the boxes.<br />
To change the time, open the input field with:<br />
v ¢ Ð Settings ¢ Date/Time<br />
You will see the following in the display (example):<br />
Date/Time<br />
Date:<br />
[15.11.07]<br />
Time:<br />
11:11<br />
Ý Save<br />
Date:<br />
Enter day, month and year in 6-digit format.<br />
The se<strong>co</strong>nd line is marked with [ ] to show it is active.<br />
¤ Enter the date using the digit keys.<br />
Time:<br />
Enter hours/minutes in 4-digit format.<br />
¤ Press the s key.<br />
The fourth line is marked with [ ] to show it is active.<br />
¤ Enter the date using the digit keys.<br />
¤ Save the changes.<br />
¤ Press the display key §Save§.<br />
¤ Then press and hold the a key. The handset switches to idle status.<br />
Or:<br />
¤ Press the display key §Options§.<br />
¤ Select Save and then press the display key §OK§.<br />
¤ Then press and hold the a key. The handset switches to idle status.<br />
159<br />
<strong>VoIPon</strong> www.voipon.<strong>co</strong>.<strong>uk</strong> sales@voipon.<strong>co</strong>.<strong>uk</strong> Tel: +44 (0)1245 808195 Fax: +44 (0)1245 808299
Appendix Writing and editing text<br />
Writing and editing text<br />
The following rules apply when writing text:<br />
u Control the cursor with u v t s.<br />
u Characters are inserted to the left of the cursor.<br />
u Press the star key * to display the table of special characters (see below "Entering special<br />
characters".)<br />
u The first letter of the name of directory entries is automatically capitalised, followed by<br />
lower case letters.<br />
Entering special characters<br />
¤ Press the star key *.<br />
A table is opened <strong>co</strong>ntaining all the special characters. The cursor is positioned on the<br />
character " . " (full stop).<br />
s _ ! ? @ , ’ " ¤<br />
( ) ; : §.§ - + & %<br />
* = < > / â £ $ ¥<br />
[ ] § Â \ ~ ^ ¿ ¡<br />
{ } # |<br />
¤ Navigate to the required character with the <strong>co</strong>ntrol key r, q. Example: to select *<br />
press 4 x u and 1 x s.<br />
¤ Press the display key §Insert§. The character is inserted into the text.<br />
Pressing ” again closes the table without inserting a character.<br />
Writing text/a name<br />
Press the relevant key several times to enter letters/characters.<br />
Standard characters<br />
1x 2x 3x 4x 5x 6x 7x 8x 9x 10x<br />
1) 2)<br />
1<br />
2 a b c 2 ä á à â ã ç<br />
3 d e f 3 ë é è ê<br />
4 g h i 4 ï í ì î<br />
5 j k l 5<br />
L m n o 6 ö ñ ó ò ô õ<br />
M p q r s 7 ß<br />
N t u v 8 ü ú ù û<br />
O w x y z 9 ÿ ý æ ø å<br />
Q . , ? ! 0<br />
1) Space<br />
2) Line break<br />
160<br />
<strong>VoIPon</strong> www.voipon.<strong>co</strong>.<strong>uk</strong> sales@voipon.<strong>co</strong>.<strong>uk</strong> Tel: +44 (0)1245 808195 Fax: +44 (0)1245 808299
Writing and editing text Appendix<br />
When you press and hold a key, the characters of the <strong>co</strong>rresponding key are displayed in<br />
the bottom display line and marked one after another. When you release the key, the<br />
highlighted character is inserted into the input field.<br />
Setting upper/lower case or digits<br />
Press and hold the hash key # before entering the character to switch from "Abc" mode<br />
to "123", from "123" to "abc" and from "abc" to "Abc" (upper case: 1st letter upper case, all<br />
others lower case).<br />
You can see briefly in the display whether upper case, lower case or digits is selected.<br />
161<br />
<strong>VoIPon</strong> www.voipon.<strong>co</strong>.<strong>uk</strong> sales@voipon.<strong>co</strong>.<strong>uk</strong> Tel: +44 (0)1245 808195 Fax: +44 (0)1245 808299
Appendix <strong>Gigaset</strong> <strong>C47</strong>0 IP/<strong>C47</strong>5 IP – Free software<br />
<strong>Gigaset</strong> <strong>C47</strong>0 IP/<strong>C47</strong>5 IP –<br />
Free software<br />
The firmware for your <strong>Gigaset</strong> <strong>C47</strong>0 IP/<strong>C47</strong>5 IP includes free software that is licensed under<br />
the GNU Lesser General Public License. This free software was developed by a third party<br />
and is protected by <strong>co</strong>pyright. You will find the licence text in its original English version on<br />
the pages that follow.<br />
The software is provided free of charge. You are authorised to use this free software in<br />
ac<strong>co</strong>rdance with the above-mentioned licence <strong>co</strong>nditions. In the event of <strong>co</strong>ntradictions<br />
between these licence <strong>co</strong>nditions and the licence <strong>co</strong>nditions that apply for the software<br />
ac<strong>co</strong>rding to <strong>Siemens</strong> Home and Office Communication Devices GmbH & Co. KG, the<br />
above-mentioned licence <strong>co</strong>nditions shall take precedence for the free software.<br />
The GNU Lesser General Public License (LGPL) is supplied with this product. You can also<br />
download the licence <strong>co</strong>nditions from the Internet:<br />
u The LGPL is available on the Internet at:<br />
http://www.gnu.org/<strong>co</strong>pyleft/lesser.html<br />
u The source text, including <strong>co</strong>pyright notices for free software, is currently available<br />
on the Internet at:<br />
http://www.siemens.<strong>co</strong>m/gigaset/developer<br />
For more information and Internet links to the source text of the free software, see the<br />
Online Support pages on the Internet at:<br />
www.siemens.<strong>co</strong>m/gigasetcustomercare<br />
If it is not already supplied with the product, you can request the source text, including <strong>co</strong>pyright<br />
notices, from <strong>Siemens</strong>. There is a charge to <strong>co</strong>ver the <strong>co</strong>st of <strong>co</strong>pying and postage.<br />
Please submit this request by e-mail or fax to the following address or fax number within 3<br />
years of purchasing this product. Please state the exact device type plus the version<br />
number of the installed device software.<br />
Small Parts Dispatch Com Bocholt<br />
E-mail: kleinteileversand.<strong>co</strong>m@siemens.<strong>co</strong>m<br />
Fax: 0049 2871 / 91 30 29<br />
Use of the free software <strong>co</strong>ntained in this product extending beyond the program<br />
sequence intended by <strong>Siemens</strong> is at the user's own risk – i.e. there shall be no claims for<br />
liability for defects against <strong>Siemens</strong> Home and Office Communication Devices GmbH & Co.<br />
KG. The GNU Lesser General Public License <strong>co</strong>ntains notes regarding the author's liability<br />
for defects or that of other proprietors of the free software.<br />
You shall have no right to assert a claim against <strong>Siemens</strong> Home and Office Communication<br />
Devices GmbH & Co. KG based on liability for defects, if a defect in the product is or <strong>co</strong>uld<br />
be due to changes you have made to the programs or their <strong>co</strong>nfiguration. Furthermore,<br />
you shall have no right to assert a claim against <strong>Siemens</strong> Home and Office Communication<br />
Devices GmbH & Co. KG based on liability for defects if the free software infringes the <strong>co</strong>pyright<br />
of third parties.<br />
<strong>Siemens</strong> shall not provide technical support for the software, including the free software<br />
included within it, if it has been changed.<br />
162<br />
<strong>VoIPon</strong> www.voipon.<strong>co</strong>.<strong>uk</strong> sales@voipon.<strong>co</strong>.<strong>uk</strong> Tel: +44 (0)1245 808195 Fax: +44 (0)1245 808299
<strong>Gigaset</strong> <strong>C47</strong>0 IP/<strong>C47</strong>5 IP – Free software Appendix<br />
GNU LESSER GENERAL PUBLIC LICENSE<br />
Version 2.1, February 1999<br />
Copyright (C) 1991, 1999 Free Software Foundation, Inc., 59 Temple Place, Suite 330, Boston, MA<br />
02111-1307 USA<br />
Everyone is permitted to <strong>co</strong>py and distribute verbatim <strong>co</strong>pies of this license document, but changing<br />
it is not allowed.<br />
[This is the first released version of the Lesser GPL. It also <strong>co</strong>unts as the successor of the GNU Library<br />
Public License, version 2, hence the version number 2.1.]<br />
Preamble<br />
The licenses for most software are designed to take away your freedom to share and change it. By <strong>co</strong>ntrast,<br />
the GNU General Public Licenses are intended to guarantee your freedom to share and change<br />
free software--to make sure the software is free for all its users.<br />
This license, the Lesser General Public License, applies to some specially designated software<br />
packages--typically libraries--of the Free Software Foundation and other authors who decide to use it.<br />
You can use it too, but we suggest you first think carefully about whether this license or the ordinary<br />
General Public License is the better strategy to use in any particular case, based on the explanations<br />
below.<br />
When we speak of free software, we are referring to freedom of use, not price. Our General Public<br />
Licenses are designed to make sure that you have the freedom to distribute <strong>co</strong>pies of free software<br />
(and charge for this service if you wish); that you receive source <strong>co</strong>de or can get it if you want it; that<br />
you can change the software and use pieces of it in new free programs; and that you are informed that<br />
you can do these things.<br />
To protect your rights, we need to make restrictions that forbid distributors to deny you these rights or<br />
to ask you to surrender these rights. These restrictions translate to certain responsibilities for you if<br />
you distribute <strong>co</strong>pies of the library or if you modify it.<br />
For example, if you distribute <strong>co</strong>pies of the library, whether gratis or for a fee, you must give the recipients<br />
all the rights that we gave you. You must make sure that they, too, receive or can get the source<br />
<strong>co</strong>de. If you link other <strong>co</strong>de with the library, you must provide <strong>co</strong>mplete object files to the recipients,<br />
so that they can relink them with the library after making changes to the library and re<strong>co</strong>mpiling it.<br />
And you must show them these terms so they know their rights.<br />
We protect your rights with a two-step method: (1) we <strong>co</strong>pyright the library, and (2) we offer you this<br />
license, which gives you legal permission to <strong>co</strong>py, distribute and/or modify the library.<br />
To protect each distributor, we want to make it very clear that there is no warranty for the free library.<br />
Also, if the library is modified by someone else and passed on, the recipients should know that what<br />
they have is not the original version, so that the original author's reputation will not be affected by<br />
problems that might be introduced by others.<br />
Finally, software patents pose a <strong>co</strong>nstant threat to the existence of any free program. We wish to make<br />
sure that a <strong>co</strong>mpany cannot effectively restrict the users of a free program by obtaining a restrictive<br />
license from a patent holder. Therefore, we insist that any patent license obtained for a version of the<br />
library must be <strong>co</strong>nsistent with the full freedom of use specified in this license.<br />
Most GNU software, including some libraries, is <strong>co</strong>vered by the ordinary GNU General Public License.<br />
This license, the GNU Lesser General Public License, applies to certain designated libraries, and is quite<br />
different from the ordinary General Public License. We use this license for certain libraries in order to<br />
permit linking those libraries into non-free programs.<br />
When a program is linked with a library, whether statically or using a shared library, the <strong>co</strong>mbination<br />
of the two is legally speaking a <strong>co</strong>mbined work, a derivative of the original library. The ordinary General<br />
Public License therefore permits such linking only if the entire <strong>co</strong>mbination fits its criteria of freedom.<br />
The Lesser General Public License permits more lax criteria for linking other <strong>co</strong>de with the library.<br />
We call this license the "Lesser" General Public License because it does Less to protect the user's freedom<br />
than the ordinary General Public License. It also provides other free software developers Less of<br />
an advantage over <strong>co</strong>mpeting non-free programs. These disadvantages are the reason we use the<br />
ordinary General Public License for many libraries. However, the Lesser license provides advantages in<br />
certain special circumstances.<br />
For example, on rare occasions, there may be a special need to en<strong>co</strong>urage the widest possible use of<br />
a certain library, so that it be<strong>co</strong>mes a de-facto standard. To achieve this, non-free programs must be<br />
163<br />
<strong>VoIPon</strong> www.voipon.<strong>co</strong>.<strong>uk</strong> sales@voipon.<strong>co</strong>.<strong>uk</strong> Tel: +44 (0)1245 808195 Fax: +44 (0)1245 808299
Appendix <strong>Gigaset</strong> <strong>C47</strong>0 IP/<strong>C47</strong>5 IP – Free software<br />
allowed to use the library. A more frequent case is that a free library does the same job as widely used<br />
non-free libraries. In this case, there is little to gain by limiting the free library to free software only,<br />
so we use the Lesser General Public License.<br />
In other cases, permission to use a particular library in non-free programs enables a greater number<br />
of people to use a large body of free software. For example, permission to use the GNU C Library in<br />
non-free programs enables many more people to use the whole GNU operating system, as well as its<br />
variant, the GNU/Linux operating system.<br />
Although the Lesser General Public License is Less protective of the users' freedom, it does ensure that<br />
the user of a program that is linked with the Library has the freedom and the wherewithal to run that<br />
program using a modified version of the Library.<br />
The precise terms and <strong>co</strong>nditions for <strong>co</strong>pying, distribution and modification follow. Pay close attention<br />
to the difference between a "work based on the library" and a "work that uses the library". The former<br />
<strong>co</strong>ntains <strong>co</strong>de derived from the library, whereas the latter must be <strong>co</strong>mbined with the library in order<br />
to run.<br />
GNU LESSER GENERAL PUBLIC LICENSE<br />
TERMS AND CONDITIONS FOR COPYING, DISTRIBUTION AND MODIFICATION<br />
0. This License Agreement applies to any software library or other program which <strong>co</strong>ntains a notice<br />
placed by the <strong>co</strong>pyright holder or other authorized party saying it may be distributed under the terms<br />
of this Lesser General Public License (also called "this License"). Each licensee is addressed as "you".<br />
A "library" means a <strong>co</strong>llection of software functions and/or data prepared so as to be <strong>co</strong>nveniently linked<br />
with application programs (which use some of those functions and data) to form executables.<br />
The "Library", below, refers to any such software library or work which has been distributed under<br />
these terms. A "work based on the Library" means either the Library or any derivative work under <strong>co</strong>pyright<br />
law: that is to say, a work <strong>co</strong>ntaining the Library or a portion of it, either verbatim or with modifications<br />
and/or translated straightforwardly into another language. (Hereinafter, translation is included<br />
without limitation in the term "modification".)<br />
"Source <strong>co</strong>de" for a work means the preferred form of the work for making modifications to it. For a<br />
library, <strong>co</strong>mplete source <strong>co</strong>de means all the source <strong>co</strong>de for all modules it <strong>co</strong>ntains, plus any associated<br />
interface definition files, plus the scripts used to <strong>co</strong>ntrol <strong>co</strong>mpilation and installation of the library.<br />
Activities other than <strong>co</strong>pying, distribution and modification are not <strong>co</strong>vered by this License; they are<br />
outside its s<strong>co</strong>pe. The act of running a program using the Library is not restricted, and output from<br />
such a program is <strong>co</strong>vered only if its <strong>co</strong>ntents <strong>co</strong>nstitute a work based on the Library (independent of<br />
the use of the Library in a tool for writing it). Whether that is true depends on what the Library does<br />
and what the program that uses the Library does.<br />
1. You may <strong>co</strong>py and distribute verbatim <strong>co</strong>pies of the Library's <strong>co</strong>mplete source <strong>co</strong>de as you receive<br />
it, in any medium, provided that you <strong>co</strong>nspicuously and appropriately publish on each <strong>co</strong>py an appropriate<br />
<strong>co</strong>pyright notice and disclaimer of warranty; keep intact all the notices that refer to this License<br />
and to the absence of any warranty; and distribute a <strong>co</strong>py of this License along with the Library.<br />
You may charge a fee for the physical act of transferring a <strong>co</strong>py, and you may at your option offer warranty<br />
protection in exchange for a fee.<br />
2. You may modify your <strong>co</strong>py or <strong>co</strong>pies of the Library or any portion of it, thus forming a work based<br />
on the Library, and <strong>co</strong>py and distribute such modifications or work under the terms of Section 1 above,<br />
provided that you also meet all of these <strong>co</strong>nditions:<br />
a) The modified work must itself be a software library.<br />
b) You must cause the files modified to carry prominent notices stating that you changed the files and<br />
the date of any change.<br />
c) You must cause the whole of the work to be licensed at no charge to all third parties under the terms<br />
of this License.<br />
d) If a facility in the modified Library refers to a function or a table of data to be supplied by an application<br />
program that uses the facility, other than as an argument passed when the facility is invoked,<br />
then you must make a good faith effort to ensure that, in the event an application does not supply<br />
such function or table, the facility still operates, and performs whatever part of its purpose remains<br />
meaningful.<br />
(For example, a function in a library to <strong>co</strong>mpute square roots has a purpose that is entirely well-defined<br />
independent of the application. Therefore, Subsection 2d requires that any application-supplied<br />
164<br />
<strong>VoIPon</strong> www.voipon.<strong>co</strong>.<strong>uk</strong> sales@voipon.<strong>co</strong>.<strong>uk</strong> Tel: +44 (0)1245 808195 Fax: +44 (0)1245 808299
<strong>Gigaset</strong> <strong>C47</strong>0 IP/<strong>C47</strong>5 IP – Free software Appendix<br />
function or table used by this function must be optional: if the application does not supply it, the<br />
square root function must still <strong>co</strong>mpute square roots.)<br />
These requirements apply to the modified work as a whole. If identifiable sections of that work are not<br />
derived from the Library, and can be reasonably <strong>co</strong>nsidered independent and separate works in themselves,<br />
then this License, and its terms, do not apply to those sections when you distribute them as<br />
separate works. But when you distribute the same sections as part of a whole which is a work based<br />
on the Library, the distribution of the whole must be on the terms of this License, whose permissions<br />
for other licensees extend to the entire whole, and thus to each and every part regardless of who<br />
wrote it.<br />
Thus, it is not the intent of this section to claim rights or <strong>co</strong>ntest your rights to work written entirely<br />
by you; rather, the intent is to exercise the right to <strong>co</strong>ntrol the distribution of derivative or <strong>co</strong>llective<br />
works based on the Library.<br />
In addition, mere aggregation of another work not based on the Library with the Library (or with a<br />
work based on the Library) on a volume of a storage or distribution medium does not bring the other<br />
work under the s<strong>co</strong>pe of this License.<br />
3. You may opt to apply the terms of the ordinary GNU General Public License instead of this License<br />
to a given <strong>co</strong>py of the Library. To do this, you must alter all the notices that refer to this License, so<br />
that they refer to the ordinary GNU General Public License, version 2, instead of to this License. (If a<br />
newer version than version 2 of the ordinary GNU General Public License has appeared, then you can<br />
specify that version instead if you wish.) Do not make any other change in these notices.<br />
Once this change is made in a given <strong>co</strong>py, it is irreversible for that <strong>co</strong>py, so the ordinary GNU General<br />
Public License applies to all subsequent <strong>co</strong>pies and derivative works made from that <strong>co</strong>py.<br />
This option is useful when you wish to <strong>co</strong>py part of the <strong>co</strong>de of the Library into a program that is not<br />
a library.<br />
4. You may <strong>co</strong>py and distribute the Library (or a portion or derivative of it, under Section 2) in object<br />
<strong>co</strong>de or executable form under the terms of Sections 1 and 2 above provided that you ac<strong>co</strong>mpany it<br />
with the <strong>co</strong>mplete <strong>co</strong>rresponding machine-readable source <strong>co</strong>de, which must be distributed under the<br />
terms of Sections 1 and 2 above on a medium customarily used for software interchange.<br />
If distribution of object <strong>co</strong>de is made by offering access to <strong>co</strong>py from a designated place, then offering<br />
equivalent access to <strong>co</strong>py the source <strong>co</strong>de from the same place satisfies the requirement to distribute<br />
the source <strong>co</strong>de, even though third parties are not <strong>co</strong>mpelled to <strong>co</strong>py the source along with the object<br />
<strong>co</strong>de.<br />
5. A program that <strong>co</strong>ntains no derivative of any portion of the Library, but is designed to work with<br />
the Library by being <strong>co</strong>mpiled or linked with it, is called a "work that uses the Library". Such a work, in<br />
isolation, is not a derivative work of the Library, and therefore falls outside the s<strong>co</strong>pe of this License.<br />
However, linking a "work that uses the Library" with the Library creates an executable that is a derivative<br />
of the Library (because it <strong>co</strong>ntains portions of the Library), rather than a "work that uses the<br />
library". The executable is therefore <strong>co</strong>vered by this License.<br />
Section 6 states terms for distribution of such executables.<br />
When a "work that uses the Library" uses material from a header file that is part of the Library, the<br />
object <strong>co</strong>de for the work may be a derivative work of the Library even though the source <strong>co</strong>de is not.<br />
Whether this is true is especially significant if the work can be linked without the Library, or if the work<br />
is itself a library. The threshold for this to be true is not precisely defined by law.<br />
If such an object file uses only numerical parameters, data structure layouts and accessors, and small<br />
macros and small inline functions (ten lines or less in length), then the use of the object file is unrestricted,<br />
regardless of whether it is legally a derivative work. (Executables <strong>co</strong>ntaining this object <strong>co</strong>de<br />
plus portions of the Library will still fall under Section 6.)<br />
Otherwise, if the work is a derivative of the Library, you may distribute the object <strong>co</strong>de for the work<br />
under the terms of Section 6.<br />
Any executables <strong>co</strong>ntaining that work also fall under Section 6, whether or not they are linked directly<br />
with the Library itself.<br />
6. As an exception to the Sections above, you may also <strong>co</strong>mbine or link a "work that uses the Library"<br />
with the Library to produce a work <strong>co</strong>ntaining portions of the Library, and distribute that work under<br />
terms of your choice, provided that the terms permit modification of the work for the customer's own<br />
use and reverse engineering for debugging such modifications.<br />
165<br />
<strong>VoIPon</strong> www.voipon.<strong>co</strong>.<strong>uk</strong> sales@voipon.<strong>co</strong>.<strong>uk</strong> Tel: +44 (0)1245 808195 Fax: +44 (0)1245 808299
Appendix <strong>Gigaset</strong> <strong>C47</strong>0 IP/<strong>C47</strong>5 IP – Free software<br />
You must give prominent notice with each <strong>co</strong>py of the work that the Library is used in it and that the<br />
Library and its use are <strong>co</strong>vered by this License. You must supply a <strong>co</strong>py of this License. If the work<br />
during execution displays <strong>co</strong>pyright notices, you must include the <strong>co</strong>pyright notice for the Library<br />
among them, as well as a reference directing the user to the <strong>co</strong>py of this License. Also, you must do<br />
one of these things:<br />
a) Ac<strong>co</strong>mpany the work with the <strong>co</strong>mplete <strong>co</strong>rresponding machine-readable source <strong>co</strong>de for the<br />
Library including whatever changes were used in the work (which must be distributed under Sections<br />
1 and 2 above); and, if the work is an executable linked with the Library, with the <strong>co</strong>mplete machinereadable<br />
"work that uses the Library", as object <strong>co</strong>de and/or source <strong>co</strong>de, so that the user can modify<br />
the Library and then relink to produce a modified executable <strong>co</strong>ntaining the modified Library. (It is<br />
understood that the user who changes the <strong>co</strong>ntents of definitions files in the Library will not necessarily<br />
be able to re<strong>co</strong>mpile the application to use the modified definitions.)<br />
b) Use a suitable shared library mechanism for linking with the Library. A suitable mechanism is one<br />
that (1) uses at run time a <strong>co</strong>py of the library already present on the user's <strong>co</strong>mputer system, rather<br />
than <strong>co</strong>pying library functions into the executable, and (2) will operate properly with a modified version<br />
of the library, if the user installs one, as long as the modified version is interface-<strong>co</strong>mpatible with<br />
the version that the work was made with.<br />
c) Ac<strong>co</strong>mpany the work with a written offer, valid for at least three years, to give the same user the<br />
materials specified in Subsection 6a, above, for a charge no more than the <strong>co</strong>st of performing this distribution.<br />
d) If distribution of the work is made by offering access to <strong>co</strong>py from a designated place, offer equivalent<br />
access to <strong>co</strong>py the above specified materials from the same place.<br />
e) Verify that the user has already received a <strong>co</strong>py of these materials or that you have already sent this<br />
user a <strong>co</strong>py.<br />
For an executable, the required form of the "work that uses the Library" must include any data and<br />
utility programs needed for reproducing the executable from it. However, as a special exception, the<br />
materials to be distributed need not include anything that is normally distributed (in either source or<br />
binary form) with the major <strong>co</strong>mponents (<strong>co</strong>mpiler, kernel, and so on) of the operating system on<br />
which the executable runs, unless that <strong>co</strong>mponent itself ac<strong>co</strong>mpanies the executable.<br />
It may happen that this requirement <strong>co</strong>ntradicts the license restrictions of other proprietary libraries<br />
that do not normally ac<strong>co</strong>mpany the operating system. Such a <strong>co</strong>ntradiction means you cannot use<br />
both them and the Library together in an executable that you distribute.<br />
7. You may place library facilities that are a work based on the Library side-by-side in a single library<br />
together with other library facilities not <strong>co</strong>vered by this License, and distribute such a <strong>co</strong>mbined<br />
library, provided that the separate distribution of the work based on the Library and of the other library<br />
facilities is otherwise permitted, and provided that you do these two things:<br />
a) Ac<strong>co</strong>mpany the <strong>co</strong>mbined library with a <strong>co</strong>py of the same work based on the Library, un<strong>co</strong>mbined<br />
with any other library facilities. This must be distributed under the terms of the Sections above.<br />
b) Give prominent notice with the <strong>co</strong>mbined library of the fact that part of it is a work based on the<br />
Library, and explaining where to find the ac<strong>co</strong>mpanying un<strong>co</strong>mbined form of the same work.<br />
8. You may not <strong>co</strong>py, modify, sublicense, link with, or distribute the Library except as expressly provided<br />
under this License. Any attempt otherwise to <strong>co</strong>py, modify, sublicense, link with, or distribute the<br />
Library is void, and will automatically terminate your rights under this License. However, parties who<br />
have received <strong>co</strong>pies, or rights, from you under this License will not have their licenses terminated so<br />
long as such parties remain in full <strong>co</strong>mpliance.<br />
9. You are not required to accept this License, since you have not signed it. However, nothing else<br />
grants you permission to modify or distribute the Library or its derivative works. These actions are prohibited<br />
by law if you do not accept this License. Therefore, by modifying or distributing the Library (or<br />
any work based on the Library), you indicate your acceptance of this License to do so, and all its terms<br />
and <strong>co</strong>nditions for <strong>co</strong>pying, distributing or modifying the Library or works based on it.<br />
10. Each time you redistribute the Library (or any work based on the Library), the recipient automatically<br />
receives a license from the original licensor to <strong>co</strong>py, distribute, link with or modify the Library<br />
subject to these terms and <strong>co</strong>nditions. You may not impose any further restrictions on the recipients'<br />
exercise of the rights granted herein.<br />
You are not responsible for enforcing <strong>co</strong>mpliance by third parties with this License.<br />
166<br />
<strong>VoIPon</strong> www.voipon.<strong>co</strong>.<strong>uk</strong> sales@voipon.<strong>co</strong>.<strong>uk</strong> Tel: +44 (0)1245 808195 Fax: +44 (0)1245 808299
<strong>Gigaset</strong> <strong>C47</strong>0 IP/<strong>C47</strong>5 IP – Free software Appendix<br />
11. If, as a <strong>co</strong>nsequence of a <strong>co</strong>urt judgment or allegation of patent infringement or for any other<br />
reason (not limited to patent issues), <strong>co</strong>nditions are imposed on you (whether by <strong>co</strong>urt order, agreement<br />
or otherwise) that <strong>co</strong>ntradict the <strong>co</strong>nditions of this License, they do not excuse you from the <strong>co</strong>nditions<br />
of this License. If you cannot distribute so as to satisfy simultaneously your obligations under<br />
this License and any other pertinent obligations, then as a <strong>co</strong>nsequence you may not distribute the<br />
Library at all. For example, if a patent license would not permit royalty-free redistribution of the<br />
Library by all those who receive <strong>co</strong>pies directly or indirectly through you, then the only way you <strong>co</strong>uld<br />
satisfy both it and this License would be to refrain entirely from distribution of the Library.<br />
If any portion of this section is held invalid or unenforceable under any particular circumstance, the<br />
balance of the section is intended to apply, and the section as a whole is intended to apply in other<br />
circumstances.<br />
It is not the purpose of this section to induce you to infringe any patents or other property right claims<br />
or to <strong>co</strong>ntest validity of any such claims; this section has the sole purpose of protecting the integrity<br />
of the free software distribution system which is implemented by public license practices. Many people<br />
have made generous <strong>co</strong>ntributions to the wide range of software distributed through that system<br />
in reliance on <strong>co</strong>nsistent application of that system; it is up to the author/donor to decide if he or she<br />
is willing to distribute software through any other system and a licensee cannot impose that choice.<br />
This section is intended to make thoroughly clear what is believed to be a <strong>co</strong>nsequence of the rest of<br />
this License.<br />
12. If the distribution and/or use of the Library is restricted in certain <strong>co</strong>untries either by patents or by<br />
<strong>co</strong>pyrighted interfaces, the original <strong>co</strong>pyright holder who places the Library under this License may<br />
add an explicit geographical distribution limitation excluding those <strong>co</strong>untries, so that distribution is<br />
permitted only in or among <strong>co</strong>untries not thus excluded. In such case, this License in<strong>co</strong>rporates the<br />
limitation as if written in the body of this License.<br />
13. The Free Software Foundation may publish revised and/or new versions of the Lesser General<br />
Public License from time to time. Such new versions will be similar in spirit to the present version, but<br />
may differ in detail to address new problems or <strong>co</strong>ncerns.<br />
Each version is given a distinguishing version number. If the Library specifies a version number of this<br />
License which applies to it and "any later version", you have the option of following the terms and <strong>co</strong>nditions<br />
either of that version or of any later version published by the Free Software Foundation. If the<br />
Library does not specify a license version number, you may choose any version ever published by the<br />
Free Software Foundation.<br />
14. If you wish to in<strong>co</strong>rporate parts of the Library into other free programs whose distribution <strong>co</strong>nditions<br />
are in<strong>co</strong>mpatible with these, write to the author to ask for permission. For software which is<br />
<strong>co</strong>pyrighted by the Free Software Foundation, write to the Free Software Foundation; we sometimes<br />
make exceptions for this. Our decision will be guided by the two goals of preserving the free status of<br />
all derivatives of our free software and of promoting the sharing and reuse of software generally.<br />
NO WARRANTY<br />
15. BECAUSE THE LIBRARY IS LICENSED FREE OF CHARGE, THERE IS NO WARRANTY FOR THE LIBRARY,<br />
TO THE EXTENT PERMITTED BY APPLICABLE LAW.<br />
EXCEPT WHEN OTHERWISE STATED IN WRITING THE COPYRIGHT HOLDERS AND/OR OTHER PARTIES<br />
PROVIDE THE LIBRARY "AS IS" WITHOUT WARRANTY OF ANY KIND, EITHER EXPRESSED OR IMPLIED,<br />
INCLUDING, BUT NOT LIMITED TO, THE IMPLIED WARRANTIES OF MERCHANTABILITY AND FITNESS FOR<br />
A PARTICULAR PURPOSE. THE ENTIRE RISK AS TO THE QUALITY AND PERFORMANCE OF THE LIBRARY IS<br />
WITH YOU. SHOULD THE LIBRARY PROVE DEFECTIVE, YOU ASSUME THE COST OF ALL NECESSARY SER-<br />
VICING, REPAIR OR CORRECTION.<br />
16. IN NO EVENT UNLESS REQUIRED BY APPLICABLE LAW OR AGREED TO IN WRITING WILL ANY COPY-<br />
RIGHT HOLDER, OR ANY OTHER PARTY WHO MAY MODIFY AND/OR REDISTRIBUTE THE LIBRARY AS PER-<br />
MITTED ABOVE, BE LIABLE TO YOU FOR DAMAGES, INCLUDING ANY GENERAL, SPECIAL, INCIDENTAL<br />
OR CONSEQUENTIAL DAMAGES ARISING OUT OF THE USE OR INABILITY TO USE THE LIBRARY (INCLU-<br />
DING BUT NOT LIMITED TO LOSS OF DATA OR DATA BEING RENDERED INACCURATE OR LOSSES SUSTAI-<br />
NED BY YOU OR THIRD PARTIES OR A FAILURE OF THE LIBRARY TO OPERATE WITH ANY OTHER SOFT-<br />
WARE), EVEN IF SUCH HOLDER OR OTHER PARTY HAS BEEN ADVISED OF THE POSSIBILITY OF SUCH<br />
DAMAGES.<br />
END OF TERMS AND CONDITIONS<br />
167<br />
<strong>VoIPon</strong> www.voipon.<strong>co</strong>.<strong>uk</strong> sales@voipon.<strong>co</strong>.<strong>uk</strong> Tel: +44 (0)1245 808195 Fax: +44 (0)1245 808299
Appendix <strong>Gigaset</strong> <strong>C47</strong>0 IP/<strong>C47</strong>5 IP – Free software<br />
How to Apply These Terms to Your New Libraries<br />
If you develop a new library, and you want it to be of the greatest possible use to the public, we re<strong>co</strong>mmend<br />
making it free software that everyone can redistribute and change. You can do so by permitting<br />
redistribution under these terms (or, alternatively, under the terms of the ordinary General Public<br />
License).<br />
To apply these terms, attach the following notices to the library. It is safest to attach them to the start<br />
of each source file to most effectively <strong>co</strong>nvey the exclusion of warranty; and each file should have at<br />
least the "<strong>co</strong>pyright" line and a pointer to where the full notice is found.<br />
Accessories<br />
<strong>Gigaset</strong> handsets<br />
Upgrade your <strong>Gigaset</strong> to a <strong>co</strong>rdless PABX:<br />
<strong>Gigaset</strong> <strong>C47</strong>H handset<br />
u Illuminated graphical <strong>co</strong>lour display (65k <strong>co</strong>lours)<br />
u Illuminated keypad<br />
u Handsfree talking<br />
u Polyphonic ringer tones<br />
u Directory for around 150 entries<br />
u SMS (pre<strong>co</strong>ndition: CLIP must be enabled)<br />
u Headset socket<br />
u Room monitor<br />
u www.siemens.<strong>co</strong>m/gigaset<strong>C47</strong>H<br />
<strong>Gigaset</strong> S67H handset<br />
u HDSP ready<br />
u Illuminated graphical <strong>co</strong>lour display (65k <strong>co</strong>lours)<br />
u Illuminated keypad<br />
u Handsfree talking<br />
u Polyphonic ringer tones<br />
u Directory for around 250 entries<br />
u Picture CLIP<br />
u SMS (pre<strong>co</strong>ndition: CLIP must be enabled)<br />
u Headset socket<br />
u Room monitor<br />
www.siemens.<strong>co</strong>m/gigasetS67H<br />
Accessories<br />
<strong>VoIPon</strong> www.voipon.<strong>co</strong>.<strong>uk</strong> sales@voipon.<strong>co</strong>.<strong>uk</strong> Tel: +44 (0)1245 808195 Fax: +44 (0)1245 808299<br />
169
Accessories<br />
<strong>Gigaset</strong> SL37H handset<br />
u HDSP ready<br />
u Illuminated graphical <strong>co</strong>lour display (65k <strong>co</strong>lours)<br />
u Illuminated keypad<br />
u Handsfree talking<br />
u Polyphonic ringer tones<br />
u Directory for around 250 entries<br />
u Picture CLIP<br />
u SMS (pre<strong>co</strong>ndition: CLIP must be enabled)<br />
u PC interface, e.g. for managing directory entries, ringer<br />
tones and screensavers<br />
u Headset socket<br />
u Bluetooth<br />
u Room monitor<br />
u Walky-talky function<br />
www.siemens.<strong>co</strong>m/gigasetSL37H<br />
<strong>Gigaset</strong> S45 handset<br />
u Illuminated <strong>co</strong>lour display (4096 <strong>co</strong>lours)<br />
u Illuminated keypad<br />
u Handsfree talking<br />
u Polyphonic ringer tones<br />
u Directory for around 150 entries<br />
u SMS (pre<strong>co</strong>ndition: CLIP must be enabled)<br />
u Headset socket<br />
u Room monitor<br />
www.siemens.<strong>co</strong>m/gigaset<br />
<strong>Gigaset</strong> repeater<br />
The <strong>Gigaset</strong> repeater can be used to increase the reception<br />
range of your <strong>Gigaset</strong> handset to the base station.<br />
www.siemens.<strong>co</strong>m/gigasetrepeater<br />
170<br />
<strong>VoIPon</strong> www.voipon.<strong>co</strong>.<strong>uk</strong> sales@voipon.<strong>co</strong>.<strong>uk</strong> Tel: +44 (0)1245 808195 Fax: +44 (0)1245 808299
<strong>Gigaset</strong> HC450 – door inter<strong>co</strong>m for <strong>co</strong>rdless phones<br />
u Use the inter<strong>co</strong>m from your <strong>co</strong>rdless phone –<br />
no need for a fixed home phone<br />
u Intuitive user functions using the display keys<br />
(open door, switch on entry light)<br />
u Simple to <strong>co</strong>nfigure using the handset menu<br />
u Forward to outside phone numbers (inter<strong>co</strong>m feature)<br />
u Simple to install and register with the <strong>Gigaset</strong> system<br />
u Replaces existing call button – no further cable is needed<br />
u Supports the existing doorbell and standard door opener<br />
u Configuration options for the se<strong>co</strong>nd ringer key<br />
(separate inter<strong>co</strong>m call, activating interior lighting,<br />
or function such as first ringer key)<br />
www.siemens.<strong>co</strong>m/<strong>Gigaset</strong>HC450<br />
Accessories<br />
All accessories and batteries are available from your phone retailer.<br />
Only use original accessories. This will avoid possible health risks and<br />
damage to property, and also ensure that all the relevant regulations are<br />
<strong>co</strong>mplied with.<br />
171<br />
<strong>VoIPon</strong> www.voipon.<strong>co</strong>.<strong>uk</strong> sales@voipon.<strong>co</strong>.<strong>uk</strong> Tel: +44 (0)1245 808195 Fax: +44 (0)1245 808299
Glossary<br />
Glossary<br />
A<br />
ADSL<br />
Asymmetric Digital Subscriber Line<br />
Special form of DSL.<br />
ALG<br />
Application Layer Gateway<br />
NAT <strong>co</strong>ntrol mechanism of a router.<br />
Many routers with integrated NAT use ALG. ALG lets the data packets in a VoIP <strong>co</strong>nnection<br />
pass and adds the public IP address of the secure private network.<br />
The router's ALG should be deactivated if the VoIP provider offers a STUN server or an<br />
outbound proxy.<br />
See also: Firewall, NAT, Outbound proxy, STUN.<br />
Authentication<br />
Restriction of access to a network/service by use of an ID and password to log in.<br />
Automatic ringback<br />
See Ringback when the number is busy.<br />
B<br />
Block dialling<br />
Enter the <strong>co</strong>mplete phone number, and <strong>co</strong>rrect it if necessary. Then pick up the receiver<br />
or press the handsfree key to dial the phone number.<br />
Broadband Internet access<br />
See DSL.<br />
Buddy<br />
Subscriber with whom you exchange brief messages on the Internet in real time (chatting).<br />
See also: Instant messaging.<br />
C<br />
Call waiting<br />
CW<br />
VoIP provider feature. A beep during a call indicates that another caller is waiting. You<br />
can accept or reject the se<strong>co</strong>nd call. You can activate/deactivate the feature.<br />
Call forwarding<br />
CF<br />
Automatic forwarding of a call to a different telephone number. There are three kinds<br />
of call forwarding:<br />
– CFU, Call Forwarding Un<strong>co</strong>nditional<br />
– CFB, Call Forwarding Busy<br />
– CFNR, Call Forwarding No Reply<br />
172<br />
<strong>VoIPon</strong> www.voipon.<strong>co</strong>.<strong>uk</strong> sales@voipon.<strong>co</strong>.<strong>uk</strong> Tel: +44 (0)1245 808195 Fax: +44 (0)1245 808299
Glossary<br />
Chatting<br />
Form of <strong>co</strong>mmunication on the Internet. During a chat, brief messages are exchanged<br />
between the <strong>co</strong>mmunicating parties in real time. Chatting in this sense is understood to<br />
be a written form of <strong>co</strong>mmunication.<br />
Client<br />
Application that requests a service from a server.<br />
Codec<br />
Coder/de<strong>co</strong>der<br />
Codec is a procedure that digitises and <strong>co</strong>mpresses analogue voice before it is sent via<br />
the Internet and de<strong>co</strong>des – i.e.translates into analogue voice – digital data when voice<br />
packets are received. There are different <strong>co</strong>decs, with differing degrees of <strong>co</strong>mpression,<br />
for instance.<br />
Both parties involved in the telephone <strong>co</strong>nnection (caller/sender and recipient) must<br />
use the same <strong>co</strong>dec. This is negotiated between the sender and the recipient when<br />
establishing a <strong>co</strong>nnection.<br />
The choice of <strong>co</strong>dec is a <strong>co</strong>mpromise between voice quality, transmission speed and the<br />
necessary bandwidth. A high level of <strong>co</strong>mpression, for example, means that the bandwidth<br />
required for each voice <strong>co</strong>nnection is low. However, it also means that the time<br />
needed to <strong>co</strong>mpress/de<strong>co</strong>mpress the data is greater, which increases execution time for<br />
data in the network and thus impairs voice quality. The time required increases the delay<br />
between the sender speaking and the recipient hearing what has been said.<br />
Consultation call<br />
You are on a call. With a <strong>co</strong>nsultation call, you interrupt the <strong>co</strong>nversation briefly to<br />
establish a <strong>co</strong>nnection to another participant. If you terminate the <strong>co</strong>nnection to this<br />
participant immediately, then this is a <strong>co</strong>nsultation call. If you switch to and fro between<br />
the first and se<strong>co</strong>nd participants, it is called Toggling.<br />
CW<br />
Call Waiting<br />
See Call waiting.<br />
D<br />
DHCP<br />
Dynamic Host Configuration Proto<strong>co</strong>l<br />
Internet proto<strong>co</strong>l that handles the automatic assignment of IP addresses to Network<br />
subscribers. The proto<strong>co</strong>l is made available in the network by a server. A DHCP server<br />
can be a router for example.<br />
The phone <strong>co</strong>ntains a DHCP client. A router that <strong>co</strong>ntains a DHCP server can assign the<br />
IP addresses for the phone automatically from a defined address block. The dynamic<br />
assignment means that several Network subscribers can share one IP address,<br />
although they use it alternately and not simultaneously.<br />
With some routers you can specify that the IP address for the phone is never changed.<br />
Displayed name<br />
VoIP provider feature. You can specify any name that is to be shown to the other party<br />
during a call instead of your phone number.<br />
173<br />
<strong>VoIPon</strong> www.voipon.<strong>co</strong>.<strong>uk</strong> sales@voipon.<strong>co</strong>.<strong>uk</strong> Tel: +44 (0)1245 808195 Fax: +44 (0)1245 808299
Glossary<br />
DMZ (Demilitarised Zone)<br />
DMZ describes a part of a network that is outside the firewall.<br />
A DMZ is set up, as it were, between a network you want to protect (e.g. a LAN) and a<br />
non-secure network (e.g. the Internet). A DMZ permits unrestricted access from the<br />
Internet to only one or a few network <strong>co</strong>mponents, while the other network <strong>co</strong>mponents<br />
remain secure behind the firewall.<br />
DNS<br />
Domain Name System<br />
Hierarchical system that permits the assignment of IP addresses to Domain names that<br />
are easier to note. This assignment has to be managed by a local DNS server in each<br />
(W)LAN. The local DNS server determines the IP address, if necessary by enquiring about<br />
superordinate DNS servers and other local DNS servers on the Internet.<br />
You can specify the IP address of the primary/se<strong>co</strong>ndary DNS server.<br />
See also: DynDNS.<br />
Domain name<br />
Name of one (of several) Web server on the Internet (e.g. <strong>Siemens</strong> Home) The domain<br />
name is assigned to the relevant IP address by DNS.<br />
DSCP<br />
Differentiated Service Code Point<br />
See Quality of Service (QoS).<br />
DSL<br />
Digital Subscriber Line<br />
Data transfer technology that allows Internet access with, for e.g., 1.5 Mbps over a <strong>co</strong>nventional<br />
telephone line. Pre<strong>co</strong>nditions: DSL modem and the appropriate service<br />
offered by the Internet provider.<br />
DSLAM<br />
Digital Subscriber Line Access Multiplexer<br />
The DSLAM is a switch cabinet in an exchange at which all subscriber <strong>co</strong>nnectors <strong>co</strong>nverge.<br />
DTMF<br />
Dual Tone Multi-Frequency<br />
Another description for dual tone multi-frequency dialling.<br />
Dynamic IP address<br />
A dynamic IP address is assigned to a network <strong>co</strong>mponent automatically via DHCP. The<br />
dynamic IP address for a network <strong>co</strong>mponent can change every time it registers or at<br />
certain time intervals.<br />
See also: Static IP address<br />
DynDNS<br />
Dynamic DNS<br />
Domain names and IP addresses are realised via DNS. For Dynamic IP addresses this<br />
service is now enhanced with "Dynamic DNS" (DynDNS). This permits the use of a network<br />
<strong>co</strong>mponent with a dynamic IP address as a Server on the Internet. DynDNS<br />
ensures that a service can always be addressed on the Internet under the same Domain<br />
name irrespective of the current IP address.<br />
174<br />
<strong>VoIPon</strong> www.voipon.<strong>co</strong>.<strong>uk</strong> sales@voipon.<strong>co</strong>.<strong>uk</strong> Tel: +44 (0)1245 808195 Fax: +44 (0)1245 808299
E<br />
Glossary<br />
ECT<br />
Explicit Call Transfer<br />
Participant A calls participant B. He puts the <strong>co</strong>nnection on hold and calls participant C.<br />
Rather than <strong>co</strong>nnect everyone in a three-party <strong>co</strong>nference, A now transfers participant<br />
B to C and hangs up.<br />
EEPROM<br />
Electrically Eraseable Programmable Read Only Memory<br />
Memory building block in your phone with fixed data (e.g. default and customised settings)<br />
and data saved automatically (e.g. entries to the list of callers).<br />
Ethernet network<br />
Wired LAN.<br />
F<br />
Firewall<br />
You can use a firewall to protect your network against unauthorised external access.<br />
This involves <strong>co</strong>mbining various measures and technologies (hard and/or software) to<br />
<strong>co</strong>ntrol the flow of data between a private network you wish to protect and an unprotected<br />
network (e.g. the Internet).<br />
See also: NAT.<br />
Firmware<br />
Device software in which basic information is saved for the functioning of a device.<br />
A new version of the firmware can be loaded into the device's memory (firmware<br />
update) to <strong>co</strong>rrect errors or update the device software.<br />
Flat rate<br />
Billing system for an Internet <strong>co</strong>nnection. The Internet provider charges a set monthly<br />
fee. There are no additional charges for the duration of the <strong>co</strong>nnection or number of<br />
<strong>co</strong>nnections.<br />
Fragmentation<br />
Data packets that are too big are split into smaller packets (fragments) before they are<br />
transferred. They are put together again when they reach the recipient (defragmented).<br />
Full duplex<br />
Data transfer mode in which data can be sent and received at the same time.<br />
G<br />
G.711 a law, G.711 µ law<br />
Standard for a Codec.<br />
G.711 delivers a very good voice quality that <strong>co</strong>rresponds to that in the ISDN fixed line.<br />
As there is little <strong>co</strong>mpression, the necessary bandwidth is around 64 kbit/s per voice <strong>co</strong>nnection,<br />
but the delay caused by <strong>co</strong>ding/de<strong>co</strong>ding is only 0.125 ms.<br />
"a law" describes the European standard and "µ law" describes the North American/Japanese<br />
equivalent.<br />
175<br />
<strong>VoIPon</strong> www.voipon.<strong>co</strong>.<strong>uk</strong> sales@voipon.<strong>co</strong>.<strong>uk</strong> Tel: +44 (0)1245 808195 Fax: +44 (0)1245 808299
Glossary<br />
G.722<br />
Standard for a Codec.<br />
G.722 is a broadband language <strong>co</strong>dec with a bandwidth of 50 Hz to 7 kHz, a net transfer<br />
rate of 64 kbit/s per language <strong>co</strong>nnection and integrated speech pause re<strong>co</strong>gnition<br />
and <strong>co</strong>mfort noise generation (silence suppression).<br />
G.722 delivers very good voice quality. A higher sampling rate provides clearer and better<br />
voice quality than other <strong>co</strong>decs and enables a speech tone in High Definition Sound<br />
Performance (HDSP).<br />
G.726<br />
Standard for a Codec.<br />
G.726 delivers a good voice quality. It is inferior to the quality with <strong>co</strong>dec G.711 but better<br />
than with G.729.<br />
G.729A/B<br />
Standard for a Codec.<br />
The voice quality is rather lower with G.729A/B. As a result of the high level of <strong>co</strong>mpression,<br />
the necessary bandwidth is only around 8 kbit/s per voice <strong>co</strong>nnection, but the<br />
delay is around 15 mins.<br />
Gateway<br />
Connects two different Networks, e.g. a router as an Internet gateway.<br />
For phone calls from VoIP to the telephone network, a gateway has to be <strong>co</strong>nnected to<br />
the IP network and the telephone network (gateway/VoIP provider). It forwards calls<br />
from VoIP to the telephone network as required.<br />
Gateway Provider<br />
See SIP provider.<br />
Global IP Address<br />
See IP address.<br />
GSM<br />
Global System for Mobile Communication<br />
Originally, European standard for mobile networks. GSM can now be described as a<br />
worldwide standard. In the USA and Japan national standards are now more frequently<br />
supported than in the past.<br />
H<br />
Headset<br />
Combination of microphone and headphone. A headset makes handsfree talking more<br />
<strong>co</strong>mfortable. There are headsets available that are <strong>co</strong>nnected to the handset by a cable.<br />
HTTP Proxy<br />
Server via which the Network subscribers can process their Internet traffic.<br />
Hub<br />
Uses one Infrastructure network to <strong>co</strong>nnect several Network subscribers. All data<br />
sent to the hub by one network subscriber is forwarded to all network subscribers.<br />
See also: Gateway, Router.<br />
176<br />
<strong>VoIPon</strong> www.voipon.<strong>co</strong>.<strong>uk</strong> sales@voipon.<strong>co</strong>.<strong>uk</strong> Tel: +44 (0)1245 808195 Fax: +44 (0)1245 808299
I<br />
Glossary<br />
IEEE<br />
Institute of Electrical and Electronics Engineers<br />
International body that defines standards in electronics and electro-technology, <strong>co</strong>ncerned<br />
in particular with the standardisation of LAN technology, transmission proto<strong>co</strong>ls,<br />
data transfer rate and wiring.<br />
Infrastructure network<br />
Network with central structure: all Network subscribers <strong>co</strong>mmunicate via a central<br />
Router.<br />
Instant messaging<br />
Service that uses a client program to allow chatting in real time, i.e. to send brief messages<br />
to other subscribers on the Internet.<br />
Internet<br />
Global WAN. A series of proto<strong>co</strong>ls have been defined for exchanging data, known by the<br />
name TCP/IP.<br />
All Network subscribers are identifiable via their IP address. DNS assigns a Domain<br />
name to the IP address.<br />
Important services on the Internet include the World Wide Web (WWW), e-mail, file<br />
transfer and discussion forums.<br />
Internet Service Provider<br />
Enables access to the Internet for a fee.<br />
IP (Internet Proto<strong>co</strong>l)<br />
TCP/IP proto<strong>co</strong>l on the Internet. IP is responsible for addressing subscribers in a Network<br />
using IP addresses and routes data from the sender to the recipient. IP determines<br />
the paths (routing) along which the data packets travel.<br />
IP address<br />
A unique address for a network <strong>co</strong>mponent within a network based on the TCP/IP proto<strong>co</strong>ls<br />
(e.g. LAN, Internet). On the Internet, domain names are usually assigned instead<br />
of IP addresses. DNS assigns the <strong>co</strong>rresponding IP address to the domain name.<br />
The IP address has four parts (decimal numbers between 0 and 255) separated by full<br />
stops (e.g. 230.94.233.2).<br />
The IP address is made up of the network number and the number of the Network subscribers<br />
(e.g. phone). Depending on the Subnet mask, the front one, two or three parts<br />
make up the network number and the rest of the IP address addresses the network <strong>co</strong>mponent.<br />
The network number of all the <strong>co</strong>mponents in any one network must be identical.<br />
IP addresses can be assigned automatically with DHCP (dynamic IP addresses) or manually<br />
(static IP addresses).<br />
See also: DHCP.<br />
IP pool range<br />
Range of IP addresses that the DHCP server can use to assign dynamic IP addresses.<br />
177<br />
<strong>VoIPon</strong> www.voipon.<strong>co</strong>.<strong>uk</strong> sales@voipon.<strong>co</strong>.<strong>uk</strong> Tel: +44 (0)1245 808195 Fax: +44 (0)1245 808299
Glossary<br />
L<br />
LAN<br />
Local Area Network<br />
Network with a restricted physical range. A LAN can be wireless (WLAN) and/or wired.<br />
Local IP address<br />
The local or private IP address is the address for a network <strong>co</strong>mponent in the local network<br />
(LAN). The network operator can assign any address he or she wants. Devices that<br />
act as a link from a local network to the Internet (gateway or router) have a public and<br />
a private IP address.<br />
See also IP address.<br />
Local SIP Port<br />
See SIP port/Local SIP port.<br />
M<br />
MAC address<br />
Media Access Control Address<br />
Hardware address by means of which each network device (e.g. network card, switch,<br />
phone) can be uniquely identified worldwide. It <strong>co</strong>nsists of 6 parts (hexadecimal numbers)<br />
separated by a "-" (e.g. 00-90-65-44-00-3A).<br />
The MAC address is assigned by the manufacturer and cannot be changed.<br />
Mbps<br />
Million bits per se<strong>co</strong>nd<br />
Unit of the transmission speed in a network.<br />
MRU<br />
Maximum Receive Unit<br />
Defines the maximum user data volume within a data packet.<br />
MTU<br />
Maximum Transmission Unit<br />
Defines the maximum length of a data packet that can be carried over the network at a<br />
time.<br />
Music on hold<br />
Music on hold<br />
Music that is played while you are on a Consultation call or Toggling. The waiting participant<br />
hears music while on hold.<br />
N<br />
NAT<br />
Network Address Translation<br />
Method for <strong>co</strong>nverting (private) IP addresss to one or more (public) IP addresses. NAT<br />
enables the IP addresses of Network subscriberss (e.g. VoIP telephones) in a LAN to be<br />
<strong>co</strong>ncealed behind a shared IP address for the Router on the Internet.<br />
VoIP telephones behind a NAT router cannot be reached by VoIP servers (on ac<strong>co</strong>unt of<br />
the private IP address). In order to "get around" NAT, it is possible to use (alternatively)<br />
ALG in the router, STUN in the VoIP telephone, or for the VoIP provider to use an Outbound<br />
proxy.<br />
If an outbound proxy is made available you must allow for this in the VoIP settings for<br />
your phone.<br />
178<br />
<strong>VoIPon</strong> www.voipon.<strong>co</strong>.<strong>uk</strong> sales@voipon.<strong>co</strong>.<strong>uk</strong> Tel: +44 (0)1245 808195 Fax: +44 (0)1245 808299
Glossary<br />
Network<br />
Group of devices. Devices can be <strong>co</strong>nnected in either wired or wireless mode.<br />
Networks can also differ in range and structure:<br />
– Range: local networks (LAN) or wide-area networks (WAN)<br />
– Structure: Infrastructure network or ad-hoc network<br />
Network subscribers<br />
Devices and <strong>co</strong>mputers that are <strong>co</strong>nnected to each other in a network, e.g. servers, PCs<br />
and phones.<br />
O<br />
Outbound proxy<br />
Alternative NAT <strong>co</strong>ntrol mechanism to STUN and ALG.<br />
Outbound proxies are implemented by the VoIP provider in firewall/NAT environments<br />
as an alternative to SIP proxy server. They <strong>co</strong>ntrol data traffic through the firewall.<br />
Outbound proxy and STUN servers should not be used simultaneously.<br />
See also: STUNand NAT.<br />
P<br />
Paging (handset search)<br />
A base station function to locate registered handsets. The base station establishes a <strong>co</strong>nnection<br />
to every registered handset. The handsets start to ring. Paging is activated by<br />
briefly pressing the button on the base station and is deactivated by briefly pressing the<br />
same button again.<br />
PIN<br />
Personal Identification Number<br />
Protects against unauthorised use. When the PIN is activated a number <strong>co</strong>mbination has<br />
to be entered in order to access a protected area.<br />
You can protect your base station <strong>co</strong>nfiguration data with a system PIN (4-digit number<br />
<strong>co</strong>mbination).<br />
Port<br />
Data is exchanged between two applications in a Network via a port.<br />
Port forwarding<br />
The Internet gateway (e.g. your router) forwards data packets from the Internet that are<br />
directed to a certain Port to the port <strong>co</strong>ncerned. This allows servers in the LAN to offer<br />
services on the Internet without you needing a public IP address.<br />
Port number<br />
Indicates a specific application of Network subscribers. Depending on the setting in<br />
the LAN, the port number is permanently assigned or else it is newly assigned with each<br />
access.<br />
The <strong>co</strong>mbination of IP address/Port number uniquely identifies the recipient or sender<br />
of a data packet within a network.<br />
Pre-dialling<br />
See Block dialling.<br />
Private IP address<br />
See Public IP address.<br />
179<br />
<strong>VoIPon</strong> www.voipon.<strong>co</strong>.<strong>uk</strong> sales@voipon.<strong>co</strong>.<strong>uk</strong> Tel: +44 (0)1245 808195 Fax: +44 (0)1245 808299
Glossary<br />
Proto<strong>co</strong>l<br />
Describes the agreements for <strong>co</strong>mmunicating within a Network. It <strong>co</strong>ntains rules for<br />
opening, administering and closing a <strong>co</strong>nnection, about data formats, time frames and<br />
possible error handling.<br />
Proxy/Proxy server<br />
Computer program that <strong>co</strong>ntrols the exchange of data between Client and Server in<br />
<strong>co</strong>mputer networks. If the phone sends a query to the VoIP server, the proxy acts as<br />
a server towards the phone and as a client towards the server. A proxy is addressed via<br />
IP address/Domain name and Port.<br />
Public IP address<br />
The public IP address is the address for a network <strong>co</strong>mponent on the Internet. It is<br />
assigned by the Internet Service Provider. Devices that act as a link from a local network<br />
to the Internet (gateway, router) have a public and a local IP address.<br />
See also: IP address, NAT<br />
Q<br />
Quality of Service (QoS)<br />
Describes the Quality of Service in <strong>co</strong>mmunication networks. Differentiations are made<br />
between various Quality of Service classes.<br />
QoS influences the flow of data packets on the Internet, e.g. by prioritising data packets,<br />
reserving bandwidth and data packet optimisation.<br />
In VoIP networks, QoS influences the voice quality. If the whole infrastructure (router,<br />
network server etc.) has QoS, the voice quality is better, i.e. fewer delays, less echoing,<br />
less crackling.<br />
R<br />
RAM<br />
Random Access Memory<br />
Memory in which you have reading and storage rights. Items such as melodies and<br />
screen pictures are saved in the RAM after you have loaded them onto the phone via the<br />
Web <strong>co</strong>nfigurator.<br />
Registrar<br />
The registrar manages the Network subscribers current IP addresses. When you register<br />
with your VoIP provider, your current IP address is saved on the registrar. This means<br />
you can also be reached when on the move.<br />
Ringback when the call is not answered<br />
= CCNR (Completion of Calls on No Reply). If a participant does not respond when called,<br />
a caller can arrange an automatic ringback. As soon as the destination phone has <strong>co</strong>mpleted<br />
a call and is free again, the caller is rung back. This feature must be supported by<br />
the exchange. The ringback request is automatically cancelled after about 2 hours<br />
(depending on the VoIP provider).<br />
Ringback when the number is busy<br />
= CCBS (Completion of Calls to Busy Subscriber). If a caller hears the busy tone, he or<br />
she can activate the ringback function. As soon as the <strong>co</strong>nnection is free the caller is<br />
rung back. As soon as the caller lifts his receiver the <strong>co</strong>nnection is made automatically.<br />
180<br />
<strong>VoIPon</strong> www.voipon.<strong>co</strong>.<strong>uk</strong> sales@voipon.<strong>co</strong>.<strong>uk</strong> Tel: +44 (0)1245 808195 Fax: +44 (0)1245 808299
Glossary<br />
ROM<br />
Read Only Memory<br />
A type of memory that can only be read, as opposed to RAM which can be both read and<br />
written.<br />
Router<br />
Routes data packets within a network and between different networks via the quickest<br />
route. Can <strong>co</strong>nnect Ethernet networks and WLAN. Can be a Gateway to the Internet.<br />
Routing<br />
Routing is the transfer of data packets to another subscriber in your network. On its way<br />
to the recipient, the data packets are sent from one router to the next until it reaches its<br />
destination.<br />
If data packets were not forwarded in this way, a network like the Internet would not be<br />
possible. Routing <strong>co</strong>nnects the individual networks to this global system.<br />
A router is a part of this system; it transfers data packets both within a local network and<br />
from one network to the next. Transfer of data from one network to another is performed<br />
on the basis of a <strong>co</strong>mmon proto<strong>co</strong>l.<br />
RTP<br />
Realtime Transport Proto<strong>co</strong>l<br />
Global standard for transferring audio and video data. Often used in <strong>co</strong>njunction with<br />
UDP. In this case, RTP packets are embedded in UDP packets.<br />
RTP port<br />
(Local) Port that is used to send and receive voice data packets for VoIP.<br />
S<br />
Server<br />
Provides a service to other Network subscribers (Clients). The term can indicate a <strong>co</strong>mputer/PC<br />
or an application. A server is addressed via IP address/Domain name and Port.<br />
SIP (Session Initiation Proto<strong>co</strong>l)<br />
Signalling proto<strong>co</strong>l independent of voice <strong>co</strong>mmunication. Used for establishing and<br />
ending a call. It is also possible to define parameters for voice transmission.<br />
SIP address<br />
See URI.<br />
SIP port/Local SIP port<br />
(Local) Port which is used to send and receive SIP signalling data for VoIP.<br />
SIP provider<br />
See VoIP provider.<br />
SIP proxy server<br />
IP address of your VoIP provider's gateway server.<br />
Static IP address<br />
A static IP address is assigned to a network <strong>co</strong>mponent manually during network <strong>co</strong>nfiguration.<br />
Unlike a Dynamic IP address a static (fixed) IP address never changes.<br />
181<br />
<strong>VoIPon</strong> www.voipon.<strong>co</strong>.<strong>uk</strong> sales@voipon.<strong>co</strong>.<strong>uk</strong> Tel: +44 (0)1245 808195 Fax: +44 (0)1245 808299
Glossary<br />
STUN<br />
Simple Transversal of UDP over NAT<br />
NAT <strong>co</strong>ntrol mechanism.<br />
STUN is a data proto<strong>co</strong>l for VoIP telephones. STUN replaces the private IP address in the<br />
data packets of the VoIP telephone with the public address of the secure private network.<br />
To <strong>co</strong>ntrol data transfer, a STUN server is also required on the Internet. STUN cannot<br />
be implemented with symmetric NATs.<br />
See also: ALG, Firewall, NAT, Outbound proxy.<br />
Subnet<br />
Segment of a Network.<br />
Subnet mask<br />
IP addresses <strong>co</strong>nsist of a fixed line number and a variable subscriber number. The network<br />
number is identical for all Network subscriberss. The proportion of the IP address<br />
made up of the network number is determined in the subnet mask. In the subnet mask<br />
255.255.255.0, for e.g., the first three parts of the IP address are the network number<br />
and the last part the subscriber number.<br />
Symmetric NAT<br />
A symmetric NAT assigns different external IP addresses and port numbers to the same<br />
internal IP addresses and port numbers – depending on the external target address.<br />
T<br />
TCP<br />
Transmission Control Proto<strong>co</strong>l<br />
Transport proto<strong>co</strong>l. Session-based transmission proto<strong>co</strong>l: it sets up, monitors and terminates<br />
a <strong>co</strong>nnection between sender and recipient for transporting data.<br />
TLS<br />
Transport Layer Security<br />
Proto<strong>co</strong>l for encrypting data transfers on the Internet. TLS is a superordinated Transport<br />
proto<strong>co</strong>l.<br />
Toggling<br />
Toggling allows you to switch between two callers or between a <strong>co</strong>nference call and an<br />
individual caller without allowing the waiting caller to screen the call.<br />
Transfer rate<br />
Speed at which data is transferred in the WAN or LAN. The transfer rate is measured in<br />
data units per unit of time (Mbit/s).<br />
Transport proto<strong>co</strong>l<br />
Controls data transport between <strong>co</strong>mmunication partners (applications).<br />
See also: UDP, TCP, TLS.<br />
182<br />
<strong>VoIPon</strong> www.voipon.<strong>co</strong>.<strong>uk</strong> sales@voipon.<strong>co</strong>.<strong>uk</strong> Tel: +44 (0)1245 808195 Fax: +44 (0)1245 808299
U<br />
Glossary<br />
UDP<br />
<strong>User</strong> Datagram Proto<strong>co</strong>l<br />
Transport proto<strong>co</strong>l. Unlike TCP, UDP is a non session-based proto<strong>co</strong>l. It does not establish<br />
a fixed <strong>co</strong>nnection. The data packets (datagrams) are sent as broadcast. The recipient<br />
is solely responsible for making sure the data is received. The sender is not notified<br />
about whether it is received.<br />
URI<br />
Uniform Resource Identifier<br />
Character sequence for identifying resources (e.g. e-mail recipient, http://siemens.<strong>co</strong>m,<br />
files).<br />
On the Internet URIs are used as a uniform identification for resources. URIs are also<br />
described as SIP addresses.<br />
URIs can be entered in the phone as a number. By dialling a URI you can call an Internet<br />
subscriber with VoIP equipment.<br />
URL<br />
Universal Resource Locator<br />
Globally unique address of a domain on the Internet.<br />
A URL is a subtype of URI. URLs identify a resource by its location on the Internet. For<br />
historical reasons the term is often used as a synonym for URI.<br />
<strong>User</strong> identification<br />
Name/number <strong>co</strong>mbination for access, e.g. to your VoIP ac<strong>co</strong>unt.<br />
V<br />
Voice <strong>co</strong>dec<br />
See Codec.<br />
VoIP<br />
Voice over Internet Proto<strong>co</strong>l<br />
Telephone calls are no longer placed and transmitted over the telephone network but<br />
over the Internet (or other IP networks).<br />
VoIP provider<br />
A VoIP, SIP or Gateway Provider is an Internet service provider that provides a Gateway<br />
for Internet telephony. As the phone works with the SIP standard, your provider must<br />
support the SIP standard.<br />
The provider routes calls from VoIP to the telephone network (analogue, ISDN and<br />
mobile radio) and vice versa.<br />
W<br />
WAN<br />
Wide Area Network<br />
Wide-area network that is unrestricted in terms of area (e.g. Internet).<br />
183<br />
<strong>VoIPon</strong> www.voipon.<strong>co</strong>.<strong>uk</strong> sales@voipon.<strong>co</strong>.<strong>uk</strong> Tel: +44 (0)1245 808195 Fax: +44 (0)1245 808299
Index<br />
A<br />
Access protection. . . . . . . . . . . . . . . 103<br />
Access to Web <strong>co</strong>nfigurator<br />
from other networks . . . . . . . . . 119<br />
Accessories . . . . . . . . . . . . . . . . . . . 169<br />
Ac<strong>co</strong>unt name (e-mail). . . . . . . . . . . 141<br />
Acknowledge tones . . . . . . . . . . . . . 100<br />
Activate<br />
annex B for G.729. . . . . . . . . . . . . 129<br />
answer machine from external<br />
location . . . . . . . . . . . . . . . . . . 72<br />
Activating<br />
advisory tones . . . . . . . . . . . . . . . 100<br />
answer machine . . . . . . . . . . . . . . . 64<br />
auto answer . . . . . . . . . . . . . . . . . . 97<br />
handset . . . . . . . . . . . . . . . . . . . 1, 31<br />
handsfree talking . . . . . . . . . . . . . . 30<br />
keypad lock . . . . . . . . . . . . . . . . . . 31<br />
repeater mode . . . . . . . . . . . . . . . 104<br />
room monitor. . . . . . . . . . . . . . . . . 93<br />
two-way re<strong>co</strong>rding . . . . . . . . . . . . . 69<br />
Address assignment (IP address) . . . . 118<br />
ADSL . . . . . . . . . . . . . . . . . . . . . . . . 172<br />
Advisory tones. . . . . . . . . . . . . . . . . 100<br />
Alarm clock . . . . . . . . . . . . . . . . . . . 101<br />
Alert tone<br />
activating/deactivating . . . . . . . . . 100<br />
ALG. . . . . . . . . . . . . . . . . . . . . . . . . 172<br />
Alternative DNS server<br />
(Web <strong>co</strong>nfigurator) . . . . . . . . . . 119<br />
Announce only mode<br />
(ans. mach.) . . . . . . . . . . . . . . . . 64<br />
Announcement (answer machine) . . . 66<br />
Answer and re<strong>co</strong>rd mode<br />
(ans. mach.) . . . . . . . . . . . . . . . . 64<br />
Answer machine . . . . . . . . . . . . . . . . 64<br />
activating/deactivating . . . . . . . . . . 64<br />
assigning receive numbers . . . . . . 131<br />
deleting messages . . . . . . . . . . . . . 68<br />
list . . . . . . . . . . . . . . . . . . . . . . . . . 50<br />
playing back messages . . . . . . . . . . 67<br />
re<strong>co</strong>rding announcement/<br />
notification . . . . . . . . . . . . . . . 66<br />
remote operation . . . . . . . . . . . . . . 71<br />
scrolling back . . . . . . . . . . . . . . . . . 67<br />
scrolling forward. . . . . . . . . . . . . . . 67<br />
Index<br />
Application Layer Gateway (ALG) . . . 172<br />
Application signal (recall key) . . . . . 133<br />
Application type (recall key). . . . . . . 133<br />
Area <strong>co</strong>de, dialling automatically . . . 134<br />
Assigning receive numbers . . . . . . . 131<br />
Assigning send number to handset . 130<br />
Asymmetric Digital Subscriber Line . 172<br />
Attaching the belt clip . . . . . . . . . . . . 21<br />
Audio (DTMF signalling) . . . . . . . . . 132<br />
Authentication . . . . . . . . . . . . . . . . 172<br />
Authorisation . . . . . . . . . . . . . . . . . 155<br />
Auto answer . . . . . . . . . . . . . . . . . . . 97<br />
activating/deactivating. . . . . . . . . . 97<br />
Automatic<br />
call acceptance . . . . . . . . . . . . . . . 29<br />
version check. . . . . . . . . . . . . . . . 143<br />
Automatic area <strong>co</strong>de<br />
activating/deactivating. . . . . . . . . 134<br />
Available <strong>co</strong>decs . . . . . . . . . . . . . . . 129<br />
Away from <strong>co</strong>mputer (messenger) . . . 78<br />
B<br />
Base station<br />
changing system PIN . . . . . . . . . . 103<br />
checking service information . . . . 153<br />
<strong>co</strong>nnecting . . . . . . . . . . . . . . . . . . 14<br />
<strong>co</strong>nnecting with fixed line network. 15<br />
<strong>co</strong>nnecting with mains power<br />
supply. . . . . . . . . . . . . . . . . . . 15<br />
<strong>co</strong>nnecting with router. . . . . . . . . . 16<br />
operating on PABX. . . . . . . . . . . . 111<br />
power <strong>co</strong>nsumption. . . . . . . . . . . 157<br />
restoring to factory settings . . . . . 103<br />
setting . . . . . . . . . . . . . . . . . . . . 103<br />
setting default <strong>co</strong>nnection . . . . . . 105<br />
setting up . . . . . . . . . . . . . . . . . . . 13<br />
updating firmware . . . . . . . . 105, 142<br />
Battery<br />
charging . . . . . . . . . . . . . . . . . . 1, 12<br />
display . . . . . . . . . . . . . . . . . . . 1, 12<br />
i<strong>co</strong>n . . . . . . . . . . . . . . . . . . . . . 1, 12<br />
inserting . . . . . . . . . . . . . . . . . . . . 10<br />
re<strong>co</strong>mmended batteries . . . . . . . . 156<br />
tone . . . . . . . . . . . . . . . . . . . . . . 100<br />
Beep. . . . . . . . . . . . . . . . . . . . . . . . 100<br />
Block dialling . . . . . . . . . . . . . . . . . 172<br />
Broadband Internet access. . . . . . . . 172<br />
Broadband language <strong>co</strong>dec G.722 . . 127<br />
Broadband speech <strong>co</strong>dec. . . . . . . . . 176<br />
<strong>VoIPon</strong> www.voipon.<strong>co</strong>.<strong>uk</strong> sales@voipon.<strong>co</strong>.<strong>uk</strong> Tel: +44 (0)1245 808195 Fax: +44 (0)1245 808299<br />
184
Index<br />
Buddy . . . . . . . . . . . . . . . . . . . . 76, 172<br />
calling . . . . . . . . . . . . . . . . . . . . . . 84<br />
checking information . . . . . . . . . . . 81<br />
messages . . . . . . . . . . . . . . . . . . . . 82<br />
status changes . . . . . . . . . . . . . . . . 80<br />
Buddy list (messenger). . . . . . . . . . . . 76<br />
opening . . . . . . . . . . . . . . . . . . . . . 79<br />
Busy (messenger) . . . . . . . . . . . . . . . 78<br />
Buttons (Web <strong>co</strong>nfigurator) . . . . . . . 117<br />
C<br />
Call<br />
accepting . . . . . . . . . . . . . . . . . . . . 29<br />
dis<strong>co</strong>nnecting (toggling) . . . . . . . . . 42<br />
ending . . . . . . . . . . . . . . . . . . . . . . 28<br />
external . . . . . . . . . . . . . . . . . . . . . 30<br />
internal . . . . . . . . . . . . . . . . . . . . . 91<br />
number/name display . . . . . . . . . . . 29<br />
picking up from answer machine. . . 68<br />
rejecting external . . . . . . . . . . . . . . 92<br />
transferring (<strong>co</strong>nnecting) . . . . . . . . 91<br />
two-way re<strong>co</strong>rding . . . . . . . . . . . . . 69<br />
Call acceptance . . . . . . . . . . . . . . . . . 70<br />
Call display . . . . . . . . . . . . . . . . . . . . 30<br />
fixed line network. . . . . . . . . . . . . . 30<br />
VoIP . . . . . . . . . . . . . . . . . . . . . . . . 30<br />
Call duration display. . . . . . . . . . . . . . 51<br />
Call forwarding . . . . . . . . . . . . . . . . 172<br />
fixed line network. . . . . . . . . . . . . . 39<br />
VoIP (handset) . . . . . . . . . . . . . . . . 41<br />
VoIP (Web <strong>co</strong>nfigurator) . . . . . . . . 132<br />
Call screening during re<strong>co</strong>rding . . . . . 69<br />
Call waiting . . . . . . . . . . . . . . . 172, 173<br />
accepting/rejecting (VoIP) . . . . . . . . 42<br />
activating/deactivating (fixed line<br />
network) . . . . . . . . . . . . . . . . . 39<br />
activating/deactivating (VoIP) . . . . . 41<br />
internal call . . . . . . . . . . . . . . . . . . 92<br />
Call-by-call list . . . . . . . . . . . . . . . . . . 43<br />
key. . . . . . . . . . . . . . . . . . . . . . . . . . 1<br />
Call-by-call numbers. . . . . . . . . . . 43, 51<br />
Calling<br />
entering IP address . . . . . . . . . . . . . 27<br />
external . . . . . . . . . . . . . . . . . . . . . 26<br />
<strong>Gigaset</strong>.net. . . . . . . . . . . . . . . . 37, 38<br />
internal . . . . . . . . . . . . . . . . . . . . . 91<br />
via VoIP/fixed line network . . . . . . . 26<br />
Calling Line Identification. . . . . . . . . . 29<br />
Calling Line Identification<br />
Presentation. . . . . . . . . . . . . . . . 29<br />
Calls list . . . . . . . . . . . . . . . . . . . . . . 49<br />
Cancelling<br />
dialling . . . . . . . . . . . . . . . . . . . . . 28<br />
operation . . . . . . . . . . . . 33, 34, 117<br />
Care of the telephone . . . . . . . . . . . 146<br />
CF, see Call forwarding<br />
Change to summertime. . . . . . . . . . 144<br />
Changing<br />
dialling mode . . . . . . . . . . . . . . . 111<br />
earpiece volume . . . . . . . . . . . . . . 98<br />
handsfree volume . . . . . . . . . . . . . 98<br />
internal number. . . . . . . . . . . . . . . 90<br />
system PIN . . . . . . . . . . . . . . . . . 103<br />
Character set table, see Special characters<br />
Charge saving function (remote<br />
operation) . . . . . . . . . . . . . . . . . 70<br />
Charge status display . . . . . . . . . . . . . 1<br />
Charge status display (battery) . . . . . 12<br />
Chatting . . . . . . . . . . . . . . . . . . 76, 173<br />
with buddies . . . . . . . . . . . . . . . . . 81<br />
Check<br />
EEPROM version. . . . . . . . . . . . . . 145<br />
firmware version . . . . . . . . . . . . . 145<br />
service information . . . . . . . . . . . 153<br />
CLI . . . . . . . . . . . . . . . . . . . . . . . . . . 29<br />
Client . . . . . . . . . . . . . . . . . . . . . . . 173<br />
CLIP . . . . . . . . . . . . . . . . . . . . . . . . . 29<br />
CLIP picture. . . . . . . . . . . . . . . . . . . . 29<br />
Codec<br />
available <strong>co</strong>decs. . . . . . . . . . . . . . 129<br />
Codecs . . . . . . . . . . . . . . . . . . . . . . 173<br />
Colour scheme (display) . . . . . . . . . . 95<br />
Conference. . . . . . . . . . . . . . . . . . . . 92<br />
Conference call<br />
fixed line network . . . . . . . . . . . . . 40<br />
VoIP . . . . . . . . . . . . . . . . . . . . . . . 42<br />
Configuration<br />
via PC . . . . . . . . . . . . . . . . . . . . . 113<br />
Configuring<br />
VoIP <strong>co</strong>nnection (handset) . . . . . . 108<br />
VoIP <strong>co</strong>nnection (Web <strong>co</strong>nfig.) . . . 120<br />
Confirmation tone. . . . . . . . . . . . . . 100<br />
Connecting<br />
PC with Web <strong>co</strong>nfigurator. . . . . . . 113<br />
to the Web <strong>co</strong>nfigurator . . . . . . . . 113<br />
Connecting the charging cradle . . . . . 11<br />
185<br />
<strong>VoIPon</strong> www.voipon.<strong>co</strong>.<strong>uk</strong> sales@voipon.<strong>co</strong>.<strong>uk</strong> Tel: +44 (0)1245 808195 Fax: +44 (0)1245 808299
Connection<br />
activating (VoIP) . . . . . . . . . . . . . . 126<br />
Internet (troubleshooting). . . . . . . . 19<br />
name/provider (Web <strong>co</strong>nfig.). . . . . 120<br />
selecting (line suffix) . . . . . . . . . . . 27<br />
to <strong>Gigaset</strong>.net. . . . . . . . . . . . . . . . 127<br />
to messenger server . . . . . . . . . . . . 77<br />
Connection assistant<br />
starting (getting started). . . . . . . . . 16<br />
Connection name<br />
fixed line network. . . . . . . . . . . . . 126<br />
VoIP . . . . . . . . . . . . . . . . . . . . . . . 122<br />
Connection socket for headset . . . . 1, 21<br />
Connection type<br />
selecting (display key). . . . . . . . . . . 27<br />
selecting (talk key) . . . . . . . . . . . . . 26<br />
Consultation call . . . . . . . . . . . . . . . 173<br />
ending . . . . . . . . . . . . . . . . . . . . . . 92<br />
external (fixed line network) . . . . . . 40<br />
external (VoIP) . . . . . . . . . . . . . . . . 42<br />
internal . . . . . . . . . . . . . . . . . . 32, 92<br />
Contrast (display). . . . . . . . . . . . . . . . 95<br />
Control key . . . . . . . . . . . . . . . . . . . . . 1<br />
functions . . . . . . . . . . . . . . . . . . . . 32<br />
Correcting in<strong>co</strong>rrect entries . . . . . . . . 34<br />
Cost <strong>co</strong>ntrol. . . . . . . . . . . . . . . . . . 8, 51<br />
defining dialling plans. . . . . . . . . . 135<br />
Customer Care. . . . . . . . . . . . . . . . . 154<br />
CW . . . . . . . . . . . . . . . . . . . . . . . . . 173<br />
D<br />
Data packets, fragmentation. . . . . . . 175<br />
Data server for firmware update . . . . 142<br />
Date<br />
set manually. . . . . . . . . . . . . . . . . . 12<br />
transferring from time server . . . . 144<br />
Deactivating<br />
advisory tones . . . . . . . . . . . . . . . 100<br />
answer machine . . . . . . . . . . . . . . . 64<br />
auto answer . . . . . . . . . . . . . . . . . . 97<br />
handset . . . . . . . . . . . . . . . . . . . 1, 31<br />
handsfree talking . . . . . . . . . . . . . . 30<br />
keypad lock . . . . . . . . . . . . . . . . . . 31<br />
repeater mode . . . . . . . . . . . . . . . 104<br />
room monitor. . . . . . . . . . . . . . . . . 94<br />
two-way re<strong>co</strong>rding . . . . . . . . . . . . . 69<br />
Default settings<br />
handset . . . . . . . . . . . . . . . . . . . . 102<br />
Deleting<br />
Index<br />
announcement for answer<br />
machine . . . . . . . . . . . . . . . . . 66<br />
characters . . . . . . . . . . . . . . . . . . . 34<br />
messages . . . . . . . . . . . . . . . . . . . 68<br />
Demilitarised Zone . . . . . . . . . . . . . 174<br />
De-registering<br />
from Web <strong>co</strong>nfigurator. . . . . . . . . 114<br />
handset from base station . . . . . . . 89<br />
Describes . . . . . . . . . . . . . . . . . . . . 180<br />
Destination number (room monitor) . 93<br />
DHCP . . . . . . . . . . . . . . . . . . . 173, 174<br />
Dialling<br />
cancelling . . . . . . . . . . . . . . . . . . . 28<br />
directory . . . . . . . . . . . . . . . . . . . . 45<br />
IP address . . . . . . . . . . . . . . . . . . . 27<br />
mode . . . . . . . . . . . . . . . . . . . . . 111<br />
with quick dial . . . . . . . . . . . . . . . . 46<br />
Dialling plans . . . . . . . . . . . . 8, 51, 135<br />
activating/deactivating. . . . . . . . . 136<br />
defining . . . . . . . . . . . . . . . . . . . 136<br />
deleting. . . . . . . . . . . . . . . . . . . . 137<br />
for emergency numbers . . . . . . . . 137<br />
Differentiated Service Code Point. . . 174<br />
Digital Subscriber Line. . . . . . . . . . . 174<br />
Digital Subscriber Line<br />
Access Multiplexer . . . . . . . . . . 174<br />
Directory . . . . . . . . . . . . . . . . . . . . . 43<br />
<strong>co</strong>pying number . . . . . . . . . . . . . . 47<br />
deleting (Web <strong>co</strong>nfigurator) . . . . . 138<br />
editing via PC. . . . . . . . . . . . . . . . 137<br />
<strong>Gigaset</strong>.net . . . . . . . . . . . . . . . . . . 36<br />
loading from PC. . . . . . . . . . . . . . 138<br />
opening . . . . . . . . . . . . . . . . . . . . 32<br />
order of entries . . . . . . . . . . . . . . . 44<br />
saving entry . . . . . . . . . . . . . . . . . 44<br />
saving numbers from SMS . . . . . . . 58<br />
selecting entry. . . . . . . . . . . . . . . . 45<br />
sending entry/list to handset . . . . . 46<br />
storing sender’s SMS number . . . . . 57<br />
transferring to/from PC. . . . . . . . . 137<br />
using to enter numbers . . . . . . . . . 47<br />
Display<br />
backlight . . . . . . . . . . . . . . . . . . . . 96<br />
call duration . . . . . . . . . . . . . . . . . 51<br />
caller's number (CLI/CLIP) . . . . . . . . 29<br />
changing display language . . . . . . . 95<br />
<strong>co</strong>lour scheme/<strong>co</strong>ntrast . . . . . . . . . 95<br />
in idle status . . . . . . . . . . . . . . . . . . 1<br />
<strong>VoIPon</strong> www.voipon.<strong>co</strong>.<strong>uk</strong> sales@voipon.<strong>co</strong>.<strong>uk</strong> Tel: +44 (0)1245 808195 Fax: +44 (0)1245 808299<br />
186
Index<br />
memory . . . . . . . . . . . . . . . . . . . . . 46<br />
network mailbox message. . . . . . . . 87<br />
screen picture. . . . . . . . . . . . . . . . . 96<br />
setting . . . . . . . . . . . . . . . . . . . . . . 95<br />
wrong language . . . . . . . . . . . . . . . 95<br />
Display keys . . . . . . . . . . . . . . . . . . 1, 33<br />
assigning . . . . . . . . . . . . . . . . . . . . 97<br />
change <strong>co</strong>nfiguration . . . . . . . . . . . 97<br />
Displayed name (VoIP) . . . . . . . 123, 173<br />
Disposal<br />
electrical and electronic devices. . . . . 6<br />
DMZ . . . . . . . . . . . . . . . . . . . . . . . . 174<br />
DNS. . . . . . . . . . . . . . . . . . . . . . . . . 174<br />
DNS server<br />
alternative (Web <strong>co</strong>nfigurator) . . . 119<br />
preferred (handset). . . . . . . . . . . . 110<br />
preferred (Web <strong>co</strong>nfigurator). . . . . 119<br />
Do not disturb (messenger) . . . . . . . . 78<br />
Domain . . . . . . . . . . . . . . . . . . . . . . 123<br />
Domain name . . . . . . . . . . . . . . . . . 174<br />
Domain Name System . . . . . . . . . . . 174<br />
Draft message list (SMS). . . . . . . . . . . 53<br />
DSCP . . . . . . . . . . . . . . . . . . . . . . . . 174<br />
DSL . . . . . . . . . . . . . . . . . . . . . . . . . 174<br />
DSLAM . . . . . . . . . . . . . . . . . . . . . . 174<br />
DTMF (tone dialling) . . . . . . . . . . . . 112<br />
DTMF-reminder for VoIP . . . . . . . . . . 132<br />
Dynamic DNS. . . . . . . . . . . . . . . . . . 174<br />
Dynamic Host Configuration<br />
Proto<strong>co</strong>l . . . . . . . . . . . . . . . . . . 173<br />
Dynamic IP address . . . . . . . . . 118, 174<br />
DynDNS. . . . . . . . . . . . . . . . . . . . . . 174<br />
E<br />
Earpiece mode. . . . . . . . . . . . . . . . . . 30<br />
Earpiece volume . . . . . . . . . . . . . . . . 98<br />
Echo service<br />
<strong>Gigaset</strong>.net. . . . . . . . . . . . . . . . . . . 35<br />
E-mail<br />
ac<strong>co</strong>unt name . . . . . . . . . . . . . . . 141<br />
entering access data . . . . . . . . . . . 141<br />
in<strong>co</strong>ming e-mail server . . . . . . . . . 141<br />
list . . . . . . . . . . . . . . . . . . . . . . . . . 73<br />
messages whilst making a<br />
<strong>co</strong>nnection. . . . . . . . . . . . . . . . 74<br />
notification. . . . . . . . . . . . . . . . . . . 73<br />
registration name/password . . . . . 141<br />
settings (Web <strong>co</strong>nfig.). . . . . . . . . . 141<br />
187<br />
viewing the message header . . . . . 75<br />
viewing the sender's address . . . . . 75<br />
E-mail address, SMS to . . . . . . . . . . . 55<br />
Emergency numbers<br />
dialling . . . . . . . . . . . . . . . . . . . . . 28<br />
dialling plans for . . . . . . . . . . . . . 137<br />
when keypad lock is active . . . . . . . . 7<br />
End call key. . . . . . . . . . . . . . . . . . 1, 28<br />
Ending, call. . . . . . . . . . . . . . . . . . . . 28<br />
Enter flash . . . . . . . . . . . . . . . . . . . . . 1<br />
Enter pause . . . . . . . . . . . . . . . . . . . . 1<br />
Entering access data (e-mail) . . . . . . 141<br />
Entering user data. . . . . . . . . . . . . . . 18<br />
Error handling<br />
messenger. . . . . . . . . . . . . . . . . . . 85<br />
Error tone . . . . . . . . . . . . . . . . . . . . 100<br />
Ethernet network . . . . . . . . . . . . . . 175<br />
Example<br />
menu input . . . . . . . . . . . . . . . . . 158<br />
multiple line input . . . . . . . . . . . . 159<br />
Explicit Call Transfer . . . . . . . . . . . . 175<br />
External call<br />
forwarding to ans. mach. . . . . . . . . 69<br />
External <strong>co</strong>nsultation call<br />
fixed line network . . . . . . . . . . . . . 40<br />
VoIP . . . . . . . . . . . . . . . . . . . . . . . 42<br />
F<br />
Factory settings<br />
base station. . . . . . . . . . . . . . . . . 103<br />
Fast access<br />
answer machine . . . . . . . . . . . . . . 71<br />
directory entries . . . . . . . . . . . . . . 46<br />
network mailbox . . . . . . . . . . . . . . 86<br />
Fax (SMS) . . . . . . . . . . . . . . . . . . . . . 55<br />
Firewall . . . . . . . . . . . . . . . . . . . . . 175<br />
Firmware . . . . . . . . . . . . . . . . . . . . 175<br />
automatic update . . . . . . . . . . . . 106<br />
checking version . . . . . . . . . . . . . 153<br />
starting update (handset). . . . . . . 105<br />
Firmware update<br />
automatic . . . . . . . . . . . . . . . . . . 143<br />
defining server for update . . . . . . 142<br />
from local PC . . . . . . . . . . . . . . . . 143<br />
starting (Web <strong>co</strong>nfigurator) . . . . . 143<br />
Fixed line network<br />
activating/deactivating call waiting . 39<br />
call forwarding . . . . . . . . . . . . . . . 39<br />
<strong>VoIPon</strong> www.voipon.<strong>co</strong>.<strong>uk</strong> sales@voipon.<strong>co</strong>.<strong>uk</strong> Tel: +44 (0)1245 808195 Fax: +44 (0)1245 808299
<strong>co</strong>nference call . . . . . . . . . . . . . . . . 40<br />
<strong>co</strong>nnection name . . . . . . . . . . . . . 126<br />
external <strong>co</strong>nsultation call . . . . . . . . 40<br />
settings for calls . . . . . . . . . . . . . . . 40<br />
Fixed line network <strong>co</strong>nnection<br />
creating settings. . . . . . . . . . . . . . . 39<br />
line suffix . . . . . . . . . . . . . . . . . . . 121<br />
Flat rate. . . . . . . . . . . . . . . . . . . . . . 175<br />
Fragmentation of data packets . . . . . 175<br />
Free software, licences. . . . . . . . . . . 162<br />
Full duplex. . . . . . . . . . . . . . . . . . . . 175<br />
G<br />
G.711 µ law. . . . . . . . . . . . . . . . . . . 127<br />
G.711 a law . . . . . . . . . . . . . . . . . . . 127<br />
G.722 . . . . . . . . . . . . . . . . . . . . . . . 127<br />
G.726 . . . . . . . . . . . . . . . . . . . . . . . 127<br />
G.729 . . . . . . . . . . . . . . . . . . . . . . . 127<br />
Gateway . . . . . . . . . . . . . . . . . . . . . 176<br />
Gateway provider. . . . . . . . . . . . . . . 176<br />
<strong>Gigaset</strong>.net . . . . . . . . . . . . . . . . . . . . 35<br />
(de)activating the <strong>co</strong>nnection . . . . 127<br />
calling subscriber . . . . . . . . . . . 37, 38<br />
changing/deleting own name . . . . . 38<br />
directory . . . . . . . . . . . . . . . . . . . . 36<br />
echo service . . . . . . . . . . . . . . . . . . 35<br />
entering name . . . . . . . . . . . . . 18, 38<br />
Jabber server . . . . . . . . . . . . . . . . 140<br />
messaging . . . . . . . . . . . . . . . . . . 140<br />
searching for subscriber . . . . . . . . . 36<br />
<strong>Gigaset</strong>.Net directory<br />
specifying/editing own name . . . . . 38<br />
Global IP address . . . . . . . . . . . . . . . 176<br />
Global System for<br />
Mobile Communication . . . . . . . 176<br />
GNU Lesser General Public License . . 162<br />
Going online (messenger) . . . . . . . . . 77<br />
Group call . . . . . . . . . . . . . . . . . . . . . 91<br />
GSM . . . . . . . . . . . . . . . . . . . . . . . . 176<br />
H<br />
Handset<br />
activating/deactivating . . . . . . . . 1, 31<br />
activating/deactivating advisory<br />
tones . . . . . . . . . . . . . . . . . . . 100<br />
assigning a receive number. . . . . . 130<br />
assigning a send number . . . . . . . 130<br />
changing internal names. . . . . . . . . 90<br />
changing internal number. . . . . . . . 90<br />
changing name . . . . . . . . . . . . . . . 90<br />
Index<br />
checking service information . . . . 153<br />
<strong>co</strong>ntact with liquid . . . . . . . . . . . . 146<br />
de-registering . . . . . . . . . . . . . . . . 89<br />
display backlight . . . . . . . . . . . . . . 96<br />
display language . . . . . . . . . . . . . . 95<br />
earpiece volume . . . . . . . . . . . . . . 98<br />
handsfree volume . . . . . . . . . . . . . 98<br />
idle status . . . . . . . . . . . . . . . . . . . 33<br />
list . . . . . . . . . . . . . . . . . . . . . . . . 32<br />
locating. . . . . . . . . . . . . . . . . . . . . 89<br />
loudspeaker volume. . . . . . . . . . . . 32<br />
muting . . . . . . . . . . . . . . . . . . . . . 31<br />
operating . . . . . . . . . . . . . . . . . . . 31<br />
registering. . . . . . . . . . . . . . . . 13, 88<br />
restoring to factory settings . . . . . 102<br />
screen picture . . . . . . . . . . . . . . . . 96<br />
setting (individual). . . . . . . . . . . . . 95<br />
setting up . . . . . . . . . . . . . . . . . . . 10<br />
transferring a call. . . . . . . . . . . . . . 91<br />
using room monitor . . . . . . . . . . . . 93<br />
using several . . . . . . . . . . . . . . . . . 88<br />
Handset directory<br />
editing via PC. . . . . . . . . . . . . . . . 137<br />
Handset operating time<br />
in room monitor mode. . . . . . . . . . 93<br />
Handset reset . . . . . . . . . . . . . . . . . 102<br />
Handsfree<br />
activating/deactivating. . . . . . . . . . 30<br />
key . . . . . . . . . . . . . . . . . . . . . . . . . 1<br />
mode . . . . . . . . . . . . . . . . . . . . . . 30<br />
talking. . . . . . . . . . . . . . . . . . . . . . 30<br />
Hash key. . . . . . . . . . . . . . . . . . . . 1, 31<br />
Headset . . . . . . . . . . . . . . . . 1, 21, 176<br />
Hearing aids . . . . . . . . . . . . . . . . . . . . 6<br />
HTTP proxy . . . . . . . . . . . . . . . . . . . 176<br />
Hub . . . . . . . . . . . . . . . . . . . . . . . . 176<br />
I<br />
I<strong>co</strong>n<br />
alarm clock . . . . . . . . . . . . . . . . . 101<br />
answer machine . . . . . . . . . . . . . . 64<br />
battery . . . . . . . . . . . . . . . . . . . . . 12<br />
new message . . . . . . . . . . . . . . . . 67<br />
new messenger message . . . . . . . . 81<br />
new SMS . . . . . . . . . . . . . . . . . . . . 56<br />
ringer tone . . . . . . . . . . . . . . . . . 100<br />
ringer tone deactivated . . . . . . . . 100<br />
Idle status<br />
back to . . . . . . . . . . . . . . . . . . . . . 33<br />
display . . . . . . . . . . . . . . . . . . . . . . 1<br />
<strong>VoIPon</strong> www.voipon.<strong>co</strong>.<strong>uk</strong> sales@voipon.<strong>co</strong>.<strong>uk</strong> Tel: +44 (0)1245 808195 Fax: +44 (0)1245 808299<br />
188
Index<br />
IEEE. . . . . . . . . . . . . . . . . . . . . . . . . 177<br />
In<strong>co</strong>ming e-mail server (e-mail) . . . . 141<br />
In<strong>co</strong>ming message list<br />
opening (SMS) . . . . . . . . . . . . . . . . 56<br />
In<strong>co</strong>ming message list (e-mail) . . . . . . 73<br />
In<strong>co</strong>rrect input (<strong>co</strong>rrection). . . . . . . . . 34<br />
Info messages (messenger) . . . . . . . . 82<br />
Info services . . . . . . . . . . . . . . . . . . 142<br />
<strong>co</strong>nfiguring . . . . . . . . . . . . . . . . . 142<br />
Infrastructure network . . . . . . . . . . . 177<br />
Installing, base station . . . . . . . . . . . . 13<br />
Instant messaging . . . . . . . 76, 139, 177<br />
pre<strong>co</strong>nditions . . . . . . . . . . . . . . . . . 76<br />
Institute of Electrical and<br />
Electronics Engineers. . . . . . . . . 177<br />
Interface language<br />
handset . . . . . . . . . . . . . . . . . . . . . 95<br />
Interface language for<br />
Web <strong>co</strong>nfigurator . . . . . . . . . . . 114<br />
Internal call . . . . . . . . . . . . . . . . . . . . 91<br />
call waiting. . . . . . . . . . . . . . . . . . . 92<br />
Internal <strong>co</strong>nsultation call . . . . . . . 32, 92<br />
Internet . . . . . . . . . . . . . . . . . . . . . . 177<br />
access (Broadband). . . . . . . . . . . . 172<br />
no <strong>co</strong>nnection to . . . . . . . . . . . . . . 19<br />
proto<strong>co</strong>l . . . . . . . . . . . . . . . . . . . . 177<br />
service provider . . . . . . . . . . . . . . 177<br />
IP . . . . . . . . . . . . . . . . . . . . . . . . . . 177<br />
IP address . . . . . . . . . . . . . . . . . . . . 177<br />
assigning (handset) . . . . . . . . . . . 109<br />
assigning (Web <strong>co</strong>nfigurator) . . . . 118<br />
automatically obtaining one . 109, 118<br />
checking (handset) . . . . . . . . . . . . 109<br />
checking (Web <strong>co</strong>nfigurator) . . . . . 145<br />
dialling. . . . . . . . . . . . . . . . . . . . . . 27<br />
displaying on handset . . . . . . . . . . . . 2<br />
dynamic . . . . . . . . . . . . . . . . . . . . 174<br />
global . . . . . . . . . . . . . . . . . . . . . 176<br />
local. . . . . . . . . . . . . . . . . . . . . . . 178<br />
private . . . . . . . . . . . . . . . . . . . . . 179<br />
public. . . . . . . . . . . . . . . . . . . . . . 180<br />
static . . . . . . . . . . . . . . . . . . . . . . 181<br />
IP address type. . . . . . . . . . . . . 109, 118<br />
IP <strong>co</strong>nfiguration<br />
Web <strong>co</strong>nfigurator . . . . . . . . . . . . . 118<br />
IP <strong>co</strong>nfiguring<br />
handset . . . . . . . . . . . . . . . . . . . . 109<br />
IP pool range . . . . . . . . . . . . . . . . . . 177<br />
J<br />
Jabber ID (messenger). . . . . . . . . . . 140<br />
Jabber server (messenger). . . . . . . . 140<br />
Jabber server port (messenger) . . . . 140<br />
K<br />
Key 1 (fast access). . . . . . . . . . . . . 1, 71<br />
Key click . . . . . . . . . . . . . . . . . . . . . 100<br />
Keypad<br />
change <strong>co</strong>nfiguration. . . . . . . . . . . 97<br />
Keypad lock . . . . . . . . . . . . . . . . . 7, 31<br />
Keys<br />
assigning directory entry . . . . . 44, 46<br />
call-by-call key . . . . . . . . . . . . . . . . . 1<br />
cancel key . . . . . . . . . . . . . . . . . . . 33<br />
<strong>co</strong>ntrol key . . . . . . . . . . . . . . . . 1, 32<br />
display keys . . . . . . . . . . . . . . . . 1, 33<br />
end call key . . . . . . . . . . . . . 1, 28, 34<br />
fast access. . . . . . . . . . . . . . . . . 1, 71<br />
handsfree key . . . . . . . . . . . . . . . . . 1<br />
hash key . . . . . . . . . . . . . . . . . . 1, 31<br />
keypad lock . . . . . . . . . . . . . . . . . . 31<br />
message key . . . . . . . . . . . . . . . 1, 48<br />
on/off key . . . . . . . . . . . . . . . . . . . . 1<br />
paging key (base station) . . . . . . . . . 2<br />
quick dial. . . . . . . . . . . . . . . . . 44, 46<br />
recall key. . . . . . . . . . . . . . . . . . . . . 1<br />
star key . . . . . . . . . . . . . . . . . . 1, 100<br />
talk key . . . . . . . . . . . . . . . . . . . . . . 1<br />
L<br />
LAN . . . . . . . . . . . . . . . . . . . . . . . . 178<br />
Language<br />
display . . . . . . . . . . . . . . . . . . . . . 95<br />
handset. . . . . . . . . . . . . . . . . . . . . 95<br />
Web <strong>co</strong>nfigurator. . . . . . . . . . . . . 114<br />
Last number redial . . . . . . . . . . . . . . 47<br />
LGPL. . . . . . . . . . . . . . . . . . . . . . . . 162<br />
Licences, free software . . . . . . . . . . 162<br />
Line suffix<br />
dialling with . . . . . . . . . . . . . . . . . 27<br />
display (Web <strong>co</strong>nfigurator) . . . . . . 121<br />
Linking, see SMS<br />
Liquid. . . . . . . . . . . . . . . . . . . . . . . 146<br />
List<br />
answer machine list . . . . . . . . . . . . 50<br />
calls list . . . . . . . . . . . . . . . . . . . . . 49<br />
e-mail notifications . . . . . . . . . . . . 73<br />
189<br />
<strong>VoIPon</strong> www.voipon.<strong>co</strong>.<strong>uk</strong> sales@voipon.<strong>co</strong>.<strong>uk</strong> Tel: +44 (0)1245 808195 Fax: +44 (0)1245 808299
handsets . . . . . . . . . . . . . . . . . . . . 32<br />
last number redial list . . . . . . . . . . . 47<br />
missed calls . . . . . . . . . . . . . . . . . . 49<br />
Local Area Network . . . . . . . . . . . . . 178<br />
Local <strong>co</strong>mmunication ports . . . . . . . 133<br />
Local IP address . . . . . . . . . . . . . . . . 178<br />
Local network . . . . . . . . . . . . . . . . . 118<br />
Local SIP port. . . . . . . . . . . . . . . . . . 181<br />
Locate<br />
handset . . . . . . . . . . . . . . . . . . . . . 89<br />
Lock (keypad lock) . . . . . . . . . . . . . . . 31<br />
Login password<br />
messenger . . . . . . . . . . . . . . . . . . 140<br />
Lösch-Taste . . . . . . . . . . . . . . . . . . . . 33<br />
Lost <strong>co</strong>nnection<br />
messenger . . . . . . . . . . . . . . . . 78, 85<br />
Loudspeaker volume . . . . . . . . . . . . . 32<br />
M<br />
MAC address . . . . . . . . . . . . . . . . . . 178<br />
checking (handset) . . . . . . . . . . . . 110<br />
checking (Web <strong>co</strong>nfigurator) . . . . . 145<br />
Mailbox ID, see SMS<br />
Mailboxes, see SMS<br />
Main menu . . . . . . . . . . . . . . . . . 22, 34<br />
Mains adapter . . . . . . . . . . . . . . . . . . . 6<br />
Making calls<br />
accepting a call. . . . . . . . . . . . . . . . 29<br />
<strong>co</strong>st-effective calls . . . . . . . . . . . . . 51<br />
external (VoIP, fixed line network) . . 26<br />
internal . . . . . . . . . . . . . . . . . . . . . 91<br />
Maximum Receive Unit. . . . . . . . . . . 178<br />
Maximum Transmission Unit. . . . . . . 178<br />
Mbps. . . . . . . . . . . . . . . . . . . . . . . . 178<br />
Media Access Control . . . . . . . . . . . . 178<br />
Medical appliances. . . . . . . . . . . . . . . . 6<br />
Memory . . . . . . . . . . . . . . . . . . . . . . 46<br />
Menu<br />
end tone . . . . . . . . . . . . . . . . . . . 100<br />
going back one menu level . . . . 33, 34<br />
menu bar (Web <strong>co</strong>nfigurator) . . . . 115<br />
menu guidance . . . . . . . . . . . . . . . 34<br />
menu input . . . . . . . . . . . . . . . . . 158<br />
opening . . . . . . . . . . . . . . . . . . . . . 32<br />
phone overview . . . . . . . . . . . . . . . 22<br />
Web <strong>co</strong>nfigurator overview . . . . . . . 25<br />
Message . . . . . . . . . . . . . . . . . . . . . . 64<br />
deleting . . . . . . . . . . . . . . . . . . . . . 68<br />
deleting (messenger) . . . . . . . . . . . 83<br />
marking as "new" . . . . . . . . . . . . . . 68<br />
190<br />
<strong>VoIPon</strong> www.voipon.<strong>co</strong>.<strong>uk</strong> sales@voipon.<strong>co</strong>.<strong>uk</strong> Tel: +44 (0)1245 808195 Fax: +44 (0)1245 808299<br />
Index<br />
new message i<strong>co</strong>n . . . . . . . . . . . . . 67<br />
playing back . . . . . . . . . . . . . . . . . 67<br />
reading the subject (e-mail) . . . . . . 75<br />
receiving (messenger) . . . . . . . . . . 81<br />
receiving (SMS) . . . . . . . . . . . . . . . 56<br />
writing/sending (messenger) . . . . . 83<br />
writing/sending (SMS) . . . . . . . . . . 53<br />
Message (ans. mach.)<br />
list . . . . . . . . . . . . . . . . . . . . . . . . 50<br />
playback via remote operation . . . . 72<br />
playing . . . . . . . . . . . . . . . . . . . . . 50<br />
Message from the network mailbox . . 87<br />
Message key . . . . . . . . . . . . . . . . . . . . 1<br />
opening lists . . . . . . . . . . . . . . . . . 48<br />
Message list<br />
e-mail . . . . . . . . . . . . . . . . . . . . . . 73<br />
messenger. . . . . . . . . . . . . . . . . . . 82<br />
SMS . . . . . . . . . . . . . . . . . . . . . . . 56<br />
Messaging<br />
<strong>Gigaset</strong>.net . . . . . . . . . . . . . . . . . 140<br />
Messenger . . . . . . . . . . . . . . . . . . . . 76<br />
ac<strong>co</strong>unt. . . . . . . . . . . . . . . . . . . . 140<br />
calling buddy. . . . . . . . . . . . . . . . . 84<br />
change own status. . . . . . . . . . . . . 78<br />
entering access data . . . . . . . . . . 139<br />
error handling . . . . . . . . . . . . . . . . 85<br />
errors when sending . . . . . . . . . . . 85<br />
lost <strong>co</strong>nnection . . . . . . . . . . . . 78, 85<br />
message list. . . . . . . . . . . . . . . . . . 82<br />
priority . . . . . . . . . . . . . . . . . . . . 140<br />
resource name. . . . . . . . . . . . . . . 139<br />
Messenger message<br />
deleting. . . . . . . . . . . . . . . . . . . . . 83<br />
reading . . . . . . . . . . . . . . . . . . . . . 83<br />
receiving . . . . . . . . . . . . . . . . . . . . 81<br />
writing/sending . . . . . . . . . . . . . . . 83<br />
Messenger server . . . . . . . . . . . . . . . 76<br />
establishing a <strong>co</strong>nnection. . . . . . . . 77<br />
Microphone . . . . . . . . . . . . . . . . . . . . 1<br />
Million bits per se<strong>co</strong>nd . . . . . . . . . . 178<br />
Missed calls . . . . . . . . . . . . . . . . . . . 49<br />
MRU. . . . . . . . . . . . . . . . . . . . . . . . 178<br />
MTU . . . . . . . . . . . . . . . . . . . . . . . . 178<br />
Multiple line input. . . . . . . . . . . . . . 159<br />
Music on hold . . . . . . . . . . 31, 104, 178<br />
Muting<br />
handset. . . . . . . . . . . . . . . . . . . . . 31<br />
microphone. . . . . . . . . . . . . . . . . . 31
Index<br />
N<br />
Name<br />
changing name of the handset . . . . 90<br />
displayed (VoIP) . . . . . . . . . . . . . . 173<br />
fixed line network<br />
<strong>co</strong>nnection. . . . . . . . . . . 122, 126<br />
NAT. . . . . . . . . . . . . . . . . . . . . . . . . 178<br />
symmetric . . . . . . . . . . . . . . . . . . 182<br />
updating . . . . . . . . . . . . . . . . . . . 125<br />
Navigation area<br />
(Web <strong>co</strong>nfigurator) . . . . . . . . . . 116<br />
Network . . . . . . . . . . . . . . . . . . . . . 179<br />
Ethernet. . . . . . . . . . . . . . . . . . . . 175<br />
Network Address Translation . . . . . . 178<br />
Network area. . . . . . . . . . . . . . . . . . 124<br />
Network mailbox . . . . . . . . . . . . . . . . 86<br />
assigning key 1. . . . . . . . . . . . . . . . 86<br />
calling . . . . . . . . . . . . . . . . . . . . . . 87<br />
Network provider (numbers list) . . . . . 43<br />
Network services<br />
fixed line network. . . . . . . . . . . . . . 39<br />
settings for fixed line network<br />
calls. . . . . . . . . . . . . . . . . . 39, 40<br />
settings for VoIP calls . . . . . . . . 41, 42<br />
VoIP . . . . . . . . . . . . . . . . . . . . . . . . 41<br />
Notification<br />
in<strong>co</strong>ming e-mail . . . . . . . . . . . . . . . 73<br />
notification via SMS . . . . . . . . . . . . 58<br />
Number<br />
as destination for room monitor . . . 93<br />
<strong>co</strong>pying from an SMS . . . . . . . . . . . 58<br />
<strong>co</strong>pying from directory . . . . . . . . . . 47<br />
<strong>co</strong>pying to directory . . . . . . . . . . . . 46<br />
displaying caller's number (CLIP) . . . 29<br />
entering network mailbox . . . . . . . . 86<br />
entering with directory . . . . . . . . . . 47<br />
saving in the directory. . . . . . . . . . . 44<br />
Number assignment. . . . . . . . . . . . . 131<br />
Numbers list<br />
network provider . . . . . . . . . . . . . . 43<br />
O<br />
Offline (messenger) . . . . . . . . . . . 76, 78<br />
On/Off key. . . . . . . . . . . . . . . . . . . . . . 1<br />
Online (messenger) . . . . . . . . . . . 76, 78<br />
Online directory<br />
<strong>Gigaset</strong>.net. . . . . . . . . . . . . . . . . . . 36<br />
opening . . . . . . . . . . . . . . . . . . . . . 32<br />
191<br />
Opening online directory. . . . . . . . . . 32<br />
Opening the in<strong>co</strong>ming e-mail list. . . . 73<br />
Operation (preparing to use the<br />
phone). . . . . . . . . . . . . . . . . . . . 10<br />
Order in directory . . . . . . . . . . . . . . . 44<br />
Outbound proxy . . . . . . . . . . . 125, 179<br />
mode . . . . . . . . . . . . . . . . . . . . . 125<br />
port . . . . . . . . . . . . . . . . . . . . . . 125<br />
P<br />
PABX<br />
operating base station on PABX . . 111<br />
pauses . . . . . . . . . . . . . . . . . . . . 111<br />
setting dialling mode . . . . . . . . . . 111<br />
setting recall . . . . . . . . . . . . . . . . 111<br />
SMS . . . . . . . . . . . . . . . . . . . . . . . 62<br />
Pack <strong>co</strong>ntents . . . . . . . . . . . . . . . . . . 10<br />
Paging . . . . . . . . . . . . . . . . . 2, 89, 179<br />
Pauses (PABX). . . . . . . . . . . . . . . . . 111<br />
Personal Identification Number . . . . 179<br />
Personal provider data. . . . . . . . . . . 122<br />
Phone<br />
<strong>co</strong>nfiguring via PC . . . . . . . . . . . . 113<br />
menu overview . . . . . . . . . . . . . . . 22<br />
protecting . . . . . . . . . . . . . . . . . . 103<br />
setting (Web <strong>co</strong>nfigurator) . . . . . . 117<br />
setting base station<br />
(on handset) . . . . . . . . . . . . . 103<br />
setting up . . . . . . . . . . . . . . . . . . . 10<br />
Phone functions, overview . . . . . . . . 22<br />
Phone jack pin <strong>co</strong>nfiguration . . . . . . . 15<br />
Phone status (Web <strong>co</strong>nfigurator) . . . 145<br />
PIN . . . . . . . . . . . . . . . . . . . . . . . . . 179<br />
changing. . . . . . . . . . . . . . . . . . . 103<br />
Playback (ans. mach.) . . . . . . . . . . . . 50<br />
remote operation. . . . . . . . . . . . . . 72<br />
Playing back<br />
announcement (answer machine) . 66<br />
message (answer machine) . . . . . . 67<br />
POP3 server . . . . . . . . . . . . . . . . . . 141<br />
Port . . . . . . . . . . . . . . . . . . . . . . . . 179<br />
Port forwarding. . . . . . . . . . . . . . . . 179<br />
Port number . . . . . . . . . . . . . . . . . . 179<br />
Power <strong>co</strong>nsumption (base station). . 157<br />
Pre-dialling . . . . . . . . . . . . . . . . . . . 179<br />
Preferred DNS server<br />
entering (handset). . . . . . . . . . . . 110<br />
entering (Web <strong>co</strong>nfigurator). . . . . 119<br />
<strong>VoIPon</strong> www.voipon.<strong>co</strong>.<strong>uk</strong> sales@voipon.<strong>co</strong>.<strong>uk</strong> Tel: +44 (0)1245 808195 Fax: +44 (0)1245 808299
Priority (messenger). . . . . . . . . . . . . 140<br />
Private IP address . . . . . . . . . . . . . . . 179<br />
Problems and solutions . . . . . . . . . . 146<br />
Proto<strong>co</strong>l. . . . . . . . . . . . . . . . . . . . . . 180<br />
Proxy. . . . . . . . . . . . . . . . . . . . . . . . 180<br />
Proxy server. . . . . . . . . . . . . . . . . . . 180<br />
Proxy server address. . . . . . . . . . . . . 123<br />
Public IP address . . . . . . . . . . . . . . . 180<br />
Q<br />
Quality of Service. . . . . . . . . . . . . . . 180<br />
Questions and answers . . . . . . . . . . 146<br />
Quick dial . . . . . . . . . . . . . . . 43, 44, 46<br />
R<br />
RAM . . . . . . . . . . . . . . . . . . . . . . . . 180<br />
Random Access Memory . . . . . . . . . 180<br />
Read Only Memory . . . . . . . . . . . . . 181<br />
Reading message (messenger) . . . . . . 83<br />
Ready to chat (messenger) . . . . . . . . . 78<br />
Recall . . . . . . . . . . . . . . . . . . . . . . . . 91<br />
Recall key . . . . . . . . . . . . . . . . . . . . . . 1<br />
function for VoIP. . . . . . . . . . . . . . 133<br />
Receive number<br />
answer machine . . . . . . . . . . . . . . . 64<br />
assigning to answer machine . . . . 131<br />
assigning to handset. . . . . . . . . . . 130<br />
display on the handset . . . . . . . . . . 30<br />
Re<strong>co</strong>rding<br />
quality . . . . . . . . . . . . . . . . . . . . . . 70<br />
time. . . . . . . . . . . . . . . . . . . . . . . . 70<br />
two-way re<strong>co</strong>rding . . . . . . . . . . . . . 69<br />
Registering<br />
handset . . . . . . . . . . . . . . . . . . 13, 88<br />
with the Web <strong>co</strong>nfigurator . . . . . . 114<br />
Registrar . . . . . . . . . . . . . . . . . . . . . 180<br />
server . . . . . . . . . . . . . . . . . . . . . 123<br />
server port . . . . . . . . . . . . . . . . . . 123<br />
Registration name<br />
e-mail . . . . . . . . . . . . . . . . . . . . . 141<br />
VoIP ac<strong>co</strong>unt . . . . . . . . . 18, 108, 122<br />
Registration password<br />
e-mail . . . . . . . . . . . . . . . . . . . . . 141<br />
VoIP ac<strong>co</strong>unt . . . . . . . . . 18, 108, 122<br />
Registration refresh time . . . . . . . . . 123<br />
Remote access to Web <strong>co</strong>nfigurator . 119<br />
Remote management. . . . . . . . . . . . 119<br />
Remote operation . . . . . . . . . . . . . . . 71<br />
Resetting<br />
base station . . . . . . . . . . . . . . . . . 103<br />
Index<br />
handset. . . . . . . . . . . . . . . . . . . . 102<br />
Resource name (messenger) . . . . . . 139<br />
RFC 2833 (DTMF signalling). . . . . . . 132<br />
Ringback<br />
when busy . . . . . . . . . . . . . . . . . 180<br />
when the call is not answered . . . 180<br />
Ringer tone<br />
activating/deactivating. . . . . . . . . 100<br />
changing. . . . . . . . . . . . . . . . . . . . 99<br />
deactivating permanently. . . . . . . 100<br />
muting . . . . . . . . . . . . . . . . . . . . . 29<br />
setting melody. . . . . . . . . . . . . . . . 99<br />
setting volume . . . . . . . . . . . . . . . 99<br />
ROM. . . . . . . . . . . . . . . . . . . . . . . . 181<br />
Room monitor. . . . . . . . . . . . . . . . . . 93<br />
Router . . . . . . . . . . . . . . . . . . . . . . 181<br />
<strong>co</strong>nnecting base station . . . . . . . . . 16<br />
Routing . . . . . . . . . . . . . . . . . . . . . 181<br />
RTP. . . . . . . . . . . . . . . . . . . . . . . . . 181<br />
RTP port . . . . . . . . . . . . . . . . . 133, 181<br />
S<br />
Safety precautions . . . . . . . . . . . . . . . 6<br />
Screen picture. . . . . . . . . . . . . . . . . . 96<br />
Search for subscriber on <strong>Gigaset</strong>.net . 36<br />
Searching<br />
in directory . . . . . . . . . . . . . . . . . . 45<br />
Select entry (menu) . . . . . . . . . . . . 158<br />
Selecting announcement mode<br />
(ans. mach.). . . . . . . . . . . . . . . . 65<br />
Sender's address (e-mail). . . . . . . . . . 75<br />
Sensitivity (room monitor). . . . . . . . . 94<br />
Server . . . . . . . . . . . . . . . . . . . . . . 181<br />
Server for firmware update . . . . . . . 142<br />
Server port . . . . . . . . . . . . . . . . . . . 123<br />
Service . . . . . . . . . . . . . . . . . . . . . . 154<br />
Set<br />
date/time on handset. . . . . . . . . . . 12<br />
default <strong>co</strong>nnection. . . . . . . . . . . . 105<br />
ringer tone melody . . . . . . . . . . . . 99<br />
Setting<br />
base station. . . . . . . . . . . . . . . . . 103<br />
flash time (PABX) . . . . . . . . . . . . . 111<br />
handset. . . . . . . . . . . . . . . . . . . . . 95<br />
screen picture . . . . . . . . . . . . . . . . 96<br />
time zone . . . . . . . . . . . . . . . . . . 144<br />
Settings for VoIP telephony . . . . . . . 121<br />
Shortcut (digit <strong>co</strong>mbination) . . . . . . . 22<br />
Signal strength . . . . . . . . . . . . . . . . . . 1<br />
<strong>VoIPon</strong> www.voipon.<strong>co</strong>.<strong>uk</strong> sales@voipon.<strong>co</strong>.<strong>uk</strong> Tel: +44 (0)1245 808195 Fax: +44 (0)1245 808299<br />
192
Index<br />
Signal tone, see Advisory tones<br />
Simple Transversal of UDP over NAT . 182<br />
SIP . . . . . . . . . . . . . . . . . . . . . . . . . 181<br />
SIP address . . . . . . . . . . . . . . . . . . . 181<br />
SIP Info (DTMF signalling). . . . . . . . . 132<br />
SIP port . . . . . . . . . . . . . . . . . . 133, 181<br />
SIP provider . . . . . . . . . . . . . . . . . . . 181<br />
SIP proxy server . . . . . . . . . . . . . . . . 181<br />
Slumber mode (alarm clock). . . . . . . 102<br />
SMS . . . . . . . . . . . . . . . . . . . . . . . . . 52<br />
activating/deactivating function . . . 62<br />
changing mailbox . . . . . . . . . . . . . . 60<br />
deleting . . . . . . . . . . . . . . . . . . . . . 54<br />
draft message list . . . . . . . . . . . . . . 53<br />
forwarding . . . . . . . . . . . . . . . . . . . 57<br />
linked. . . . . . . . . . . . . . . . . . . . . . . 52<br />
mailbox ID . . . . . . . . . . . . . . . . . . . 59<br />
notification by SMS. . . . . . . . . . . . . 58<br />
notification number . . . . . . . . . . . . 58<br />
notification type . . . . . . . . . . . . . . . 59<br />
PIN protection. . . . . . . . . . . . . . . . . 60<br />
reading . . . . . . . . . . . . . . . . . . . . . 54<br />
receiving . . . . . . . . . . . . . . . . . . . . 56<br />
replying to and forwarding . . . . . . . 57<br />
rules . . . . . . . . . . . . . . . . . . . . . . . 52<br />
saving number . . . . . . . . . . . . . . . . 57<br />
self help with error messages . . . . . 63<br />
sending as a fax . . . . . . . . . . . . . . . 55<br />
sending to a personal mailbox. . . . . 61<br />
sending to an e-mail address . . . . . . 55<br />
setting up a mailbox . . . . . . . . . . . . 59<br />
to a PABX . . . . . . . . . . . . . . . . . . . . 62<br />
troubleshooting . . . . . . . . . . . . . . . 62<br />
writing/sending . . . . . . . . . . . . . . . 53<br />
SMS centre<br />
changing number . . . . . . . . . . . . . . 61<br />
setting . . . . . . . . . . . . . . . . . . . . . . 61<br />
Snooze (alarm clock) . . . . . . . . . . . . 102<br />
Sound, see Ringer tone<br />
Special characters . . . . . . . . . . . . . . 160<br />
Specifications . . . . . . . . . . . . . . . . . 156<br />
Standard gateway<br />
entering (handset) . . . . . . . . . . . . 110<br />
entering (Web <strong>co</strong>nfigurator) . . . . . 118<br />
Star key . . . . . . . . . . . . . . . . . . . . 1, 100<br />
Start <strong>co</strong>nnection assistant (menu) . . 107<br />
State of presence (messenger) . . . 76, 78<br />
setting own . . . . . . . . . . . . . . . . . . 78<br />
Static IP address . . . . . . . . . . . . 118, 181<br />
Status<br />
buddy . . . . . . . . . . . . . . . . . . . . . . 76<br />
changing own (messenger) . . . . . . 78<br />
VoIP <strong>co</strong>nnection. . . . . . . . . . . . . . 121<br />
Status <strong>co</strong>des<br />
activating display (Web <strong>co</strong>nfig.) . . 144<br />
Status <strong>co</strong>des (VoIP), table . . . . . . . . 150<br />
Structure of IP address. . . . . . . . . . . 177<br />
STUN . . . . . . . . . . . . . . . . . . . . . . . 182<br />
STUN port. . . . . . . . . . . . . . . . . . . . 124<br />
STUN refresh time. . . . . . . . . . . . . . 125<br />
STUN server . . . . . . . . . . . . . . . . . . 124<br />
Submenu . . . . . . . . . . . . . . . . . . . . . 34<br />
Subnet . . . . . . . . . . . . . . . . . . . . . . 182<br />
Subnet mask. . . . . . . . . . . . . . . . . . 182<br />
defining (handset) . . . . . . . . . . . . 109<br />
defining (Web <strong>co</strong>nfigurator) . . . . . 118<br />
Suffix . . . . . . . . . . . . . . . . . . . . . . . 121<br />
dialling with . . . . . . . . . . . . . . . . . 27<br />
Summer time<br />
changing automatically to . . . . . . 144<br />
Suppressing<br />
silence . . . . . . . . . . . . . . . . . . . . 129<br />
speech pauses (VoIP) . . . . . . . . . . 129<br />
Symmetric NAT . . . . . . . . . . . . . . . . 182<br />
Synchronisation with time server. . . 144<br />
System settings. . . . . . . . . . . . . . . . 103<br />
T<br />
Talk key . . . . . . . . . . . . . . . . . . . . . . . 1<br />
Tasten<br />
Lösch-Taste . . . . . . . . . . . . . . . . . . 33<br />
TCP. . . . . . . . . . . . . . . . . . . . . . . . . 182<br />
Telephone book file<br />
<strong>co</strong>ntent (vCard format) . . . . . . . . 139<br />
Telephone <strong>co</strong>nnection<br />
<strong>co</strong>nfiguring (Web <strong>co</strong>nfig.) . . . . . . 120<br />
Text information<br />
in idle display mode . . . . . . . . . . . 142<br />
Text message, see SMS<br />
Time<br />
set manually . . . . . . . . . . . . . . . . . 12<br />
transferring from time server . . . . 144<br />
Time server. . . . . . . . . . . . . . . . . . . 144<br />
TLS. . . . . . . . . . . . . . . . . . . . . . . . . 182<br />
Toggling . . . . . . . . . . . . . . . . . . . . . 182<br />
dis<strong>co</strong>nnecting call . . . . . . . . . . . . . 42<br />
VoIP . . . . . . . . . . . . . . . . . . . . . . . 42<br />
Touch tone dialling . . . . . . . . . . . . . 112<br />
193<br />
<strong>VoIPon</strong> www.voipon.<strong>co</strong>.<strong>uk</strong> sales@voipon.<strong>co</strong>.<strong>uk</strong> Tel: +44 (0)1245 808195 Fax: +44 (0)1245 808299
Transfer rate . . . . . . . . . . . . . . . . . . 182<br />
Transferring PC address book<br />
to directory . . . . . . . . . . . . . . . . 137<br />
Transmission Control Proto<strong>co</strong>l. . . . . . 182<br />
Transport Layer Security . . . . . . . . . . 182<br />
Transport proto<strong>co</strong>l . . . . . . . . . . . . . . 182<br />
Troubleshooting. . . . . . . . . . . . . . . . 146<br />
e-mail . . . . . . . . . . . . . . . . . . . . . . 74<br />
Internet <strong>co</strong>nnection . . . . . . . . . . . . 19<br />
SMS . . . . . . . . . . . . . . . . . . . . . . . . 62<br />
U<br />
UDP. . . . . . . . . . . . . . . . . . . . . . . . . 183<br />
Uniform Resource Identifier . . . . . . . 183<br />
Universal Resource Locator. . . . . . . . 183<br />
Unknown . . . . . . . . . . . . . . . . . . . . . 30<br />
Unknown caller . . . . . . . . . . . . . . . . . 30<br />
URI . . . . . . . . . . . . . . . . . . . . . . . . . 183<br />
URL . . . . . . . . . . . . . . . . . . . . . . . . . 183<br />
Use random ports . . . . . . . . . . . . . . 133<br />
<strong>User</strong> Datagram Proto<strong>co</strong>l . . . . . . . . . . 183<br />
<strong>User</strong> identification . . . . . . . . . . . . . . 183<br />
<strong>User</strong> name<br />
(VoIP-Ac<strong>co</strong>unt) . . . . . . 18, 108, 123<br />
V<br />
vCard format . . . . . . . . . . . . . . . . . . 139<br />
vcf file . . . . . . . . . . . . . . . . . . . . . . . 137<br />
Version check, automatic . . . . . . . . . 143<br />
VIP (directory entry). . . . . . . . . . . . . . 45<br />
Voice over Internet Proto<strong>co</strong>l . . . . . 9, 183<br />
Voice quality . . . . . . . . . . . . . . . . . . 127<br />
Voice quality and infrastructure . . . . 130<br />
VoIP . . . . . . . . . . . . . . . . . . . . . . . . 183<br />
accepting/rejecting call waiting . . . . 42<br />
activating/deactivating call waiting . 41<br />
activating/deactivating status<br />
message . . . . . . . . . . . . . . . . 110<br />
advantages. . . . . . . . . . . . . . . . . . . . 9<br />
assigning IP address . . . . . . . . . . . 109<br />
call forwarding . . . . . . . . . . . . . . . . 41<br />
<strong>co</strong>mpleting settings . . . . . . . . . . . . 19<br />
<strong>co</strong>nference call . . . . . . . . . . . . . . . . 42<br />
<strong>co</strong>nfiguring ac<strong>co</strong>unt . . . . . . . . . . . 121<br />
<strong>co</strong>nfiguring ac<strong>co</strong>unt (first) . . . . . . . 18<br />
<strong>co</strong>nnection name . . . . . . . . . . . . . 122<br />
external <strong>co</strong>nsultation call . . . . . . . . 42<br />
loading provider data . . . 17, 107, 126<br />
making call settings . . . . . . . . . . . . 41<br />
network services. . . . . . . . . . . . . . . 41<br />
194<br />
<strong>VoIPon</strong> www.voipon.<strong>co</strong>.<strong>uk</strong> sales@voipon.<strong>co</strong>.<strong>uk</strong> Tel: +44 (0)1245 808195 Fax: +44 (0)1245 808299<br />
Index<br />
phone number . . . . . . . . . . . 18, 122<br />
pre<strong>co</strong>nditions . . . . . . . . . . . . . . . . . 9<br />
settings (on handset) . . . . . . . . . . 106<br />
start <strong>co</strong>nnection assistant. . . . 16, 107<br />
status <strong>co</strong>des (table) . . . . . . . . . . . 150<br />
toggling . . . . . . . . . . . . . . . . . . . . 42<br />
VoIP <strong>co</strong>nnection<br />
activating/deactivating. . . . . 121, 126<br />
<strong>co</strong>nfiguring (handset) . . . . . . . . . 106<br />
<strong>co</strong>nfiguring (Web <strong>co</strong>nfigurator) . . 121<br />
line suffix . . . . . . . . . . . . . . . . . . 121<br />
name (Web <strong>co</strong>nfigurator) . . . . . . . 122<br />
name/provider (Web <strong>co</strong>nfig.) . . . . 120<br />
VoIP provider . . . . . . . . . . . . . . . . . 183<br />
downloading data . . . . . . . . . 17, 126<br />
selecting (Web <strong>co</strong>nfigurator) . . . . 122<br />
updating data automatically. . . . . 143<br />
VoIP status messages<br />
activating display<br />
(Web <strong>co</strong>nfigurator) . . . . . . . . 144<br />
status <strong>co</strong>des table . . . . . . . . . . . . 150<br />
VoIP telephony<br />
settings (Web <strong>co</strong>nfig.) . . . . . . . . . 121<br />
VoIP user data<br />
entering . . . . . . . . . . . . . . . . . . . . 18<br />
entering (handset). . . . . . . . . . . . 108<br />
entering (Web <strong>co</strong>nfigurator). . . . . 122<br />
Volume<br />
earpiece . . . . . . . . . . . . . . . . . . . . 98<br />
earpiece volume . . . . . . . . . . . . . . 98<br />
handset handsfree volume . . . . . . . 98<br />
handset language . . . . . . . . . . . . . 32<br />
loudspeaker. . . . . . . . . . . . . . . . . . 98<br />
ringer tone . . . . . . . . . . . . . . . . . . 99<br />
W<br />
WAN. . . . . . . . . . . . . . . . . . . . . . . . 183<br />
Warning tone, see Advisory tones<br />
Warranty . . . . . . . . . . . . . . . . . . . . 155<br />
Web <strong>co</strong>nfigurator . . . . . . . . . . . . . . 113<br />
activating VoIP <strong>co</strong>nnection . . . . . . 121<br />
alternative DNS server . . . . . . . . . 119<br />
assign receive number to<br />
ans. mach. . . . . . . . . . . . . . . 131<br />
assigning receive number. . . 130, 131<br />
assigning send number . . . . . . . . 130<br />
checking EEPROM version . . . . . . 145<br />
checking firmware version . . . . . . 145<br />
checking IP address . . . . . . . . . . . 145<br />
checking MAC address . . . . . . . . . 145
Index<br />
<strong>co</strong>nnecting with PC. . . . . . . . . . . . 113<br />
creating e-mail settings. . . . . . . . . 141<br />
deactivating VoIP <strong>co</strong>nnection . . . . 121<br />
defining IP address . . . . . . . . . . . . 118<br />
defining standard gateway . . . . . . 118<br />
de-registering. . . . . . . . . . . . . . . . 114<br />
directory transfer . . . . . . . . . . . . . 137<br />
DTMF-reminder for VoIP . . . . . . . . 132<br />
firmware update. . . . . . . . . . . . . . 142<br />
interface language . . . . . . . . . . . . 114<br />
IP <strong>co</strong>nfiguration . . . . . . . . . . . . . . 118<br />
local network . . . . . . . . . . . . . . . . 118<br />
menu . . . . . . . . . . . . . . . . . . . . . . . 25<br />
messenger access data . . . . . . . . . 139<br />
name of a VoIP <strong>co</strong>nnection . . . . . . 122<br />
name/provider of a <strong>co</strong>nnection . . . 120<br />
number assignment . . . . . . . . . . . 131<br />
opening Web page . . . . . . . . . . . . 117<br />
phone status . . . . . . . . . . . . . . . . 145<br />
preferred DNS server. . . . . . . . . . . 119<br />
remote access. . . . . . . . . . . . . . . . 119<br />
selecting IP address type . . . . . . . . 118<br />
setting phone . . . . . . . . . . . . . . . . 117<br />
specifying dialling plans . . . . . . . . 135<br />
status of a VoIP <strong>co</strong>nnection . . . . . . 121<br />
structure of the Web pages . . . . . . 115<br />
subnet mask. . . . . . . . . . . . . . . . . 118<br />
Web interface, see Web <strong>co</strong>nfigurator<br />
Web page (Web <strong>co</strong>nfigurator)<br />
opening . . . . . . . . . . . . . . . . . . . . 117<br />
structure . . . . . . . . . . . . . . . . . . . 115<br />
Web server, see Web <strong>co</strong>nfigurator<br />
Wide Area Network . . . . . . . . . . . . . 183<br />
Working area (Web <strong>co</strong>nfigurator) . . . 116<br />
Writing (SMS) . . . . . . . . . . . . . . . . . . 53<br />
Writing, editing text . . . . . . . . . . . . . 160<br />
195<br />
<strong>VoIPon</strong> www.voipon.<strong>co</strong>.<strong>uk</strong> sales@voipon.<strong>co</strong>.<strong>uk</strong> Tel: +44 (0)1245 808195 Fax: +44 (0)1245 808299
196<br />
<strong>VoIPon</strong> www.voipon.<strong>co</strong>.<strong>uk</strong> sales@voipon.<strong>co</strong>.<strong>uk</strong> Tel: +44 (0)1245 808195 Fax: +44 (0)1245 808299
<strong>VoIPon</strong> www.voipon.<strong>co</strong>.<strong>uk</strong> sales@voipon.<strong>co</strong>.<strong>uk</strong> Tel: +44 (0)1245 808195 Fax: +44 (0)1245 808299<br />
197