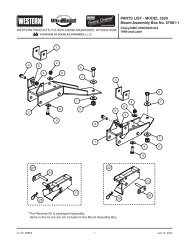
II PRO PLUS Snowplow #64750/64999/66901/66974/66980
II PRO PLUS Snowplow #64750/64999/66901/66974/66980
II PRO PLUS Snowplow #64750/64999/66901/66974/66980

You also want an ePaper? Increase the reach of your titles
YUMPU automatically turns print PDFs into web optimized ePapers that Google loves.
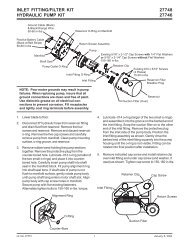
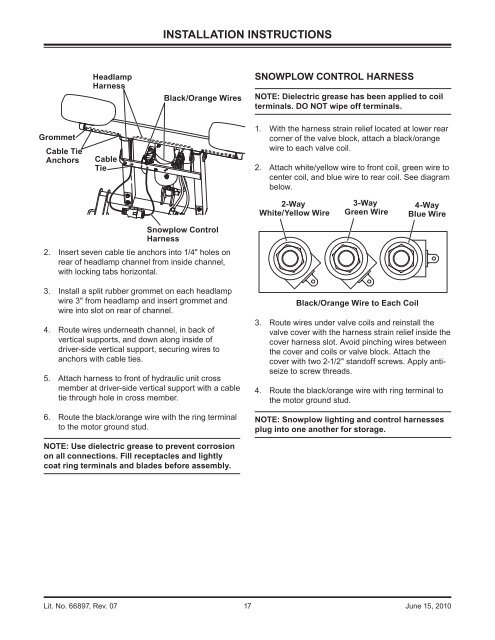
INSTALLATION INSTRUCTIONSHeadlampHarnessBlack/Orange WiresSNOWPLOW CONTROL HARNESSNOTE: Dielectric grease has been applied to coilterminals. DO NOT wipe off terminals.GrommetCable TieAnchorsCableTie1. With the harness strain relief located at lower rearcorner of the valve block, attach a black/orangewire to each valve coil.2. Attach white/yellow wire to front coil, green wire tocenter coil, and blue wire to rear coil. See diagrambelow.2-WayWhite/Yellow Wire3-WayGreen Wire4-WayBlue Wire<strong>Snowplow</strong> ControlHarness2. Insert seven cable tie anchors into 1/4" holes onrear of headlamp channel from inside channel,with locking tabs horizontal.3. Install a split rubber grommet on each headlampwire 3" from headlamp and insert grommet andwire into slot on rear of channel.4. Route wires underneath channel, in back ofvertical supports, and down along inside ofdriver-side vertical support, securing wires toanchors with cable ties.5. Attach harness to front of hydraulic unit crossmember at driver-side vertical support with a cabletie through hole in cross member.6. Route the black/orange wire with the ring terminalto the motor ground stud.Black/Orange Wire to Each Coil3. Route wires under valve coils and reinstall thevalve cover with the harness strain relief inside thecover harness slot. Avoid pinching wires betweenthe cover and coils or valve block. Attach thecover with two 2-1/2" standoff screws. Apply antiseizeto screw threads.4. Route the black/orange wire with ring terminal tothe motor ground stud.NOTE: <strong>Snowplow</strong> lighting and control harnessesplug into one another for storage.NOTE: Use dielectric grease to prevent corrosionon all connections. Fill receptacles and lightlycoat ring terminals and blades before assembly.Lit. No. 66897, Rev. 07 17 June 15, 2010