Burnham V8 Series Instructions.pdf - Heating Help
Burnham V8 Series Instructions.pdf - Heating Help
Burnham V8 Series Instructions.pdf - Heating Help
Create successful ePaper yourself
Turn your PDF publications into a flip-book with our unique Google optimized e-Paper software.
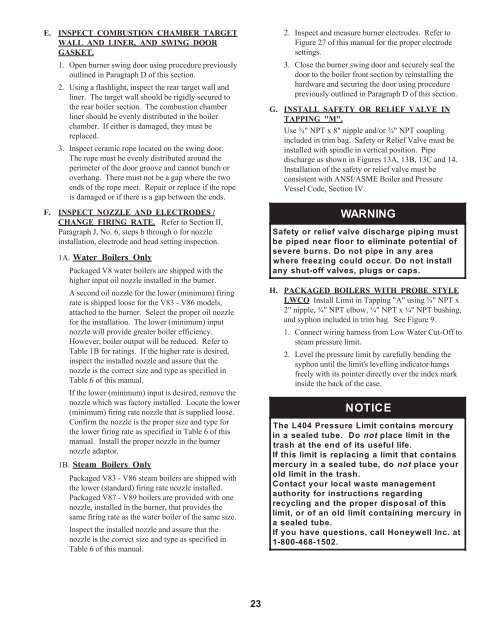
E. INSPECT COMBUSTION CHAMBER TARGETWALL AND LINER, AND SWING DOORGASKET.1. Open burner swing door using procedure previouslyoutlined in Paragraph D of this section.2. Using a flashlight, inspect the rear target wall andliner. The target wall should be rigidly secured tothe rear boiler section. The combustion chamberliner should be evenly distributed in the boilerchamber. If either is damaged, they must bereplaced.3. Inspect ceramic rope located on the swing door.The rope must be evenly distributed around theperimeter of the door groove and cannot bunch oroverhang. There must not be a gap where the twoends of the rope meet. Repair or replace if the ropeis damaged or if there is a gap between the ends.F. INSPECT NOZZLE AND ELECTRODES /CHANGE FIRING RATE. Refer to Section II,Paragraph J, No. 6, steps b through o for nozzleinstallation, electrode and head setting inspection.1A. Water Boilers OnlyPackaged <strong>V8</strong> water boilers are shipped with thehigher input oil nozzle installed in the burner.A second oil nozzle for the lower (minimum) firingrate is shipped loose for the <strong>V8</strong>3 - <strong>V8</strong>6 models,attached to the burner. Select the proper oil nozzlefor the installation. The lower (minimum) inputnozzle will provide greater boiler efficiency.However, boiler output will be reduced. Refer toTable 1B for ratings. If the higher rate is desired,inspect the installed nozzle and assure that thenozzle is the correct size and type as specified inTable 6 of this manual.If the lower (minimum) input is desired, remove thenozzle which was factory installed. Locate the lower(minimum) firing rate nozzle that is supplied loose.Confirm the nozzle is the proper size and type forthe lower firing rate as specified in Table 6 of thismanual. Install the proper nozzle in the burnernozzle adaptor.1B. Steam Boilers OnlyPackaged <strong>V8</strong>3 - <strong>V8</strong>6 steam boilers are shipped withthe lower (standard) firing rate nozzle installed.Packaged <strong>V8</strong>7 - <strong>V8</strong>9 boilers are provided with onenozzle, installed in the burner, that provides thesame firing rate as the water boiler of the same size.Inspect the installed nozzle and assure that thenozzle is the correct size and type as specified inTable 6 of this manual.2. Inspect and measure burner electrodes. Refer toFigure 27 of this manual for the proper electrodesettings.3. Close the burner swing door and securely seal thedoor to the boiler front section by reinstalling thehardware and securing the door using procedurepreviously outlined in Paragraph D of this section.G. INSTALL SAFETY OR RELIEF VALVE INTAPPING "M".Use ¾" NPT x 8" nipple and/or ¾" NPT couplingincluded in trim bag. Safety or Relief Valve must beinstalled with spindle in vertical position. Pipedischarge as shown in Figures 13A, 13B, 13C and 14.Installation of the safety or relief valve must beconsistent with ANSI/ASME Boiler and PressureVessel Code, Section IV.WARNINGSafety or relief valve discharge piping mustbe piped near floor to eliminate potential ofsevere burns. Do not pipe in any areawhere freezing could occur. Do not installany shut-off valves, plugs or caps.H. PACKAGED BOILERS WITH PROBE STYLELWCO Install Limit in Tapping "A" using ¾" NPT x2" nipple, ¾" NPT elbow, ¾" NPT x ¼" NPT bushing,and syphon included in trim bag. See Figure 9.1. Connect wiring harness from Low Water Cut-Off tosteam pressure limit.2. Level the pressure limit by carefully bending thesyphon until the limit's levelling indicator hangsfreely with its pointer directly over the index markinside the back of the case.NOTICEThe L404 Pressure Limit contains mercuryina sealed tube. Do notplace limit in thetrash at the end of its useful life.If this limit is replacing a limit that containsmercuryin a sealed tube, do notplace yourold limit in the trash.Contact your local waste managementauthority for instructions regardingrecycling and the proper disposal of thislimit, or of an old limit containing mercury ina sealed tube.If you have questions, call Honeywell Inc. at1-800-468-1502.23


