2. installation procedure for optional equipment - toshiba tec europe
2. installation procedure for optional equipment - toshiba tec europe
2. installation procedure for optional equipment - toshiba tec europe
- No tags were found...

You also want an ePaper? Increase the reach of your titles
YUMPU automatically turns print PDFs into web optimized ePapers that Google loves.
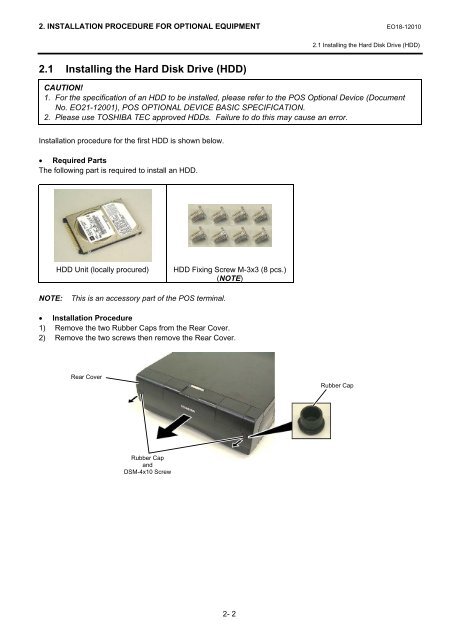
<strong>2.</strong> INSTALLATION PROCEDURE FOR OPTIONAL EQUIPMENT EO18-12010<strong>2.</strong>1 Installing the Hard Disk Drive (HDD)<strong>2.</strong>1 Installing the Hard Disk Drive (HDD)CAUTION!1. For the specification of an HDD to be installed, please refer to the POS Optional Device (DocumentNo. EO21-12001), POS OPTIONAL DEVICE BASIC SPECIFICATION.<strong>2.</strong> Please use TOSHIBA TEC approved HDDs. Failure to do this may cause an error.Installation <strong>procedure</strong> <strong>for</strong> the first HDD is shown below.• Required PartsThe following part is required to install an HDD.HDD Unit (locally procured)HDD Fixing Screw M-3x3 (8 pcs.)(NOTE)NOTE:This is an accessory part of the POS terminal.• Installation Procedure1) Remove the two Rubber Caps from the Rear Cover.2) Remove the two screws then remove the Rear Cover.Rear CoverRubber CapRubber CapandDSM-4x10 Screw2- 2