NCR USB Printer Setup in OPOS (RSM)
NCR USB Printer Setup in OPOS (RSM)
NCR USB Printer Setup in OPOS (RSM)
- No tags were found...

You also want an ePaper? Increase the reach of your titles
YUMPU automatically turns print PDFs into web optimized ePapers that Google loves.
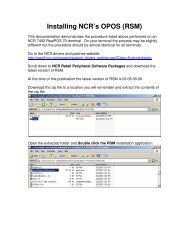
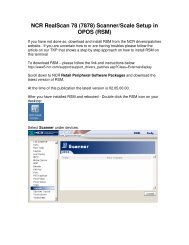
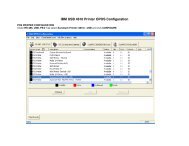
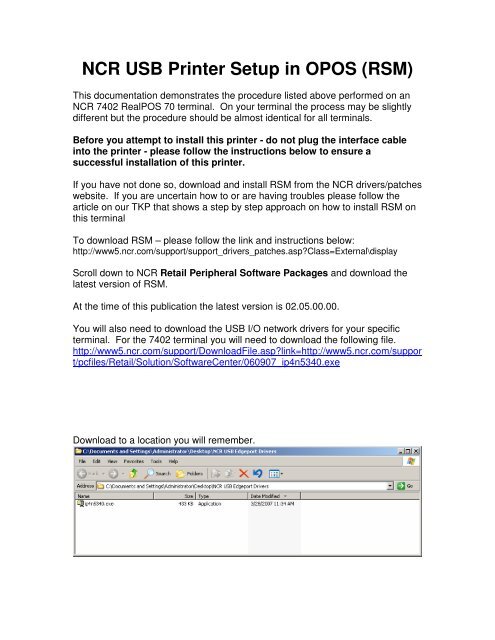
<strong>NCR</strong> <strong>USB</strong> <strong>Pr<strong>in</strong>ter</strong> <strong>Setup</strong> <strong>in</strong> <strong>OPOS</strong> (<strong>RSM</strong>)This documentation demonstrates the procedure listed above performed on an<strong>NCR</strong> 7402 RealPOS 70 term<strong>in</strong>al. On your term<strong>in</strong>al the process may be slightlydifferent but the procedure should be almost identical for all term<strong>in</strong>als.Before you attempt to <strong>in</strong>stall this pr<strong>in</strong>ter - do not plug the <strong>in</strong>terface cable<strong>in</strong>to the pr<strong>in</strong>ter - please follow the <strong>in</strong>structions below to ensure asuccessful <strong>in</strong>stallation of this pr<strong>in</strong>ter.If you have not done so, download and <strong>in</strong>stall <strong>RSM</strong> from the <strong>NCR</strong> drivers/patcheswebsite. If you are uncerta<strong>in</strong> how to or are hav<strong>in</strong>g troubles please follow thearticle on our TKP that shows a step by step approach on how to <strong>in</strong>stall <strong>RSM</strong> onthis term<strong>in</strong>alTo download <strong>RSM</strong> – please follow the l<strong>in</strong>k and <strong>in</strong>structions below:http://www5.ncr.com/support/support_drivers_patches.asp?Class=External\displayScroll down to <strong>NCR</strong> Retail Peripheral Software Packages and download thelatest version of <strong>RSM</strong>.At the time of this publication the latest version is 02.05.00.00.You will also need to download the <strong>USB</strong> I/O network drivers for your specificterm<strong>in</strong>al. For the 7402 term<strong>in</strong>al you will need to download the follow<strong>in</strong>g file.http://www5.ncr.com/support/DownloadFile.asp?l<strong>in</strong>k=http://www5.ncr.com/support/pcfiles/Retail/Solution/SoftwareCenter/060907_ip4n5340.exeDownload to a location you will remember.
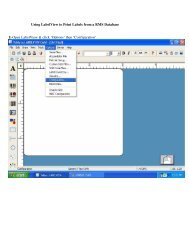
Double click the exe. Click RUN.Click OK.Do not extract the file to the TEMP directory - extract it to the same location yousaved the driver to so you will know where the files are for future use.Enter <strong>in</strong> the location you want to extract to and click UNZIP.
Click OK.Click CLOSE.In the folder you extracted the files to double click the ionetwrk.cab file
Select all files, right click, and click EXTRACT:Extract the files to the same location you extracted the orig<strong>in</strong>al files from the exeto. Click EXTRACT
Double click edgeport.exeThe Edgeport application will load.
Plug <strong>in</strong> your pr<strong>in</strong>ter. The found new hardware wizard will pop up.Click NO, NOT THIS TIME and click NEXTClick INSTALL FROM A LIST OR SPECIFIED LOCATION and click NEXT
Browse to the location where you extracted the exe and cab files and clickNEXT:The new hardware wizard will <strong>in</strong>stall your pr<strong>in</strong>ter
Click FINISH to close the new hardware wizardAnother found new hardware wizard will open to <strong>in</strong>stall the virtual com port yourpr<strong>in</strong>ter will communicate over. Click NO, NOT THIS TIME and click NEXT
Click INSTALL FROM A LIST OR SPECIFIED LOCATION and click NEXTClick BROWSE, select the location you extracted the exe and cab files toand click NEXT
Click FINISHIn the EDGEPORT application you will now see your device listed:
Click the plus sign (+) beside the pr<strong>in</strong>ter name to see what virtual com portthis device is on. Remember that com port as it will be needed when you setthe pr<strong>in</strong>ter up <strong>in</strong> <strong>RSM</strong>. Click OK to close the applicationDouble click the <strong>RSM</strong> icon on your desktop:Select POS <strong>Pr<strong>in</strong>ter</strong> under devices:
Change profile name to <strong>NCR</strong>POS<strong>Pr<strong>in</strong>ter</strong>.7197 or which ever model pr<strong>in</strong>ter youare <strong>in</strong>stall<strong>in</strong>g and click OKIf needed change the Com Port and port sett<strong>in</strong>gs to match that of the pr<strong>in</strong>ter’scom port <strong>in</strong> the edgeport.exe application and click SAVE.
Click Diagnostics, select Local Attended and select OKSelect a test to perform and click RUN TEST:The status of the test will be displayed. Click OK.
Click DONE:Click OK:Your Serial pr<strong>in</strong>ter is now set up for <strong>OPOS</strong>.Your device name is <strong>NCR</strong>OposSO.POS<strong>Pr<strong>in</strong>ter</strong>