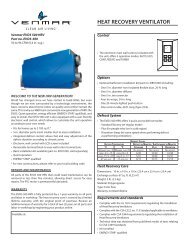
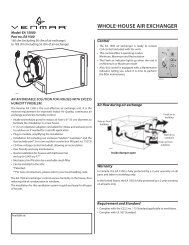
part nos 45720 and 45725 - Venmar
part nos 45720 and 45725 - Venmar
part nos 45720 and 45725 - Venmar

Create successful ePaper yourself
Turn your PDF publications into a flip-book with our unique Google optimized e-Paper software.
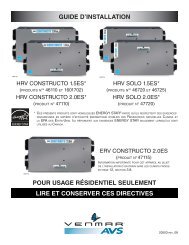
7. Installation (cont’d)7.4 INSTALLING THE DUCTWORK AND REGISTERS! WARNINGNever install a stale air exhaust register in a room where there is a combustion device, such as agas furnace, a gas water heater or a fireplace.CAUTIONThe ductwork is intended to be installed in compliance with all local <strong>and</strong> national codes that are applicable.7.4.1 Fully Ducted System (as illustrated in Section 6.1)Stale air exhaust ductwork:• Install registers in areas where contaminants are produced: Kitchen, bathrooms, laundry room, etc.• Install registers 6 to 12 inches (152 to 305 mm) from the ceiling on an interior wall OR install them inthe ceiling.• Install the kitchen register at least 4 feet (1.2 m) from the range.• If possible, measure the velocity of the air flowing through the registers. If the velocity is higherthan 400 ft/min. (122 m/min), then the register type is too small. Replace with a larger one.Fresh air distribution ductwork:• Install registers in bedrooms, dining room, living room <strong>and</strong> basement.• Install registers either in the ceiling or high on the walls with air flow directed towards the ceiling.(The cooler air will then cross the upper <strong>part</strong> of the room, <strong>and</strong> mix with room air before descending tooccupant level.)• If a register must be floor installed, direct the air flow up the wall.7.4.2 Exhaust Ducted System (Source Point Ventilation) (as illustrated in Section 6.2)Stale air exhaust ductwork: (same as for Fully Ducted System, described on point 7.4.1)Fresh air distribution:! WARNINGWhen performing duct connection to the furnace, installation must be done in accordance withall applicable codes <strong>and</strong> st<strong>and</strong>ards. Please refer to your local building code.CAUTIONWhen performing duct connection to the furnace supply duct, this duct must be sized to support theadditional airflow produced by the ERV/HRV. Also, use a metal duct. It is recommended that theERV/HRV is running when the furnace is in operation in order to prevent backdrafting inside ERV/HRV.There are two methods for connecting the unit to the furnace:Method 1: Supply side connection• Cut an opening into the furnace supply duct at least18 inches (0.5 m) from the furnace.• Connect this opening to the fresh air distribution port of theHRV/ERV (use metal duct, see figure 9).• Make sure that the HRV/ERV duct forms an elbow inside thefurnace ductwork.• If desired, interlock (synchronize) the furnace blower operationwith the HRV/ERV operation. (See Section 9.3).Metal ductMinimum18” (0.5 m)Method 2: Return side connection• Cut an opening into the furnace return duct not less than10 feet (3.1m) from the furnace (A+B).• Connect this opening to the fresh air distribution port of theHRV/ERV (see figure 10).NOTE: For Method 2, it is not essential that the furnaceblower runs when the unit is in operation, but werecommend it. If desired, synchronize the furnaceblower operation with the HRV/ERV operation.(See Section 9.3).13VD0172VD0108figure 9AA+B = not lessthan 10’ (3.1 m)figure 10B