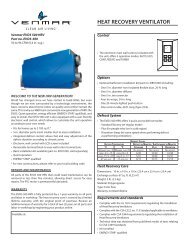
part nos 45720 and 45725 - Venmar
part nos 45720 and 45725 - Venmar
part nos 45720 and 45725 - Venmar

Create successful ePaper yourself
Turn your PDF publications into a flip-book with our unique Google optimized e-Paper software.
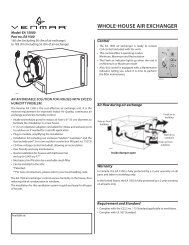
7. Installation (cont’d)7.5 CONNECTING THE DUCTS TO THE UNITInsulated flexible ductUse the following procedure for connecting the insulated flexible duct to the ports on the unit (exhaust to outside <strong>and</strong>fresh air from outside).a) Pull back the insulation to expose the flexible duct.b) Connect the interior flexible duct to the port using a duct tie.c) Carefully seal the connection with duct tape.d) Pull the insulation over the joint <strong>and</strong> tuck it between the inner <strong>and</strong> outer rings of the double collar.e) Pull the vapor barrier over the insulation <strong>and</strong> over the outer ring of the double collar.f) Apply duct tape to the joint making an airtight seal. Avoid compressing the insulation when you pull the tape tightlyaround the joint. Compressed insulation loses its R value <strong>and</strong> causes water dripping due to condensation on theexterior surface of the duct.CAUTIONMake sure that the vapor barrier on the insulated ducts does not tear during installation to avoidcondensation within the duct.a) b) c) d), e) f)VJ0001VJ0002VJ0003 VJ0004 VJ0005Rigid ductUse duct tape to connect the rigid ducts to the ports.CAUTIONDo not use screws to connect rigid ducts to the ports.Make sure that the 2 balancing dampers are left in a fully open position before connecting the ducts to these ports(fresh air distribution port <strong>and</strong> stale air exhaust port as shown on figure 13).VJ0007figure 1315