Quick Solutions Packet - Notes/Domino Release Notes - Ortho ...
Quick Solutions Packet - Notes/Domino Release Notes - Ortho ...
Quick Solutions Packet - Notes/Domino Release Notes - Ortho ...
- No tags were found...

You also want an ePaper? Increase the reach of your titles
YUMPU automatically turns print PDFs into web optimized ePapers that Google loves.
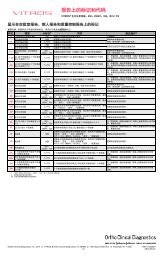
INTERRUPTED LIQUID FLOW ERROR ASPM255AUTOVUE ® INNOVA/ULTRA QUICK SOLUTION NO. 1OVERVIEW:ESTIMATED TIME:The pressure in the tanks is continuously monitored during aspiration of the saline anddistilled water solutions. If a leak or an air intake occurs during aspiration the machine willsense a difference in pressure, which will generate error code ASPM255.15 minutesDetermine which line is causing the error:1. To determine which line is causing theerror, perform 5 rinses with distilled waterand 5 rinses with saline as follows:Select Maintenance.Select Flush.Select Execute.Select the Flush setup button on theright to choose saline or distilled waterand to specify the number of cycles.Select OK.Select Continue.Note: This is not possible if the error codeappears during initialisation.If the error code appears on the saline ordistilled water line only, go tostep 2.If the error refers to only one fluid line, perform steps 2 through 8 on that line.If the error refers to both fluid lines, perform steps 2 through 8 on both lines, and then perform theremaining steps.2. Disconnect the two fluid Connectors fromthe line (distilled water or saline) showingthe error on the left side of the machine.Make sure the male and femaleConnectors are not broken.Check that the Tubing is not pinched orpierced.Page 1 of 4ORTHO AutoVue ® , ORTHO AutoVue ® Innova, and ORTHO AutoVue ® Ultra are trademarks of <strong>Ortho</strong>-Clinical Diagnostics Inc.This document is a troubleshooting aid only.Refer to the appropriate ORTHO AutoVue ® user documentation for more information.2008-11-15 J33039_EN
INTERRUPTED LIQUID FLOW ERROR ASPM2553. Remove: The straight Tube from the SolutionTank. The White Block from the Tube.AUTOVUE ® INNOVA/ULTRA QUICK SOLUTION NO. 14. Press the Check Valve of the yellow or redConnector (depending on the line) andshake the Tube to remove all traces ofliquid.5. Replace the White Block on the Tube.White Block6. Reconnect the Connectors, matching thecolors.7. Replace the Tube in the Solution Tank.8. Perform 5 rinses on the line.9. Select Shutdown and turn off the analyser.Note: It is not necessary to turn off thecomputer10. Make sure that the Pipette Tip is notobstructed by completing the followingsteps: Place the Probe over the Wash Station.Remove the right Connector from theValve.Move the Connector up.If no liquid flows from the Pipette,replace it.LeftConnectorRightConnectorPage 2 of 4ORTHO AutoVue ® , ORTHO AutoVue ® Innova, and ORTHO AutoVue ® Ultra are trademarks of <strong>Ortho</strong>-Clinical Diagnostics Inc.This document is a troubleshooting aid only.Refer to the appropriate ORTHO AutoVue ® user documentation for more information.2008-11-15 J33039_EN
INTERRUPTED LIQUID FLOW ERROR ASPM25511. Check for leaks at the Syringe and theValve level (crystal or oxidation). If there is a leak:o Tighten the Clamp on the leftConnector.AUTOVUE ® INNOVA/ULTRA QUICK SOLUTION NO. 1o Tighten the upper part of theSyringe.o Replace the Syringe on the lowerpart of the Syringe.Upper part ofthe SyringeLower part ofthe Syringe12. When the steps above are completed: Close all the doors. Turn on the analyser. Double-click on the AutoVue icon. Log in to initialise the system. If an error code is displayed, contactthe OCD Customer Technical SupportCenter.For more information, contact the OCD Customer Technical Support Center.Page 3 of 4ORTHO AutoVue ® , ORTHO AutoVue ® Innova, and ORTHO AutoVue ® Ultra are trademarks of <strong>Ortho</strong>-Clinical Diagnostics Inc.This document is a troubleshooting aid only.Refer to the appropriate ORTHO AutoVue ® user documentation for more information.2008-11-15 J33039_EN
INTERRUPTED LIQUID FLOW ERROR ASPM255AUTOVUE ® INNOVA/ULTRA QUICK SOLUTION NO. 1Page 4 of 4ORTHO AutoVue ® , ORTHO AutoVue ® Innova, and ORTHO AutoVue ® Ultra are trademarks of <strong>Ortho</strong>-Clinical Diagnostics Inc.This document is a troubleshooting aid only.Refer to the appropriate ORTHO AutoVue ® user documentation for more information.2008-11-15 J33039_EN
REPLACE THE AIR FILTERAUTOVUE ® INNOVA/ULTRA QUICK SOLUTION NO. 25. Place the Grid back on the frame. If necessary, replace the four (4) Screws.6. Press on the four corners of the Grid toensure it is correctly set in place.7. Turn on the analyzer.For more information, contact the OCD Customer Technical Support Center.Page 2 of 2ORTHO AutoVue ® , ORTHO AutoVue ® Innova, and ORTHO AutoVue ® Ultra are trademarks of <strong>Ortho</strong>-Clinical Diagnostics Inc.This document is a troubleshooting aid only.Refer to the appropriate ORTHO AutoVue ® user documentation for more information.2008-11-15 J33039_EN
DEFRAGMENT THE HARD DRIVEAUTOVUE ® INNOVA/ULTRA QUICK SOLUTION NO. 33. On the Disk Defragmenter window, makesure the C: drive is highlighted and selectAnalyze.The Disk Defragmenter utility performs ananalysis of your hard drive. When theanalysis is complete, the Disk Defragmenterwill either recommend that you defragmentyour hard drive, or that you postpone thedefragment process.4. If the recommendation is to defragmentyour hard drive, click Defragment.Page 2 of 4ORTHO AutoVue ® , ORTHO AutoVue ® Innova, and ORTHO AutoVue ® Ultra are trademarks of <strong>Ortho</strong>-Clinical Diagnostics Inc.This document is a troubleshooting aid only.Refer to the appropriate ORTHO AutoVue ® user documentation for more information.2008-11-15 J33039_EN
DEFRAGMENT THE HARD DRIVEAUTOVUE ® INNOVA/ULTRA QUICK SOLUTION NO. 35. The Disk Defragmenter window displaysthe progress of the defragmentationprocess.Note: The time required fordefragmentation will vary depending on thesize of the disk, the amount of data, andsystem resources.6. When the process is complete, theDefragmentation Complete window willdisplay.To view the defragmentation report,select View Report.To close the window, select Close.7. Double-click on the AutoVue®Innova/Ultra icon to launch theapplication.8. Enter the password to initialise theanalyser.For more information, contact the OCD Customer Technical Support Center.Page 3 of 4ORTHO AutoVue ® , ORTHO AutoVue ® Innova, and ORTHO AutoVue ® Ultra are trademarks of <strong>Ortho</strong>-Clinical Diagnostics Inc.This document is a troubleshooting aid only.Refer to the appropriate ORTHO AutoVue ® user documentation for more information.2008-11-15 J33039_EN
DEFRAGMENT THE HARD DRIVEAUTOVUE ® INNOVA/ULTRA QUICK SOLUTION NO. 3Page 4 of 4ORTHO AutoVue ® , ORTHO AutoVue ® Innova, and ORTHO AutoVue ® Ultra are trademarks of <strong>Ortho</strong>-Clinical Diagnostics Inc.This document is a troubleshooting aid only.Refer to the appropriate ORTHO AutoVue ® user documentation for more information.2008-11-15 J33039_EN
FORMAT A DVDAUTOVUE ® INNOVA/ULTRA QUICK SOLUTION NO. 4OVERVIEW:REQUIRED SUPPLIES:ESTIMATED TIME:Backup DVDs must be properly formatted before use. It may be necessary to format theDVD again if the DVD drive no longer recognizes it.DVD RW30 minutes1. During the formatting process, theinstrument must not be in use.Verify that no sample is in the “profile inprogress” status before you begin toformat the DVD (e.g. blue arrow in thestatus column next to the profile).2. Insert a new DVD in the DVD burner.3. Minimize the AutoVue ® Innova/Ultraapplication.4. Select the Menu icon from the Roxio boxand drag it to the disc screen.5. Select Format Disc.Page 1 of 2ORTHO AutoVue ® , ORTHO AutoVue ® Innova, and ORTHO AutoVue ® Ultra are trademarks of <strong>Ortho</strong>-Clinical Diagnostics Inc.This document is a troubleshooting aid only.Refer to the appropriate ORTHO AutoVue ® user documentation for more information.2008-11-15 J33039_EN
FORMAT A DVDAUTOVUE ® INNOVA/ULTRA QUICK SOLUTION NO. 46. Enter the DVD name into the VolumeLabel field as follows: MONDAY for Monday’s DVD TUESDAY for Tuesday’s DVD WEDNESDAY for Wednesday’s DVD THURSDAY for Thursday’s DVD FRIDAY for Friday’s DVD SATURDAY for Saturday’s DVD SUNDAY for Sunday’s DVDAAAA-1 for the first six-month period(e.g. 2008-1)AAAA-2 for the second six-monthperiod (e.g. 2008-2)7. Select the Full Format button.8. Click OK.9. Click Yes in the Disc Preparation Neededwindow.Once formatting is complete, awindow appears displaying the nameof the DVD.10. Click the arrow icon in the bottom-rightcorner of the Roxio box to eject the DVD.11. Select the maximize arrow to continuewith the application.For more information, contact the OCD Customer Technical Support Center.Page 2 of 2ORTHO AutoVue ® , ORTHO AutoVue ® Innova, and ORTHO AutoVue ® Ultra are trademarks of <strong>Ortho</strong>-Clinical Diagnostics Inc.This document is a troubleshooting aid only.Refer to the appropriate ORTHO AutoVue ® user documentation for more information.2008-11-15 J33039_EN
DAILY AND WEEKLY DVD BACKUPAUTOVUE ® INNOVA/ULTRA QUICK SOLUTION NO. 5OVERVIEW:REQUIRED SUPPLIES:ESTIMATED TIME:Use the AV2G (AutoVue Second Generation) Backup Setup window to schedule dailybackups. Display the Backup Setup window by right-clicking on the backup icon andselecting Setup. Choose a time when the instrument will typically not be processingsamples. If you choose to create DVD backups, a popup message displays at thescheduled time prompting you to insert the correct DVD in the DVD drive.Formatted DVD RW (-RW or +RW) for each day of the week5 minutes1. Minimize the AutoVue® Innova/Ultrasoftware, and insert the appropriate DVD inthe DVD drive.Backup icon2. When the ‘Day’ appears in the Roxio box,click OK.The backup icon on the task bar(bottom right of screen) changes frommulti-colored to green during backup.When the backup is complete, the iconchanges back to multi-colored and thesystem displays the log file.3. To view the log file at any time, right-click onthe multicolored backup icon and selectView Log File.The Backup Log displays, showing thedate, time, and status of backupattempts.4. To see any notes, click on the .TXT link toview the full file.If the system has been unsuccessful, anexplanation appears at the bottom ofthe .TXT file. This information should becommunicated to the OCD CustomerTechnical Support Center.5. After the backup is complete, right-click theRoxio box and select Eject Disc.Page 1 of 2ORTHO AutoVue ® , ORTHO AutoVue ® Innova, and ORTHO AutoVue ® Ultra are trademarks of <strong>Ortho</strong>-Clinical Diagnostics Inc.This document is a troubleshooting aid only.Refer to the appropriate ORTHO AutoVue ® user documentation for more information.2008-11-15 J33039_EN
DAILY AND WEEKLY DVD BACKUPAUTOVUE ® INNOVA/ULTRA QUICK SOLUTION NO. 5Failure of Daily BackupOverview:The log file appears on the screen indicating that the daily backup was not successful.Required Supplies: Formatted DVD RW (-RW or +RW) for each day of the weekEstimated Time: Two minutesTo perform the Daily Backup again:Right-click on the multicolored backup icon and select Perform Daily Backup.Place the appropriate DVD into the drive.Wait for the current title to appear in the Roxio box. Click OK.o The backup icon changes from multi-colored to green during backup. The icon changes back tomulti-colored when the backup is complete.If the daily backup is not successful, contact the OCD Customer Technical Support Center.Weekly Archive BackupOverview: On Tuesday, the daily backup system prompts for the Archive backup DVD (e.g., 2008-1).Required Supplies: Appropriate archive backup DVDEstimated Time: Two minutesTo perform the Weekly Archive Backup:Place the appropriate DVD into the drive. Wait for the current title to appear in the Roxio box (e.g. 2008-1).Click OK.o The backup icon changes from multi-colored to green during backup. The icon changes back tomulti-colored when the backup is complete.Failure of Weekly Archive BackupOverview:The log file appears on the screen indicating that the archive backup was unsuccessful.Required Supplies: Appropriate archive backup DVDEstimated Time: Two minutesTo perform the Archive Backup again: Right-click on the multicolored backup icon and select Perform Archive Backup.Place the appropriate DVD into the drive.Wait for the current title to appear in the Roxio box.Click OK.o The backup icon changes from multi-colored to green during backup. The icon changes back tomulti-colored when the backup is complete.If the archive backup is not successful, contact the OCD Customer Technical Support Center.For more information, contact the OCD Customer Technical Support Center.Page 2 of 2ORTHO AutoVue ® , ORTHO AutoVue ® Innova, and ORTHO AutoVue ® Ultra are trademarks of <strong>Ortho</strong>-Clinical Diagnostics Inc.This document is a troubleshooting aid only.Refer to the appropriate ORTHO AutoVue ® user documentation for more information.2008-11-15 J33039_EN
Manually Open the Cassette DrawerAUTOVUE ® INNOVA/ULTRA QUICK SOLUTION NO. 6OVERVIEW:TOOLS:ESTIMATED TIME:You may occasionally find it necessary to open the Cassette Drawer manually. This mayhappen if the solenoid fails, or a jam or blockage occurs, or the Cassette Drawer remainsclosed after the analyser is turned off.To manually open the drawer you must press the Cassette Drawer manual release switch.This is a metal tab located toward the rear of the instrument in the gap between theCasunca and the AutoRotor.Note: It is not necessary to turn off the instrument to perform this procedure.A wooden dowel or other narrow, non-conductive (non-metallic) device, such as a woodenor plastic ruler or a cassette liner box, and gloves5 minutes1. Open the Main Door.2. Extend a suitable non-conductive toolthrough the gap between the Casuncaand the AutoRotor.Cassette DrawerManual <strong>Release</strong>Switch3. Press the metal switch (silver tab) toopen the Cassette Drawer.Caution: Be careful not to damage ordislodge the Cassette Barcode ReaderCable, positioned near the release switch.AutoRotorCasunca4. Remove any blockage.5. Check that the cassette sleeves andbiocards are correctly loaded.6. Close the Cassette Drawer.Important: You MUST reinitialise the systemafter you close the Cassette Drawer tocontinue inventory.Cassette DrawerManual <strong>Release</strong>SwitchCassetteBarcodeReader CableNote: To avoid damaging the instrument, donot use this method to apply pressure to anyother part of the analyser.For more information, contact the OCD Customer Technical Support Center.Page 1 of 2ORTHO AutoVue ® , ORTHO AutoVue ® Innova, and ORTHO AutoVue ® Ultra are trademarks of <strong>Ortho</strong>-Clinical Diagnostics Inc.This document is a troubleshooting aid only.Refer to the appropriate ORTHO AutoVue ® user documentation for more information.2008-11-15 J33039_EN
Manually Open the Cassette DrawerAUTOVUE ® INNOVA/ULTRA QUICK SOLUTION NO. 6Page 2 of 2ORTHO AutoVue ® , ORTHO AutoVue ® Innova, and ORTHO AutoVue ® Ultra are trademarks of <strong>Ortho</strong>-Clinical Diagnostics Inc.This document is a troubleshooting aid only.Refer to the appropriate ORTHO AutoVue ® user documentation for more information.2008-11-15 J33039_EN
AUTOREADER INITIALISATION ERROR ASAR011AUTOREADER POSITIONING ERROR ASAR012AUTOVUE ® INNOVA/ULTRA QUICK SOLUTION NO. 7OVERVIEW:REQUIRED SUPPLIES:ESTIMATED TIME:These errors can result from poor positioning of the AutoReader Shuttle, due to a jammedcassette or faulty alignment.Allen Key; compressed air; and soft cloth20 minutes1. Touch Shutdown.2. Turn off the analyser.Note: It is not necessary to turn off the PC.3. Open the Main Door and Waste Door.Pull out the 2 doorstops for the Waste Doorand 1 doorstop for the Main Door on theinside of the upper frame (see picture).Turn them ¼ turn counterclockwise.4. Manually move the Gripper to the left.Note: When moving the Gripper, be careful notto damage the teeth.5. Push the Main Door and Waste Door to theleft.6. Remove the Cassette Waste Bin.7. Remove the 3 Screws (circled in picture atright) on the top of the AutoReader Cover.8. Remove the AutoReader Cover.Page 1 of 4ORTHO AutoVue ® , ORTHO AutoVue ® Innova, and ORTHO AutoVue ® Ultra are trademarks of <strong>Ortho</strong>-Clinical Diagnostics Inc.This document is a troubleshooting aid only.Refer to the appropriate ORTHO AutoVue ® user documentation for more information.2008-11-15 J33039_EN
AUTOREADER INITIALISATION ERROR ASAR011AUTOREADER POSITIONING ERROR ASAR012AUTOVUE ® INNOVA/ULTRA QUICK SOLUTION NO. 79. Check whether there is a jammed cassette inthe AutoReader Shuttle or in the AutoRotor. If you find a jam, remove it.10. Blow compressed air on the right Sensor.11. Blow compressed air on the left Sensor.Page 2 of 4ORTHO AutoVue ® , ORTHO AutoVue ® Innova, and ORTHO AutoVue ® Ultra are trademarks of <strong>Ortho</strong>-Clinical Diagnostics Inc.This document is a troubleshooting aid only.Refer to the appropriate ORTHO AutoVue ® user documentation for more information.2008-11-15 J33039_EN
AUTOREADER INITIALISATION ERROR ASAR011AUTOREADER POSITIONING ERROR ASAR01212. When the troubleshooting steps above arecompleted:Place the AutoReader Cover back inposition and replace the 3 Screws.Place the cassette Waste Bin back in theinstrument.Replace and lock the 3 doorstops.Place the Main Door and Waste Door backin the instrument.Place the Gripper on the metallic plateabove the Centrifuge.AUTOVUE ® INNOVA/ULTRA QUICK SOLUTION NO. 713. To continue: Close all of the doors. Power on the analyser. Double-click on the AutoVue icon. Log in to initialise the system.For more information, contact the OCD Customer Technical Support Center.Page 3 of 4ORTHO AutoVue ® , ORTHO AutoVue ® Innova, and ORTHO AutoVue ® Ultra are trademarks of <strong>Ortho</strong>-Clinical Diagnostics Inc.This document is a troubleshooting aid only.Refer to the appropriate ORTHO AutoVue ® user documentation for more information.2008-11-15 J33039_EN
AUTOREADER INITIALISATION ERROR ASAR011AUTOREADER POSITIONING ERROR ASAR012AUTOVUE ® INNOVA/ULTRA QUICK SOLUTION NO. 7Page 4 of 4ORTHO AutoVue ® , ORTHO AutoVue ® Innova, and ORTHO AutoVue ® Ultra are trademarks of <strong>Ortho</strong>-Clinical Diagnostics Inc.This document is a troubleshooting aid only.Refer to the appropriate ORTHO AutoVue ® user documentation for more information.2008-11-15 J33039_EN