Belgacom Twist 600 - Help and support - Belgacom
Belgacom Twist 600 - Help and support - Belgacom
Belgacom Twist 600 - Help and support - Belgacom
- No tags were found...

You also want an ePaper? Increase the reach of your titles
YUMPU automatically turns print PDFs into web optimized ePapers that Google loves.
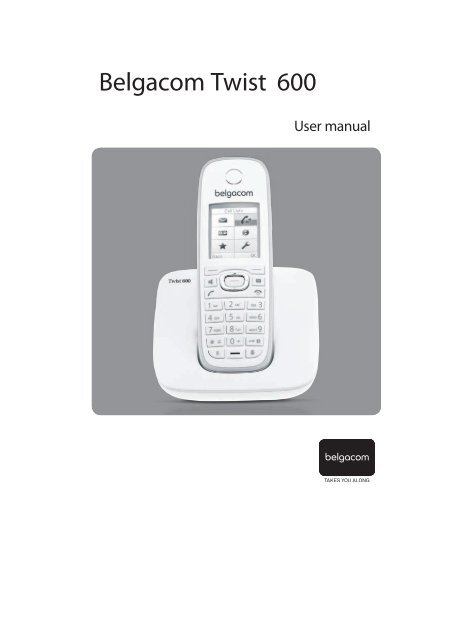
<strong>Belgacom</strong> <strong>Twist</strong> <strong>600</strong>User manual
The h<strong>and</strong>set at a glance1716INT 1Calls15141312111098i à V07:1514 OctSMS1234567The h<strong>and</strong>set at a glance1 Display in idle status2 Battery charge status (¢ page 15)3 Display keys (¢ page 19)4 Message key (¢ page 38)Access to calls <strong>and</strong> message lists;Flashes: new message or new call5 End call key, On/Off keyEnd call, cancel function, go back one menulevel (press briefly), back to idle status (press<strong>and</strong> hold), activate/deactivate h<strong>and</strong>set(press <strong>and</strong> hold in idle status)6 Hash keyKeypad lock on/off (press <strong>and</strong> hold inidle status);toggles between upper/lower case<strong>and</strong> digits7 Mute key (¢ page 29)Mute the microphone8 Microphone9 Recall key- Consultation call (flash)- Insert a dialling pause (press <strong>and</strong> hold)10 Star keyRingtone on/off (press <strong>and</strong> hold);with an open connection: switch betweendial pulsing/tone dialling (press briefly);Text input: Open table of special characters11 Connection socket for headset(¢ page 16)12 Key 1Dial answering machine (<strong>Twist</strong> 610 only)/network mailbox (press <strong>and</strong> hold)13 Talk keyFlashes: incoming call;Accept a call; open redial list (press briefly);start dialling (press <strong>and</strong> hold);When writing an SMS: send SMS14 Speaker keySwitch between earpiece <strong>and</strong> speaker mode15 Control key (¢ page 18)16 Signal strength (¢ page 15)Green: Eco Mode activated (¢ page 55)17 Answering machine icon (<strong>Twist</strong> 610 only)Answering machine switched on;Flashes: Answering machine is recording amessage or is being operated by anotherinternal party1
Display symbolsDisplay symbolsThe following symbols are displayed dependent on the settings <strong>and</strong> the operating statusof your telephone:Signal strength i(¢ page 55)or ECO Mode+ ¼icon (¢ page 55)Answering machine activated (<strong>Twist</strong> 610 only)Ringtone switched off (¢ page 64)Battery charging (¢ page 15)Battery charge status (¢ page 15)i à ó VÛ 08:00 07:15INT 1 14 OctAlarm switched on <strong>and</strong> wake-up time (¢ page 56)Current time (¢ page 15)Current day <strong>and</strong> month (¢ page 15)Name of the h<strong>and</strong>set (¢ page 59)à ¾ 02 10 09 08CallsSMSNumber of new messages:u à on the network mailbox (¢ page 37)u in the list of missed calls (¢ page 38)u ¾ in the SMS list (¢ page 42)u in the list of missed appointments (¢ page 39)SignallingExternal call (¢ page 27)Ø«ÚAlarm clock (¢ page 56)ØìÚInternal call (¢ page 57)ØåÚAnniversary (¢ page 36)ØðÚAnswering machine isrecording (¢ page 48)Ø þ Ú2
The base at a glanceThe base at a glanceYou can use the keys on the base toregister h<strong>and</strong>sets to the base, searchfor h<strong>and</strong>sets (paging) ¢ page 57 <strong>and</strong>operate the integrated answeringmachine (<strong>Twist</strong> 610 only).<strong>Twist</strong> 610 baseDuring message playback:4 Play/stop keyPlay back new messages from answeringmachine or cancel playback (press briefly).Play back new <strong>and</strong> old messages (press <strong>and</strong>hold).5 Skip to next message (press once) or nextmessage but one (press twice).6 Skip back five seconds (press briefly once),to skip back to the beginning of the message(press <strong>and</strong> hold) or skip back to the previousmessage (press twice).7 Delete current message.8 Adjust volume during message playback:÷ = quieter; ø = louder.While an external call is being signalled:adjust ringtone volume.Please note:If the answering machine is being operatedfrom a h<strong>and</strong>set or if it is recordinga message (00 flashes), it cannot beoperated from the base.<strong>Twist</strong> <strong>600</strong> base761382541 Registration/paging keyPress briefly: Search for h<strong>and</strong>sets (paging)¢ page 57.Press <strong>and</strong> hold: Register h<strong>and</strong>sets <strong>and</strong>DECT devices ¢ page 56.2 On/Off keyActivating/deactivating the answering machine.3 Display iconLights up: answering machine is activated.The number of saved messages is displayed.00 flashes: The answering machine isrecording a new message.Flashes slowly: There are new messages.The number of new messages is displayed.99 flashes quickly: The answering machineis full.Registration/paging key– Press briefly: Search for h<strong>and</strong>sets (paging)¢ page 57.– Press <strong>and</strong> hold: Register h<strong>and</strong>sets <strong>and</strong>DECT devices ¢ page 56.3
ContentsContentsThe h<strong>and</strong>set at a glance . . . . . . . . . . . . . . . . . . . . . . . . . . . . . . . . . 1The base at a glance . . . . . . . . . . . . . . . . . . . . . . . . . . . . . . . . . . . . 3Safety precautions . . . . . . . . . . . . . . . . . . . . . . . . . . . . . . . . . . . . . . 7<strong>Twist</strong> <strong>600</strong>/610 – more than just a telephone . . . . . . . . . . . . . . . . . 8First steps . . . . . . . . . . . . . . . . . . . . . . . . . . . . . . . . . . . . . . . . . . . . . 9Checking the pack contents . . . . . . . . . . . . . . . . . . . . . . . . . . . . . . . . . . . . . . 9Setting up the base . . . . . . . . . . . . . . . . . . . . . . . . . . . . . . . . . . . . . . . . . . . . 10Connecting the base . . . . . . . . . . . . . . . . . . . . . . . . . . . . . . . . . . . . . . . . . . . 10Setting up the h<strong>and</strong>set for use . . . . . . . . . . . . . . . . . . . . . . . . . . . . . . . . . . . 11Choosing the language . . . . . . . . . . . . . . . . . . . . . . . . . . . . . . . . . . . . . . . . . 13Setting the date <strong>and</strong> time . . . . . . . . . . . . . . . . . . . . . . . . . . . . . . . . . . . . . . . 14Connecting the headset . . . . . . . . . . . . . . . . . . . . . . . . . . . . . . . . . . . . . . . . 16What would you like to do next? . . . . . . . . . . . . . . . . . . . . . . . . . . . . . . . . . . 17Using the phone . . . . . . . . . . . . . . . . . . . . . . . . . . . . . . . . . . . . . . . 18Control key . . . . . . . . . . . . . . . . . . . . . . . . . . . . . . . . . . . . . . . . . . . . . . . . . . . 18Display keys . . . . . . . . . . . . . . . . . . . . . . . . . . . . . . . . . . . . . . . . . . . . . . . . . . 19Keys on the keypad . . . . . . . . . . . . . . . . . . . . . . . . . . . . . . . . . . . . . . . . . . . . 19Correcting incorrect entries . . . . . . . . . . . . . . . . . . . . . . . . . . . . . . . . . . . . . . 19Menu guidance . . . . . . . . . . . . . . . . . . . . . . . . . . . . . . . . . . . . . . . . . . . . . . . 20Activating/deactivating the h<strong>and</strong>set . . . . . . . . . . . . . . . . . . . . . . . . . . . . . . . 21Activating/deactivating the keypad lock . . . . . . . . . . . . . . . . . . . . . . . . . . . . 21Illustration of operating steps in the user guide . . . . . . . . . . . . . . . . . . . . . . 22Menu overview . . . . . . . . . . . . . . . . . . . . . . . . . . . . . . . . . . . . . . . . 24Making calls . . . . . . . . . . . . . . . . . . . . . . . . . . . . . . . . . . . . . . . . . . 27Making an external call . . . . . . . . . . . . . . . . . . . . . . . . . . . . . . . . . . . . . . . . . 27Ending a call . . . . . . . . . . . . . . . . . . . . . . . . . . . . . . . . . . . . . . . . . . . . . . . . . 27Accepting a call . . . . . . . . . . . . . . . . . . . . . . . . . . . . . . . . . . . . . . . . . . . . . . . 27Calling Line Identification . . . . . . . . . . . . . . . . . . . . . . . . . . . . . . . . . . . . . . . 27Speaker mode . . . . . . . . . . . . . . . . . . . . . . . . . . . . . . . . . . . . . . . . . . . . . . . . 29Switching to mute . . . . . . . . . . . . . . . . . . . . . . . . . . . . . . . . . . . . . . . . . . . . . 29Making calls using network services . . . . . . . . . . . . . . . . . . . . . . 30Calling Line Identification . . . . . . . . . . . . . . . . . . . . . . . . . . . . . . . . . . . . . . . 30Ringback . . . . . . . . . . . . . . . . . . . . . . . . . . . . . . . . . . . . . . . . . . . . . . . . . . . . 30Call waiting during an external call . . . . . . . . . . . . . . . . . . . . . . . . . . . . . . . . 30Call divert (CD) . . . . . . . . . . . . . . . . . . . . . . . . . . . . . . . . . . . . . . . . . . . . . . . 31Consultation call, call swap, conference . . . . . . . . . . . . . . . . . . . . . . . . . . . . 31Further functions . . . . . . . . . . . . . . . . . . . . . . . . . . . . . . . . . . . . . . . . . . . . . . 324
ContentsUsing the directory <strong>and</strong> lists . . . . . . . . . . . . . . . . . . . . . . . . . . . . . 33Directory . . . . . . . . . . . . . . . . . . . . . . . . . . . . . . . . . . . . . . . . . . . . . . . . . . . . 33Redial list . . . . . . . . . . . . . . . . . . . . . . . . . . . . . . . . . . . . . . . . . . . . . . . . . . . . 36Incoming SMS message list . . . . . . . . . . . . . . . . . . . . . . . . . . . . . . . . . . . . . . 37Answering machine list (<strong>Twist</strong> 610 only) . . . . . . . . . . . . . . . . . . . . . . . . . . . 37Call lists . . . . . . . . . . . . . . . . . . . . . . . . . . . . . . . . . . . . . . . . . . . . . . . . . . . . . 37Opening lists with the message key . . . . . . . . . . . . . . . . . . . . . . . . . . . . . . . 38List of missed appointments . . . . . . . . . . . . . . . . . . . . . . . . . . . . . . . . . . . . . 39SMS (text messages) . . . . . . . . . . . . . . . . . . . . . . . . . . . . . . . . . . . 40Writing/sending an SMS . . . . . . . . . . . . . . . . . . . . . . . . . . . . . . . . . . . . . . . . 40Receiving an SMS . . . . . . . . . . . . . . . . . . . . . . . . . . . . . . . . . . . . . . . . . . . . . 42SMS with vCard (option not available) . . . . . . . . . . . . . . . . . . . . . . . . . . . . . 43Notification by SMS . . . . . . . . . . . . . . . . . . . . . . . . . . . . . . . . . . . . . . . . . . . . 44SMS mailboxes . . . . . . . . . . . . . . . . . . . . . . . . . . . . . . . . . . . . . . . . . . . . . . . . 44Setting SMS centres . . . . . . . . . . . . . . . . . . . . . . . . . . . . . . . . . . . . . . . . . . . . 45SMS on a PABX . . . . . . . . . . . . . . . . . . . . . . . . . . . . . . . . . . . . . . . . . . . . . . . . 46Activating/deactivating first ringtone muting . . . . . . . . . . . . . . . . . . . . . . . . 46Activating/deactivating SMS function . . . . . . . . . . . . . . . . . . . . . . . . . . . . . . 46SMS troubleshooting . . . . . . . . . . . . . . . . . . . . . . . . . . . . . . . . . . . . . . . . . . . 47Operating the answering machine of the <strong>Twist</strong> 610 base . . . . . 48Operation via the h<strong>and</strong>set . . . . . . . . . . . . . . . . . . . . . . . . . . . . . . . . . . . . . . . 48Activating/deactivating call screening . . . . . . . . . . . . . . . . . . . . . . . . . . . . . . 51Setting the recording parameters . . . . . . . . . . . . . . . . . . . . . . . . . . . . . . . . . 52Resetting fast access for the answering machine using key 1 . . . . . . . . . . . 52Operating when on the move (remote operation) . . . . . . . . . . . . . . . . . . . . 53Using the network mailbox . . . . . . . . . . . . . . . . . . . . . . . . . . . . . . 54Configuring fast access for the network mailbox . . . . . . . . . . . . . . . . . . . . . 54Viewing the network mailbox message . . . . . . . . . . . . . . . . . . . . . . . . . . . . 54ECO DECT . . . . . . . . . . . . . . . . . . . . . . . . . . . . . . . . . . . . . . . . . . . . . 55Setting the alarm clock . . . . . . . . . . . . . . . . . . . . . . . . . . . . . . . . . 56Using several h<strong>and</strong>sets . . . . . . . . . . . . . . . . . . . . . . . . . . . . . . . . . 56Registering h<strong>and</strong>sets . . . . . . . . . . . . . . . . . . . . . . . . . . . . . . . . . . . . . . . . . . . 56De-registering h<strong>and</strong>sets . . . . . . . . . . . . . . . . . . . . . . . . . . . . . . . . . . . . . . . . 57Locating a h<strong>and</strong>set ("Paging") . . . . . . . . . . . . . . . . . . . . . . . . . . . . . . . . . . . . 57Changing the base . . . . . . . . . . . . . . . . . . . . . . . . . . . . . . . . . . . . . . . . . . . . . 57Making internal calls . . . . . . . . . . . . . . . . . . . . . . . . . . . . . . . . . . . . . . . . . . . 57Listening in to an external call . . . . . . . . . . . . . . . . . . . . . . . . . . . . . . . . . . . 59Changing the name of a h<strong>and</strong>set . . . . . . . . . . . . . . . . . . . . . . . . . . . . . . . . . 59Changing a h<strong>and</strong>set's internal number . . . . . . . . . . . . . . . . . . . . . . . . . . . . . 59Using a h<strong>and</strong>set as a room monitor . . . . . . . . . . . . . . . . . . . . . . . 605
ContentsH<strong>and</strong>set settings . . . . . . . . . . . . . . . . . . . . . . . . . . . . . . . . . . . . . . 61Quick access to numbers <strong>and</strong> functions . . . . . . . . . . . . . . . . . . . . . . . . . . . . 61Changing the display language . . . . . . . . . . . . . . . . . . . . . . . . . . . . . . . . . . . 62Setting the display . . . . . . . . . . . . . . . . . . . . . . . . . . . . . . . . . . . . . . . . . . . . . 62Activating/deactivating auto answer . . . . . . . . . . . . . . . . . . . . . . . . . . . . . . . 63Changing the speaker/earpiece volume . . . . . . . . . . . . . . . . . . . . . . . . . . . . 63Changing ringtones . . . . . . . . . . . . . . . . . . . . . . . . . . . . . . . . . . . . . . . . . . . . 64Activating/deactivating advisory tones . . . . . . . . . . . . . . . . . . . . . . . . . . . . . 65Setting your own area code . . . . . . . . . . . . . . . . . . . . . . . . . . . . . . . . . . . . . 65Restoring the h<strong>and</strong>set default settings . . . . . . . . . . . . . . . . . . . . . . . . . . . . . 65Base settings . . . . . . . . . . . . . . . . . . . . . . . . . . . . . . . . . . . . . . . . . . 66Changing the base ringtones (<strong>Twist</strong> 610) . . . . . . . . . . . . . . . . . . . . . . . . . . . 66Activating/deactivating music on hold . . . . . . . . . . . . . . . . . . . . . . . . . . . . . 66Repeater <strong>support</strong> (option not available) . . . . . . . . . . . . . . . . . . . . . . . . . . . . 66Protecting against unauthorised access . . . . . . . . . . . . . . . . . . . . . . . . . . . . 66Restoring the base to the factory settings . . . . . . . . . . . . . . . . . . . . . . . . . . 67Connecting the base to the PABX . . . . . . . . . . . . . . . . . . . . . . . . . 68Dialling modes <strong>and</strong> recall . . . . . . . . . . . . . . . . . . . . . . . . . . . . . . . . . . . . . . . 68Saving an access code (outside line code) . . . . . . . . . . . . . . . . . . . . . . . . . . 68Setting pauses . . . . . . . . . . . . . . . . . . . . . . . . . . . . . . . . . . . . . . . . . . . . . . . . 69Temporarily switching to tone dialling (DTMF) . . . . . . . . . . . . . . . . . . . . . . . 69Questions <strong>and</strong> answers . . . . . . . . . . . . . . . . . . . . . . . . . . . . . . . . . . . . . . . . . 70Declaration of Conformity . . . . . . . . . . . . . . . . . . . . . . . . . . . . . . . . . . . . . . . 71Guarantee terms . . . . . . . . . . . . . . . . . . . . . . . . . . . . . . . . . . . . . . . . . . . . . . 72Environment . . . . . . . . . . . . . . . . . . . . . . . . . . . . . . . . . . . . . . . . . . 73Appendix . . . . . . . . . . . . . . . . . . . . . . . . . . . . . . . . . . . . . . . . . . . . . 74Care . . . . . . . . . . . . . . . . . . . . . . . . . . . . . . . . . . . . . . . . . . . . . . . . . . . . . . . . 74Contact with liquid . . . . . . . . . . . . . . . . . . . . . . . . . . . . . . . . . . . . . . . . . . . . 74Specifications . . . . . . . . . . . . . . . . . . . . . . . . . . . . . . . . . . . . . . . . . . . . . . . . . 74Writing <strong>and</strong> editing text . . . . . . . . . . . . . . . . . . . . . . . . . . . . . . . . . . . . . . . . . 75Mounting the base on the wall . . . . . . . . . . . . . . . . . . . . . . . . . . . 76Index . . . . . . . . . . . . . . . . . . . . . . . . . . . . . . . . . . . . . . . . . . . . . . . . 776
Safety precautionsSafety precautionsWarningRead the safety precautions <strong>and</strong> the user guide before use.Explain their content <strong>and</strong> the potential hazards associated with using the telephone toyour children.$Only use the mains adapter supplied, as indicated on the underside of the base.Only use the recommended, rechargeable batteries (¢ page 74) as thiscould otherwise result in significant health risks <strong>and</strong> personal injury.The operation of medical appliances may be affected. Be aware of the technicalconditions in your particular environment, e.g. doctor's surgery.Do not hold the rear of the h<strong>and</strong>set to your ear when it is ringing or whenspeaker mode is activated. Otherwise you risk serious <strong>and</strong> permanent damageto your hearing.Your telephone is compatible with the majority of digital hearing aids on themarket. However, perfect function with all hearing aids cannot be guaranteed.The h<strong>and</strong>set may cause an unpleasant humming or whistling noise in hearingaids or cause them to overload. If you require assistance, please contact thehearing aid supplier.Do not install the base or charging cradle in bathrooms or shower rooms.The base <strong>and</strong> charging cradle are not splashproof (¢ page 74).Do not use your phone in environments with a potential explosion hazard(e.g. paint shops).ƒIf you give your phone to someone else, make sure you also give them theuser guide.Please remove faulty bases from use or have them repaired by our Servicedepartment, as they could interfere with other wireless services.Please noteNot all of the functions described in this user guide are available in all countries.7
<strong>Twist</strong> <strong>600</strong>/610 – more than just a telephone<strong>Twist</strong> <strong>600</strong>/610 – more than just a telephoneYour telephone sets new st<strong>and</strong>ards for the way you communicate at home.The large TFT display, user-friendly keypad <strong>and</strong> clearly laid out menu are verysimple to use.It can do a whole lot more:u Store anniversaries such as birthdays in your phone <strong>and</strong> it will remind youof them in advance.u Allocate important people to one of six VIP groups so you can identify importantcalls from the ringtone <strong>and</strong> the colour of the allocated VIP group.u If you only want to accept calls when you can see the number, you can setyour phone to only ring when the phone number is transferred.u You can assign important numbers to the number keys on your h<strong>and</strong>set.The number is then dialled by simply pressing the key.u Set the display to show in large print to increase readability during certainimportant situations (e.g. in the directory <strong>and</strong> in lists).u Set the menu display to suit your individual requirements so that only themost important functions (st<strong>and</strong>ard mode) or all functions are displayed(expert mode).u Your <strong>Twist</strong> <strong>600</strong>/610 – be environmentally aware when using your phone.Contact <strong>Belgacom</strong> customer services for more information about your telephone.Have fun using your new phone!8
First stepsFirst stepsChecking the pack contents1or23 4 58671 one <strong>Twist</strong> <strong>600</strong>/610 base2 one mains adapter3 one h<strong>and</strong>set4 one phone cord with a four-pin connection5 two batteries6 one battery cover7 one belt clip8 one user guide9
First stepsSetting up the baseThe base is designed for use in enclosed dry rooms with a temperature rangeof +5°C to +45°C.¤ Install the base on a level, non-slip surface in a central location in your houseor flat or mount the base on the wall ¢ page 76.Please notePay attention to the range of the base.This is up to 300 m in unobstructed outdoor areas <strong>and</strong> up to 50 m insidebuildings. The range is reduced when Eco Mode (¢ page 55) is activated.The phone's feet do not usually leave any marks on surfaces. However, due tothe multitude of different varnishes <strong>and</strong> polishes used on today's furnishings,the occurrence of marks on the surfaces cannot be completely ruled out.Please note:u Never expose the telephone to the influence of heat sources, direct sunlightor other electrical devices.u Protect your telephone from moisture, dust, corrosive liquids <strong>and</strong> vapours.Connecting the base¤ First connect themains adapter 1.¤ Then connect thetelephone jack 2<strong>and</strong> insert thecables into thecable ducts.121Please note:u The mains adapter must always be connected, as the phone will not operatewithout a mains connection.u Only use the mains adapter <strong>and</strong> phone cord supplied. Pin connections ontelephone cables can vary (pin connections ¢ page 75).10
First stepsSetting up the h<strong>and</strong>set for useThe display is protected by a plastic film.Please remove the protective film!Inserting the batteries <strong>and</strong> closing the battery coverWarningOnly use the rechargeable batteries (¢ page 74), i.e. never use conventional(non-rechargeable) batteries, as this could result in significant healthrisks <strong>and</strong> personal injury. For example, the outer casing of the batteriescould be damaged or the batteries could explode. The phone could alsomalfunction or be damaged as a result of using batteries that are not of therecommended type.¤ Insert the batteries theright way round.The polarity is indicatedin/on the batterycompartment.ab¤ First insert the batterycover at the top a.¤ Then press the cover buntil it clicks into place.If you need to open the batterycover, for instance to replace thebatteries, place your fingertip inthe cavity on the casing <strong>and</strong> pullthe battery cover upwards.11
First stepsAttaching the belt clipThe h<strong>and</strong>set has notches on each side to attach the belt clip.¤ To attach – press the belt cliponto the back of the h<strong>and</strong>set sothat the protrusions on the beltclip engage with the notches.¤ To remove – using your rightthumb apply pressure to thecentre of the belt clip, push thefingernail of your left index fingerbetween the clip <strong>and</strong> thecasing <strong>and</strong> lift the clip upwards.Placing the h<strong>and</strong>set in the base¤ Place the h<strong>and</strong>set in the base with its display facing forward.Each h<strong>and</strong>set is registered with the base at the factory. You do not need to completea registration. If you wish to use your h<strong>and</strong>set with a different base or usefurther h<strong>and</strong>sets with your base, you will have to register the h<strong>and</strong>set manually¢ page 56.To charge the batteries, leave the h<strong>and</strong>set in the base.Please noteOnly place the h<strong>and</strong>set in the base that is intended for it.12
First stepsInitial charging <strong>and</strong> discharging of the batteriesThe correct charge level can only be displayed if the batteries are first fullycharged <strong>and</strong> discharged.¤ Place the h<strong>and</strong>set in the base for 10 hours.10 h¤ Then remove the h<strong>and</strong>setfrom the base <strong>and</strong> do notreplace it until the batteriesare fully discharged.Please noteu After the first battery charge <strong>and</strong> discharge you may replace your h<strong>and</strong>setin the base after every call.u Always repeat the charging <strong>and</strong> discharging procedure if you remove thebatteries from the h<strong>and</strong>set <strong>and</strong> reinsert them.u The batteries may warm up during charging. This is not dangerous.u After a while, the charge capacity of the batteries will decrease for technicalreasons.Choosing the languageTo make it easier for you to use your phone, we suggest changing the language(default language: English). See page 18 for more information about the controlkeys.1 Press w then v.2 Press s to select Settings, then press §OK§.3 Press s to select Language, then press §OK§.4 Press t or s to select the required language, then press Select to confirmyour choice.5 Hold down the akey to return to idle status.See "Changing the display language", ¢ page 62 for instructions on changingthe language.13
First stepsSetting the date <strong>and</strong> timeSet the date <strong>and</strong> time so that the correct date <strong>and</strong> time can be assigned toincoming calls, <strong>and</strong> so that the alarm can be used.CallsTime¤ Press the key below §Time§ on thescreen display to open the inputfield.(If you have already set the time <strong>and</strong>date, open the input field via themenu ¢ page 26.)Date:31.01.2009Time:00:00Date/TimeThe Date/Time submenu is shown onthe display.¤ The active input position flashes.Enter day, month <strong>and</strong> year as an8-digit number via the keypad,e.g. 4Q2QQO for 14/10/2009.BackSavePress the right or left controlkey to change the input position<strong>and</strong> correct an entry.¤ Press down on the control key to switchto the time input field.Date/Time¤ Enter the hours <strong>and</strong> minutes asfour digit numbers via the keypad,e.g. QM5 for07:15 am.Change the input position withthe control key if necessary.Date:14.10.2009Time:00:00BackSave14
First stepsBackSave¤ Press the key below §Save§ on the displayscreen to confirm your entry.Date/Time‰SavedThe display shows Saved. You will heara confirmation tone <strong>and</strong> the h<strong>and</strong>setwill automatically return to idle status.Display in idle statusOnce the phone is registered <strong>and</strong> the time set, the idle display is shown as inthis example. If the answering machine is activated, the answering machineicon Ãwill be displayed in the header.15
First stepsDisplaysu Reception signal between the base <strong>and</strong> h<strong>and</strong>set:– good to poor: Ð iÑÒ– no reception: | flashesGreen: Eco Mode activated (¢ page 55)u Battery charge status:– yy{{ (empty to full)– y flashes red: batteries almost empty– xyx{x{ (charging)u INT 1Internal name of the h<strong>and</strong>set (¢ page 59)If Eco Mode+ (¢ page 55) is activated, the ¼ icon is displayed in the top left.Your answering machine is set with a pre-recorded announcement.Your phone is now ready for use!Connecting the headseti à VINT 1Calls07:1514 OctSMSYou can connect a headset with a 2.5 mm jack connector.16
What would you like to do next?First stepsNow you have successfully started your telephone, you will probably want toadapt it to your personal requirements. Use the following guide to quicklylocate the most important subjects.If you are unfamiliar with menu-driven devices you should first read the sectionentitled "Using the phone" ¢ page 18.Information on ...... is located here.Setting the ringtone <strong>and</strong> volume page 64Setting the earpiece volume page 63Recording a personal announcement for the answeringmachinepage 49Setting Eco Mode / Eco Mode+ page 55Preparing the telephone for SMS reception page 40Operating the telephone on a PABX page 68Registering existing h<strong>and</strong>sets to a base page 56Transferring directory entries from existing h<strong>and</strong>sets tonew h<strong>and</strong>set(s)ggggggggpage 35If you have any questions about using your phone, please read the tips ontroubleshooting (¢ page 70).17
Using the phoneUsing the phoneControl keyBelow, the side of the control key that you must press inthe respective operating situation is marked in black(top, bottom, right, left, centre), e.g. v for "press righton the control key" or w for "press the centre of thecontrol key".The control key has a number of different functions:When the h<strong>and</strong>set is in idle statuss Open the directory.v Open the main menu.u Open the list of h<strong>and</strong>sets.t Call up the menu to set the call volume (¢ page 63) ofthe h<strong>and</strong>set.In the main menut, s, v or uNavigate to the required function.In submenus <strong>and</strong> listst / s Scroll up/down line by line.In input fieldsUse the control key to move the cursor up t, down s, right v or left u.Press <strong>and</strong> hold v or u to move the cursor word by word.During an external callsutOpen the directory.Initiate an internal consultation call.Adjust the loudspeaker volume for earpiece <strong>and</strong> speaker mode.Functions when pressing the middle of the control keyDepending on the operating situation, the key has different functions.u In idle status the key opens the main menu.u In submenus, selection <strong>and</strong> input fields the key takes on the function ofthe display keys §OK§, §Yes§, §Save§, §Select§ or §Change§.Please noteIn these instructions, opening the main menu is represented by pressingright on the control key <strong>and</strong> functions are confirmed by pressing the correspondingdisplay key. However, if you prefer, you can use the control key asdescribed above.18
Using the phoneDisplay keysThe functions of the display keys change depending on the particular operatingsituation. Example:Back Save Current display key functions.Display keysSome important display keys:Options Open a context-dependent menu.OK Confirm selection.Û Delete key: delete one character/word at a time from right to left.Back Go back one menu level or cancel operation.Save Store entry.Þ Open the redial list.à Forward a call to the answering machine.Keys on the keypadc / Q / * etc.Press the matching key on the h<strong>and</strong>set.~ Enter digits or letters.Correcting incorrect entriesYou can correct incorrect characters in the input fields by navigating to theincorrect entry using the control key. You can then:u Delete the character by briefly pressing Ñ or press <strong>and</strong> hold to delete theword to the left of the cursor.u Insert characters next to the cursor.u Overwrite the highlighted (flashing) character, e.g. when entering time <strong>and</strong>date.19
Using the phoneMenu guidanceYour telephone's functions are accessed using a menu that has a numberof levels.The menu display can be extended (Expert mode) or reduced (St<strong>and</strong>ardmode). St<strong>and</strong>ard mode is activated by default.Settings or functions that are only available in expert mode are marked in theseinstructions with the • icon.Switching between st<strong>and</strong>ard/expert mode <strong>and</strong> the menu overview ¢ page 24.Main menu (first menu level)¤ When the h<strong>and</strong>set is in idle status press the right v control key to openthe main menu.The main menu functions are shown in the displaywith icons. The icon for the selected function isSettingsmarked in orange <strong>and</strong> the name of the associatedfunction appears in the display's header.Ë ÊTo access a function, i.e. to open the correspondingsubmenu (next menu level):Ì Ç¤ Use the control key p to select the required function<strong>and</strong> press the display key §OK§.É ÏBriefly press the display key §Back§ or the end call keyBackOKa to revert back to idle status.SubmenusThe functions in the submenus are displayed as lists(example on the right).To access a function:¤ Scroll to the function with the control key q <strong>and</strong>press §OK§.Briefly press the display key §Back§ or the end call keya to return to the previous menu level/cancel theoperation.SettingsDate/TimeAudio SettingsDisplayLanguageRegistrationBackOKReverting to idle statusYou can revert to idle status from anywhere in themenu as follows:¤ Press <strong>and</strong> hold the end call key a.Or:¤ Do not press any key: after 2 minutes the display will automatically revertto idle status.Settings that have not been saved by selecting the display key §OK§, §Yes§, §Save§ or§Change§ will be lostAn example of the display in idle status is shown on page 15.20
Using the phoneActivating/deactivating the h<strong>and</strong>setaWith the phone in idle status, press <strong>and</strong> hold the end call key(confirmation tone) to switch off the h<strong>and</strong>set.Press <strong>and</strong> hold the end call key again to switch the h<strong>and</strong>set on.Activating/deactivating the keypad lockThe keypad lock prevents any inadvertent use of the phone.# Press <strong>and</strong> hold the hash key in idle status to activate or deactivatethe keypad lock. You will hear the confirmation tone.If the keypad lock is activated a warning will be shown when you press a key.The keypad lock deactivates automatically when you receive a call. It is reactivatedwhen the call is ended.Please noteWhen the keypad lock is active, you cannot call emergency numbers.21
Using the phoneIllustration of operating steps in the user guideThe operating steps are shown in abbreviated form.Example:The illustration:v ¢ Ï ¢ Eco Mode ¢ Eco Mode+ (³ =on)means:¤ Press right on the control key vto open the main menu.ËSettingsʤ Use the right, left, down <strong>and</strong> upcontrol key p to navigate to theSettings submenu.ÌÉÇÏBackOK¤ Press the display key §OK§ to confirmyour selection.SettingsDisplayLanguageRegistrationMenu View¤ Press down on the control key suntil the Eco Mode menu appearson the display.Eco ModeBackOK¤ Press the display key §OK§ to confirmyour selection.22
Using the phoneEco ModeEco Mode ³Eco Mode+ ´¤ Press down on the control key suntil the Eco Mode+ menu appearson the display.BackChange¤ Press the display key §Change§ toactivate/deactivate the function.TelephonyEco Mode ³Eco Mode+ ³Changes are effective immediately<strong>and</strong> do not have to be confirmed.BackChange¤ Press the key below §Back§ on thedisplay to jump back to the previousmenu level.orPress <strong>and</strong> hold the end call key ato return to idle status.23
Menu overviewMenu overviewSetting st<strong>and</strong>ard or expert modeThe menu display can be extended (Expert mode) or reduced (St<strong>and</strong>ard mode).The settings are carried out as follows:Select v ¢ Ï ¢ Menu View ¢ Simplified (st<strong>and</strong>ard mode) or Complete (expert mode)¢ §Select§ (the active mode is marked with Ø).Menu options that are only available in expert mode are marked with the • icon.Open the main menu: When the telephone is in idle status pressv.Ë SMSYou have activated an SMS mailbox (general or private) without a PINNew SMS ¢ page 40Incoming ¢ page 42Outgoing ¢ page 41You have activated an SMS mailbox with a PIN or 2-3 mailboxesMailbox New SMS ¢ page 40Incoming ¢ page 42Outgoing ¢ page 41Mailbox 1Mailbox 2Mailbox 3New SMSIncoming¢ page 40¢ page 42Outgoing ¢ page 41• Settings Service Centres ¢ page 45SMS Mailboxes ¢ page 44Notification ¢ page 44Status Report ¢ page 41Ê Call ListsAll Calls ¢ page 37Outgoing Calls ¢ page 37Accepted Calls ¢ page 37Missed Calls ¢ page 3724
Menu overviewÌ Voice MailPlay Messages Network Mailbox ¢ page 54Answering Machine * ¢ page 48Activation * ¢ page 48Announcements * Rec. Announcement * ¢ page 49Play Announcement * ¢ page 49Del. Announcement * ¢ page 49• Rec. Advisory Msg. * ¢ page 49• Play Advisory Msg. * ¢ page 49• Del. Advisory Msg. * ¢ page 49• Recordings * ¢ page 52• Call Screening * ¢ page 51• Network Mailbox ** ¢ page 54• Set Key 1 * Network Mailbox ¢ page 54Answering Machine ¢ page 54* Only base with answering machine** Only base without answering machineÇ Select ServicesWithhold Number ¢ page 30Send Number ¢ page 30Automatic Recall ¢ page 30All Calls Call Divert ¢ page 31Call Waiting ¢ page 30Fixed Destin. Call ¢ page 32Ringback Off ¢ page 30É Additional FeaturesAlarm Clock ¢ page 56Room Monitor ¢ page 6025
Menu overviewÏ SettingsDate/Time ¢ page 14Audio Settings H<strong>and</strong>set Volume ¢ page 63• Advisory Tones ¢ page 65Ringtones(H<strong>and</strong>set) ¢ page 64Ringtones (Base) ¢ page 66• Music on hold ¢ page 66Display Screensaver ¢ page 62Large Font ¢ page 63Colour Schemes ¢ page 63• Backlight ¢ page 63Language ¢ page 62Registration Register H<strong>and</strong>set ¢ page 56De-reg. H<strong>and</strong>set ¢ page 57Select Base ¢ page 57• Telephony Auto Answer ¢ page 63Area Codes ¢ page 65Listening In ¢ page 59Access Code ¢ page 68Dialling Mode ¢ page 68Recall ¢ page 68• System H<strong>and</strong>set Reset ¢ page 65Base Reset ¢ page 67Repeater Mode ¢ page 66System PIN ¢ page 66Menu View Simplified ¢ page 24Complete ¢ page 24Eco Mode Eco Mode ¢ page 55Eco Mode+ ¢ page 5526
Making callsMaking callsMaking an external callExternal calls are calls using the public telephonenetwork.~c Enter the number <strong>and</strong> pressthe talk key.Or:c~ Press <strong>and</strong> hold the talk keyc <strong>and</strong> then enter thenumber.You can cancel the dialling operation withthe end call key a.You are shown the duration of the callwhile the call is in progress.Please noteDialling with the directory(¢ page 33), calls list (¢ page 37)<strong>and</strong> redial list (¢ page 36) savesyou from repeatedly keying in phonenumbers.Ending a callaPress the end call key.Accepting a callThe h<strong>and</strong>set indicates an incoming call inthree ways: by ringing, by a display on thescreen <strong>and</strong> by the flashing talk key c.You can accept the call by:¤ Pressing the talk key c.¤ Pressing the speaker key d.¤ <strong>Twist</strong> <strong>600</strong>/610: Press the display key§Accept§.¤ <strong>Twist</strong> 610: Press the display key Ô todivert the call to the answeringmachine (¢ page 51).If the h<strong>and</strong>set is in the base <strong>and</strong> the AutoAnswer function is activated(¢ page 63), the h<strong>and</strong>set automaticallyanswers the call when you remove it fromthe base.To deactivate the ringtone, press the§Silence§ display key. You can accept the callas long as it is displayed on the screen.Calling Line IdentificationWhen you receive a call, the caller'snumber <strong>and</strong>/or name is displayed on thescreen if the following conditions are met:u Your network provider <strong>support</strong>s CLIP,CLI <strong>and</strong> CNIP.– CLI (Calling Line Identification): thecaller's number is transmitted.– CLIP (Calling Line Identification Presentation):the caller's number is displayed.– CNIP (Calling Name IdentificationPresentation): the caller's name isdisplayed.u You have requested CLIP or CNIP fromyour network provider.u The caller has requested CLI from thenetwork provider.27
Making callsCall display with CLIP/CLIIf the caller's number is saved in yourdirectory, the caller's name will be displayed.Ø«Ú1234567890<strong>Twist</strong> <strong>600</strong>12Display with CNIPIf you have CNIP, then the name that isregistered with your network provider forthe caller's number will also be displayed.If the number of the caller is stored in yourdirectory, the CNIP display is replaced bythe corresponding directory entry.Ø«Ú12345678901AcceptSilenceAnna Fielding,2orØ«Ú1234567890à Silence<strong>Twist</strong> 61012AcceptSilence1 Caller's number2NameThe display shows:u External, if no number is transmitted.u Withheld, if the caller has withheld CallingLine Identification (¢ page 30).u Unavailable, if the caller has notrequested Calling Line Identification.1 Ringtone icon2 Number or name of callerThe following is displayed in place of thenumber:u External, if no number is transmitted.u Withheld, if the caller has withheld CallingLine Identification (¢ page 30).u Unavailable, if the caller has notrequested Calling Line Identification.28
Making callsSpeaker modeIn speaker mode, instead of holding theh<strong>and</strong>set to your ear you can put it down,for example on the table in front of you.This allows others to participate in the call.Activating/deactivating speaker modeActivating while dialling~d Enter the number <strong>and</strong> pressthe speaker key.¤ You should inform your caller beforeyou use the speaker function so thatthey know someone else is listening.Switching to muteYou can deactivate the microphone inyour h<strong>and</strong>set during an external call.hPress key to mute the h<strong>and</strong>set.The display shows Microphoneis off.Press the key again to reactivatethe microphone.Please noteIf the telephone is muted, all keysexcept the mute key h <strong>and</strong> theend-call key a will not work.Switching between earpiece <strong>and</strong> speakermoded Press the speaker key.During a call <strong>and</strong> when listening to theanswering machine (<strong>Twist</strong> 610 only), activateor deactivate speaker mode.If you wish to place the h<strong>and</strong>set in thebase during a call:¤ Press <strong>and</strong> hold the speaker key dwhile placing the h<strong>and</strong>set in the base.For instructions on how to adjust the loudspeakervolume, ¢ page 63.29
Making calls using network servicesMaking calls using networkservicesNetwork services are functions that yournetwork provider makes available to you.You have to request these services fromyour network provider.¤ If you require assistance, pleasecontact your network provider.Calling Line IdentificationWithhold Calling Line Identification once(CLIR):If you make a call, your number is shownin the display of the call recipient if thatperson has activated CLIP (¢ page 28).If in certain instances you do not wish tohave your number displayed, you canwithhold your number for the next call(CLIR).v ¢ Ç ¢ Withhold Number~ Enter phone number.c Press the talk key.Enable Calling Line Identification onceIf your number is permanently withheldby your network provider, you can changethe settings to display your phone numberon your next call.v ¢ Ç ¢ Send Number~ Enter phone number.c Press the talk key.RingbackInitiating ringbackIf the number you have called is engaged,you can initiate ringback. As soon as theline of the person you called is free, yourh<strong>and</strong>set will ring.You hear the busy tone.§Options§ ¢ Ringbacka Press the end call key.Cancelling ringbackYou can cancel a ringback that has alreadystarted.v ¢ Ç ¢ Ringback OffReturning a missed callYou can return the last missed call, even ifthe number is not displayed.v ¢ Ç ¢ Automatic RecallCall waiting during anexternal callIf the function is activated during anexternal call you will hear a call waitingtone to signal that another external calleris trying to get through. If you have CLIP(¢ page 28) the number of the waitingcaller or the corresponding directory entryis shown in the display.Activating/deactivating call waitingv ¢ Ç ¢ All Calls ¢ Call WaitingStatus§Dial§Activate/deactivate.Press the display key.30
Making calls using network servicesAccepting a waiting callYou are making an external call <strong>and</strong> hearthe call waiting tone.You have the following options:§Options§ ¢ Accept Waiting callor(only if CLIP is activated ¢ page 27)Press the display key.Once you have accepted the waitingcall you can switch between the twocallers ("call swap" ¢ page 32)or speak to both at the same time("conference" ¢ page 32).§Accept§§Options§ ¢ Favour Waiting callEnd the current conversation <strong>and</strong>accept the waiting call.Rejecting a waiting callYou can hear the call waiting tone but donot want to speak to the caller.§Options§ ¢ Reject Waiting callThe caller hears the busy tone.Call divert (CD)When diverting a call, the call is forwardedto another connection.The following options are available:u All Calls: Calls are diverted immediately.No more calls are signalled on yourphone.u No Answer: Calls are diverted if no oneaccepts the call within several rings.u When Busy: Calls are diverted whenyour line is busy. Call is diverted withouta call waiting tone.v ¢ Ç ¢ All Calls ¢ Call Divert¤ Change multiple line input:When:Select All Calls / When Busy / No Answer.Phone Number:Enter the number to which the call is tobe diverted.Status:Activate/deactivate call divert.§Dial§ Press the display key.aAfter the announcement,press the end call key.Consultation call, call swap,conferenceThese functions enable you tou Call a second external caller(consultation call call)u Switch between two calls (call swap)u Talk to two callers at the same time(conference)Consultation callYou can call a second external caller.The first call is placed on hold.During an external call:§Ext.Call§ Press the display key.The previous call is placed onhold. The other participanthears an announcement.~ Enter the second participant'stelephone number.The phone number is dialled. You areconnected to the second participant.If the caller does not answer, select thedisplay key §End§ to return to the firstparticipant.Please noteYou can also select the second participant'sphone number from the directory(¢ page 35) or the calls list(¢ page 37).31
Making calls using network servicesEnding a consultation call§Options§ ¢ End Active CallYou are reconnected to the first caller.You can also end the consultation call byselecting the end call key. The connectionis briefly interrupted <strong>and</strong> you will be calledback. Once you have pressed the talk keyyou are reconnected to the first caller.Call swappingYou can speak to both callers one at a time(call swap).Precondition: You are conducting anexternal call <strong>and</strong> have called a second participant(consultation call) or haveaccepted a waiting call.¤ Use q to swap between the participants.The caller you are currently speaking to ismarked with the æ icon.End the current call§Options§ ¢ End Active CallYou are re-connected to the waiting caller.Forwarding a callYou are swapping calls or making an externalcall. You can connect both externalcallers. Your call with both participants isended.§Options§ ¢ Forward CallEnding a conference calla Press the end call key to endthe call with both participants.Or:§EndConf§ Press the display key.You return to the "call swap" status. Youare reconnected to the caller with whomyou started the conference call.You can continue your conversation withthe other callers.Each of the callers can end their participationin the conference call by selecting theend call key <strong>and</strong> replacing the h<strong>and</strong>set.Further functionsConnecting without diallingIf you remove the telephone from the baseor press the talk key c the storednumber is automatically dialled after fiveseconds without having to press a button.v ¢ Ç ¢ All Calls ¢ Fixed Destin. Call¤ Change multiple line input:Phone Number:Enter the telephone number.Status:Activate/deactivate function.§Dial§ Press the display key.ConferenceYou can speak to both participants simultaneously.Precondition: You are conducting anexternal call <strong>and</strong> have called a second participant(consultation call) or haveaccepted a waiting call.§Conf.§ Press the display key.You <strong>and</strong> the two other callers (bothmarked by the æ icon) can hear <strong>and</strong>speak to each other simultaneously.32
Using the directory <strong>and</strong> listsUsing the directory <strong>and</strong> listsThe options are:u Directoryu Redial listu Incoming SMS message listu Call listsu List of missed appointmentsu Answering machine list(<strong>Twist</strong> 610 only)You can create a personalised directory foryour own individual h<strong>and</strong>set. You can alsosend lists/entries to other h<strong>and</strong>sets(¢ page 35).DirectoryYou can save up to 150 entries in the directory.Please noteFor quick access to a number from thedirectory (shortcut), you can assignthe number to a key (¢ page 61).DirectoryIn the directory, you can saveu Up to three numbers <strong>and</strong> associatedfirst names <strong>and</strong> surnamesu E-mail addressu Anniversaries with reminderu VIP ringtones with VIP symbol.You open the directory in idle status usingthe s key.Length of the entries3 numbers:each max. 32 digitsFirst name <strong>and</strong> surname:each max. 16 charactersE-mail address:max. 64 charactersSaving a number in the directorys ¢ ¤ Change multiple line input:First Name: / Surname:Enter first names <strong>and</strong>/or surnames.If a name is not entered in any of thefields, the telephone number is saved<strong>and</strong> displayed as the surname.(For instructions on how to enter text<strong>and</strong> special characters, please see¢ page 75.)Phone (Home): / Phone (Office): /Phone (Mobile):Enter a number in at least one of thefields.When scrolling through the directory,the entries are highlighted by a prefixedsymbol: ä/ k/ l.E-mail:Enter the e-mail address.Anniversary:Select On or Off.When set to On:Enter Annivers. (Date) <strong>and</strong> Anniversary(time) <strong>and</strong> select reminder type:Anniversary (tone) ¢ page 35.VIP Group:Mark directory entry as VIP(Very Important Person).Each entry can be allocated to one of6 VIP groups, which are defined by thecolour of the Æ symbol, the name ofthe VIP group <strong>and</strong> the correspondingringtone.VIP calls are recognised by the ringtone.The background colour of theringtone animation changes to the colourof the VIP group.Precondition: Calling Line Identification(¢ page 27).§Save§ Press the display key.33
Using the directory <strong>and</strong> listsOrder of directory entriesDirectory entries are generally sortedalphabetically by surname. Spaces <strong>and</strong>digits take first priority. If only the firstname was entered in the directory, this isincorporated into the sort order instead ofthe surname.The sort order is as follows:1. Space2. Digits (0–9)3. Letters (alphabetical)4. Other charactersTo get round the alphabetical order of theentries, insert a space or a digit in front ofthe first letter of the surname. Theseentries will then move to the beginning ofthe directory.Selecting a directory entrys Open the directory.You have the following options:u Use s to scroll through the entriesuntil the required name is selected.u Enter the first letters of the name; ifnecessary scroll to the entry with thes key.The directory searches for the surname.If a surname has not been entered, thedirectory searches for the first name.Dialling with the directorys ¢ s (Select entry).c Press the talk key.(If several numbers have beenentered, select the requirednumber <strong>and</strong> press talk keycagain).The number is dialled.Managing directory entriesViewing entriess ¢ s (Select entry).§View§ Press the display key.The entry is displayed.§Options§ Press the display key.The following functions can be selectedwith q:Display NumberTo edit or add to a saved number, or tosave it as a new entry, press Óafterthe number is displayed.Delete EntryDelete selected entry.Copy Entryto Internal: Send a single entry to ah<strong>and</strong>set (¢ page 35).vCard via SMS: Send a single entry invCard format via SMS (option notavailable).Editing entriess ¢ s (Select entry).§View§ §Edit§ Press the display keys one afterthe other.¤ Carry out changes <strong>and</strong> save.Using other functionss ¢ s (Select entry)¢ §Options§ (Open menu)The following functions can be selectedwith q:Display NumberEdit or add to a saved number <strong>and</strong> thendial with c or save as a new entry;to do this, press Óafter the numberappears on the display.Edit EntryEdit selected entry.Delete EntryDelete selected entry.34
Using the directory <strong>and</strong> listsCopy Entryto Internal: Send a single entry to ah<strong>and</strong>set (¢ page 35).vCard via SMS: Send a single entry invCard format via SMS (option notavailable).VIP GroupsChange the name <strong>and</strong> ringtone of VIPgroups; to do this:Select the VIP group ¢ §Edit§¢ Change entry ¢ §Save§.Delete AllDelete all entries in the directory.Copy Allto Internal: Send the complete list to ah<strong>and</strong>set (¢ page 35).Available MemoryDisplay the number of entries that arestill available in the directory(¢ page 33).Using shortcut keys¤ Press <strong>and</strong> hold the required shortcutkey (¢ page 61).Sending the directory to anotherh<strong>and</strong>setPreconditions:u The sending <strong>and</strong> receiving h<strong>and</strong>setsmust both be registered to the samebase.u The other h<strong>and</strong>set <strong>and</strong> the base cansend <strong>and</strong> receive directory entries.s ¢ s (Select entry) ¢ §Options§(Open menu) ¢ Copy Entry / Copy All¢ to InternalsSelect the internal number ofthe receiving h<strong>and</strong>set <strong>and</strong>press §OK§.You can transfer several individual entriesone after the other by responding tothe Entry copied - Copy next entry? promptwith §Yes§.A successful transfer is confirmed by amessage <strong>and</strong> confirmation tone on thereceiving h<strong>and</strong>set.Please note:u Entries with identical numbers are notoverwritten on the receiving h<strong>and</strong>set.u The transfer is cancelled if the phonerings or if the memory of the receivingh<strong>and</strong>set is full.u Pictures <strong>and</strong> sounds allocated to entriesare not transferred.Copying the displayed number to thedirectoryYou can copy numbers displayed in a list,e.g. the calls list or the redial list, or in anSMS to the directory.If you have CNIP, the first 16 characters ofthe transmitted name are also copied tothe Surname line.A number is displayed:§Options§ ¢ Copy to Directory¤ Complete the entry ¢ page 33.<strong>Twist</strong> 610: Message playback is interruptedduring the number transfer fromthe answering machine list.Copying a number or e-mail addressfrom the directoryIn some operating situations, you canopen the directory to copy a number or e-mail address, for example. Your h<strong>and</strong>setneed not be in idle status.¤ Depending on the operating situation,open the directory with s or Ó.q Select entry (¢ page 34).Saving an anniversary in the directoryFor each number in the directory, you cansave an anniversary <strong>and</strong> specify a timeat which a reminder call should be madeon the anniversary (default setting:Anniversary: Off).s ¢ s (Select entry)35
Using the directory <strong>and</strong> lists§View§ §Edit§ Press the display keys one afterthe other.s Scroll to the Anniversary line.v Select On.¤ Change multiple line input:Annivers. (Date)Enter day/month/year in 8-digit format.Anniversary (time)Enter the hour/minute for the remindercall in 4-digit format.Anniversary (tone)Select the type of signal for thereminder.§Save§ Press the display key.Please noteA time must be specified for remindercalls. If you select a visual signal, atime is not required <strong>and</strong> is automaticallyset to 00.00.Deactivating anniversariess ¢ s (Select entry)§View§ §Edit§sv§Save§Press the display keys one afterthe other.Scroll to the Anniversary line.Select Off.Press the display key.Reminder call on an anniversaryIn idle status, a reminder call is shown inthe h<strong>and</strong>set display <strong>and</strong> indicated by theselected ringtone.OffØðÚMiller,FrankSMSYou can:§SMS§Write an SMS.§Off§ Press the display key toacknowledge <strong>and</strong> end thereminder call.When you are on the phone a remindercall is indicated on the h<strong>and</strong>set with asingle advisory tone.Anniversaries that are indicated during acall <strong>and</strong> that are elapsed are entered in theMissed Alarms list (¢ page 39).Redial listThe redial list contains the twenty numberslast dialled with the h<strong>and</strong>set(max. 32 digits). If one of the numbersis in the directory, the correspondingname will be displayed.Manual redialcscPress the key briefly.Select entry.Press the talk key again.The number is dialled.When a name is displayed, you can displaythe corresponding phone number bypressing the display key §View§.Managing entries in the redial listcsPress the key briefly.Select entry.§Options§ Open menu.The following functions can be selectedwith q:Copy to DirectoryCopy an entry to the directory(page 33).Display Number (as in the directory,page 34)Delete Entry (as in the directory, page 34)Delete All (as in the directory, page 35)36
Using the directory <strong>and</strong> listsIncoming SMS message listAll received SMS messages are saved inthe incoming message list ¢ page 42.Answering machine list(<strong>Twist</strong> 610 only)You can use the answering machine listto listen to the messages that are on theanswering machine.Call listsPrecondition: Calling Line Identification(CLIP, page 27)Your telephone stores various types ofcalls:u Accepted callsu Outgoing callsu Missed callsu Calls recorded by the answeringmachine (<strong>Twist</strong> 610 only)You can view each type of call separatelyor gain an overview of all calls. Each callrecord contains the last 20 numbers in itscategory.When in idle status, open the call lists byselecting the §Calls§ display key or via themenu:v ¢ ÊList entryNew messages are displayed at the top.Example of list entries:All Calls Frank14.10.09, 15:40š 08956379514.10.09, 15:32 ...012372785936292214.10.09, 15:07ViewOptionsu List type (in header)u Status of entryBold: New entryu Number or name of calleru Date <strong>and</strong> time of call (if set, page 14)u Type of entry:– Accepted calls ( › )– Missed calls ( )– Outgoing calls ( š )– Calls recorded by the answeringmachine (Ã, <strong>Twist</strong> 610 only)Press the talk key c to return the callsselected.Select the §View§ display key to access additionalinformation, including for examplethe number linked to the name. If youhave CNIP, then the name <strong>and</strong> town that isregistered with your network provider forthe calling number will be displayed. If thename <strong>and</strong> town are not shown, it meansthat the caller has not requested CallingLine Identification or that Calling LineIdentification has been withheld.Select the §Options§ display key to select thefollowing options:Copy to DirectoryCopying a displayed number to thedirectory.Delete EntryDelete selected entry.Delete AllDelete all entries.37
Using the directory <strong>and</strong> listsWhen you quit the call lists, all entries areset to the status "old", i.e. the next timeyou open the call the list they will nolonger be shown in bold.Opening lists with themessage keyYou can use the message key f to openthe following list selection:u Answering machine list (<strong>Twist</strong> 610only) or network mailbox, if your networkprovider <strong>support</strong>s this function<strong>and</strong> a shortcut is set for the networkmailbox (¢ page 54).u Incoming message list (¢ page 42)If several mailboxes are set up(¢ page 44), several lists are displayed.u List of missed callsu List of missed appointments(¢ page 39)An advisory tone sounds as soon as a newmessage arrives in a list. The f keyflashes (it goes off when the key ispressed). In idle status, the display showsan icon for the new message:IconNew message...Please noteIf calls are saved in the network mailbox,you will receive a message if theappropriate settings have been made(see your network provider userguide).After pressing the message key f youwill see all the lists that contain messages<strong>and</strong> the network mailbox list.Lists containing new messages are at thetop of the list <strong>and</strong> are marked in a boldfont.Messages & CallsCalls: (3)Missed Alarms (1)SMS: (2)BackOKSelect a list with q. To open, press §OK§.ÃË... in the answering machine list(<strong>Twist</strong> 610 only) or on the networkmailbox... in list of missed calls... in the SMS list... in the Missed Alarms list:The number of new entries is displayedunder the corresponding icon.à œ ¾ 02 10 09 0838
Using the directory <strong>and</strong> listsList of missed appointmentsMissed anniversaries (¢ page 35) aresaved in the Missed Alarms list if:u You do not accept an anniversary.u The anniversary was signalled duringa phone call.u The h<strong>and</strong>set is deactivated at the timeof the anniversary.u Open the list by pressing the messageskey f (¢ page 38).Each entry is shown withu Number or nameu Date <strong>and</strong> timeThe most recent entry is at the head of thelist.Press the display key §Delete§ to delete theselected entry.If 10 entries are already stored in the list,the next appointment reminder will deletethe oldest entry.39
SMS (text messages)SMS (text messages)Your device is delivered ready to send SMSmessages.Preconditions:u Calling Line Identification is enabled foryour phone line.u Your network provider <strong>support</strong>s SMS onthe fixed line network (information onthis can be obtained from your networkprovider).u You are registered with your serviceprovider to send <strong>and</strong> receive SMS.u To receive SMS messages you must beregistered with your service provider.This is completed automatically whenyou send your first SMS.Please noteIf your phone is connected to a PABX,please read ¢ page 46.Writing/sending an SMS§Options§SendSMSPress the display key.Select <strong>and</strong> press §OK§.Select <strong>and</strong> press §OK§.~ / s Select number with area code(even if you are in that area)from the directory or enterdirectly. For sending SMS to anSMS mailbox: add the mailboxID to the end of the number.§Send§Press the display key. The SMSis sent.Please noteu If you are interrupted by an externalcall while writing an SMS, the text isautomatically saved in the draftSMS list.u If the memory is full, or if the SMSfunction on the base is being usedby another h<strong>and</strong>set, the operation iscancelled. An appropriate messageappears in the display. Delete SMSmessages you no longer require orsend the SMS later.Writing an SMSv ¢ ËMailbox 2 Select mailbox if necessary<strong>and</strong> press §OK§.~ Enter mailbox PIN if necessary<strong>and</strong> press §OK§.New SMS Select <strong>and</strong> press §OK§.~ Write an SMS.Please noteu For instructions on how to entertext <strong>and</strong> special characters,please see page 75.u An SMS can be up to 160 characters.Sending an SMSc Press the talk keyOr:40
SMS (text messages)• SMS status reportPrecondition: Your network provider <strong>support</strong>sthis feature.If you have activated the status report, youwill receive an SMS with a confirmationmessage after sending.Activating/deactivating status reportsv ¢ Ë ¢ SettingsStatus ReportSelect <strong>and</strong> press §Change§(³ =on).Reading/deleting status report/savingnumber to directory¤ Open the incoming message list(¢ page 42) <strong>and</strong> then:q Select SMS with State OK orState not OK status.§Read§Press the display key.u Delete:§Options§ ¢ Delete Entry ¢ §OK§.u Copy to directory:§Options§ ¢ Copy to Directory ¢ §OK§.u Delete entire list:§Options§ ¢ Delete All ¢ §OK§.Draft SMS listYou can save an SMS in the draft SMS list,<strong>and</strong> edit <strong>and</strong> send it later.Saving an SMS in the draft SMS list¤ You are writing an SMS (¢ page 40).§Options§ Press the display key.Save EntrySelect <strong>and</strong> press §OK§.Opening the draft SMS listv ¢ Ë ¢ if necessary ~ (Mailbox,mailbox PIN) ¢ OutgoingThe first list entry is displayed, e.g.The number will be displayed in the firstline, if the entry has been saved with thephone number, i.e. when the SMS wassaved from the incoming message list.Reading or deleting SMS messages¤ Open the draft SMS list <strong>and</strong> then:q Select SMS.§Read§Press the display key.The entry will be displayed.Scroll line by line using q.Or delete the SMS with§Options§ ¢ Delete Entry ¢ §OK§.Writing/changing an SMS¤ You are reading an SMS in the draftSMS list.§Options§ Open menu.You have the following options:CopySend stored SMS.EditEdit the text of the saved SMS <strong>and</strong> thensend it (¢ page 40).Character SetDisplay text in the selected characterset.Deleting draft SMS list¤ Open the draft SMS list <strong>and</strong> then:§Options§ Open menu.Delete All Select, press §OK§ <strong>and</strong> confirmwith §Yes§. The list is cleared.Saved14.10.08 15:0741
SMS (text messages)Sending SMS messages to an e-mailaddressIf your service provider <strong>support</strong>s the SMSas e-mail feature, you can also send yourSMS messages to e-mail addresses (optionnot available).The e-mail address must be at the beginningof the text. You must send the SMS tothe e-mail service of your SMS send centre.v ¢ Ë ¢ (Mailbox, mailbox PIN)¢ New SMSs / ~ Load the e-mail address fromthe directory or enter itdirectly. End the entry with aspace or colon (depending onthe service provider).~ Enter the SMS text.§Options§SendE-mail§Send§Press the display key.Select <strong>and</strong> press §OK§.Select <strong>and</strong> press §OK§. If thenumber of the e-mail service isnot entered (¢ page 45),enter the number of the e-mailservice.Press the display key.Receiving an SMSAll received SMS messages are saved inthe incoming SMS list. Linked SMS messagesare displayed as one message. If thisis too long or is not transferred completely,it is split into individual messages.Since an SMS remains in the list even afterit has been read, you should regularlydelete SMS messages from the list.The display tells you if the SMS memory isfull.Please noteEach incoming SMS is signalled by asingle ring (ringtone as for externalcalls). If you accept such a "call", theSMS will be lost. To prevent this ring,suppress the first ringtone for allexternal calls (¢ page 46).Incoming SMS listThe incoming SMS list contains:u All received SMS messages, startingwith the most recent.u SMS messages that could not be sentdue to an error.New SMS messages are signalled on allh<strong>and</strong>sets by the Ë icon in the display, theflashing message key f <strong>and</strong> an advisorytone.Opening the incoming SMS list with thef keyf Press.The incoming message list is indicated bythe mailbox name <strong>and</strong> the number ofentries (example):SMS: (2)bold: new entriesnormal font: read entriesIf necessary select a mailbox <strong>and</strong> open listby selecting §OK§ (if necessary enter mailboxPIN <strong>and</strong> confirm by pressing §OK§).The number <strong>and</strong> date of receipt are displayedin the entry list.012372785936292214.10.09 09:07Opening the incoming message box viathe SMS menuv ¢ Ë ¢ if necessary select mailbox,enter mailbox PIN) ¢ Incoming42
SMS (text messages)Deleting the incoming SMS listAll new <strong>and</strong> old SMS messages in the listare deleted.¤ Open the incoming message box.§Options§ Open menu.Delete AllSelect, press §OK§ <strong>and</strong> confirmwith §Yes§. The list is cleared.Reading or deleting SMS messages¤ Open the incoming message list, then:q Select SMS.§Read§Press the display key.The entry will be displayed.Scroll line by line using q.Or delete the SMS with§Options§ ¢ Delete Entry ¢ §OK§.After you have read a new SMS, it is giventhe status "Old" (is no longer shown inbold).Changing the character set¤ Reading an SMS§Options§ Press the display key.Character SetText is shown in the selected characterset.Replying to or forwarding textmessages¤ Reading an SMS§Options§ Press the display key.You have the following options:ReplyWrite <strong>and</strong> send a new SMS in reply tothe sender (¢ page 40).EditEdit the text in the SMS <strong>and</strong> return it tothe sender (¢ page 40).ForwardForward the SMS to another number(¢ page 40).Copying the number to the directoryCopying the sender's number¤ Open the incoming message list <strong>and</strong>select entry (¢ page 42).§Options§ ¢ Copy to Directory¤ Complete the entry ¢ page 35.Please noteAn attached mailbox identifier is addedto the directory.Copying/dialling numbers from an SMStext¤ Read the SMS <strong>and</strong> scroll to the telephonenumber.The digits are highlighted.Ó Press the display key.Complete the entry ¢ page 35.Or:c Press the talk key to dial thenumber.If you wish to use the number to send anSMS:¤ Save the number with the local areacode (dialling code) in the directory.SMS with vCard (option notavailable)The vCard is an electronic business card. Itis displayed by the Å symbol in the bodyof the SMS.A vCard can include:u Nameu Private numberu Business numberu Mobile phone numberu BirthdayEntries in a vCard can individually be savedto the directory one after the other.43
SMS (text messages)Opening the vCard¤ Read the SMS containing the vCard.§View§ Press the display key.To return to the body of theSMS, press §Back§.q Select number.§Save§ Press the display key.When you save a number, the directory isopened automatically. The number <strong>and</strong>name are copied. If a birthday is enteredon the vCard, the date is copied to thedirectory as an anniversary.¤ If necessary, edit the entry in the directory<strong>and</strong> save it. You will return to thevCard automatically.• Notification by SMSYou can be notified about missed calls ornew answering machine messages(<strong>Twist</strong> 610 only) via SMS.Precondition: For missed calls, the caller'snumber (CLI) must have been transmitted.Notification is sent to your mobile phoneor another device with SMS functionality.You only need to save the telephonenumber to which you wish the message tobe sent.v ¢ Ë ¢ Settings ¢ Notification¤ Change multiple line input:To:Enter the number to which the SMSshould be sent.On missed callSelect On if you require SMS notification.On message on answer machine(<strong>Twist</strong> 610 only).Select On if you require SMS notification.§Save§SMS mailboxesPress the display key.WarningDo not enter your own fixed line networknumber for the notification ofmissed calls. This can lead to chargeableendless looping.The general mailbox is the default setting.Anyone can access this mailbox <strong>and</strong>it cannot be protected by a PIN. You canadditionally set up three personal mailboxes<strong>and</strong> protect these with a PIN. Eachmailbox is identified by a name <strong>and</strong> a"mailbox ID" (a kind of extension number).Please note:u If you operate a number of devices(bases) with SMS functionality on a singlephone line, then each SMS mailboxID may only occur once. In this case youmust also change the preset ID of thegeneral mailbox ("0").u You can only use personal mailboxes ifyour service provider <strong>support</strong>s thisfunction. You can tell whether this isthe case by the addition of a star (*) tothe number of a (preset) SMS centre.u If you have forgotten your mailbox PIN,you can reset it by restoring default settingsof the base. This will delete allSMS messages from all mailboxes.• Setting up <strong>and</strong> changing apersonal mailboxSetting up a personal mailboxv ¢ Ë ¢ Settings ¢ SMS Mailboxess Select mailbox, e.g. Mailbox 2<strong>and</strong> press §Edit§.¤ Change multiple line input:Activation:Activate or deactivate mailbox.Name:Enter name.44
SMS (text messages)Box ID:Select mailbox ID (0–9). You can onlyselect the available numbers.Protection:Activate/deactivate PIN protection.SMS PIN:If necessary, enter 4-digit PIN.§Save§ Press the display key.Active mailboxes are marked with μ inthe mailbox list. They are shown in theSMS list <strong>and</strong> can, if necessary, be displayedby pressing the message key f.Deactivating a mailbox¤ Set Activation to Off. Confirm messagewith §Yes§ if necessary.All SMS messages saved in this mailboxwill be deleted.Deactivating PIN protection¤ Set Protection to Off.The mailbox PIN is reset to "0000".Changing the name of a mailboxv ¢ Ë ¢ Settings ¢ SMS Mailboxes¢ s (Select mailbox)§Edit§ Press the display key.~ Enter new name.§Save§Press the display key.Changing a mailbox's PIN <strong>and</strong> IDv ¢ Ë ¢ Settings ¢ SMS Mailboxes¢ s (Select mailbox)~ Enter mailbox PIN if necessary<strong>and</strong> press §OK§.¤ Set Box ID, Protection <strong>and</strong> SMS PIN(¢ page 44).Sending an SMS to a personal mailboxTo send an SMS to a personal mailbox, thesender must know your ID <strong>and</strong> enter itafter your number.¤ You can send your SMS contact an SMSvia your personal mailbox.Your SMS contact will receive your SMSnumber with current ID <strong>and</strong> can save it intheir directory. If the ID is invalid, the SMSwill not be delivered.Setting SMS centresSMS messages are exchanged betweenSMS centres operated by service providers.You must enter the SMS centrethrough which you wish to send <strong>and</strong>receive SMS messages into your phone.You can receive SMS messages from everySMS centre that is entered, provided youhave registered with your service provider.Your SMS messages are sent through theSMS centre that is entered as the activesend service centre (¢ page 45). Onlyone SMS centre can be the active sendservice centre at any one time.If no SMS service centre is entered,the SMS menu only contains the entrySettings. Enter an SMS Service Centre(¢ page 45).• Entering/changing SMS centres¤ You should find out about the services<strong>and</strong> special functions offered by yourservice provider before you make anew application <strong>and</strong>/or before youdelete pre-configured call numbers.v ¢ Ë ¢ Settings ¢ Service Centress Select SMS centre (e.g. ServiceCentr. 1) <strong>and</strong> press §Edit§.¤ Change multiple line input:Active Send:Select §Yes§ if SMS messages are to besent via the SMS centre.SMS Service Centre no.:Enter the number of the SMS service<strong>and</strong> insert a star if your service provider<strong>support</strong>s personal mailboxes.Send e-mail to (option not available):Enter the number of the e-mail service.§Save§ Press the display key.45
SMS (text messages)Please noteAsk your service provider for details onhow to enter service numbers if youwish to use personal mailboxes (precondition:your service provider <strong>support</strong>sthis function).Sending an SMS via another SMScentre¤ Activate the SMS centre (2 to 4) as theactive send service centre.¤ Send the SMS.SMS on a PABXu You can only receive an SMS whenthe Calling Line Identification is forwardedto the extension of the PABX(CLIP). The CLIP evaluation of theSMS centre number is completed byyour telephone.u Depending on your PABX, you mayhave to add the access code (externalline prefix) before the number of theSMS centre.If in doubt, test your PABX, e.g. bysending an SMS to your own number:once with <strong>and</strong> once without the accesscode.u When you send SMS messages, yoursender number may be sent withoutyour extension number. In this case therecipient cannot reply to you directly.Sending <strong>and</strong> receiving SMS messages onISDN PABXs is only possible via the MSNnumber assigned to your base.Activating/deactivating firstringtone mutingv Open the main menu.*#Q5# OPress keys.Q §OK§ Make the first ring audible.Or: §OK§ Mute the first ring.Activating/deactivating SMSfunctionIf you deactivate the SMS function, youcannot send or receive any SMS messageswith your phone.The settings you have selected for sending<strong>and</strong> receiving SMS messages (e.g. thenumbers of the SMS centres) <strong>and</strong> theentries in the incoming <strong>and</strong> draft SMS listsare saved even after you turn off yourphone.v Open the main menu.*#Q5# 2 LEnter the digits.Q §OK§ Deactivate the SMS function.Or: §OK§ Activate the SMS function(default setting).46
SMS (text messages)SMS troubleshootingError codes when sendingE0 Calling Line Identification permanentlywithheld (CLIR) or Calling Line Identificationnot activated.FE Error occurred during SMS transmission.FD Connection to SMS centre failed; see selfhelp.Self-help with errorsThe following table lists error situations,possible causes <strong>and</strong> provides notes ontroubleshooting.You cannot send messages.1. You have not requested the CLIP service(Calling Line Identification Presentation).¥ Ask your service provider to enable thisservice.2. SMS transmission has been interrupted(e.g. by a call).¥ Re-send the SMS.3. The network provider does not <strong>support</strong> thisfeature.4. No number or an invalid number is enteredfor the SMS centre set as the active sendservice centre.¥ Enter the number (¢ page 45).You receive an incomplete SMS.1. Your phone's memory is full.¥ Delete old SMS messages (¢ page 41).2. The service provider has not yet sent therest of the SMS.You have stopped receiving SMS messages.1. You have changed the ID of your mailbox.¥ Give your SMS contacts your new ID orundo the change (¢ page 45).2. You have not activated your mailbox.¥ Activate your mailbox (¢ page 45).3. Call divert (redirecting) is activated withWhen: All Calls or for the network mailbox byselecting All Calls.¥ Change the call divert (¢ page 31).47
Operating the answering machine of the <strong>Twist</strong> 610 baseOperating the answeringmachine of the <strong>Twist</strong> 610baseThe answering machine is operated viathe h<strong>and</strong>set, the keys on the base(¢ page 3) or by remote operation (fromanother telephone/mobile phone). Youcan record your own announcement messageor advisory message via the h<strong>and</strong>set.Answering machine modeYou can use the answering machine intwo different modes.u In Answer & record mode, the callerhears the announcement <strong>and</strong> can thenleave a message.u In Answer only mode, the caller hearsyour announcement but cannot leave amessage.Operation via the h<strong>and</strong>setThe h<strong>and</strong>set loudspeaker activates automaticallyif you receive an acousticprompt or message while operating theanswering machine. You can switch it offwith the speaker key d.Activating/deactivating <strong>and</strong> setting theanswering machine modeYou can choose between Answer & record,Answer only <strong>and</strong> Alternating. By using theAlternating setting you can activate theanswer <strong>and</strong> record mode for a set period,outside this period the caller will hear theadvisory message.v ¢ Ì ¢ Activation (μ= on)§Edit§Press the display key.¤ Change multiple line input:Activation:Select On or Off to activate/deactivatethe answering machine.• Mode:Answer & record, Answer only orselect Alternating.If the Alternating mode is selected:Record from:Enter hours/minutes for the start of theperiod in 4-digit format.(The time must be set on the phonebeforeh<strong>and</strong>.)Record until:Enter hours/minutes for the end of theperiod in 4-digit format.§Save§ Press the display key.When you switch the answering machineon, the remaining memory time isannounced. If the time has not yet beenset an appropriate announcement is made(Set time ¢ page 14). The à iconappears in the display. The LED displaylights up on the base (¢ page 3).The phone is supplied with pre-recordedannouncements for answer <strong>and</strong> recordmode <strong>and</strong> for advisory only mode. If apersonal announcement has not beenrecorded, the relevant pre-recordedannouncement is used.If the messages memory is full <strong>and</strong>Activation: On has been selected, savingis interrupted <strong>and</strong> you will receive aninstruction to delete old messages.48
Operating the answering machine of the <strong>Twist</strong> 610 baseRecording a personal announcement/• advisory messagev ¢ Ì ¢ Announcements¢ Rec. Announcement / Rec. Advisory Msg.§OK§ Press the display key to startthe recording.You hear the ready tone (short tone).¤ Now speak your announcement (atleast 3 seconds).§End§ Press the display key to endthe recording.Cancel recording with a or §Back§.Restart the recording with §OK§.After recording, the announcement isplayed back for you to check. You can rerecordthe announcement with §New§.Please note:u Recording ends automatically if themaximum recording time of 170 secondsis exceeded or there is a break inspeech for more than 2 seconds.u If you cancel the recording, the prerecordedannouncement will be usedagain.u If the answering machine's memory isfull, it will switch to Answer only mode.¤ Delete old messages <strong>and</strong> theanswering machine will automaticallyswitch back to Answer & recordmode. Repeat recording if required.Playing back announcements/• advisory messagesv ¢ Ì ¢ Announcements¢ Play Announcement / Play Advisory Msg.If you have not recorded a personalannouncement, the relevant pre-recordedannouncement is played.Record a new announcement while playingback the announcement:§New§ Press the display key.If the answering machine's memory is full,it will switch to Answer only mode.¤ Delete old messages <strong>and</strong> the answeringmachine will automatically switch backto Answer & record mode. Repeat recordingif required.Deleting announcements/• advisory messagesv ¢ Ì ¢ Announcements¢ Del. Announcement / Del. Advisory Msg.§Yes§ Press the display key to confirmthe prompt.Once you have deleted your announcement,the relevant pre-recordedannouncement will be used again.Playing back messagesThe date <strong>and</strong> time of each message islogged (provided this has been set,¢ page 14) <strong>and</strong> displayed during theplayback. If Calling Line Identification isactivated, the caller's number or name isdisplayed. If the caller's number is saved inthe directory, their name is displayed.Playing back new messagesNew messages that have not yet beenheard are indicated in the display with asymbol <strong>and</strong> number:Ã02The fkey on the h<strong>and</strong>set <strong>and</strong> the displayon the base will flash. The number of newmessages is shown on the base.f Press the message key.Answer. Mach.:Select <strong>and</strong> press §OK§.If there are new messages, playback thenbegins with the first new message. Afterthe last new message you will hear theend tone <strong>and</strong> an announcement abouthow much recording time remains.49
Operating the answering machine of the <strong>Twist</strong> 610 baseIf the message has been saved with thedate <strong>and</strong> time, you will hear an appropriateannouncement before playbackbegins.Playing back old messagesYou can listen to old messages if there areno more new messages. Begin playback asdescribed under "Playing back new messages".After the entry time <strong>and</strong> date have beenplayed back (after approx. 3 seconds) anew message assumes the status "old".Stopping <strong>and</strong> controlling playbackDuring message playback:2 Pause playback. Press 2again to resume.or§Options§ Open menu.Pause Select <strong>and</strong> press §OK§.To continue select Continue<strong>and</strong> press §OK§.t orGo to the start of the currentmessage.Press twice to go back to theprevious message.s or 3Skip to next message.Press twice to skip to the nextbut one message.If playback is interrupted for over aminute, the answering machine returns toidle status.Marking a message as "new"A previously played back "old" message isdisplayed as a "new" message again.During message playback:* Press the star key.Or:§Options§ Open menu.Mark as NewSelect <strong>and</strong> press §OK§.An announcement informs you of themessage's new status.Playback of the current message is cancelled.Playback of next message starts, ifapplicable.The f key on the h<strong>and</strong>set flashes.Copying the phone number of a messageto the directoryDuring playback or pause:§Options§ ¢ Copy to Directory¤ Complete the entry ¢ page 35.Deleting messagesYou can either delete all old messagestogether or individually.Deleting all old messagesDuring playback or pause:§Options§ ¢ Delete Old List§OK§ Press the display key to confirmthe prompt.§Yes§ Press the display key to confirmthe prompt.Deleting individual old messagesDuring playback or pause:§Delete§ Press the display key.50
Operating the answering machine of the <strong>Twist</strong> 610 basePicking up a call from the answeringmachineYou can pick up a call while the answeringmachine is recording or is being operatedvia remote operation:c/ §Accept§Press the talk or display key.Recording stops <strong>and</strong> you can speak to thecaller.If 2 seconds of the call have already beenrecorded when you pick it up, the callwill be displayed as a new message.The f key on the h<strong>and</strong>set flashes.You can answer the call even if it is notsignalled on the h<strong>and</strong>set.Diverting an external call to theanswering machineYou can divert an incoming external call tothe answering machine even if it is deactivated.Precondition: Sufficient memory space isavailable on the answering machine.An external call is signalled on the h<strong>and</strong>set:Ô Select display key.The answering machine immediatelystarts in recording mode <strong>and</strong> records thecall. The set time for ring delay(¢ page 52) is ignored.§End§ Press the display key to stoptwo-way record.The maximum recording time is dependenton the memory available on theanswering machine. If the memory is fullyou will hear an end tone, the recording isaborted, <strong>and</strong> the call recorded up to thatpoint is listed in the answering machinelist as a new message.• Activating/deactivating callscreeningWhile a message is recording, you canscreen calls via the loudspeaker of thebase <strong>and</strong> registered h<strong>and</strong>sets.Permanently activating/deactivating callscreeningv ¢ Ì ¢ Call Screening¢ H<strong>and</strong>set / Base (³= on)§Change§ Select display key to activate/deactivate the function.Call screening can be simultaneously activatedon the base <strong>and</strong> h<strong>and</strong>set.Deactivating call screening for the currentrecordingYou can deactivate the function on theh<strong>and</strong>set during the recording.§Silence§ Press the display key.Activating/deactivating two-wayrecordYou can record an external call with theanswering machine.¤ Inform the caller that the call is beingrecorded.§Options§ Open menu.Two-way RecordSelect <strong>and</strong> press §OK§.Two-way record is indicated on the displayby an advisory text <strong>and</strong> is added to theanswering machine list as a new message.51
Operating the answering machine of the <strong>Twist</strong> 610 base• Setting the recordingparametersThe answering machine has already beenpreset at the factory. Individual settingscan be adjusted using the h<strong>and</strong>set.v ¢ Ì ¢ Recordings¤ Change multiple line input:Length:Maximum recording time 1 min.,Select 2 min., 3 min. or Maximum.Quality:Select recording quality Long Play orHigh. If the quality is higher, the maximumrecording time is reduced.Ring Delay:Select when the answering machineshould accept a call: Immediately, after10 sec., 18 sec., 30 sec. or Automatic.§Save§Press the display key.Information about call acceptanceIn Automatic mode, the following appliesfor ring delay:u If there are no new messages, theanswering machine accepts a call after18 seconds.u If new messages are present, theanswering machine accepts a call after10 seconds.When operating remotely (¢ page 53)you can tell after approx. 15 seconds thatthere are no new messages (otherwise theanswering machine would already haveaccepted your call). There will be no callcharges if you hang up now.Please note:You can configure your telephone so thatthe first ring is suppressed on all calls(¢ page 46). This means that the timeselected for call acceptance predetermineshow long the caller must waitbefore the answering machine answersthe call.Changing the language for voiceprompt <strong>and</strong> pre-recordedannouncementv Open the main menu.*#Q5#2Enter digits <strong>and</strong> pressQ §OK§ To set Dutch. §OK§ To set French.2 §OK§ To set German.• Resetting fast access for theanswering machine using key 1By default, key has been assigned forfast access to the integrated answeringmachine. However, if you have set the networkmailbox for fast access (¢ page 54),you can reset this setting.v ¢ Ì ¢ Set Key 1Answering MachineSelect <strong>and</strong> press §OK§.Once you have selected the answeringmachine, press <strong>and</strong> hold key . Youwill be connected directly.The setting for fast access applies to allregistered h<strong>and</strong>sets.52
Operating the answering machine of the <strong>Twist</strong> 610 baseOperating when on the move(remote operation)You can call <strong>and</strong> activate the answeringmachine <strong>and</strong> even activate ringback fromthe answering machine with SMS fromany telephone (with voice frequency).Preconditions:u You have set a system PIN other than0000 (¢ page 66).u The phone you are using for remoteoperation has tone dialling (DTMF),i.e. you hear different tones when youpress the keys. Alternatively, you canuse a code transmitter (available fromaretailer).Calling the answering machine <strong>and</strong>playing back messages~ Dial your own number.9~ When you hear yourannouncement, press 9 <strong>and</strong>enter the system PIN.You will be informed whether any newmessages have been recorded. The messagesare now played back. You can nowoperate the answering machine with thekeypad.The following keys are used for operation:A To return to the start of thecurrent message.Press twice to go back to theprevious message.B Stop playback. Press again toresume.3 Go to the next message.0 Delete current message.Activating the answering machine¤ Phone home <strong>and</strong> let the phone ringuntil you hear: "Please enter PIN".~ Enter system PIN.Your answering machine is activated. Ittells you how much memory time is left.The messages are now played back.The answering machine cannot be deactivatedremotely.Initiating ringback from the answeringmachine with SMS <strong>and</strong> listening tomessagesPrecondition: You must have stored anotification number (¢ page 44).You can use the telephone (mobile phoneor any other device with SMS functionality)for which you have stored the notificationnumber in your phone to send an SMSto your answering machine when you areaway from home. It will then call you back.Message playback begins when youaccept the call <strong>and</strong> press any digit key.The SMS must contain the following:***The ringback number is optional.Examples:*4711* or *4711*089123456*If a ringback number is entered, it isdialled; otherwise the notification numberis dialled.You can now operate the answeringmachine via the keypad, as described inthe previous sections.53
Using the network mailboxUsing the network mailbox• Configuring fast access forthe network mailboxWith fast access, you can dial the networkmailbox or the integrated answeringmachine (<strong>Twist</strong> 610 only) directly.<strong>Twist</strong> <strong>600</strong>: Fast access is preset for the networkmailbox. You only need to enter thenumber of the network mailbox.<strong>Twist</strong> 610: The integrated answeringmachine is preset for fast access. You canconfigure the network mailbox instead.Ask your network provider about this.Configuring fast access for the networkmailbox <strong>and</strong> entering the network mailboxnumber<strong>Twist</strong> <strong>600</strong>:v ¢ Ì ¢ Set Key 1Network MailboxSelect <strong>and</strong> press §Select§(Ø =selected).<strong>Twist</strong> 610:v ¢ Ì ¢ Network MailboxContinue with:~ Enter the number for the networkmailbox.§Save§ Press the display key.The setting for fast access applies to allh<strong>and</strong>sets.Calling the network mailbox Press <strong>and</strong> hold. You are connecteddirectly to the networkmailbox.d Press speaker key d ifrequired. You will hear the networkmailbox announcement.Viewing the network mailboxmessageWhen a message is recorded, you receivea call from the network mailbox. If youhave requested Calling Line Identification,the network mailbox number will be displayed.If you accept the call, the newmessages are played back. If you do notaccept the call, the network mailboxnumber will be saved in the missed call list<strong>and</strong> the message key flashes(¢ page 38).54
ECO DECTECO DECTYou are helping to protect the environmentwith your <strong>Twist</strong> <strong>600</strong>/610.Reduced energy consumptionYour telephone has a power-savingadapter plug <strong>and</strong> uses less power.Reducing radiationThe radiation from your telephone isreduced automatically:u The h<strong>and</strong>set's transmission power isreduced depending on the distance tothe base.u The transmission power on the base isreduced to virtually zero when only oneh<strong>and</strong>set is registered <strong>and</strong> the h<strong>and</strong>set isin the base.You can reduce the radiation from theh<strong>and</strong>set <strong>and</strong> base even more by usingEco Mode or Eco Mode+:u Eco Mode80% transmission power reduction ofthe base in st<strong>and</strong>by <strong>and</strong> talk mode.u Eco Mode+100% transmission power deactivationof the base <strong>and</strong> h<strong>and</strong>set when a call isnot being made or received.Eco Mode / Eco Mode+ can be activated<strong>and</strong> deactivated independently of eachother <strong>and</strong> also work on multiple h<strong>and</strong>sets.The h<strong>and</strong>set does not have to be in thebase.Activating/deactivating the Eco Mode /Eco Mode+v ¢ Ï ¢ Eco Mode¢ Eco Mode / Eco Mode+§Change§ Press the display key(³ =on).Status displaysDisplay iconÐiÑÒ|(flashes)Ð whiteÐ green¼ white¼ greenSignal strength:– good to poor– no signalEco Mode deactivatedEco Mode enabledEco Mode+ enabled(displayed instead of thereception strength iconwhen in idle status)Eco Mode <strong>and</strong> EcoMode+ activatedPlease noteu With Eco Mode+ enabled, press <strong>and</strong>hold the talk key c to check thatthe base can be reached. You willhear the ringtone if the base can bereached.u When Eco Mode+ is enabled:– call setup will be delayed byapprox. 2 seconds.– h<strong>and</strong>set st<strong>and</strong>by time will bereduced by approx. 50%.u Registering h<strong>and</strong>sets that do not<strong>support</strong> Eco Mode+ will cause themode to be deactivated on the base<strong>and</strong> all other h<strong>and</strong>sets.u Activating Eco Mode reduces therange of the base.u Eco Mode / Eco Mode+ <strong>and</strong>repeater <strong>support</strong> (¢ page 66) canceleach other out, i.e. if you use arepeater you cannot use Eco Mode<strong>and</strong> Eco Mode+.55
Setting the alarm clockSetting the alarm clockPrecondition: The date <strong>and</strong> time havealready been set (¢ page 14).Activating/deactivating the alarmclock <strong>and</strong> setting the wake-up timev ¢ É ¢ Alarm Clock¤ Change multiple line input:Activation:Select On or Off.Time:Enter the wake-up time in 4-digit format.Volume:Set the volume (1–6).Melody:Select melody.§Save§ Press the display key.In idle status, the ¼ icon <strong>and</strong> wake-uptime are displayed.A wake-up call is signalled on the display<strong>and</strong> with the selected ringtone(¢ page 2). The wake-up call sounds for60 seconds. If no key is pressed, the wakeupcall is repeated twice at five minuteintervals <strong>and</strong> then switched off.During a call, the wake-up call is only signalledby a short tone.Deactivating the wake-up call/repeating after a pause (snooze mode)Precondition: A wake-up call is sounding.§OFF§or§Snooze§Press the display key. Thewake-up call is deactivated.Press the display key or anykey. The wake-up call is deactivated<strong>and</strong> then repeated after5 minutes. After the secondrepetition the wake-up call isdeactivated completely.Using several h<strong>and</strong>setsRegistering h<strong>and</strong>setsYou can register up to six h<strong>and</strong>sets to yourbase.A h<strong>and</strong>set can be registered on up to fourbases.Manual registration on <strong>Twist</strong> <strong>600</strong>/610You must activate manual registration ofthe h<strong>and</strong>set on both the h<strong>and</strong>set <strong>and</strong> thebase.When the registration process has completedsuccessfully, the h<strong>and</strong>set returns toidle status. The h<strong>and</strong>set's internal numberis shown in the display e.g. INT 1. If not,repeat the procedure.On the h<strong>and</strong>setThe h<strong>and</strong>set must not be registered to abase.§Register§ Press the display key.The h<strong>and</strong>set is already registered to abase:v ¢ Ï ¢ Registration¢ Register H<strong>and</strong>setIf the h<strong>and</strong>set is already registered on fourbases:s Select base, e.g. Base 3 <strong>and</strong>press §OK§.~ If required, enter the systemPIN for the base <strong>and</strong> press §OK§.A message displays that a search for a basethat is ready for registration is being carriedout.On the baseWithin 60 seconds press <strong>and</strong> hold the registration/pagingkey on the base(¢ page 3) (approx. 3 seconds).56
Using several h<strong>and</strong>setsRegistering other h<strong>and</strong>setsYou can register other h<strong>and</strong>sets <strong>and</strong> h<strong>and</strong>setsfor other devices with GAP functionalityas follows.On the h<strong>and</strong>set¤ Start to register the h<strong>and</strong>set asdescribed in its user guide.On the basePress <strong>and</strong> hold the registration/paging keyon the base (¢ page 3) (approx. 3 sec.).De-registering h<strong>and</strong>setsYou can de-register any other registeredh<strong>and</strong>set from any registered h<strong>and</strong>set.v ¢ Ï ¢ Registration¢ De-reg. H<strong>and</strong>sets Select the internal subscriberyou wish to deregister <strong>and</strong>press §OK§.(The h<strong>and</strong>set you are currentlyusing is highlighted with
Using several h<strong>and</strong>setsTransferring a call to another h<strong>and</strong>setYou can transfer an external call toanother h<strong>and</strong>set (connect).u Open the list of h<strong>and</strong>sets.The external participant hearshold music if activated(¢ page 66).s Select a h<strong>and</strong>set or Call All <strong>and</strong>press §OK§.When the internal participant answers:¤ If necessary, announce the externalcall.a Press the end call key.The external call is transferred to the otherh<strong>and</strong>set.If the internal participant does not answeror the line is busy, press the display key§End§ to return to the external call.When transferring a call you can also pressthe end call key a before the internalparticipant answers.Then, if the internal participant does notanswer or the line is busy, the call willautomatically return to you.Internal consultation/conference callsWhen you are conducting an externalcall, you can call an internal participant atthe same time for consultation or hold aconference call between all 3 participants.You are conducting an external call:usOpen the list of h<strong>and</strong>sets.The external participant hearshold music if activated(¢ page 66).Select h<strong>and</strong>set <strong>and</strong> press §OK§.You are connected to the internalparticipant.either:§End§Or:§Conference§Press the display key.You are reconnected with theexternal participant.Press the display key.All 3 participants are connectedwith each other.Ending a conference calla Press the end call key.If an internal participant presses the endcall key a, the other h<strong>and</strong>set remainsconnected to the external participant.Accepting/rejecting call waitingIf you receive an external call during aninternal call, you will hear the call waitingtone (short tone). The caller's number orname will appear in the display if CallingLine Identification is enabled.Ending an internal call, accepting anexternal call§Accept§ Press the display key.The internal call is ended. You are connectedto the external caller.Rejecting the external call§Reject§ Press the display key.The call waiting tone is turned off. Youremain connected with the internal participant.The ringtone can still be heard onother registered h<strong>and</strong>sets.58
Using several h<strong>and</strong>setsListening in to an external callPrecondition: The Listening In functionmust be activated.You are conducting an external call. Aninternal participant can listen in on thiscall <strong>and</strong> take part in the conversation. Allparticipants are made aware of the "listeningin" by a signal tone.• Activating/deactivatinglistening inv ¢ Ï ¢ Telephony ¢ Listening InPress §Change§ to activate/deactivate thefunction (³ =on).Internal listening inThe line is engaged with an external call.Your screen will display information tothat effect. You want to listen in to theexternal call.c Press <strong>and</strong> hold the talk key.You can listen in to the call. All participantshear a signal tone. During this time, thish<strong>and</strong>set displays the Conference message<strong>and</strong> it is not possible to dial anothernumber from this h<strong>and</strong>set.Ending listening ina Press the end call key.All participants hear a signal tone.If the first internal participant presses theend call key a, the h<strong>and</strong>set that has"listened in" remains connected to theexternal participant.Changing the name of a h<strong>and</strong>setThe names "INT 1", "INT 2" etc. areassigned automatically on registration.You can change these names. The namemust be no more than 10 characters. Thechanged name is displayed in every h<strong>and</strong>setlist.usOpen the list of h<strong>and</strong>sets. Yourown h<strong>and</strong>set is indicated by f.Select h<strong>and</strong>set.§Options§ Open menu.Rename~ Enter name.§Save§Press the display key.Changing a h<strong>and</strong>set's internalnumberA h<strong>and</strong>set is automatically assigned thelowest free number when it is registered.If all slots are occupied, number 6 is overwrittenif this h<strong>and</strong>set is in idle status. Youcan change the internal number of all registeredh<strong>and</strong>sets (1–6).u Open the list of h<strong>and</strong>sets. Yourown h<strong>and</strong>set is indicated by f.§Options§ Open menu.Assign H<strong>and</strong>set No.Select <strong>and</strong> press §OK§.r§Save§Select number. Only numbersthat have not been assignedare displayed.Press the display key to savethe input.59
Using a h<strong>and</strong>set as a room monitorUsing a h<strong>and</strong>set as aroom monitorIf the room monitor is activated, a previouslysaved destination number is calledas soon as a set noise level is reached. Youcan save an internal or external number inyour h<strong>and</strong>set as the destination number.All of the h<strong>and</strong>set keys are deactivated,with the exception of the display keys.The room monitor call to an externalnumber is terminated after approximately90 seconds. The room monitor call to aninternal number (h<strong>and</strong>set) stops afterapprox. 3 minutes (depending on thebase). When the room monitor is activated,all keys are locked except the endcall key. The h<strong>and</strong>set's speaker is muted.When the room monitor is activated,incoming calls to the h<strong>and</strong>set are indicatedwithout a ringtone <strong>and</strong> are onlyshown on the screen. The display <strong>and</strong> keypadare not illuminated <strong>and</strong> advisorytones are also turned off.If you accept an incoming call, the roommonitor is suspended for the duration ofthe call, but the function remains activated.If you deactivate then reactivate the h<strong>and</strong>set,the room monitor remains activated.Warning!u You should always check theoperation of the room monitorbefore use. For example, test itssensitivity. Check the connectionif you are diverting the roommonitor to an external number.u When the function is switched on,the h<strong>and</strong>set's operating time is considerablyreduced. If necessary,place the h<strong>and</strong>set in the base.This ensures that the battery doesnot run down.u Ideally the h<strong>and</strong>set should be positioned1 to 2 metres away from thebaby. The microphone must bedirected towards the baby.u The connection to which the roommonitor is diverted must not beblocked by an activated answeringmachine.Activating the room monitor <strong>and</strong>entering the destination numberv ¢ É ¢ Room Monitor¤ Change multiple line input:Activation:Select On to activate.Alarm to:Select Internal or External.External number: Select the numberfrom the directory (press display keyö) or enter it directly.Internal number: Select display key§Change§ ¢ Select h<strong>and</strong>set or Call All ifyou want to call all registered h<strong>and</strong>sets¢ §OK§.In idle status, the destination numberor the internal destination number isdisplayed.¤ Press §Save§ to save the settings.60
H<strong>and</strong>set settingsWhen the room monitor function is activated,the idle display looks as shownbelow:i à VINT 1OFF07:1522 OctÁRoom Monitor0891234567OptionsChanging the set destination numberv ¢ É ¢ Room Monitor¤ Enter <strong>and</strong> save number as described in"Activating the room monitor <strong>and</strong>entering the destination number"(¢ page 60).Cancel/deactivate room monitorPress the end call key a to cancel thecall when the room monitor is activated.In the idle status press the display key§OFF§ to deactivate the room monitormode.Deactivating the room monitorremotelyPreconditions: The phone must <strong>support</strong>tone dialling <strong>and</strong> the room monitor shouldbe set for an external destination number.¤ Accept the call from the room monitor<strong>and</strong> press keys 9 ;.The room monitor function will deactivateafter the call ends. There will be no furtherroom monitor calls. The other room monitorsettings (e.g. no ringtone) on theh<strong>and</strong>set will remain activated until youpress the display key §OFF§ on the h<strong>and</strong>set.To reactivate the room function with thesame phone number:¤ Turn on the activation again <strong>and</strong> savewith §Save§ (¢ page 60).H<strong>and</strong>set settingsYour h<strong>and</strong>set is preconfigured, but youcan change the settings to suit your individualrequirements.Quick access to numbers <strong>and</strong>functionsYou can assign a number from the directoryto each of the digit keys Q <strong>and</strong>2to O.The left <strong>and</strong> right display keys have afunction pre-selected by default. You canchange the assignment (¢ page 62).The number is then dialled or the functionstarted by simply pressing a key.Assigning digit keysPrecondition: You have not yet assigned anumber to the digit key.¤ Press <strong>and</strong> hold the digit key.orPress the digit key briefly <strong>and</strong> press the§QuickDial§ display key.The directory is opened.¤ Select an entry <strong>and</strong> press §OK§.The entry is saved on the appropriate digitkey.Please noteIf you delete or edit the entry in thedirectory at a later date, this will notaffect the assignment to the numberkey.61
H<strong>and</strong>set settingsDialling a number/changingassignmentPrecondition: The digit key already has anumber assigned to it.When the h<strong>and</strong>set is in idle status¤ Press <strong>and</strong> hold the digit key.The number is dialled immediately.or¤ Briefly press the digit key:Press the display key with number/name (abbreviated if necessary) to dialthe number orPress the §Change§ display key to changethe digit key assignment or to deletethe assignment.Changing display key assignments¤ Press <strong>and</strong> hold the left or right displaykey.The list of possible key assignments isopened. The following can be selected:Room MonitorAssign menu for setting <strong>and</strong> activatingthe room monitor to a key(¢ page 60).Alarm ClockAssign menu for setting <strong>and</strong> activatingthe alarm clock to a key (¢ page 56).RedialDisplay the redial list.More Functions...More features are available:Call ListsDisplay call lists (¢ page 37).INTInternal calls (¢ page 57).SMSAssign menu for SMS functions to akey (¢ page 40).Withhold NumberSuppress Calling Line Identificationfor the next call (¢ page 30).¤ Select an entry <strong>and</strong> press §OK§.Changing the display languageYou can view the display texts in differentlanguages.v ¢ Ï ¢ LanguageThe current language is indicated by a Ø.s Select language <strong>and</strong>press §Select§.If you accidentally choose a language youdo not underst<strong>and</strong>:v ¢ Ï ¢ s ¢ s ¢ sPress keys in sequence <strong>and</strong>confirm by selecting §OK§.sSelect the correct language<strong>and</strong> press the right displaykey.Setting the displaySetting the screensaverYou can set a picture or the time to be displayedas a screensaver when the h<strong>and</strong>setis in idle status. This will replace the idlestatus display. It may conceal the date,time <strong>and</strong> name.The screensaver is not displayed in certainsituations, e.g. during a call or if the h<strong>and</strong>setis deregistered.If a screensaver is activated, the Screensavermenu option is marked with μ.v ¢ Ï ¢ Display ¢ ScreensaverThe current setting is displayed.¤ Change multiple line input:Activation:Select On (screensaver is displayed)or Off (no screensaver).Selection :Select screensaver or§View§sPress the display key.The active screensaver isdisplayed.Select screensaver <strong>and</strong>press §OK§.62
H<strong>and</strong>set settings§Save§ Press the display key.When the screensaver conceals the display,briefly press a to show the idledisplay.Setting large fontYou can increase the font size of print <strong>and</strong>symbols in call lists <strong>and</strong> in the directory toimprove readability. After doing this, onlyone entry instead of multiple entriescan be shown at the same time on eachdisplay <strong>and</strong> names are shortened wherenecessary.v ¢ Ï ¢ Display ¢ Large Font§Change§Press display key (³= on).Setting the colour schemeYou can set the display to have a dark orlight background.v ¢ Ï ¢ Display ¢ Colour SchemesSelect Colour Scheme 1 or Colour Scheme 2<strong>and</strong> press §OK§.• Setting the display backlightDepending on whether or not the h<strong>and</strong>setis in the base, you can activate or deactivatethe lighting. If it is activated, the displayis permanently dimmed.v ¢ Ï ¢ Display ¢ BacklightThe current setting is displayed.¤ Change multiple line input:In ChargerSelect On or Off.Out of ChargerSelect On or Off.Please noteWith the On setting, the st<strong>and</strong>bytime of the h<strong>and</strong>set can be significantlyreduced.§Save§Press the display key.• Activating/deactivatingauto answerIf you activate this function, when youreceive a call you can simply lift the h<strong>and</strong>setout of the base without having to pressthe talk key c.v ¢ Ï ¢ Telephony ¢ Auto Answer§Change§Press display key (³= on).Changing the speaker/earpiecevolumeYou can set the loudspeaker volume forh<strong>and</strong>sfree talking <strong>and</strong> the earpiece volumeto five different levels.In idle status:trsrCall up the H<strong>and</strong>set Volumemenu.Set the earpiece volume.Scroll to the Speaker: line.Set the speaker volume.§Save§ Press the display key if necessaryto save the setting permanently.Setting the volume during a call:t Press the control key.r Select volume.The setting will automatically be savedafter approximately 3 seconds, if not thenpress the display key §Save§.If t is assigned to another function,e.g. call swap (¢ page 32):§Options§ Open menu.Volume Select <strong>and</strong> press §OK§.Configure setting (see above).Please noteYou can also set the call volume usingthe menu (¢ page 26).63
H<strong>and</strong>set settingsChanging ringtonesu Volume:You can choose between five volumes(1–5; e.g. volume 3 = Š) <strong>and</strong> the"crescendo" ringtone (6; volumeincreases with each ring = ‡).u Ringtones:You can select a ringtone from a list ofpre-loaded ringtones.You can set different ringtones for the followingfunctions:u Int. Callsu Extern. CallsSetting volume/melodyIn idle status:v ¢ Ï ¢ Audio Settings¢ Ringtones(H<strong>and</strong>set)¢ Volume / Melodiesrsr§Save§Set volume/melody for internalcalls <strong>and</strong> anniversaries.Scroll to the next line.Set volume/melody for externalcalls.Press the display key to savethe setting.Switching on/off the ringtone foranonymous callsYou can set your telephone not to ring if acaller withholds their number. The call willonly be signalled in the display.In idle status:v ¢ Ï ¢ Audio Settings¢ Ringtones(H<strong>and</strong>set)¢ Anon. Calls SilentPress §Change§ to activate/deactivate thefunction (³= on).Activating/deactivating the ringtoneYou can deactivate the ringtone on yourh<strong>and</strong>set before you answer a call or whenthe h<strong>and</strong>set is in idle status; the ringtonecan be deactivated permanently or just forthe current call. The ringtone cannot bere-activated while an external call is inprogress.Deactivating the ringtone permanently* Press <strong>and</strong> hold the star key.The ó icon appears in the display.Reactivating the ringtone* Press <strong>and</strong> hold the star key.Deactivating the ringtone for the currentcall§Silence§ Press the display key.Activating/deactivating the alert toneIn place of the ringtone you can activatean alert tone. When you receive a call, youwill hear a short tone ("Beep") instead ofthe ringtone.* Press <strong>and</strong> hold the star key<strong>and</strong> within 3 seconds:§Beep§ Press the display key. A call willnow be signalled by one shortalert tone.The ñ icon appears in thedisplay.64
H<strong>and</strong>set settings• Activating/deactivating • Setting your own area codeadvisory tonesYour h<strong>and</strong>set uses advisory tones to tellyou about different activities <strong>and</strong> statuses.The following advisory tones can be activated/deactivatedindependently of eachother:u Key click: every key press is confirmed.u Acknowledge tones:– Confirmation tone (ascending tonesequence): at the end of an entry/setting <strong>and</strong> when an SMS or a newentry arrives in the answeringmachine list or call list– Error tone (descending tonesequence): when you make anincorrect entry– Menu end tone: when scrolling tothe end of a menuu Battery low beep: the battery requirescharging.In idle status:v ¢ Ï ¢ Audio Settings¢ Advisory Tones¤ Change multiple line input:Key Tones:Select On or Off.Confirmation:Select On or Off.Battery:Select On or Off.§Save§Press the display key.Please noteYou can also set the call volume, theringtones <strong>and</strong> the advisory tones viathe menu (¢ page 26).In order to transfer phone numbers, it isessential that your area code (international<strong>and</strong> local area code) is saved on thephone.Some of these numbers are already preset.v ¢ Ï ¢ Telephony ¢ Area CodesCheck that the (pre)set area code is correct.¤ Change multiple line input:q Select/change input field.r Navigate in the input field.Ñ If necessary, delete number:press the display key.~ Enter number.§Save§Example:Press the display key.• Restoring the h<strong>and</strong>setdefault settingsYou can reset individual settings <strong>and</strong>changes that you have made.The following settings are not affected bya resetu Registration to the baseu Date <strong>and</strong> timeu Directory entries, the call lists, the SMSlistsv ¢ Ï ¢ System ¢ H<strong>and</strong>set Reset§Yes§Area CodesInternational code:00 - 32Local area code:0 - [ ]ÛSavePress the display key.65
Base settingsBase settingsThe base settings are carried out using aregistered h<strong>and</strong>set.Changing the base ringtones(<strong>Twist</strong> 610)u Volume:You can choose between five volumes(1–5; e.g. volume 3 = Š) <strong>and</strong> the"crescendo" ringtone (6; volumeincreases with each ring = ‡).u Ringtones:You can select a ringtone from a list ofpre-loaded ringtones.In idle status:v ¢ Ï ¢ Audio Settings¢ Ringtones (Base)¤ Change multiple line input:r Set volume.sr§Save§Scroll to the next line.Set melody.Press the display key to savethe setting.• Activating/deactivatingmusic on holdv ¢ Ï ¢ Audio Settings¢ Music on holdPress §Change§ to activate or deactivate themusic on hold (³ = on).• Repeater <strong>support</strong> (option notavailable)With a repeater you can increase the range<strong>and</strong> signal strength of your base. You willneed to activate repeater mode. This willterminate any calls that are in progress atthe time.Precondition: A repeater is registered.v ¢ Ï ¢ System ¢ Repeater ModePress §Change§ to deactivate repeater mode(³= on).Please noteEco Mode / Eco Mode+ (¢ page 55)<strong>and</strong> repeater <strong>support</strong> cancel eachother out, i.e. if you use a repeater youcannot use Eco Mode <strong>and</strong> Eco Mode+.• Protecting againstunauthorised accessProtect the system settings of the basewith a PIN known only to yourself. The systemPIN must be entered when, for example,registering/deregistering a h<strong>and</strong>setto/from the base or when restoring thedefault settings.Changing the system PINYou can change the 4-digit system PIN seton the base (default setting: 0000) to a 4-digit PIN known only by you.<strong>Twist</strong> 610: Setting a system PIN facilitatesremote operation of the answeringmachine ¢ page 53.v ¢ Ï ¢ System ¢ System PIN~ Enter the current system PIN<strong>and</strong> press §OK§.~ Enter your new system PIN<strong>and</strong> press §OK§.66
Base settingsResetting the system PINIf you have forgotten your system PIN youcan reset the base to the original code0000:Disconnect the power cord from the base.Hold down the registration/paging key onthe base while reconnecting the powercable to the base. Press <strong>and</strong> hold the keyfor at least five seconds.The base has now been reset <strong>and</strong> the systemPIN 0000 set.Please noteAll h<strong>and</strong>sets are deregistered <strong>and</strong> mustbe re-registered. All settings arerestored to the factory settings.• Restoring the base to thefactory settingsWhen the settings are restoredu date <strong>and</strong> time will be retainedu h<strong>and</strong>sets are still registeredu Eco Mode is switched on <strong>and</strong>Eco Mode+ is switched offu the system PIN is not resetv ¢ Ï ¢ System ¢ Base Reset~ Enter the system PIN <strong>and</strong>press §OK§.§Yes§ Press the display key.67
Connecting the base to the PABXConnecting the base tothe PABXThe following settings are only necessaryif your PABX requires them; see the PABXuser guide.You cannot send or receive SMS messageson PABXs that do not <strong>support</strong> Calling LineIdentification.• Dialling modes <strong>and</strong> recallThe current setting is indicated by Ø.Changing the dialling modeThe following dialling modes can beselected:u Tone dialling (DTMF)u Dial pulsing (DP)v ¢ Ï ¢ Telephony ¢ Dialling ModesSetting recallSelect dialling mode <strong>and</strong> press§Select§ (Ø =selected).Your phone is preset at the factory foroperation on the main connection.For operation on a PABX, you may haveto change this value. Please refer to theuser guide for your PABX.v ¢ Ï ¢ Telephony ¢ RecallsSelect recall <strong>and</strong> press §Select§(Ø = set value).Possible values are:80 ms, 100 ms, 120 ms,180 ms, 250 ms, 300 ms,400 ms, <strong>600</strong> ms, 800 ms.• Saving an access code(outside line code)Precondition: You may have to enter anaccess code for external calls in your PABX,e.g. "0".v ¢ Ï ¢ Telephony ¢ Access Code~ Enter or change access code,max. 3 digits.§Save§ Press the display key.If an access code has been saved:u The access code is prefixed automaticallywhen you select from the followinglists: numbers of the SMS centres,calls list or answering machine list.u The access code must be entered whendialling manually <strong>and</strong> when manuallyentering directory, emergency/shortcutnumbers <strong>and</strong> SMS centre numbers.u If you copy the recipient's number fromthe directory when sending an SMS,you have to delete the access code.u An existing access code is deletedusing Ñ.68
Connecting the base to the PABXSetting pausesChanging the pause after line seizureYou can change the length of the pausethat is inserted between pressing the talkkey c <strong>and</strong> sending the number.v Open the main menu.*#Q5#LPress keys.~ Enter digit for the pauselength (1 = 1 sec.; 2 = 3 sec.;3 = 7 sec.) <strong>and</strong> press §OK§.Temporarily switching to tonedialling (DTMF)If your PABX still operates with dial pulsing(DP), but you need tone dialling for a connection(e.g. to listen to the network mailbox)you must switch to tone dialling forthe call.Precondition: You are conducting a call orhave already dialled an external number.* Press the star key.After the call is ended, dial pulsing is automaticallyactivated again.Change pause after recall keyYou can change the length of the pause ifyour PABX requires this (refer to the userguide for your PABX).v Open the main menu.*#Q5#2Press keys.~ Enter a digit for the length ofthe pause (1 = 800 ms;2 = 1<strong>600</strong> ms; 3 = 3200 ms)<strong>and</strong> press §OK§.Changing a dialling pause (pause afteraccess code)Precondition: You have saved an accesscode (¢ page 68).v Open the main menu.*#Q5#Press keys.~ Enter number for the length ofthe pause (1 =1sec.;2 =2sec.; 3 = 3 sec.;4 = 6 sec.) <strong>and</strong> press §OK§.To insert a dialling pause: press <strong>and</strong> holdS for 2 seconds. A P appears in the display.69
Service (Customer Care)Service (Customer Care)Questions <strong>and</strong> answersThe table below contains a list of commonproblems <strong>and</strong> possible solutions.The display is blank.1. The h<strong>and</strong>set is not switched on.¥ Press <strong>and</strong> hold the end call key a.2. The battery is flat.¥ Charge the battery or replace it(¢ page 11).Not all menu options are displayed.The menu display is reduced (St<strong>and</strong>ard mode).¥ Activate extended menu display (Expertmode) (¢ page 24).No Base flashes on the display.1. The h<strong>and</strong>set is outside the range of thebase.¥ Move the h<strong>and</strong>set closer to the base.2 The range of the base is reduced becauseeco mode is activated.¥ Deactivate eco mode (¢ page 55) orreduce the distance between the h<strong>and</strong>set<strong>and</strong> the base.3. The base is not switched on.¥ Check the mains adapter of the base(¢ page 10).Please register h<strong>and</strong>set flashes on the display.H<strong>and</strong>set has not been registered with the baseor has been deregistered.¥ Register the h<strong>and</strong>set (¢ page 56).H<strong>and</strong>set does not ring.1. The ringtone is deactivated.¥ Activate the ringtone (¢ page 64).2. Call divert set for "All Calls".¥ Deactivate call divert (¢ page 31).3. The telephone only rings when the phonenumber is transferred.¥ Activate the ringtone for anonymouscalls (¢ page 64).You cannot hear a ringtone/dialling tonefrom the fixed line network.The phone cord supplied has not been used orhas been replaced by a new cord with thewrong pin connections.¥ Please always use the phone cord suppliedor ensure that the pin connections are correctwhen purchasing from a retailer(¢ page 10).Error tone sounds after system PIN prompt.You have entered the wrong system PIN.¥ Reset the system PIN to 0000 (¢ page 67).Forgotten the system PIN.¥ Reset the system PIN to 0000 (¢ page 67).The other party cannot hear you.You have pressed the mute key h.The h<strong>and</strong>set is "muted".¥ Activate the microphone again(¢ page 29).The number of the caller is not displayeddespite CLIP.Calling Line Identification is not enabled.¥ The caller should ask the network providerto enable Calling Line Identification (CLI).You hear an error tone when keying an input(a descending tone sequence).Action has failed/invalid input.¥ Repeat the operation.Watch the display <strong>and</strong> refer to the userguide if necessary.You cannot listen to messages on the networkmailbox.Your PABX is set for dial pulsing.¥ Set your PABX to tone dialling.70
Service (Customer Care)<strong>Twist</strong> 610 only:No time is specified for a message in the calllist.Date <strong>and</strong> time have not been set.¥ Set the date/time (¢ page 14).The answering machine announces "PIN isincorrect" during remote operation.1. You have entered the wrong system PIN.¥ Enter the system PIN again.2. The system PIN is still set to 0000.¥ Change the system PIN (¢ page 66).The answering machine is not recording anymessages/has switched to announce only.Its memory is full.Delete old messages.¥ Play back new messages <strong>and</strong> delete.Exclusion of liabilitySome displays may contain pixels (pictureelements), which remain activatedor deactivated. As a pixel is madeup of three sub-pixels (red, green,blue), it is possible that pixel coloursmay vary.This is completely normal <strong>and</strong> does notindicate an error.Declaration of ConformityThis device is intended for the <strong>Belgacom</strong>analogue phone lines in Belgium.Country-specific conditions have beentaken into account.We, Gigaset Communications GmbH,declare, that the <strong>Twist</strong> <strong>600</strong>/610 is manufacturedaccording to our Full QualityAssurance System certified by CETECOMICT Services GmbH in compliance withANNEX V of the R&TTE-Directive 1999/5/EC.The presumption of conformity with theessential requirements regarding CouncilDirective 1999/5/EC is ensured accordingtoArt. 3.1 a) Safety:EN 60950 (equivalent to 73/23/EC)Art. 3.1 a) EMF/SAR:1999/519/EC (EU-Council Recommendation)EN 50360Art. 3.1 a) Acoustic Shock:TBR 10 ( Portable Part )Art. 3.1 b) EMC:EN 301 489-1 / EN 301 489-6(equivalent to 89/336/EC)Art. 3.2 Radio:EN 301 406A copy of the 1999/5/EC Declaration ofConformity is available at this Internetaddress:www.gigaset.com/docsSenior Approvals Manager71
Service (Customer Care)Guarantee termsThe Equipment you have bought has beencarefully selected by <strong>Belgacom</strong> <strong>and</strong> is coveredby a two-year warranty on spareparts <strong>and</strong> labor in the event of any materialor manufacturing defect, unless otherwisespecified. The warranty shall be validfrom the date on which the equipment iscollected or delivered.If you have any problems with the equipment,you should take it to a Teleboutiqueor to one of our authorized agents, in itsentirety <strong>and</strong> in its original packaging, or inpackaging providing the same degree ofprotection, together with the originalreceipt. The addresses for our Teleboutiques<strong>and</strong> authorized agents are given inthe Information Section of the WhitePages.Your equipment will be repaired orreplaced free of charge, on presentationof the receipt, in the event of any materialor manufacturing defect.<strong>Belgacom</strong> alone shall determine whatrepairs <strong>and</strong>/or replacements are necessary.The warranty on the repaired orreplaced equipment shall end on the dateon which the original warranty on the purchasedequipment expires, but shall notbe less than 3 months.The warranty shall not cover:– damage of any kind that does notpredate the sale;– any damage, faults or defects attributableto the Customer or to causesunrelated to the Equipment: lightning,power surges, humidity, accidentaldamage, improper use orpoor maintenance, failure to complywith the instructions in the usermanual, <strong>and</strong> force majeure;– the repair or replacement of movableparts (cords, wires, plugs, aerials,etc.), consumables (cells, batteries,paper, ink, etc.) needing regularreplacement <strong>and</strong> the supply ofcleaning products.The warranty shall not apply:– to any changes or repairs to the terminalEquipment undertaken by theCustomer himself/herself or throughthe services of persons not designatedby <strong>Belgacom</strong>;– if the Customer removes or tamperswith the manufacturer’s serial numbers<strong>and</strong>/or br<strong>and</strong> names on the terminalEquipment.<strong>Belgacom</strong> shall not be liable for any indirector immaterial loss sustained by theCustomer as a result of the malfunctioningof the terminal Equipment, such asany loss of production, revenue or contracts.The General Terms <strong>and</strong> Conditions forthe Sale of Terminal Equipment can beobtained on request from any <strong>Belgacom</strong>service available to the public or atwww.belgacom.be72
EnvironmentEnvironmentu The equipment that you bought hasrequired the extraction <strong>and</strong> use of naturalresources for its production. It maycontent hazardous substances for thehealth <strong>and</strong> the environment.u In order to avoid the dissemination ofthose substances in our environment<strong>and</strong> to diminish the pressure on thenatural resources, we encourage you touse the appropriate take-back systems.Those systems will reuse or recyclemost of the materials of your end lifeequipment in a sound way.u The crossed-bin symbol invites you touse those systems.u If you need more information on thecollection, reuse <strong>and</strong> recycling systems,please contact your local or regionalwaste administration.u You can also contact us for more informationon the environmental performancesof our products.Ecological energy consumptionThe use of ECO DECT (¢ page 55) savesenergy <strong>and</strong> makes an active contributiontowards protecting the environment.DisposalBatteries should not be disposed of in generalhousehold waste. Observe the localwaste disposal regulations, details ofwhich can be obtained from your localauthority or the dealer you purchased theproduct from.All electrical <strong>and</strong> electronic equipmentmust be disposed of separately from generalhousehold waste using the sites designatedby local authorities.If a product displays thissymbol of a crossed-outrubbish bin, the product issubject to European Directive2002/96/EC.The appropriate disposal<strong>and</strong> separate collection ofused equipment serve to prevent potentialharm to the environment <strong>and</strong> to health.They are a precondition for the re-use <strong>and</strong>recycling of used electrical <strong>and</strong> electronicequipment.For further information on disposing ofyour used equipment, please contact yourlocal authority, your refuse collection serviceor the dealer you purchased the productfrom.73
AppendixAppendixCare¤ Wipe the base <strong>and</strong> the h<strong>and</strong>set with adamp cloth (do not use solvent) or anantistatic cloth.Never use a dry cloth as this can causestatic.Contact with liquidIf the h<strong>and</strong>set should come into contactwith liquid:1. Switch the h<strong>and</strong>set off <strong>and</strong> removethe battery immediately.2. Allow the liquid to drain from the h<strong>and</strong>set.3. Pat all parts dry, then place the h<strong>and</strong>setwith the battery compartment open<strong>and</strong> the keypad facing down in a dry,warm place for at least 72 hours (notin a microwave, oven etc.).4. Do not switch on the h<strong>and</strong>set againuntil it is completely dry.When it has fully dried out, you will usuallybe able to use it again.!SpecificationsTechnology:Nickel-metal-hydride (NiMH)Size: AAA (Micro, HR03)Voltage: 1,2 VCapacity: 550 - 1000 mAhThe device is supplied with two approvedbatteries.H<strong>and</strong>set operating times/chargingtimesThe operating time depends on the capacity<strong>and</strong> age of the batteries <strong>and</strong> the waythey are used. (All times are maximumpossible times <strong>and</strong> apply when the displaybacklight is switched off).St<strong>and</strong>by time(hours)Capacity (mAh) approx.550 700 800 1000160/48185/56210/64260/79Talktime (hours) 10 12 13 17Operating time for1.5 hrs of calls perday (hours)85 100 115 140Charging time inbase (hours)Charging time incharging cradle(hours)7,5 8,5 10 126,5 7,5 8,5 10,5Base power consumptionIn st<strong>and</strong>by mode:<strong>Twist</strong> <strong>600</strong>:approx.1,1 watt<strong>Twist</strong> 610: approx. 1,2 wattDuring the call:<strong>Twist</strong> <strong>600</strong>:approx.1,0 watt<strong>Twist</strong> 610: approx. 1,1 watt74
AppendixGeneral specificationsDECT st<strong>and</strong>ard is <strong>support</strong>edGAP st<strong>and</strong>ard is <strong>support</strong>edNo. of channels 60 duplex channelsRadio frequency range 1880–1900 MHzDuplex method Time multiplex,10 ms frame lengthChannel grid 1728 kHzBit rate1152 kbit/sModulationGFSKLanguage code 32 kbit/sTransmission power 10 mW, average powerper channelRangeup to 300 m outdoors,up to 50 m indoorsBase power supply 230 V ~/50 HzEnvironmental conditionsin operationDialling modePin connections on the telephone jack321456Writing <strong>and</strong> editing text+5°C to +45°C, 20% to75% relative humidityDTMF (tone dialling)/DP (dial pulsing)1unused2unused3a4b5unused6unusedThe following rules apply when writingtext:u Each key between Q <strong>and</strong> O isassigned several letters <strong>and</strong> characters.u Control the cursor with uvts Press <strong>and</strong> hold u or v to movethe cursor word by word.u Characters are inserted at the cursorposition.u Press the star key * to displaythe table of special characters.Select the required character <strong>and</strong> pressthe display key §Insert§ to insert the characterat the cursor position.u Press <strong>and</strong> hold Q to O to insertdigits.u Press Ñ display key to delete the charactersto the left of the cursor. Press<strong>and</strong> hold to delete the word to the leftof the cursor.u The first letter of the name of directoryentries is automatically capitalised, followedby lower case letters.Writing an SMS/namesPress the relevant key several times toenter letters/characters.If you press <strong>and</strong> hold a key, the correspondingdigit is inserted.St<strong>and</strong>ard characters1x 2x 3x 4x 5x 6x 7x 8x 9x 10x1) 2) 12 a b c 2 ä á à â ã ç3 d e f 3 ë é è ê4 g h i 4 ï í ì î5 j k l 5L m n o 6 ö ñ ó ò ô õM p q r s 7 ßN t u v 8 ü ú ù ûO w x y z 9 ÿ ý æ ø åQ . , ? ! 01) Space2) Line breakSetting upper/lower case or digitsPress the hash key # briefly to switchfrom "Abc" mode to "123" <strong>and</strong> from "123"to "abc" <strong>and</strong> from "abc" to "Abc" (uppercase: 1st letter upper case, all others lowercase). Press the hash key #beforeentering the letter.You can see in the display whether uppercase, lower case or digits is selected.75
Mounting the base on the wallMounting the base on the wall<strong>Twist</strong> 610: 64 mm<strong>Twist</strong> <strong>600</strong>: 43 mmapprox.2.5 mm76
IndexIndexAAccess code . . . . . . . . . . . . . . . . . . . . 68for a PABX . . . . . . . . . . . . . . . . . . . 68Access protection. . . . . . . . . . . . . . . . 66Acknowledge tones . . . . . . . . . . . . . . 65Activatingadvisory tones . . . . . . . . . . . . . . . . 65answering machine . . . . . . . . . . . . 48answering machine (remoteoperation) . . . . . . . . . . . . . . . . 53h<strong>and</strong>set . . . . . . . . . . . . . . . . . . . . . 21keypad lock . . . . . . . . . . . . . . . . . . 21listening in . . . . . . . . . . . . . . . . . . . 59muting ringtone . . . . . . . . . . . . . . . 46ring delay . . . . . . . . . . . . . . . . . . . . 63room monitor. . . . . . . . . . . . . . . . . 60two-way record . . . . . . . . . . . . . . . 51Advisory tones. . . . . . . . . . . . . . . . . . 65Alarm clock . . . . . . . . . . . . . . . . . . . . 56Alert tone . . . . . . . . . . . . . . . . . . . . . 64Anniversary . . . . . . . . . . . . . . . . . . . . 35deactivating . . . . . . . . . . . . . . . . . . 36missed . . . . . . . . . . . . . . . . . . . . . . 39saving in directory . . . . . . . . . . . . . 35Announcement (answeringmachine) . . . . . . . . . . . . . . . . . . 49Announcement mode(answering machine). . . . . . . . . . 48Anonymous calling . . . . . . . . . . . . . . 30Answering machine . . . . . . . . . . . . . . 48activating/deactivating . . . . . . . . . . 48deleting messages . . . . . . . . . . . . . 50list . . . . . . . . . . . . . . . . . . . . . . 37, 38playing back messages . . . . . . . . . . 49recording announcement/announceonly. . . . . . . . . . . . . . . . . . . . . 49remote operation . . . . . . . . . . . . . . 53scrolling back . . . . . . . . . . . . . . . . . 50scrolling forward. . . . . . . . . . . . . . . 50Answering machine, see alsoNetwork mailboxArea codesetting own area code. . . . . . . . . . . 65Assigning a number key . . . . . . . . . . . 61Auto answer . . . . . . . . . . . . . . . . 27, 63BBasechanging. . . . . . . . . . . . . . . . . . . . 57connecting . . . . . . . . . . . . . . . . . . 10connecting to PABX . . . . . . . . . . . . 68restoring to factory settings . . . . . . 67set ringtone. . . . . . . . . . . . . . . . . . 66setting up . . . . . . . . . . . . . . . . . . . 10settings . . . . . . . . . . . . . . . . . . . . . 66system PIN . . . . . . . . . . . . . . . 66, 67Batterycharging . . . . . . . . . . . . . . . . 1, 2, 13display . . . . . . . . . . . . . . . . . . . . 1, 2icon . . . . . . . . . . . . . . . . . . . . . . 1, 2inserting . . . . . . . . . . . . . . . . . . . . 11tone . . . . . . . . . . . . . . . . . . . . . . . 65Best base . . . . . . . . . . . . . . . . . . . . . 57Birthday, see AnniversaryCCallaccepting . . . . . . . . . . . . . . . . . . . 27connect participant . . . . . . . . . . . . 59diverting . . . . . . . . . . . . . . . . . . . . 32diverting (connecting) . . . . . . . . . . 58ending . . . . . . . . . . . . . . . . . . . . . 27external. . . . . . . . . . . . . . . . . . . . . 27internal . . . . . . . . . . . . . . . . . . . . . 57make anonymous call . . . . . . . . . . 30picking up from answeringmachine . . . . . . . . . . . . . . . . . 51transferring (connecting) . . . . . . . . 59two-way record . . . . . . . . . . . . . . . 51Call duration. . . . . . . . . . . . . . . . . . . 27Call forwarding . . . . . . . . . . . . . . . . . 31Call lists . . . . . . . . . . . . . . . . . . . . . . 37Call screening during recording . . . . . 51Call swapping . . . . . . . . . . . . . . . . . . 32Call waitingaccepting/rejecting . . . . . . . . . . . . 31activating/deactivating. . . . . . . . . . 30external call. . . . . . . . . . . . . . . . . . 30internal call . . . . . . . . . . . . . . . . . . 58Callinganonymously. . . . . . . . . . . . . . . . . 30external. . . . . . . . . . . . . . . . . . . . . 27internal . . . . . . . . . . . . . . . . . . . . . 57Calling back a caller. . . . . . . . . . . . . . 3077
IndexCalling Line Identification. . . . . . . . . . 27cancel once . . . . . . . . . . . . . . . . . . 30Care of the telephone . . . . . . . . . . . . 74CD, see Call divertChangingdialling mode . . . . . . . . . . . . . . . . . 68display language. . . . . . . . . . . . . . . 62earpiece volume . . . . . . . . . . . . . . . 63internal number of a h<strong>and</strong>set . . . . . 59name of a h<strong>and</strong>set . . . . . . . . . . . . . 59pauses . . . . . . . . . . . . . . . . . . . . . . 69ringtone. . . . . . . . . . . . . . . . . . 64, 66speaker volume . . . . . . . . . . . . . . . 63system PIN . . . . . . . . . . . . . . . . 66, 67Character set . . . . . . . . . . . . . 41, 43, 75Charge status display . . . . . . . . . . . . 1, 2CLI, CLIP . . . . . . . . . . . . . . . . . . . . . . 27CLIR. . . . . . . . . . . . . . . . . . . . . . . . . . 30CNIP . . . . . . . . . . . . . . . . . . . . . . . . . 27Colour scheme. . . . . . . . . . . . . . . . . . 63Conference . . . . . . . . . . . . . . . . . . . . 32Conference (internal) . . . . . . . . . . . . . 58Confirmation tone . . . . . . . . . . . . . . . 65Connecting the headset . . . . . . . . . . . 16Connecting, base to PABX. . . . . . . . . . 68Consultation call . . . . . . . . . . . . . . . . 31Consultation call (internal) . . . . . . . . . 58Control key . . . . . . . . . . . . . . . . . . 1, 18Correcting incorrect entries . . . . . . . . 19DDeactivate anonymous calls . . . . . . . . 64Deactivatingadvisory tones . . . . . . . . . . . . . . . . 65answering machine . . . . . . . . . . . . 48h<strong>and</strong>set . . . . . . . . . . . . . . . . . . . . . 21keypad lock . . . . . . . . . . . . . . . . . . 21listening in . . . . . . . . . . . . . . . . . . . 59muting ringtone . . . . . . . . . . . . . . . 46ring delay . . . . . . . . . . . . . . . . . . . . 63room monitor. . . . . . . . . . . . . . . . . 61two-way record . . . . . . . . . . . . . . . 51Delete key . . . . . . . . . . . . . . . . . . . . . 19Deletingannouncement for answeringmachine . . . . . . . . . . . . . . . . . 49characters . . . . . . . . . . . . . . . . . . . 19message. . . . . . . . . . . . . . . . . . . . . 50Deregistering (h<strong>and</strong>set) . . . . . . . . . . . 57Destination number (room monitor) . 60Dial pulsing. . . . . . . . . . . . . . . . . . . . 68Diallingdirectory . . . . . . . . . . . . . . . . . . . . 34mode . . . . . . . . . . . . . . . . . . . . . . 68pause . . . . . . . . . . . . . . . . . . . . . . 69using quick dial . . . . . . . . . . . . 35, 61Directory . . . . . . . . . . . . . . . . . . . . . 33copying number from text . . . . . . . 35managing entries. . . . . . . . . . . . . . 34opening . . . . . . . . . . . . . . . . . . . . 18order of entries . . . . . . . . . . . . . . . 34saving anniversary . . . . . . . . . . . . . 35saving entry . . . . . . . . . . . . . . . . . 33saving the sender’s number(SMS) . . . . . . . . . . . . . . . . . . . 43sending entry/list to h<strong>and</strong>set . . . . . 35using to enter numbers . . . . . . . . . 35Displaychanging display language . . . . . . . 62colour scheme . . . . . . . . . . . . . . . . 63in idle status . . . . . . . . . . . . . . 15, 20lighting . . . . . . . . . . . . . . . . . . . . . 63memory directory . . . . . . . . . . . . . 35missed anniversaries . . . . . . . . . . . 39name (CNIP) . . . . . . . . . . . . . . . . . 27network mailbox message . . . . . . . 54number (CLI/CLIP) . . . . . . . . . . . . . 27screensaver . . . . . . . . . . . . . . . . . . 62setting . . . . . . . . . . . . . . . . . . . . . 62symbols. . . . . . . . . . . . . . . . . . . . . . 2Display keys . . . . . . . . . . . . . . . . . 1, 19assigning. . . . . . . . . . . . . . . . . . . . 61Disposal . . . . . . . . . . . . . . . . . . . . . . 73DP (dial pulsing) . . . . . . . . . . . . . . . . 68Draft message list (SMS) . . . . . . . . . . 41EEarpiece volume . . . . . . . . . . . . . . . . 63ECO DECT . . . . . . . . . . . . . . . . . . . . . 55Eco mode . . . . . . . . . . . . . . . . . . . . . 55Eco mode+ . . . . . . . . . . . . . . . . . . . . 55Editingdestination number(room monitor) . . . . . . . . . . . . 61E-mail address. . . . . . . . . . . . . . . . . . 42copying from the directory . . . . . . . 35End call key. . . . . . . . . . . . . . . . . . 1, 27Ending, call. . . . . . . . . . . . . . . . . . . . 2778
IndexEntryselecting from directory . . . . . . . . . 34Environment . . . . . . . . . . . . . . . . . . . 73Error tone . . . . . . . . . . . . . . . . . . . . . 65Expert mode . . . . . . . . . . . . . . . . 24, 70External callcall waiting. . . . . . . . . . . . . . . . . . . 30diverting to ans. mach. . . . . . . . . . . 51FFast accessanswering machine . . . . . . . . . . . . 52network mailbox. . . . . . . . . . . . . . . 54GGeneral troubleshooting . . . . . . . . . . 70Group call . . . . . . . . . . . . . . . . . . . . . 57Guarantee terms . . . . . . . . . . . . . . . . 72HH<strong>and</strong>setactivating/deactivating . . . . . . . . . . 21advisory tones . . . . . . . . . . . . . . . . 65changing internal number. . . . . . . . 59changing name . . . . . . . . . . . . . . . 59changing the number . . . . . . . . . . . 59changing to a different base . . . . . . 57changing to best reception . . . . . . . 57colour scheme . . . . . . . . . . . . . . . . 63contact with liquid . . . . . . . . . . . . . 74de-registering. . . . . . . . . . . . . . 56, 57display language. . . . . . . . . . . . . . . 62display lighting . . . . . . . . . . . . . . . . 63diverting a call . . . . . . . . . . . . . . . . 58earpiece volume . . . . . . . . . . . . . . . 63idle status . . . . . . . . . . . . . . . . . . . 20large font . . . . . . . . . . . . . . . . . . . . 63list . . . . . . . . . . . . . . . . . . . . . . . . . 18locating . . . . . . . . . . . . . . . . . . . . . 57muting. . . . . . . . . . . . . . . . . . . . . . 29paging . . . . . . . . . . . . . . . . . . . . . . 57registering . . . . . . . . . . . . . . . . . . . 56registering to a different base . . . . . 57restoring to factory settings. . . . . . . 65screensaver . . . . . . . . . . . . . . . . . . 62set up for use . . . . . . . . . . . . . . . . . 11setting . . . . . . . . . . . . . . . . . . . . . . 61speaker volume . . . . . . . . . . . . . . . 63using room monitor . . . . . . . . . . . . 60using several . . . . . . . . . . . . . . . . . 56H<strong>and</strong>set mode . . . . . . . . . . . . . . . . . 29H<strong>and</strong>set operating timein room monitor mode. . . . . . . . . . 60Hash key. . . . . . . . . . . . . . . . . . . . 1, 21Headset socket . . . . . . . . . . . . . . . . . 16Hearing aids . . . . . . . . . . . . . . . . . . . . 7<strong>Help</strong> . . . . . . . . . . . . . . . . . . . . . . . . . 70IIconalarm clock . . . . . . . . . . . . . . . . . . 56answering machine . . . . . . . . . 48, 52for new messages . . . . . . . . . . . . . 38keypad lock . . . . . . . . . . . . . . . . . . 21new message . . . . . . . . . . . . . . . . 49new SMS . . . . . . . . . . . . . . . . . . . . 42ringtone . . . . . . . . . . . . . . . . . . . . 64Iconsdisplay . . . . . . . . . . . . . . . . . . . . . . 2Idle status (display) . . . . . . . . . . . 15, 20Idle status, returning to . . . . . . . . . . . 20Incoming message list (SMS) . . . . . . . 42Incorrect input (correction) . . . . . . . . 19Installing, base . . . . . . . . . . . . . . . . . 10Internalconference . . . . . . . . . . . . . . . . . . 58consulting . . . . . . . . . . . . . . . . . . . 58listening in . . . . . . . . . . . . . . . . . . 59making calls . . . . . . . . . . . . . . . . . 57Internal call. . . . . . . . . . . . . . . . . . . . 57call waiting . . . . . . . . . . . . . . . . . . 58KKeyassign function or number . . . . . . . 61Key 1 (fast access). . . . . . . . . . . . . 1, 52Keypad lock . . . . . . . . . . . . . . . . . . . 21Keyscontrol key . . . . . . . . . . . . . . . . 1, 18delete key . . . . . . . . . . . . . . . . . . . 19display keys . . . . . . . . . . . . . . . . 1, 19end call key . . . . . . . . . . . . . . . . 1, 27fast access. . . . . . . . . . . . . . . . . 1, 52hash key . . . . . . . . . . . . . . . . . . 1, 21message key . . . . . . . . . . . . . . . . . . 1mute key . . . . . . . . . . . . . . . . . . . . . 1On/Off key. . . . . . . . . . . . . . . . . . . . 1quick dial. . . . . . . . . . . . . . . . . . . . 35recall key. . . . . . . . . . . . . . . . . . . . . 179
Indexspeaker key . . . . . . . . . . . . . . . . . . . 1star key . . . . . . . . . . . . . . . . . . . . . . 1talk key . . . . . . . . . . . . . . . . . . . 1, 27LLanguage, display . . . . . . . . . . . . . . . 62Large font . . . . . . . . . . . . . . . . . . . . . 63Listanswering machine . . . . . . . . . 37, 38call lists . . . . . . . . . . . . . . . . . . . . . 37h<strong>and</strong>sets . . . . . . . . . . . . . . . . . . . . 18missed calls . . . . . . . . . . . . . . . . . . 37network mailbox. . . . . . . . . . . . . . . 38SMS draft message list . . . . . . . . . . 41SMS incoming message list . . . . . . . 42SMS list . . . . . . . . . . . . . . . . . . . . . 38Listening in to a call . . . . . . . . . . . . . . 59Locating, h<strong>and</strong>set . . . . . . . . . . . . . . . 57Lockactivating/deactivating keypad lock . 21MMailbox ID, see SMSMailboxes, see SMSMains adapter . . . . . . . . . . . . . . . . . . . 7Making callsaccepting a call. . . . . . . . . . . . . . . . 27external . . . . . . . . . . . . . . . . . . . . . 27internal . . . . . . . . . . . . . . . . . . . . . 57Manual redial. . . . . . . . . . . . . . . . . . . 36Medical appliances. . . . . . . . . . . . . . . . 7Memory, directory . . . . . . . . . . . . . . . 35Menuend tone . . . . . . . . . . . . . . . . . . . . 65opening . . . . . . . . . . . . . . . . . . . . . 18overview . . . . . . . . . . . . . . . . . . . . 24prompting . . . . . . . . . . . . . . . . . . . 20Menu displayExpert mode. . . . . . . . . . . . . . . 24, 70St<strong>and</strong>ard mode . . . . . . . . . . . . . 24, 70Message keyopen list. . . . . . . . . . . . . . . . . . . . . 42opening lists. . . . . . . . . . . . . . . . . . 38Messages . . . . . . . . . . . . . . . . . . . . . 48copy the number to thedirectory . . . . . . . . . . . . . . . . . 50deleting . . . . . . . . . . . . . . . . . . . . . 50key. . . . . . . . . . . . . . . . . . . . . . . . . . 1marking as "new" . . . . . . . . . . . . . . 50new message icon . . . . . . . . . . . . . 49playing back . . . . . . . . . . . . . . . . . 49Microphone . . . . . . . . . . . . . . . . . . . . 1Missed calls . . . . . . . . . . . . . . . . . . . 37Music on hold . . . . . . . . . . . . . . . . . . 66Mute key . . . . . . . . . . . . . . . . . . . . . . 1Mutingfirst ring . . . . . . . . . . . . . . . . . . . . 46h<strong>and</strong>set. . . . . . . . . . . . . . . . . . . . . 29NNamedisplaying caller's name (CNIP) . . . . 27of a h<strong>and</strong>set . . . . . . . . . . . . . . . . . 59Network mailbox. . . . . . . . . . . . . . . . 54Network services. . . . . . . . . . . . . . . . 30Notification by SMS. . . . . . . . . . . . . . 44Numberas destination for room monitor . . . 60copying from an SMS text . . . . . . . 43copying from directory. . . . . . . . . . 35copying to directory . . . . . . . . . . . . 35displaying caller's number (CLIP). . . 27entering with directory. . . . . . . . . . 35fixed destination call . . . . . . . . . . . 32saving in the directory . . . . . . . . . . 33OOn/Off key . . . . . . . . . . . . . . . . . . . . . 1Order in directory . . . . . . . . . . . . . . . 34PPABXconnecting base . . . . . . . . . . . . . . 68pauses . . . . . . . . . . . . . . . . . . . . . 69saving access code. . . . . . . . . . . . . 68setting dialling mode . . . . . . . . . . . 68setting recall . . . . . . . . . . . . . . . . . 68SMS . . . . . . . . . . . . . . . . . . . . . . . 46switching to tone dialling . . . . . . . . 69Pack contents . . . . . . . . . . . . . . . . . . . 9Paging . . . . . . . . . . . . . . . . . . . . . . . 57Pauseafter access code . . . . . . . . . . . . . . 69after line seizure . . . . . . . . . . . . . . 69after recall key . . . . . . . . . . . . . . . . 69PIN changesystem PIN . . . . . . . . . . . . . . . . . . 67Pin connections . . . . . . . . . . . . . . . . 7580
IndexPlaying backannouncement (answeringmachine) . . . . . . . . . . . . . . . . . 49message (answering machine) . . . . 49Power consumption . . . . . . . . . . . . . . 74Protecting the phone against access . . 66QQuestions <strong>and</strong> answers . . . . . . . . . . . 70RRange . . . . . . . . . . . . . . . . . . . . . . . . 10Recall . . . . . . . . . . . . . . . . . . . . . . . . 68Recall key . . . . . . . . . . . . . . . . . . . 1, 69Reception booster, see RepeaterRecordingquality . . . . . . . . . . . . . . . . . . . . . . 52time. . . . . . . . . . . . . . . . . . . . . . . . 52two-way record . . . . . . . . . . . . . . . 51Redial . . . . . . . . . . . . . . . . . . . . . . . . 36Redirect, see Call divertRegistering (h<strong>and</strong>set). . . . . . . . . . . . . 56Reminder call. . . . . . . . . . . . . . . . . . . 36Remote operation . . . . . . . . . . . . . . . 53Repeater . . . . . . . . . . . . . . . . . . . . . . 66Ring delay . . . . . . . . . . . . . . . . . . 52, 63Ringback . . . . . . . . . . . . . . . . . . . . . . 30Ringtonechanging . . . . . . . . . . . . . . . . . 64, 66muting. . . . . . . . . . . . . . . . . . . . . . 46setting volume . . . . . . . . . . . . . 64, 66Room monitor . . . . . . . . . . . . . . . . . . 60SSaving (access code) . . . . . . . . . . . . . 68Screensaver . . . . . . . . . . . . . . . . . . . . 62Searching in directory . . . . . . . . . . . . 34Sendingdirectory entry to h<strong>and</strong>set. . . . . . . . 35Settingdate . . . . . . . . . . . . . . . . . . . . . 14, 26time. . . . . . . . . . . . . . . . . . . . . 14, 26Setting uph<strong>and</strong>set . . . . . . . . . . . . . . . . . . . . . 11Signal tone, see Advisory tonesSMS . . . . . . . . . . . . . . . . . . . . . . . . . 40active send service centre . . . . . . . 45changing mailbox . . . . . . . . . . . . . 45deleting. . . . . . . . . . . . . . . . . . 41, 43diverting . . . . . . . . . . . . . . . . . . . . 43draft message list . . . . . . . . . . . . . 41incoming message list . . . . . . . . . . 42list . . . . . . . . . . . . . . . . . . . . . . . . 38mailbox ID. . . . . . . . . . . . . . . . . . . 44mailboxes . . . . . . . . . . . . . . . . . . . 44notification by SMS . . . . . . . . . . . . 44PIN protection . . . . . . . . . . . . . . . . 45reading . . . . . . . . . . . . . . . . . . 41, 43receiving . . . . . . . . . . . . . . . . . . . . 42replying to or diverting. . . . . . . . . . 43saving number. . . . . . . . . . . . . . . . 43self help with error messages . . . . . 47sending to a personal mailbox . . . . 45sending to an e-mail address . . . . . 42SMS to PABXs . . . . . . . . . . . . . . . . 46status report . . . . . . . . . . . . . . . . . 41troubleshooting. . . . . . . . . . . . . . . 47vCard . . . . . . . . . . . . . . . . . . . . . . 43writing . . . . . . . . . . . . . . . . . . 40, 75SMS centrechanging number . . . . . . . . . . . . . 45setting . . . . . . . . . . . . . . . . . . . . . 45Snooze mode . . . . . . . . . . . . . . . . . . 56Sound, see RingtoneSpeaker key . . . . . . . . . . . . . . . . . . . . 1Speaker mode. . . . . . . . . . . . . . . . . . 29Special functions. . . . . . . . . . . . . . . . 68Specifications . . . . . . . . . . . . . . . . . . 74Speed dial. . . . . . . . . . . . . . . . . . 33, 61St<strong>and</strong>ard mode . . . . . . . . . . . . . . 24, 70Star key . . . . . . . . . . . . . . . . . . . . . . . 1System settings. . . . . . . . . . . . . . . . . 66TTalk key . . . . . . . . . . . . . . . . . . . . 1, 27Telephone jack, pin connections . . . . 75Text message, see SMS81
IndexThree-party conference . . . . . . . . . . . 32Tone dialling . . . . . . . . . . . . . . . . 68, 69Troubleshooting (SMS) . . . . . . . . . . . . 47UUnknown . . . . . . . . . . . . . . . . . . . . . 28Unknown caller . . . . . . . . . . . . . . . . . 28VvCard (SMS). . . . . . . . . . . . . . . . . . . . 43Viewing the network mailboxmessage . . . . . . . . . . . . . . . . . . . 54VIP group (Directory entry). . . . . . 33, 35Volumeearpiece . . . . . . . . . . . . . . . . . . . . . 63h<strong>and</strong>set speaker volume . . . . . . . . . 63loudspeaker . . . . . . . . . . . . . . . . . . 63ringtone. . . . . . . . . . . . . . . . . . 64, 66WWarning tone, see Advisory tonesWriting (SMS) . . . . . . . . . . . . . . . . . . 40Writing <strong>and</strong> editing text . . . . . . . . . . . 7582