ACCON-S7-EasyLog User Manual - INEE
ACCON-S7-EasyLog User Manual - INEE
ACCON-S7-EasyLog User Manual - INEE
- No tags were found...

Create successful ePaper yourself
Turn your PDF publications into a flip-book with our unique Google optimized e-Paper software.
<strong>ACCON</strong>-<strong>S7</strong>-<strong>EasyLog</strong><strong>User</strong> <strong>Manual</strong>Version 3.0.1The best solutions for PLC
Copyright© 1995 - 2008 byDELTALOGIC Automatisierungstechnik GmbHStuttgarter Strasse 373525 Schwaebisch GmuendGermanyPhone sale: +49-(0)7171-916-120Phone support: +49-(0)7171-916-112Fax sale: +49-(0)7171-916-220Fax support: +49-(0)7171-916-212E-Mail sale: vertrieb@deltalogic.deE-Mail support: support@deltalogic.deWeb site: http://www.deltalogic.deAll rights reserved. No part of this work is allowed to be copied, reproduced,conferred, processed and stored into electronic media or translated into any otherlanguage without a written permission of the author.Last update 2008-06-10. All technical changes reserved.<strong>S7</strong>-200 ® , <strong>S7</strong>-300 ® , <strong>S7</strong>-400 ® , HMI ® , STEP ® and SIMATIC ® are registered trademarksof Siemens AG, <strong>ACCON</strong> ® and DELTALOGIC ® are registered trademarks ofDELTALOGIC Automatisierungstechnik GmbH.Note:We have checked the content of this manual for conformity with the hardware andsoftware described. Nevertheless, because deviations cannot be ruled out, wecannot accept any liability for complete conformity. The data in this manual havebeen checked regularly and any necessary corrections will be included insubsequent editions. We always welcome suggestions for improvement.<strong>ACCON</strong>-<strong>S7</strong>-<strong>EasyLog</strong> 2 DELTALOGIC GmbH
Table of contents1 Table of contents1 Table of contents............................................................................................... 32 Main view............................................................................................................. 42.1 Starting parameters of <strong>ACCON</strong>-<strong>S7</strong>-<strong>EasyLog</strong>............................................ 53 Configuration ..................................................................................................... 63.1 Administrate configurations....................................................................... 63.2 Basis configuration.................................................................................... 73.2.1 Device configuration .................................................................. 73.2.2 Protocol configuration................................................................ 73.2.3 Archiving configuration .............................................................. 83.2.4 Data directory ............................................................................ 93.2.5 Data name ................................................................................. 93.3 Configuration of variables ....................................................................... 103.3.1 PLC-Information....................................................................... 123.4 Notes for the use with Excel ................................................................... 124 <strong>ACCON</strong>-AGLink 4.0 Configuration................................................................. 144.1 <strong>S7</strong>-MPI .................................................................................................... 144.2 <strong>S7</strong>-NetLink .............................................................................................. 164.3 <strong>S7</strong>-NetLink-PRO ..................................................................................... 184.4 <strong>S7</strong>-NetLink-USB...................................................................................... 204.5 <strong>S7</strong>-TCP/IP............................................................................................... 224.6 <strong>S7</strong>-PC/CP ............................................................................................... 245 Installation........................................................................................................ 275.1 Demo version.......................................................................................... 275.2 Licence with USB dongle ........................................................................ 275.3 Licence with software authorization ........................................................ 28<strong>ACCON</strong>-<strong>S7</strong>-<strong>EasyLog</strong> 3 DELTALOGIC GmbH
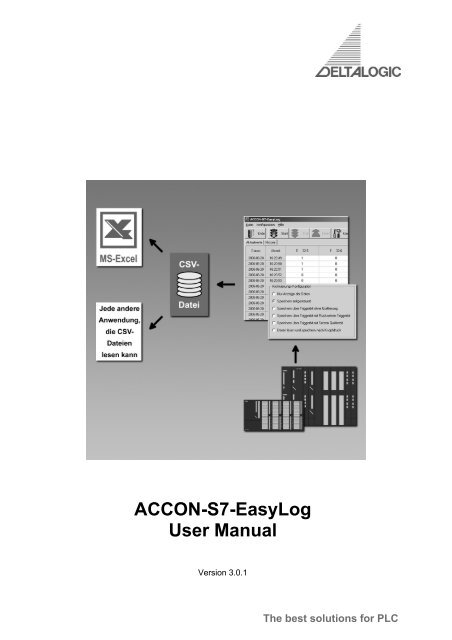
Main view2 Main viewBy using <strong>ACCON</strong>-<strong>S7</strong>-<strong>EasyLog</strong>, it is possible to save and display values of any PLCoperands. The read data are stored in a CSV data file which can be e.g. shown andprocessed further via Excel.Figure 1: Main view <strong>ACCON</strong>-<strong>S7</strong>-<strong>EasyLog</strong>The main view of <strong>ACCON</strong>-<strong>EasyLog</strong> shows the window for the actual output valuesof a connected PLC and the window history for the recorded datasets of the log file.<strong>ACCON</strong>-<strong>EasyLog</strong> is controlled via the following buttons:• »Quit«, quits <strong>ACCON</strong>-<strong>S7</strong>-<strong>EasyLog</strong>• »Start«, initiates the readout of the parametrized operands' content• »Stop«, stops the readout of the parametrized operands' content• »Read«, reads and saves the content of the parametrized operands• »Config«, opens the configuration window• »Info«, shows the name, version, copyright, etc.<strong>ACCON</strong>-<strong>S7</strong>-<strong>EasyLog</strong> 4 DELTALOGIC GmbH
Main view2.1 Starting parameters of <strong>ACCON</strong>-<strong>S7</strong>-<strong>EasyLog</strong>Using version 3.0.0 you can call <strong>ACCON</strong>-<strong>S7</strong>-<strong>EasyLog</strong> with starting parameters. So itis possible to start multiple instances of <strong>ACCON</strong>-<strong>S7</strong>-<strong>EasyLog</strong>, each with differentconfigurations. You can add the parameters to the program shortcut.Figure 2: Shortcut with starting parametersPossible parameters:/K** The entered configuration will be used. You have to use the name of an alreadycreated configuration. Otherwise the last configuration is used./START: Connection to PLC will be established, immediately. If any error occurs theprogram is constantly trying to connect to the PLC./STOP: Connection to the PLC will be disconnectedExample: »"C:\<strong>ACCON</strong>-<strong>S7</strong>-<strong>EasyLog</strong>.exe" /KAnlage3 /START«<strong>ACCON</strong>-<strong>S7</strong>-<strong>EasyLog</strong> will be started with the configuration »Anlage3« (facility3),automatically.The parameters are separated by a blank and started by the sign »/«. You have tolook that there is no blank within a parameter.<strong>ACCON</strong>-<strong>S7</strong>-<strong>EasyLog</strong> 5 DELTALOGIC GmbH
<strong>ACCON</strong>-AGLink 4.0 configuration3 Configuration3.1 Administrate configurationsBy using <strong>ACCON</strong>-<strong>S7</strong>-<strong>EasyLog</strong> from version 2.5.2 it is possible to use up to16different configurations. Select them via Configuration > Configurationadministration.Figure 3: Administrate configurationsConfigurations of older installations (< version 2.5.2) will be detected automaticallyand can be used again.Via Configuration administration you can call the settings. With the button»Copy« you can save an existing configuration. The configurations 2-16 can bedeleted or renamed by pressing [F2].The configuration »Standard« can neither be deleted nor be renamed!With the button »Select« the marked configuration will be accepted. Every singleconfiguration has its own settings and operand table.By going to Configuration > Change selected configuration the respectivesettings can be adjusted.The active configuration will be shown in the headline of <strong>ACCON</strong>-<strong>S7</strong>-<strong>EasyLog</strong> if youdo not use the standard configuration.<strong>ACCON</strong>-<strong>S7</strong>-<strong>EasyLog</strong> 6 DELTALOGIC GmbH
<strong>ACCON</strong>-AGLink 4.0 configuration3.2 Basis configurationTo create a new configuration press »Config« in the main view. Then a window withthe tab »Basis configuration« opens.Figure 4: Basis configuration <strong>ACCON</strong>-<strong>S7</strong>-<strong>EasyLog</strong>3.2.1 Device configurationThe desired device number (see button »AGLink40_Config«) and PLC number isshown here. When communicating via PROFIBUS-CP (e.g. CP342-5) you canoptionally indicate the PLC's rack and slot number. If you do not enter any values,so the CPU will be directly accessed.3.2.2 Protocol configurationThe query interval in seconds indicates in which time interval the data from theparametrized operands should be read out.The save interval indicates in which time interval the data from the parametrizedoperands should be read out.You have to enter the save and read interval in the format HH:MM:SS.E.g. Enter: »00:01:00« Display: »1:00« Execution every minuteTrigger bit: Signal bit to start the recording. Has to be set by the PLC and can bereset by <strong>ACCON</strong>-<strong>S7</strong>-<strong>EasyLog</strong> (saving via trigger bit with resetting trigger bit).<strong>ACCON</strong>-<strong>S7</strong>-<strong>EasyLog</strong> 7 DELTALOGIC GmbH
<strong>ACCON</strong>-AGLink 4.0 configurationAcknowledgement bit: Signal bit for the acknowledgement when the recording hasbeen executed. Will be set by <strong>ACCON</strong>-<strong>S7</strong>-<strong>EasyLog</strong> and can be analyzed in the PLCprogram. Should be 0 when setting the trigger bit.3.2.3 Archiving configurationThe following archiving configurations can be selected:• »Show only data«Only the read out data will be shown and not saved.• »Time-controlled saving«The data will be saved within a set time interval (up to 24 hours).• »Time-controlled saving with setting acknowledgement bit«The data will be saved within a set time interval (up to 24 hours). <strong>ACCON</strong>-<strong>S7</strong>-<strong>EasyLog</strong> sets the acknowledgement bit from 0 to 1. The PLC has to set the bit to0 that the cycle can start again from the beginning.• »Saving via trigger bit without acknowledgement«Data will be saved when the trigger bit in the PLC changes from 0 to 1.• »Saving via trigger bit with resetting trigger bit«Data will be saved when the trigger bit in the PLC changes from 0 to 1. Whensaving is complete the trigger bit will be reset by <strong>ACCON</strong>-<strong>S7</strong>-<strong>EasyLog</strong>.• »Saving via trigger bit with setting acknowledgement bit«Data will be saved when the trigger bit changes from 0 to 1. <strong>ACCON</strong>-<strong>S7</strong>-<strong>EasyLog</strong> sets the acknowledgement bit from 0 to 1. That the cycle can startagain from the beginning, the PLC has to set both bits to 0.• »Reading and saving data at the push of a button«The data will be read by pressing a button and saved depending on the settingsof the data name.When the option »Only read data if trigger condition is fulfilled« is activated theprogram checks if the trigger bit is set to 1. The values of the parametrized operandswill only be read and saved when the trigger bit changes its status from 0 to 1 (risingedge).<strong>ACCON</strong>-<strong>S7</strong>-<strong>EasyLog</strong> 8 DELTALOGIC GmbH
<strong>ACCON</strong>-AGLink 4.0 configurationFigure 5: Data configuration <strong>ACCON</strong>-<strong>S7</strong>-<strong>EasyLog</strong>The option »Always overwrite data = only the last entry is stored in the CSV data«means the following:Always the last logged values will be stored in the indicated CSV data file. Previousvalues will be overwritten by new values. So you can process actual values byimporting them to e.g. Excel.3.2.4 Data directoryHere you have to indicate in which directory the CSV data file should be saved.3.2.5 Data nameUsing this function it is possible to define the form of the CSV data file. You have abetter overview of the data files and you can assign them accurately.<strong>User</strong>-defined input of the data name with respective placeholders:$Y = Year four-digit$M = Month two-digit$D = Day two-digit$W = Calendar week two-digit$H = Hour two-digit$N = Minute two-digit$S = Second two-digit$X = Date in the form YYYY-MM-DD$T = Time in the form HH.MM.SSIf a respective data file already exists the data will be added. If not the data file willbe created.<strong>ACCON</strong>-<strong>S7</strong>-<strong>EasyLog</strong> 9 DELTALOGIC GmbH
<strong>ACCON</strong>-AGLink 4.0 configuration3.3 Configuration of variablesFigure 6: Variable configuration <strong>ACCON</strong>-<strong>S7</strong>-<strong>EasyLog</strong>A maximum of 64 variables can be created.The <strong>S7</strong> operand address can be entered in the field »Operand«.A free selectable name for an operand can be entered in the field »Description«.In the field »Type« you can choose the operand type (e.g. Bool, String, etc.)The field »Digits« shows the digits with which the operand should be displayed andrecorded.In the field »Factor« you have to enter the factor with which the read out value of theoperand should be divided. You can use this to display <strong>S7</strong> analog values correctly.<strong>ACCON</strong>-<strong>S7</strong>-<strong>EasyLog</strong> 10 DELTALOGIC GmbH
<strong>ACCON</strong>-AGLink 4.0 configuration<strong>S7</strong> data type Operand Pos. types Example Digits FactorBIT DB10.DBX0.0 Binary 0/10 1Booltrue/falseBYTE DB10.DBB0 Binary 10000000 0..10 1..Decimal withprefixDecimalwithout prefixHexadecimal-1281280x80WORDDB10.DBW0 Binary 1000 0..10 1..INTDecimal withprefixDecimalwithout prefixHexadecimal-1281280x80S5TIME DB10.DBW0 S5 time S5T#500ms 0..10 1..S5 time inmilliseconds500DWORDDB10.DBD0 Binary 1000 0..10 1..DINTDecimal withprefixDecimalwithout prefixHexadecimal-1281280x80REAL DB10.DBD0 Floating point 1,001 0..10 1..numberSTRINGDB10.DBB0[1..10] <strong>S7</strong>-String MyString 0 1(Look for page 12)String MyStringARRAYDB10.DBB0[1..10] Dec. separatedDec: separatedDec.separated,inver.Dec:separated,inver.Hex. separatedHex: separatedHex.separated,inverHex:separated,0.1.100:1:1010.1.010:1:000.01.0A00:01:0A0A.01.000A:01:000..10 1..<strong>ACCON</strong>-<strong>S7</strong>-<strong>EasyLog</strong> 11 DELTALOGIC GmbH
<strong>ACCON</strong>-AGLink 4.0 configurationinver.DATE_AND_TIME DB10.DBB0[1..8] DateAndTime 1990-01-0100:00:00.0000 1Remember when using type »<strong>S7</strong>-String« that the size of an array has to be 2 byteslonger than indicated in STEP7. Because the first 2 bytes contain the lengthinformation and the desired string begins with byte 3.Example: My<strong>S7</strong>String [30] with the address DB1.DBB 0 has to be entered in thefield »Operand« the following way: " DB1.DBB0[1..32]".3.3.1 PLC-InformationFigure 7: PLC information <strong>ACCON</strong>-<strong>S7</strong>-<strong>EasyLog</strong>By pressing the button »Read PLC info« technical information of the connected PLCwill be read out and displayed.3.4 Notes for the use with ExcelThe advantage of the directly read out data is that you can save and import them asa CSV data file to Excel without additional efforts.E.g. you can import the CSV data file to Excel via Data > External Data > Importtext file. Excel can be adjusted that it automatically reads out the CSV data file.(see Figure 10).<strong>ACCON</strong>-<strong>S7</strong>-<strong>EasyLog</strong> 12 DELTALOGIC GmbH
<strong>ACCON</strong>-AGLink 4.0 configurationFigure 8: Import CSV data file to ExcelFigure 9: ExcelFigure 10: Settings of the external data range<strong>ACCON</strong>-<strong>S7</strong>-<strong>EasyLog</strong> 13 DELTALOGIC GmbH
<strong>ACCON</strong>-AGLink 4.0 configuration4 <strong>ACCON</strong>-AGLink 4.0 ConfigurationPress the button »AGLink40_Config« in the configuration menu to get to thecommunication settings. You can connect up to 16 PLC devices e.g. via <strong>ACCON</strong>-NetLink-PRO or <strong>ACCON</strong>-NetLink-USB.4.1 <strong>S7</strong>-MPIFigure 11: <strong>S7</strong>-MPIThe group »Local connection« contains parameter of the serial interface. The serialinterface at which the used adapter is attached to the PC, do you adjust under»Port«. The speed of the serial connection between the PC and the adapter isadjusted under »Max. transmission rate« and »Min. transmission rate«. The dataconnection with the adapter is always built up with the highest possible speed. Ifonly a certain transmission rate shall be used, then put both parameters on thesame value. The <strong>ACCON</strong>-MPI-Adapter supported all of the given transmission rates.The Siemens PC adapter supports only 19200 and 38400 (take care on the switchposition at the PC adapter). For the possibilities of other adapters you have to lookinto the respective manuals..The group »Station parameter« contains settings for the attached adapter. Theswitch »PG/PC is the only master on the bus« is an additional security functionwhich only then must be activated if exclusively Slaves are attached. Under »PG-Address« the bus address of the adapter at the MPI bus is given. The address hasto be in the range of 0 up to the value adjusted under »Highest node address«. AMPI address must be unique within one MPI bus.The parameter »Timeout« sets the connection timeout. The value is indicated inmilliseconds. The value can be increased at problems, for example with highresponse times in the MPI bus.The group »Network parameter« contains parameter of the attached adapterregarding the MPI bus. With »Transmission rate« the speed used at the MPI bus is<strong>ACCON</strong>-<strong>S7</strong>-<strong>EasyLog</strong> 14 DELTALOGIC GmbH
<strong>ACCON</strong>-AGLink 4.0 configurationadjusted. The value at »Highest node address« sets the highest available addressat the MPI bus. It must be guaranteed that the same highest node address is set atall participants. With »Profile« the parameter for the PROFIBUS will be set. Theseare profile specific time parameter.The group »Connection parameter« contains settings of the attached adapterregarding connections be built on. The »Connection type« sets the type ofconnections to be built on. The adjusted value doesn't have influence on thecommunication possibilities.<strong>ACCON</strong>-<strong>S7</strong>-<strong>EasyLog</strong> 15 DELTALOGIC GmbH
<strong>ACCON</strong>-AGLink 4.0 configuration4.2 <strong>S7</strong>-NetLinkFigure 12: <strong>S7</strong>-NetLinkThe group »Local connection« contains parameters of the <strong>ACCON</strong>-NetLink.The IP address of the <strong>ACCON</strong>-NetLink is put in the field »NetLink IP address«.No new bus parameters are transferred to the <strong>ACCON</strong>-NetLink if the switch »Useparameter from NetLink« is set. The bus parameters stored in the <strong>ACCON</strong>-NetLinkare used instead of the values shown here. This affects the settings for »Address«,»Transmission rate«, »Highest node address« and »Profile«.The group »Station parameter« contains the station-related parameter of the<strong>ACCON</strong>-NetLink.The switch »PG/PC is the only master on the bus« is an additional security functionwhich has to be activated if only Slaves are attached.Under »Address« the address is given to the PROFIBUS card. The address must bein the area of zero up to the value adjusted under »Highest node address« beingput. Addresses have to be unique within one PROFIBUS.The parameter »Timeout» sets the connection timeout. The value is indicated inmilliseconds. The value can be increased at problems, for example with highresponse times in the PROFIBUS.The group »Network parameter« contains the net-related attitudes of the <strong>ACCON</strong>-NetLink.With »Transmission rate« the speed used at the PROFIBUS is adjusted. The valueat »Highest node address« sets the highest available address at the PROFIBUS. Itmust be guaranteed that the same highest node address is set at all participants.With »Profile« the parameter for the PROFIBUS will be set. These are profilespecific time parameter.<strong>ACCON</strong>-<strong>S7</strong>-<strong>EasyLog</strong> 16 DELTALOGIC GmbH
<strong>ACCON</strong>-AGLink 4.0 configurationThe group »Connection parameter« contains settings of the attached adapterregarding connections be built on.The »Connection type« sets the type of connections to be built on. The adjustedvalue doesn't have influence on the communication possibilities.By pressing »Configure NetLink…« the program tries to reach and parametrize theconnected <strong>ACCON</strong>-NetLink. Using the button »Scan NetLinks…« all connected<strong>ACCON</strong>-NetLinks are shown in a separate window can be parametrized there, too.<strong>ACCON</strong>-<strong>S7</strong>-<strong>EasyLog</strong> 17 DELTALOGIC GmbH
<strong>ACCON</strong>-AGLink 4.0 configuration4.3 <strong>S7</strong>-NetLink-PROFigure 13: <strong>S7</strong>-NetLink-PROThe group »Local connection« contains parameters of the <strong>ACCON</strong>-NetLink-PRO.The IP address of the <strong>ACCON</strong>-NetLink-PRO has to be put in the field »NetLink IPaddress«.The group »Station parameter« contains the station-related parameter of the<strong>ACCON</strong>-NetLink-PRO. The switch »Automatic reconnaissance of the net-relatedparameters« means that the bus parameters transferred to the <strong>ACCON</strong>-NetLink-PRO are not used if the <strong>ACCON</strong>-NetLink-PRO is able to detect the bus parametersitself. This affects the settings for »Address«, »Transmission rate«, »Highest nodeaddress« and »Profile«. Under »PG-Address« the address is given to thePROFIBUS card. The address must be in the range of 0 up to the value adjustedunder »Highest node address« being put. Addresses have to be unique within onePROFIBUS.The parameter »Timeout« sets the connection timeout. The value is indicated inmilliseconds. The value can be increased when having problems, e.g. with highresponse times in the PROFIBUS.The group »Network parameter« contains the net-related attitudes of the <strong>ACCON</strong>-NetLink-PRO. With »Transmission rate« the speed used at the PROFIBUS isadjusted. The value at »Highest node address« sets the highest available addressat the PROFIBUS. It must be guaranteed that all participants have the same highestnode address. With »Profile« the parameter for the PROFIBUS will be set. Theseare profile specific time parameters.The group »Connection parameter« contains settings of the attached adapterregarding connections be built on. The »Connection type« sets the type ofconnections to be built on. The adjusted value doesn't have influence on thecommunication possibilities.<strong>ACCON</strong>-<strong>S7</strong>-<strong>EasyLog</strong> 18 DELTALOGIC GmbH
<strong>ACCON</strong>-AGLink 4.0 configurationBy pressing »Configure NetLink…« the program tries to reach and parametrize theconnected <strong>ACCON</strong>-NetLink. Using the button »Scan NetLinks…« all connected<strong>ACCON</strong>-NetLinks are shown in a separate window can be parametrized there, too.<strong>ACCON</strong>-<strong>S7</strong>-<strong>EasyLog</strong> 19 DELTALOGIC GmbH
<strong>ACCON</strong>-AGLink 4.0 configuration4.4 <strong>S7</strong>-NetLink-USBFigure 14: <strong>S7</strong>-NetLink-USBThe group »Local connection« contains parameter to the <strong>ACCON</strong>-NetLink-USB. TheName of the <strong>ACCON</strong>-NetLink-USB has to be put in the field »NetLink USB Name«.This option is not available at present. It is intended for the future to distinguishbetween multiple <strong>ACCON</strong>-NetLink-USB connected to one PC.The group »Station parameter« contains the station-related parameter of the<strong>ACCON</strong>-NetLink-USB.The switch »Automatic reconnaissance of the net-related parameters« means thatthe bus parameters transferred to the <strong>ACCON</strong>-NetLink-USB are not used if the<strong>ACCON</strong>-NetLink-USB is able to detect the bus parameters itself. This affects thesettings for »Address«, »Transmission rate«, »Highest node address« and»Profile«. Under »PG-Address« the address is given to the PROFIBUS card. Theaddress must in the range of 0 up to the value adjusted under »Highest nodeaddress« being put. Addresses have to be unique within one PROFIBUS.The parameter »Timeout« sets the connection timeout. The value is indicated inmilliseconds. The value can be increased when having problems, e.g. with highresponse times in the PROFIBUS.The group »Network parameter« contains the net-related attitudes of the <strong>ACCON</strong>-NetLink-USB. With »Transmission rate« the speed used at the PROFIBUS isadjusted. The value at »Highest node address« sets the highest available addressat the PROFIBUS. It must be guaranteed that the same highest node address is setat all participants. With »Profile« the parameter for the PROFIBUS will be set. Theseare profile specific time parameters.The group »Connection parameter« contains settings of the attached adapterregarding connections to be built on.<strong>ACCON</strong>-<strong>S7</strong>-<strong>EasyLog</strong> 20 DELTALOGIC GmbH
<strong>ACCON</strong>-AGLink 4.0 configurationThe »Connection type« sets the type of connections to be built on. The adjustedvalue doesn't have influence on the communication possibilities.By pressing »Configure NetLink…« the program tries to reach and parametrize theconnected <strong>ACCON</strong>-NetLink. Using the button »Scan NetLinks…« all connected<strong>ACCON</strong>-NetLinks are shown in a separate window can be parametrized there, too.<strong>ACCON</strong>-<strong>S7</strong>-<strong>EasyLog</strong> 21 DELTALOGIC GmbH
<strong>ACCON</strong>-AGLink 4.0 configuration4.5 <strong>S7</strong>-TCP/IPFigure 15: <strong>S7</strong>-TCP/IPThe page »TCP/IP« contains a virtual list of IP addresses.TCP/IP connections do not support any functions for the determination of thereachable <strong>S7</strong> PLCs. Furthermore, the address consists of several numbers. To havea uniform addressing scheme (device number and address) when indicating theconnection data, the necessary address data are summarized under a virtualaddress, PLC no.In the field »PLC no.« you can enter any number in the range of 0 to 126, which isused as an addressing at the connections listed.The field »IP address« contains the IP address of the CP343-1 or the CP443-1about which the connection to the <strong>S7</strong> PLC shall be built up. Instead of the IPaddress, a name also can be given if this can be assigned via DNS to the IPaddress.The IP address puts only the way firm up to the CP343-1 or the CP443-1. With»Rack« and »Slot« the <strong>S7</strong> PLC can now be clearly identified. These details have tobe taken from the <strong>S7</strong> project if necessary. In most cases the values are »0« and »2«at the <strong>S7</strong>-300.<strong>ACCON</strong>-<strong>S7</strong>-<strong>EasyLog</strong> 22 DELTALOGIC GmbH
<strong>ACCON</strong>-AGLink 4.0 configurationFigure 16: <strong>S7</strong>-TCP/IP, optionsThe group »Local connection« contains parameter of the local network interface.The parameter »Timeout« sets the connection timeout. The value is indicated inmilliseconds. The value can be increased at problems, for example with highresponse times in the MPI bus.The group »Connection parameter« contains settings regarding connections be builton. The »Connection type« sets the type of connections to be built on. The adjustedvalue doesn't have influence on the communication possibilities.<strong>ACCON</strong>-<strong>S7</strong>-<strong>EasyLog</strong> 23 DELTALOGIC GmbH
<strong>ACCON</strong>-AGLink 4.0 configuration4.6 <strong>S7</strong>-PC/CPFigure 17: <strong>S7</strong>-PC/CPThe group »Local connection« contains the Access Point of the Application whichshould be used. The current selected communication device (CPxxxx) is additionallyshown. You can only select allowed and configured access points. Any change onthis, e.g. adding a new access point, changing the configuration or setup thecommunication devices, are done in the applet »Set PG/PC Interface« in the controlpanel.The group »Station parameter« contains the local settings. The parameter»Timeout« sets the connection timeout. The value is indicated in milliseconds. Thevalue can be increased when you have problems e.g. with high response times atthe PROFIBUS.The group »Connection parameter« contains settings regarding connections be builton. The »Connection type« sets the type of connections to be built on. The adjustedvalue doesn't have influence on the communication possibilities.<strong>ACCON</strong>-<strong>S7</strong>-<strong>EasyLog</strong> 24 DELTALOGIC GmbH
<strong>ACCON</strong>-AGLink 4.0 configurationFigure 18: <strong>ACCON</strong>-AGLink 4.0 connection testGoing to the tab »Test« you can check if the connected device works correctly. If thecommunication settings are correct, the MLFB numbers of the reachable CPUswhich are adjusted via the device are shown.<strong>ACCON</strong>-<strong>S7</strong>-<strong>EasyLog</strong> 25 DELTALOGIC GmbH
<strong>ACCON</strong>-AGLink 4.0 configurationFigure 19: <strong>ACCON</strong>-AGLink 4.0 configuration, optionsHere you can switch between German and English.<strong>ACCON</strong>-<strong>S7</strong>-<strong>EasyLog</strong> 26 DELTALOGIC GmbH
Installation5 Installation• Insert the DELTALOGIC Automatisierungstechnik-CD into your CD-drive.• Start the file »Setup<strong>S7</strong><strong>EasyLog</strong>.exe«. Located in the CD menu under»Software\<strong>ACCON</strong>-<strong>S7</strong>-<strong>EasyLog</strong>\«. You can find it in the explorer under»CD-drive:\Software\<strong>ACCON</strong>-<strong>S7</strong>-<strong>EasyLog</strong>\«, too.• Choose the respective installation type:5.1 Demo versionIf running <strong>ACCON</strong>-<strong>S7</strong>-<strong>EasyLog</strong> in demo mode a small note appears all 5 minuteswhich says that you are running only a demo. But there are no further restrictions.5.2 Licence with USB dongleTo complete the activation you have to plug in the supplied USB dongle. After ashort and automatic authorization you can start <strong>ACCON</strong>-<strong>S7</strong>-<strong>EasyLog</strong>.When using <strong>ACCON</strong>-<strong>S7</strong>-<strong>EasyLog</strong> the USB dongle has to be always plugged in!<strong>ACCON</strong>-<strong>S7</strong>-<strong>EasyLog</strong> 27 DELTALOGIC GmbH
InstallationAs soon as we have received the above-mentioned information you will get ane-mail from us including the activation key. Enter the name in the field »Name« andthe key in the field »Schlüssel«.When clicking »OK« the following message has to appear:Figure 22: Valid licence keySo the activation is complete and you can use <strong>ACCON</strong>-<strong>S7</strong>-<strong>EasyLog</strong> from now on asa full version.But if this message appears:Figure 23: Invalid licence keyYou have to check if the»Name« and »Licence key« were correctly entered. If soplease compare your hardware fingerprint with the one from our e-mail and turn toour technical support.<strong>ACCON</strong>-<strong>S7</strong>-<strong>EasyLog</strong> 29 DELTALOGIC GmbH