
Create successful ePaper yourself
Turn your PDF publications into a flip-book with our unique Google optimized e-Paper software.
USER'S MANUALTABLE OF CONTENTSPage #Contents1.0 FEATURES ..................................................................................................................... 12.0 SPECIFICATIONS .......................................................................................................... 23.0 SYSTEM REQUIREMENTS ............................................................................................ 24.0 WARNING ....................................................................................................................... 25.0 CONTROL BOX DESCRIPTION ..................................................................................... 35.1 Front Panel Description ............................................................................................ 35.2 Back Panel Description ............................................................................................. 35.3 Internal Layout ........................................................................................................... 46.0 QUICK START (STEP by step) ...................................................................................... 46.1 Step 1. Connecting Motor cables. ............................................................................ 46.2 Step 2. Connecting Limit switches Board. ............................................................... 56.3 Step 3. Connecting VFD ............................................................................................ 66.4 Step 4. Coolant / Vacuum AC Plug. .......................................................................... 66.5 Step 5. Connecting Probe. ........................................................................................ 76.6 Step 6. Connecting External E-Stop. ........................................................................ 76.7 Step 7. Selecting the AC operting voltage ............................................................... 86.8 Step 8. Software Installation: .................................................................................... 86.9 Step 9. Configuring the Pendant. ............................................................................. 87.0 WIRING DIAGRAMS ..................................................................................................... 128.0 PART LIST .................................................................................................................... 139.0 PINOUT ......................................................................................................................... 1410.0 DISCLAIMER ................................................................................................................ 15ii
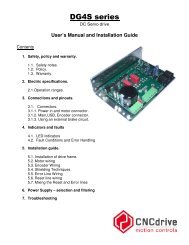
1.0 FEATURES• Ethernet controlled CNC Stepper Control Box with microstepping.• 4 Stepper Motor.• Suitable for a wide range of stepping motors of Nema 17, 23 and 34.• Connector for an external Pendant.• On-Panel Emergency Stop Push Button (E-Stop).• RJ45 Interface for VFD control (Variable Analog Output, Relaycontacts for Start CW and Start CCW).• Relay Controlled Aux1 and Aux2 AC Plug.• 1 Probe input. (Probe not included)• 1 External E-Stop input.• Relay Controlled Coolant DC Plug.• Works directly with Mach3.User’s <strong>Manual</strong> Page 1
2.0 SPECIFICATIONSMain Voltage Input (VAC)110V or 220V - Switch selectableMain voltage for motors (VDC)48V or 36VLogic supply voltage (VDC)5V and 24VPeak Current per axis (A)5.6 Amp per PhaseStep input frequency0-200KHzDigital inputs (LOW) -0.5V - 0.8VDigital inputs (HIGH)2V-5VCoolant/Vacuums output110VAC@10A or 220VAC@7ACooling1 DC FanDimensions (in) / (mm)17x13.27x4.88/432x337x124Weight (lbs) / (kg)3.0 SYSTEM REQUIREMENTSProcessor1Ghz CPUMemory 512USB 1.1 or 2.0Operating System Windows 2000, Windows XP, Windows Vista, or Windows 7SoftwareMach3 Version R3.043.0624.0 WARNINGElectrical shock or serious physical injury could result due tomisuse Control BOX.Disconnect power cables while installing the Control Box.Read and follow instructions on the manual.User’s <strong>Manual</strong> Page 2
5.0 CONTROL BOX DESCRIPTION5.1 Front Panel Description5.2 Back Panel DescriptionUser’s <strong>Manual</strong> Page 3
5.3 Internal Layout6.0 QUICK START (STEP BY STEP)6.1 Step 1. Connecting Motor cables.STEPPER MOTOR CABLEWIREPIN DESCRIPTION COLOR1 A+ RED2 A- WHITE3 B+ BLACK4 B- GREENUser’s <strong>Manual</strong> Page 4
6.2 Step 2. Connecting Limit switches Board.LIMIT SWITCHSCONNECTORRJ45PIN DESCRIPTION1 GND2 LPT1_133 LPT1_124 LPT1_115 NOT USED6 NOT USED7 5V8 NOT USEDSample Wiring with mechanical switches.Sample Wiring with limit switches OMRON DSA-8514Wiring is made to work with an A32 Switch Assembly, C16 – Photo and Limit Board, aC45 LIMIT AND HOME UNIVERSAL, A61 – Inductive Switch Assembly or a C27-Ethernet RJ45 Breakout Board, which could take any kind of switches, includinginductive, capacitive, hall effect, optical, or mechanical.User’s <strong>Manual</strong> Page 5
6.3 Step 3. Connecting VFDVFD CONNECTORRJ45PIN DESCRIPTION1 ANALOG OUTPUT COMMON (ACM)2 ANALOG OUTPUT (AVI)3 NOT USED4 RELAY 1 NO (Normally Open) CONTACT (ON/OFF)5 NOT USED6 RELAY 2 NO (Normally Open) CONTACT (CW) or (CWW)7 NOT USED8 RELAYS COMMON CONTACTS (DCM)The box is prewired for INTERNATIONAL VFD Mode, if using on US mode, open thebox and move the jumper on the C32.The true max and min speeds of the spindle must be set:6.4 Step 4. Aux 1 / Aux 2 AC Plug.Aux 1 / Aux 2 are 110VAC/220VAC outputs controlled by electromechanical Relays.User’s <strong>Manual</strong> Page 6
6.5 Step 5. Connecting Probe.Touch probes are wired and preconfigured and just needs to be connected to the backpanel. <strong>CNC4PC</strong> offers this unit:http://www.cnc4pc.com/Store/osc/product_info.php?cPath=69&products_id=323, but othermay be used as long as the wiring is compatible,Refer to the product’s documentation for additional information:http://cnc4pc.com/Tech_Docs/TP1.pdf6.6 Step 6. Connecting External E-Stop.The external e-stop is optional. If the plug is not present, the e-stop circuit will getclosed. If the plug is put in place, a NC e-stop switch must be used.User’s <strong>Manual</strong> Page 7
6.7 Step 7. Selecting the AC operting voltageSelect the AC operating voltage by using the switch located in the power supply, closeto this image.S E L E C T O P E R A T I N GV O L T A J E B E F O R EC O N N E C TIN G TO P O W E R .6.8 Step 8. Software Installation:Before connecting the box to power install the basic software and configuration files:1. Download and install Mach3: http://www.machsupport.com/downloads.php.2. Download and install the USB Driver and Smooth Stepper Plugin:http://warp9td.com/files/ESS_v10a.zip3. Install the Mach3 License.4. Download and copy XML and configuration files: http://cnc4pc.com/Files/CS4EA4-3_rev1.zip. Make sure to copy each file in the specific directory.6.9 Step 9. Configuring the Pendant.1. Configure Ports & Pins to use port 2 and pins 29 as inputs.User’s <strong>Manual</strong> Page 8
2. Configure the Smooth Stepper Plugin to use pins 29 on port 2 as inputs:3. Enable Output 6 on port 2 pin 1.User’s <strong>Manual</strong> Page 9
4. Configure the MPG and ENCODER on port 2 pins 2 and 3 for channels A and B.5. Configure the OEM Triggers as described in the image:User’s <strong>Manual</strong> Page 10
6. Download, copy in to the Brains Directory and enable the following brains found HERE.7. Set the Step Jog resolution:User’s <strong>Manual</strong> Page 11
7.0 WIRING DIAGRAMSUser’s <strong>Manual</strong> Page 12
8.0 PART LISTCS4EA4-1 CNC Stepper Motor Control Box KitPart# Name / Link QttyA2 A2 - DB25 Gender Changer, DB25 pin Female to DB25 pin Female. 1A20 A20 - 5VDC@3A Regulated Switching Power Supply 1A27 A27 - 3 FT Booted Cat5e Network Patch Cable - Orange 6A30 A30 - RJ45 Pass Through Panel Mount 3A31 A31 - Latch Twist-Release E-Stop Button 1A44 A44 - Box Fan 1BX2 BX2 - CNC Enclosure 1A57 A57 - Set of screws and nuts 1A59 A59 - Set of Electrical Cables and Connectors 1BPD BPD Back Panel for BX2 Type D 1C32 C32 - Dual Port Multifunction CNC Board 1C38 C38 - BRAKING CIRCUIT BOARD. 1C48 C48 -EXT_E-STOP & PROBE CONNECTOR BOARD 1ESS Ethernet Smooth Stepper Board 1FPB FPB Front Panel for BX2 Type B 1SPA1 SPA1 Enclosure Subpanel 1User’s <strong>Manual</strong> Page 13
9.0 PINOUTPORT PIN CONTROL BOX FUNCTION MACH FUNCTION1 1 NOT USED NOT USED1 2 STEP X STEP PIN#1 3 DIR X DIR PIN#1 4 STEP Y STEP PIN#1 5 DIR Y DIR PIN#1 6 STEP Z STEP PIN#1 7 DIR Z DIR PIN#1 8 STEP A STEP PIN#1 9 DIR A DIR PIN#1 10 MACH E-STOP FUNTION ESTOP1 11 LIMIT X X++1 12 LIMIT Y Y++1 13 LIMIT Z Z++1 14 STEP SPINDLE (PWM) STEP PIN#1 15 PROBE PROBE1 16 DIR SPINDLE DIR PIN#1 17 NOT USED NOT USED2 1 NOT USED NOT USED2 2 ENCODER A ENCODER 1 AND MPG#12 3 ENCODER B ENCODER 1 AND MPG#12 4 SELECT X (MPG) OEM TRIG #12 5 SELECT Y (MPG) OEM TRIG #22 6 SELECT Z (MPG) OEM TRIG #32 7 SELECT A (MPG) OEM TRIG #42 8 SELECT 1 (MPG) OEM TRIG #52 9 SELECT 10 (MPG) OEM TRIG #62 10 SELECT 100 (MPG) OEM TRIG #72 11 NOT USED NOT USED2 12 SELECT 5(MPG) OEM TRIG #92 13 SELECT 6 (MPG) OEM TRIG #102 14 NOT USED NOT USED2 15 NOT USED NOT USED2 16 COOLANT 12VDC OUTPUT #22 17 CHARGE PUMP CHARGE PUMP3 2 RELAY 1 (COM_R) ENABLE 13 3 RELAY 2 (R1_NO) ENABLE 23 4 RELAY 3 (R2_NO) ENABLE 33 5 RELAY 4 (AVI) ENABLE 43 6 RELAY 5 (ACM) ENABLE 5User’s <strong>Manual</strong> Page 14
3 7 RELAY 6 AUX 1 (TRIMER) ENABLE 63 8 RELAY 7 AUX 2 OUTPUT #110.0 DISCLAIMERUse caution. CNC machines could be dangerous machines. DUNCAN USA, LLC orArturo Duncan are not liable for any accidents resulting from the improper use of thesedevices. This product is not fail-safe device, and it should not be used in life supportsystems or in other devices where its failure or possible erratic operation could causeproperty damage, bodily injury or loss of life.User’s <strong>Manual</strong> Page 15