Tucked-Front Blouse - My Label 3D Fashion Pattern Software
Tucked-Front Blouse - My Label 3D Fashion Pattern Software
Tucked-Front Blouse - My Label 3D Fashion Pattern Software

You also want an ePaper? Increase the reach of your titles
YUMPU automatically turns print PDFs into web optimized ePapers that Google loves.
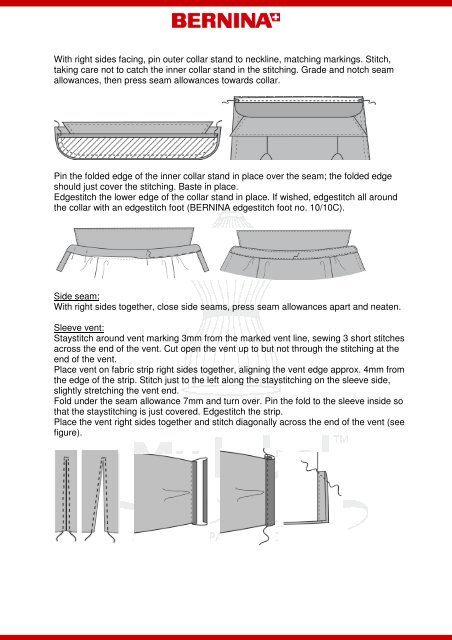
With right sides facing, pin outer collar stand to neckline, matching markings. Stitch,taking care not to catch the inner collar stand in the stitching. Grade and notch seamallowances, then press seam allowances towards collar.Pin the folded edge of the inner collar stand in place over the seam; the folded edgeshould just cover the stitching. Baste in place.Edgestitch the lower edge of the collar stand in place. If wished, edgestitch all aroundthe collar with an edgestitch foot (BERNINA edgestitch foot no. 10/10C).Side seam:With right sides together, close side seams, press seam allowances apart and neaten.Sleeve vent:Staystitch around vent marking 3mm from the marked vent line, sewing 3 short stitchesacross the end of the vent. Cut open the vent up to but not through the stitching at theend of the vent.Place vent on fabric strip right sides together, aligning the vent edge approx. 4mm fromthe edge of the strip. Stitch just to the left along the staystitching on the sleeve side,slightly stretching the vent end.Fold under the seam allowance 7mm and turn over. Pin the fold to the sleeve inside sothat the staystitching is just covered. Edgestitch the strip.Place the vent right sides together and stitch diagonally across the end of the vent (seefigure).