


Create successful ePaper yourself
Turn your PDF publications into a flip-book with our unique Google optimized e-Paper software.
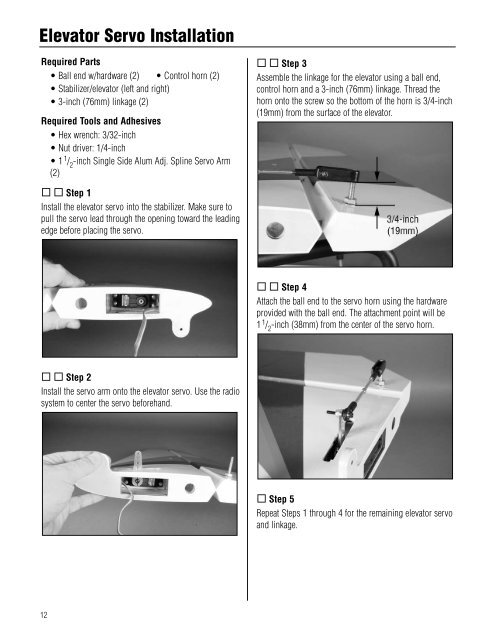
Elevator Servo InstallationRequired Parts• Ball end w/hardware (2) • Control horn (2)• Stabilizer/elevator (left and right)• 3-inch (76mm) linkage (2)Required Tools and Adhesives• Hex wrench: 3/32-inch• Nut driver: 1/4-inch• 1 1 / 2-inch Single Side Alum Adj. Spline Servo Arm(2) Step 3Assemble the linkage for the elevator using a ball end,control horn and a 3-inch (76mm) linkage. Thread thehorn onto the screw so the bottom of the horn is 3/4-inch(19mm) from the surface of the elevator. Step 1Install the elevator servo into the stabilizer. Make sure topull the servo lead through the opening toward the leadingedge before placing the servo. Step 4Attach the ball end to the servo horn using the hardwareprovided with the ball end. The attachment point will be1 1 / 2-inch (38mm) from the center of the servo horn. Step 2Install the servo arm onto the elevator servo. Use the radiosystem to center the servo beforehand. Step 5Repeat Steps 1 through 4 for the remaining elevator servoand linkage.12


