


You also want an ePaper? Increase the reach of your titles
YUMPU automatically turns print PDFs into web optimized ePapers that Google loves.
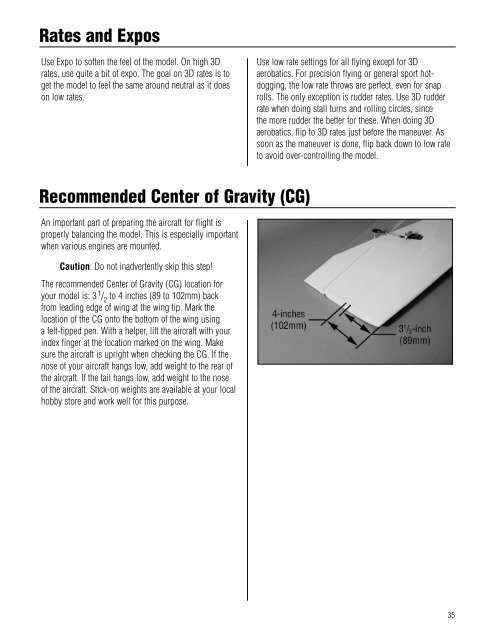
Rates and ExposUse Expo to soften the feel of the model. On high 3Drates, use quite a bit of expo. The goal on 3D rates is toget the model to feel the same around neutral as it doeson low rates.Use low rate settings for all flying except for 3Daerobatics. For precision flying or general sport hotdogging,the low rate throws are perfect, even for snaprolls. The only exception is rudder rates. Use 3D rudderrate when doing stall turns and rolling circles, sincethe more rudder the better for these. When doing 3Daerobatics, flip to 3D rates just before the maneuver. Assoon as the maneuver is done, flip back down to low rateto avoid over-controlling the model.Recommended Center of Gravity (CG)An important part of preparing the aircraft for flight isproperly balancing the model. This is especially importantwhen various engines are mounted.Caution: Do not inadvertently skip this step!The recommended Center of Gravity (CG) location foryour model is: 3 1 / 2to 4 inches (89 to 102mm) backfrom leading edge of wing at the wing tip. Mark thelocation of the CG onto the bottom of the wing usinga felt-tipped pen. With a helper, lift the aircraft with yourindex finger at the location marked on the wing. Makesure the aircraft is upright when checking the CG. If thenose of your aircraft hangs low, add weight to the rear ofthe aircraft. If the tail hangs low, add weight to the noseof the aircraft. Stick-on weights are available at your localhobby store and work well for this purpose.35


