DDS Integration Guide
DDS Integration Guide
DDS Integration Guide

Create successful ePaper yourself
Turn your PDF publications into a flip-book with our unique Google optimized e-Paper software.
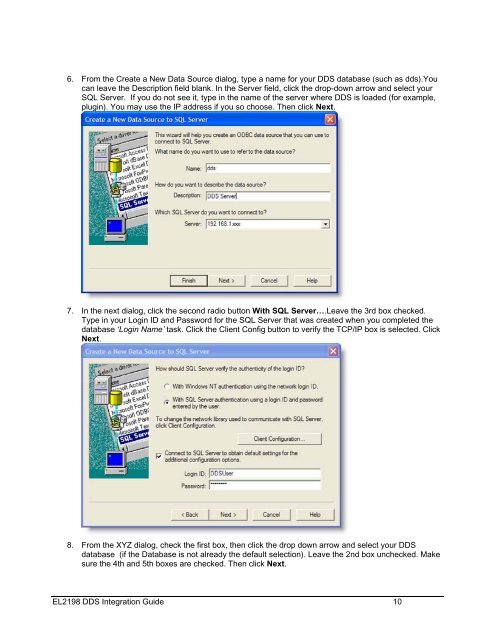
6. From the Create a New Data Source dialog, type a name for your <strong>DDS</strong> database (such as dds).Youcan leave the Description field blank. In the Server field, click the drop-down arrow and select yourSQL Server. If you do not see it, type in the name of the server where <strong>DDS</strong> is loaded (for example,plugin). You may use the IP address if you so choose. Then click Next.7. In the next dialog, click the second radio button With SQL Server….Leave the 3rd box checked.Type in your Login ID and Password for the SQL Server that was created when you completed thedatabase ‘Login Name’ task. Click the Client Config button to verify the TCP/IP box is selected. ClickNext.8. From the XYZ dialog, check the first box, then click the drop down arrow and select your <strong>DDS</strong>database (if the Database is not already the default selection). Leave the 2nd box unchecked. Makesure the 4th and 5th boxes are checked. Then click Next.EL2198 <strong>DDS</strong> <strong>Integration</strong> <strong>Guide</strong> 10