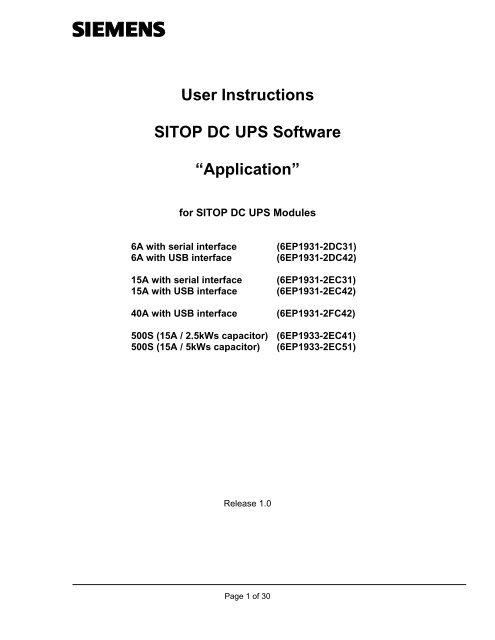
User Instructions SITOP DC UPS Software “Application”
User Instructions SITOP DC UPS Software “Application”
User Instructions SITOP DC UPS Software “Application”

Create successful ePaper yourself
Turn your PDF publications into a flip-book with our unique Google optimized e-Paper software.
<strong>User</strong> <strong>Instructions</strong><br />
<strong>SITOP</strong> <strong>DC</strong> <strong>UPS</strong> <strong>Software</strong><br />
<strong>“Application”</strong><br />
for <strong>SITOP</strong> <strong>DC</strong> <strong>UPS</strong> Modules<br />
6A with serial interface (6EP1931-2<strong>DC</strong>31)<br />
6A with USB interface (6EP1931-2<strong>DC</strong>42)<br />
15A with serial interface (6EP1931-2EC31)<br />
15A with USB interface (6EP1931-2EC42)<br />
40A with USB interface (6EP1931-2FC42)<br />
500S (15A / 2.5kWs capacitor) (6EP1933-2EC41)<br />
500S (15A / 5kWs capacitor) (6EP1933-2EC51)<br />
Release 1.0<br />
Page 1 of 30
Contents<br />
1. Download <strong>SITOP</strong> <strong>DC</strong> <strong>UPS</strong> <strong>Software</strong>.........................................................................3<br />
2. Installation of Application ..........................................................................................4<br />
2.1. Basic Installation ...................................................................................................4<br />
2.2. Installation USB Drivers ......................................................................................11<br />
2.3. Update USB Drivers ............................................................................................15<br />
3. Program Operation..................................................................................................17<br />
3.1. Program Start ......................................................................................................17<br />
3.2. Configuration.......................................................................................................18<br />
3.3. <strong>SITOP</strong> <strong>DC</strong> <strong>UPS</strong> Monitoring .................................................................................23<br />
3.4. Protocol Window .................................................................................................24<br />
3.5. Logfile..................................................................................................................25<br />
3.6. Further Settings...................................................................................................26<br />
4. OPC Server.............................................................................................................27<br />
4.1. Manual Registration of OPC Server ....................................................................27<br />
4.2. Description of OPC Server Interface ...................................................................28<br />
5. Help and Support ....................................................................................................29<br />
Page 2 of 30
1. Download <strong>SITOP</strong> <strong>DC</strong> <strong>UPS</strong> <strong>Software</strong><br />
<strong>Software</strong> download from our homepage (www.siemens.com/sitop).<br />
Page 3 of 30
2. Installation of Application<br />
2.1. Basic Installation<br />
Execute file “Setup_Sitop_3.x.2.x.exe“.<br />
Select your language.<br />
Installation is started.<br />
Page 4 of 30
Accept the license agreement.<br />
Page 5 of 30
Select the program components required.<br />
For installation as application the components <strong>“Application”</strong> and “Driver“ (when using a<br />
USB connection) are required.<br />
Page 6 of 30
Choose the destination folder in which to instal the program packages.<br />
Page 7 of 30
Select a start menu folder, if you would like to create an entry there.<br />
Page 8 of 30
Typical settings of the <strong>SITOP</strong> software can be preset here:<br />
• Communication interface<br />
• Location of logfile (please note: write permission is required)<br />
• Service actions in <strong>UPS</strong> buffer mode (mains failure)<br />
• Automatic installation of OPC server interface (see chapter 4)<br />
Page 9 of 30
Completion of installation.<br />
Page 10 of 30
2.2. Installation USB Drivers<br />
The installation of drivers is only required for versions with USB interface.<br />
Before starting the installation please make sure that the <strong>SITOP</strong> <strong>DC</strong> <strong>UPS</strong> software<br />
(freeware download under www.siemens.de/sitop) is installed completely. Then connect<br />
the <strong>SITOP</strong> <strong>DC</strong> <strong>UPS</strong> module with a free USB interface. The <strong>SITOP</strong> <strong>DC</strong> <strong>UPS</strong> module is<br />
now identified automatically, the hardware wizard opens:<br />
Page 11 of 30
Select “Install software from a list or specific location”.<br />
Click “Next“ to continue.<br />
In the next window you choose the location from where the driver will be installed,<br />
normally: ”C:\Program Files\Sitop\DRIVER“.<br />
If you have installed the <strong>SITOP</strong> <strong>DC</strong> <strong>UPS</strong> software in a different location, please enter it<br />
in the browse field. Click “Next” to continue.<br />
Page 12 of 30
Please acknowledge the following warning with a click on “Continue Anyway“.<br />
In the next window you complete the driver installation with a click on “Finish“.<br />
Page 13 of 30
Following the same steps, the driver for a new serial COM port is installed.<br />
In this window you complete the driver installation with a click on “Finish“. The driver for<br />
the <strong>SITOP</strong> <strong>DC</strong> <strong>UPS</strong> module is now installed successfully.<br />
Yon can control in the device manager whether the <strong>SITOP</strong> <strong>DC</strong> <strong>UPS</strong> module has been<br />
identified correctly:<br />
Page 14 of 30
2.3. Update USB Drivers<br />
For the correct function of the <strong>SITOP</strong> <strong>DC</strong> <strong>UPS</strong> software it is necessary to install an<br />
up-to-date USB driver. From driver version 2.2.4.0 upwards this is guaranteed.<br />
If an older driver is installed already, an update of the USB driver has to be made.<br />
Before starting the driver update please make sure that the <strong>SITOP</strong> <strong>DC</strong> <strong>UPS</strong> software<br />
(freeware download on www.siemens.de/sitop) is installed completely.<br />
Search the entry ”<strong>SITOP</strong> xx“ in the folder “USB controllers” of the device manager.<br />
Mark the entry and by clicking the right mouse button open the context menu<br />
“Properties“. Here you can check the driver version.<br />
Page 15 of 30
If the driver version is less than 2.2.4.0, an update has to be made. In order to do this<br />
please activate the button “Update Driver“.<br />
Then continue as described in chapter 2.2, “Installation USB drivers”.<br />
Page 16 of 30
3. Program Operation<br />
3.1. Program Start<br />
Double click on ”<strong>SITOP</strong>_<strong>DC</strong>_USV.exe.<br />
On the first program start the language selection opens.<br />
Page 17 of 30
3.2. Configuration<br />
• Selection of communication interface (COM or USB)<br />
• Option for display of monitoring window on status change (optionally after a time<br />
that can be set)<br />
• Option for an acoustic signal on status change<br />
• Selection of location of logfile (write permission required!)<br />
• Option for sending a signal on manual Windows shutdown (latching shutdown of<br />
<strong>SITOP</strong> <strong>DC</strong> <strong>UPS</strong> module;<br />
only available when communicating via USB of the following versions: 6EP1931-<br />
2<strong>DC</strong>42; 6EP1931-2EC42 und 6EP1931-2FC42)<br />
• Option for saving the configuration with write protection<br />
Page 18 of 30
• Option for starting an application after a set time when buffering<br />
(example: *.exe, *.bat, *.vbs or *.js)<br />
• Option for PC shutdown after a set time when buffering (note: if the mains<br />
voltage returns during the set time, the PC will NOT shut down)<br />
• Option for signalizing the <strong>DC</strong> <strong>UPS</strong> on Windows shutdown (remote off)<br />
Page 19 of 30
• Option for starting an application after a set time at ALARM (buffer not ready),<br />
(example: *.exe, *.bat, *.vbs or *.js)<br />
• Option for starting an application after a set time at interrupted data<br />
communication (example: *.exe, *.bat, *.vbs or *.js)<br />
Page 20 of 30
• Option for starting an application after a set time at recommended “battery<br />
replacement depending on aging“ (example: *.exe, *.bat, *.vbs oder *.js)<br />
Page 21 of 30
• Option for starting an application after a set time at reaching battery charge<br />
>85% (battery fully charged), (example: *.exe, *.bat, *.vbs oder *.js)<br />
• Option for starting an application after a set time at falling below battery charge<br />
>85% (battery not fully charged), (example: *.exe, *.bat, *.vbs oder *.js)<br />
Page 22 of 30
3.3. <strong>SITOP</strong> <strong>DC</strong> <strong>UPS</strong> Monitoring<br />
Display of version number<br />
Display of <strong>SITOP</strong> <strong>DC</strong> <strong>UPS</strong> module connected<br />
Display of operating states in accordance with the LEDs on the <strong>SITOP</strong> <strong>DC</strong> <strong>UPS</strong> module<br />
• <strong>DC</strong> o.k.<br />
• Alarm<br />
• Normal mode / buffer mode<br />
• Battery charge condition<br />
Buttons:<br />
opens configuration menu<br />
opens protocol window<br />
opens additional window with received data words<br />
minimizes monitor window to system tray, can be displayed again<br />
by clicking the right mouse button<br />
Page 23 of 30
3.4. Protocol Window<br />
The protocol window opens after clicking the button “Protocol“.<br />
Display protocol file, all events are registered here with timestamp.<br />
Button:<br />
opens logfile with Windows editor<br />
Page 24 of 30
3.5. Logfile<br />
In the logfile all events are registered and made available for later evaluation.<br />
Page 25 of 30
3.6. Further Settings<br />
In the “<strong>SITOP</strong>_<strong>DC</strong>_USV.INI“ file further individual program settings can be made.<br />
Page 26 of 30
4. OPC Server<br />
The <strong>SITOP</strong> <strong>DC</strong> <strong>UPS</strong> software <strong>“Application”</strong> has an integrated OPC server interface. This<br />
software interface allows access to information sent by the <strong>SITOP</strong> <strong>DC</strong> <strong>UPS</strong> module out<br />
of own applications.<br />
4.1. Manual Registration of OPC Server<br />
Before the OPC server interface can be used, it is necessary to register the <strong>SITOP</strong> <strong>DC</strong><br />
<strong>UPS</strong> software in the operating system. If this was not effected during installation, the<br />
OPC server can also be registered manually.<br />
On clicking the Windows buttons “Start“ -> “Run...“ the following window opens:<br />
As destination the path has to be selected where the program file “<strong>SITOP</strong>_<strong>DC</strong>_<strong>UPS</strong>.exe“<br />
– unpacked in step “Basic Installation“ - is located.<br />
The OPC server can be removed by following the same steps, using the parameter<br />
“-unregserver“.<br />
Page 27 of 30
4.2. Description of OPC Server Interface<br />
Addressing the OPC server interface implicates an automatic start of the <strong>SITOP</strong> <strong>DC</strong><br />
<strong>UPS</strong> software “Application“.<br />
Note: On starting the program a stable data connection to the <strong>SITOP</strong> <strong>DC</strong> <strong>UPS</strong> module is<br />
built up. This process may last a few seconds. A resulting possible delay of data<br />
availability at the OPC server interface must be taken into account.<br />
Sitop <strong>DC</strong> <strong>UPS</strong> OPC server - name: <strong>SITOP</strong>_<strong>UPS</strong>.OPC<br />
Sitop <strong>DC</strong> <strong>UPS</strong> OPC server – available items:<br />
Table1:<br />
Item name Type Description<br />
AKKU<br />
Bool – active: battery exchange Variables describing the status of<br />
required<br />
the <strong>SITOP</strong> <strong>UPS</strong>. “True”<br />
ALARM Bool – active: buffer not ready corresponds to the active LED on<br />
the device.<br />
BAT<br />
Bool – active: buffer mode<br />
BAT85<br />
Bool – active: battery fully charged<br />
<strong>DC</strong>_OK Bool – active: input voltage o.k.<br />
Connection Longint Status: 0 – no connection<br />
1, 2 – connection available<br />
Status changes between 1 and 2<br />
for monitoring connection<br />
Status Longint Binary-coded status word,<br />
see table 2<br />
Device String Type of connected device<br />
(example.: <strong>SITOP</strong> <strong>DC</strong> <strong>UPS</strong> 40)<br />
last_Message String Last message/ logfile entry<br />
Received String Last telegram from <strong>UPS</strong><br />
Page 28 of 30
Table 2: Coding status word<br />
The status word consists of 2 bytes, always 4 bits belonging to a LED of the <strong>SITOP</strong><br />
<strong>UPS</strong>.<br />
Bits Correlation Status binary Description<br />
0-3 Battery charge 1000<br />
0010<br />
4-7 Input voltage 1000<br />
0010<br />
8-11 Buffer mode 1000<br />
0100<br />
12-15 Alarm 1000<br />
0001<br />
0100<br />
5. Help and Support<br />
Further information is available in “ReadMe.rtf“.<br />
Page 29 of 30<br />
Battery not fully loaded<br />
Battery fully loaded<br />
No input voltage<br />
Input voltage available<br />
Normal mode<br />
Buffer mode<br />
No alarm<br />
Buffer not ready<br />
Battery replacement required<br />
(LED flashing)
Note: The information provided in these user instructions contains descriptions or characteristics of performance which in<br />
case of actual use do not always apply as described or which may change as a result of further development of the<br />
products. Technical specifications are subject to change without prior notice, errors excepted.<br />
© Siemens AG, 2008<br />
Industry Sector,<br />
Industry Automation<br />
SE IP<br />
Postfach 2355, D-90713 Fürth<br />
Page 30 of 30