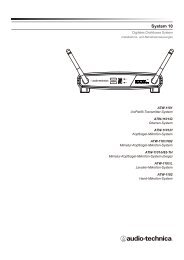
4000 & 5000 Series Owners Manual - Audio-Technica
4000 & 5000 Series Owners Manual - Audio-Technica
4000 & 5000 Series Owners Manual - Audio-Technica

Create successful ePaper yourself
Turn your PDF publications into a flip-book with our unique Google optimized e-Paper software.
21Artist Elite ® <strong>4000</strong> & <strong>5000</strong> <strong>Series</strong> Professional UHF Wireless SystemsSystem OperationArtist Elite ® wireless receivers and transmitters are extremelyversatile components with many operating features and functions,some of which are not obvious. As a result, we suggest the followingapproaches to assure a “comfort level” with any new equipment:1. Begin using a single receiver/transmitter pair at their Default(“DEF”) settings, to become familiar with equipment functionsand operation before doing any customizing. (If the Defaultfrequency is not usable in your area, change the frequency to onethat is suitable.)2. Before installing/starting up a large multi-channel system, explorethe functions and operation of only two or three receiver/transmitter pairs together.The details of setting up and operating a multi-channel system varygreatly in complexity, depending upon the number of receivers andnature of the system. Because the feature-rich nature of AEW unitscan greatly increase this complexity, we suggest starting with asimpler, straightforward setup and use to become familiar with theequipment and its capabilities.Single AEW-R4100 receiver system: Begin using a receiver andtransmitter at their Default (“DEF”) settings, to become familiar withequipment functions and operation before doing any customizing.(If the Default frequency is not usable in your area, manually changeonly the frequency to one that is suitable.)Single AEW-R5200 receiver system (two channels): Start outusing only Channel 1, treating this the same as the singleAEW-R4100 above.Multiple-receiver system with link cables only: The link cablesprovide data and control between receivers. The IntelliScan featurescans for clear channels and assigns non-conflicting frequencies to alllinked receivers. (If IntelliScan is not used, the receiver frequenciesmay all be set individually/manually, as with any standard receiver,selecting frequencies that are within the same IntelliScan groupslisted on page 25.)Multiple-receiver system with Ethernet-connected computerinterface: Refer to the separate Artist Elite Wireless Control Interfacemanual for setup and operation of a computer-based system; theArtist Elite Wireless Control Interface manual is furnished with<strong>5000</strong> <strong>Series</strong> wireless systems both as a printed document and onCD in PDF form. Basic hardware aspects of the receivers, and alltransmitter setup/operating information, are in the manual you arenow reading.Turning on the ReceiverTurn down the AF Level of the mixer or amplifier. Switch on thereceiver. Do not switch on the transmitter yet. The Alert indicator andthe LCD window lights up; the normal operation LCD display appearsafter 1–2 seconds. If any of the bars show in the “RF” bar-graphmeters, there may be RF interference in the area. If this occurs, selectanother frequency as explained below. (If the Meter Hold function hasbeen selected, one of the RF bars in each column will be flashing,indicating the lowest RF levels received.)Selecting/Setting Receiver FrequencySelection of the desired operating frequency is made throughthe function menus. There must be no local interference on thatfrequency. If the Default frequency (lowest in band) happens not tobe usable, the receiver frequency may be set manually, or by usingthe IntelliScan function.• <strong>Manual</strong> frequency selection: Adjust the receiver frequency asdetailed in the next section.• IntelliScan frequency selection: The receiver’s IntelliScanfunction may be employed to select a usable operatingfrequency automatically, as detailed in the section followingon page 22.Note: Once the receiver frequency is set, the associated transmittermust be set manually to the receiver’s exact frequency. See page 23for the correct procedure.Setting Receiver Frequency <strong>Manual</strong>lyTouch:Hold:A momentary press of the Mode/Set button. It is usedto enter Menu mode, to enter Edit mode, or to Escapewithout making any changes to current settings.A press and hold (about two seconds) of the Mode/Set button. It is used to accept a new setting whenthe receiver is in Edit mode or to save the currentsettings to one of the five user-defined namepresets or the internal memory location (“NAME?”).1. Touch the Mode/Set button once. “FRQ” appears on the first lineof the LCD window with the current frequency setting on thesecond line. (The receiver is now in Menu mode.)2. Touch the Mode/Set button again. The small flashing word“EDIT” appears at the bottom of the window. (The receiver isnow in Edit mode.)3. Use the Up/Down arrow buttons to change the first three digits(MHz) to the desired frequency. Choose a frequency appropriatefor your area, avoiding frequencies with active TV channels. Presseither arrow for single steps, or hold down either arrow for rapidcycling through the band. Frequencies “wrap around” to the otherend of the range when the top or bottom of the band is reached.4. Touch the Mode/Set button once to set the first three digits tothe desired frequency.5. Use the Up/Down arrow buttons to change the second threedigits (kHz) to the desired frequency. Again, be certain to choosea frequency appropriate for your area, avoiding frequencies withactive TV channels.6. To activate this frequency selection, hold the Mode/Set buttonuntil the word “STORED” appears in the receiver’s window. (Ifyou do not wish to complete this particular selection, just touchthe Mode/Set button once. The word “ESCAPE” will appearbriefly in the window and the receiver will return to theMenu mode.)