
You also want an ePaper? Increase the reach of your titles
YUMPU automatically turns print PDFs into web optimized ePapers that Google loves.
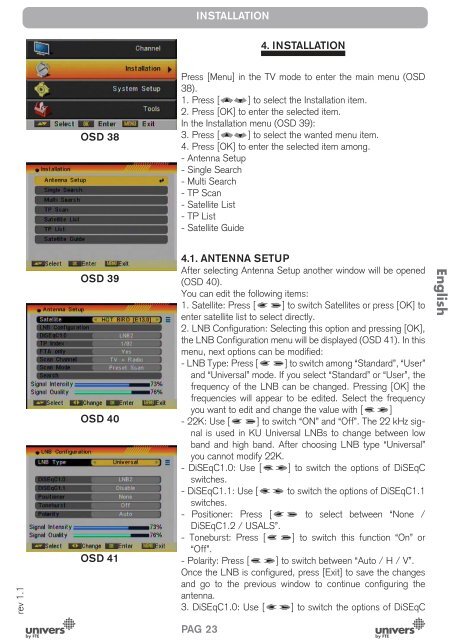
INSTALLATION4. INSTALLATIONOSD 38Press [Menu] in the TV mode to enter the main menu (OSD38).1. Press [ ] to select the Installation item.2. Press [OK] to enter the selected item.In the Installation menu (OSD 39):3. Press [ ] to select the wanted menu item.4. Press [OK] to enter the selected item among.- Antenna Setup- Single Search- Multi Search- TP Scan- Satellite List- TP List- Satellite Guiderev 1.1OSD 39OSD 40OSD 414.1. ANTENNA SETUPAfter selecting Antenna Setup another window will be opened(OSD 40).You can edit the following items:1. Satellite: Press [ ] to switch Satellites or press [OK] toenter satellite list to select directly.2. LNB Configuration: Selecting this option and pressing [OK],the LNB Configuration menu will be displayed (OSD 41). In thismenu, next options can be modified:- LNB Type: Press [ ] to switch among “Standard”, “User”and “<strong>Univers</strong>al” mode. If you select “Standard” or “User”, thefrequency of the LNB can be changed. Pressing [OK] thefrequencies will appear to be edited. Select the frequencyyou want to edit and change the value with [ ]- 22K: Use [ ] to switch “ON” and “Off”. The 22 kHz signalis used in KU <strong>Univers</strong>al LNBs to change between lowband and high band. After choosing LNB type “<strong>Univers</strong>al”you cannot modify 22K.- DiSEqC1.0: Use [ ] to switch the options of DiSEqCswitches.- DiSEqC1.1: Use [ to switch the options of DiSEqC1.1switches.- Positioner: Press [ to select between “None /DiSEqC1.2 / USALS”.- Toneburst: Press [ ] to switch this function “On” or“Off”.- Polarity: Press [ ] to switch between “Auto / H / V”.Once the LNB is configured, press [Exit] to save the changesand go to the previous window to continue configuring theantenna.3. DiSEqC1.0: Use [ ] to switch the options of DiSEqCEnglishPAG.23