Documentation for the use of the Advanced Ambient Light ... - Daz 3D
Documentation for the use of the Advanced Ambient Light ... - Daz 3D
Documentation for the use of the Advanced Ambient Light ... - Daz 3D

You also want an ePaper? Increase the reach of your titles
YUMPU automatically turns print PDFs into web optimized ePapers that Google loves.
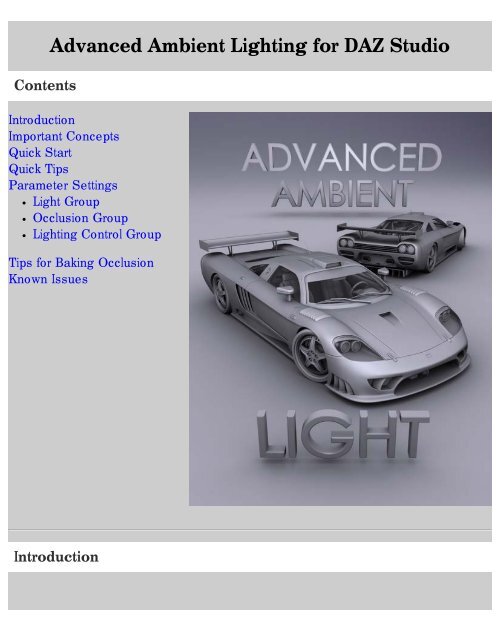
Contents<strong>Advanced</strong> <strong>Ambient</strong> <strong>Light</strong>ing <strong>for</strong> DAZ StudioIntroductionImportant ConceptsQuick StartQuick TipsParameter Settings<strong>Light</strong> GroupOcclusion Group<strong>Light</strong>ing Control GroupTips <strong>for</strong> Baking OcclusionKnown IssuesIntroduction
The AoA <strong>Advanced</strong> <strong>Ambient</strong> <strong>Light</strong> <strong>for</strong> DAZ Studio works by itself to create beautiful, s<strong>of</strong>t lighting or along witho<strong>the</strong>r lights to help provide extra accent lighting and detail with ambient occlusion.Wanting more lighting flexibility in DAZ Studio, I created this light <strong>for</strong> <strong>use</strong> in my own projects. Over <strong>the</strong> years Iadded more features as needs arose. These features mainly focus on control and rendering speed optimizations.O<strong>the</strong>r features include settings to adjust <strong>the</strong> s<strong>of</strong>tness <strong>of</strong> occlusion and lighting functions to allow <strong>for</strong> <strong>the</strong> properbaking <strong>of</strong> ambient occlusion to texture maps.At first glance it my not appear particularly special but, with <strong>use</strong>, I believe <strong>the</strong> extra control that this light <strong>of</strong>ferswill become indispensable. Almost every <strong>Daz</strong> Studio render I have created over <strong>the</strong> last few years has <strong>use</strong>d aversion <strong>of</strong> this light as ei<strong>the</strong>r <strong>the</strong> only illumination in <strong>the</strong> scene or as <strong>the</strong> scene's principle fill light.Important Concepts
Instead <strong>of</strong> behaving like a lightbulb where <strong>the</strong> light emanates from a single point shining outward, <strong>the</strong> <strong>Advanced</strong><strong>Ambient</strong> <strong>Light</strong> works like a sphere <strong>of</strong> light shining inward, from all directions.To allow <strong>for</strong> more control over what areas <strong>of</strong> <strong>the</strong> scene are illuminated, <strong>the</strong> <strong>Advanced</strong> <strong>Ambient</strong> <strong>Light</strong> includesillumination range and fall<strong>of</strong>f blend features. Although this is not a physically correct way <strong>for</strong> light to behave, <strong>the</strong>effect is very pleasing and believable.The ambient fall <strong>of</strong>f effect can be <strong>use</strong>d in conjunction with standard directional lights to produce a very convincing"Bounce" light appearance without <strong>the</strong> long render times associated with full indirect lighting.Although attempts have been made to clearly label <strong>the</strong> settings and make <strong>the</strong> light as intuitive as possible, <strong>the</strong>additional controls make this a light intended <strong>for</strong> advanced lighting.The advanced features <strong>of</strong> <strong>the</strong> light may be a little confusing at first. However, <strong>the</strong> light's dials have been set todefaults which should work well in most situations right out <strong>of</strong> <strong>the</strong> box.Please note that <strong>the</strong> lighting and occlusion will work on any surface but some <strong>of</strong> <strong>the</strong> advanced, surface flaggingfeatures will only recognize materials which <strong>use</strong> <strong>the</strong> DAZ Studio Default, Ubersurface, HumanSurface,SimpleSurface or <strong>the</strong> AoA Subsurface Shader. These shaders are <strong>use</strong>d <strong>for</strong> <strong>the</strong> overwhelming majority <strong>of</strong> DAZStudio based materials so it is rare that a <strong>use</strong>r will encounter any limitation with <strong>the</strong> light.
Quick StartThe light can be found in <strong>the</strong> content folder under <strong>Light</strong> Presets - Age <strong>of</strong> Armour - <strong>Ambient</strong> <strong>Light</strong>.The radius <strong>of</strong> <strong>the</strong> distance fall<strong>of</strong>f begins at <strong>the</strong> light's icon which appears like a wireframe "C" with 6 spikespointing in all directions. If you wish to <strong>use</strong> <strong>the</strong> light with fall<strong>of</strong>f, move <strong>the</strong> light to <strong>the</strong> point where you wish <strong>the</strong>brightest illumination and adjust <strong>the</strong> <strong>Light</strong> Radius setting (Found in <strong>the</strong> 'Parameters' tab) to encompass <strong>the</strong> area<strong>of</strong> <strong>the</strong> scene you wish to illuminate.If you prefer to illuminate everything in <strong>the</strong> scene evenly, simply set <strong>the</strong> <strong>Light</strong> Radius to 0.00. This overrides <strong>the</strong>fall<strong>of</strong>f function and ca<strong>use</strong>s <strong>the</strong> light to behave similarly to an environment light.As with <strong>the</strong> default DAZ Studio lights, <strong>the</strong> illumination drop-down list allows setting <strong>the</strong> light to selectively castdiff<strong>use</strong> and/or specular lighting. The Intensity and <strong>Light</strong> color also work <strong>the</strong> same as standard DS lights.The most important settings to keep in mind are AO Samples, AO Shading Rate and AO Max Error. Thesesettings all work in conjunction as speed and quality throttles.The higher <strong>the</strong> AO Samples <strong>the</strong> slower <strong>the</strong> render but <strong>the</strong> smoo<strong>the</strong>r <strong>the</strong> appearance. Shading Rate and MaxError work <strong>the</strong> same way but in <strong>the</strong> opposite direction where lower values produce quality results and highervalues will render faster.The remaining settings allow <strong>for</strong> more advanced customization and control over <strong>the</strong> light and are explained indetail below.Quick Tips
GeneralYou can download this guide <strong>for</strong> <strong>of</strong>fline viewing by right clicking any blank area <strong>of</strong> this page and selectingSave Page As...As with most lights, <strong>the</strong> illumination itself is fast to calculate but shadows can be slow. Renders can bemade faster by setting Cast Shadows to <strong>of</strong>f <strong>for</strong> little seen, or out <strong>of</strong> focus, background objects. By default<strong>the</strong> light will respect <strong>the</strong>se settings and not calculate occlusion shadows <strong>for</strong> <strong>the</strong>se items.Primitive hitmode can produce substantially faster renders than Shader hitmode. Using this setting <strong>for</strong>draft renders or in scenes where no transparency maps are <strong>use</strong>d can be a huge time saver.Since Primitive Hitmode may produce shadows which are too dark on or around transmapped surfaces,you can flag <strong>the</strong> transmapped surfaces and <strong>the</strong> surfaces receiving occlusion from <strong>the</strong> transmapped items<strong>the</strong>n set <strong>the</strong> light so that it <strong>use</strong>s Shader Hitmode <strong>for</strong> <strong>the</strong>se surfaces only.Try a low Subsurface Samples setting since SSS can <strong>of</strong>ten look smooth even at much lower AO samplerates than <strong>the</strong> general diff<strong>use</strong> lighting. This can speed up <strong>the</strong> SSS lighting precalculation.Different lights can be <strong>use</strong>d to illuminate different surfaces. Try using a light with faster settings <strong>for</strong>transmapped surfaces.Holding Shift or Control (Command on a Mac) while selecting lights can allow <strong>for</strong> <strong>the</strong> settings <strong>of</strong> multiplelights to be adjusted at once.If you want to quickly match <strong>the</strong> settings on multiple lights, you can select one light, hit CTL+C to copy <strong>the</strong>light's settings <strong>the</strong>n, with <strong>the</strong> o<strong>the</strong>r lights selected, <strong>use</strong> CTL+V to paste <strong>the</strong> settings.This can be <strong>use</strong>ful <strong>for</strong> quickly setting up different lights to illuminate different surfaces. After matching <strong>the</strong>lights simply set one to Illuminate Flagged Surfaces Only and <strong>the</strong> o<strong>the</strong>r to Don't Illuminate FlaggedSurfacesSmaller AO Shading Rates <strong>of</strong>ten produce more accurate shadowing on objects with fine detail.Although rendering my be slightly slower, objects with Sub-D applied usually look significantly nicer inrenders <strong>the</strong>n those where <strong>the</strong> base mesh is <strong>use</strong>d.O<strong>the</strong>r than specular, 100% reflective or refractive objects, such as chrome and clear glass, <strong>of</strong>ten look <strong>the</strong>same even with no light or shadows hitting <strong>the</strong>m.Rendering can go faster by flagging such items to not receive shadows (a setting on some surfaceshaders) or flagging <strong>the</strong> surfaces so <strong>the</strong> ambient light does not illuminate <strong>the</strong>m at all.Parameter Settings
<strong>Light</strong> GroupThe parameters <strong>of</strong> <strong>the</strong> <strong>Light</strong> group contain settings which are familiar to, and work much <strong>the</strong> same as, those <strong>of</strong>standard DAZ Studio <strong>Light</strong>s.In this group you can adjust <strong>the</strong> color and intensity <strong>of</strong> <strong>the</strong> light as well as control <strong>the</strong> range <strong>of</strong> <strong>the</strong> light. Occlusionis not calculated beyond <strong>the</strong> radius ensuring that renders are as fast as possible.The Fall<strong>of</strong>f Color sets <strong>the</strong> color <strong>of</strong> <strong>the</strong> light which is beyond <strong>the</strong> <strong>Light</strong> Radius. A fall<strong>of</strong>f color <strong>of</strong> black willprobably be <strong>the</strong> most common usage but control is available to adjust <strong>the</strong> light color outside <strong>the</strong> radius should aspecial need arise.Illumination - Drop down menu to set <strong>the</strong> light to On (Illuminate both Diff<strong>use</strong> and Specular) Diff<strong>use</strong> only,Specular only or Off.__category - A text name may be entered into this setting to allow shaders, with custom illumination loops,to process only lights with a matching category name.<strong>Light</strong> Intensity - Sets <strong>the</strong> overall strength <strong>of</strong> <strong>the</strong> light. The limits <strong>of</strong> this setting can be increased if a verybright light is necessary.<strong>Light</strong> Color - Color setting allowing <strong>the</strong> adjustment <strong>of</strong> <strong>the</strong> overall hue <strong>of</strong> <strong>the</strong> Illumination within <strong>the</strong> <strong>Light</strong>Radius.Fall<strong>of</strong>f Color - The color <strong>of</strong> <strong>the</strong> ambient illumination that will be cast beyond <strong>the</strong> <strong>Light</strong> Radius setting.<strong>Light</strong> Radius - The maximum range, in meters, from <strong>the</strong> light's icon that <strong>the</strong> <strong>Light</strong> Color setting andocclusion will be <strong>use</strong>d. Beyond this distance no occlusion is calculated and <strong>the</strong> Fall<strong>of</strong>f Color will be <strong>use</strong>d toilluminate surfaces.Fall<strong>of</strong>f Blend - This adjusts how s<strong>of</strong>t <strong>the</strong> transition will be between <strong>the</strong> regular <strong>Light</strong> Color illumination and<strong>the</strong> outer Fall<strong>of</strong>f Color. Setting this parameter to 0% will ca<strong>use</strong> <strong>the</strong> light to stop abruptly at <strong>the</strong> <strong>Light</strong>Radius. A setting <strong>of</strong> 100% will ca<strong>use</strong> <strong>the</strong> light to fade gently away from <strong>the</strong> lights location, blending fully
into <strong>the</strong> Fall<strong>of</strong>f Color at <strong>the</strong> <strong>Light</strong> Radius distance.Occlusion GroupClick here <strong>for</strong> a larger image.
The parameters in <strong>the</strong> Occlusion group adjust <strong>the</strong> appearance and quality <strong>of</strong> <strong>the</strong> occlusion based shadows.There are several speed enhancements, such as adaptive sampling and primitive hitmode. Theseenhancements may not look good in all situations.Fortunately, beca<strong>use</strong> <strong>of</strong> <strong>the</strong> advanced lighting controls <strong>of</strong> <strong>the</strong> light, you can selectively illuminate different objectswith different settings or different lights. This allows <strong>for</strong> <strong>the</strong> speed enhancements to be turned <strong>of</strong>f <strong>for</strong> surfaceswhere higher quality settings are needed yet keep <strong>the</strong> fast rendering optimizations <strong>for</strong> surfaces where <strong>the</strong>enhancements will have no negative effect.Adaptive Sampling - When enabled <strong>the</strong> light will <strong>use</strong> a lower occlusion sample rate in areas which mayrequire less samples. In <strong>the</strong>se areas <strong>the</strong> renderer will <strong>use</strong> a sample count as low as 1/4 <strong>the</strong> AO Samplessetting. As shadow quality may suffer, it is recommended that this setting only be <strong>use</strong>d with an AOSamples setting <strong>of</strong> 64 or higher.AO Color - Sets <strong>the</strong> hue <strong>of</strong> occlusion based shadows. Black will usually give <strong>the</strong> most believable resultsbut having <strong>the</strong> option to change <strong>the</strong> shadow color allows <strong>for</strong> more creative freedom.AO Strength - Sets <strong>the</strong> strength, or contrast, <strong>of</strong> occlusion based shadows. A setting <strong>of</strong> 0% will disableocclusion calculations.AO Samples - Declares <strong>the</strong> highest number <strong>of</strong> rays which will be cast from a surface point to check <strong>for</strong>occlusion. Higher samples generally create shadows which are less grainy though overall quality or speedis determined by a combination <strong>of</strong> AO Samples, AO Shading Rate and AO Max Error.Alternate Samples - This setting is <strong>the</strong> same as AO Samples but an alternate rate which can be <strong>use</strong>d onsurfaces flagged conditionally with options in <strong>the</strong> <strong>Light</strong>ing Control Group.Subsurface Samples - This is ano<strong>the</strong>r alternate sample rate which will only be <strong>use</strong>d in <strong>the</strong> pre-render,subsurface scattering calculation pass in scenes containing subsurface shaders. The AO Samples settingwill still be <strong>use</strong>d <strong>for</strong> <strong>the</strong> diff<strong>use</strong> portion <strong>of</strong> <strong>the</strong>se shaders but subsurface calculation can have a speedbenefit from using a lower sample count with little noticeable image quality loss.AO Shading Rate - Similar to "Shading Rate" located in DAZ Studio's render settings, this parameteradjusts how frequently to sample occlusion. Higher values render considerably faster but <strong>the</strong> results tendto look washed out and detail may be lost.The setting is roughly based on geometry and screen space. At an AO Shading Rate <strong>of</strong> 1 <strong>the</strong> geometryunder every image pixel will cast occlusion rays. At a setting <strong>of</strong> 16, rays will be cast from <strong>the</strong> surfaces only,approximately, every 16th pixel and <strong>the</strong> result interpolated over <strong>the</strong> area <strong>of</strong> <strong>the</strong> shading grid.This setting is strongly tied to AO Max Error.AO Max Error - A speed versus quality adjustment which sets <strong>the</strong> maximum allowable interpolation error<strong>of</strong> <strong>the</strong> AO Shading Rate. Provided <strong>the</strong> AO Shading Rate setting is greater than 1, higher AO Max Errorvalues will render substantially faster. In my tests <strong>the</strong>re is rarely a noticeable difference at AO Max Errorsettings above 0.5.AO Max Distance - A limit to how far away (in centimeters) any two surfaces will will contribute toocclusion. For instance, <strong>the</strong> default setting <strong>of</strong> 250 will tell <strong>the</strong> occlusion ray not consider any shadowcontribution if <strong>the</strong> ray travels 250cm without hitting ano<strong>the</strong>r object.
Though it can slow down renders a bit, scenes with large or far away objects such as buildings, whichshould cast shadows on to o<strong>the</strong>r objects, may look more believable with longer AO Max Distance settings.A setting <strong>of</strong> 0cm overrides this function and ca<strong>use</strong>s objects even kilometers away to contribute toocclusion.AO Cone Angle - A limit on <strong>the</strong> spread angle that occlusion rays are cast from <strong>the</strong> surface to check <strong>for</strong>o<strong>the</strong>r, occluding geometry. Low values check a very narrow angle and produce harsher shadows. Highvalues produce s<strong>of</strong>t, spread out shadows. Angles nearing or above 90 degrees may ca<strong>use</strong> <strong>the</strong> geometry to"self occlude" causing artifacts.AO Bias - Like <strong>the</strong> bias setting on o<strong>the</strong>r lights, this <strong>of</strong>fsets <strong>the</strong> occlusion shadow calculation a slightdistance away from <strong>the</strong> surface to avoid self shadowing artifacts. Depending on o<strong>the</strong>r settings like HitSides - Both and AO Cone Angle, The <strong>Advanced</strong> <strong>Ambient</strong> <strong>Light</strong> can be a little more sensitive to bias thano<strong>the</strong>r lights. If self shadowing artifacts do appear ei<strong>the</strong>r increase <strong>the</strong> bias, apply Sub-D to <strong>the</strong> geometry ortry using Hit Sides - Front.AO Distribution Curve - This is <strong>the</strong> <strong>for</strong>mula that controls <strong>the</strong> rate at which <strong>the</strong> occlusion shadows fade instrength as distance increases. Cosine has a sharper fall<strong>of</strong>f producing slightly harsher shadows in corners.Uni<strong>for</strong>m fades at a linear rate and produces s<strong>of</strong>ter, more even shadows. Cosine is probably morephysically correct but I <strong>of</strong>ten prefer <strong>the</strong> s<strong>of</strong>t look <strong>of</strong> Uni<strong>for</strong>m distribution in my work.Hitmode - This option tells <strong>the</strong> render whe<strong>the</strong>r it should examine a surface's transparency <strong>for</strong> everyocclusion ray (Shader Hitmode) or if it should only examine <strong>the</strong> base opacity strength setting once <strong>the</strong>n<strong>use</strong> that value <strong>for</strong> <strong>the</strong> whole surface (Primitive Hitmode).Beca<strong>use</strong> Shader Hitmode requires <strong>the</strong> surface shader code to be run and examined it is usually muchslower than Primitive hitmode. The drawback to Primitive hitmode is that only <strong>the</strong> opacity strength <strong>of</strong> asurface is considered and transparency maps or procedural transparencies are ignored. This ca<strong>use</strong>s thingslike transmapped hair to cast darker and inaccurate shadows.In scenes where <strong>the</strong>re are no transmapped surfaces, such as architectural renders, you may gain a renderspeed benefit from using Primitive Hitmode without any noticeable image quality loss.Hit Sides - This tells occlusion which side <strong>of</strong> geometry to consider in shadow calculation.Front only casts rays from, or hits <strong>the</strong> side <strong>of</strong> faces where <strong>the</strong> shading normal points in a positive direction.This can sometimes prove <strong>use</strong>ful with creative application.Back does <strong>the</strong> opposite, only casting rays from <strong>the</strong> negative geometric normal facing direction. Althoughthis setting generally does not produce desirable results, it can be employed selectively to speed uprenders by using it on "Proxy" or "Fantom" objects to produce faster rendering, simplified shadows in onedirection only.Setting to this to Both casts rays and considers hits from both sides <strong>of</strong> a micropolygon. This option usuallyproduces <strong>the</strong> best results.Polygon Facing Direction - This option instructs <strong>the</strong> light to ei<strong>the</strong>r <strong>use</strong> <strong>the</strong> geometry's default polygonnormals or <strong>use</strong> <strong>for</strong>ward facing normals when providing illumination.
It is common <strong>for</strong> shaders, lights or <strong>the</strong> scene file to adjust <strong>the</strong> surface normals so that <strong>the</strong>y never face awayfrom <strong>the</strong> camera.For instance, if you place a camera and a standard DAZ Studio light inside <strong>of</strong> a large cube primitive youwould see light hitting <strong>the</strong> walls <strong>of</strong> <strong>the</strong> box beca<strong>use</strong> <strong>the</strong> renderer is flipping <strong>the</strong> (normally outward facing)polygon normals to face inward towards <strong>the</strong> camera or "Face Forward".Face Forward is generally a good setting, however it produces poor results when baking illumination mapsbeca<strong>use</strong> <strong>the</strong> light will be illuminating <strong>the</strong> wrong sides <strong>of</strong> any flipped faces.In addition to its <strong>use</strong> in illumination baking, <strong>the</strong> Surface Normal setting is usually better <strong>for</strong> calculatingsubsurface scattering which reads <strong>the</strong> surface normal direction to determine were light enters and exits anobject. Face Forward will yield incorrect, though possibly acceptable, results on surfaces with SSS.<strong>Light</strong>ing ControlThe features available under <strong>the</strong> <strong>Light</strong>ing Control group allow you to set how <strong>the</strong> light behaves <strong>for</strong> different
surfaces and objects. This is where I feel <strong>the</strong> benefits <strong>of</strong> <strong>the</strong> <strong>Advanced</strong> <strong>Ambient</strong> <strong>Light</strong> really come through.The light examines all <strong>the</strong> shaders in <strong>the</strong> scene and looks <strong>for</strong> certain settings or "flags." The light can <strong>the</strong>n, atyour discretion, adjust <strong>the</strong> lighting differently <strong>for</strong> <strong>the</strong> flagged surfaces.The light can be told to <strong>use</strong> lower samples <strong>for</strong> flagged surfaces, illuminate <strong>the</strong>m at different strengths or evencompletely ignore those surfaces. It is also simple to have <strong>the</strong> light only illuminate surfaces which have beenflagged. This allows <strong>for</strong> different surfaces to be illuminated by different lights <strong>for</strong> ultimate control <strong>of</strong> your lighting.Set <strong>Light</strong> Strength with Surface <strong>Ambient</strong> Strength - When enabled, <strong>the</strong> <strong>Advanced</strong> <strong>Ambient</strong> <strong>Light</strong> willmultiply <strong>the</strong> Intensity setting by <strong>the</strong> <strong>Ambient</strong> Strength setting <strong>of</strong> <strong>the</strong> surface shaders in <strong>the</strong> scene. Thisallows <strong>the</strong> light strength to be fine tuned <strong>for</strong> each surface individually.Only <strong>the</strong> surface's <strong>Ambient</strong> Strength setting is <strong>use</strong>d, not <strong>the</strong> <strong>Ambient</strong> Color. Beca<strong>use</strong> <strong>of</strong> this, <strong>the</strong>surface's ambient color can be set to black, ensuring <strong>the</strong> surface does not glow.Object Cast Shadows - With this set to Respect Object Settings, occlusion based shadows will not becast from objects which have <strong>the</strong>ir Cast Shadows switch set to <strong>of</strong>f. The light will also respect <strong>the</strong> ReceiveShadows setting available on some surface shaders.An object's Cast Shadows setting is found by selecting <strong>the</strong> object or figure's root node and looking under<strong>the</strong> Display Group in <strong>the</strong> Parameters tab.When <strong>the</strong> light is set to Always Cast AO Shadows it will, as <strong>the</strong> name suggests, calculate AO shadowseven <strong>for</strong> objects which are set to not cast or receive shadows.Flag Surfaces With - This drop-down menu <strong>of</strong>fers several options to instruct which surfaces <strong>the</strong> lightshould flag and treat differently.None disables flagging and <strong>the</strong> light will treat all surfaces in <strong>the</strong> same manner.
Diff<strong>use</strong> Strength Of... Tells <strong>the</strong> light to read <strong>the</strong> Diff<strong>use</strong> Strength parameters <strong>of</strong> surfaces in <strong>the</strong> scene.The light will flag any surfaces whos Diff<strong>use</strong> Strength matches <strong>the</strong> light's Diff<strong>use</strong>, <strong>Ambient</strong> or IOR Valuesetting.<strong>Ambient</strong> Strength Of... works <strong>the</strong> same as <strong>the</strong> previous setting except that <strong>the</strong> light examines <strong>the</strong><strong>Ambient</strong> Strength <strong>of</strong> surfaces and flags any that have <strong>the</strong> same value as <strong>the</strong> light's Diff<strong>use</strong>, <strong>Ambient</strong> orIOR Value setting.The light can also flag surfaces based on <strong>the</strong>ir Index <strong>of</strong> Refraction parameter (fourth option in <strong>the</strong> light'sdrop-down menu). Note that, <strong>for</strong> <strong>the</strong> AoA Subsurface Shader, Reflection Index <strong>of</strong> Refraction is <strong>the</strong>parameter that <strong>the</strong> light examines, not <strong>the</strong> IOR in <strong>the</strong> Subsurface Scattering group.Garibaldi Hair Shader setting will tell <strong>the</strong> light to flag all hair which <strong>use</strong>s <strong>the</strong> Garibaldi hair shader. Iattempted to code <strong>the</strong> light so that it would recognize and flag <strong>the</strong> Look At My Hair shader but,un<strong>for</strong>tunately, its hair shader was not conducive to flagging.Any <strong>of</strong> <strong>the</strong>se, will ca<strong>use</strong> <strong>the</strong> light to flag any and all surfaces where <strong>the</strong> light finds a Diff<strong>use</strong> Strength,<strong>Ambient</strong> Strength or Index <strong>of</strong> Refraction which matches <strong>the</strong> Diff<strong>use</strong>, <strong>Ambient</strong> or IOR Value settingbelow, as well as any hair using <strong>the</strong> Garibaldi hair shader.Diff<strong>use</strong>, <strong>Ambient</strong> or IOR Value - This is <strong>the</strong> setting that will be <strong>use</strong>d to match values on surfaces whichare to be flagged.For instance, let's assume you have transparency mapped hair which is rendering slowly and you wouldlike it to <strong>use</strong> fewer shadow samples. You could adjust <strong>the</strong> hair's ambient strength to 1% <strong>the</strong>n would set <strong>the</strong>light's Flag Surface Shaders With to <strong>Ambient</strong> Strength Of..., <strong>the</strong>n <strong>the</strong> Diff<strong>use</strong>, <strong>Ambient</strong> or IOR Value to1% and If Surface is Flagged to Use Alt Samples.If Surface is Flagged - This menu works in conjunction with <strong>the</strong> Flag Surfaces With setting. If a surface isflagged you can choose several ways <strong>the</strong> light should react to that surface.The first option, Don't Illuminate, will instruct <strong>the</strong> light to completely ignore any surface which has beenflagged. No light or self occlusion will be calculated <strong>for</strong> <strong>the</strong> flagged surfaces.Illuminate Flagged Only will ca<strong>use</strong> <strong>the</strong> light to do <strong>the</strong> opposite as <strong>the</strong> previous setting. The light will onlyilluminate and calculate occlusion <strong>for</strong> surfaces that are flagged. This and <strong>the</strong> above setting can be very<strong>use</strong>ful to have different lights responsible <strong>for</strong> illuminating different surfaces or <strong>for</strong> rendering multiple passeswith different objects.Use Alt Samples will instruct <strong>the</strong> light to illuminate all objects but <strong>use</strong> <strong>the</strong> Alternate Samples setting, in<strong>the</strong> Occlusion group, <strong>for</strong> surfaces which are flagged. This can be <strong>use</strong>d to improve rendering speed byflagging slow rendering or less important background objects.Use Shader Hitmode can be <strong>use</strong>d when <strong>the</strong> light's Hitmode is set to Primitive but one or two surfaceswith transparency simply do not look good under <strong>the</strong> Primitive hitmode. Those surfaces can be flagged to<strong>use</strong> <strong>the</strong> slower Shader hitmode while still receiving <strong>the</strong> speed benefit <strong>of</strong> having all o<strong>the</strong>r surfaces <strong>use</strong> <strong>the</strong>faster Primitive htimode.Use Primitive Hitmode is intended to provide a rendering speed improvement, when <strong>the</strong> light is in ShaderHitmode, by flagging a few surfaces which can benefit from <strong>the</strong> Primitive hitmode without <strong>the</strong> imagequality suffering.
Use Shader Hitmode and Alt Samples - This is primarily intended to improve <strong>the</strong> rendering speed <strong>of</strong>transmapped hair. It allows <strong>the</strong> surface to <strong>use</strong> correctly calculated transparency maps but at a lowersample rate.Use Primitive Hitmode and Alt Samples - Flagging a surface and using this setting will likely produce <strong>the</strong>fastest results <strong>for</strong> <strong>the</strong> flagged surface. Beca<strong>use</strong> <strong>of</strong> <strong>the</strong> Primitive hitmode, this setting may not look correct<strong>for</strong> transparency mapped surfaces but could be <strong>use</strong>ful <strong>for</strong> background items or, simply, <strong>for</strong> settingtransmapped hair to a fast rendering option during draft or test renders.Tips <strong>for</strong> Baking Occlusion MapsDAZ Studio has a very handy built in feature to bake lighting onto a texture map. The process is a bit slow so it isnot time efficient <strong>for</strong> <strong>use</strong> in rendering single images in most cases.Baking ambient occlusion can, however, be a huge time saver <strong>for</strong> animations. Baked light maps can be produced<strong>for</strong> every item in a scene that does not move. The textures can <strong>the</strong>n be <strong>use</strong>d ei<strong>the</strong>r in <strong>the</strong> <strong>Ambient</strong> Color orDiff<strong>use</strong> Strength slots <strong>of</strong> surface shaders. This will eliminate <strong>the</strong> need <strong>for</strong> raytraced occlusion to be <strong>use</strong>d <strong>for</strong><strong>the</strong>se surfaces when <strong>the</strong> animation is rendered. This could save minutes or even an hour per frame.Baked AO maps can also be <strong>use</strong>ful in <strong>the</strong> creation <strong>of</strong> diff<strong>use</strong> textures. I find, bringing in <strong>the</strong> baked AO map as alayer into Photoshop serves as a good guide when painting textures. The occluded areas may be good places toadd rust since <strong>the</strong>y represent crevices which could trap water and dirt. The bright areas are more exposedsurfaces where paint may be worn and chipped or where wood will have been sun bleached.When baking ambient occlusion to a texture map <strong>the</strong> Polygon Facing Direction is very important. This shouldbe set to Surface Normal. Without this setting, polygons facing away from <strong>the</strong> camera would automatically flipand receive <strong>the</strong> incorrect illumination.Although it would not seem to work properly, setting <strong>the</strong> light to Hitsides - Both usually produces nicer lightmaps. The reason is a bit hard to explain but <strong>the</strong> result is that polygons which are inside o<strong>the</strong>r polygons willrender as being in shadow. Without this setting those inner polygons would cast out rays yet not see <strong>the</strong> outerpolygons covering <strong>the</strong>m. This is beca<strong>use</strong> <strong>the</strong> ray collisions would be on <strong>the</strong> backside <strong>of</strong> <strong>the</strong> outer polygons which<strong>the</strong> Hit Sides - Front setting tells occlusion to ignore.
Not all surfaces will bake well in DAZ Studio. Models using UV coordinates outside <strong>the</strong> 0-1 range, models withgeometry errors such as inconsistent surface normals, or overlapping UVs (within a single material) will likelyproduce unusable light maps.Below is a screen capture showing <strong>the</strong> settings I commonly <strong>use</strong> when baking illumination in DAZ Studio. Sincebaking can sometimes be slow you may wish to <strong>use</strong> a smaller texture resolution while doing initial test bakes.It is important to note <strong>the</strong> Bake Surfaces Simultaneously mode. Without this setting surfaces will only bake<strong>the</strong>ir own occlusion, not <strong>the</strong> occlusion cast onto <strong>the</strong> surface by o<strong>the</strong>r objects. To have <strong>the</strong> bake include <strong>the</strong>occlusion cast by o<strong>the</strong>r objects onto <strong>the</strong> surface you must also select and bake those o<strong>the</strong>r surfaces at <strong>the</strong> sametime. This is <strong>of</strong>ten inconvenient but it is simply how illumination baking is set up in DAZ Studio.Also keep in mind that <strong>the</strong> resulting textures are saved using <strong>the</strong> surface's name. This will ca<strong>use</strong> improperbaking if two objects share <strong>the</strong> same surface name. For example, all DAZ Studio primitives have <strong>the</strong> surfacename "default". To ensure a sphere primitive sitting on a plane primitive will properly bake to 2 different textureswith unique filenames, you will need to rename one <strong>of</strong> <strong>the</strong> surfaces with ei<strong>the</strong>r DAZ Studio's Polygon GroupEditor Tool or <strong>use</strong> a modeling application.Known Issues
Somewhat Rare - DAZ Installer - There have been reports that (on computers running Windows) <strong>the</strong> DAZInstall Manager does not always install a few <strong>of</strong> <strong>the</strong> necessary files to <strong>the</strong> correct location. If you load <strong>the</strong>n select<strong>the</strong> light and it shows only two parameters, <strong>Light</strong> Color and <strong>Light</strong> Strength, <strong>the</strong>n <strong>the</strong> light did not install correctly.You will need manually move some files into place.Under <strong>the</strong> computer's Admin User's folder <strong>the</strong>re must be <strong>the</strong> following:C:\Users\AdminUserName\AppData\Roaming\DAZ <strong>3D</strong>\Studio4\scripts\support\AgeOfArmour\<strong>Light</strong>AoA_AO<strong>Light</strong>Attribs.dsaAoA_AO<strong>Light</strong>Def.dsaAoA_AO<strong>Light</strong>Params.dsaAnd in C:\Users\AdminUserName\AppData\Roaming\DAZ <strong>3D</strong>\Studio4\shaders\AgeOfArmour\<strong>Light</strong>AoA_AO<strong>Light</strong>.sdlWhen using UberSurface - The <strong>Advanced</strong> <strong>Ambient</strong> <strong>Light</strong> will see and respect <strong>the</strong> Occlusion Shading Rateand Override settings <strong>of</strong> <strong>the</strong> UberSurface shader in all cases except when Ubersurface's Occlusion ShadingRate is set to exactly 4. All o<strong>the</strong>r Occlusion Shading Rate settings will function properly. This was simply alimitation that had to be incorporated in order to allow <strong>for</strong> greater overall light flexibility.Somewhat Common - At <strong>the</strong> time <strong>of</strong> this writing, all surface shaders will be properly illuminated by <strong>the</strong><strong>Advanced</strong> <strong>Ambient</strong> <strong>Light</strong> but flags can only be read from surfaces which <strong>use</strong> <strong>the</strong> DS Default shader,UberSurface, HumanSurface, SimpleSurface and <strong>the</strong> AoA Subsurface Shader. I'm experimenting with someDAZ Studio scripting which may allow shaders which have been created in Shader Mixer to be updated andallow <strong>for</strong> proper flagging.
Somewhat Rare Conditions - Diff<strong>use</strong> or specular artifacts may appear when multiple and overlapping<strong>Advanced</strong> <strong>Ambient</strong> <strong>Light</strong>s are <strong>use</strong>d with different AO Max Distance or AO Cone Angle settings. Differing anyo<strong>the</strong>r settings should not ca<strong>use</strong> an issue. The ca<strong>use</strong> is unknown at this time however, it is unlikely that <strong>the</strong> lightswould be <strong>use</strong>d in this manner very <strong>of</strong>ten.Only when using Volumetric Atmosphere All functions <strong>of</strong> <strong>the</strong> light work with volumes with <strong>the</strong> exception <strong>of</strong>when a single light is set to have various intensities on different surfaces, such as using <strong>the</strong> Set <strong>Light</strong> Strengthwith Surface <strong>Ambient</strong> Strength feature. This is likely to ca<strong>use</strong> artifacts surrounding lower intensity surfaces.The issue is a difficult one to resolve due to how atmospheric volumes work. I continue to experiment withvolume code in <strong>the</strong> hopes <strong>of</strong> finding a fix.When using Copy and Paste - Using copy from a default DS light which has shadows turned on <strong>the</strong>n pastingonto <strong>the</strong> <strong>Advanced</strong> <strong>Ambient</strong> <strong>Light</strong>, will ca<strong>use</strong> DAZ Studio to attempt to <strong>use</strong> its builtin shadow functions, which <strong>the</strong>ambient light does not support, such as Deep Shadow Maps. This will ca<strong>use</strong> <strong>the</strong> light to render black.This situation is easily resolved by setting DAZ studio to show hidden parameters, selecting <strong>the</strong> <strong>Advanced</strong><strong>Ambient</strong> <strong>Light</strong> and changing <strong>the</strong> hidden Shadow Type (Warning DO NOT USE) dropdown to None. The lightshould <strong>the</strong>n per<strong>for</strong>m correctly.It appears DAZ Studio requires this menu <strong>for</strong> all lights. When I removed it from <strong>the</strong> code, DS replaced it uponloading <strong>the</strong> light, haha. The best solution I could find was to hide <strong>the</strong> setting and add a warning not <strong>use</strong> it.Top Introduction Important Concepts Quick Start Parameter Settings Baking Occlusion