
You also want an ePaper? Increase the reach of your titles
YUMPU automatically turns print PDFs into web optimized ePapers that Google loves.
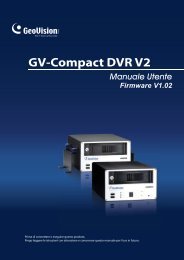
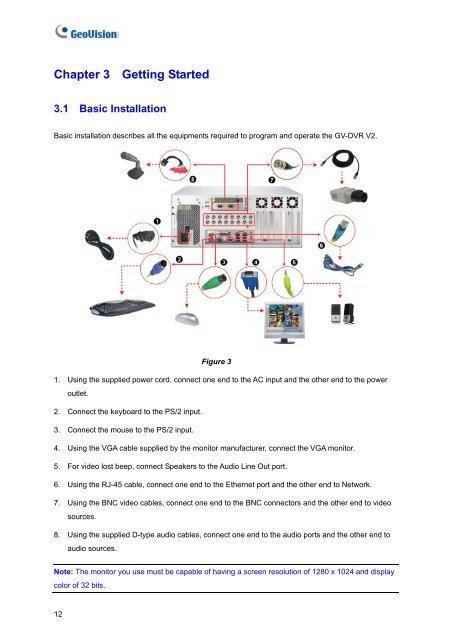
Chapter 3 Getting Started3.1 Basic InstallationBasic installation describes all the equipments required to program and operate the <strong>GV</strong>-<strong>DVR</strong> <strong>V2</strong>.Figure 31. Using the supplied power cord, connect one end to the AC input and the other end to the poweroutlet.2. Connect the keyboard to the PS/2 input.3. Connect the mouse to the PS/2 input.4. Using the VGA cable supplied by the monitor manufacturer, connect the VGA monitor.5. For video lost beep, connect Speakers to the Audio Line Out port.6. Using the RJ-45 cable, connect one end to the Ethernet port and the other end to Network.7. Using the BNC video cables, connect one end to the BNC connectors and the other end to videosources.8. Using the supplied D-type audio cables, connect one end to the audio ports and the other end toaudio sources.Note: The monitor you use must be capable of having a screen resolution of 1280 x 1024 and displaycolor of 32 bits.12