
You also want an ePaper? Increase the reach of your titles
YUMPU automatically turns print PDFs into web optimized ePapers that Google loves.
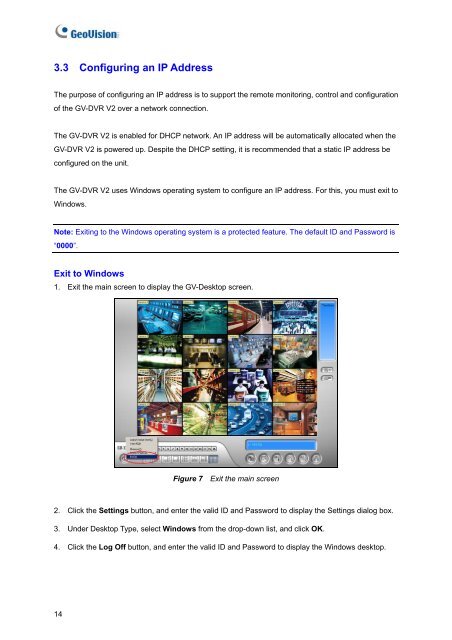
3.3 Configuring an IP AddressThe purpose of configuring an IP address is to support the remote monitoring, control and configurationof the <strong>GV</strong>-<strong>DVR</strong> <strong>V2</strong> over a network connection.The <strong>GV</strong>-<strong>DVR</strong> <strong>V2</strong> is enabled for DHCP network. An IP address will be automatically allocated when the<strong>GV</strong>-<strong>DVR</strong> <strong>V2</strong> is powered up. Despite the DHCP setting, it is recommended that a static IP address beconfigured on the unit.The <strong>GV</strong>-<strong>DVR</strong> <strong>V2</strong> uses Windows operating system to configure an IP address. For this, you must exit toWindows.Note: Exiting to the Windows operating system is a protected feature. The default ID and Password is“0000”.Exit to Windows1. Exit the main screen to display the <strong>GV</strong>-Desktop screen.Figure 7 Exit the main screen2. Click the Settings button, and enter the valid ID and Password to display the Settings dialog box.3. Under Desktop Type, select Windows from the drop-down list, and click OK.4. Click the Log Off button, and enter the valid ID and Password to display the Windows desktop.14