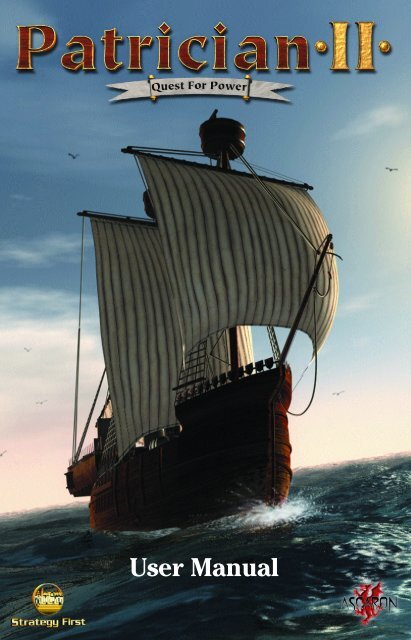
User Manual
User Manual - Strategy First
User Manual - Strategy First
- No tags were found...

Create successful ePaper yourself
Turn your PDF publications into a flip-book with our unique Google optimized e-Paper software.
<strong>User</strong> <strong>Manual</strong>
Contents<br />
The Patrician and the Hanseatic League 3<br />
The <strong>Manual</strong>s 3<br />
Technical Support 4<br />
The Installation and its Requirements 4<br />
A Quick Start for the Impatient 5<br />
Starting the tutorial 5<br />
Starting a Single Game 5<br />
Playing the Game 5<br />
Controls 8<br />
The Trading Window 9<br />
The Formalities: The Main Menu and its Options 12<br />
The Tutorial 12<br />
The Campaigns 12<br />
The Single Game 12<br />
Multiplayer 15<br />
Load Game 15<br />
Options 15<br />
Credits 16<br />
Exit 16<br />
Game Controls 16<br />
The City View 16<br />
The Sea Chart 23<br />
Ships, Convoys, and Expeditions 27<br />
Types of Ships 27<br />
Selecting Ships 28<br />
Selecting Several Ships 29<br />
The Deck 29<br />
The Crew Menu 29<br />
Automatic Trade 32<br />
Convoys 34<br />
1
Trade: your daily Business 37<br />
Trade between Cities 37<br />
Ships and Transport 38<br />
The City: Its Buildings and its Citizens 40<br />
The Citizens’ Happiness 41<br />
The Construction of Buildings 43<br />
The Different Buildings 45<br />
Career and Politics – A Trader’s Life 68<br />
The Strenuous Struggle for Advancement & Recognition 68<br />
Steps of a Career 71<br />
Founding a Family 73<br />
Politics and Diplomacy 75<br />
Traders on Trial 77<br />
Bribery 79<br />
Battles and Conflicts 80<br />
Sea Battles 80<br />
Pirates and how to treat them 85<br />
Sieges 86<br />
Attacks on Towns from the Sea 89<br />
Multiplayer Mode 90<br />
Setting up a Network Game 90<br />
Joining a Network Game 92<br />
Credits 94<br />
Ascaron Software 94<br />
Strategy First 96<br />
Appendix 97<br />
Mouse Controls 97<br />
Keyboard Controls 98<br />
Goods 99<br />
LICENSE AGREEMENT AND LIMITED WARRANTY 100<br />
2
The Patrician and the Hanseatic League<br />
The Hanseatic League was an organization founded in the middle of the 13th century to protect<br />
common interests in trade. It was initially a loose association of daring traders. However, if one<br />
wanted to be a successful trader in the waters of the North Sea and the Baltic Sea, it became<br />
increasingly important to be a member of this league, since it developed into a mighty<br />
economic organization over the years. At the height of its power, the Hanseatic League was far<br />
more than a mere bond of cities or traders: It held immense political power and could be<br />
considered an early predecessor of the European Community or, as one might say, one of the<br />
first true ‘global players’ in history – although contemporaries knew little more of this world<br />
than Europe and parts of Asia and Africa, while America and Australia were yet to be discovered.<br />
Of course, not just anyone could join the Hanseatic League. Membership was usually reserved<br />
for the so-called patricians, a prosperous and self-confident social group that increasingly<br />
dominated the cities of the Holy Roman Empire, continually undermining the interests of an<br />
aristocracy that was still holding on to its privileges.<br />
‘Patrician II’ throws you back into the exciting world of the past, where a new beginning is<br />
imminent. Protected by the Hanseatic League, the traders commute between Lubeck and<br />
London, Cologne and Bergen, Riga and Novgorod. You are a small trader with high ambitions, a<br />
shrewd businessman who wants to be successful, planning to build up your own empire. Trying<br />
to reach your goal, you must gather information, build dependencies in other Hanseatic towns,<br />
fulfil missions that do not always match your profession, and bribe as much as your funds allow.<br />
Nevertheless, it is not solely your own advantage that you seek but also the well-being of your<br />
home town. You strive for recognition and prestige, deal with minor affairs as well as serious<br />
politics, trying to leave your competitors behind; you fight nasty pirates and merciless<br />
emperors. In short, success will not come easily…<br />
‘Patrician II’ is not merely a trading simulation, but also has – apart from the various aspects of<br />
construction – a whole lot of action to offer: real-time battles at sea, for instance, and city<br />
blockades (a quite rough, but, considering the time, rather common means to win one’s way).<br />
The following pages will show you what else there is to do and what you must bear in mind as<br />
an aspiring patrician. Have fun!<br />
The <strong>Manual</strong>s<br />
This manual will inform you about the basic functions of ‘Patrician II’. On the CD, you will also<br />
find a multimedia manual containing further information as well as speech regarding the<br />
historical background.<br />
3
Technical Support<br />
Should you experience a technical problem concerning the operation of this product, please<br />
contact our technical support staff. Before you call, please read the README.TXT file on the<br />
EUROPA UNIVERSALIS CD to see any last minute recommendations pertinent to your problem.<br />
Also, check out the Support page on our web site listed below. When you call, please be at your<br />
computer and have the following information available :<br />
• Computer make and model • Windows version • Total system RAM<br />
• Total Hard Drive space • Video card make and model<br />
Phone#:(514) 844-2433, Mon.-Fri. 10am-5pm EST<br />
Fax#: (514) 844-4337, Attn: Support<br />
Internet e-mail: support@strategyfirst.com<br />
Strategy First Web Site: http://www.strategyfirst.com<br />
Patrician II official web site:<br />
http://www.ascaron.com<br />
The Installation and its Requirements<br />
To play ‘Patrician II’, you need at least a Pentium II class system with a clock speed of 233 MHz,<br />
32 MB RAM, Windows 95/98/2000/ME, DirectX 7 (included with the game), a quad speed CDROM<br />
drive, a video card with at least 4 MB video RAM and a DirectX compliant soundcard. A Pentium<br />
II 450 MHz (or faster) and at least 64 MB RAM are recommended. For faster rendering and better<br />
special effects we furthermore recommend a 3D video card with 16 MB of video RAM (Direct3D).<br />
To install the game, first boot up your computer. Then insert the ‘Patrician II’ CD into your<br />
CDROM drive. Setup should start automatically. If you have disabled the autostart feature,<br />
please run setup manually from the CD. Then follow the on-screen instructions.<br />
Important: ‘Patrician II’ requires DirectX 7, but if it has previously been installed (or if you have<br />
a newer version of it), you may skip that part of the installation.<br />
After the program has been installed successfully, the ‘Patrician II’ video card setup application<br />
will be started in order to determine the supported resolutions. You can execute this program<br />
manually should this be required (e.g. if you’ve installed a new video card).<br />
4
A Quick Start for the Impatient<br />
This section is for those who want to get started quickly, without thorough study of this entire<br />
manual. Nevertheless, you should not immediately begin with a single player game. We advise<br />
you to begin with the tutorial, which will guide you through the vital parts of the user interface<br />
and the various aspects of the game. Afterwards, you can explore the game’s more advanced<br />
features by yourself in either a single player game, a campaign, or a multiplayer game – and<br />
perhaps read through the subsequent sections of this manual at a later time.<br />
Starting the tutorial<br />
After you have started ‘Patrician II’ and enjoyed the opening sequence, you pro c e e d<br />
automatically to the main menu. Prior to starting the tutorial, you might want to have a look at<br />
the options. You do not need to change any options to play, but you might still want to tweak<br />
one or two settings. The options screen can be reached at any time from within the game. A<br />
detailed description of the options can be found in chapter 6.<br />
Note:<br />
For the tutorial, a resolution of 1024 x 768 should be selected in the options.<br />
Launch the tutorial by clicking on the button labeled ‘Tutorial’. You will learn about the interface<br />
step by step and are introduced to the game’s main features.<br />
Starting a Single Game<br />
From the main menu, select ‘Single Game’. The following screen will allow you to enter your<br />
name. All the other options are irrelevant at this time, but do keep Lubeck as your hometown.<br />
Playing the Game<br />
Playing the game is quite simple: You click on an object to either retrieve information about it or<br />
to perform some kind of action with it. The objects in question are ships, buildings, citizens, or<br />
icons/buttons.<br />
5
The Structure of the Screen<br />
The Different Views<br />
The City<br />
This is the view in which the game begins. You can get a<br />
view like this of any city in which you own buildings or<br />
ships. To enter a city’s view, simply click on the city using<br />
the left mouse button on the sea chart (see below). To<br />
leave a city, click on the icon for ‘leave town’ in the upper<br />
icon bar.<br />
The Sea Chart<br />
Whenever you leave a city, you get to the sea chart, which<br />
shows the whole area that is important to the Hanseatic<br />
League. All your ships are also shown, allowing you to trace<br />
or alter their paths.<br />
6
The Sea Area<br />
When you engage in a sea battle, either because you’re<br />
attacked by pirates or because you are the attacker and<br />
thus act as a pirate, the game will change to this view. At<br />
the end of a battle, it will return to the map view.<br />
Forwarding<br />
In the upper icon bar, there is an icon labeled ‘Forward’. It allows you to accelerate the game.<br />
Time passes more quickly while the specific view will show you what is happening. As soon as<br />
a ship docks or some other important event occurs, the forward mode ends. You can also end it<br />
manually by clicking the left mouse button.<br />
The Mini Map<br />
Depending on your current main view, the mini map will show you a scaled-down version of<br />
either the city area or the sea chart. The rectangular frame designates the area that presently<br />
fills your main view.<br />
Additional Functions:<br />
• Left clicking anywhere on the mini map will display the region you selected in the main view.<br />
• If the sea chart is shown in the mini map window, use the right mouse button to send the<br />
selected ship to the city you specify.<br />
• While you are in a city, the ‘switch’ allows you to change from the city map to the sea chart<br />
and vice versa, allowing you to trade in the city and to manage the paths of your ships at the<br />
same time.<br />
7
Symbols<br />
Using the symbols on the mini map, you can determine the locations of your ships. The cities in<br />
which you act as a trader are also marked.<br />
Symbol<br />
square (blue, white, red, black)<br />
red diamond<br />
blue diamond<br />
framed diamond<br />
Meaning<br />
ships (yours, traders’, players’, pirates’)<br />
city<br />
city in which you are present as a trader<br />
city you are currently viewing<br />
• slowly flashing squares mark the ships you have selected.<br />
• quickly flashing symbols indicate that an important event has occurred, such as the arrival of<br />
one of your ships at a port or a ship that is currently threatened by a storm.<br />
Controls<br />
You can control everything in ‘Patrician II’ using the mouse. The left mouse button selects while<br />
the right mouse buttons moves your ships to the specified locations.<br />
Left Mouse Button<br />
You can select objects in the main view using the left mouse button. Usually, a menu will then<br />
pop up or information about the object will be displayed. Clicking on an empty space will<br />
deselect the object.<br />
Left click on…<br />
your own ship<br />
someone else’s ship<br />
a position in the sea and then dragging<br />
the mouse pointer over several ships<br />
belonging to you<br />
your convoy in the city view<br />
your own ships while pressing Ctrl<br />
a building with which interaction<br />
is possible<br />
a business or a dwelling<br />
citizens<br />
Action<br />
select the ship<br />
display information about the ship<br />
(not always accurate)<br />
select several ships<br />
select the convoy. Another click on<br />
a ship in the convoy will select the<br />
ship and display its load.<br />
select several ships<br />
enter the building<br />
display information<br />
inquire about their opinions<br />
8
Right Mouse Button<br />
Press the right mouse button to perform an action on the ship you previously selected. The<br />
following table lists all possible interactions:<br />
Right click on…<br />
any position in the sea or a river<br />
a city on the mini map<br />
a city on the sea chart<br />
an enemy ship during a sea battle<br />
a convoy<br />
Action<br />
the ship will move to that position<br />
and wait there<br />
the ship will move to that city<br />
and dock there<br />
a)the ship will move to that city<br />
and dock there<br />
b) if the ship is already docking there,<br />
the trading window will be opened<br />
the enemy ship will be attacked automatically<br />
the selected ship is added to the convoy<br />
Further uses of the right mouse button:<br />
• It can be used to close windows. Whenever a window pops up in the main view (e.g. if you<br />
receive a message), you can close it by pressing the right mouse button. If it cannot be closed,<br />
you must first perform an important action in that window.<br />
• If you have a trading office in a city, you can open that city’s trading window by right clicking<br />
on the city in the sea map view or the mini map.<br />
Scrolling the main view using the mouse and the arrow keys<br />
The main view can be scrolled by either moving the mouse to the boundaries of the screen or<br />
by using the arrow keys.<br />
The Trading Window<br />
Trading with the selected ship<br />
When a ship (or a convoy) has been selected that is currently at anchor in a city, the trading<br />
window can be opened. If you are in the city view, this is done by left clicking on the port crane;<br />
if you are in the sea chart view, right click on the city.<br />
By default, trade between your ship and the city is selected. If you have a trading office in the<br />
city, you have the following options:<br />
• trade between your ship and the city (default)<br />
• transportation of goods between your ship and your trading office<br />
• trade between your trading office and the city<br />
• transportation of weapons between your ship and the trading office<br />
9
Trading via your trading office<br />
If you own a trading office in a certain city and no ship is<br />
selected, left clicking on the port crane in the city view will<br />
open the trading window, allowing you to trade goods<br />
between your office and the city only.<br />
To transfer goods from your office to a ship, you must first<br />
select the ship (see above).<br />
The trading window not only lists all the merchandise, but<br />
also the availability of the goods in the city (in barrels or<br />
bushels), the amount you have in your office or your ship,<br />
and the prices for purchase and sales. Note that the purchase<br />
price of a certain commodity is always higher than the sales<br />
price of that same commodity. To buy or sell a commodity,<br />
simply click on the corresponding price.<br />
Prices – Supply and Demand<br />
The principle will sound familiar: supply and demand determine the price! The more<br />
a commodity is needed in a certain city, the more the city will pay for it. And you will have to<br />
pay even more if you buy up rare goods.<br />
This results in the following:<br />
1. Whenever you sell a commodity to a city, its price will begin to drop, because with every<br />
unit you sell, the demand is lessened.<br />
2. Whenever you buy a commodity, its price will rise, because the supplies in the city are<br />
reduced.<br />
The Numbers Game<br />
At the bottom of the window, you can select the number of units you would like to trade in one<br />
go: either one, five or as much as possible (max). You will notice that selecting different numbers<br />
has an impact on the price. For instance, when you switch from one to five, you will see that the<br />
purchase price rises and the sales price drops.<br />
This may seem illogical at first, but there is a simple explanation: If you want to buy or sell five<br />
barrels or bushels of a certain commodity, it makes no difference whether you buy them one at<br />
a time or all at once. You will pay or receive the same amount of money. But if you choose to<br />
10
trade more than one unit at a time, the price displayed already includes the aforementioned<br />
price increment/decrement. The price that is indicated is consequently an average price.<br />
Mass Units<br />
In ‘Patrician II’, there are two different mass units, bushels and barrels, where one bushel equals<br />
ten barrels. A 15-bushel-Snaikka will therefore accommodate 15 bushels or 150 barrels.<br />
Weapons<br />
Weapons are also transferred to and from your ships using the trading window.<br />
Trading using the mini map<br />
You can also trade via the mini sea map. First select a ship that is currently in the port of a city<br />
(either using the ship list or the button in the caption bar). Then right click on the city. The<br />
trading window will now open. The advantage of this method is that you can trade from<br />
anywhere in this manner; you don’t have to ‘enter’ the city to trade.<br />
A little Advice<br />
Buy cheap, sell expensive! Now you might say, how am I to know which price is good and which<br />
is not? Well, to find out, there is some guidance in the trading window:<br />
1. Only buy goods when the sales price and the purchase price are very close to one another<br />
(a 10% margin, for example), because in that case, there are sufficient supplies in the city<br />
and the price should be reasonable. The scarcer a commodity becomes, the more the two<br />
prices will differ.<br />
2. Obviously, never sell any goods at a price below the average price you paid for them, which<br />
is displayed at the very right of the window.<br />
One more hint:<br />
It is best to buy goods from cities where they are being produced. Conversely, you are advised<br />
to sell goods in cities where they are not being produced.<br />
11
The Formalities: The Main Menu and its Options<br />
Before you set sail, there are some fundamental decisions to make. No big deal for an old seadog,<br />
but such formalities must be dealt with.<br />
The Tutorial<br />
The tutorial will gradually make you familiar with the complex world of ‘Patrician II’. In five<br />
chapters, you get to know everything you need to know about trade, battles, and the<br />
construction of buildings. Before each mission, you see a brief summary of the tasks you are to<br />
fulfil.<br />
A small window at the bottom of the screen (as well as dialogue) will continue to inform you<br />
about your next task.<br />
The Campaigns<br />
A campaign is a series of missions that must be completed consecutively. While the single<br />
player game can be configured freely, you cannot simply make adjustments to the game settings<br />
here, for the initial circumstances and the winning conditions are largely predetermined. To<br />
successfully complete a campaign, it is necessary to fulfil certain missions or to reach a<br />
particular goal.<br />
The Single Game<br />
The single player game is the main game mode of ‘Patrician<br />
II’ and is in no way less attractive than the campaign mode.<br />
Here, too, you are faced with a dynamic world in which a<br />
variety of unexpected events can occur.<br />
So if you prefer to make your way on your own – without<br />
predefined conditions and goals - the ‘Single Game’ should<br />
be your choice. As soon as you choose this option, you will<br />
be able to ‘tweak’ your game’s settings to your liking.<br />
Name, Address…<br />
This field could be considered as the municipal office of the game. This is where you choose<br />
your name, your gender and your home town (12 Hanseatic towns are at your disposal).<br />
Moreover, you choose the year in which the adventure begins…<br />
12
Adjusting the Level of Difficulty<br />
Here you can choose the level of difficulty. There are five options: small shopkeeper, trader,<br />
m e rchant, councillor and patrician. Altern a t i v e l y, you can design your very own level of diff i c u l t y<br />
by editing the ‘Details’.<br />
When you choose one of the five aforementioned levels of difficulty, this naturally has an impact<br />
on your starting circumstances, which include the number of ships you initially own, your<br />
capital, and the ease with which you gain authority from the citizens. The ‘intermediate’<br />
difficulty level is ‘merchant’. If you’re entering the world of the Hanseatic League for the very<br />
first time, it is probably best to pick ‘small shopkeeper’; you are less likely to be threatened by<br />
pirates, and the royals will be more easy-tempered and will thus refrain from early sieges. But if<br />
you’re a daring seadog who isn’t afraid of tough challenges, try your best as a ‘patrician’.<br />
The individualists among you are free to create their own<br />
level of difficulty by adjusting the parameters.<br />
Concerning trade, you set the margin for price differences in<br />
the various cities and your maximum profit margin (the<br />
higher the level of diff i c u l t y, the lower they will be).<br />
‘Recognition’ and ‘Needs’ determine how difficult it will be to<br />
satisfy the citizens and how hard it will be to be respected<br />
by them.<br />
The parameter ‘sea battles’ determines the computer’s intelligence in sea battles, i.e. whether it<br />
manoeuvres with skill or is prone to making mistakes.<br />
Using the menu item ‘pirates activity’, you decide how many pirates threaten the sea. ‘Activity<br />
of the royal house’ determines how envious the royals will be of flourishing cities, as well as the<br />
size of their besieging armies.<br />
Moreover, you can decide on your initial wealth and the number of ships you begin with.<br />
Once you have made adjustments to your settings, return to the ‘Game Settings’ screen by<br />
selecting ‘OK’. The game will now display the difficulty level that is closest to your settings.<br />
13
The Objective Conditions<br />
You decide when the game is over! You decide what position you must attain to win the game<br />
and how much time you have to do so. Six objectives are possible:<br />
None<br />
You can start playing and persuade a self defined goal.<br />
Councillor<br />
The player who is elected councillor of his home town first wins the game.<br />
All players (including computer players) are bound to the same objective.<br />
Before the game begins, you will receive a message informing you about your<br />
competitors. You may specify a period of time in which the objective is to<br />
be reached.<br />
Mayor<br />
Similar to ‘Councillor’, except you have to be elected mayor.<br />
Alderman<br />
The most difficult objective. The player who is elected Alderman, president<br />
of the Hanseatic League, wins the game. In contrast to historical facts, this<br />
does not necessarily have to be the mayor of Lubeck.<br />
Capital balance<br />
Your wealth will decide victory or defeat. Apart from your money, this also<br />
includes the value of your ships, your stock, and your buildings. The<br />
player who has acquired the most capital after a certain time wins the game.<br />
Score balance<br />
The player who has collected the most points wins the game. This includes<br />
your possessions, the respect you have earned, and all actions you have<br />
taken to raise your standing.<br />
As soon as you reach the goal you’ve set for yourself, the game ends. It also ends when the time<br />
elapses without a winner, or if a competitor arrives at his goal before you do. In any case, you<br />
will be asked if you would nonetheless like to continue the game.<br />
City Production<br />
You can choose between ‘realistic’ and ‘random’ (‘incidental’) . If you select ‘realistic’, the cities’<br />
production will match the geographic circumstances and correspond to historical facts.<br />
‘Random’ will result in unpredictable production, distributing the goods randomly.<br />
Adjusting the Game Speed<br />
‘Patrician II’ is a real-time game. Nevertheless, there are means of slowing down or accelerating<br />
the flow of events. There are six different speeds for you to choose from: slow motion, very slow,<br />
slow, normal (default), quick and very quick. The game speed can also be adjusted during the<br />
14
game (using the options menu), which can be required if, for example, you have lots of ships to<br />
manage. The ‘slow motion’ mode can be switched on and off by pressing ‘Pause’ on the<br />
keyboard.<br />
Multiplayer<br />
If you have a couple of friends around and would like to compete with human players, this is the<br />
game mode to choose. (see ‘Multiplayer Mode’ for further information)<br />
Load Game<br />
Of course a previously saved game can be loaded to resume an interrupted session. Select this<br />
option to open the ‘Load Game’ screen. Now, select the type of game you would like to load – a<br />
single player game, a tutorial, or a campaign. All games of that type will be listed. Use your<br />
mouse to select a game. To load the game, click ‘Load’. You are now returned to your Hanseatic<br />
town. In case you have changed your mind and do not want to load a game, click ‘Back’<br />
(‘Backwards’ / ‘Abort’) to return to the main menu.<br />
Options<br />
The options menu provides numerous settings for you to adjust the graphical appearance of the<br />
game, sound options, and the game speed.<br />
resolution<br />
color depth<br />
detail level<br />
volume: music,<br />
sound, video<br />
event videos on/off<br />
tool-tips on/off<br />
game speed<br />
choose from 800x600, 1024x768 and 1280x1024 pixels<br />
16 bit (high color) or 32 bit (true color)<br />
either ‘normal’ or ‘high’. Bear in mind that a high level of detail will<br />
slow down game perf o rmance, as it re q u i res more system<br />
resources.<br />
adjust the volume as appropriate<br />
For every special event, there is a video sequence. If you would<br />
like to see the videos, enable this option by checking the box.<br />
The tool-tips will give you some advice in difficult situations.<br />
The game speed determines at what pace time passes in the game.<br />
The ‘normal’ setting means that one day lasts 60 seconds, ‘quick’<br />
reduces that time to 30 seconds, and a ‘very quick’ day lasts 20<br />
seconds.<br />
Click ‘OK’ to save the changes you have made. To leave the options menu without saving the<br />
changes, choose ‘Cancel’ (‘Abort’).<br />
15
Credits<br />
The usual suspects…<br />
Exit<br />
From time to time, there will be situations when a patrician must leave the world of the<br />
Hanseatic League. Work, school, studies – what a cruel world this is!<br />
Game Controls<br />
First of all, note one thing: Everything can be controlled by using the mouse only, so you may<br />
put aside your keyboard while you’re playing ‘Patrician II’. In general, the left mouse button<br />
selects, while the right mouse button is used to control selected ships. For those of you who like<br />
to use keyboard shortcuts, refer to the appendix.<br />
When the game starts, the main game screen is displayed. This is where all the events take place:<br />
ships and buildings are selected, buildings are constructed, crew members and workers are<br />
hired or fired, ships are loaded with expensive commodities, ships are sent on a voyage or to the<br />
bottom of the sea – to name just some of the things that lie ahead of you.<br />
The game has three different main views: the city view, the sea chart view, and the sea area view.<br />
You can switch between the sea chart view and the city view at any time, while the sea area view<br />
is only used during sea battles. No matter which view you are currently using, the sea chart view<br />
or the city view, the game screen will always consist of five parts: the caption bar, the main view,<br />
the mini map, the selection window, two icon bars and the switch (used to change between the<br />
views). (also see chapter 5 ‘A Quick Start for the Impatient’)<br />
The City View<br />
Do take a close look at your home town – the people who live there, the lively events in its many<br />
alleys, the frenzied port area, the beautiful houses of the patricians, but also the building estate,<br />
the unused terrain. If you want to succeed, you must know your home town well – and fight for<br />
a high position…<br />
Later in the game, you’ll be looking at many cities, because every city in which you own a<br />
trading office or have one of your ships docked can be entered by clicking on it in the sea chart<br />
view.<br />
16
The Caption Bar<br />
The man to the very left will gladly inform you about the current population of the city<br />
you are in. Left click on the icon to open a window indicating how the population is<br />
structured as far as the three demographic strata are concerned. Moreover, the number<br />
of beggars and the happiness of each group is displayed.<br />
If you own several ships and trade all over northern Europe, you can sometimes lose your<br />
orientation. Therefore, the city’s name is also displayed in the caption bar.<br />
Get an overview of your buildings. One click of the mouse and all buildings that do not<br />
belong to you and cannot be interacted with will be faded out or displayed as<br />
transparent in the main view.<br />
The number next to the pile of gold pieces indicates the total cash you currently have<br />
at your disposal. Click on the icon to display general company information. Statistics<br />
on traders and cities are also available from this window.<br />
If you click on the icon next to the date display, the chronicle of the game is displayed,<br />
listing all public news regarding cities and traders.<br />
The Main View<br />
This is where all the action takes place, whether you trade goods, make deals with your<br />
competitors, or get elected mayor. Just scroll through the city using the arrow keys or by<br />
moving the mouse pointer to the boundaries of the screen.<br />
If you click on the various buildings in town, you will notice that you can interact with many of<br />
them. Some buildings will display information about them while others can be entered – in this<br />
case a new window opens in the main display and all possible actions you can take are listed in<br />
the selection window to the right. The actions you may take depend on the type of building: For<br />
example, your trading office will allow you to go about your business, the tavern is the place to<br />
hire new crew members, and the port crane allows you to trade and transfer goods between your<br />
ships, your office, and the city. To leave a building, click on the ‘x’ to the lower right of the newly<br />
opened window or simply click the right mouse button. For detailed information about the types<br />
of buildings and the people you are likely to meet there, see chapters 9 and 10.<br />
17
The Mini Map<br />
The mini map gives you a good overview of the city you are<br />
currently viewing, or a scaled-down view of the entire sea<br />
chart. The frame designates the area you are currently<br />
viewing in the main display. To center an area in the main<br />
view, simply click on that specific area in the mini map.<br />
The mini map is color-coded, so that you can immediately<br />
identify buildings that belong to you. They are marked blue,<br />
while buildings belonging to the city appear grey; computer<br />
traders’ buildings are grey and buildings of other human<br />
players are red. These colors also apply to the ships.<br />
The upper Icon Bar<br />
Between the mini map and the selection window, there is an icon bar with the following<br />
functions:<br />
This menu item gives you an overview of your fleet. The window lists all your ships,<br />
their names, type, and current status (at sea, under repair, at anchor, etc.). To the<br />
lower right, there is a button that allows you to switch between viewing the ship’s<br />
current load status and its crew and weapon status. If you would like to immediately select and<br />
locate one of your ships, click on the arrow next to the ship’s name. The main view and the mini<br />
map will then change to the appropriate view and show you the ship’s position.<br />
If you click on the ‘forward’ button, time will pass very quickly. The main view will<br />
change to the sea chart view while your ships sail in fast motion – a handy feature for<br />
time-consuming sea voyages. Almost instantly, your ship will reach the destination<br />
harbor. The forward mode ends automatically as soon as an important event occurs. You can<br />
end it manually by clicking anywhere in the main display.<br />
This icon opens the news menu in the lower icon bar (see below) and displays the<br />
latest message you received. Repeated clicking displays your unread messages one<br />
after the other. When you receive new messages, the icon will briefly light up. You can<br />
study all your messages using the menu in the lower icon bar. But bear in mind that this is the<br />
Middle Ages. You will receive messages with a certain delay, so the information you receive<br />
might not always be accurate – except for messages regarding the situation of your businesses.<br />
18
The construction menu – it will open in the lower icon bar – is of high importance to<br />
any patrician. It allows you to build roads, manufacturing works, and various kinds of<br />
other buildings. Read more about construction in chapter 10.<br />
This icon allows you to change to the sea chart. Click on it to return to the city.<br />
The options menu behind this icon differs only slightly from the one in the main menu,<br />
as it offers some additional functionality (‘save game’, ‘load game’ and ‘end game’).<br />
The News Menu<br />
Here you will find all the highly important letters that the authorities have sent to you,<br />
letters that you’d better not ignore. This includes overdue notices, court orders,<br />
seizures, and tax assessments. Such bad news always reaches you immediately. Some<br />
things never change…<br />
This is where your personal news is listed, i.e. news about trade, businesses, and<br />
ships. You will be informed when your ships or buildings are completed, how an<br />
automatic sea battle ended, etc. Simply click on any message to read more.<br />
Some of the news in this folder will be written in handwriting, which tells you that this is a<br />
personal letter that only you are to receive. Such private letters will reach you without a delay.<br />
Here you can browse current trade information.<br />
Successful traders need to organize their letters well. This menu allows you to<br />
configure how long certain news or letters will be saved and whether you should be<br />
notified by a sound when you receive them.<br />
19
Get rid of superfluous and outdated messages. If you want to delete a message, first<br />
click on the message in question and then click on this icon. Alternatively, press the<br />
‘Del’ key.<br />
The Construction Menu<br />
Aside from your ship, the trading office is perhaps your most important tool to aid you<br />
in your quest for social ascent (not counting your wits, of course). You need to have a<br />
trading office in a city before you can construct other buildings. Also, you can only<br />
trade with a city in which you don’t have one of your ships docked if you own a trading office<br />
there. The trading office is the place where all the goods you buy or sell are stored (provided<br />
that you don’t trade directly with your ship). Moreover, all personal information regarding a<br />
particular city, e.g. your wife’s popularity, is gathered in your trading office. Therefore, you<br />
should do your best to build trading offices in as many Hanseatic towns as you can.<br />
Here you have the option to build roads, merchant’s houses, gabled houses, half<br />
timbered houses, wells, and hospitals. Once you have decided what you want to build,<br />
you receive further information on the costs, the build time, the material requirements,<br />
how much of each material you already have in stock, and what materials you will have to buy.<br />
Using the ‘raw materials’ button you can manage all your buildings that produce raw<br />
materials, such as the fisherman’s house, the corn farm, the cattle farm, the sawmill,<br />
and the hemp farm. Just select one of these building types to display information about<br />
the construction costs and time.<br />
Here you will find a list of all businesses that process raw materials to produce more<br />
refined products. Provided that you have all the necessary resources, you can build all<br />
of these buildings, which include the workshop, the salt maker, the brickworks, the<br />
forge, etc. Again, to get further details, click on the type of business.<br />
The construction of city walls and watchtowers is reserved for the municipality.<br />
Therefore, this menu will not be accessible until you are elected mayor of the town.<br />
20
The Ship Menu<br />
This menu is displayed as soon as you select one of your ships.<br />
This icon will give you an overview of the goods you have aboard the ship.<br />
Your ship’s crew is shown upon selection of this menu item.<br />
Selecting this icon will show you the deck of your ship and the weaponry you are<br />
currently using.<br />
If you want to form a convoy, press this button once you have selected all the ships<br />
that are to be part of it.<br />
To disband an existing convoy, press this button when the convoy is selected.<br />
Automatic trade allows you to assign a certain trade route to your ships. When your<br />
ships reach the last station of the route, they will start from the beginning while you<br />
receive a message regarding the balance of the last tour. For additional information on<br />
automatic trading, refer to chapter 8.<br />
21
The Statistics Menu<br />
Open the statistics menu – it will appear in the lower icon bar – using the gold pieces icon in the<br />
caption bar.<br />
(blue button) The business report provides a general overview as well as information<br />
on your wealth, your ships, and your production.<br />
(red button) If you would like to find out how the competition is doing, inform yourself<br />
about their wealth, their capacities, and their popularity.<br />
This menu item displays the city data: population figures, the supply of needs, the<br />
quality of life, the balance of trade, production, and supplies.<br />
With this feature, you can compare the figures of several cities.<br />
The Options Menu<br />
22
Save Game<br />
Click here if you want to save your game. Then, enter a description on the<br />
following screen and choose ‘Save’. If you change your mind, click ‘Back’ to<br />
return to the main menu.<br />
Load Game<br />
The screen you will see is identical to the one you already know from the<br />
main menu: First choose the game type, then select one of the savegames<br />
and choose ‘Load Game’.<br />
End Game<br />
Click here to return to the main menu.<br />
The Selection Window<br />
The selection window usually displays information about the object that is currently selected in<br />
the main display, e.g. descriptions of ships, convoys, units, or buildings. If further information is<br />
available, this window can also serve as a menu.<br />
If you have selected a building that can be entered, the selection window will list the possible<br />
interactions. Simply choose one of the actions by using the left mouse button or close the list by<br />
right clicking.<br />
A little advice: Time will not stand still while you’re busy viewing statistics or taking actions in<br />
the selection window. So don’t waste your valuable time!<br />
The Sea Chart<br />
A serious trader should always be aware of the location of his goods and should recognise the<br />
places where great deals can be made. With the aid of the two sea charts (main display and mini<br />
map), you can do both. The sea chart provides an excellent overview of northern Europe, the<br />
sphere of influence of the Hanseatic League. Using the switch to the left of the mini map, you can<br />
change the mini map view from the city view to the sea chart view and vice versa. Once you have<br />
the sea chart in your mini map view, selecting any region of it by using the left mouse button<br />
opens the sea chart view in the main display as well.<br />
The Caption Bar<br />
In sea chart mode, four new icons appear in the caption bar:<br />
This shows the number of ships that are presently at anchor in different cities. If<br />
you left click on the icon, one of the ships will be selected and the main view will<br />
be centered on it. As usual, ship information is displayed in the selection window.<br />
If you repeatedly click on the icon, the other ships at anchor will be selected one after the other.<br />
23
Note:<br />
Ships that are part of convoys will not be selected.<br />
Displays the number of ships at sea. Selection is done in the same way as above.<br />
Tells you the number of convoys at anchor and allows you to select them<br />
(as above).<br />
Shows you how many of your convoys are at sea and allows you to select them<br />
(as above).<br />
As soon as you click on one of these icons and your ship appears, a new menu will open in the<br />
lower icon bar. For more information, see chapter 8.<br />
The Main Display<br />
Even experienced seadogs require good nautical charts! The main display shows a sea chart of<br />
northern Europe, with all the cities relevant to a member of the Hanseatic League. The chart can<br />
be scrolled by using the arrow keys or by moving the mouse pointer to the boundaries of the<br />
screen. To quickly move from one position to another, use the mini map and click on the desired<br />
position to center on it.<br />
From the sea chart, you can enter any city in which you either own a trading office or have one<br />
of your ships at anchor by clicking on the city, i.e. the respective button. Both views will then<br />
change accordingly. If you cannot enter a city, you will merely receive general information about<br />
the city when you click on it.<br />
The sea chart view also contains a number of symbols next to the cities’ names. These symbols<br />
stand for a certain status in the city, e.g. a shortage of beer. To get an explanation, simply move<br />
the mouse pointer over the symbol.<br />
You will come across the following symbols:<br />
Whenever you see this symbol you better have lots of food on board. It stands for<br />
famine.<br />
If you stumble upon this symbol, you might want to avoid entering the city. There is an<br />
epidemic.<br />
24
A fire broke out in the city.<br />
Beer is scarce in this city. You will find a list of all the other commodity symbols – all<br />
commodities can be in short supply – in the appendix.<br />
The city is under siege. Most probably, the entrance to the port is inaccessible. Don’t<br />
expect to find a peaceful port here.<br />
A convoy is waiting for permission to leave the port. The color of the icon indicates<br />
who the convoy belongs to. If it’s blue, it’s yours; if it’s red, it belongs to one of your<br />
fellow players; and if it’s white, it’s the computer’s.<br />
Alarm! Pirates are terrorizing these waters. Play it safe and stay away from this<br />
town – or dig out your grappling hooks and prepare your cannons!<br />
One glance at the map is enough to see whether you have any ships docked in the<br />
city, and if you have, you will also see how many.<br />
The red buttons represent cities.<br />
Your home town is shown as a blue button.<br />
Cities in which you own a trading office are displayed as red buttons with a blue dot in<br />
the middle.<br />
25
The Mini Map<br />
The mini map shows a scaled-down version of the entire sea chart. Again, the rectangular frame<br />
shows you which part of the sea chart is presently shown in the main view. Your home town (and<br />
any cities in which your ships are docked) are displayed as blue diamonds, whereas the other<br />
Hanseatic towns appear red. Your ships and convoys are shown as blue squares, which will flash<br />
slowly when selected. Other ships or convoys are red squares, except for pirates, which appear<br />
black. If you see any pirate ships beforehand, you might want to avoid a confrontation and sail<br />
around them. In multiplayer mode, your friends’ ships will appear red.<br />
The mini map simplifies navigation: Click anywhere on the mini map or simply keep the left<br />
mouse button pressed while you move across the mini map to center the main view on the spot<br />
specified by the mouse pointer. Quickly flashing spots on the mini map always point to<br />
important events, such as pirate attacks, incoming ships, storms, etc. To examine these events,<br />
click on the flashing part of the mini map and then use the main view to obtain information.<br />
Controlling Ships<br />
Use the mini map to quickly send your ships to different locations. Simply select one of your<br />
ships (using the sea chart, the ship list, or the city view) and then right click on a city in the mini<br />
map. The white line that appears in the main view (if you’re using the sea map view) is the route<br />
your ship is going to take. But the destination need not necessarily be a port – send your ships<br />
anywhere you please.<br />
The Selection Window<br />
In sea chart mode, the selection window is mainly of importance when selecting ships. Read the<br />
next chapter to learn all you need to know about dealing with ships – no matter who they belong<br />
to.<br />
The Icon Bar<br />
The upper icon bar remains the same. Logically, the construction menu and the ‘leave city’<br />
option are disabled.<br />
26
Ships, Convoys, and Expeditions<br />
Ships guarantee a patrician’s well-being. Therefore, it is especially important to treat them well<br />
and to protect them. Those who fail to build up an effective fleet will soon have to bear the<br />
consequences. After all, traders without ships are like pirates without grappling hooks.<br />
Types of Ships<br />
There are four different types of ships in the game: the fairly small but very manoeuvrable<br />
snaikka, the crayer, the renowned cog, and the hulk, a massive three-master. The cog and the<br />
hulk can only be used on the high seas; they’re a little slow but offer very large capacities and<br />
can accommodate more weapons, whereas the snaikka and the crayer are rather fast and can<br />
also reach the cities in the inland area. In the beginning, a cheap snaikka will be sufficient, as the<br />
bigger ships only make sense if you have the funds to use their capacities. The cog and the hulk<br />
are not only quite expensive to acquire but will also result in high running costs. While a<br />
snaikka requires a minimum crew of four men, a hulk requires three times as many sailors.<br />
Snaikka<br />
capacity: 15-20<br />
weapon slots small/large<br />
level 0: 0/0<br />
level 2: 4/2<br />
speed (knots): 5,5<br />
no. of masts: 1<br />
manoeuvrability: 100%<br />
minimum crew: 4<br />
maximum crew: 20<br />
Crayer<br />
capacity: 28-35<br />
weapon slots small/large<br />
level 0: 0/0<br />
level 2: 2/4<br />
speed (knots): 6<br />
no. of masts: 2<br />
manoeuvrability: 95%<br />
minimum crew: 8<br />
maximum crew: 35<br />
27
Cog<br />
capacity: 45-55<br />
weapon slots small/large<br />
level 0: 0/4<br />
level 2: 2/8<br />
speed (knots): 4.5<br />
no. of masts: 1<br />
manoeuvrability: 90%<br />
minimum crew: 10<br />
maximum crew: 55<br />
Hulk<br />
capacity: 55-70<br />
weapon slots small/large<br />
level 0: 0/6<br />
level 2: 0/12<br />
speed (knots): 5<br />
no. of masts: 3<br />
manoeuvrability: 85%<br />
minimum crew: 12<br />
maximum crew: 70<br />
Note:<br />
• One large weapon slot has room for two small weapons. At the shipyard, every ship can be<br />
extended twice to accommodate more weapons at the expense of storage space.<br />
• The given speeds apply to empty ships. Fully loaded ships are approximately 15% slower.<br />
Selecting Ships<br />
Ships can be selected in several different ways.<br />
You already know how to select ships by using the ship list and the caption bar of the sea chart<br />
view. These ways of selection are especially useful when you don’t know where your ships are.<br />
You can also select ships at any time by simply clicking on them – either in the city view or the<br />
sea chart view.<br />
Once you have selected one of your ships, the selection window will display the following<br />
information: the ship’s name, its type, its destination (or the port it is in), its traveling speed, the<br />
estimated duration of the current voyage, the total load and all the goods, the free capacities as<br />
well as data concerning your crew, the weapons you have aboard, and the ship’s condition.<br />
If you have selected a ship belonging to one of your competitors, you receive very little<br />
information: the ship’s name, its owner and his rank, and estimated figures on the ship’s speed,<br />
condition, crew, load and weaponry.<br />
28
Selecting Several Ships<br />
You can select several ships at once by first clicking next to one of the ships and then keeping<br />
the left mouse button pressed while you move the mouse (thereby enlarging the frame that is<br />
now displayed) over the ships you want to select. A second way of doing this: Press Ctrl while<br />
you select all the ships one by one. After that, you could, for example, send all the selected ships<br />
to a single destination by using the sea chart and right clicking on a city. To deselect the ships,<br />
click on an empty space in the background graphics or select a different object.<br />
When you select more than one ship, the selection window will display a list of all the ships you<br />
selected. If you move the mouse over one of the ships in the selection window, you will receive<br />
information about that ship. You can select one of the ships by clicking on it in the selection<br />
window.<br />
The Deck<br />
If you have selected a single ship, you can view its deck by<br />
clicking on the corresponding button in the icon bar. Here<br />
you have access to the weapon configuration. Moreover,<br />
you can prepare for your career as a pirate by clicking on<br />
the flag icon to raise the Jolly Roger; but this only works<br />
when there are no other ships in sight, for this is to be done<br />
secretly. After all, you’ve got to maintain your reputation as<br />
an honorable businessman. The pirate symbol next to the<br />
ship’s name will remind you that the Jolly Roger is raised, so<br />
don’t forget to lower it in time.<br />
Additionally, the deck offers features that will only be activated during sea battles. To learn more<br />
about them, read chapter 12.<br />
The Crew Menu<br />
This menu appears as soon as you select a ship and click on the crew icon in the icon bar. This<br />
is where you inform yourself about the crew’s morale, the weekly pay, the number of swords<br />
your sailors are equipped with, and the name and age of your captain, as well as his skills (see<br />
‘The Captain’ later on). Moreover, you can make first preparations for your life as a pirate in the<br />
crew menu.<br />
29
Hiring and Firing Sailors<br />
B e f o re you decide to weigh anchor, you should take care of<br />
your crew and make sure you have enough sailors aboard. In<br />
case there are too few, your ship will fail to move and the<br />
s h i p ’s name will appear red in the ship list. Just select your<br />
ship to find out if your crew is ready to go. If you need more<br />
sailors, stop by at the tavern (see also ‘The Ta v e rn’ in<br />
chapter 10), for this is the place to meet unemployed sailors.<br />
If you are experiencing financial problems, you might want<br />
to sack your crew: In the selection window, press the ‘+’ and<br />
‘-‘ buttons to choose the number you want and then select<br />
‘Dismiss sailors’. Of course you can only dismiss your<br />
sailors when your ship is in a port.<br />
But do not proceed too light-heartedly and fire your sailors as you please, because if you keep<br />
firing members of your crew, the remaining people will begin to lose faith in you. And what’s even<br />
worse is that the sailors you fired will spread the news quickly and it will become harder and<br />
harder for you to find people who want to work for you. Captains will be particularly expensive<br />
to hire under such circumstances. And it will take some time for you to regain your reputation<br />
as a dependable employer.<br />
The Crew’s Morale<br />
Firing sailors not only reduces their faith in you but also has a negative impact on the morale<br />
aboard the ship. The crew’s morale is displayed on a scale between 0 (very bad) and 4 (very<br />
good). If the morale drops too low, this will, for instance, reduce your chances of surviving sea<br />
battles, because your sailors will simply not aim as well as they used to. A bad mood aboard the<br />
ship will also make the captain think twice before rejecting offers he may receive from your<br />
competitors. Lost sea battles and excessively long sea voyages will depress your crew. A couple<br />
of free days on shore will help in this case.<br />
Mutiny on the high seas<br />
If you continually ignore the mood of your crew, don’t be surprised if mutineers take over your<br />
ship, who might suddenly disregard the actual destination of your ship and head for a nearby<br />
port instead. You can still select your ship, but you can no longer control it. The selection<br />
window will inform you about the ship’s unfortunate status. Once your ship arrives at the port,<br />
30
many of the crew members will leave the ship – along with many of your goods. Only the<br />
captain is sure to remain aboard.<br />
After a couple of days ashore, the crew will have calmed down and you regain control and are<br />
free to sail. Make sure the mood will not drop again too soon. It is advisable to permit a shore<br />
leave from time to time. And while your ship isn’t usable, you might as well repair it at the<br />
shipyard so you don’t waste any valuable time.<br />
Equipping the crew with swords<br />
Your crew should always be equipped with sufficient swords, so that they can defend<br />
themselves when they face the enemy in a sea battle. Otherwise, your ship is an easy target for<br />
pirates. There are no legal means of acquiring swords, but you might find someone who’s willing<br />
to help you at the tavern (see chapter 10).<br />
The Captain<br />
You need only one captain per ship, but good captains are hard to find and not exactly cheap.<br />
Snaikkas and crayers will often run well without a captain. A captain is only necessary if you…<br />
• want to use the automatic trade feature<br />
• need an orlogship to form a convoy (also read the section on convoys further on)<br />
• want to provide a coastal patrol vessel (Auslieger)<br />
A Captain’s abilities<br />
Captains have further advantages: Depending on their age, they<br />
have experience in the fields of steering, battle, and trade, and<br />
thus offer bonus values ranging from 0 to 5, making your ships sail<br />
faster and improving the accuracy of your shots. Captains who<br />
are experienced traders will sometimes even bargain for better<br />
prices (automatic trading). This means price improvements up to<br />
10% with an experience of 5. The manoeuvrability of your ships<br />
can be increased by 30%. Such experienced captains are well<br />
worth the money. The downside is – he knows that as well as you<br />
do.<br />
31
Automatic Trade<br />
As soon as you have a captain aboard, the ‘automatic trade’ icon in the ship menu will be<br />
enabled.<br />
This feature allows you to pick a profitable route which your ship is to sail automatically. You<br />
can choose the goods you wish to trade and the prices at which they are to be bought or sold.<br />
Selecting Cities<br />
You can select up to 10 cities that will be part of your trade route. The positions of the cities can<br />
be changed using ‘drag and drop’.<br />
Selecting Goods and the Direction of Trade<br />
Using the ‘Goods’ button next to the city’s name, you can select the goods you would like to<br />
trade in that city. You can also specify whether you would like to trade between your ship and<br />
the city or if you would just like to transfer goods between your trading office and the ship.<br />
Obviously, the latter is only available if you own an office in that city.<br />
Prices<br />
If you want to sell goods, you must specify the lowest price at which the captain should sell your<br />
goods. If you want to buy, the maximum price you are willing to pay must be specified.<br />
Amounts<br />
For each commodity, you also have to specify how much you want to trade or transfer.<br />
Priorities<br />
In some cases, you will want to specify priorities for certain goods. For example: You would like<br />
to buy pottery in Cologne – but only if wine is not available. Just set your prices for both and<br />
then drag the button for ‘wine’ (keep the left mouse button pressed on the button and then<br />
move) above the ‘pottery’ button. This will raise the priority for wine. Now wine will be bought<br />
first and pottery will only be bought if there is storage space left in the ship.<br />
32
Activating automatic Trade<br />
When you are done with all the settings, don’t forget to activate automatic trade. The ship will<br />
then begin with the first city on the list. Once it reaches the last city, it will start from the<br />
beginning.<br />
If it doesn’t make sense to head for one of the cities on the list (e.g. if you didn’t get the goods<br />
you were supposed to sell there), the captain will skip it automatically.<br />
Hint:<br />
The automatic trade feature can be used to provide your own businesses with raw materials or<br />
to distribute the goods you manufactured.<br />
The Transfer between two Ships<br />
Two ships that are at anchor in the same port can exchange crew members, captains, or swords.<br />
This feature can come in handy during a mutiny or if you are short of sailors. First select one of<br />
the ships and then right click on another ship. The ship will move toward the other and a<br />
window will appear, allowing you to transfer crew members or swords with ease. However,<br />
smalls arms in the ship’s storage space cannot be transferred.<br />
Note:<br />
Since there can only be one captain per ship, transferring the captain when there is already one<br />
aboard the other ship will exchange the two captains.<br />
Blocked Ships<br />
There are situations when your ships don’t move although you’ve given them an order. Your ship<br />
will be blocked if…<br />
• you do not have the minimum crew on board<br />
• the ship is overloaded<br />
• the ship is in a very bad condition<br />
• the crew’s morale is at a low level<br />
• the ship is under repairs<br />
• it has been positioned for a blockade<br />
A small window will inform you about the reasons in any case.<br />
Damage<br />
Of course your ships can get damaged when they are hit during sea battles, but even if you can<br />
avoid confrontations, your ships’ condition will get worse over time. Therefore, if your ships<br />
33
aren’t in perfect shape, do not engage in long sea voyages where you might encounter pirates or<br />
storms. Furthermore, damaged ships have a reduced capacity, worse manoeuvrability, and a<br />
slower maximum speed. If you repair your ships regularly, you can reduce signs of wear and tear<br />
(caused by long voyages, anchoring on the high seas, icebergs and storms) to a minimum.<br />
Building Ships<br />
If you want to build a new ship, you should visit the shipyard of your hometown or that of any<br />
town in which you own a trading office. When you click on the shipyard, a window will open.<br />
Choose the ‘Build Ship’ option. (see ‘The Shipyard’ in chapter 10)<br />
Ship Names<br />
Shipwrights are fairly unimaginative when it comes to choosing names for your ships, but you<br />
could have any name you wish painted on its walls by visiting the shipyard when your ship is in<br />
town.<br />
Convoys<br />
Long voyages can sometimes be dangerous, for even competitors will sometimes attack you if<br />
they think they can get an advantage out of it. The weather can also be hazardous, so watch<br />
those little clouds on the sea chart. Given all these dangers, it can be advisable to group your<br />
ships in a convoy. Pirates will then be frightened by the sheer firepower of your ships.<br />
Forming a Convoy<br />
As soon as you select a ship that is not part of a convoy, a button will be enabled in the icon bar.<br />
Click on it if you want to form a convoy. However, there are certain restrictions, because at least<br />
one of your ships must be suitable as an orlogship, the leader of a convoy.<br />
An orlogship must…<br />
• not be damaged over 50%<br />
• be armed sufficiently (weapons strength 10)<br />
• have a comparatively large crew (at least 20 men)<br />
• be led by a captain<br />
If your ship does not meet these requirements, you will be informed. You can either try to<br />
upgrade your ship or add your ship to a public convoy formed by one of your competitors<br />
instead.<br />
34
Private and public Convoys<br />
If you have a suitable ship, you can choose to form a ‘private’ or a ‘public’ convoy. If it’s a<br />
private convoy, it doesn’t concern anyone but yourself. Treat it like any of your single ships: Just<br />
load it with the goods you need and specify a destination port…<br />
If it’s a public convoy, a notice is put up at the guild. Once you specify a destination port, the<br />
other players have five days’ time to decide whether they would like to participate. A security<br />
message will appear, asking you whether you would like to sail in five days – confirm and wait<br />
for other ships to join you. Note: After the destination port has been confirmed, it can no longer<br />
be changed.<br />
As soon as your public convoy reaches the destination, the other members will leave the<br />
convoy and do their own business as usual. As a reward for the safe voyage, you will receive a<br />
payment. The sum depends on the value of the goods that were transported and the distance<br />
traveled.<br />
Disbanding a Convoy<br />
A convoy will disband automatically when it reaches its destination (see above) or when the<br />
orlogship sinks, but you can split it up manually by clicking on the appropriate icon in the icon<br />
bar. If other people’s ships are part of the convoy, you should be careful: Such incidents will get<br />
around quickly, and the other traders as well as the Hanseatic League will lose respect for you.<br />
Joining a Convoy<br />
You can join a public convoy that is currently in the same port as your own ship at any time. Just<br />
select your ship and then click on the convoy button in the ship menu. You can then choose the<br />
convoy you would like to join.<br />
Removing a Ship from a Convoy<br />
If you have changed your mind or need your ship elsewhere, you can remove your ship from a<br />
convoy whenever you like, even during the voyage. Select your ship and then choose ‘Disband<br />
Convoy’ (‘Destroy Convoy’?!!?) from the icon bar. Another way is to simply send your ship to a<br />
different location by right clicking. This has no impact on your reputation, unless you are the<br />
owner of the orlogship.<br />
35
Blocked Convoys<br />
The conditions for blocked ships stated earlier also apply to convoys, but there are some<br />
special cases to consider:<br />
Your orlogship is blocked<br />
If your orlogship is one of the blocked ships, you will receive a message informing you that the<br />
entire convoy is blocked.<br />
One of your ships within your convoy is blocked<br />
You receive the usual message, but you are additionally asked whether you would like to remove<br />
the ship from the convoy, so that the remaining ships can sail. Click ‘Sail’ to do so.<br />
One of your ships within someone else’s convoy is blocked<br />
You are out of luck in this case. The others will not wait for you to sort out your problems. They<br />
will sail away while you remain in the port.<br />
Several different ships and convoys are blocked<br />
Not every convoy will be listed separately. Always mind the following: Your own convoys will<br />
wait while other traders’ convoys will sail without hesitating.<br />
Expeditions<br />
Expeditions can only be undertaken with convoys because they are dangerous trips into<br />
unknown and potentially dangerous waters. Daring sailors will at first explore the<br />
Mediterranean. After all, tomatoes from Provence are better than Dutch ones! And who knows<br />
what else there is to discover?<br />
Whenever you send a convoy to the very southwest of the sea chart, you will be asked if you<br />
want to engage in an expedition. If you are interested, the expedition window will open. There,<br />
your goods, your crew and your weapons will be listed. Now specify how much money you want<br />
your crew to use on their expedition and what commodities you are interested in (spices are<br />
always lucrative). Then select two places that are to be visited or mapped, and before you know<br />
it, your crew is ready to explore the mysteries of the south. One last hint: Select one uncharted<br />
place (for reputation) and one established trading centre (for money)! Rest assured that your<br />
heroes will bring home some valuable material.<br />
Don’t be surprised if you don’t hear from your team for quite some time. You will not receive any<br />
news until they return to the waters of the Hanseatic League.<br />
36
Expeditions will raise your standing – the Hanseatic League respects venturesome traders.<br />
However, promising discoveries won’t remain a secret for long. They will be announced in the<br />
Guild (see chapter 10).<br />
Trade: your daily Business<br />
This chapter will give you some hints on trade between cities, which not only includes the buying<br />
and selling of merchandise at good prices, but also production, storage, and transportation.<br />
Trade between Cities<br />
As a trader of the Hanseatic League, you concentrate on trade between its cities. Trade is based<br />
upon the fact that each city’s production is limited to certain commodities, while the population<br />
demands that the entire line of goods be available. As you know, the population is made up of<br />
poor, well-to-do, and rich citizens plus a number of beggars, who are particularly attracted to<br />
flourishing cities.<br />
Always pay attention to the happiness of the citizens! Click on the citizen icon in the caption bar<br />
to view their statistics. This includes the number of beggars, which rises and falls with the<br />
happiness of the poor. If the poor aren’t satisfied, homeless people won’t dare to come into town.<br />
A city needs beggars as workers for newly established businesses. You will learn more about the<br />
different social classes in the next chapter, so we will now concentrate on the goods that<br />
determine their happiness.<br />
All goods can be grouped into foodstuffs, luxury goods, and consumer goods that are needed in<br />
different proportions by the three groups. The well-to-do are at an intermediate level. They<br />
require everything, but in small amounts.<br />
Foodstuffs<br />
Corn, fish and beer are most important for the lower segment of the population. Since that part<br />
of the population is a majority, you will quickly earn a reputation if you supply these goods. In<br />
contrast, meat and wine are consumed primarily by the rich and the well-to-do.<br />
Consumer Goods<br />
Consumer goods include wool, skins and timber for the poor, as well as cloth, train oil and furs<br />
for the richer citizens. Hemp, salt and iron goods are not needed as much, but the basic demand<br />
must still be met.<br />
37
Luxury Goods<br />
Wine, spices, cloth, train oil (oben bereits aufgeführt), pottery and furs are all luxury goods, so<br />
if you want to please the richer citizens, these are the goods to trade.<br />
Don’t be surprised if you find only a few buyers for these goods sometimes. There are not too<br />
many rich people living in the cities, but if you keep supplying them with the goods they desire,<br />
their number will gradually rise.<br />
Raw Materials<br />
Apart from the citizens’ needs, the needs of the processing ‘industry’ must be satisfied. Pig iron,<br />
tiles and pitch are pure raw materials – the latter being needed for the making of ships.<br />
Furthermore, hemp, salt, wood, iron goods and wool are needed to a great extent. In chapter 10,<br />
you will learn more about the needs of each type of business.<br />
The Trading Process<br />
Read the section, ‘The Trading Window’ in chapter 5, which will tell you more about trading<br />
goods, the development of prices, and how to recognize good bargains.<br />
Ships and Transport<br />
If you sail the seas with just a pinch of salt aboard, you will soon see that the running costs of<br />
your business, which include the pay of your employees and repairs, will soon become<br />
unaffordable. You must try to use your ships to capacity! Settle for one ship in the beginning, at<br />
least until you find that you can easily afford to transport more goods. Also pay attention to the<br />
type of ship you are using: Snaikkas and crayers have a small storage space but they sail fast and<br />
are comparatively cheap. Moreover, only these types of ships can reach the river ports of<br />
Cologne, Thorn, and Novgorod. Cogs and hulks are suited for mass transports, e.g. to transport<br />
goods like timber or corn, which are needed in large quantities. Also, once you equip these ships<br />
with cannons, they will put off pirates and will serve as great orlogships for convoys. (see also<br />
chapter 8)<br />
When you have found a profitable trade route, the automatic trade feature might come in handy.<br />
Production and Storage<br />
The production of goods is not always the best way to obtain them. Salaries, taxes and other<br />
costs can quickly result in high prices. In many cases, the price of raw materials has to be added.<br />
In order to be cost-effective, a business you run must always be used to capacity.<br />
38
Nevertheless, producing your own goods is worthwhile in many cases. Once the business runs<br />
well, you can expect to get stable prices and a constant supply of goods. Moreover, you create<br />
jobs, which helps improve your standing and encourages city growth.<br />
Your trading office is the place where your businesses get their raw materials from and the place<br />
where they store the finished products. If the raw materials are missing, your business will not<br />
produce anything, but the running costs remain the same, so make sure the supply of raw<br />
materials is secure. At your office, you can inform yourself about the materials you have in stock<br />
and what materials will be needed in the next couple of days. If the prices for raw materials are<br />
low, buy in advance, as this will reduce your production costs.<br />
A trading office administrator can be hired to secure the supply of raw materials. Note that an<br />
administrator will pay no attention to the prices. If there’s a need, he will buy. After all,<br />
expensive raw materials are better than untapped resources.<br />
You should also make sure that the goods you produced are removed from your office once in a<br />
while. Your office has considerable storage space, but once its limits are reached, additional<br />
storerooms have to be rented, which is not exactly cheap.<br />
If you’re having a hard time transporting all the goods you produced, this could be the right time<br />
to think about buying a new ship.<br />
Housing<br />
Your workers require housing. If the competition is not doing so already, you should build a<br />
sufficient number of residential buildings. Per worker, there are four other people who need<br />
housing. Apart from the rent you get, constructing such buildings will also raise your standing.<br />
Again, your apartments will only be cost-effective if they are used to capacity because there are<br />
running costs and taxes to pay.<br />
Recognition through Trade<br />
Whenever you supply a city with the goods it needs, your standing is raised. Depending on the<br />
type of goods you supply, your standing regarding the three different social classes, which<br />
require different goods, will rise accordingly.<br />
It is not advisable to supply goods that are not needed. If you sell a certain commodity and<br />
notice that the purchase price and the selling price get closer and closer to one another, then<br />
the need is met for now. If you continue to sell that commodity, this will have no further impact<br />
on your standing. In that case, it is better to sell it elsewhere or to store it in your trading office.<br />
39
On the other hand, if you buy goods that are desperately needed in the city and thus reduce the<br />
supplies, this has a negative impact on your standing.<br />
The City: Its Buildings and its Citizens<br />
The world of ‘Patrician II’ includes all the important towns of the Hanseatic era – 20 in all. But<br />
not all of them are suitable as your home town: You cannot get to the top everywhere. ‘Patrician<br />
II’ differentiates between three types of towns:<br />
Hanseatic Towns<br />
You can choose one out of twelve hanseatic towns as your home town. In these towns,<br />
everything is possible: Build, trade, fight for recognition and be elected mayor! Hamburg,<br />
Bremen, Rostock, Lubeck, Cologne, Stetin, Gdansk, Bisbee, Riga, Reval, Thorn and Stockholm are<br />
all Hanseatic towns.<br />
Hanseatic Offices<br />
You can build a trading office and other buildings in Bergen, London, Bruges and Novgorod, but<br />
you will never be elected mayor there.<br />
Hanseatic Branches<br />
These cities are not that important to you, because you cannot build a trading office there.<br />
Malmo, Edinburgh, Oslo and Aalborg do not even have their own guild. You trade there but that’s<br />
about it.<br />
The river ports, Cologne, Novgorod and Thorn, play a different role as well. They can only be<br />
reached with small ships – snaikkas and crayers. This must be taken into consideration when<br />
building ships at the shipyard.<br />
Of course you can enter all of the cities. Take a look around and watch the citizens and their<br />
bustling activity!<br />
Out in the Streets – the People you meet<br />
If you see lots of workers in the streets, this means that you are successful as a businessman.<br />
The more of these workers who carry loads or pull carts, the more businesses you probably<br />
own.<br />
40
Do not have a low opinion of beggars, for they represent a possible future workforce . They will<br />
linger mainly in the port area, at markets or around churches. As soon as a beggar finds a job,<br />
he becomes part of the ‘poor’ people.<br />
Also have a look at the streets that lead into and out of town. The more people move to the city,<br />
the more attractive it has become. Conversely, if people are dissatisfied and frustrated, they will<br />
leave town. Feel free to click on any of the citizens to inquire about their thoughts or opinions.<br />
Furthermore, you might come across your colleagues. In every city, there is a small local dealer<br />
who provides the city with some basic goods. He is not a true rival, so never mind him. However,<br />
when it comes to reserving building estate, he might interfere with your plans. In many<br />
Hanseatic towns, however, you will also meet global traders, who, much like yourself, are<br />
fighting for gold and prestige. So watch out! And keep an eye on them, especially when they’re<br />
trying to establish their business in ‘your’ cities.<br />
The Citizens’ Happiness<br />
If you want to be elected mayor of your home town, you have to pay attention to the citizens’<br />
worries and needs. You must try to remedy social injustices, or else you will have a hard time<br />
becoming a prime candidate. But even those who run for office with the best of intentions will<br />
soon find out that fulfilling everyone’s needs is easier said than done . The reason is simple: In<br />
every city, there are poor, well-to-do, and rich cities, each of which have entirely different<br />
interests and needs.<br />
Daily Needs<br />
The daily requirement of staple food and consumer goods is a prime example for different<br />
interests: While the poor need only sufficient supplies of corn, the well-to-do citizens want beer,<br />
fish and wool. The rich prioritize the supply of meat, wine and cloth.<br />
Supplying the goods for a single day is not enough though. All social classes pay attention to the<br />
status of supplies, and they want those supplies to be secure for the next couple of days. The<br />
prospect of a secure supply calms them down a little bit.<br />
The weekly needs of the citizens can be seen at the market. The figures will help you estimate<br />
for how long the currently available goods will be sufficient.<br />
41
Festivals<br />
People want to celebrate once in a while. Treat them to a<br />
festival regularly and they will thank you for it. Such<br />
festivals are especially effective and re w a rding after a<br />
famine, an epidemic, or a siege.<br />
Housing<br />
Make sure there is enough housing for all the different social classes, for if many people have to<br />
share small areas of living space, the result is a bad general mood. It is particularly important to<br />
provide housing for the poor. Otherwise, you won’t be able to hire any more workers and city<br />
growth will stagnate.<br />
The Church<br />
The church is not only a place where people meet and pray. It also has a representative function<br />
for the people, who admire exceptional buildings. So make sure you extend the church if you can<br />
afford it – religious people will be most thankful!<br />
War and Famine…<br />
evoke a feeling of depression within the city. In the end, you will be blamed for everything. The<br />
citizens always react with unhappiness to sieges of any kind. If, however, your city manages to<br />
escape the grasp of the suppressor, the happiness will increase rapidly.<br />
Wells<br />
Wells will protect your city in the case of fire. If they aren’t built in large numbers, the people will<br />
fear that one day a great fire will sweep through town. The fear of losing everything that was built<br />
up with such great effort saddens the citizens immensely.<br />
42
Hygiene<br />
Hygiene was rather undervalued in the Middle Ages and epidemics were common. If you want to<br />
reduce the fear of epidemics and thus improve the happiness of the citizens, build hospitals and<br />
paved roads.<br />
City Defence<br />
The bigger the city, the greater the fear of attacks by intruders. You can only do something about<br />
the defence of a city if you’ve been elected mayor. You could, for instance, train more guards to<br />
defend your city.<br />
The more buildings that are outside the protective city walls, the more the happiness of the<br />
citizens will drop. Extending the city walls will help them gain confidence.<br />
The Construction of Buildings<br />
The Construction Menu<br />
As soon as you own a trading office in a city, you can build<br />
additional buildings. But there are certain restrictions: You<br />
need quite a bit of money (the money lender could help you<br />
out), and you have to accept geographic facts – there’s no<br />
way you can build a mine in the middle of nowhere. Note<br />
that you have no influence on public buildings, such as the<br />
church, the town hall, or the tavern.<br />
Select an option from the construction menu and take a look at the buildings you can construct.<br />
Choose the building you want and then study the information you are given: the construction<br />
costs, the time it will take to build, and the materials required. You will be told what materials<br />
you have at your disposal (at your office and aboard the ships you have at anchor). If your<br />
materials are insufficient, you are told whether the remaining materials are available in the city,<br />
as well as their cost.<br />
If it is currently impossible to construct the building you have selected – either because the<br />
required materials are unavailable or because you don’t have enough money – a message will be<br />
displayed at the bottom of the selection window.<br />
43
Putting up a Building<br />
If all conditions are fulfilled, the view will change: All<br />
possible construction sites will be marked blue in the main<br />
view and in the mini map. Now move the mouse pointer to<br />
one of the blue sites. An outline of the new building will be<br />
displayed. Place the building using the left mouse button<br />
and then select ‘build’. The money will be deducted and the<br />
construction site will soon be filled with life. Once the<br />
construction time elapses, your sparkling new building is<br />
ready for use – and you can decide whether you would like<br />
to construct another building or do business as usual.<br />
Construction Workers<br />
There are about five construction teams in each city. If all of them are busy, the construction of<br />
your next building will have to wait – you will be informed as soon as you select one of the<br />
buildings from the menu.<br />
Building Regulations<br />
The construction of a building is a highly bureaucratic affair, and there are some regulations to<br />
abide by:<br />
No Uncontrolled Expansion!<br />
The municipality will ensure that people don’t build their houses all over town. Certain areas will<br />
be assigned to you, so don’t be surprised if you don’t find a construction site even though there<br />
is enough space available.<br />
Public Interest Has Top Priority<br />
In general, businesses can be built inside the city walls, but if there are few construction sites<br />
remaining, residential buildings have priority and you might have to build your business outside<br />
the city walls.<br />
Zero Tolerance<br />
When building trading offices, you will have to build them where the city wants them to be. You<br />
simply have no choice.<br />
44
The Different Buildings<br />
As an ambitious trader who wants to make his way in the medieval world of the Hanseatic<br />
League, you need not found new cities, but you have the chance to influence the character of<br />
your home town. Successful traders pay high taxes, create new jobs, give alms and construct<br />
buildings, streets or city walls. The following section will tell you what buildings you can build<br />
and what actions you can take inside them.<br />
The Trading Office<br />
The trading office is perhaps the most important building. It is the place<br />
where your social life meets business. You need to have a trading office<br />
inside a city before you can construct other buildings. Your office is your<br />
warehouse, and records your overseas transactions and trade between your<br />
businesses and the warehouse. You already own an office when the game<br />
starts; just search the port area to find it. You can also extend your office –<br />
there are three extension levels – to increase the storage capacity and adapt the office to your<br />
needs. Trading offices can be built in all Hanseatic towns and Hanseatic offices.<br />
Simply click on your office to enter it. A window will open in the main display and the selection<br />
window will allow you to move about, displaying several buttons with the following functions:<br />
Stocks of Goods<br />
Use this option to check the current stock of goods as well as your production and consumption<br />
during the past week. It does make a difference whether ‘--‘ or ‘0’ is specified behind a certain<br />
commodity: ‘--‘ means you aren’t producing this commodity, while ‘0’ means that you own<br />
production facilities for that commodity but have failed to produce anything. In such cases,<br />
investigate the causes – typically a lack of workers or raw materials.<br />
Overview<br />
You will get an overview of all your income and expenses in that specific city. Your income<br />
includes: automatic trade with the city, rental income, and other income on the credit side. Your<br />
expenses: automatic trade, salaries, maintenance costs, and other expenses (e.g. fees and<br />
charges).<br />
Storage Capacity<br />
Choose this option to find out how much storage space you are currently using, the size of your<br />
own storeroom, and the capacity you might have rented along with the price you pay for it. You<br />
can also extend your office here to accommodate larger quantities – because once you become<br />
a successful trader, you will soon reach the limits of your initial storeroom.<br />
45
Extending Your Trading Office<br />
The extension only concerns the storeroom of your office. There are three extension levels,<br />
adding between 50 and 200 bushels to the initial capacity. For every level, you get information<br />
about the construction time, the costs, and the required materials (if you aren’t using your own<br />
materials, you will be informed about the supplies of the city and the price you would have to<br />
pay).<br />
If you have placed an order for an extension, the dialog will close and you receive a confirmation<br />
– or a message informing you that you have already reached the maximum capacity.<br />
Personal Information<br />
At your office, you can also review personal information. Alongside trivial information, such as<br />
your name, birthplace, home town and age, this includes highly important information on your<br />
standing and the popularity of your wife or husband. His/her popularity is largely dependent on<br />
your skills as a trader and can vary between ‘extremely popular’ and ‘unknown’.<br />
Automatic Purchase<br />
Automatic purchase is a time-saving way of repeatedly trading with the city in the same way. The<br />
condition is that your trading office is managed by an administrator who will take care of this.<br />
The basic salary of an administrator amounts to 10 gold per day. Add one more gold coin for<br />
every additional building you own in the city.<br />
If you want to hire an administrator, click on the button at the very bottom of the window. If, after<br />
some time, you come to the conclusion that he’s hardly worth the hard-earned money you pay<br />
him, you can fire him in the same way.<br />
You can set a minimum amount you would always like to have in stock for each commodity. The<br />
administrator will then buy goods whenever necessary. In this way, you can secure the supply<br />
of raw materials for your businesses.<br />
The Offices of your Competitors<br />
All your competitors in the city manage their businesses from this building.<br />
It’s in the port area from the beginning and there’s nothing you can do about<br />
it.<br />
Click on it to find out who you’re dealing with. A list will appear, showing you<br />
the names of all the traders (human traders are indicated with a little man).<br />
A house indicates that this is the trader’s home town. You are also informed about the traders’<br />
reputations and the offices they are in.<br />
46
In multiplayer mode, you can make offers to your human contenders . You can offer them goods,<br />
ships that are at anchor here in the city (none that are part of convoys though), a bag full of gold,<br />
a business you run, or a residential building! You must then specify what you expect in return.<br />
Finally, send off your offer and wait for a reply.<br />
If you receive offers from other players, they will appear in the personal section of the news<br />
menu. (see chapter 7)<br />
The Shipyard<br />
The shipyard is another very important building. After all, it is the ships you<br />
build, repair or upgrade here that form the basis of your business.<br />
Click on it to open a picture of the shipyard in the main view. The selection<br />
window will display the shipyard’s current status as well as a set of options:<br />
Building Contract<br />
You can build four types of ships: snaikkas, crayers, cogs, and hulks. The type you choose<br />
depends not only on money, but on the materials you have in stock. Moreover, cogs and hulks<br />
are quite large and cannot sail on rivers, i.e. they can’t reach Novgorod, Thorn and Cologne.<br />
For every ship (turn the pages), there is a brief description and a list of materials required for<br />
c o n s t ruction. The construction time is also displayed. Once you have confirmed the<br />
construction of a certain ship, you will receive a message about the remaining construction time.<br />
Click OK to finalize the contract.<br />
Note: You cannot build hulks in the very beginning. This advanced type of ship can only be built<br />
by experienced shipyards that have previously built many other ships, i.e. the more building<br />
contracts you make, the earlier the hulk will be available.<br />
Repair Ship<br />
If this option is enabled, any of your damaged ships are in the port. Select the ships you want to<br />
repair.<br />
It is your choice whether you send your ships to the shipyard for repairs one at a time or all at<br />
once. However, they will be repaired one after the other. If you feel that the repairs take too long,<br />
you can send your ship away at any time. Just select your ship to cancel the repairs. A dialog<br />
will then appear asking you to confirm your decision. But don’t expect to get any of your<br />
materials back.<br />
47
Upgrade Ship<br />
You will soon find out that journeys to London or Riga are not always relaxing. Therefore, you<br />
should make sure that your ships can defend themselves. The shipyard offers a service to<br />
upgrade your ship so that more weapons can be placed on its deck. Note that an upgrade will<br />
convert storage space into weapon slots.<br />
Every ship can be upgraded twice, but keep in mind that it is going to lose a considerable part<br />
of its storage capacity. A snaikka with a capacity of 15-25 bushels, for instance, won’t accommodate<br />
more than 5-15 bushels after the second upgrade.<br />
The shipyard only works on the ship itself. You will have to buy the appropriate weapons from<br />
the weapon smith.<br />
List of Contracts<br />
The list of contracts will inform you about the status of the current orders. If necessary, you can<br />
remove one of the ships from the list. You will then get 90% of your money back but none of the<br />
materials. If, however, the shipyard has already started to work on the ship, there is no way out<br />
and you will have to wait till it’s finished.<br />
Note: You should place orders at the shipyard regularly. A shipyard that is booked out will hire<br />
new workers, reduce construction times, and therefore raise your standing. This, in turn, makes<br />
it easier for you to reach your goal of becoming mayor.<br />
Change Ship’s Name<br />
You can also rename ships that are at anchor at the shipyard. This service is free, and you don’t<br />
even have to wait until the paint is dry. You can sail on right away.<br />
The Harbourmaster<br />
Right at the harbor, there is a little building belonging to the harbormaster.<br />
He will gladly give you a list of all the ships that are currently at anchor in<br />
the port if you ask for it by clicking on his house.<br />
48
The Port Crane<br />
The port crane will open the trading window as soon as you click on it,<br />
provided that you either own a trading office or have selected one of your<br />
ships at anchor. If you have selected a ship, you can trade between your ship<br />
and the local market. Otherwise you can trade between your office and the<br />
market. (see chapter 9 for further information)<br />
The Tavern<br />
The tavern is not just a lively and cozy place to meet people and to spend a<br />
pleasurable evening with your friends. It is also the place where sinister folks<br />
hang out - characters you would rather not be seen with in the light of day.<br />
Nevertheless, some lucrative deals can be made in the tavern.<br />
Click on the tavern to enter it. The selection window will list the persons that<br />
are hanging around there. Not all the people mentioned here will always be present, but you will<br />
usually come across at least one of them. Just choose one of the guests and see what happens.<br />
The Mission Trader<br />
The trader’s name will appear on a button in the selection window – people like him aren’t the<br />
usual guests, for mission traders only appear when you are on a mission that involves a meeting<br />
with a certain trader. He will be available to you as a reference person until the mission is<br />
completed. The aim and purpose of the mission can always be found in your personal messages.<br />
The trader will be waiting for your delivery. If you click on his button, he will start a<br />
conversation. If your delivery is incomplete, he will tell you about the missing goods and remind<br />
you of the deadline.<br />
The Common Trader<br />
If you are not on a mission, you might come across one of your colleagues in the tavern. Most<br />
likely, he will offer you some merchandise that he couldn’t sell in the city, probably owing to an<br />
oversupply. It can be a bargain at times. If you are interested, accept his offer. You will then be<br />
asked where the goods should be transferred to (either your office or your ship). In case you<br />
have a ship only, the goods will be transferred there immediately.<br />
Sailors<br />
Of course sailors are among the habitués of every tavern. If the city is doing well, you are likely<br />
to meet them there every single day, sipping on a pint of beer.<br />
49
If you select this option, you will be told how many sailors are currently in the tavern and you<br />
will be asked how many of them you would like to hire. Needless to say, one of your ships has to<br />
be in the port. You also have to select the ship whose crew you want to strengthen – if there’s<br />
more than one at anchor.<br />
Select ‘Hire sailors’ to hire them. If you want to hire sailors for several ships, just repeat the<br />
process.<br />
Note:<br />
If your ship is totally overloaded, even sailors won’t have room. You cannot hire any sailors in<br />
this case.<br />
M o re o v e r, there is a maximum number of crew members for every ship which cannot be exceeded.<br />
The Captain<br />
A ship led by a captain can often come in handy, e.g. if you want to use the automatic trade<br />
feature. An orlogship can’t do without a captain either. In the tavern, you get the opportunity to<br />
hire a captain, possibly an experienced one who will help save traveling time and improve the<br />
manoeuvrability of your ships and the aim of your shots during sea battles.<br />
If there’s no captain in the tavern, just come back later. Once you’ve found a captain, click on the<br />
button to inquire about his capabilities. You will see a list of all the ships at anchor that do not<br />
yet have a captain. You have the option of hiring the captain for duty on one of them.<br />
If you’re looking for another captain, you could be out of luck. Another one probably won’t show<br />
up till the next day.<br />
The Weapons Dealer<br />
The weapons dealer is one of those dubious characters we mentioned earlier. He has a<br />
questionable reputation in the underworld and can apparently be met at the tavern. If you’re<br />
interested in some barely legal arms deals, just specify your ship or your trading office as the<br />
place of delivery! You can then buy or sell weapons just like you usually trade your goods. Then<br />
leave as quickly as possible, for if the police come around, your reputation in the city is down<br />
the drain! An expensive trial and large bribes will be lying ahead of you.<br />
Nevertheless, the purchase of weapons can be rewarding. Swords will drastically improve your<br />
chances of winning boarding battles.<br />
50
Pirates<br />
You would usually rather not meet these shady characters.<br />
And they are not typically talkative either – they prefer to let<br />
their cannons do the talking. But in the tavern, you can meet<br />
and – even worse – hire pirates!<br />
If you select this option, you will be told that a pirate captain<br />
and his followers are offering you their services – in return for<br />
profit sharing. You provide them with the ship for their<br />
adventures, which can be selected in the window. You then<br />
have to hand it over, and before you know it, the pirates will be<br />
gone along with your load and your former crew is sacked. On<br />
that day, no more pirates will show up in the tavern.<br />
The underlying idea behind such actions: Pirates you have hired will terrorize the designated<br />
area, which is bad for your competitors and might lead to their ultimate downfall. But this entire<br />
affair is not without risks: If the pirates are captured by your contenders and have to undergo a<br />
hearing, they probably won’t hesitate to name their sponsor, and your contender will<br />
immediately take you to court, which usually turns out to be expensive!<br />
Burglars<br />
You can hire burglars to break into the local offices of your competitors. They will destroy goods<br />
and valuables, as well as documents, and remove any traces of a crime. Not exactly impractical<br />
if you want to really upset an annoying contender.<br />
You won’t come across burglars every day, but still often enough to turn your sinister plans into<br />
reality. If you meet with a burglar and start a conversation, he will ask you which one of your<br />
competitors is going to be the target. Select one of them and the burglar will tell you his price –<br />
the more influential and richer the target, the more it will cost you. If you accept his offer, he will<br />
leave, promising to carry out the deed as soon as possible. He then leaves, and you are advised<br />
to do the same.<br />
51
Informants<br />
I n f o rmants are among the more educated and re s p e c t e d<br />
guests of the tavern. They have lots of useful information<br />
about the region at their disposal and of course they don’t call<br />
it out loud. But they will share it with you at a certain price.<br />
They are common guests in the tavern and can be met<br />
re g u l a r l y. Their names are well known and they off e r<br />
information you would usually receive several days later by<br />
means of the sea chart symbols.<br />
The informant can thus tell you about the acute needs or huge<br />
supplies of certain cities in advance. He might also tell you<br />
about famines, fires, epidemics, sieges, or the presence of<br />
pirates. However, if there is nothing of interest to report, the informant prefers to stay at home<br />
and you probably won’t meet him at the pub.<br />
If you select the informant from the menu, he will tell you the price for his piece of information.<br />
If you accept his offer, a message containing the information will appear in the personal section<br />
of the news menu.<br />
Travelers<br />
Travelers are rarely seen at the tavern, but if you do meet one<br />
of them, he’s probably in a hurry. He will usually pay a good<br />
price if you bring him to a distant city within a certain time<br />
limit. So if you accept his offer, be sure to stick to the deadline.<br />
Whenever you meet a traveler at the pub, he will tell you his<br />
name, his destination, the amount he’s willing to pay, and the<br />
closing date. You can accept his offer if you have a ship at<br />
anchor. He will then board the ship.<br />
You should try your best to bring him to his destination as<br />
soon as you can, because if your passenger has to wait too<br />
long, he won’t hesitate to leave your ship angrily and you can<br />
forget about your payment. One week is the maximum he is<br />
going to tolerate.<br />
52
A word of warning to all those who want to deal with pirates, burglars or weapon dealers: Always<br />
bear in mind that you are not the only ones in the tavern! Your competitors like to have a little<br />
refreshment once in a while, too. And you’ll get into an uncomfortable situation if one of them<br />
spots you chatting with criminals. Such scandals won’t soon be forgotten and judges generally<br />
react rather angrily.<br />
The Market Halls<br />
The market halls can always be found near the port. They regulate trade in<br />
the city and are responsible for supplying the population with their everyday<br />
needs. The market halls are among the buildings that can be entered: A view<br />
of the interior and a menu will be displayed.<br />
The menu allows you to study certain statistics: It thoroughly informs you<br />
about the stocks, the production, and the consumption of goods in the city.<br />
• ‘Stocks of goods’ will list the available quantity of each commodity and the prices for pur<br />
chase and sale.<br />
• ‘Production’ will list the city’s weekly production along with the current stocks.<br />
• ‘Consumption’ shows you how much the citizens and the city’s businesses consume every<br />
week as well as the total weekly consumption.<br />
Again, the current stocks are displayed as a reference.<br />
The Open Market<br />
Via the open market, you can announce a festivity to which all the<br />
citizens will be invited. You just have to make sure that enough<br />
goods (especially beer, corn, wine, fish and meat) are available in<br />
your trading office.<br />
The number of guests will depend upon your popularity and the<br />
amount of good food you are offering. It will be noted who comes<br />
to your festivity: The poor will seize any opportunity to eat as<br />
much as possible, while it takes large quantities of meat and wine<br />
for the rich to attend. If the members of a certain group have an exceptionally voracious<br />
appetite, this is a sign that they have not been doing too well lately.<br />
53
The Money Lender<br />
Banks as we know them today were nonexistent in the Middle Ages, but rich<br />
businessmen would often serve as lenders. But be careful, the interest rates<br />
were often rather high!<br />
There are six options in the lender’s house:<br />
Take up loan<br />
This option will offer you a maximum of five loans – with different conditions depending on the<br />
sum and the repayment period. Loans from lenders in all cities in which you either own an office<br />
or have ships at anchor will be displayed.<br />
Pay off loan<br />
Here you can repay a loan you have taken up earlier. When you click on this button, a list of all<br />
the loans you have taken up in all the cities will be displayed. If you either own an office in these<br />
cities or have a ship there, you can pay them off – completely or partially.<br />
Grant loan<br />
Since you are perhaps a successful merchant yourself, you too can grant loans. The lender will<br />
name up to five interested people and the sums they want to borrow over a certain period. If you<br />
decide to grant one of them a loan, you can specify the interest rate. Then wait for your future<br />
creditor to accept – or decline.<br />
Loans granted<br />
This will list all the loans you have granted: the creditors, the sums, and the repayment dates.<br />
Buy shares<br />
Clever traders will invest their hard-earned money in other businesses. The lender will gladly<br />
inform you about any investments you may make or have made thus far.<br />
Sell shares<br />
If you are low on funds, you could offer the lender shares of your own company instead of<br />
taking up further loans – or you could sell shares of other companies you have previously<br />
acquired.<br />
54
The Church<br />
Of course there is a church in every Hanseatic town. After all, traders were<br />
not only shrewd businessmen but also firm believers who feared hell more<br />
than anything. Enter the church to get the following options:<br />
Pray<br />
If you feel like praying, this is the place to do it.<br />
Feeding the poor<br />
Here you can show off your generosity and treat the poor to a feast they won’t soon forget.<br />
Naturally, such actions raise your standing. You can transfer goods from your office to the<br />
church after selecting this option. But don’t overdo it, or else the city will be flooded with<br />
beggars. The beggars will be most thankful, but the rich will be displeased.<br />
Donation<br />
God will thank you for anything you can spare! And so will the people – donations will raise your<br />
standing. The beauty of the church must be preserved, and perhaps even a few new paintings or<br />
sculptures could be added to create an even more captivating atmosphere. But the money must<br />
keep flowing, or else the church’s magnificence will soon fade away. If you would like to donate<br />
some money, just select the amount you can do without. It’s for a cause in any event.<br />
Extension<br />
The magnificence of a great church uplifts the living standard of the people. A generous<br />
donation will help extend the church (three levels are possible) and is thus welcomed by the<br />
people.<br />
If an extension is possible, you will be informed about the current state of funds (you are not the<br />
only one who is to sponsor the church). You can donate as much as you feel is appropriate. Then<br />
confirm your noble gesture.<br />
55
The Town Hall<br />
All towns in the game have a town hall. Depending on the type of town,<br />
different information is available there. The option to move your home<br />
office, for instance, is not available in Hanseatic branches.<br />
Your own status is important as well: While you are councillor, you can only<br />
inform yourself at the town hall, but as mayor, you’re sitting at the other side<br />
of the desk.<br />
The following options are available:<br />
Notice Board<br />
This is just like the notice board of the guild. It allows you to view all the missions that are<br />
currently available. If there are no missions to engage in, this option remains disabled. Only one<br />
mission will be visible at a time, but there can be up to five missions available. Use the<br />
plus/minus buttons to see them all.<br />
If you accept a mission, it will disappear from the list and you can accept the next one right away<br />
if you please. In some cases, the city will refuse to entrust you with the mission. Then you should<br />
reflect on your reputation, because you are obviously being regarded as untrustworthy.<br />
Coastal Patrol Vessels<br />
The name of the trader who currently provides the coastal patrol, which protects the city from<br />
any unwanted intruders, is displayed. If a patrol vessel is being sought, you might consider<br />
providing it yourself – an honorable but poorly paid responsibility.<br />
Move<br />
If you find that your hometown is no longer the place to be, possibly because your contenders<br />
have grown too strong, the town hall of your to-be hometown is where you can get the form a l i t i e s<br />
done. If a move is possible, you will be informed about the fees your previous hometown<br />
charges. Note that you must own a trading office in your future hometown – otherwise moving<br />
is impossible. Be careful: The fees for moving are rather high, especially if you have been<br />
successful in your former hometown, for they would rather have kept you as an important trader.<br />
Town information<br />
Inform yourself about the people that yet stand in your way. You will see:<br />
• the current mayor’s name<br />
• the date of the next elections<br />
• the names, ranks and reputations of all the candidates<br />
56
Hanseatic info<br />
Here you are informed about the political leadership of the Hanseatic League. The following can<br />
be looked into:<br />
• the name and hometown of the current Alderman<br />
• the date of the next Hanseatic League meeting, which includes the election of the Alderman<br />
• the names of a maximum of four nominees as well as their ranks, their reputation, and their<br />
hometowns<br />
• the date of the next extraordinary meeting and its topic (if planned)<br />
Conference room<br />
This is where meetings of the Hanseatic League take place. Therefore, this option is only available<br />
shortly before the meetings take place. Such meetings always take place in the town hall of<br />
the current Alderman’s hometown.<br />
Rathskeller<br />
The Rathskeller is a customary restaurant in the cellar of a town hall, where traditional food is<br />
served. Today’s menu will be shown if you choose this option. Those who are particular about<br />
their status will have lunch at the Rathskeller.<br />
The Guild<br />
Don’t mistake this for the traders’ guild, which every trader must be a<br />
member of to be able to do business. The guild in question here is a meetingplace,<br />
an association of rich patricians that has branches in every Hanseatic<br />
town. You do not necessarily have to be a member of this guild, but the<br />
advantages you get are considerable, e.g. the ability to take part in<br />
expeditions and auctions, and the respect that the guild’s members enjoy.<br />
But do think twice before you join the guild of every city, as that can get rather expensive. The<br />
entrance fees are lowest in your hometown, so a membership there is surely worthwhile. But to<br />
be elected Alderman, you will have to join the guild of the corresponding (the current<br />
Alderman’s??) city.<br />
Join<br />
If you are not yet a member, this option is enabled. Naturally, you will require a certain status<br />
before your membership is accepted. Once all the conditions are satisfied, you get to join the<br />
guild.<br />
57
Auctions<br />
This option allows you to inform yourself about upcoming auctions in all the Hanseatic towns. If<br />
you have at least one ship in the port (none of which are part of convoys), a list will appear,<br />
allowing you to offer one of them for auction. The ship you register will be removed from the<br />
port immediately, along with all the goods you have aboard and all its crew members.<br />
You can also participate in an auction. If you don’t want to forget the date, you should mark it to<br />
be reminded of the time.<br />
Note that you can only buy or offer a ship at an auction in cities in which you are a member of<br />
the guild.<br />
Auction Hall<br />
This option is enabled one day before the auction. If you want to participate, you must enter the<br />
hall before the auction begins.<br />
A dialog will inform you about the type, name, extension level and condition of all the ships.<br />
Below, you will see a picture of the ship as well as the current bid.<br />
If you decide to bid more, your name will appear next to the highest bid. If no other trader outbids<br />
you, the ship is yours. Just wait for verification.<br />
Convoys<br />
Here, you receive a list of all public convoys: It contains the name, the average armament of all<br />
the armed ships, the current position, the date of departure (if known), and the destination port<br />
of each convoy.<br />
Members<br />
If you are curious who else is a member of this guild, select this option. The members’<br />
reputation, the number of ships and trading offices they own and some other information are<br />
displayed.<br />
Trading Centers<br />
Even non-members can have a look at the discovery map, but they will hardly find anything of<br />
interest, as only the trading centres that they have discovered themselves will be shown.<br />
Members can see much more: All the trading centres that have been discovered by members of<br />
the guild will be shown.<br />
58
The Public Bath<br />
The public bath is a place of relaxation, of casual conversations. The hot<br />
steam will soothe its visitors – and obscure any remarks that weren’t<br />
intended for the public anyway.<br />
Have a bath<br />
Treat yourself to a bath once in while and just relax, listening to beautiful songs, and regain your<br />
strength.<br />
Talking to people<br />
The public bath is a common meeting-place for all businessmen. You will probably come across<br />
many important personalities in the bath – just look at the buttons in the selection window. If<br />
you want to smooth the progress of your political career or influence judicial decisions that<br />
might concern you, the support of some influential people might come in handy. Talk to these<br />
powerful individuals, for they all have one thing in common: They are usually open to bribery.<br />
Starting conversations<br />
Just click on the person’s button! The dialog that follows will tell you what the person is up to.<br />
If he is just delighted to have a relaxing bath, nobody has tried to bribe him yet. This might be<br />
your chance! If, however, he mentions your last meeting, he is probably still appalled by your<br />
previous offerings. If he mentions your competitors, he has already been bribed – you’re too late.<br />
If he reacts rudely, he was disappointed by a previous attempt of bribery and won’t be<br />
accepting any offers for now.<br />
Bribing<br />
If the person you met is currently open to bribery, you can specify the sum you would like to<br />
offer. Then choose ‘Bribe’ and wait for his reaction. If the sum is too small, he will be deeply<br />
offended and your reputation suffers. And he won’t be accepting any higher offers either.<br />
But how to choose the right sum? Well, it all depends on your reputation (the more respected<br />
you are, the more you’re going to have to spend) and the person’s status (the more influential,<br />
the higher the sum has to be). If the person has previously been bribed by one of your<br />
competitors, you will have to offer him twice the amount.<br />
59
Bribing pays – but only for a short period of time. Once the affair (e.g. an election or a trial) is<br />
over, the person you bribed won’t recall anything at all. Moreover, you can only bribe two<br />
people in each town.<br />
Legal Arms Dealing – the Weapon Smith<br />
There is a weapon smith in every town. You can legally acquire all sorts of<br />
weapons for your ships there, but you must own a trading office in town,<br />
because all the weapons you buy will be transferred there. Those who don’t<br />
have an office will have to settle for an overview of the weapons that are<br />
produced.<br />
Local dealers can buy six types of weapons: the cheapest are the small catapult and the small<br />
ballista. Then there’s the large ballista, the large catapult, the mortar (Bombarde) and finally the<br />
cannon, the largest and most powerful weapon money can buy.<br />
The quantities show you how many weapons are in stock and how many you already have at<br />
your office. The number of weapons a smith produces depends on the size of the city. If you visit<br />
different smiths, you will notice that not all of them produce all six weapons, because the<br />
product range depends on the occupancy rate of the city’s shipyard. Only shipyards that are<br />
booked out will guarantee that the weapon smith supplies everything you possibly desire.<br />
Use the buttons to buy or sell weapons! Note that weapons can only be bought or sold one by<br />
one – trade on a large scale is not allowed for such delicate products.<br />
Military Buildings and Objects<br />
To be able to build or access the following buildings, you must have attained a considerable<br />
position in your hometown – only as the mayor do you have permission to deal with the<br />
arsenal, watchtowers, or the city walls.<br />
The Arsenal<br />
The right to build an arsenal is reserved for the city, but of course it long<br />
existed when you commenced your life as a trader. For quite some time, the<br />
arsenal will remain the most uninteresting building of the city. Only when<br />
you become mayor, you will be responsible for your city’s defence. You can<br />
then train guards and archers at the arsenal.<br />
60
When you click on the arsenal, a window listing the different kinds of weapons, the number of<br />
guards in service, and the number of guards being trained and the respective costs involved will<br />
appear. As soon as you select one kind of weapon, two buttons will be enabled below:<br />
Form unit<br />
For every new unit, you require five workers, who, along with their families, are equivalent to 20<br />
beggars. If you don’t have enough of them in town, a message will appear and you should<br />
immediately attempt to improve the quality of life in your city. The new unit will have to be<br />
trained for one week before it begins to serve the city. Note that only one unit can be trained at<br />
a time. Furthermore, the number of militias is limited. After all, you’re the mayor of a Hanseatic<br />
town and not the emperor of the Holy Roman Empire. Depending on the size of your city, a<br />
maximum of 10, 20 or 40 militias is possible.<br />
Every unit requires five weapons, which can be obtained from the weapon smith. For once you<br />
don’t have to buy them yourself. The city will pay. But if the smith doesn’t have enough weapons<br />
in stock, you will have to supply them (from your ship or storeroom).<br />
Dismiss unit<br />
First select the corresponding line of the unit and then choose ‘Dismiss unit’. A unit that is<br />
currently training will then be dismissed, and if none are training, a unit that is already in<br />
service will be dismissed.<br />
Wages costs<br />
Security is expensive, and it is the mayor who has to pay the weekly wages of the city guards. At<br />
the end of the month, you will be reminded of the amount you have to pay – even if you’ve only<br />
just become mayor.<br />
Military Buildings (Construction Menu)<br />
Watchtowers<br />
Watchtowers/defence towers will either be placed in designated areas near<br />
the port or to the left and right of the town gates. A city can have up to nine<br />
watchtowers with one guard each. If there’s no one guarding a watchtower,<br />
it is useless. Watchtowers exist in two extension stages. They have a longer<br />
firing range than ships and twice the firing rate.<br />
61
City walls<br />
Every city has city walls right from the beginning. However, as the city grows<br />
bigger and bigger, you will have to put up your buildings in the unprotected<br />
area outside the city walls. At some point, a reconstruction should be taken<br />
into consideration.<br />
Ordering the reconstruction of the city walls<br />
As mayor you can order the reconstruction of the city walls. The enormous costs will be paid<br />
proportionally by the various traders and the city. The construction will be carried out in<br />
several stages, as such large projects cannot be completed in one go.<br />
Click on the city walls icon in the construction menu and specify the future size of the walls. Now<br />
an outline of the new city walls will be displayed. If you can afford it, order the extension and a<br />
new section of the city walls will be built. The old city walls will not be destroyed until the new<br />
ones are completed. Eventually, new building estate will be obtained.<br />
Click on the city walls if you want to be informed of the city’s defence status, the number of<br />
watchtowers, and the number of soldiers on duty.<br />
Contributing to the reconstruction<br />
If you are not the builder-owner, you will receive a bill from the city upon completion. The share<br />
you have to pay depends on the degree to which you benefit from the new city walls: The more<br />
buildings of yours are protected by the new city walls, the more you have to pay.<br />
City Buildings (Construction Menu)<br />
Residential buildings<br />
You have the right to build residential buildings, but only within the city<br />
walls. You should always make sure that there is enough living space in your<br />
hometown for all of the social strata. There are three types of buildings<br />
(half-timbered houses, gabled houses and merchant’s houses), with two<br />
extension levels each. The construction of residential buildings will reduce<br />
housing shortage and improve your financial situation – regular rental<br />
income is not to be neglected.<br />
62
Businesses<br />
Except for weapons and spices, all goods can be produced by your own businesses. However,<br />
you can only put up a business in a certain city if you own a trading office there. The game<br />
differentiates between two groups of businesses: businesses that produce raw materials, and<br />
businesses that process raw materials in order to produce more refined goods (finishing). You<br />
will find all sorts of businesses in this menu, ranging from apicultures to workshops.<br />
Not all businesses can be built in every city, as some require special grounds (mines) or must be<br />
built close to the shore (fisherm a n ’s house); others depend on certain geographic<br />
c i rcumstances. Still, the construction of businesses makes you independent from price<br />
fluctuations; you create jobs, boost the economy of your hometown and earn money. Of course<br />
you also have to deal with higher expenses (wages, taxes, raw materials, etc.).<br />
A left click on one of your businesses will display information on all your businesses of that same<br />
type: the number of employees (current/maximum), the total production, the total consumption,<br />
the occupancy rate, and the total costs (all weekly). The two buttons allow you to increase or<br />
decrease the occupancy of your businesses.<br />
You can also legally spy on the competition’s businesses: A left click on a business belonging to<br />
the competition will inform you about the business’ status (running/ inoperative) and the total<br />
number of businesses of this type.<br />
Businesses a Trader can build<br />
The running costs are the weekly costs for businesses that are fully occupied. An empty<br />
business will cost 280 gold per week. Note that all businesses that depend on cultivation (corn,<br />
hemp, honey and wine) produce less during winter (December, January, February).<br />
Apiculture<br />
production/day:<br />
2 barrels of honey<br />
consumption/day: -<br />
workers: 30<br />
running costs: 1680<br />
64
Brewery<br />
production/day:<br />
consumption/day:<br />
workers: 30<br />
running costs: 1820<br />
?? barrels of beer<br />
1/5 bushel of corn,<br />
1/15 bushel of wood<br />
Brickworks<br />
production/day:<br />
1 bushel of tiles<br />
consumption/day:<br />
1/2 bushel of timber<br />
workers: 5<br />
running costs: 420<br />
Farm (Corn)<br />
production/day:<br />
1 bushel of corn<br />
consumption/day: -<br />
workers: 30<br />
running costs: 840<br />
Farm (Cattle)<br />
production/day:<br />
consumption/day:<br />
workers: 30<br />
running costs: 3640<br />
1/4 bushel of meat, 1 barrel of skins<br />
1 barrel of salt,<br />
1/100 bushel of timber<br />
Farm (Hemp)<br />
production/day:<br />
1/4 bushel of hemp<br />
consumption/day: -<br />
workers: 30<br />
running costs: 840<br />
65
Farm (Sheep)<br />
production/day:<br />
1/2 bushel of wool<br />
consumption/day: -<br />
workers: 30<br />
running costs: 3360<br />
Fisherman’s House (fish only)<br />
production/day:<br />
consumption/day:<br />
workers: 30<br />
running costs: 2870<br />
1 bushel of fish<br />
1/10 bushel of hemp,<br />
2 barrels of salt<br />
Fisherman’s House (fish + train oil – only if whales are nearby)<br />
production/day:<br />
1 bushel of fish, 4 barrels of train oil<br />
consumption/day:<br />
1/10 bushel of hemp,<br />
2 barrels of salt<br />
workers: 30<br />
running costs: 4620<br />
Forge (passend?)<br />
production/day:<br />
1 barrel of pitch<br />
consumption/day:<br />
1/10 bushel of timber<br />
workers: 5<br />
running costs: 315<br />
Hunting Lodge<br />
production/day:<br />
1 barrel of furs<br />
consumption/day:<br />
1/100 bushel of hemp, 1/10 barrel of<br />
iron goods<br />
workers: 30<br />
running costs: 5040<br />
66
Iron Smelting<br />
production/day:<br />
1/2 bushel of pig iron<br />
consumption/day: -<br />
workers: 30<br />
running costs: 3360<br />
Pottery<br />
production/day:<br />
2 barrels of pottery<br />
consumption/day:<br />
1/10 bushel of timber<br />
workers: 30<br />
running costs: 2520<br />
Salt Maker<br />
production/day:<br />
5 barrels of salt<br />
consumption/day:<br />
1/3 bushel of timber<br />
workers: 30<br />
running costs: 1120<br />
Sawmill<br />
production/day:<br />
2 bushels of timber<br />
consumption/day: -<br />
workers: 30<br />
running costs: 840<br />
Vineyard<br />
production/day:<br />
2 barrels of wine<br />
consumption/day: -<br />
workers: 30<br />
running costs: 3360<br />
67
Weaving Mill<br />
production/day:<br />
3 barrels of cloth<br />
consumption/day:<br />
1/4 bushel of wool<br />
workers: 30<br />
running costs: 3360<br />
Workshop<br />
production/day:<br />
consumption/day:<br />
workers: 30<br />
running costs: 3430<br />
3 barrels of iron goods<br />
1/3 bushel of timber,<br />
1/3 bushel of pig iron<br />
Career and Politics – A Trader’s Life<br />
Successful traders can not be identified solely by their balance sheets. Those who aim only for<br />
maximized profits and largely ignore their reputation will soon find that their career stagnates.<br />
If you want to really influence the Hanseatic League, you must have a deeply rooted social<br />
conscience, care about your reputation, and show some political dedication.<br />
The Strenuous Struggle for Advancement & Recognition<br />
Striving for recognition is just as important as finding the best places for buying and selling<br />
goods. However, you must always be aware of the fact that whatever you do will be evaluated<br />
differently by the three social strata.<br />
Social Recognition and Status<br />
Actions you take for the benefit of the people (feeding the poor for instance) will raise your<br />
social recognition. You will become a valued benefactor. Actions intended to better your<br />
monetary situation and that directly affect your social standing, e.g. great, lucrative deals or<br />
victories in sea battles, will raise your status, and you will become respected in the best circles.<br />
Your social recognition and your status should always be on par with each other. Although a<br />
trader belongs to the upper class, he should never forget that he depends upon the votes and<br />
opinions of all the people as mayor.<br />
68
However, good deeds are short-lived. Even the most noble gesture won’t be remembered<br />
forever: In hard times – during sieges, blockades, famines or epidemics – your kindness will soon<br />
be forgotten. However, a faux pas, wrong decisions or crimes will be remembered for much<br />
longer. The people are unforgiving.<br />
Local and Global Recognition<br />
Usually, good deeds, and therefore your recognition, remain local – a donation to Novgorod’s<br />
church will not even be noticed in Cologne. Some actions, however, will influence your standing<br />
throughout northern Europe, e.g. if you spend your free time as a merciless pirate. Make sure<br />
you enjoy the best standing possible in your hometown, or else you will have to wait till<br />
kingdom come to be elected mayor.<br />
Meeting the Demand for Goods<br />
To gain a lot of recognition within a fairly short period of time, you must try to meet a city’s<br />
demand. The regular satisfaction of consumer needs (which will vary according to the class) is<br />
always effective. Don’t try to cheat: If the need is 10 bushels and you supply the city with 5<br />
bushels twice, you won’t be rewarded twice. And don’t ruin your newly acquired standing with<br />
subsequent actions: Do not buy up rare goods or else the people will react most irritably and<br />
your standing suffers.<br />
Certain events can have a positive impact on your standing: If you manage to supply a city<br />
suffering from famine with corn, fish or meat, your standing will improve twice as much as usual.<br />
Moreover, during boycotts, sieges, epidemics and fires, the people will gratefully accept<br />
anything they can get, and the merchant who anchors in times of trouble will be celebrated.<br />
What else you can do…<br />
Meeting the demands of the people is certainly not the only way to raise your standing. The<br />
construction of wells, for instance, is gratefully accepted by the people. The same applies to the<br />
construction of hospitals, the improvement of roads (an epidemic counter-measure), and the<br />
aforementioned donations to the church. Your standing also rises with the number of people you<br />
employ in your businesses. Moreover, the number of commissions you regularly issue at the<br />
shipyard, the capacity of your ships, your sheer wealth and your willingness to provide needy<br />
people with loans also affect your standing. The friendliness of your family (more on this subject<br />
later), your membership at the guild, your discoveries during expeditions, the number of coastal<br />
patrol vessels you provide, and your accuracy and effectiveness in fights against pirates<br />
influence your standing as well.<br />
69
Additionally, you should try to fulfil a mission for the town of your choice once in a while. The<br />
town hall’s notice board will inform you about all the missions available. Make sure you<br />
complete all the missions you engage in. Once you are known to be unreliable, you can forget<br />
about further missions for some time. Your standing also suffers.<br />
By the way: The recognition you acquired is easily lost – disastrous festivals, high interest rates,<br />
pulled down businesses, delinquencies (instigation of burglary for instance) or failed bribery –<br />
those who are stingy at the wrong time will be punished.<br />
The Charismatic Trader<br />
Well, it’s not quite true that you cannot ‘cheat’ at all when it comes to gaining recognition. You<br />
have the possibility of adjusting the difficulty level to make life easier for you. (see chapter 6)<br />
A Good Reputation<br />
No matter what you do or who you deal with – nothing remains unnoticed. The slightest faux pas<br />
will be remembered by the competition or at least by the underworld, even harmless feasts<br />
among thieves or pirates. The word is quickly spread; the world of the Hanseatic League is small<br />
after all.<br />
Reliability<br />
Make sure you are regarded as reliable. Always fulfil your missions conscientiously, because if<br />
you don’t, further missions will soon be refused. And if you repeatedly find no one to join your<br />
public convoys, this could be a consequence of your bad reputation – perhaps because you’ve<br />
abandoned your last convoy or been attacked by pirates. Disasters like that get around quickly.<br />
Illegal actions or piracy also impair your reliability – provided that you have been caught, of<br />
course.<br />
Your Public Reputation<br />
Apart from your reliability, which you cannot really check anywhere, you also enjoy a public<br />
reputation by which you are permanently judged throughout the Hanseatic League. Your<br />
reputation is always named in one breath along with your name and represents the overall<br />
nature of your previous actions. If you are rather reserved and careful, you might be evaluated<br />
as inexperienced, nice, capable, experienced, successful, clever, sophisticated, or simply as<br />
unbelievable. If, however, you are a boisterous old warhorse who hardly ever hesitates, you<br />
could be considered as inexperienced, impetuous, brave, daring, courageous, aggressive,<br />
ruthless or even dangerous.<br />
70
Your reputation has little to do with your standing. Nevertheless, councillors are sometimes<br />
blinded by your reputation when voting – if you are present at the meeting. The more extreme<br />
your reputation, the more respect people will have for you.<br />
Your Reputation in the Underworld<br />
Your reputation among the common people or the upper classes can be as good as it may be;<br />
once you are involved with pirates or thieves, you get an entirely different reputation in the<br />
underworld. It does not matter whether these contacts become known to the public – thieves<br />
have their very own ways of spreading the news. A ‘good’ reputation (through recurring dubious<br />
contacts) in the underworld can be quite helpful: The probability of meeting one of the<br />
underworld’s representatives rises, and under some circumstances, your ships will be totally<br />
spared during pirate attacks.<br />
Those who care for a good reputation in the underworld should refrain from pirate hunts and<br />
provide no coastal patrols whatsoever: The underworld tends to get very upset when a pirate<br />
ship is sunk!<br />
Steps of a Career<br />
The degree of recognition in your hometown is the decisive factor for the rank you occupy in the<br />
Hanseatic League’s hierarchy. If you neglect the affairs of your hometown, you will forever<br />
remain a small shopkeeper, no matter how highly people think of you elsewhere. In such cases,<br />
you might want to take a move into consideration (see chapter 10, The Town Hall). A move is not<br />
exactly cheap, but it can help you attain the status you deserve.<br />
Small Shopkeeper<br />
This is the lowest level. You are a young, inexperienced, and largely unknown trader.<br />
Trader<br />
A former small shopkeeper who has acquired some wealth and is somewhat recognized in his<br />
hometown.<br />
Merchant<br />
A merchant is a noble character – an exceptionally wealthy trader who could long have become<br />
councillor or even patrician, if only he had joined the guild. Yet for some reason he refuses to do<br />
so. Others may have wanted to become a member but couldn’t join due to a criminal past.<br />
Nevertheless, the merchant has certain privileges: He can accept missions in any city, provide<br />
71
coastal patrol vessels, and he can contribute his share to the development of a city’s<br />
infrastructure, i.e. he can build wells, paved roads (oder gibt’s wirklich Straßengräben?) and<br />
hospitals.<br />
Long Distance Merchant<br />
The long distance merchant has no reservations about the guild – to the contrary: He is an<br />
honored member and uses the guild to exchange experiences and to make agreements with<br />
fellow traders. A long distance trader has a considerable fortune, which is evident from the fact<br />
that he pays the guild’s membership fee without batting an eyelid. He can expect to be highly<br />
esteemed in society and enjoys further privileges that will come in handy in the future; for<br />
instance, the right to improve the city’s infrastructure and the right to form convoys. He may<br />
also provide coastal patrol vessels and accept missions in every town, and can be elected<br />
member of his hometown’s council. Perhaps the most enjoyable privilege is the right to examine<br />
his competitors’ documents – he may inform himself about the riches of all the members of the<br />
guild.<br />
Councillor<br />
As councillor one has influence on the town council’s decisions. To become councillor, one must<br />
be well-known and respected among the common people (social recognition) and among the<br />
rich (status).<br />
Patrician<br />
You’ve made it! Patricians are among the most influential citizens of your hometown and enjoy<br />
high social recognition. Another noteworthy point is that patricians are usually incredibly rich.<br />
As patrician, you can afford not to talk about money anymore.<br />
Mayor<br />
Once you have a attained a very high standing, you can try to be elected mayor of your<br />
hometown. As mayor, you depend on the goodwill of the upper class as well as the common<br />
people. Therefore, your social recognition again plays an important role. The mayor must devote<br />
himself to public interest, not to the interests of a minority. He has great influence on the town<br />
council, can make proposals of any kind, and can decide to extend the city walls or build<br />
watchtowers at any time (asking others to pay for it).<br />
72
The mayor must spend the taxes the city receives wisely. The income is for the benefit of the<br />
city, so that watchtowers can be built and soldiers can be paid. Your main objective will be to<br />
strengthen the economy of your city while offering the maximum possible security.<br />
Being mayor makes you a prominent member of the Hanseatic League. You are known far beyond<br />
the boundaries of your hometown. This might strengthen your ego, but there are certain<br />
disadvantages, for your doings will be critically evaluated by all the influential members of the<br />
League. To gain recognition, you must attack pirates more fiercely at times and perhaps<br />
selflessly protect and support other towns.<br />
Alderman<br />
Alderman is the highest position attainable, as the Alderman is the president of the Hanseatic<br />
League. You may only become a nominee if you are the mayor of your hometown. But there are<br />
additional conditions: You must enjoy the highest possible social recognition in at least five<br />
Hanseatic towns / Hanseatic offices.<br />
Historically, the mayor of Lubeck automatically attained the position of Alderman. In ‘Patrician<br />
II’, however, you get the chance to be elected Alderman no matter what town you rule over<br />
– provided that you deserve it.<br />
Losing an Office<br />
As a trader, you should fear bankruptcy but never social descent. Once you become a patrician,<br />
you will never again lose that status. However, this does not apply to offices (mayor or<br />
Alderman). You can expect to be voted out of office at any time. But have no fear, for politicians<br />
fall softly. A former mayor will become a simple patrician who can live a life of luxury and<br />
self-centeredness once again. Of course, you can run for office again if you want to, provided that<br />
your situation allows it.<br />
An Alderman who is voted out of office still bears the title of mayor. Should the people no longer<br />
want you as mayor, this initially has no impact on your status as Alderman. Only if you lose your<br />
second office, too, will you have to get used to a life without substantial political power.<br />
Founding a Family<br />
In the beginning, you are young, unmarried and full of energy. You have other things in mind than<br />
your private life, because after all, you want to have success. And your quest leaves little time<br />
for serious relationships.<br />
73
As soon as you become more successful, you will increasingly receive strange and slightly<br />
obtrusive personal letters from marriage brokers and worried fathers that want to find a<br />
husband for their daughters.<br />
Letters of Proposal<br />
A marriage broker will offer you a bride/groom, with detailed information<br />
about her/his standing and the dowry she/he brings in. But don’t think you<br />
can improve your own position with a good match, for you won’t receive any<br />
proposals until you reach a certain standing and wealth – and the higher<br />
your status, the higher the dowry will be. Your underworld recognition<br />
should not be underestimated. If your situation is respectable, you will be<br />
flooded with proposals, and you can only put an end to this annoying<br />
situation if you get married…<br />
The first enquiry<br />
You will receive a personal letter from a marriage broker, in which he introduces himself and<br />
names his fee for a successful arrangement. Carefully consider his proposals. Beside the<br />
qualities of your future wife or husband, he/she also has an influence on your reputation and<br />
therefore your chances of succeeding – possibly a negative influence if you’re out of luck. If you<br />
accept the offer, you will receive a second letter within a few days’ time.<br />
The second enquiry<br />
The second letter gets a lot more concrete. It is more like a marriage ad, which contains a<br />
picture of the bride/groom, the name, and some other information.<br />
Once you have received the message, you can agree to the proposal. You don’t have to decide<br />
right away – such decisions are to be made with care. You have five days’ time to reply. If you<br />
don’t reply, this will be regarded as a refusal due to a lack of interest.<br />
If you agree, the date of your wedding will be displayed and again, you get some time. After all,<br />
there are preparations to be made for a lavish celebration.<br />
The Wedding<br />
Your wedding day should be well prepared. A wedding is a highly important social event and<br />
your guests (their number will vary according to the size of the city, your standing, and the food<br />
you supply) are ready for a feast. So make sure you store enough corn, fish, meat, wine, beer and<br />
honey in advance. The success of the celebration (and the recognition you gain) will depend on<br />
whether your guests have all eaten their fill.<br />
74
The next day you will be informed of the number of guests and the success of the celebration.<br />
Since you are a whole-hearted trader, you will also want to find out the names of any ships your<br />
partner brought along. Such good news will hopefully make you recover from your hangover a<br />
little more quickly.<br />
Politics and Diplomacy<br />
You will have to deal with a number of political events during your career, which will influence<br />
business as well as your recognition. There are three different fields of politics to keep an eye<br />
on: your hometown’s measures, the Hanseatic League’s politics, and the actions of cities that are<br />
not part of the Hanseatic League.<br />
You have the most influence on decisions made by your hometown, as you have a vote in all<br />
decisions of the council. If you are at least councillor or mayor, you can also influence the<br />
serious political decisions made at Hanseatic League meetings. However, there are no means to<br />
affect political decisions in cities outside the Hanseatic League; all you can do is decide on<br />
counter-measures in case they are necessary.<br />
Voting takes place at the town hall (Hanseatic League meetings are held in the Alderman’s town<br />
hall). All meetings are accessible to you, provided that your rank is high enough. In any event,<br />
you will be notified of any results or decisions.<br />
A Mayor’s Political Power<br />
Hanseatic towns never make decisions autonomously. It is the mayor’s duty to guarantee<br />
prosperity by striving for his own success. The attained prosperity must be secured by<br />
investing in city defence. When the game starts, your hometown is being led by a mayor, and<br />
three highly respected candidates will already be nominated for the next elections.<br />
Elections<br />
All the citizens of your hometown are allowed to vote. You will<br />
receive the official results of an election as a message (which you<br />
can view using the news menu). You cannot watch the election<br />
itself, for it is secret. The term of office is one year, then new<br />
elections are held. Four candidates can compete, namely the<br />
citizens with the highest recognition in the entire town.<br />
Recognition among all the social strata is decisive for winning the<br />
elections – if all candidates play by the rules. Even if your stats are<br />
75
the worst, you need not give up. There are certain ways to get around a handicap like that… We<br />
will get to that later in this chapter.<br />
The Highest Committee – Hanseatic League Meetings<br />
Regular and extraordinary meetings<br />
Usually, the Hanseatic League meets once a year, namely when the election of the president, the<br />
Alderman, is on the agenda. These regular meetings will take place in the town hall of the<br />
current Alderman. The date of the following year’s meeting will be fixed during these meetings.<br />
On some occasions, the Hanseatic League will call for an extraordinary meeting – especially<br />
when the trading interests of the league are at stake. Such meetings could end with a boycott<br />
against disorderly cities. If extraordinary meetings overlap regular ones, the election of the<br />
Alderman could be postponed.<br />
The Participants<br />
Different numbers of councillors and mayors from the different cities will participate in these<br />
meetings.<br />
You can take part as soon as you are at least councillor. If other human players take part in the<br />
game, the number of computer participants is reduced appropriately.<br />
If you want to participate, go to the conference room of the town hall in the morning.<br />
The Process of Voting<br />
In the selection window, the topic of the voting and the various options will be displayed. Choose<br />
one of the alternatives and then select ‘cast vote’. Note that your vote counts differently<br />
according to your rank: As a councillor, you have a single vote, a mayor’s vote counts as two<br />
votes, and the Alderman’s vote counts as three.<br />
The Election of the Alderman<br />
There are four candidates: The current Alderman and three others, sorted according to their<br />
standing. Of course the most respected candidate is usually favored. The participants cast their<br />
votes. Then comes the moment of suspense: The winning candidate who received the most<br />
votes is announced.<br />
Trading Boycotts<br />
If an application for a trading boycott is on the agenda of an extraordinary meeting, the<br />
participants will have to vote on it.<br />
76
If a majority is in favor of the boycott, two traders will have to provide one of their ships to help<br />
carry out the boycott. The Alderman is always one of them.<br />
If you are the second one, you will receive a letter from the Alderman instructing you to send<br />
one of your two most efficiently armed ships to a specific destination port within seven days. Be<br />
punctual – or lose recognition in every town.<br />
Once both ships reach the harbor, they will be positioned in the center of the basin and you will<br />
no longer be able to control your ship.<br />
The boycott will not be ended until the rebellious city gives in. But the two ships will be<br />
patrolling for at least five days, as this is the minimum duration of a boycott. While it lasts, no<br />
traders are allowed to trade with the city – not even between the office and the city. Goods can<br />
only be transferred between your ships and your trading office. All computer traders will stick<br />
to the boycott – and so should you. Any traders who violate the boycott will be taken to court.<br />
And such law suits can be expensive.<br />
The Methods of Cities that don’t belong to the Hanseatic League<br />
The eight cities that are not part of the Hanseatic League can get quite annoying when they see<br />
their interests at stake:<br />
Export Duty<br />
A city can demand export duty for goods that are produced in the city. The price of these goods<br />
consequently rises by 15%. Not even the highest profit margins would withstand that. Export<br />
duty is applicable to the following goods: meat, honey, furs, iron goods, wool, and pottery.<br />
Such a measure will last for at least 21 days and can last for as long as 67 days. But cities that<br />
revert to such methods will soon be faced with a trading boycott initiated by an extraordinary<br />
meeting of the Hanseatic League.<br />
Traders on Trial<br />
You might end up in court earlier than you think – if you commit a crime and are careless enough<br />
to get caught (e.g. if you talk too loudly at the pub). But even if you don’t feel responsible in any<br />
way, you could still be taken to court. The trial always takes place in your hometown – perhaps<br />
that’s an advantage, perhaps not.<br />
77
The Trial<br />
The Charge<br />
No matter where you are, the prosecutor will find you. An official letter will inform you why legal<br />
proceedings have been instituted against you.<br />
The Verdict<br />
After one or two weeks, a verdict will be reached – you don’t have to be present in court. If you<br />
have not taken any actions previously, you probably won’t avoid some form of punishment. A<br />
conviction always means an entry in the public chronicle – a kind of pillory…<br />
Guilt and Redemption<br />
You could be charged if you have been involved in any of the following:<br />
Contact with Criminals<br />
Those who fraternize with criminals like arms dealers, burglars or pirates are risking a charge if<br />
they are spotted by honest citizens. The price you pay for losing your innocence: a small fine<br />
and a loss of recognition in the cities involved.<br />
Ignoring a Boycott<br />
Ignoring boycotts of the Hanseatic League can be expensive. If you are convicted, expect a medium<br />
fine and a loss of recognition in every town.<br />
Piracy<br />
If you secretly act as a pirate, don’t expect to get away with it. A high fine will have to be paid<br />
and the word of your wrongdoing will spread throughout the Hanseatic League.<br />
Hired Burglar is caught<br />
If a burglar you hired is caught, he will probably squeal. Being the initiator, you will have to pay<br />
a high fine and bear a loss of recognition in the city where the crime was committed and in your<br />
hometown.<br />
Hired Pirate is caught<br />
The same applies to pirates you hired. You will lose your reputation as an honorable man and<br />
lots of money.<br />
78
False Accusations<br />
Life isn’t fair! You can be accused of a crime even though you’ve always been respectable and<br />
have never had contact with any dubious criminals. Especially as a rich, decent trader, you are<br />
often confronted with ridiculous accusations.<br />
In case you are convicted, expect a moderate sentence: Only between 0.2 and 0.8% of your<br />
money will be taken away – it seems that the judges aren’t totally convinced. The same applies<br />
to the population, for your recognition remains the same.<br />
Bribery<br />
If you do not mind a little distress and a few unpleasant surprises, you can calmly await political<br />
and judicial decisions. Dynamic people, however, prefer to tempt their fate. If you meet the right<br />
people at the right time and have some gold coins to spare, you can avoid some difficult<br />
situations: Go to the public bath of the town in question and bribe some influential people!<br />
Elections and decisions might be going your way.<br />
As you know from the previous chapter, only two people can be bribed effectively per town.<br />
Addressing others is a waste of time and money.<br />
Influencing a Voting<br />
If you have bribed someone successfully, he will vote in your favor. During the voting, he will wait<br />
five seconds for you to cast your vote and then vote for the same. If you wait too long, he will<br />
vote freely (and unpredictably).<br />
When the mayor is being elected, every successful bribery will give you 20% of the rich people’s<br />
votes, which can be enough to make the elections turn out your way.<br />
Influencing Trials<br />
The verdict is determined by four votes: the prosecutor and the two judges have one vote each;<br />
the actual evidence determines the fourth vote. After all, a judge is only human and thus<br />
receptive to financial support. However, a verdict of not guilty is only certain if you bribe both<br />
judges.<br />
Once the trial or voting is over, the bribe is no longer effective and the respective people will<br />
behave as if you’d never met them.<br />
79
Battles and Conflicts<br />
Pirates are out for your ships’ precious loads, jealous competitors<br />
begrudge your success, rebellious cities oppose the Hanseatic<br />
League, power-hungry royals besiege cities – the world is full of<br />
contempt. Even if you are always noble and simply want to trade in<br />
peace, you can never be safe from such actions and will have to<br />
defend yourself.<br />
Sea Battles<br />
Sea battles are a very common form of confrontation. They will occur whenever enemy ships (at<br />
least one of them must have raised the Jolly Roger) attack your ships – either on the high seas<br />
or in a port. You don’t have to wait until you are attacked. If you are patrolling or acting as a<br />
pirate, don’t hesitate to open fire.<br />
The Preparations<br />
Upgrading<br />
You should upgrade your ships at the shipyard of your choice, preferably your hometown’s<br />
shipyard (see chapter 8). This will not only increase the number of weapon slots but also the<br />
stability of your ships. Every ship can be upgraded twice. There is a drawback though, for<br />
upgrading reduces storage space.<br />
Purchasing Weapons<br />
The necessary weapons can be obtained from the weapon smith. Use the deck menu of your ship<br />
to inform yourself about the number of ballista, cannons or catapults you require. Then order<br />
them at the weapon smith’s.<br />
However, you will only get weapons for your ships from the weapon smith. Swords to equip your<br />
crew, which are desirable when boarding enemy ships, can only be obtained from the arms<br />
dealer at the tavern (see chapter 8). Note that buying weapons from an arms dealer is not always<br />
considered illegal. In times of trouble, especially during sieges, the authorities won’t mind if you<br />
buy some arms (ostensibly to protect the city).<br />
80
Swords that are stored in your ships can be assigned to your crew members using the ‘Crew’<br />
option from the ship menu. You cannot use more weapons than you have crew members aboard<br />
the ship.<br />
Identifying the Enemy<br />
The Sight Radius<br />
Your ships can only sight ships that are within a certain radius. Beyond that radius, all ships<br />
disappear in the fog. But you don’t necessarily see all the ships within reach, sometimes you<br />
miss one of them. If you move using the slow patrol mode, your chances of spotting enemy ships<br />
are higher.<br />
Note: Pirates always patrol, unless they’re after a certain ship. So your chances of fleeing are not<br />
too bad.<br />
The Attack Range<br />
The attack range of your ships is much shorter than the sight radius. To engage in a sea battle,<br />
the enemy ship must be within range: Select your ship and then right click on the enemy ship!<br />
Your ship will sail towards it and then position itself.<br />
The Beginning of a Sea Battle<br />
The battle begins as soon as the two ships are close enough to each other. You will then be asked<br />
whether you want to fight manually or automatically.<br />
Automated Battle<br />
If you aren’t bothered by the details, you can choose to automate the battle. The screen will be<br />
closed and you will be notified of the results after some time. The battle itself remains invisible,<br />
the ship disappears from the sea chart and cannot be selected until the end of the battle. A<br />
battle symbol on the chart will indicate the encounter. If you click on it, you will receive<br />
information on the battle – the names of the enemies, the names of the ships, and information<br />
on any convoys involved.<br />
If you don’t react quickly when you are prompted, the game will assume an automatic battle if<br />
on the high seas and a manual battle when fighting in a port.<br />
<strong>Manual</strong> Battle<br />
If you want to get your hands dirty, the sea area view will appear. You again have a choice: Either<br />
you let your ships attack designated targets automatically or do it all by yourself and control the<br />
speed of your ships, their exact movements, and the direction and timing of your shots<br />
manually.<br />
81
When several ships are selected, the strongest will attack first while the others remain in the<br />
background.<br />
After the battle, a short message will appear, documenting the outcome. The view will then close<br />
and you are back to the sea chart.<br />
It all depends on the Captain!<br />
No matter what mode you choose, the captain’s capabilities are decisive during sea battles. An<br />
experienced captain will improve the ship’s speed by 10% and its manoeuvrability by 30%. And<br />
your hits are more effective, too – up to 30% more damage. Especially when the fighting ships<br />
are on par, the captain’s skill becomes crucial.<br />
Your crew’s morale has an impact on the way they fight as well. A highly motivated crew’s shots<br />
will be 10% more exact.<br />
Ship Controls<br />
During sea battles, the selection window will always display the deck. Here you can watch over<br />
the condition of your ship and its weapons and the status of your weapons (reloading/ready).<br />
Automatic Navigation<br />
If you prefer automatic navigation, select one of your ships and then right click on an enemy.<br />
Your ship will sail towards the enemy, taking the wind into consideration, and position itself at<br />
an appropriate angle. As soon as it gets into reach, it will start firing. This method can be used<br />
to control several ships at once. Drag a frame around them and then again use the right mouse<br />
button to specify a target.<br />
<strong>Manual</strong> Navigation<br />
You can do it all manually as well, using either the mouse or a mouse/keyboard combination (see<br />
appendix for keyboard shortcuts). Right click anywhere on the water to move the selected ships<br />
about. Navigating in this way is slightly more difficult because you have to consider the<br />
manoeuvrability and the speed of your ships as well as the direction of the wind (which can<br />
change during the battle).<br />
Scroll the view to locate your enemies and then use the appropriate commands:<br />
Increase/decrease Sail Area<br />
Click on the rope in the deck view to change the sail area<br />
and in so doing the speed of your ship. You can choose 0,<br />
_, _, _ and full speed.<br />
82
The speed is also influenced by the type of ship, the load, and the captain.<br />
Firing<br />
Click on the button in the selection window or press the space bar to deliver a broadside against<br />
the enemy! The enemy has to be within reach. If your ship is caught between two enemy ships,<br />
it will fire on both sides.<br />
Weapons and Tactics<br />
Your success depends on whether you use your weapons strategically. Your weapons have<br />
different ranges and their effectiveness varies greatly depending on the distance. The striking<br />
force of some weapons is greater if you use the maximum range. For example, a large catapult ,<br />
that is fired from a close range won’t inflict as much damage as a mortar (Bombarde), but it is<br />
far superior when fired from long range. So if you’re primarily using catapults, stay as far away<br />
as possible.<br />
Ballista and mortars, however, will inflict more damage from close range. Use the manual<br />
controls to get as close as possible and then fire.<br />
As you can see, it is advisable to equip your ships with many different types of weapons to<br />
ensure that your firepower is sufficient from any position.<br />
Damage<br />
The deck window will keep you informed about the damage that is inflicted on your ship.<br />
Damages up to 20% won’t have noticeable consequences. However, any damage beyond this<br />
mark will result in clearly perceptible impediments: Speed and manoeuvrability of your ship<br />
deteriorate and the storage capacity is reduced. You won’t notice the reduced storage capacity<br />
until you reload your ship at the harbor – during the battle none of your goods are lost.<br />
Damage to the Ship<br />
If you are out of luck and are severely hit by a broadside, this is not necessarily a reason to<br />
surrender. The impact of the shot always depends on the distance to the enemy, the direction of<br />
the shot, and the calibre that was used. At close range, the mortar is the most effective weapon,<br />
followed by the large ballista and the cannon. If you are firing from a distance, the large catapult<br />
is more effective than any other weapon; and cannons won’t inflict more damage than a small<br />
catapult.<br />
Damage to the Weapons<br />
Extensive sea battles will leave their mark on your weapons, so don’t be surprised if some of<br />
your weapon slots are suddenly empty . Listen to the background noise during the battle – the<br />
loss of a weapon has a very unique sound.<br />
83
Losing Crew Members<br />
Sailors can take a beating, but even the toughest are sometimes unable to survive a direct hit.<br />
You will often need some new crew members after a sea battle. If the number of crew members<br />
drops below the minimum during a sea battle, you will only just reach the next port. You won’t<br />
be able to set sail again until you’ve hired some new crew members at the tavern. Even the<br />
captain is not invincible, but at least he’s always the last one to die.<br />
Boarding Enemy Ships<br />
It is often advisable to capture an enemy ship instead of destroying it in order to add it to your<br />
own fleet. After all, new ships are expensive. If you select ‘Board’ from the crew menu, your ship<br />
will try to get as close as possible so that your crew members can board the enemy ship.<br />
If a ship’s crew is currently boarding an enemy ship, you no longer have control over that ship.<br />
You will have to wait until the fight is over and until you receive a message informing you of the<br />
outcome. If the ship is part of a group of ships you selected, you won’t be able to control the<br />
group either.<br />
As soon as your crew boards the enemy ship, both ships will stop moving. By left clicking, you<br />
can inform yourself about a ship’s condition, its weapons (the more cannonballs you see in the<br />
ship list, the better), the size of the crew, and the store of swords. Swords are particularly<br />
important, as boarding is a matter of hand-to-hand fighting. So you should be able to estimate<br />
the enemy’s strength. If you find that you are inferior, it might be advisable to abort the action<br />
and fight from a distance. Also pay attention to the morale of your crew: Highly motivated sailors<br />
will fight more courageously than a bunch of disillusioned loafers.<br />
Taking over an Enemy Ship<br />
The fight is over as soon as one of the crews has been eliminated. The victorious crew can be<br />
divided to occupy both ships if you first select your ship and then right click on the other. A<br />
window will appear that allows you to transfer crew members to your new ship. If the size of<br />
your crews are below the minimum, you will only be able to move the ships to a nearby port.<br />
New sailors will then have to be hired. Any goods aboard the ship you captured will become part<br />
of your treasury.<br />
Attacks on Convoys<br />
Of course, convoys can also be involved in sea battles. The battle is always between the<br />
attacker and the armed ships of the convoy leader. If you are not the leader of the convoy, sit<br />
back and watch from a distance as he fights. If he is defeated, you may punish him with<br />
contempt.<br />
84
However, if you are the leader, you will have to face the enemy with all your armed ships that are<br />
part of the convoy.<br />
If the leader of the convoy is defeated, the attacker might try to capture the remaining ships, but<br />
only if their load is truly inviting. If the other ships are heavily armed or very fast, he probably<br />
won’t consider it.<br />
As soon as the convoy’s orlogship is destroyed, the convoy is disbanded. The remaining ships<br />
continue their voyage to the next port, at which point they will go their own ways.<br />
On the other hand, if the leader of the convoy is successful, the voyage will continue as usual,<br />
the only change being that the leader’s recognition will have risen considerably. If any ships were<br />
captured, the leader furthermore receives much of the plunder.<br />
Pirates and how to treat them<br />
Most probably, you will soon encounter pirates. Especially at the beginning of your career, when<br />
you don’t have the necessary funds to equip your ships with expensive weapons, privateers will<br />
be a burden. Later on, you will no longer be helpless. You might even become a famous pirate<br />
hunter, for those who destroy pirate ships or even discover hideouts will be rewarded with<br />
considerable sums of money and gain a lot of recognition.<br />
But the life of a criminal does have its merits. If you want, raise the Jolly Roger yourself and hunt<br />
heavy-laden ships for valuables. Alternatively, you could hire pirates to weaken the competition<br />
– not exactly gentleman-like either, but if it fills your treasury…<br />
Hiring Pirates<br />
Terrorize the shores of a city! Go to any tavern, hire a pirate and leave him one of your ships<br />
along with its crew (but without the captain). 50% of the total plunder will be yours. You will<br />
receive payments and notifications in your personal mail. (see also chapter 8, The Tavern)<br />
Being a Pirate<br />
If you love thrills as much as your treasury, become a pirate yourself! All you need is an armed<br />
ship led by a captain. First of all, you will need to raise the Jolly Roger, which is done using a<br />
button in the crew menu, and of course, no one should be watching you. Therefore, it cannot be<br />
done near towns or other ships. As soon as the Jolly Roger flutters in all its glory, you are free<br />
to fill your treasury by attacking your dear competitors. Naturally, there’s always the danger of<br />
being unmasked, but the probability is fairly low.<br />
85
Avoid being boarded though, for if your ship is captured, the captain will have to undergo a<br />
hearing and he’s unfortunately likely to squeal. You will not only lose your ship, your load, and<br />
all your plunder, but also your hard-won reputation. Moreover, you will be taken to court. Your<br />
captain will go to jail for at least two months, perhaps even 20.<br />
Pirate Hunts<br />
Instead of getting involved with these good-for-nothings, you should be hunting them all across<br />
the sea. Pirate hunters are honored among cities and colleagues, and rewards are regularly<br />
offered for destroying pirate ships. There are two ways of earning a reputation as a pirate hunter:<br />
• You incidentally come across a pirate and attack him.<br />
• You are attacked by pirates.<br />
Sieges<br />
A siege occurs whenever a city is attacked from the land,<br />
usually if greedy royals have an eye on the city or if arms deals<br />
were made in the hinterland.<br />
During a siege, the city is cut off from its hinterland and can only<br />
be provided with goods by its own businesses and via the sea.<br />
Traders who support a city under siege will be rewarded; their<br />
recognition rises.<br />
Although you cannot directly affect the battle, sieges are of great importance to any trader. Your<br />
production might stagnate due to a lack of raw materials, but this is a minor problem<br />
considering that your businesses could be plundered or totally destroyed. As mayor, you have<br />
twice the trouble: On the one hand, you must fear for your businesses. On the other hand, you<br />
are responsible for the city itself and must try to secure its prosperity. Will the city walls<br />
withstand the attack? Have enough guards been trained to use the different weapons in order to<br />
oppose the oppressor? Your political career is at stake!<br />
When a city is under siege, the town gates are closed and the city walls are defended. Any<br />
businesses outside the city walls will soon fall prey to the besieger and the production will stand<br />
still in any event.<br />
86
Initial Actions<br />
The Besiegers take up their Position<br />
The besiegers will try to attack the weakest spot of the city’s defence, usually the town gate with<br />
the fewest watchtowers. They will put up their tents at a safe distance from the gate and will<br />
readily show the defenders any weapons they brought along – large catapults or battering rams<br />
for instance.<br />
The City’s Reaction<br />
Meanwhile, the city won’t remain idle either. All the citizens will try to save themselves and<br />
move to the city center. The gates rattle as they are lowered; the city is on alert. The defenders<br />
position themselves on the city walls and the arsenal stops training the guards. All the traders<br />
involved will receive a letter informing them about the besiegers strength as well as the identity<br />
and the motives of the ruler who is responsible.<br />
The Attack begins<br />
The besieging army will attack after nine days at the earliest. The<br />
battle then continues until the bitter end. Either the city holds its<br />
ground and beats the besiegers, or the besiegers break in and<br />
plunder everything that wasn’t nailed down.<br />
The Attackers’ Strategy<br />
At first, the besiegers will try to break the town gates using a battering ram. In the meantime, the<br />
catapults will be moved toward their targets, the watchtowers. Once within reach, they will open<br />
fire. When the towers have been destroyed, the soldiers on the city walls and then the<br />
swordfighters will be targeted. The besiegers won’t return to their camp until all foes are killed.<br />
Meanwhile, the archers will attack the soldiers defending the city walls. Then they will await the<br />
city’s swordfighters. Swordfighters will use a battering ram to further weaken the town gates.<br />
Any buildings on the way will be relentlessly torched. Once the gates are in ruins, the swordfighters<br />
will be waiting for the city’s militia, their final obstacle before the plundering begins.<br />
The Defenders’ Strategy<br />
The watchtowers will try to destroy the catapults before attacking long distance fighters<br />
(archers?) and then swordfighters. But as soon as the besiegers manage to enter the city, the<br />
towers become useless. It is the swordfighters who must then defeat the intruders. Long<br />
87
distance fighters will target on their opponents in the meantime, before attacking swordfighters<br />
or catapults.<br />
The Decision<br />
When the town gates are destroyed by a battering ram, the<br />
decisive ground battle begins. The surviving swordfighters will<br />
try a sally in order to defeat the enemies that have gathered in<br />
front of the remains of the gates.<br />
Keep an eye on the morale of the troops. Motivated soldiers will<br />
fight better! Apathetic soldiers, with a motivation of 0 (the<br />
reason could be a lack of food), might even open the town gates<br />
voluntarily.<br />
If the defenders manage to eliminate all besieging swordfighters or if the intruders become<br />
outnumbered, the besiegers will retreat.<br />
If the opposite is the case and the defending swordfighters are defeated, the remaining long<br />
distance fighters will move to a different town gate and barricade themselves there. The<br />
intruders are free to do whatever they please.<br />
The Besiegers are victorious<br />
Three swordfighters will sweep the city and capture the town hall. The city is plundered. As soon<br />
as the besiegers leave along with their swag, all local traders receive an official letter from the<br />
city, asking them to pay a special tax intended for reconstruction.<br />
The City is victorious<br />
The city will send a letter to all local traders, informing them about the glorious victory and the<br />
inevitable losses. The siege ends and the quality of life rises dramatically.<br />
The Behavior Of The Citizens<br />
The citizens live in a constant state of alert during sieges – the mood is critical. If, for instance,<br />
certain goods are not delivered on time, the mayor’s recognition suffers more than usual.<br />
Conversely, a trader who can supply needed goods in times of trouble is very generously<br />
rewarded. The number of beggars, which rises due to unemployment, is an increasingly<br />
alarming nuisance. However, if, the population has to make no concessions at all during a siege,<br />
the people react euphorically, which has a positive impact on the mayor’s popularity. All these<br />
feelings intensify every day that the siege continues.<br />
88
The consequences of defeat are difficult to deal with: The stolen money will, for instance, in the<br />
long term make the rich unhappy. The other people will gradually become more unhappy as well,<br />
especially when the full extent of the plundering becomes known and the supply of certain<br />
goods is no longer secure.<br />
If the city has survived the siege without being plundered, the mayor must not be worried about<br />
his reputation for some time. If the opponent was crushed out in the fields, the mayor’s<br />
recognition will rise to a previously unseen level.<br />
Some advice: If you have just survived your first siege as mayor, don’t rest on your laurels. To<br />
the contrary: The more prosperous your city becomes, the higher the danger of future sieges.<br />
The security of your city will become increasingly important. Prepare yourself!<br />
Attacks on Towns from the Sea<br />
Sieges are not the only dangers a city is faced with, for greedy<br />
pirates and royals can choose to assault a town from the sea – and<br />
so can you. Consequently, it is necessary to defend the harbor basin<br />
as well. Defence towers can save you and your city in dangerous<br />
situations. In every harbor basin, three positions are reserved for<br />
such towers. But whether the mayor decides to build these towers<br />
is an entirely different question.<br />
Attacks from the sea will cut off a city from maritime trade. The city will have to be supported<br />
by the hinterland. After a plundering, the city cannot be attacked for 30 days. If somebody<br />
nevertheless tries, he will receive a message telling him that there won’t be anything to plunder<br />
for some time.<br />
During an assault from the sea, a small part of the city map will be displayed, which shows the<br />
positions of the three watchtowers.<br />
The Participants<br />
During such attacks, the attacker’s ships will be fighting against the defence towers and coastal<br />
patrol vessels. Other ships cannot participate. If the city is neither protected by defence towers<br />
nor by a coastal patrol, the situation is critical.<br />
89
Defence Towers<br />
The defence towers’ mortars have a range of 120m and are therefore superior to attacking ships,<br />
whose range is 95m. And since they are very destructive, they are a serious threat for any<br />
attacker. However, no more than three of these towers can be built. Only a coastal patrol can be<br />
used to further strengthen the city defence.<br />
Coastal Patrol Vessels<br />
Every town can hire coastal patrol vessels, which are provided by a local trader. A single ship is<br />
hardly effective. Several ships should therefore be provided. (see chapter 10, The Town Hall)<br />
The Course of the Attack<br />
If you want to attack a town from the sea chart, the Jolly Roger must be raised. If you decide to<br />
attack, your ships can either be controlled manually or automatically – you will be asked to<br />
choose. The same question will be asked if a pirate attacks while you’re in command of the<br />
coastal patrol.<br />
Those who own only a trading office in the town that is attacked will hardly notice the attack.<br />
However, you will notice as soon as you find out that none of your ships in the port is allowed<br />
to sail.<br />
If an attacker has destroyed all the defence towers and defeated the coastal patrol, a short<br />
message about the plunder will be displayed. If you’re among the lucky owners of a trading office<br />
in town, you will be asked to pay some taxes to rebuild the town. If, however, you controlled the<br />
coastal patrol and decided to flee (seeing that you had been overpowered), expect further<br />
punishment: Your recognition suffers and so does your alleged reliability. You’ll also receive a<br />
letter, so you’ll have a written account of the authorities’ opinion of you.<br />
Multiplayer Mode<br />
Up to eight players can play ‘Patrician II’ simultaneously. There are two ways of playing a<br />
multiplayer game: network mode and hot seat mode.<br />
Setting up a Network Game<br />
Network mode requires a TCP/IP network to be installed. All players must have the TCP/IP<br />
protocol installed and must be connected to the network.<br />
In every game, there is a server that configures the game and one or more clients that connect<br />
to the server.<br />
90
To configure a multiplayer game, select ‘Multiplayer’ from the main menu. Next, select the game<br />
type - ‘Network’ in this case. Several buttons will be activated to the right. Choose ‘Set up game’<br />
to spawn the server.<br />
Note (regarding serial links):<br />
Under Windows 98, a TCP/IP connection can also be established via a serial link. Note that the<br />
bandwidth is comparatively small. You might therefore experience lags during the game.<br />
Game Settings<br />
You then get to the game settings screen, which is identical to the one in single player mode.<br />
Here, the server determines the game type and specifies his data…<br />
The Lobby<br />
Once the game settings are confirmed, you get to the lobby. This is where all the players meet<br />
before the game begins.<br />
The screen is divided into four areas:<br />
Game Description<br />
All the players will be able to see what options the server has selected.<br />
Personal Settings<br />
Here you can specify your name, your gender, and your hometown. As soon as you confirm your<br />
data, it is registered and transferred to the other players.<br />
91
The Player List<br />
The player list lists all the players that are going to take part in the game. The server is at the<br />
very top of the list. The list consists of eight lines, each of which has a button to the left with<br />
which the server determines whether or not the line is available for a player to join. Whenever<br />
a player joins, his data will be displayed in a previously empty line.<br />
When all the clients are ready, the server can launch the game by clicking ‘Start’.<br />
Note:<br />
The number of players that are allowed to join is limited by the number of empty lines available.<br />
The server must adjust the number of available lines accordingly.<br />
Chat Section<br />
Here, players can talk to each other before the game begins. The chat section consists of a<br />
message window and an input line. Click on the input line to enter a message and press Enter to<br />
send it off. It will then be displayed in the message window, visible to everyone.<br />
Joining a Network Game<br />
To join a network game, select ‘Multiplayer’ in the main menu and then choose ‘Join Game’. The<br />
game will now search for any Patrician II servers.<br />
Note:<br />
The server will not be listed until it reaches the lobby and is waiting for clients to connect. You<br />
can repeat your search at any time by clicking ‘Search’.<br />
When you are not playing in a LAN, servers will not be displayed although a game has been<br />
created. The client will have to explicitly specify the IP address of the server, which has the<br />
following format: ‘XXX.XXX.XXX.XXX’. The address is shown on the server’s computer – above<br />
his trader’s name.<br />
The Lobby<br />
The lobby is identical to that of the server. The player must confirm his data and then choose<br />
‘Ready’. The server cannot start the game until all clients are ready.<br />
Hot Seat Mode<br />
In hot seat mode, all players play on a single computer. A hot seat game cannot be combined<br />
with a network game.<br />
92
The game is set up in the same way, except that everything is done on the same computer.<br />
In contrast to network games, which are real-time, hot seat games are turn-based, i.e. players act<br />
one after the other and not simultaneously. They end their turns by pressing the Forward<br />
button.<br />
Note:<br />
Some things are managed differently in hot seat mode. For instance, elections and auctions take<br />
place turn by turn.<br />
Load Game<br />
Instead of creating a new game, the server can load a savegame. The savegame doesn’t have to<br />
be a multiplayer game and it doesn’t need to be saved on all the computers.<br />
Each player simply selects one of the traders from the savegame, which can be a trader who was<br />
previously controlled by the computer.<br />
The trader is chosen before you get to the lobby. The trader’s name cannot be changed<br />
afterwards. Therefore, the player data need not be confirmed as usual.<br />
Note:<br />
As soon as the server has chosen his trader, he can adjust the number of players as usual. The<br />
number of players does not have to be equal to the number of players in the savegame.<br />
Consequently, the number of players can be changed by loading a savegame.<br />
Special Features of the Network Game<br />
Saving the Game<br />
Every player can save the game so that it can be resumed at a later time. The player who wants<br />
to be the server the next time will have to save the game.<br />
Removing and Adding Players<br />
This is done by loading a game in multiplayer mode. The current game must be saved and then<br />
quit. Next, load the game as stated above. The number of players can be adjusted in the lobby.<br />
(see ‘Load Game’)<br />
93
Chatting during the Game<br />
To chat during the game, press Enter. You can then type a message which is sent to the other<br />
players when you press Enter again. The message will appear in the upper left corner of the main<br />
display.<br />
Have Fun!<br />
Credits<br />
Ascaron Software<br />
Concept<br />
Daniel Dumont<br />
Bernd Ludewig<br />
based upon<br />
“The Patrician”, released 1991<br />
Programming<br />
Lead<br />
Bernd Ludewig<br />
Layout and Illustration<br />
Monika Krawinkel<br />
Animation and 3D Graphics<br />
Marco Zeugner<br />
City Design and Illustration<br />
Anca Finta<br />
Music and Sound Effects<br />
Isometric Engine<br />
Martin Mayer<br />
Music and Composition<br />
Yanco<br />
Interface<br />
Matthias Schiller<br />
Sea Battles<br />
Michael Guthe<br />
Graphics<br />
Lead<br />
Christoph Werner<br />
Effects and Mixing<br />
Dag Winderlich<br />
Henrik Hobein<br />
Tutorial Voice<br />
Andreas Fiebig<br />
Intro Voice Recordings<br />
M&S Music<br />
3D Graphics<br />
Jörg Laurien<br />
Patrick Lubbers<br />
Patrick Schumacher<br />
Tests<br />
Lead<br />
Jörg Beilschmidt<br />
94
Testers<br />
Adrian von Pokrziwnitzki<br />
Marcel André Schalomon<br />
Mario Endlich<br />
Markus Reiser<br />
Oliver Nemet<br />
Roman Grow<br />
Sascha Bobrowski<br />
Producer<br />
Holger Flöttmann<br />
Marketing Director<br />
Berndt Almstedt<br />
Product Manager<br />
Ralph Frefat<br />
Additional Programming<br />
Engine<br />
Bastian Rolf<br />
2D Tools<br />
Ulf Winkelmann<br />
Installation<br />
Jordan Russel<br />
and<br />
Fabian Winkler<br />
Michael Glück<br />
Nils Widmer<br />
Ralf Rüdiger<br />
Stefan Radermacher<br />
Tim Plöger<br />
Additional Graphics<br />
Intro<br />
The Light Works<br />
<strong>Manual</strong><br />
Texts<br />
Thomas Schmidt<br />
Historical Texts<br />
Claus Fritzenkötter<br />
Layout and Correction<br />
Christiane Pfeifer<br />
Interactive <strong>Manual</strong><br />
Carsten Woithe<br />
Translation<br />
Dominik Jain<br />
Package Design<br />
Christiane Pfeifer<br />
Christoph Werner<br />
Cutscenes<br />
Daniel Lieske<br />
Guido Neumann<br />
Sebastian Cosor<br />
Special Effects<br />
Mark Külker<br />
Project Manager<br />
Daniel Dumont<br />
95
Strategy First<br />
President<br />
Don McFatridge<br />
Senior V.P.<br />
Brian Clarke<br />
V.P. Business Development<br />
Steve Wall<br />
V.P. Product Development<br />
Richard Therrien<br />
V.P. Systems<br />
Dave Hill<br />
Director of Product Development<br />
Jamie McNeely<br />
Executive Producer<br />
Paul Thibault<br />
Product Manager<br />
Adam Phillips<br />
Marketing Manager<br />
Steven Milburn<br />
PR Manager<br />
Christina Ginger<br />
PR Associates<br />
Kelly Elkins, Michèle Fortier<br />
Packaging and Design<br />
Kenneth Green, Philippe Brindamour<br />
Web Design<br />
Serge Mongeau<br />
96
Appendix<br />
Mouse Controls<br />
ships<br />
left click on…<br />
your own ship<br />
your own ship or anywhere<br />
into the sea, dragging the<br />
mouse over several ships<br />
your own ships while pressing Ctrl<br />
somebody else’s ship<br />
the water<br />
right click on…<br />
a pop-up window<br />
a city on the sea chart<br />
a position in the sea<br />
an enemy ship<br />
a convoy<br />
action<br />
Action<br />
select your ship<br />
select several ships<br />
select several ships<br />
display information<br />
deselect<br />
Action<br />
close the window<br />
1. the ship heads for the city and docks there<br />
2. the trading window is opened<br />
(if your ship is at anchor)<br />
the ship moves there and waits<br />
the ship is attacked<br />
the ship is added to the convoy<br />
(only in city view)<br />
cities<br />
left click on…<br />
interactive building<br />
business or residential building<br />
citizen<br />
port crane<br />
city button on the sea chart<br />
Action<br />
enter the building<br />
display information<br />
inquire opinion<br />
open trade between your office and the city<br />
1. enter the city (if you have an office<br />
or a ship there)<br />
2. otherwise display information<br />
right click on…<br />
a pop-up window<br />
Action<br />
close window<br />
97
Keyboard Controls<br />
city, sea chart<br />
ESC<br />
End action<br />
arrow keys<br />
scroll view<br />
F5<br />
switch mini map<br />
F6<br />
ship list<br />
F7<br />
news menu<br />
F8<br />
leave city<br />
F12<br />
forward<br />
spacebar<br />
open trading window<br />
1, 2, 3 quantities for trade menu (1, 5, max)<br />
Tab<br />
switch to ship and center on it<br />
Del<br />
delete selected message<br />
Pause<br />
activate/deactivate slow motion<br />
sea battles<br />
SPACEBAR, NUM-0<br />
Page up<br />
Page down<br />
FIRE<br />
sails up<br />
sails down<br />
CLOSE WINDOW, OPTIONS MENU<br />
board<br />
98
Goods<br />
beer<br />
pottery<br />
iron goods<br />
(brown) skins<br />
(grey) furs<br />
pitch<br />
fish<br />
pig iron<br />
meat<br />
salt<br />
corn<br />
train oil<br />
spices<br />
cloth<br />
hemp<br />
wine<br />
timber<br />
wool<br />
honey<br />
tiles<br />
99
LICENSE AGREEMENT AND LIMITED WARRANTY<br />
PLEASE READ THIS LICENSE CAREFULLY BEFORE USING THE SOFTWARE. THIS DOCUMENT IS AN AGREEMENT<br />
BETWEEN YOU AND STRATEGY FIRST INC. (THE ìCOMPANYî). THE COMPANY IS WILLING TO LICENSE THE<br />
ENCLOSED SOFTWARE TO YOU ONLY ON THE CONDITION THAT YOU ACCEPT ALL THE TERMS CONTAINED IN THIS<br />
A G R E E M E N T. BY USING THE SOFTWARE YOU ARE AGREEING TO BE BOUND BY THE TERMS OF THIS LICENSE.<br />
1. Ownership and License. This is a license agreement and NOT an agreement for sale. The software contained in<br />
this package (the ìSoftwareî) is the pro p e rty of the Company and/or its Licensors. You own the disk/CD on which<br />
the Software is re c o rded, but the Company and/or its Licensors retain title to the Software and related documentation.<br />
Your rights to use the Software are specified in this Agreement, and the Company and/or its Licensors re t a i n<br />
all rights not expressly granted to you in this Agre e m e n t .<br />
2. Permitted Uses. You are granted the following right to the Software :<br />
(a) Right to Install and Use. You may install and use the Software on a single computer. If you wish to use the<br />
S o f t w a re on more than one computer, please contact the Company for information concerning an upgraded license<br />
allowing use of the Software with additional computers.<br />
(b) Right to Copy. You may make and maintain one copy of the Software for backup and archival purposes, pro v i d-<br />
ed that the original and each copy of the Software are kept in your possession.<br />
3. Prohibited Uses. The following uses of the Software are prohibited. If you wish to use the Software in a manner<br />
p rohibited below, please contact the Company at the address, phone, or fax numbers listed above for inform a t i o n<br />
re g a rding a ìSpecial Use License. îOtherwise, you may NOT :<br />
(a) Make or distribute copies of the Software or documentation, or any portion thereof, except as expressly provided<br />
in this Agre e m e n t .<br />
(b) Use any backup or archival copy of the Software (or allow someone else to use such copy) for any purpose other<br />
than to replace the original copy in the event it is destroyed or becomes defective;<br />
(c) Alter, decompile, modify reverse engineer or disassemble the Software, create derivative works based upon the<br />
S o f t w a re, or make any attempt to bypass, unlock or disable any protective or initialization system on the Software ;<br />
(d) Rent, lease, sub-license, time-share, or transfer the Software or documentation, or your rights under this<br />
A g re e m e n t .<br />
(e) Remove or obscure any copyright or trademark notice(s) on the Software or documentation;<br />
(f) Upload or transmit the Software, or any portion thereof, to any electronic bulletin board, network, or other type<br />
of multi-use computer system re g a rdless of purpose;<br />
(g) Include the Software in any commercial products intended for manufacture, distribution, or sale; or<br />
(h) Include the Software in any product containing immoral, scandalous, controversial, dero g a t o ry, obscene, or<br />
o ffensive works.<br />
4. Te rmination. This license is effective upon the first use, installation, loading or copying of the Software. You may<br />
t e rminate this Agreement at any time by destruction and disposal of the Software and all related documentation.<br />
This license will terminate automatically without notice from the Company if you fail to comply with any pro v i s i o n s<br />
of this license. Upon termination, you shall destroy all copies of the Software and any accompanying documentation.<br />
All provisions of this Agreement as to warranties, limitation of liability, remedies or damages shall survive term i-<br />
n a t i o n .<br />
5. Copyright Notice. The Company and/or our Licensors hold valid copyright of the Software. Nothing in this<br />
A g reement constitutes a waiver of any right under Canadian Copyright law or any other federal or provincial law.<br />
This program is protected by Canadian federal and international copyright laws.<br />
6. Miscellaneous. This Agreement shall be governed by the laws of Canada and the Province of Quebec. If any provision,<br />
or any portion, of this Agreement is found to be unlawful, void, or for any reason unenforceable, it shall be<br />
s e v e red from, and shall in no way affect the validity or enforceability of the remaining provisions of the Agre e m e n t .<br />
7. Limited Wa rranty and Disclaimer of Wa rr a n t y. For a period of 90 days from the date on which you purchased the<br />
S o f t w a re, the Company warrants that the media on which the Software is supplied will be free from defects in materials<br />
and workmanship under normal use. If the Software fails to conform to this warr a n t y, you may, as your sole<br />
and exclusive re m e d y, obtain a replacement free of charge if you re t u rn the Software to us with a dated proof of purchase.<br />
The Company does not warrant that the Software or its operations or functions will meet your re q u i re m e n t s ,<br />
nor that the use thereof will be without interruption or erro r.<br />
EXCEPT FOR THE EXPRESS WARRANTY SET FORTH ABOVE, THE COMPANY DISCLAIMS ALL WARRANTIES, EXPRESS<br />
OR IMPLIED, INCLUDING AND WITHOUT LIMITATION, THE IMPLIED WARRANTIES OF MERCHANTABILITY AND FIT-<br />
NESS FOR A PA RTICULAR PURPOSE. EXCEPT FOR THE EXPRESS WARRANTY SET FORTH ABOVE, THE COMPA N Y<br />
DOES NOT WA R R A N T, GUARANTEE OR MAKE ANY REPRESENTATION REGARDING THE USE OR THE RESULTS OF THE<br />
USE OF THE SOFTWARE IN TERMS OF ITS CORRECTNESS, ACCURACY, RELIABILITY, CURRENTNESS OR OTHERW I S E .<br />
IN NO EVENT SHALL THE COMPANY OR ITS EMPLOYEES OR LICENSORS BE LIABLE FOR ANY INCIDENTAL, INDIRECT,<br />
SPECIAL, OR CONSEQUENTIAL DAMAGES ARISING OUT OF OR IN CONNECTION WITH THE LICENSE GRANTED UNDER<br />
THIS AGREEMENT INCLUDING AND WITHOUT LIMITATION, LOSS OF USE, LOSS OF DATE, LOSS OF INCOME OR PROF-<br />
I T, OR OTHER LOSS SUSTAINED AS A RESULT OF INJURY TO ANY PERSON, OR LOSS OF OR DAMAGE TO PROPERT Y,<br />
OR CLAIMS OF THIRD PA RTIES, EVEN IF THE COMPANY OR AN AUTHORIZED REPRESENTATIVE OF THE COMPA N Y<br />
HAS BEEN ADVISED OF THE POSSIBILITY OF SUCH DAMAGES, IN NO EVENT SHALL LIABILITY OF THE COMPANY FOR<br />
DAMAGES WITH RESPECT TO THE SOFTWARE EXCEED THE AMOUNTS ACTUALLY PAID BY YOU, IF ANY, FOR THE<br />
S O F T WA R E .<br />
SOME JURISDICTIONS DO NOT ALLOW THE<br />
L I M I TATION OR EXCLUSION OF LIABILITY FOR INCIDENTAL OR CONSEQUENTIAL DAMAGES SO THE ABOVE LIMITA-<br />
TION OR EXCLUSION MAY NOT APPLY TO YOU.<br />
A C K N O W L E D G E M E N T<br />
YOU ACKNOWLEDGE THAT YOU HAVE READ THIS AGREEMENT, UNDERSTAND IT AND AGREE TO BE BOUND BY ITS<br />
TERMS AND CONDITIONS. YOU ALSO AGREE THAT THIS AGREEMENT IS THE COMPLETE AND EXCLUSIVE STAT E-<br />
MENT OF THE AGREEMENT BETWEEN YOU AND THE COMPANY AND SUPERCEDES ALL PROPOSALS OR PRIOR<br />
ENDORSEMENTS, ORAL OR WRITTEN, AND ANY OTHER COMMUNICATIONS BETWEEN YOU AND THE<br />
C O M PANYOR ANY REPRESENTATIVE OF THE COMPANY RELATING TO THE SUBJECT MATTER OF THIS AGREEMENT.<br />
100
w w w . s t r a t e g y f i r s t . c o m<br />
w w w . a s c a r o n . c o m<br />
04-23077M