METROLAND Spring 2022
Metroland Magazine is written by the community for the community with our own unique design. Covering life in Chesham, Amersham and Chalfont bringing you the best places to dine, days out, high street businesses, charities and projects.
Metroland Magazine is written by the community for the community with our own unique design. Covering life in Chesham, Amersham and Chalfont bringing you the best places to dine, days out, high street businesses, charities and projects.

You also want an ePaper? Increase the reach of your titles
YUMPU automatically turns print PDFs into web optimized ePapers that Google loves.
Upcycling Project:<br />
Terrarium Lamp<br />
Last year Jeyes Fluid, the British heritage brand<br />
that’s been proudly keeping the nation’s gardens<br />
clean for over 140 years, launched its Creative<br />
Spaces initiative in June, by partnering up with<br />
Melanie Lissack, the award winning interior stylist,<br />
writer and influencer. Together, they are helping to<br />
inspire Brits on how people can easily repurpose<br />
tired furniture, leftover materials in the home and<br />
upcycle them to transform their gardens.<br />
To help give you inspiration, here is how to use an<br />
old mason jar to create an Insta-worthy terrarium<br />
lamp:<br />
Tools and materials needed:<br />
• Bucket<br />
• Jeyes Fluid<br />
• Sponge, cloth or stiff brush<br />
• 1 gallon mason jar<br />
• Terrarium kit<br />
• Terrarium plants<br />
• Garden gloves<br />
• Drill<br />
• Lamp wiring kit for glass jar<br />
• Lampshade in a colour of your choice<br />
Method<br />
Creating the lamp base<br />
1. To clean your mason jar - use a measuring jug,<br />
pour 5000 ml of water and 250ml of Jeyes Fluid<br />
into a bucket.<br />
2. Jeyes heritage tin has been replaced, so look<br />
out for its new recyclable plastic bottle with<br />
an updated formula as part of its commitment<br />
to help pave the way for a more sustainable<br />
future.<br />
3. Wear some rubber gloves for protection. Dip a<br />
cloth, sponge or stiff brush inside the solution<br />
and use it on the inside and outside of the<br />
mason jar. Then rinse the jar and allow it to<br />
completely dry.<br />
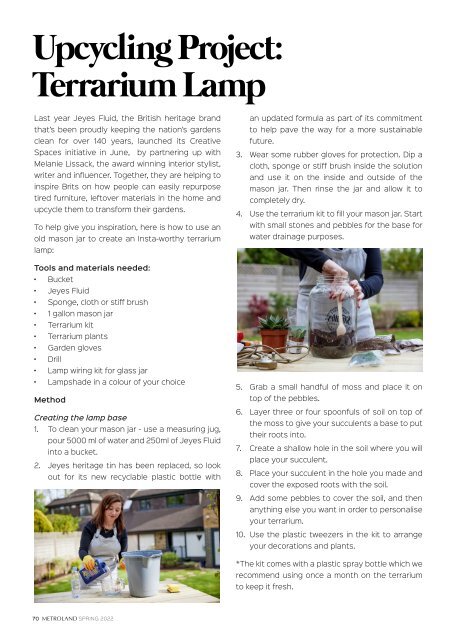
4. Use the terrarium kit to fill your mason jar. Start<br />
with small stones and pebbles for the base for<br />
water drainage purposes.<br />
5. Grab a small handful of moss and place it on<br />
top of the pebbles.<br />
6. Layer three or four spoonfuls of soil on top of<br />
the moss to give your succulents a base to put<br />
their roots into.<br />
7. Create a shallow hole in the soil where you will<br />
place your succulent.<br />
8. Place your succulent in the hole you made and<br />
cover the exposed roots with the soil.<br />
9. Add some pebbles to cover the soil, and then<br />
anything else you want in order to personalise<br />
your terrarium.<br />
10. Use the plastic tweezers in the kit to arrange<br />
your decorations and plants.<br />
*The kit comes with a plastic spray bottle which we<br />
recommend using once a month on the terrarium<br />
to keep it fresh.<br />
70 <strong>METROLAND</strong> SPRING <strong>2022</strong>