

Manual - Leybold Repair by Tech Services
Manual - Leybold Repair by Tech Services
Manual - Leybold Repair by Tech Services

Create successful ePaper yourself
Turn your PDF publications into a flip-book with our unique Google optimized e-Paper software.
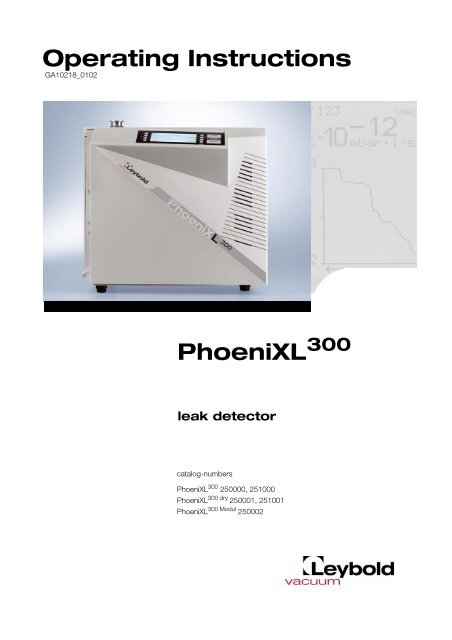
Operating Instructions<br />
GA10218_0102<br />
PhoeniXL 300<br />
leak detector<br />
catalog-numbers<br />
PhoeniXL 300 250000, 251000<br />
PhoeniXL300 dry 250001, 251001<br />
PhoeniXL 300 Modul 250002
Head<br />
Table of Contents<br />
2 ⏐GA10218_0102 - 6/2002<br />
1 General Information ........................................................................................8<br />
1.1 Notes on the Use of this Handbook .................................................................... 8<br />
1.1.1 Safety Symbols .................................................................................................. 8<br />
1.1.2 Indications .......................................................................................................... 8<br />
1.1.3 Symbols of Vacuum <strong>Tech</strong>nology ........................................................................ 8<br />
1.1.4 Definiton of Terms .............................................................................................. 9<br />
1.2 Support from LEYBOLD Service ....................................................................... 10<br />
1.3 Introduction ...................................................................................................... 11<br />
1.3.1 Purpose ........................................................................................................... 11<br />
1.3.2 <strong>Tech</strong>nical Data PhoeniXL 300 ............................................................................. 12<br />
1.3.2.1 <strong>Tech</strong>nical Data ................................................................................................. 12<br />
1.3.2.2 Electrical Data .................................................................................................. 12<br />
1.3.2.3 Other Data ....................................................................................................... 13<br />
1.3.2.4 Ambient Conditions .......................................................................................... 13<br />
1.3.3 <strong>Tech</strong>nical Data PhoeniXL 300 dry ........................................................................ 13<br />
1.3.3.1 <strong>Tech</strong>nical Data ................................................................................................. 13<br />
1.3.3.2 Electrical Data .................................................................................................. 14<br />
1.3.3.3 Other Data ....................................................................................................... 14<br />
1.3.3.4 Ambient Conditions .......................................................................................... 14<br />
1.3.4 <strong>Tech</strong>nical Data PhoeniXL 300 Modul .................................................................... 15<br />
1.3.4.1 <strong>Tech</strong>nical Data ................................................................................................. 15<br />
1.3.4.2 Electrical Data .................................................................................................. 15<br />
1.3.4.3 Other Data ....................................................................................................... 16<br />
1.3.4.4 Ambient Conditions .......................................................................................... 16<br />
1.4 Unpacking ........................................................................................................ 16<br />
1.4.1 Supplied Equipment ......................................................................................... 16<br />
1.4.2 Accessories and Options .................................................................................. 17<br />
1.4.2.1 Sniffer line SL300 ............................................................................................. 17<br />
1.4.2.2 Remote control ................................................................................................ 18<br />
1.4.2.3 Partial flow system (PhoeniXL 300 only) .............................................................. 18
Head<br />
2 Installation ......................................................................................................19<br />
2.1 Working Location ............................................................................................. 19<br />
2.2 Electrical Connections ...................................................................................... 20<br />
2.2.1 Mains Power .................................................................................................... 20<br />
2.2.2 Connections for the Data Acquisition Systems ................................................. 21<br />
2.2.2.1 Option (Accessories) ........................................................................................ 21<br />
2.2.2.2 Digital Out (Control) .......................................................................................... 22<br />
2.2.2.3 Digital In (Control 2) .......................................................................................... 22<br />
2.2.2.4 Recorder .......................................................................................................... 23<br />
2.2.2.5 RS232 .............................................................................................................. 23<br />
2.2.2.6 Remote Control ................................................................................................ 24<br />
2.3 Vaccum Connections ....................................................................................... 24<br />
2.3.1 Inlet Port ........................................................................................................... 24<br />
2.3.2 Exhaust ............................................................................................................ 24<br />
2.3.3 Vent ................................................................................................................. 24<br />
2.3.4 Gas ballast connection ..................................................................................... 24<br />
2.3.5 Connection of an external pump (Only PhoeniXL 300 Modul ) ................................ 25<br />
2.4 Default settings ................................................................................................ 25<br />
3 First Operation Check ...................................................................................27<br />
3.1 Needed Equipment .......................................................................................... 27<br />
3.2 Description of the Initial Operation .................................................................... 27<br />
3.2.1 Startup and Measure ........................................................................................ 27<br />
3.2.2 Internal Calibration ............................................................................................ 28<br />
3.2.3 Verification with an external test leak ................................................................ 29<br />
3.2.4 Measure with a test object ............................................................................... 29<br />
3.2.5 Switch off ......................................................................................................... 29<br />
4 Description and Working Principle ..............................................................30<br />
4.1 Introduction ...................................................................................................... 30<br />
4.1.1 Vacuum System PhoeniXL 300 ........................................................................... 30<br />
4.1.1.1 Vacuum System PhoeniXL 300 dry ...................................................................... 31<br />
4.1.1.2 Vacuum System PhoeniXL 300 Modul .................................................................. 32<br />
4.1.2 Control Panel ................................................................................................... 34<br />
4.1.2.1 LC Display ........................................................................................................ 34<br />
GA10218_0102 - 6/2002 ⏐ 3
Head<br />
4 ⏐GA10218_0102 - 6/2002<br />
4.1.2.2 START Button .................................................................................................. 34<br />
4.1.2.3 STOP Button .................................................................................................... 34<br />
4.1.2.4 ZERO Button .................................................................................................... 35<br />
4.1.2.5 MENU Button ................................................................................................... 36<br />
4.1.2.6 Soft Keys ......................................................................................................... 36<br />
4.1.2.7 Numerical Entries ............................................................................................. 36<br />
4.1.3 Vacuum Method ............................................................................................... 38<br />
4.1.4 Partial Flow Method .......................................................................................... 39<br />
4.1.5 Sniffer Mode ..................................................................................................... 39<br />
4.1.6 Controls on the Remote Control (Optional) ....................................................... 40<br />
4.1.7 Displays on the Remote Control ....................................................................... 42<br />
5 Operation of the PhoeniXL ...........................................................................43<br />
5.1 Display ............................................................................................................. 43<br />
5.2 The Screen in Run-Up Mode ............................................................................ 43<br />
5.3 Display in stand-<strong>by</strong> mode ................................................................................. 44<br />
5.3.1 Gas Ballast/Purge ............................................................................................ 44<br />
5.4 The Screen in Measurement Mode ................................................................... 44<br />
5.4.1 Call for Calibration ............................................................................................ 45<br />
5.4.2 Speaker Volume ............................................................................................... 45<br />
5.4.3 Status Line in the Display ................................................................................. 45<br />
5.4.4 Measurement Mode with bargraph ................................................................... 46<br />
5.4.5 Measurement Mode with trend information ....................................................... 46<br />
6 Description of the Menu ...............................................................................48<br />
6.1 Main menu ....................................................................................................... 48<br />
6.2 View ................................................................................................................. 50<br />
6.2.1 Scale linear/logarithmic ..................................................................................... 51<br />
6.2.2 Display-range auto/manual ............................................................................... 52<br />
6.2.3 Time axis .......................................................................................................... 52<br />
6.2.4 Contrast ........................................................................................................... 53<br />
6.2.5 Background in Stand-<strong>by</strong> .................................................................................. 53<br />
6.2.6 Lower display limit ............................................................................................ 54
Head<br />
6.3 Mode ............................................................................................................... 54<br />
6.4 Trigger & Alarms ............................................................................................... 55<br />
6.4.1 Trigger Level 1 .................................................................................................. 56<br />
6.4.2 Trigger Level 2 .................................................................................................. 56<br />
6.4.3 Trigger Level 3 .................................................................................................. 56<br />
6.4.4 Units ................................................................................................................ 56<br />
6.4.5 Volume ............................................................................................................. 57<br />
6.4.6 Alarm delay ...................................................................................................... 58<br />
6.4.7 Audio alarm type .............................................................................................. 58<br />
6.4.7.1 Pinpoint ............................................................................................................ 59<br />
6.4.7.2 Leak rate prop. ................................................................................................. 59<br />
6.4.7.3 Setpoint ........................................................................................................... 59<br />
6.4.7.4 Trigger alarm .................................................................................................... 59<br />
6.5 Calibration ........................................................................................................ 60<br />
6.6 Settings ............................................................................................................ 61<br />
6.6.1 Vacuum settings ............................................................................................... 62<br />
6.6.1.1 Automatic purge .............................................................................................. 63<br />
6.6.1.2 Vent delay ........................................................................................................ 63<br />
6.6.1.3 Vacuum ranges ................................................................................................ 64<br />
6.6.1.4 Partial flow setup .............................................................................................. 65<br />
6.6.1.5 Sniffer factor ..................................................................................................... 67<br />
6.6.1.6 Machine factor ................................................................................................. 67<br />
6.6.1.7 Leak rate internal test leak ................................................................................ 68<br />
6.6.2 Filter & Background .......................................................................................... 68<br />
6.6.2.1 Calculate inlet area background ....................................................................... 69<br />
6.6.2.2 Background suppression ................................................................................. 69<br />
6.6.2.3 Leak rate filter ................................................................................................... 69<br />
6.6.3 Mass ................................................................................................................ 70<br />
6.6.4 Interfaces ......................................................................................................... 70<br />
6.6.4.1 Location of Control ........................................................................................... 70<br />
6.6.4.2 Define recorder output ..................................................................................... 71<br />
6.6.4.3 RS232 .............................................................................................................. 72<br />
6.6.4.4 Define PLC outputs .......................................................................................... 72<br />
6.6.4.5 Define PLC inputs ............................................................................................ 73<br />
GA10218_0102 - 6/2002 ⏐ 5
Head<br />
6 ⏐GA10218_0102 - 6/2002<br />
6.6.4.6 Scaling Recorder Output .................................................................................. 75<br />
6.6.4.7 PLC Sample Rate ............................................................................................. 75<br />
6.6.5 Miscellaneous ................................................................................................... 75<br />
6.6.5.1 Time&Date ....................................................................................................... 76<br />
6.6.5.2 Language ......................................................................................................... 76<br />
6.6.5.3 Calibration request ........................................................................................... 77<br />
6.6.5.4 Service interval fore pump ................................................................................ 77<br />
6.6.5.5 Service interval exhaust oil filter ....................................................................... 77<br />
6.6.5.6 Service message exhaust oil filter ..................................................................... 78<br />
6.6.6 Parameter save / load ...................................................................................... 78<br />
6.6.6.1 Load parameter set .......................................................................................... 79<br />
6.6.6.2 Save parameter set .......................................................................................... 79<br />
6.6.7 Monitoring functions ......................................................................................... 79<br />
6.6.7.1 Pressure limits for vacuum mode. ..................................................................... 79<br />
6.6.7.2 Pressure limits for sniff mode ............................................................................ 80<br />
6.6.7.3 Maximum evacuation time ................................................................................ 81<br />
6.7 Information ....................................................................................................... 82<br />
6.7.1 Service ............................................................................................................. 82<br />
6.8 Access Control ................................................................................................. 83<br />
6.8.1 Access to CAL function .................................................................................... 83<br />
6.8.2 Change Menu-PIN ............................................................................................ 84<br />
6.8.3 Zero ................................................................................................................. 84<br />
7 Calibration ......................................................................................................85<br />
7.1 Introduction ...................................................................................................... 85<br />
7.2 The calibration routines .................................................................................... 85<br />
7.2.1 Internal Calibration ............................................................................................ 85<br />
7.2.2 External Calibration .......................................................................................... 85
Head<br />
7.3 Factor of Calibration - Range of Values ............................................................. 87<br />
8 Error And Warning Messages ......................................................................88<br />
8.1 Hints ................................................................................................................ 88<br />
8.2 List of Errors & Warnings .................................................................................. 88<br />
9 Maintenance ..................................................................................................95<br />
9.1 LEYBOLD Service ............................................................................................ 95<br />
9.1.1 Maintenance Plan ............................................................................................. 95<br />
9.1.2 Opening the PhoeniXL ...................................................................................... 96<br />
9.1.3 Exchanging the filter mats ................................................................................ 97<br />
9.1.4 Exchanging the oil ............................................................................................ 97<br />
9.1.5 Cleaning ........................................................................................................... 98<br />
9.1.6 Exchanging the fuses ....................................................................................... 98<br />
9.1.7 Exhaust Oil filter .............................................................................................. 100<br />
9.2 Turbo molecular pump ................................................................................... 100<br />
9.3 Calibrated leak TL7 ........................................................................................ 100<br />
9.3.1 Tecnical Data ................................................................................................. 101<br />
9.3.2 Factory Inspection .......................................................................................... 101<br />
Appendix ..............................................................................................................102<br />
GA10218_0102 - 6/2002 ⏐ 7
Head<br />
8 ⏐GA10218_0101 - 5/2002<br />
1 General Information<br />
We recommend that you carefully read this operating instructions to<br />
ensure optimum operating conditions right from the start.<br />
This <strong>Tech</strong>nisches Handbuch contains important informations on the<br />
functions, installation, start-up and operation of the PhoeniXL.<br />
All the informations in this handbook are based for the PhoeniXL 300 leak<br />
detector. Changes in the use for the Models PhoeniXL300 dry and<br />
PhoeniXL 300 Modul are stated below the information for the PhoeniXL 300 .<br />
We reserve the right to modify the design and the specified data. The illustrations<br />
are not binding.<br />
1.1 Notes on the Use of this<br />
Handbook<br />
1.1.1 Safety Symbols<br />
Important remarks concerning operational safety and protection are<br />
emphasised as follows:<br />
Attention Information on correct handling or use. Disregard can lead to<br />
malfunctions or minor equipment damage.<br />
Caution Information on preventing any kind of physical injury.<br />
1.1.2 Indications<br />
The references to diagrams consists of the figure number and the item<br />
number in this order. For example: Fig. 2/7 refers to item 7 in the figure 2.<br />
1.1.3 Symbols of Vacuum <strong>Tech</strong>nology<br />
Given in the following are some important vacuum symbols which are<br />
used in this manual.<br />
Vacuum pump in general<br />
Turbomolecular pump<br />
Measuring instrument<br />
Valve
1.1.4 Definiton of Terms<br />
The range of the preamplifier and the vacuum ranges are selected automatically.<br />
The autoranging feature of the PhoeniXL covers the entire range or leak<br />
rates depending on the selected operating mode. Not only the leak rate<br />
signal, but also the pressure in the test sample (inlet pressure P1) and the<br />
forevacuum pressure (P2) are used for control purposes. Range switching<br />
between the main ranges is performed via valves. Fine range switching<br />
within the main ranges is implemented <strong>by</strong> switching over the gain factor of<br />
the preamplifier.<br />
This function automatically aligns the mass spectrometer so that a maximum<br />
leak rate is displayed. The control processor changes the voltage<br />
which erates the ions in the selected mass range until a maximum ion current<br />
is detected <strong>by</strong> the ion detector. During each calibration the mass alignment<br />
is run automatically.<br />
Determination and automatic adaptation of the internal background.<br />
Through this function, the internal zero level of the instrument is determined<br />
which is then substracted from the current leak rate signal. This fuction<br />
is run during the calibration process or when operating the start<br />
pushbutton, provided the PhoeniXL has been running previously for at<br />
least 20 seconds in the stan<strong>by</strong> or vent mode.<br />
GROSS is a measurement mode which allows high inlet pressure (15 to<br />
0,2 mbar). The smallest detectable leak rate is 1 · 10-7 mbar l / s.<br />
FINE is a measurement mode with inlet pressure < 0.2 mbar. The minimum<br />
detectable leak rate is ≤ 5 ·10 -12 mbar l / s<br />
Precision is a measurement mode for the PhoeniXL 300 dry only from an<br />
inlet pressure < 0,1 mbar. In this mode the PhoeniXL300 dry has the highest<br />
sensitivity, the minimum detectable leak rate is ≤ 3·10 -11 mbar l / s.<br />
Pressure in the foreline between Turbo pump and rotary vane pump.<br />
The existing helium partial pressure in the measurement system. The level<br />
of the internal helium background is measured in the Stand-<strong>by</strong> mode and<br />
subtracted from the measured signal.<br />
The smallest leak rate the PhoeniXL is able to detect (≤ 5·10 -12 mbar l / s)<br />
in vacuum mode.<br />
The menu allows the user to program the PhoeniXL according to his requirements.<br />
The menu has a tree architecture.<br />
The PhoeniXL measures the leak rate of the test sample.<br />
Status of the PhoeniXL when supplied <strong>by</strong> the factory.<br />
Autoranging<br />
Autotune<br />
Mass alignment<br />
Auto zero<br />
GROSS<br />
FINE<br />
PRECISION<br />
Foreline pressure<br />
Internal helium<br />
background<br />
Minimum detectable<br />
leak rate<br />
Menu<br />
Measure<br />
Measurement mode<br />
Default<br />
Head<br />
GA10218_0101 - 5/2002 ⏐ 9
Head<br />
10 ⏐GA10218_0101 - 5/2002<br />
1.2 Support from LEYBOLD Service<br />
Declaration of Contamination of Compressors, Vacuum Pumps and Components<br />
The repair and / or servicing of compressors, vacuum pumps and components will be carried out only if a correctly completed declaration has been<br />
submitted. Non-completion will result in delay. The manufacturer can refuse to accept any equipment without a declaration.<br />
A separate declaration has to be copleted for every single component.<br />
This declaration may be completed and signed only <strong>by</strong> authorised and qualified staff.<br />
Customer/Dep./Institute : Reason for returning applicable please mark<br />
Address : repair chargable warranty<br />
exchange chargable warranty<br />
DKD-Calibration Factory Calibration<br />
Person to contact: restoring goods because of following reason:<br />
Phone : Fax: rent/loan for credit against exchange<br />
Order number of customer: exchange already received/arranged<br />
A. Description of the equipment (machine or component) Ancillary equipment<br />
Type :<br />
Catalogue number:<br />
Serial number:<br />
Type of oil used :<br />
B. Condition of the equipment No Yes No Contamination : No Yes<br />
1. Has the equipment been used toxic<br />
2. Drained (Product/service fluid) corrosive<br />
3. All openings sealed airtight microbiological<br />
4. Purged explosive<br />
If yes, which cleaning agent radioactive<br />
and which method of cleaning other harmful substances<br />
C. Description of processed substances (Please fill in absolutely)<br />
1. What substances have come into contact with the equipment :<br />
Trade name and / or chemical term of service fluids and substances processed, properties of the substances<br />
According to safety data sheet (e.g. toxic, inflammable, corrosive, radioactive)<br />
X Tradename: Chemical name:<br />
a)<br />
b)<br />
c)<br />
d)<br />
1. Are these substances harmful ?<br />
2. Dangerous decomposition products when thermally loaded<br />
Which :<br />
Fig. 1 Declaration of contamination form<br />
Yes No<br />
Components contaminated <strong>by</strong> microbiological, explosive or radioactive products will not be accepted without written evidence of<br />
decontamination.<br />
D. Legally binding declaration<br />
I / we here<strong>by</strong> declare that the information supplied on this form is accurate and sufficient to judge any contamination level.<br />
Name of authorised person (block letters) :<br />
_______________________________<br />
date signatur of authorised person<br />
firm stamp<br />
If equipment is returned to <strong>Leybold</strong>, indicate whether the equipment is<br />
free of substances damaging to health or whether it is contaminated. If it<br />
is contaminated also indicate the nature of the hazard. For this you must<br />
use a form which has been prepared <strong>by</strong> us which we will provide upon<br />
request or you can take from the technical documentation folder. Also you<br />
will find this declaration on our homepage: www.leybold.com under „support<br />
& download“.<br />
Please attach this form to the equipment or enclose it with the equipment.<br />
This declaration of contamination is required to comply with legal requirements<br />
and to protect our personal. <strong>Leybold</strong> must return any equipment<br />
without a declaration of contamination to the sender’s adress.<br />
Before shipping fit the yellow screw-on seals on to the connections<br />
EXHAUST Fig 3/2 and GAS BALLAST Fig 3/3.
1.3 Introduction<br />
1.3.1 Purpose<br />
The PhoeniXL is a leak detector for Helium or Hydrogen. This instrument<br />
may be used to detect the location and the size of leaks on objects under<br />
test in two different ways:<br />
� when the test sample has been evacuated first and is sprayed with<br />
helium on the outside. It is required that a vacuum connection is provided<br />
between the PhoeniXL and the test sample (vacuum mode).<br />
or<br />
� when a helium overpressure is provided in the test sample and the test<br />
sample is searched from the outside with a sniffer probe which is attached<br />
to the inlet port (sniffer mode).<br />
The PhoeniXL is to be used for leak detection only. It must not be<br />
used as a pumping system (esp. pumping aggressive or humid<br />
gases.)<br />
Pumping condensable gases and steams: When pumping test sample<br />
water vapour that is inside the test object can attain to the fore pump.<br />
With the water vapor that is in the air - especially in humid areas or when<br />
using humid or wet test samples - the acceptable compatibility of water<br />
vapor or capacity of water vapor respectively can be exceeded.<br />
The steam in the oil of the pump condeses when the water vapor rises<br />
over the acceptable value. So the attribute of the oil changes and danger<br />
of corrosion occures for the pump.<br />
While using the leak detector with condensable gases and steams the oil<br />
of the fore pump has to be controlled regularly. So you can recognize a<br />
condensation of water vapor in the pump. Usually the oil is light and<br />
lucent. When water vapor is inside it gets blear and milky at operating<br />
state temperature.<br />
When turning the pump off water vapor condensates and raises the part<br />
of water in the oil.<br />
The leak detector must not directly be switched off after the process,<br />
in which condensable gases or steams are pumped, is<br />
finished. It must be running (at least 20 minutes) with opend gas<br />
ballast valve (see Chapter 5.3.1) until the oil of the pump is freed<br />
from detached steam.<br />
When not taking care of this instruction there can be a corrosion<br />
within the pump, which will not be covered <strong>by</strong> our warranty.<br />
The heighth of the oil of the pump has to be controlled regularly.<br />
The normal intervalls of changing the oil from the producer have<br />
to be taken care of. See instructions of the rotary vane pump.<br />
If the PhoeniXL will be used in an application with toxic materials please<br />
contact <strong>Leybold</strong> for appropriate decontamination rules. Should the unit will<br />
be in contact with dangerous gases, the declaration of contamination has<br />
to be filled in.<br />
Caution<br />
Caution<br />
Head<br />
GA10218_0101 - 5/2002 ⏐ 11
Head<br />
12 ⏐GA10218_0101 - 5/2002<br />
1.3.2 <strong>Tech</strong>nical Data PhoeniXL 300<br />
1.3.2.1 <strong>Tech</strong>nical Data<br />
Max. inlet pressure 15 mbar<br />
Minimum detectable Helium leak rates<br />
� in vacuum mode ≤5·10 -12 mbar l / s<br />
� in sniffer mode
1.3.2.3 Other Data<br />
Valves solenoid<br />
Dimensions (L × W × H) in mm 495 x 456 x 314<br />
Weight in kg 40.0<br />
Noise level dB (A) < 54<br />
max. Audio alarm dB (A) 90<br />
Contamination level (to IEC 60664-1) 2<br />
Overvoltage category (to IEC 60664-1) II<br />
1.3.2.4 Ambient Conditions<br />
For use within buildings<br />
Permissible ambient temperature (during operation) +10 °C … +40 °C<br />
Permissible storage temperature -10 °C … +60 °C<br />
Max. rel. humidity 80% (up to 31°C)<br />
linear decreasing to<br />
50% at 40°C<br />
Max. permissible height above sea level<br />
2000 m<br />
(during operation)<br />
1.3.3 <strong>Tech</strong>nical Data PhoeniXL300 dry<br />
1.3.3.1 <strong>Tech</strong>nical Data<br />
Max. inlet pressure 15 mbar<br />
Minimum detectable Helium leak rates<br />
� in vacuum mode ≤ 3·10 -11 mbar l / s<br />
� in sniffer mode < 1·10 -7 mbar l / s<br />
Minimum detectable Hydrogen leak rates<br />
� in vacuum mode ≤ 1·10 -8 mbar l / s<br />
� in sniffer mode < 1·10 -7 mbar l / s<br />
Maximum Helium leak rate which can be displayed 0.1 mbar l / s<br />
Measurement range 11 decades<br />
Time constant of the leak rate signal (blanked off,<br />
63% of the final value)<br />
Pumping speed (Helium) at the inlet<br />
2.5 l / s<br />
Detectable masses 2, 3 and 4<br />
Mass spectrometer 180° magnetic sector<br />
field<br />
Ion source 2 filaments;<br />
Iridium/Yttria-oxide<br />
Inlet port DN 25 KF<br />
Run-up time (after starting) ≤ 2min<br />
Head<br />
GA10218_0101 - 5/2002 ⏐ 13
Head<br />
14 ⏐GA10218_0101 - 5/2002<br />
To get down to the minimum detected leak rate range some conditions<br />
must be fulfilled:<br />
� PhoeniXL has to run at least 20 minutes<br />
� Ambient conditions must be stable (temperature, no vibration/accelerations.)<br />
� The part under test has been evacuated long enough without using the<br />
zero function (background is no longer decreasing)<br />
� ZERO must be active<br />
1.3.3.2 Electrical Data<br />
Power supply 230 V, 50 Hz<br />
115 V, 60 Hz<br />
Power consumption 350 VA<br />
Type of protection IP40<br />
Power cords (EU, USA, UK) 2.5 m<br />
1.3.3.3 Other Data<br />
Valves solenoid<br />
Dimensions (L × W × H) in mm 495 x 456 x 314<br />
Weight in kg 35.5<br />
Noise level dB (A) < 54<br />
max. Audio alarm dB (A) 90<br />
Contamination level (to IEC 60664-1) 2<br />
Overvoltage category (to IEC 60664-1) II<br />
1.3.3.4 Ambient Conditions<br />
For use within buildings<br />
Permissible ambient temperature (during operation) +10 °C … +40 °C<br />
Permissible storage temperature -10 °C … +60 °C<br />
Max. rel. humidity 80% (up to 31°C)<br />
Max. permissible height above sea level<br />
(during operation)<br />
linear decreasing to<br />
50% at 40°C<br />
2000 m
300 Modul<br />
1.3.4 <strong>Tech</strong>nical Data PhoeniXL<br />
1.3.4.1 <strong>Tech</strong>nical Data<br />
Max. inlet pressure 15 mbar<br />
Minimum detectable Helium leak rates<br />
� in vacuum mode<br />
– with Scroll pump ≤ 8·10-12 mbar l / s<br />
– with oil sealed pump ≤ 5·10 -12 mbar l / s<br />
� in sniffer mode 2.5 l / s<br />
Detectable masses 2, 3 and 4<br />
Mass spectrometer 180° magnetic sector<br />
field<br />
Ion source 2 filaments;<br />
Iridium/Yttria-oxide<br />
Inlet port DN 25 KF<br />
Run-up time (after starting) ≤ 2min<br />
To get down to the minimum detected leak rate range some conditions<br />
must be fulfilled:<br />
� PhoeniXL has to run at least 20 minutes<br />
� Ambient conditions must be stable (temperature, no vibration/accelerations.)<br />
� The part under test has been evacuated long enough without using the<br />
zero function (background is no longer decreasing)<br />
� ZERO must be active<br />
1.3.4.2 Electrical Data<br />
Power supply 100V ...230 V,<br />
50/60 HZ<br />
Power consumption 350 VA<br />
Type of protection IP40<br />
Power cords (EU, USA, UK) 2.5 m<br />
Head<br />
GA10218_0101 - 5/2002 ⏐ 15
Head<br />
16 ⏐GA10218_0101 - 5/2002<br />
1.3.4.3 Other Data<br />
Valves solenoid<br />
Dimensions (L × W × H) in mm 495 x 456 x 314<br />
Weight in kg 29.5<br />
Noise level dB (A) < 54<br />
max. Audio alarm dB (A) 90<br />
Contamination level (to IEC 60664-1) 2<br />
Overvoltage category (to IEC 60664-1) II<br />
1.3.4.4 Ambient Conditions<br />
For use within buildings<br />
Permissible ambient temperature (during operation)+10 °C … +40 °C<br />
Permissible storage temperature -10 °C … +60 °C<br />
Max. rel. humidity 80% (up to 31°C)<br />
Max. permissible height above sea level<br />
(during operation)<br />
linear decreasing to<br />
50% at 40°C<br />
2000 m<br />
1.4 Unpacking<br />
Unpack the PhoeniXL immediately after delivery, even if it will be installed<br />
later on.<br />
Examine the shipping container for any external damage. Completely<br />
remove the packaging materials.<br />
Check the PhoeniXL is complete (see Chapter 1.4.1 Supplied Equipment)<br />
and carefully examine the PhoeniXL visually.<br />
If any damage is discovered, report it immediately to the forwarding agent<br />
and insurer. If the damaged part has to be replaced, please contact the<br />
orders department.<br />
Retain the packaging materials in the case of complaints about damage.<br />
1.4.1 Supplied Equipment<br />
� Leak Detector PhoeniXL<br />
� Set of fuses<br />
� Power cord<br />
� Folder with documents<br />
– Operating unstructions PhoeniXL<br />
– Spare Parts List PhoeniXL<br />
� 2 L-type screwed connections (hose connections)<br />
� 1 hose nozzle
� Blank flange DN 25 KF<br />
� Clamping ring DN 25 KF<br />
� Centering ring DN 25 KF<br />
1.4.2 Accessories and Options<br />
The following parts can be ordered additionally:<br />
� Sniffer Line SL300 252003<br />
� Leak Ware (Software for data aquisation) 14090<br />
� Helium Sniffer QUICK-TEST QT100 15594<br />
� Remote Control Set consisting of<br />
– Remote control<br />
– Cable , 4 m<br />
– Mounting parts<br />
� Extension Cable for remote control, 8 m<br />
1.4.2.1 Sniffer line SL300<br />
By use of the sniffer line the PhoeniXL can easily be converted to a sniffer<br />
leak detector. The length of the sniffer line is 4m (i.e. 12 feet).<br />
Installation:<br />
The sniffer line is to be adapted to the KF 25 of the PhoeniXL with the<br />
small flange. Then the plug of the sniffer line is to be connected to the<br />
input „Options“ of the PhoeniXL.<br />
Function:<br />
The green LED is on when<br />
– the PhoeniXL is ready for use and<br />
– the selected trigger level is not exceeded<br />
The red LED is on when<br />
– the PhoeniXL is not ready for use or<br />
– the selected trigger level is exceeded.<br />
252002<br />
14022<br />
� Spray gun with hose 16555<br />
� Set of connection plugs 20028782<br />
� Partial flow system PhoeniXL 300 only 14020 for EU-version<br />
� Partial flow system 14028 for US-version<br />
The pushbutton in the grip is for the zero function. When pushing the button<br />
the helium background will be suppressed. For cancelling the zero<br />
function push the button once more. (refer to Chapter 4.1.2.4)<br />
Head<br />
GA10218_0101 - 5/2002 ⏐ 17
Head<br />
18 ⏐GA10218_0101 - 5/2002<br />
Options for the sniffer line:<br />
� Sniffer tip rigid 120 mm 12213<br />
� Sniffer tip rigid 385 mm 12215<br />
� Sniffer tip flexible 120 mm 12214<br />
� Sniffer tip flexible 385 mm 12216<br />
� Capillary filter metal ( for rough conditions) 12217<br />
Spare parts for the sniffer line<br />
� Capillary filter plastic (5 pcs) 20003501<br />
� Sinter filter with seal (5 pcs) 20003500<br />
� Felt disc for capillary filter (50 pcs) 200001116<br />
1.4.2.2 Remote control<br />
The remote control is to operate the PhoeniXL from distance up to 30 m<br />
depending on the cable lenght. It provides the functions START, STOP/<br />
VENT, ZERO and speaker volume, and displays leak rates in the bargraph.<br />
(refer to Chapter 4.1.6 and 4.1.7)<br />
1.4.2.3 Partial flow system (PhoeniXL 300 only)<br />
In the partial flow mode the test sample is additionally evacuated <strong>by</strong> an<br />
auxiliary pump. Using the optional partial flow pump set offers to the user<br />
the following advantages:<br />
� faster response<br />
� entry into the measurement mode already at an inlet pressure of<br />
1000 mbar<br />
� faster venting of large test objects<br />
The partial flow system consists of the components partial flow valve<br />
block, right angle valve DN 25 KF, control cable and vacuum hose with<br />
flange connections.<br />
The partial flow valve block with the right angle valve has to be connected<br />
to the inlet flange of the PhoeniXL 300 . Connect the control cable to the<br />
Option port and the vacuum hose to the auxiliary pump. The PhoeniXL300 has to be configurated as described in chapter 6.6.1.4.<br />
For further detailed information please refer to operating instructions GA<br />
10.277 partial flow system.
2 Installation<br />
2.1 Working Location<br />
Danger of electrical shock. The PhoeniXL must not be operated<br />
while standing in water or when exposed to drip water. The same<br />
applies to all other kinds of liquids.<br />
Avoid contact with bases, acids or solvents as well as exposure<br />
to extreme climatic conditions.<br />
The PhoeniXL is designed for indoor use only.<br />
Ensure a sufficient air cooling. The air inlet as well the air<br />
discharge openings must never be obstructed.<br />
It is recommended that you check all major helium sources in the vicinity<br />
of the PhoeniXL within a radius of about 10 m for the presence of any big<br />
leaks. You may use the sniffer probe for this.<br />
1<br />
Fig. 2: View of the PhoeniXL<br />
1 inlet flange 2 control panel<br />
2<br />
Caution<br />
Attention<br />
Attention<br />
Attention<br />
Head<br />
GA10218_0101 - 5/2002 ⏐ 19
Head<br />
20 ⏐GA10218_0101 - 5/2002<br />
2.2 Electrical Connections<br />
2.2.1 Mains Power<br />
Generally the local regulations for electrical connections must be observed.<br />
Caution Before connecting the PhoeniXL to the mains you must make<br />
sure that the mains voltage rating of the PhoeniXL coincides with<br />
the locally available mains voltage. The instrument must exclusively<br />
be connected to a single phase supply with fuses for installation<br />
(Circuit breaker 10A max. according to IEC/EN 60898 with<br />
tripping characteristic B).<br />
Attention Only 3-core mains cables having a protection ground conductor<br />
must be used. Operation of the PhoeniXL where the ground<br />
conductor has been left unconnected is not permissible. The<br />
PhoeniXL can be damaged when using the wrong voltage. The<br />
voltage must be in the range 230V (+/- 5%) or 115V (+/- 5%)<br />
depending on the version.<br />
The mains voltage rating for the PhoeniXL can be read off from the name<br />
plate beneath the mains socket Fig. 3/4 at the side. This voltage is fixed<br />
and can not be changed.<br />
A separate fuse for each of the mains conductors has been integrated<br />
into the mains switch.<br />
The mains voltage is applied to the instrument via the detachable mains<br />
cable which is supplied with the instrument. A mains socket Fig. 3/4 is<br />
available for this purpose at the side of the instrument.
Fig. 3 Side views of the PhoeniXL<br />
Left side:<br />
1. Vent<br />
2. Exhaust<br />
3. Gasballast<br />
4. On / Off<br />
switch<br />
Right side:<br />
5. Serial RS232<br />
6. Control 2<br />
7. Record<br />
8. Control<br />
9. Option<br />
10. Remote<br />
2.2.2 Connections for the Data Acquisition<br />
Systems<br />
2.2.2.1 Option (Accessories)<br />
The sniffer line SL300 or the partial flow system may be connected to the<br />
option port (Fig. 3/9):<br />
Contact pins 1 and 3 are fused together with a 0.8 A slow-blow fuse. The<br />
amount of power which can be drawn is limited to 10 W. The contacts are<br />
numbered from bottom to top.<br />
Pin Assignment<br />
1 +24 V, constantly applied, power supply for the <strong>Leybold</strong><br />
partial flow valve or sniffer line.<br />
2 GND<br />
3, +24V switched <strong>by</strong> the PhoeniXL for an external venting<br />
valve<br />
4, 5, 6, 7, 8 These pins are used in connection with accessories.<br />
Head<br />
GA10218_0101 - 5/2002 ⏐ 21
Head<br />
22 ⏐GA10218_0101 - 5/2002<br />
2.2.2.2 Digital Out (Control)<br />
The following relay outputs Fig. 3/8 are available for further signal processing.<br />
The maximum rating for the relay contacts is 60V AC/1A.<br />
The contacts are numbered from bottom to top.<br />
Pin Assignment<br />
1 PLC in free selectable<br />
2 PLC in free selectable<br />
3 PLC in free selectable<br />
4 GND<br />
5 to 7 Digital out free selectable, 5 center contact, 6 normally open<br />
contact, 7 normally closed contact<br />
8 to 10 Digital out free selectable<br />
11 to 13 Digital out free selectable<br />
14 to 16 Digital out free selectable<br />
The pin assignment for contacts 8 to 16 follows the same order as for pins<br />
5 to 7.<br />
For further information see chapter 6.6.4.4<br />
2.2.2.3 Digital In (Control 2)<br />
These inputs can be used to control the PhoeniXL with a programmable<br />
logic control (PLC).<br />
Pin Assignment<br />
1 PLC in free selectable<br />
2 PLC in free selectable<br />
3 PLC in free selectable<br />
4 PLC GND<br />
These inputs Fig. 3/6 are working only, if the correct location of control is<br />
chosen. See chapter 6.6.4.1<br />
To avoid a mistake between the connection Control 2 and Record, pin 1<br />
and 4 are blocked. When using the connectors the guiding nose for pin 1<br />
and 4 must be removed.<br />
For further information see chapter 6.6.4.5
2.2.2.4 Recorder<br />
The recorder output Fig. 3/7 may be used to chart the leak rate, the inlet<br />
pressure and the forevacuum pressure. Both recorder activities can be<br />
adjusted individually for showing leak rates and pressures.<br />
The measured values are provided <strong>by</strong> way of an analogue signal in the<br />
range of 0 V … 10 V. The resolution is limited to 10 mV. The instrument<br />
which is connected to the recorder output (e. g. X(t) chart recorder) should<br />
have an input resistance of no less than 2.5 kΩ. The measured values are<br />
available through pins 1 and 4. The reference potential (GND) is available<br />
at pins 2 and 3. The contacts are numbered from bottom to top.<br />
The chart recorder outputs are electrically isolated from other plugs. If, in<br />
spite of this, hum interference is apparent it is recommended to operate<br />
the PhoeniXL and the chart recorder from the same mains phase. If this is<br />
not possible, you must make sure that the frame ground of both instruments<br />
is kept at the same potential.<br />
Pin Assignment<br />
1 Analog 1, leak rate, inlet pressure P1 or forevacuum pressure P2<br />
2 GND<br />
3 GND<br />
4 Analog 2, leak rate, inlet pressure P1 or forevacuum pressure P2<br />
For further information see chapter 6.6.4.2 and 6.6.4.6.<br />
2.2.2.5 RS232<br />
This RS232 interface Fig. 3/5 is wired as data communication equipment<br />
(DCE) and permits the connection of a personal computer (PC) for monitoring<br />
and data logging. The connection is made through a 9 pin sub-D sokket.<br />
For more information refer to chapter 6.6.4.3 and the Interface<br />
Description.<br />
Pin Assignment<br />
1 24 V switchable, default setting 0<br />
2 TXD<br />
3 RXD<br />
4 GND 24V<br />
5 GND<br />
6 DSR<br />
7 CTS<br />
8 RTS<br />
9 free<br />
Head<br />
GA10218_0101 - 5/2002 ⏐ 23
Head<br />
24 ⏐GA10218_0101 - 5/2002<br />
2.2.2.6 Remote Control<br />
The remote control interface Fig. 3/10 is a serial interface to control the<br />
PhoeniXL <strong>by</strong> the remote control. The remote control can be connected via<br />
an extension cable with a RJ45 plug. Refer to the Interface Description for<br />
more information. The remote control does not belong to the standard<br />
equipment.<br />
Pin<br />
Assignment<br />
2 +24V (fuse 0.8 A time lag)<br />
3 0 V<br />
4 RXD (intern. RS232)<br />
5 TXD (intern. RS232)<br />
2.3 Vaccum Connections<br />
2.3.1 Inlet Port<br />
The inlet port is located on the top of the PhoeniXL Fig. 2/1. The size of<br />
the flange is DN 25 KF.<br />
A test object or a test chamber has to be connected to the inlet port if the<br />
vacuum mode is chosen (See Chapter 6.3).<br />
The inlet port is also used for the connection of the sniffer line.<br />
2.3.2 Exhaust<br />
The exhaust Fig. 3/2 flange is located on the side of the PhoeniXL.<br />
There is a filter mounted in the exhaust that absorbs the oil steams occuring<br />
during the use of the rotary vane pump. The exhaust filter has to be<br />
cleaned when doing the maintenance.<br />
Caution When the Phoenix is running in closed rooms the exhaust has to<br />
be put out-of-doors using the provided adapter. So the oil<br />
steams that are harmful to health are lead off.<br />
With the provided connection a hose line can be connected to the<br />
exhaust of the PhoeniXL and lead off.<br />
2.3.3 Vent<br />
Usually the parts under test are vented with ambient air when the test is<br />
finished. If it is required the parts can be vented with a different gas (i. e.<br />
fresh air, dry air, nitrogen, …) at atmospheric pressure. In this case a vent<br />
hose has to be connected to the hose coupling Fig. 3/1.<br />
2.3.4 Gas ballast connection<br />
For the mode gas ballast it is recommended to use helium-free gases at<br />
atmospheric pressure. Ambient air can be contaminated with helium due<br />
to spraying or charging. In this case a gas supply line (i. e. nitrogen, fresh<br />
air, …) should be connected to the hose coupling Fig. 3/3. The pressure
of these gas line must not exceed 1050 mbar.<br />
The connector 1,2 and 3 in Fig. 3 are quick connectors for hose diameters<br />
of 8/6 mm.<br />
2.3.5 Connection of an external pump (Only<br />
PhoeniXL 300 Modul )<br />
The PhoeniXL300 Modul offers two possibilities to connect the external<br />
forevacuum pump to the DN 25 KF flange. One on the side of the<br />
PhoeniXL or one in the bottom (measurements see appendix). As default<br />
setting the flange on the side is chosen. To change the connection proceed<br />
as follows:<br />
1. Take of the mechanical hood, see chapter 9.1.2<br />
2. Loose the flange with the connection piece on the side of the PhoeniXL<br />
3. Disconnect the blind flange on the bottom, therefor the put the<br />
PhoeniXL carefully on the electronic hood.<br />
4. Screw in the connection piece into the flange in the bottom.<br />
5. Connect the hose for the forevacuum pump.<br />
6. Connect the blind flange to the sidewise flange.<br />
7. Put on the mechanical hood.<br />
2.4 Default settings<br />
The following parameters are set like shown when in the menu of the<br />
PhoeniXL under Settings → Parameters, Load → Save is chosen.<br />
Scale linear<br />
Display range: 4 decades<br />
Time axis: 32 seconds<br />
LCD inverted off<br />
Background in stand <strong>by</strong> mode: off<br />
Calibration request: off<br />
Mass: 4 (helium)<br />
Recorder: leak rate<br />
Volume: 2<br />
Leak rate unit: mbar l/s<br />
Mode: Vacuum<br />
Trigger level 1: 1E-9 mbar l/s<br />
Trigger level 2: 1E-8 mbar l/s<br />
Trigger level 3: 1E-7 mbar l/s<br />
Leak rate external test leak (vacuum): 1E-7 mbar l/s<br />
Leak rate external test leak (sniffer): 1E-5 mbar l/s<br />
Vent delay: 2 seconds<br />
Automatic purge (PhoeniXL300 dry<br />
and PhoeniXL 300 Modul only)<br />
on<br />
Head<br />
GA10218_0101 - 5/2002 ⏐ 25
Head<br />
26 ⏐GA10218_0101 - 5/2002<br />
Pressure: mbar<br />
Minimum volume: 0<br />
Beep: on<br />
Maximum evacuation time: 30 minutes<br />
Audio Alarm Type: Trigger Alarm<br />
Max. pressure limit for sniff mode 0.15 mbar<br />
Min. pressure limit for sniff mode 0.05 mbar<br />
Control location local<br />
Alarm delay: 30 seconds<br />
Leak rate filter: auto<br />
Zero: enable<br />
Vacuum ranges normal<br />
Upper display limit 1E-5 mbar l/s<br />
Service message exhaust oil filter (PhoeniXL 300 only) on
3 First Operation<br />
Check<br />
The steps for an initial operation are described in this chapter. It is explained<br />
how to switch on the PhoeniXL, how to measure and how to carry out<br />
an internal calibration.<br />
If anything unexpected happens during the initial operation or the leak<br />
detector acts in a strange way the PhoeniXL can be switched off <strong>by</strong> the<br />
mains switch at any time.<br />
3.1 Needed Equipment<br />
The following parts will be needed:<br />
� A blind flange 25 KF (if not preassembled at the inlet port).<br />
� A helium test leak with a DN 25 KF connection (optional).<br />
� A forevacuum pump connected to the DN25 KF flange on the side or<br />
under the bottom (dry or wet version) for use with the PhoeniXL 300<br />
Modul<br />
3.2 Description of the Initial Operation<br />
Please proceed the following description step <strong>by</strong> step to start the initial<br />
operation. Refer to Chapter 5 for a more detailed description.<br />
3.2.1 Startup and Measure<br />
1. Unpack the PhoeniXL and inspect it for any external damage (refer to<br />
Chapter 1.4).<br />
2. Connect the instrument to the mains power (Refer to Chapter 2.2.1).<br />
For the PhoeniXL 300 Modul connect the forevacuum pump and switch it<br />
on.<br />
3. Switch on the PhoeniXL <strong>by</strong> using the mains switch Fig. 3/4.<br />
Don’t switch the PhoeniXL on when ambient temperature is<br />
below 10°C or above 40°C.<br />
After power on a welcoming picture appears on the screen of the control<br />
panel Fig. 4/1, the status information on the speed of the turbo pump, the<br />
foreline pressure, the emission and the active filament are given.<br />
The start up procedure takes less than 2 minutes and the end is indicated<br />
<strong>by</strong> a signal. The PhoeniXL is in Stand-<strong>by</strong> mode now.(Fig. 4)<br />
4. Check if the inlet port is blanked off. If not, please mount a blind flange<br />
with o-ring on the inlet port.<br />
Head<br />
Caution<br />
GA10218_0101 - 5/2002 ⏐ 27
Head<br />
28 ⏐GA10218_0101 - 5/2002<br />
5. Press the START Button Fig. 4/10. The inlet will be evacuated and if the<br />
inlet pressure drops below 15 mbar a measured leak rate will be displayed.<br />
6. Press the STOP Button Fig. 4/12, the PhoeniXL will go to Stand-<strong>by</strong>. If<br />
you press STOP a few seconds the inlet of the PhoeniXL will be vented.<br />
7. To finish the startup procedure please proceed with step 21. For calibration<br />
proceed with step 8.<br />
3<br />
4<br />
1<br />
2<br />
9<br />
Fig. 4 Control panel<br />
Pos. Description Pos. Description<br />
1 Soft Key no. 1 8 Soft Key no. 8<br />
2 Soft Key no. 2 9 LC Display<br />
3 Soft Key no. 3 10 START<br />
4 Soft Key no. 4 11 ZERO<br />
5 Soft Key no. 5 12 STOP<br />
6 Soft Key no. 6 13 MENU<br />
7 Soft Key no. 7<br />
3.2.2 Internal Calibration<br />
8. Proceed the internal calibration (Please refer to Chapter 7.2.1). For better<br />
quantitative measurements please let the unit warm up (15 … 20<br />
minutes).<br />
� Press Calibration (Soft Key no. 5 Fig. 4/5) to get into the calibration<br />
menu.<br />
� Select internal (Soft Key no. 4, Fig. 23) to choose the internal calibration.<br />
The internal calibration starts automatically and takes about 30 seconds.<br />
After a succesfull calibration a visual and audible signal comes up.<br />
9. Press the STOP Button Fig. 4/12 until the message STAND-BY / VEN-<br />
TED appears on the display. The inlet is vented now.<br />
5<br />
6<br />
7<br />
8<br />
13<br />
10<br />
11<br />
12
3.2.3 Verification with an external test leak<br />
To verify the accuracy please proceed through the following steps. A test<br />
leak is required. If a test leak is not available please continue with step 21.<br />
10. Remove the blind flange from the inlet port and connect the open<br />
helium test leak to the inlet port.<br />
11. Press the START Button Fig. 4/10. The inlet will be evacuated and the<br />
leak rate of the test leak will be measured and displayed.<br />
12. Press the STOP Button Fig. 4/12 to stop the measurement. The<br />
PhoeniXL goes into Stand-<strong>by</strong> mode.<br />
13. Press the STOP Button Fig. 4/12 again until the message STAND-BY /<br />
VENTED appears on the display. The inlet is vented now.<br />
14. Remove the helium test leak from the inlet port and put a blind flange<br />
onto the inlet port again.<br />
3.2.4 Measure with a test object<br />
15. Remove the blind flange from the inlet port and connect the test object<br />
to the inlet port<br />
16. Press the START Button Fig. 4/10. The test object will be evacuated.<br />
17. Start spraying Helium onto the outside of the test object. The leak rate<br />
of the test object will be shown in the display.<br />
18. Press the STOP Button Fig. 4/12 to stop the measurement. The<br />
PhoeniXL goes into Stand-<strong>by</strong> mode.<br />
19. Press the STOP Button Fig. 4/12 again until the message STAND-BY /<br />
Vented appears on the display. The inlet is vented now.<br />
20. Remove the test object and put on a blinf flange on the inlet port.<br />
3.2.5 Switch off<br />
21. Switch off the PhoeniXL if the unit is in STAND-BY or VENTED mode<br />
<strong>by</strong> using the mains switch Fig. 3/4.<br />
Head<br />
GA10218_0101 - 5/2002 ⏐ 29
Head<br />
30 ⏐GA10218_0101 - 5/2002<br />
4 Description and<br />
Working Principle<br />
4.1 Introduction<br />
The PhoeniXL basically is a helium leak detector for vacuum applications,<br />
i.e. the part under test is evacuated while the test is performed. The<br />
vacuum is achieved with a pumping system that is part of the PhoeniXL.<br />
In addition the vacuum can be generated <strong>by</strong> pumps which are set up in<br />
parallel to the PhoeniXL.<br />
The PhoeniXL300 Modul needs a forevacuum pump, dry or wet version, to<br />
be connected because this unit has no internal roughing pump. The connection<br />
(DN25 KF) is on the side or under the bottom of the PhoeniXL 300<br />
Modul .<br />
Another operating mode of the PhoeniXL is the Sniffer mode which can<br />
only be used when a sniffer line (See Chapter 1.4.2) is hooked up.<br />
4.1.1 Vacuum System PhoeniXL 300<br />
The vacuum diagram below shows the major components inside the<br />
PhoeniXL 300 :<br />
1<br />
2<br />
3<br />
4<br />
Fig. 5 Vacuum diagram PhoeniXL 300<br />
Pos. Description<br />
1 MS: Mass Spectrometer, Helium sensor (180° magnetic field mass<br />
spectrometer)<br />
2 Turbomolecular Pump (TMP, provides high vacumm conditions in<br />
the MS)<br />
3 Pirani gauge P2 (fore vacuum pressure)<br />
6<br />
5
Pos. Description<br />
4 Fore pressure pump (provides the foreline pressure for the TMP und<br />
pumps down the parts under test)<br />
5 Inlet Port<br />
6 Pirani gauge P1 (inlet pressure)<br />
V1 … V7: Electromagnetic Valves to control the gas flows<br />
The mass spectrometer (MS) is mainly composed of the ion source with<br />
cathode, the magnetic separator and the ion collector.<br />
Gas molecules getting into the mass spectrometer are ionized <strong>by</strong> the ion<br />
source. These positively charged particles are accelerated into the magnetic<br />
field following a circular path, the radius of which depends on the<br />
mass-to-charge ratio of the ions. When mass 4 is selected (Default setting)<br />
only helium ions can pass this filter and reach the ion collector where the<br />
stream of the ions is measured as a electrical current. When selected<br />
another mass than 4, only the corresponding ions can pass the filter.<br />
For operation the mass spectrometer requires a vacuum level in the range<br />
of 1·10 -4 mbar and lower. This pressure is provided <strong>by</strong> the turbomolecular<br />
pump which in turn is backed up <strong>by</strong> a fore vacuum pump.<br />
Besides maintaining the pressure in the mass spectrometer the pump<br />
system is used to evacuate the test parts. It is made sure that the pressure<br />
in the mass spectrometer is low enough under all circumstances. The valves<br />
V1, V2a, V2b, V4a control the gas flows when measuring. Valves V3<br />
and V5 are used to vent the system and the Turbo pump, valve V6 controls<br />
the gas ballast function of the fore vacuum pump. Valve V7 opens<br />
and closes the internal test leak during calibration.<br />
With the pressure in the test part being lower than ambient pressure<br />
sprayed helium (or Hydrogen as forming gas) can penetrate into the part in<br />
case of a leakage. As soon as the pressure conditions allow it one of the<br />
valves to the TMP opens. Now Helium can penetrate into the mass spectrometer<br />
contrary to the pumping direction of the TMP.<br />
4.1.1.1 Vacuum System PhoeniXL300 dry<br />
The PhoeniXL300 dry has a diaphragm pump as forevacuum pump,<br />
making it suitable for applications where oil sealed systems can not be<br />
used. Furthermore the PhoeniXL 300 dry contains one more valve, the valve<br />
4b. This valve opens step <strong>by</strong> step to regulate the inlet pressure into the<br />
turbo pump.<br />
Head<br />
GA10218_0101 - 5/2002 ⏐ 31
Head<br />
32 ⏐GA10218_0101 - 5/2002<br />
3<br />
1<br />
2<br />
4<br />
P 2<br />
Diaphragm pump<br />
V 2a<br />
MS<br />
V 1<br />
V 2b<br />
Fig. 6 Vacuum diagram PhoeniXL300 dry<br />
Pos. Description<br />
1 MS: Mass Spectrometer, Helium sensor (180° magnetic field mass<br />
spectrometer)<br />
2 Turbomolecular Pump (TMP, provides high vacumm conditions in<br />
the MS)<br />
3 Pirani gauge P2 (fore vacuum pressure)<br />
4 Diaphragm pump (provides the foreline pressure for the TMP und<br />
pumps down the parts under test)<br />
5 Inlet Port<br />
6 Pirani gauge P1 (inlet pressure)<br />
V1 … V7: Electromagnetic Valves to control the gas flows<br />
300 Modul<br />
4.1.1.2 Vacuum System PhoeniXL<br />
6<br />
The PhoeniXL300 Modul has no roughing pump integrated as the other<br />
models. Therefore it can be used with an external pump only. This pump<br />
can be oil sealed or a dry version with a roughing capacity between 2.5<br />
and 65 m 3 /h. This pump has to be connected to the DN25 KF at the side<br />
or under the bottom of the PhoeniXL 300 Modul .<br />
V 7<br />
V<br />
4 b<br />
V 4 a<br />
V 6<br />
V 5<br />
P 1<br />
V 3<br />
5
P 2<br />
external pump<br />
2<br />
7<br />
4<br />
1<br />
V 6<br />
V 2a<br />
MS<br />
300 Modul<br />
Fig. 7 Vacuum diagram PhoeniXL<br />
Pos. Description<br />
1 MS: Mass Spectrometer, Helium sensor (180° magnetic field mass<br />
spectrometer)<br />
2 Turbomolecular Pump (TMP, provides high vacumm conditions in<br />
the MS)<br />
3 Pirani gauge P2 (forevacuum pressure)<br />
4 Fore pressure pump (provides the foreline pressure for the TMP<br />
und pumps down the parts under test)<br />
5 Inlet Port<br />
6 Pirani gauge P1 (inlet pressure)<br />
V1 … V7: Electromagnetic Valves to control the gas flows<br />
V 2b<br />
V 1<br />
6<br />
V 7<br />
V 4a<br />
V 5<br />
P 1<br />
V 3<br />
5<br />
Head<br />
GA10218_0101 - 5/2002 ⏐ 33
Head<br />
34 ⏐GA10218_0101 - 5/2002<br />
4.1.2 Control Panel<br />
The Control Panel Fig. 8 contains a liquid chrystal display (LC Display), the<br />
START, STOP, ZERO and MENU buttons and eight soft Keys for the different<br />
menus and inputs selections.<br />
3<br />
4<br />
1<br />
2<br />
9<br />
Fig. 8 Control Panel<br />
Pos. Description Pos. Description<br />
1 Soft Key no. 1 8 Soft Key no. 8<br />
2 Soft Key no. 2 9 LC Display<br />
3 Soft Key no. 3 10 START<br />
4 Soft Key no. 4 11 ZERO<br />
5 Soft Key no. 5 12 STOP<br />
6 Soft Key no. 6 13 MENU<br />
7 Soft Key no. 7<br />
4.1.2.1 LC Display<br />
The LC Display Fig. 8/1 is the communication interface to the operator. It<br />
displays the leak rates, the status report of the PhoeniXL, messages,<br />
warnings and errors. With the soft keys no.1 to no. 8 various functions<br />
which are shown in the display can be selected<br />
4.1.2.2 START Button<br />
Pushing the START Button Fig. 8/10 enables the PhoeniXL to start the<br />
measure procedure. The measured leak rate is shown in the display. If the<br />
START button is pushed again in measurement mode, the maximum leak<br />
rate indicator („hold“ function) is acitvated. This indicator shows the maximum<br />
leak rate since „START“. By pressing the START-button again the<br />
„hold“ function will be started again.<br />
4.1.2.3 STOP Button<br />
Pushing the STOP Button Fig. 8/12 interupts the measure procedure. If<br />
the button is pressed longer the inlet is vented acording to the conditions<br />
defined in the menu Vent delay. See Chapter 6.6.1.2 to select the time<br />
parameters of the venting.<br />
5<br />
6<br />
7<br />
8<br />
13<br />
10<br />
11<br />
12
4.1.2.4 ZERO Button<br />
Pushing the ZERO Button Fig. 8/11 enables the zero mode. (see also<br />
Chapter 4.1.6)<br />
When pressing ZERO the currently measured leak rate is taken as a background<br />
signal and is subtracted from all further measurements. As a result<br />
the displayed leak rate then is<br />
� 1·10 -8 mbarl/s in GROSS<br />
� 1·10 -12 mbarl/s in FINE<br />
After pressing ZERO (Fig. 9, t=1) the decreasing background is fitted to<br />
the course (Fig. 9, t=2) automatically. When the measurement signal declines<br />
below the saved backgrond the underground value will automatically<br />
be equated with the measurement signal. As soon as the measurement<br />
signal is increasing again the saved decreasing value remains constant.<br />
Increasings of the signal are displayed clearly as a leak So it is possible to<br />
recognize leaks even when the signal is decreasing rapidly.<br />
Fig. 9 Zero activation<br />
Fig. 10 Undo ZERO<br />
Head<br />
GA10218_0101 - 5/2002 ⏐ 35
Head<br />
36 ⏐GA10218_0101 - 5/2002<br />
When you want to see the measurement signal (including underground)<br />
please press the ZERO button again. The saved value will be reset to<br />
zero. The underground signal will not be suppressed anymore (Fig. 10).<br />
4.1.2.5 MENU Button<br />
When pressing the MENU button (Fig. 8/13) the selecting menu is shown<br />
at the display. This function is not depending on the operating mode when<br />
calibrating.<br />
If the menu is opened during the current session the operator will lead to<br />
the last screen before the menu was left.<br />
Pushing the MENU button again leads back to the screen of the previous<br />
working mode. The software shows the last screen that was used before.<br />
4.1.2.6 Soft Keys<br />
The function of the eight Soft Keys Fig. 8/1…8 depends on the current<br />
menu.<br />
Special Functions When inputs are allowed or when settings can be selected in a submenu<br />
two of the Soft Keys always have the same function:<br />
� Soft Key no. 1 Fig. 8/1 is Cancel.<br />
It allows to escape from the submenu without any changes of the present<br />
settings and return to the previous menu page.<br />
� Soft Key no. 8 Fig. 8/8 is OK.<br />
The selected settings or edited values will be stored and the previous<br />
menu page will be displayed again.<br />
4.1.2.7 Numerical Entries<br />
If you have opened a menu page where a digit can be changed please<br />
proceed in the following way:<br />
� If you don’t want to change anything, press Soft Key no. 1 Cancel.<br />
� If you want to change the digit please proceed as follows:<br />
1. The digit that can be changed is displayed inverted. With the arrows →<br />
(Soft Key no. 8) and ← (Soft Key no. 4) you can choose which digit you<br />
want to change.<br />
2. To change a digit to a specific number press the corresponding pair of<br />
numbers. A submenu opens and the desired number can be selected.<br />
The submenu closes automatically and the next digit of the total number<br />
now is inverted.<br />
3. Having reached the last digit all changes have to be confirmed <strong>by</strong> OK<br />
(Soft Key no. 8). To correct a wrong entry press Cancel (Softkey 1) or<br />
Softkey 4 ← and enter the desired value again.<br />
Example To change the trigger level 1.0 · 10 -7 mbar l/s to 3 · 10 -7 mbar l/s please<br />
press 2/3 (Soft Key no. 3) Fig. 11.
Fig. 11 Numerical entry of the Trigger Level, sample of the digit<br />
In the submenu press 3 (Soft Key no. 4) Fig. 12<br />
Fig. 12 Trigger Level, change of the first digit<br />
Head<br />
GA10218_0101 - 5/2002 ⏐ 37
Head<br />
38 ⏐GA10218_0101 - 5/2002<br />
4.1.3 Vacuum Method<br />
For the purpose of leak detection on a test sample (vacuum method), the<br />
sample has to be evacuated so that Helium or Hydrogen which is sprayed<br />
on to the outside, can enter through any leaks due to the pressure differential<br />
for detection <strong>by</strong> the PhoeniXL.<br />
The test sample is evacuated - START button (Fig 3-1/10) - <strong>by</strong> the<br />
backing pump or the external pump. In the case of larger test samples an<br />
additional external partial flow pump with a corresponding linking valve<br />
may be connected in parallel as required.<br />
Inlet valve V1 is opend so that the evacuation can take place. At the same<br />
time all other valves are closed in order to prevent an unacceptable pressure<br />
increase in the mass spectrometer.<br />
In this context (valve V2a closed) the turbomolecular pump is operated<br />
without being supported <strong>by</strong> the rotary vane pump. Since generally no gas<br />
is pumped out of the mass spectrometer, p2 remains constant or increases<br />
only slowly.<br />
The condition for the evacuation process described here is maintained<br />
until the inlet pressure p1 has droped ≤15 mbar. Now the valves V2a and<br />
V2b are opened additionally. Possibly present Helium or Hydrogen may<br />
now flow upstream against the pumping direction of the turbomolecular<br />
pump into the mass spectrometer where it is detected. This measurement<br />
mode is called GROSS. In this mode, leak reates down to 10 -8 mbar l/s<br />
can be detected.<br />
Since the rotary vane vacuum pump continues to evacuate the test sample<br />
via valves V2a, V2b and V1 the inlet pressure p1 will continue to drop.<br />
When the pressure drops below pE < 0.2 mbar, the PhoeniXL will switch<br />
to the FINE mode, i.e. valve V1and V2b closes and valve V4a opens so<br />
that the gas flow enters the turbomolecular pump at the side. This offer<br />
two advantages:<br />
a) A part of the high pumping speed of the turbomolecular pump<br />
remains available for further evacuation of the test sample. The<br />
response time is inversely proportional to pumping speed.).<br />
b) The advantages offered <strong>by</strong> the counterflow priniple can still be utzilized<br />
In the FINE mode the full sensitivity of the PhoeniXL is reached.<br />
Because of the higher base pressure of the diaphragm pump the switching<br />
from GROSS to FINE mode of the PhoeniXL 300 dry is done <strong>by</strong> the<br />
valve V4b. When the pressure drops below ≤3,5 mbar the valves V1 and<br />
V2b will be close and V4b opens step <strong>by</strong> step. When valve V4b is open<br />
completely, pressure < 0,1 mbar, V4a will open also to get the maximum<br />
pumping speed. In PRECISION mode the PhoeniXL 300 dry opens the valve<br />
V4b only, with the disadvantage of low pumping speed but with the highest<br />
sensitivity.<br />
When the leak detection process is stopped – STOP-button – all valves<br />
exept valve V2a are closed.<br />
Valve V3 is opened during venting of the inlet or test sample.
4.1.4 Partial Flow Method<br />
In the partial flow mode the test sample is additionally evacuated <strong>by</strong> an<br />
auxiliary pump. Using the optional partial flow pump set offers to the user<br />
the following advantages ( only possible for PhoeniXL300 ):<br />
� faster response<br />
� entry into the measure mode already at an inlet pressure of 1000 mbar<br />
� faster venting of large test objects<br />
Alternatively to a partial flow pump set an external auxiliary pump may also<br />
be connected via a tee, this option is possible for the PhoeniXL300 dry<br />
and PhoeniXL300 Modul also. However, in such a case the PhoeniXL will<br />
not be able to make measurements already at an inlet pressure of<br />
1000 mbar.<br />
4.1.5 Sniffer Mode<br />
The PhoeniXL may simply be converted into a sniffer leak detector via the<br />
rugged sniffer line (Cat. No. 252003)<br />
For this the KF flange of the sniffer line is connected to the inlet flange and<br />
the sniffer mode is selected through menu mode. After pressing START,<br />
the inlet valve V4a opens. The sniffer lines have been designed in such a<br />
way that the PhoeniXL is operated in the FINE mode (as described in<br />
Chapter 4.1.3). If the forevacuum pressure P2 increases over 0,2 mbar<br />
respectively 0,1 mbar a warning sign and audio alarm comes up in the display<br />
In the measurement mode the helium present in the ambient air is now<br />
indicated as the leak rate (about 2 · 10-6 mbar l/s). Smaller leaks may be<br />
detected <strong>by</strong> pressing the ZERO-button. In sniffer mode the smallest<br />
detectable leak rate is < 1· 10 -7 mbarl/s.<br />
Head<br />
GA10218_0101 - 5/2002 ⏐ 39
Head<br />
40 ⏐GA10218_0101 - 5/2002<br />
4.1.6 Controls on the Remote Control (Optional)<br />
Fig. 13 View of remote control<br />
1 ZERO button 8 Scale for the pressure in<br />
2 STOP / VENT button the test sample<br />
3 START button 9 Exponent<br />
4 LED Bargraph display 10 LED Lock<br />
5 Underflow display 11 Acoustic signal quiter<br />
(under range) 12 Acoustic signal louder<br />
6 Leak rate scale<br />
7 Overflow display<br />
(over range)<br />
An overview of the controls on the remote control is given in Fig 13.<br />
START-button Based on the operating modes Stand<strong>by</strong> or Vent of the PhoeniXL, the<br />
START-button is used to start the measurement mode <strong>by</strong> evacuating the<br />
connected test sample. Here the PhoeniXL will operate either with automatic<br />
ranging or it will only display the measured values within a fixed<br />
range which has been selected <strong>by</strong> the operator.<br />
The status of measurement readiness is indicated to the operator <strong>by</strong> a<br />
green LED at the START-button. During the pumpdown phase this LED<br />
flashes. As soon as the status of measurement readiness has been reached,<br />
this LED stays on continiously.<br />
When pressing the START-button in the Stand<strong>by</strong> mode, the internal Zero<br />
11<br />
10<br />
12
level is taken over anew, provided the PhoeniXL has been running in the<br />
Stand<strong>by</strong> or Vent status for at least 20s.<br />
The STOP/VENT-button has two different fuctions, depending on how<br />
long it is pressed:<br />
STOP function<br />
Based on the measurement mode of the PhoeniXL, a brief press of the<br />
STOP-button interrupts the evacuation process of the test sample and the<br />
measurement mode is interrupted. The duration of this key press must be<br />
no longer than the time which is defined in the menu. The default time is<br />
1.5 s. The PhoeniXL will return to the Stand<strong>by</strong> mode, i.e. all valves except<br />
valve V2a are closed. This condition is indicated to the operator <strong>by</strong> the<br />
green LED in the START-button which is turned off.<br />
After pressing the STOP/VENT-button the display will indicate the message<br />
“Stand<strong>by</strong> Vacuum”.<br />
VENT function<br />
When pressing the STOP/VENT-button for a period of time which exceeds<br />
the time as defined in the menu, the connected test sample is vented as<br />
soon as this time has elapsed. This is done <strong>by</strong> opening of the venting valve<br />
V3. This operating mode is indicated to the operator <strong>by</strong> the green LED in<br />
the STOP/VENT-button which comes on.<br />
The venting valve may be closed again <strong>by</strong> pressing the STOP/VENT-button<br />
briefly once more. The PhoeniXL will return to the Stand<strong>by</strong> mode. The<br />
“Vent Vacuum” display is turned off.<br />
A constant leak rate reading may be suppressed <strong>by</strong> pressing the ZERObutton,<br />
i.e. a constant helium background within a test sample. This button<br />
is only active in the measurement mode. (see Chapter 4.1.2.4)<br />
In AUTO mode and ZERO activated the indication limit is set to the highest<br />
sensitivity range, for. ex. 1E-12 mbar l/s<br />
The exponent on the remote control is retained in the case of “Zero” when<br />
the leak rate display always remains at the upper decade of the bargraph<br />
display. If the leak rate is indicated in the lower decade, the exponent is<br />
decremented <strong>by</strong> one in the case of “Zero”. Thus the displayed leak rate<br />
can always be suppressed <strong>by</strong> at least one decade so as to increase resolution.<br />
Example:<br />
A leak rate of 4,1 · 10 -8 mbar l/s can be displayed in two ways on the<br />
remote control:<br />
a) The exponent indicates -8 and the narrow part of the bargraph display<br />
is fully on the wider section is on up to number 4.<br />
b) The exponent indicates -7 and only the lower narrow section of the<br />
bargraph display is on up to number 0.4.<br />
In both cases the exponent -8 and the bargraph display is dark after pressing<br />
ZERO.<br />
With the background set to off pressing the zero button saves the cur-<br />
STOP / VENT-button<br />
ZERO-button<br />
Head<br />
GA10218_0101 - 5/2002 ⏐ 41
Head<br />
42 ⏐GA10218_0101 - 5/2002<br />
rently measured value as the “zero level”. However, the internal zero level<br />
setting as in use remains unchanged.<br />
After operating the zero button, only that amount of the currently measured<br />
value is substracted so that the display limit is just reached. The displayed<br />
results of a leak rate measurement will be too high <strong>by</strong> an amunt<br />
which corresponds to the display limit. Thus also increases in the leak rate<br />
will be visible, which are less than the display limit. Here the internal zero<br />
level is not changed.<br />
It is not possible to reduce the detection limit of the instrument <strong>by</strong> pressing<br />
the ZERO-button. The ZERO function is cancelled <strong>by</strong> pressing the<br />
ZERO-button once more. The ZERO function is also cancelled automatically<br />
as soon as the STOP/VENT-button is pressed.<br />
The ZERO function has an effect on all output devices such as display,<br />
chart recorder, triggers and RS232 interface.<br />
Acoustic signal The acoustic signal is used to indicate the leak rate. An acoustic signal is<br />
also generated in the case of warning and error messages.<br />
The volume of the acoustic signal can be increased <strong>by</strong> operating the button<br />
to the left of the loudspeaker. With the button to the right of the<br />
loudspeaker the volume of the acoustic signal may be reduced.<br />
To check this, a signal will be output at the selected volume for 2 seconds<br />
after operating the button. At the same time the volume is indicated on the<br />
seven segment display on the hand unit (Fig. 13/4).<br />
4.1.7 Displays on the Remote Control<br />
Measurement range Here the leak rate is indicated as a bar. In case of a range overflow, the<br />
upper arrow at the bargraph on the hand unit comes on and in the case of<br />
range underflow, the lower arrow at the bargraph on the hand unit comes<br />
on.<br />
The corresponding exponent is indicated at the tip to the right of the bargraph<br />
display.<br />
Two leak rate decades can be indicated <strong>by</strong> the bargraph display. The<br />
panel for the upper leak rate decade (1…10) is twice as wide as that for<br />
the lower decade (0.1…1).<br />
LOCK LED The LOCK LED comes on when the remote control has been locked.
5 Operation of the<br />
PhoeniXL<br />
The PhoeniXL is switched on <strong>by</strong> pushing the mains switch (Please refer to<br />
Chapter 3.2.1). After about 2 minutes the run-up procedure is finished; the<br />
unit is in Stand-<strong>by</strong>-mode and ready to measure.<br />
When using the PheoniXL 300 Modul an additional forevacuum pump (dry or<br />
wet version) has to be connected to the forevacuum connection (DN25<br />
KF) on the side or the bottom.<br />
Please connect the part to be tested to the inlet port and press START.<br />
The PhoeniXL starts to evacuate the part. The evacuation time depends<br />
on the volume of the test part. During evacuation the screen shows the<br />
inlet pressure online.<br />
Once the pressure of 15 mbar (11 Torr or 1500 Pa) is reached the unit<br />
switches to measurement mode. The corresponding leak rate is displayed.<br />
For further explanations of the screen please refer to 5.4.<br />
The displayed leak rate corresponds to the helium background concentration<br />
in the part under test. Since the PhoeniXL continues to pump down<br />
the part this background leak rate will further reduce. As soon as the leak<br />
rate is low enough in respect to your requirements you may start spraying<br />
Helium or Hydrogen to search for possible leaks.<br />
When the measurement is finished please press STOP and hold the button<br />
a few seconds to vent the part under test.<br />
5.1 Display<br />
The display is used to either show leak rates or program specific set-ups<br />
and get information <strong>by</strong> means of the software menu (Please refer to Chapter<br />
6). In addition messages and maintenance instructions are displayed<br />
on the screen (Please refer to Chapter 8).<br />
5.2 The Screen in Run-Up Mode<br />
In run-up mode the display shows:<br />
� Speed of the turbomolecular pump<br />
� Forevacuum pressure<br />
� State of emission<br />
� Active filament<br />
� A bar graph which shows the run-up progress<br />
If the display is too bright or too dark you can change the contrast. Please<br />
see Chapter 6.2.4. During run-up phase the menu button can be pushed<br />
(see Chapter 4.1.2.5) to get to the selection menu.<br />
Head<br />
GA10218_0101 - 5/2002 ⏐ 43
Head<br />
44 ⏐GA10218_0101 - 5/2002<br />
5.3 Display in stand-<strong>by</strong> mode<br />
In stand <strong>by</strong> mode the conditions are shown in the upper edge of the display<br />
(see Chapter 5.4.3). Furthermore calibration (Please refer to Chapter<br />
7) can also be started in stand <strong>by</strong> mode and purging, too (see Chapter<br />
5.3.1)<br />
5.3.1 Gas Ballast/Purge<br />
In stand-<strong>by</strong> mode the gas ballast of the fore pump can be switched on/off<br />
manually or via softkey 7. The gas ballast is for abolishing a too huge<br />
helium background. Additionally a condensation of water vapour in the<br />
pump will be avoided. After 20 minutes the machine closes the gas ballast<br />
valve automatically to limit the loss of oil.<br />
This function can be chosen automatically for the PhoeniXL300 dry and<br />
PhoeniXL300 Modul. Every time the unit changes into stand-<strong>by</strong> mode it<br />
can start automatically after 20 seconds. During this purge the membrane<br />
or sroll pump will be purged <strong>by</strong> the valve V6.<br />
Attention In case there was a large quantum of water vapor pumped with<br />
the machine please activate the gas ballast for about 20 minutes<br />
before running the machine down.<br />
5.4 The Screen in Measurement<br />
Mode<br />
In measurement mode the leak rates can be displayed in two different<br />
modes:<br />
� Numerically, combined with a bargraph Fig. 14<br />
� As trend: numerically, combined with a diagram (leak rate versus time)<br />
Fig. 15<br />
In the lower right corner of the display (next to the Soft Key no. 8, Fig. 14<br />
and Fig. 15) you will find a symbol that allows to switch between the display<br />
modes <strong>by</strong> pressing Soft Key no. 8. See chapter 5.4.4 and 5.4.5 for<br />
explanations of the different display modes.<br />
Access to calibration (Soft Key no. 5, Fig. 14 and Fig. 15) and access to<br />
the speaker volume (Soft Keys no. 2 and no. 3, Fig. 14 and Fig. 15) is the<br />
same in all modes. Also the status icons in the upper line are in common<br />
in both display modes.
Fig. 14 Display: Measurement Mode with bargraph<br />
5.4.1 Call for Calibration<br />
In all modes the Soft Key no. 5 is used to get to the calibration routine.<br />
Refer to Chapter 7 Calibration for further information regarding calibration.<br />
5.4.2 Speaker Volume<br />
On the left hand side two loud speaker symbols are shown, combined<br />
with the signs + and - (Fig. 14 & 15). By pressing the corresponding softkeys<br />
(Soft Keys no. 2 and no. 3) the volume can be adjusted for convenient<br />
loudness. In the bottom line of the display another loud speaker<br />
symbol is shown, combined with a number. This number indicates the<br />
level of the current loudness (ranges from 0 to 15).<br />
Refer to Chapter 6.4.5 Volume for information on loudness, alarms, and<br />
sound tracks.<br />
5.4.3 Status Line in the Display<br />
The status line at the top of the display (Fig. 14 and Fig. 15) informs about<br />
(reading from left to right):<br />
Symbol of display Meaning Explanation<br />
Volume level Please refer to Chapter 5.4.2<br />
Speaker Volume.<br />
S1 Trigger 1 If the trigger values are exceeded<br />
these signs are inverted.<br />
(White on black background.)<br />
S2 Trigger 2 see: Trigger 1<br />
S3 Trigger 3 see: Trigger 1<br />
! Warning triangle Please refer to Chapter 8.1<br />
VAC Working mode VAC or SNIFF indicate which<br />
working mode was selected<br />
FINE Vacuum area Depending on the inlet pressure<br />
the Phoenix may be in GROSS,<br />
PRECISION (PhoeniXL300 dry<br />
only) or FINE mode, which is<br />
indicated here (Chapter 4.1.3 )<br />
Head<br />
GA10218_0101 - 5/2002 ⏐ 45
Head<br />
46 ⏐GA10218_0101 - 5/2002<br />
Symbol of display Meaning Explanation<br />
ZERO ZERO Indicates if ZERO-function is<br />
active.<br />
5.4.4 Measurement Mode with bargraph<br />
The display shows the leak rate in big digital figures, see Fig. 14. The unit<br />
of the leak rate is shown, too. Underneath the leak rate the inlet pressure<br />
is displayed in smaller digits. The units of leak rate and pressure can be<br />
defined in the menu (See Chapter 6.4.4).<br />
Below this the same leak rate is shown graphically as a bar. The scale of<br />
this bar, i.e. the number of decades included in this bar can be defined in<br />
the menu (Please refer to Chapter 6.2.2). The programmed trigger levels<br />
(Please refer to Chapters 6.4.1 and 6.4.2) are indicated at the bar <strong>by</strong> short<br />
vertical lines: a straight line for trigger 1 and a dotted line for trigger 2.<br />
5.4.5 Measurement Mode with trend information<br />
In trend mode the leak rates are displayed over time Fig. 15. In addition<br />
the actual leak rate and inlet pressure also are displayed digitally. The time<br />
axis can be defined in the menu (Please refer to Chapter 6.2.3 Time axis).<br />
The intensity axis (y-axis) is defined the same way as the bargraph (Please<br />
refer to Chapter 6.2.1 Scale linear/logarithmic).<br />
Fig. 15 Display: Measurement Mode with trend information
6 Description of the<br />
Menu<br />
By pressing the MENU push button Fig. 8/13 the main menu will be displayed<br />
regardless of the current working mode or status of the PhoeniXL<br />
The main menu Fig. 16 leads the operator to several submenus described<br />
in the following chapters. The main menu is identically for all PhoeniXL<br />
models.<br />
The next page gives an overview of the entire menu architecture Fig. 17.<br />
The overview of the menu architecture corresponds to the PhoeniXL 300 ,<br />
differing menu points or setting posibilities are described in the respective<br />
menu point.<br />
6.1 Main menu<br />
The main menu Fig. 16 shows 7 sub-menus. In these sub-menus groups<br />
of technical features are put together logically. From here the next levels of<br />
the menu tree can be reached Fig. 17.<br />
All following chapters show the path to get to the described menu line<br />
right underneath the headline. This path is indicated <strong>by</strong> a dot (•).<br />
.<br />
Fig. 16 Display: Main Menu<br />
Head<br />
GA10218_0101 - 5/2002 ⏐ 48
Head<br />
Main menu<br />
1. Level 2. Level 3. Level<br />
View Scale linear/logarithmic<br />
Display-range auto/manual<br />
Time axis<br />
Contrast<br />
Background in Stand-<strong>by</strong><br />
Lower display limit<br />
Mode Sniff/Vacuum<br />
Trigger & Alarms Trigger Level 1<br />
Trigger Level 2<br />
Trigger Level 3<br />
Units<br />
Volume<br />
Alarm delay<br />
Audio alarm type<br />
Calibration internal<br />
external<br />
Settings Vacuum settings Vent delay<br />
Vacuum ranges<br />
Partial flow setup<br />
Sniff factor<br />
Machine factor<br />
Leak rate internal test leak<br />
Filter & Background<br />
Mass<br />
Background suppression<br />
Calculate inlet area background<br />
Leak rate filter<br />
Interfaces Location of Control<br />
Define recorder output<br />
RS232<br />
Define PLC outputs<br />
Define PLC inputs<br />
Scaling Recorder Output<br />
Scaling Recorder Output<br />
Miscellaneous<br />
Parameter save / load<br />
Time&Date<br />
Language<br />
Calibration request<br />
Service interval fore pump<br />
Service interval exhaust oil filter<br />
Service message exhaust oil filter<br />
Monitoring functions Pressure limits for sniff mode<br />
Maximum evacuation time<br />
Pressure limits for vacuum mode.<br />
Information View settings<br />
View internal data<br />
Vacuum diagram<br />
View error list<br />
Calibration history<br />
Calibration factors<br />
Service<br />
Access Control Access to CAL function<br />
Change Device-PIN<br />
Change Menu-PIN<br />
Zero<br />
49 ⏐GA10218_0101 - 5/2002<br />
Fig. 17 Menu structure overview
Explanation to figure 16:<br />
Key No. Name Description<br />
1 Back Return to the previous screen.<br />
2 View Display settings like scaling, contrast,<br />
system background.<br />
Please refer to Chapter 6.2.<br />
3 Mode Selection of the working modes Vacuum or<br />
Sniff<br />
Please refer to Chapter 6.3.<br />
4 Trigger & Alarms Settings of units, trigger levels and alarms.<br />
Please refer to Chapter 6.4.<br />
5 Calibration Calibration of the PhoeniXL.<br />
Please refer to Chapter 6.5.<br />
6 Settings Settings of internal machine parameters.<br />
Please refer to Chapter 6.6.<br />
7 Information Information on the PhoeniXL (electrical and<br />
vacuum data) and service menu.<br />
Please refer to Chapter 6.7.<br />
8 Access Control Access restrictions.<br />
Please refer to Chapter 6.8.<br />
6.2 View<br />
� Main menu > View<br />
In this menu Fig. 18 all features that influence the data display are put<br />
together.<br />
Fig. 18 Display: View Menu<br />
Head<br />
GA10218_0101 - 5/2002 ⏐ 50
Head<br />
51 ⏐GA10218_0101 - 5/2002<br />
Explanation to Fig. 18:<br />
Key No. Name Description<br />
1 Back Return to the main menu.<br />
2 Scale linear/logarithmic Settings for bargraph and trend mode.<br />
Please refer to Chapter 6.2.1.<br />
3 Display-range auto/<br />
manual<br />
6.2.1 Scale linear/logarithmic<br />
� Main menu > View > Scale linear/logarithmic<br />
<strong>Manual</strong> or automatic scaling. Please<br />
refer to Chapter 6.2.2<br />
4 Time axis Time axis in trend. Please refer to<br />
Chapter 6.2.3<br />
5 Contrast Display contrast. Please refer to Chapter<br />
6.2.4<br />
6 Background in Stand<strong>by</strong><br />
Background displayed or not. Please<br />
refer to Chapter 6.2.5<br />
8 Lower display limit Setting of the display limit. Please refer<br />
to Chapter 6.2.6<br />
These settings apply to the bargraph (= bar underneath the digital figures<br />
in the measurement mode) and Y-axis in the trend diagram.<br />
The scale of the bargraph can either be linear or logarithmic. With the<br />
arrows (↑ and ↓) it can be determined how many decades the bargraph<br />
and Y-axis arecovering.<br />
Usually a logarithmic scale is recommended because leak rates may<br />
change easily over several decades. Default setting is logarithmic with 4<br />
decades.<br />
Softkey 2: Linear<br />
Pressing this key switches the display to a linear scale, starting at zero.<br />
Softkey 3: ↓ (Number of decades)<br />
Pressing this key reduces the number of displayed decades. The minimum<br />
value is 2 decades. Only available if log (softkey 6) was chosen.<br />
Softkey 6: Logarithmic<br />
The scaling will be displayed logarithmically.<br />
Softkey 7: ↑ (Number of decades)<br />
Increase the number of displayed decades. Maximum value is 9 decades.<br />
Only available if log (softkey 6) was chosen.
6.2.2 Display-range auto/manual<br />
� Main menu > View > Display-range auto/manual<br />
The upper limit of the displayed leak rate range can be set manually or<br />
automatically. These settings apply to the bargraph ( = bar underneath the<br />
digital figures in the measurement mode and y-axis in the trend mode).<br />
With the upper limit defined here the lower limit is set to a value based on<br />
the number of decades (See Chapter 6.2.1 Scale linear/logarithmic).<br />
Softkey 2: <strong>Manual</strong><br />
The upper limit of the displayed range can be set manually.<br />
Softkey 3: ↓<br />
Decrease the upper limit if manual is chosen. The minimum value is<br />
10 -11 mbar l/s<br />
Softkey 5: ?<br />
Help text<br />
Softkey 6: Automatic<br />
The limit of the displayed range will be chosen automatically.<br />
Softkey 7: ↑<br />
Increase the upper limit if manual is chosen. The maximum value is<br />
10 +3 mbar l/s<br />
Softkey 8:<br />
Save the settings and return to the previous menu.<br />
If linear scale is selected, the lower limit is always zero. The upper limit is<br />
only a default value. You can change this on the measurement screen with<br />
the Soft Key 6 and 7 if you have chosen manual display ranging.<br />
6.2.3 Time axis<br />
� Main menu > View > Time axis<br />
The length of the time axis in trend mode can be changed in given steps<br />
between 16 … 960 seconds.<br />
Softkey 3: ↓<br />
Decrease the length of the time axis. The minimum value is 16 seconds.<br />
Softkey 5: ?<br />
Help text<br />
Softkey 7: ↑<br />
Increase the length of the time axis. The maximum adjustable value is 960<br />
seconds.<br />
Head<br />
GA10218_0101 - 5/2002 ⏐ 52
Head<br />
53 ⏐GA10218_0101 - 5/2002<br />
6.2.4 Contrast<br />
� Main menu > View > Contrast<br />
The contrast of the display can be changed. The recommended value<br />
under regular conditions is about 50 (Default setting).<br />
Softkey 3: ↓<br />
Fade the contrast to dark. The minimum values is 0.<br />
Softkey 4: Invert display<br />
Invert the contrast of the screen, that means background dark and font<br />
bright.<br />
Softkey 5: ?<br />
Help text<br />
Softkey 7: ↑<br />
Fade the contrast to light. The maximum value is 99.<br />
If <strong>by</strong> accident the display has been set too bright or too dark so that it can<br />
not be read off, this may be changed as follows:<br />
Switch off the PhoeniXL and turn it on again. During the run-up phase<br />
press the key no. 3 or 7 so long until the display can be read properly<br />
again. This setting is saved to the EPROM only after confirming this<br />
through the contrast menu. If this setting is not confirmed, the former setting<br />
will be appled after switching on the instrument on again.<br />
6.2.5 Background in Stand-<strong>by</strong><br />
� Main menu > View > Background in Stand-<strong>by</strong><br />
The internal background leak rate can be displayed in Stand-<strong>by</strong> mode or<br />
not.The default setting is OFF.<br />
Softkey 3: Off<br />
The background leak rate will not be shown.<br />
Softkey 5: ?<br />
Help text.<br />
Softkey 7: ON<br />
The background leak rate will be shown.<br />
The internal background is generated <strong>by</strong> residual gas (e. g. helium) that<br />
has not been pumped away yet. Sources for residual gas are air or absorbed<br />
gases from the inner surfaces of the PhoeniXL. This internal background<br />
will never disappear totally. Very clean systems which have been<br />
pumped for a long time will show a background in the 10 -11 mbar l/s<br />
range. Under normal conditions the background level is in the<br />
10 -10 mbar l/s or low 10 -9 mbar l/s range.<br />
When pressing START the current internal background is subtracted from<br />
all further measured signals automatically. Thus it is made sure that only
the net leak rate from the part under test is measured.<br />
When switched to Stand-<strong>by</strong> / Vent again a new internal background is calculated<br />
after 25 s. The updated value is underlined. This means that if you<br />
press START when the value is underlined, the actual background signal<br />
will be subtracted. If you press START when the value is not underlined,<br />
the old background signal from the last Stand-<strong>by</strong> will be subtracted.<br />
6.2.6 Lower display limit<br />
� Main menu > View > Lower display limit<br />
This mode limits the lower detection limit of the measured leak rate. This is<br />
valid for vacuum mode only.<br />
Softkey 3, 7: ↑ ↓<br />
Changing of the lower detection limit between 1 · 10 -9 and 1 · 10 -12<br />
The lower limit for the PhoeniXL 300 dry ranges between 1 · 10 -9 and 1 · 10 -<br />
11 mbarl/s.<br />
Softkey 5: ?<br />
Help text<br />
6.3 Mode<br />
� Main menu > Mode<br />
The mode menu Fig. 19 enables the submenu to select the different working<br />
modes.<br />
Fig. 19 Display: Mode Menu<br />
Head<br />
GA10218_0101 - 5/2002 ⏐ 54
Head<br />
55 ⏐GA10218_0101 - 5/2002<br />
Explanation to Fig. 19:<br />
Key No. Name Description<br />
1 Cancel Return to the main menu without any changes<br />
of the present settings.<br />
3 Sniff The sniffer mode will be used.<br />
7 Vacuum The vacuum mode will be used.<br />
8 OK Save the settings and return to the previous<br />
menu.<br />
6.4 Trigger & Alarms<br />
� Main menu > Trigger & Alarms<br />
The trigger levels, the volume of the loudspeaker and the units of leak<br />
rates and pressures can be set in this menu Fig. 20.<br />
Fig. 20 Display: Trigger & Alarms Menu<br />
Explanation for Fig. 20:<br />
Key No. Name Description<br />
1 Back Return to the main menu.<br />
2 Trigger Level 1 Definition of Trigger level 1. Chapter 6.4.1<br />
3 Trigger Level 2 Definition of Trigger level 2. Chapter 6.4.2<br />
4 Trigger Level 3 Definition of Trigger level 2. Chapter 6.4.3<br />
5 Units Selection of leak rate and pressure units.<br />
Refer to Chapter 6.4.4<br />
6 Volume Refer to Chapter 6.4.5<br />
7 Alarm delay Refer to Chapter 6.4.6<br />
8 Audio alarm type Choice of different alarm types. Refer to<br />
Chapter 6.4.7
6.4.1 Trigger Level 1<br />
� Main menu > Trigger & Alarms > Trigger Level 1<br />
The value of the first trigger level can be set. See Chapter 4.1.2.7 Numerical<br />
Entries for the description of the entry.<br />
Trigger 1, 2 and Trigger 3 are programmable switching thresholds. When<br />
these thresholds will be exceeded the PhoeniXL reacts as follows:<br />
In the status line of the display the signs for Trigger 1, 2 and Trigger 3 are<br />
displayed inverted if the leak rate exceeds (becomes higher than) the programmed<br />
value. (see Fig. 14 &15)<br />
The trigger-relais of the digital out switches. Please refer to Chapter<br />
2.2.2.2, Digital out, for further details.<br />
Additionally Trigger level 1 defines at which level the various alarm types<br />
react (See Chapter 6.4.7, Audio alarm type)<br />
6.4.2 Trigger Level 2<br />
� Main menu > Trigger & Alarms > Trigger Level 2<br />
The value of the second trigger level can be set. Please refer to Chapter<br />
4.1.2.7 Numerical Entries for the description of the entry.<br />
If Trigger 2 is exceeded the corrensponding relay will switch. This is also<br />
indicated at the display (see 6.4.1).<br />
6.4.3 Trigger Level 3<br />
� Main menu > Trigger & Alarms > Trigger Level 3<br />
The value of the second trigger level can be set. Please refer to Chapter<br />
4.1.2.7 Numerical Entries for the description of the entry.<br />
If Trigger 3 is exceeded the corrensponding relay will switch. This is also<br />
indicated at the display (see 6.4.1).<br />
6.4.4 Units<br />
� Main menu > Trigger & Alarms > Units<br />
The prefered leak rate unit can be selected. There is the choice of 4 (mbar,<br />
Pa, Torr, atm) pressure units and 5 leak rate units (mbar l/s, Pa m 3 /s,<br />
Torr l/s, atm cc/s, s ft 3 /yr).<br />
In Sniff mode the following measuring units are selectable (Refer to chapter<br />
6.3): ppm, g/a eq (helium leak rate is equivalent with leak rate R134a),<br />
oz/yr eq (helium leak rate is equivalent with leak rate R134a).<br />
Display<br />
Relay Output<br />
Alarm/Loudspeaker<br />
Head<br />
GA10218_0101 - 5/2002 ⏐ 56
Head<br />
57 ⏐GA10218_0101 - 5/2002<br />
Softkey 2: ↑<br />
Scroll up to select a pressure unit.<br />
Softkey 3: ↓<br />
Scroll down to select a pressure unit.<br />
Softkey 6: ↑<br />
Scroll up to select a leak rate unit.<br />
Softkey 7: ↓<br />
Scroll down to select a leak rate unit.<br />
6.4.5 Volume<br />
� Main menu > Trigger & Alarms > Volume<br />
The minimum loudness and the actual volume of the loudspeaker can be<br />
adjusted.<br />
The minimum loudness is the minimum speaker volume that cannot be<br />
exceeded to even lower values. Thus it is avoided that the actual volume<br />
is accidentally adjusted to a value that is below the noise level of the environment.<br />
The actual volume can be adjusted between 15 (maximum) and the value<br />
defined as minimum loudness.<br />
Softkey 2: ↓<br />
Decrease the minimum loudness. The minimum value is 0.<br />
Softkey 3: ↓<br />
Decrease the actual volume. The minimum value is limited <strong>by</strong> the minimum<br />
volume.<br />
Softkey 4: Beep off / Beep on<br />
Softkey 5: ?<br />
Help text.<br />
Softkey 6: ↑<br />
Increase the minimum volume. The maximum value is 15.<br />
Softkey 7: ↑<br />
Increase the regular volume. The maximum value is 15.
6.4.6 Alarm delay<br />
� Main menu > Trigger & Alarms > Alarm delay<br />
In some applications (for instance during pump down in a „chamber test<br />
system“) it might be necessary to block an alarm for some time after pressing<br />
START.<br />
This delay time of the alarm can be changed.<br />
Softkey 3: ↓<br />
Decrease the delay time. The minimum value is 0 seconds.<br />
Softkey 5: ?<br />
Help text.<br />
Softkey 7: ↑<br />
Increase the delay time. The maximum value is 10 minutes up to infinity.<br />
After pressing START the loudspeaker is activated as soon as the leak<br />
rate drops below trigger level 1 or after the entered alarm delay time has<br />
elapsed. This setting is only active for the audio alarm types SETPOINT<br />
and TRIGGER ALARM (See Chapter 6.4.7).<br />
6.4.7 Audio alarm type<br />
� Main menu > Trigger & Alarms > Audio alarm type<br />
The audio alarm type can be chosen.<br />
Softkey 2: Pinpoint<br />
This function is for localization of a known leak rate value. Details see<br />
chapter 6.4.7.1<br />
Softkey 3: Leak rate prop.<br />
The sound will be proportional to the leak rate signal. Details see chapter<br />
6.4.7.2<br />
Softkey 5: ?<br />
Help text<br />
Softkey 6: Setpoint<br />
The sound will be proportional to the leak rate signal only if trigger 1 is<br />
exceeded. Details see chapter 6.4.7.3.<br />
Softkey 7: Trigger alarm<br />
An alarm sounds when the trigger 1 is exceeded. Details see chapter<br />
6.4.7.4.<br />
Head<br />
GA10218_0101 - 5/2002 ⏐ 58
Head<br />
59 ⏐GA10218_0101 - 5/2002<br />
6.4.7.1 Pinpoint<br />
The tone of the acustical signal changes its frequency only in a Leakratewindow<br />
Fig. 21 which ranges from one decade below the Trigger level 1<br />
up to one decade above the Trigger level 1. Below the window the tone is<br />
constantly low, above the window it is constantly high.<br />
Example: The Trigger level 1 is 4·10 -7 mbar l/s. So the window where the<br />
tone changes reaches from 4·10-8 mbar l/s up to 4·10-6 mbar l/s.<br />
f<br />
2570 Hz -<br />
491 Hz -<br />
0.1 • Tr. 1 Tr. 1 10 • TR. 1<br />
Fig. 21 Pinpoint: Change of the frequency in the leak rate window<br />
(TR1=Triggerlevel 1)<br />
6.4.7.2 Leak rate prop.<br />
The frequency of the accoustic output is proportional to the reading on<br />
the bargraph display. The frequency ranges from 300 Hz to 3300 Hz.<br />
Please refer to Chapter 6.2.1 Scale linear/logarithmic for the definition of<br />
the number of decades.<br />
6.4.7.3 Setpoint<br />
The tone is off as long as the leak rate is below the Trigger level 1. Above<br />
Trigger 1 the tone varies proportional to the leak rate Fig. 22.<br />
f<br />
3000 Hz -<br />
375 Hz -<br />
no tone<br />
Tr. 1<br />
Fig. 22 Setpoint: Change of the frequency above the triggerlevel 1 (TR1=<br />
Triggerlevel 1)<br />
6.4.7.4 Trigger alarm<br />
As soon as the leak rate increases above trigger level 1, a multi-tone<br />
signal is generated. The tone does not vary with the leak rate.<br />
LR<br />
1000 • TR.1 LR
6.5 Calibration<br />
� Main menu > Calibration<br />
In the menu Calibration Fig. 23 the selection between internal and external<br />
calibration can be chosen.<br />
Please refer to Chapter 7 Calibration for a detailed description of the calibration.<br />
Fig. 23 Display: Calibration Menu<br />
Head<br />
GA10218_0101 - 5/2002 ⏐ 60
Head<br />
61 ⏐GA10218_0101 - 5/2002<br />
6.6 Settings<br />
� Main menu > Settings<br />
This menu Fig. 24 allows to observe and to change the adjustment of the<br />
internal machine settings.<br />
Fig. 24 Display: Settings Menu<br />
Explanation for Fig. 24:<br />
Key No. Name Description<br />
1 Back Return to the main menu.<br />
2 Vacuum settings Settings of vacuum system related<br />
functions. See chapter 6.6.1<br />
3 Filter & Background See Chapter 6.6.2<br />
4 Mass Switching between Helium and Hydrogen.<br />
See Chapter 6.6.3<br />
5 Interfaces Settings for electrical communication and<br />
selection for control location See Chapter<br />
6.6.4<br />
6 Miscellaneous Settings like date or time. See Chapter<br />
6.6.5<br />
7 Parameter save / load Store and load sets of parameters. See<br />
Chapter 6.6.6<br />
8 Monitoring functions Choose functions of protection of the<br />
PhoeniXL in this mode. See Chapter<br />
6.6.7
6.6.1 Vacuum settings<br />
� Main menu > Settings > Vacuum settings<br />
This menu allows to observe and to change the settings belonging to the<br />
vacuum system.<br />
Softkey 3: Vent delay<br />
Refer to chapter 6.6.1.2<br />
Softkey 4: Vacuum ranges<br />
Refer to chapter 6.6.1.3<br />
Softkey 5: Partial flow setup<br />
Refer to chapter 6.6.1.4<br />
Softkey 6: Sniffer factor<br />
Refer to chapter 6.6.1.5<br />
Softkey 7: Machine factor<br />
Refer to chapter 6.6.1.6<br />
Softkey 8: Leak rate internal test leak<br />
Refer to chapter 6.6.1.7<br />
The menu for the PhoeniXL 300 dry version allows the following vacuum settings<br />
which varies to the PhoeniXL 300 :<br />
Softkey 2: Automatic purge<br />
Refer to chapter 6.6.1.1<br />
Softkey 3: Vent delay<br />
Refer to chapter 6.6.1.2<br />
Softkey 4: Vacuum ranges<br />
Refer to chapter 6.6.1.3<br />
Softkey 6: Sniffer factor<br />
Refer to chapter 6.6.1.5<br />
Softkey 7: Machine factor<br />
Refer to chapter 6.6.1.6<br />
Softkey 8: Leak rate internal test leak<br />
Refer to chapter 6.6.1.7<br />
Head<br />
GA10218_0101 - 5/2002 ⏐ 62
Head<br />
63 ⏐GA10218_0101 - 5/2002<br />
The menu for the PhoeniXL300 Modul version allows the following vacuum<br />
settings which varies to the PhoeniXL 300 :<br />
Softkey 2: Automatic purge<br />
Refer to chapter 6.6.1.1<br />
Softkey 3: Vent delay<br />
Refer to chapter 6.6.1.2<br />
Softkey 4: Vacuum ranges<br />
Refer to chapter 6.6.1.3<br />
Softkey 5: Forepump set up<br />
Refer to chapter 6.6.1.4<br />
Softkey 6: Sniffer factor<br />
Refer to chapter 6.6.1.5<br />
Softkey 7: Machine factor<br />
Refer to chapter 6.6.1.6<br />
Softkey 8: Leak rate internal test leak<br />
Refer to chapter 6.6.1.7<br />
6.6.1.1 Automatic purge<br />
� Main menu > Settings > Vacuum settings > Automatic purge<br />
Through this menu is it possible to start automatic purge for 20 seconds<br />
automatically.<br />
This setting is only possible for the PhoeniXL 300 dry and PhoeniXL 300<br />
Modul (refer to Chapter 5.3.1)<br />
Softkey 3: Off<br />
The function automatic purge is off.<br />
Softkey 6: ON<br />
The function automatic purge is on. When changing from measure to<br />
stand-<strong>by</strong> the forevacuum pump will be purged automatically for 20<br />
seconds.<br />
6.6.1.2 Vent delay<br />
� Main menu > Settings > Vacuum settings > Vent delay<br />
Through this menu item it is possible to define the delay time until the inlet<br />
port is vented when operating the STOP botton. When the STOP button is<br />
pressed for a period of time which is shorter than the delay time specified<br />
here, the PhoeniXL will just change to Stand-<strong>by</strong> mode.<br />
When the STOP button is pressed for a period of time which is longer<br />
than the delay time specified here, the PhoeniXL will vent the inlet port.
Softkey 2: Immediately<br />
The inlet port will be vented immediately after pressing the STOP button.<br />
Softkey 3: After 1 second<br />
The inlet port will be vented with a time delay of 1 second.<br />
Softkey 4: After 1.5 seconds<br />
The inlet port will be vented with a time delay of 1.5 second.<br />
Softkey 5: ?<br />
Help<br />
Softkey 6: after 2 seconds<br />
The inlet port will be vented with a time delay of 2 second.<br />
Softkey 7: No venting<br />
The inlet port cannot be vented with the STOP button.<br />
6.6.1.3 Vacuum ranges<br />
� Main menu > Settings > Vacuum settings > Vacuum ranges<br />
With this menu you can adjust different modes concerning the activity of<br />
leak detection. This setting is only active in mode vacuum (see Chapter<br />
6.3).<br />
Softkey No. 2: GROSS only<br />
In this mode the PhoeniXL remains at the inlet flange after falling below<br />
15 mbar. When the pressure is increasing over 15 mbar the PhoeniXL<br />
switches automatically into evacuation mode. The smallest detactable<br />
leak rate is 1 ·10-8 mbarl/s.<br />
Softkey No. 3: FINE only<br />
In this mode the PhoeniXL remains after falling below 0,2 mbar at the inlet<br />
flange . Valve V1 will be closed. When the pressure at the inlet flange is<br />
increasing > 0.2 mbar the PhoeniXL switches immediately into evacuation<br />
mode. The advantage of FINE only is that while this mode is running<br />
no valve will switch and the PhoeniXL has a high pumping speed.<br />
Taste No. 5: ?<br />
Help text<br />
Softkey No.6 Partial flow<br />
Mode for use with a partial flow system<br />
Softkey No. 7: Normal (default settings)<br />
This is the default setting. The activity runs as explained in Chapter 4.1.3.<br />
Head<br />
GA10218_0101 - 5/2002 ⏐ 64
Head<br />
65 ⏐GA10218_0101 - 5/2002<br />
The PhoeniXL 300 dry allows the vacuum ranges as follows:<br />
Softkey No. 2: GROSS only<br />
In this mode the PhoeniXL 300 dry remains at the inlet flange after falling<br />
below 15 mbar. When the pressure is increasing over 15 mbar the<br />
PhoeniXL300 dry switches automatically into evacuation mode. The smallest<br />
detactable leak rate is 1 ·10 -8 mbarl/s.<br />
Softkey No. 3: FINE only<br />
In this mode the PhoeniXL300 dry remains after falling below 0,1 mbar at<br />
the inlet flange . Valve V1 will be closed. When the pressure at the inlet<br />
flange is increasing > 0.1 mbar the PhoeniXL 300 dry switches immediately<br />
into evacuation mode. The advantage of FINE only is that while this mode<br />
is running no valve will switch and the leak detector has a high pumping<br />
speed.<br />
Taste No. 5: ?<br />
Help text<br />
Softkey No. 6: Precision<br />
In this mode the PhoeniXL 300 dry dry achieves the maximum sensitivity.<br />
Softkey No. 7: Normal (default settings)<br />
This is the default setting. The activity runs through the vacuum ranges<br />
from GROSS to FINE.<br />
6.6.1.4 Partial flow setup<br />
� Main menu > Settings > Vacuum settings > Partial flow setup<br />
Through this menu item the settings for a use of a partial flow system can<br />
be set. In the partial flow mode the test sample is additionally evacuated<br />
<strong>by</strong> an auxiliary pump, which offers the advantageof measuring from 1000<br />
mbar on.<br />
This setting is not possible for the PhoeniXL 300 dry version.<br />
The PhoeniXL 300 Modul allows additionally the settings for the forepump (oil<br />
sealed or dry) and selectable pumping speed for the forepump.<br />
Partial flow setup for the PhoeniXL 300 .
Softkey 2: ↓<br />
The entry of the nominal pumping speed of the partial flow pump can be<br />
decreased. The minimum pumping speed is 4m 3 /h.<br />
Softkey 3: ↓<br />
Decrease Quick-pump time. The quick-pump time defines whether and<br />
how long valve V10 of the partial flow block is opened. (For detailed descriptions<br />
please refer to the operating instructions “GA 10.277” of the partial<br />
flow sytem.)<br />
At TQ = 0 seconds valve V10 will not be open for the time being. This selection<br />
is recommended for large volumes and dirty objects.<br />
At TQ = endless valve V10 will open when pressing start. At an inlet pressure<br />
p1 < 15 mbar the PhoeniXL switches to measurement mode and<br />
display leak rates. This is recommended if it is acceptable to wait for a<br />
while until measurement mode is reached and leak rate reading at high<br />
inlet pressures are not needed.<br />
With times between 0 and endless V10 is opened and the leak detector<br />
tries to reach a inlet pressure of less than 15 mbar within this time TQ. When TQ has gone <strong>by</strong> V10 is closed and the PhoeniXL switches to measurement<br />
mode (Helium/Hydrogen comes through the orifice of the partial<br />
flow valve block).<br />
Softkey 4: Changing behavior of the valve V8 of the partial flow system<br />
Closed: In partial flow mode valve V8 (see GA.10.277 partial flow system)<br />
switches dependent on the inlet pressure<br />
Open: Valve V8 stays open, even whwn the inlet pressure is low enough<br />
Softkey 5: ?<br />
Help text.<br />
Softkey 6: ↑<br />
Increase the pumping speed of the partial flow pump. The entry of the<br />
nominal pumping speed of the partial flow pump can be increased. The<br />
maximum pumping speed is 80 m 3 /h. Default setting 25 m 3 /h<br />
Softkey 7: ↑<br />
Increase of the quick-pump time up to the maximum.<br />
The PhoeniXL 300 Modul allows additionally the settings for the forepump (<br />
oil sealed or dry) and selectable pumping speed for the forepump.<br />
Head<br />
GA10218_0101 - 5/2002 ⏐ 66
Head<br />
67 ⏐GA10218_0101 - 5/2002<br />
Fore pump for the PhoeniXL 300 Modul :<br />
Softkey 2: ↓<br />
The entry of the nominal pumping speed of the partial flow pump can be<br />
decreased. The minimum pumping speed is 4 m 3 /h.<br />
Softkey 3: Fore pump type<br />
The PhoeniXL300 Modul can be operated with a dry fore pump (for ex.<br />
Scroll pump) or a wet fore (oil sealed) pump.<br />
This key is for choosing a dry (Sroll, piston) fore vacuum pump.<br />
Softkey 5: ?<br />
Help text<br />
Softkey 6: ↑<br />
The entry of the nominal pumping speed of the partial flow pump can be<br />
increased. The maximum pumping speed is 80m 3 /h.<br />
Softkey 7: Fore pump type<br />
The PhoeniXL300 Modul can be operated with a dry (for ex. Scroll pump)<br />
fore pump or a wet (oil sealed) pump.<br />
This key is for choosing a wet (oil sealed) fore vacuum pump.<br />
6.6.1.5 Sniffer factor<br />
� Main menu > Settings > Vacuum settings > Sniffer factor<br />
The sniffer factor takes into account, after an internal calibration, an external<br />
partial flow ratio, for example the Quicktest or a auxiliary pump with<br />
sniffer line connected via teepeace to the leak detector.<br />
During an internal calibration the internal sensitivity of the PhoeniXL is calibrated.<br />
The calculated number is multiplied with the sniffer factor and the<br />
result is the sniffer factor for this application.<br />
Softkey 4: Set default value<br />
Setting between the default value 1 for the sniffer line SL300 or the correction<br />
factor (1000) for the use of the Quicktest.<br />
6.6.1.6 Machine factor<br />
� Main menu > Settings > Vacuum settings > Machine factor<br />
The machine factor takes into account, after an internal calibration, the<br />
ratio between the effective helium pumping rate of the PhoeniXL and the<br />
pumps in the pump system in measurement mode as well as the measurement<br />
mode used (GROSS/FINE).Based on an internal calibration only,<br />
all measured leak rate would be measured too small. The measured leak<br />
rate is multiplied with the machine factor and the result is displayed. This<br />
factor is only used for vacuum measurement modes (not for sniff mode).<br />
See Chapter 4.1.2.7 Numerical Entries for the description of the entry.
Since the effective pumping rates are usually not known due to the conductances<br />
of the vacuum connections, we recommend the following indirect<br />
measurement:<br />
1. Set up the PhoeniXL for operation<br />
2. First an internal calibration must be performed with machine factor = 1<br />
(Refer to Chapter 7)<br />
3. Connect an external calibrated leak (for example 2.0·10 -6 mbar l/s) to<br />
the test chamber<br />
4. Measure leak rate of the external test leak, for example<br />
5.0·10 -8 mbar l/ s<br />
5. The machine factor is the quotient of the desired value and the actual<br />
value. Desired value: 2.0·10 -6 mbar l/ s / 5.0·10 -8 mbar l/ s = machine<br />
factor 40<br />
6. Set the acquired value in the menu point<br />
7. Calibrate again internally so that the machine factor is taken over<br />
8. All signals that are measured in further measurements are multiplied <strong>by</strong><br />
factor 40 and then shown in the display<br />
6.6.1.7 Leak rate internal test leak<br />
� Main menu > Settings > Vacuum settings > Leak rate internal test leak<br />
The value of the internal test leak can be set. See Chapter 4.1.2.7 Numerical<br />
Entries for the description of the entry.<br />
Normally there is no reason to edit the leak rate of the internal test leak<br />
besides after a change or a recertification of the internal test leak. A wrong<br />
leak rate of the internal test leak will lead to wrong leak rate readings!<br />
6.6.2 Filter & Background<br />
� Main Menu > Settings > Filter & Background<br />
The type of leak rate filters and background condition can be chosen. The<br />
default setting for the leak rate filter is auto.<br />
Softkey 2: Calculate inlet area background<br />
This function is for assignation of the background in the inlet area. See<br />
chapter 6.6.2.1<br />
Softkey 3: Background suppression<br />
Setting of the internal condition for the background. See chapter 6.6.2.2<br />
Softkey 7: Leak rate filter<br />
The type of leak rate filter can be chosen. See chapter 6.6.2.3<br />
Head<br />
GA10218_0101 - 5/2002 ⏐ 68
Head<br />
69 ⏐GA10218_0101 - 5/2002<br />
6.6.2.1 Calculate inlet area background<br />
� Main menu > Settings > Filter & Background > Calculate inlet area<br />
background<br />
This function calculates the background of the inlet area. The PhoeniXL<br />
has to be in the following conditions:<br />
1. Mode vacuum<br />
2. Stand-<strong>by</strong> mode (min. 25 seconds)<br />
3. Inlet port blanked off<br />
4. Minimum 20 minutes since power on<br />
After starting this function the leak detector starts with evacuating the inlet<br />
area. Earliest two minutes after start the measured value can be accepted<br />
as „Background inlet area“. This value will be saved.<br />
6.6.2.2 Background suppression<br />
� Main menu > Settings > Filter & Background > Background suppression<br />
Softkey 3: Off<br />
Deactivation of the offset function. Under certain circumstances a positive<br />
leak rate can be displayed. This setting should be used <strong>by</strong> experienced<br />
users only because of the high possibilities of measuring wrong<br />
leak rates.<br />
Softkey 6: inlet area<br />
Additionally to the internal offset (background) the offset of the inlet area<br />
will be subtracted. This function for the inlet area is only possible in<br />
stand-<strong>by</strong> mode, therefore this value has to be determined with the menu<br />
point „Calculate inlet area background“.<br />
Softkey 7: internal only (default)<br />
With start the PhoeniXL defines the internal offset (background) and subtracts<br />
this value from the leak rate signal, so that just the leak rate is<br />
shown in the display. This setting should be used as standard setting for<br />
the PhoeniXL.<br />
6.6.2.3 Leak rate filter<br />
Main menu > Settings > Filter & Background > Leak rate filter<br />
Softkey 3: Fixed<br />
A leak rate filter with a fixed time constant is used<br />
Softkey 6: Auto<br />
Auto makes sure, that the signals are averaged in optimized time intervals,<br />
based on the leak rate intensity. Auto also eliminates noise peaks<br />
that are not related to leak rate signals and provides extraordinary short<br />
response times for low leak rate signals. This setting should be used for<br />
the PhoeniXL.
6.6.3 Mass<br />
� Main menu > Settings > Mass<br />
The requested mass of the measured gas can be selected. The PhoeniXL<br />
must be in stand-<strong>by</strong> for changing to another mass.<br />
Softkey 2: H2 (2 amu)<br />
Hydrogen with the mass of 2 amu will be measured.<br />
Softkey 3: 3<br />
He (3 amu)<br />
Isotop of helium with the mass of 3 amu will be measured.<br />
Softkey 7: 4<br />
He (4 amu)<br />
Helium with the mass of 4 amu will be measured. Default setting<br />
After changing the mass a calibration for the selected mass should be<br />
done. See chapter 7.<br />
6.6.4 Interfaces<br />
� Main menu > Settings > Interfaces<br />
The parameters of the interface can be set.<br />
Softkey 2: Location of Control<br />
Softkey 3: Define recorder output<br />
Softkey 4: RS232<br />
Softkey 5: Define PLC outputs<br />
Softkey 6: Define PLC inputs<br />
Softkey 7: Scaling Recorder Output<br />
Softkey 8: PLC sample rate<br />
6.6.4.1 Location of Control<br />
� Main menu > Settings > Interfaces > Location of Control<br />
Softkey 2: PLC<br />
The PhoeniXL is controlled via the Digital In connector (See Chapter<br />
6.6.4.1). The START, STOP and ZERO buttons at the control panel and<br />
remote control are locked.<br />
Softkey 3: RS232<br />
The PhoeniXL is controlled via RS232 interface <strong>by</strong> an external computer.<br />
In this mode the PhoeniXL can not be controlled via keyboard. The<br />
START, STOP and ZERO button at the machine are deactivated.<br />
Softkey 5: Local & PLC<br />
The PhoeniXL is controlled via the Digital In connector or/and the START,<br />
STOP and ZERO buttons at the control panel and remote control.<br />
Softkey 6: Local & RS232<br />
Head<br />
GA10218_0101 - 5/2002 ⏐ 70
Head<br />
71 ⏐GA10218_0101 - 5/2002<br />
The PhoeniXL is controlled via the Digital In connector or/and the START,<br />
STOP and ZERO buttons at the control panel and remote control.<br />
Softkey 7: Local<br />
The PhoeniXL is controlled via the START, STOP and ZERO buttons at<br />
the control panel or remote control. This is the default setting.<br />
6.6.4.2 Define recorder output<br />
� Main menu > Settings > Interfaces > Define recorder output<br />
The signals to be recorded can be selected in this submenu. With the left<br />
keys the pin can be selected, with the right keys a function is assigned to<br />
the selected pin. The recorder output has 2 channels (Fig. 25)<br />
0 1 2 3 4 5 6 7 8 9 10 V<br />
Fig. 25 Range of leak rate in channel 1 (LR= leak rate)<br />
The following functions can be selected:<br />
Off<br />
The recorder output is switched off<br />
P1 (L200)<br />
The setting for the inlet pressure P1 is identical with those of the L200.<br />
Users can exchange their L200 for a PhoeniXL without changing pin assignement.<br />
P1 (Pirani)<br />
The inlet pressure P1 of the PhoeniXL will be shown logarithmic.<br />
P2 (L200)<br />
The setting for the forevacuum pressure P2 is identical with those of the<br />
L200. Users can exchange their L200 for a PhoeniXL without changing<br />
pin assignement.<br />
P2 (Pirani)<br />
The forevacuum pressure P2 of the PhoeniXL will be shown logarithmic.<br />
LR mantisse<br />
The leak rate mantissa is recorded lenearly from 1 ... 10V.<br />
LR exponent<br />
The exponent is recorded as step function: U = 1 ... 10V with steps of<br />
0,5V per decade, starting with 1V = 1·10-12 LR linear<br />
The fundamental output voltage is scaled linear. The fundamental voltage<br />
is 0 ... 10V in scalable steps from 0,5 to 10 volts per decade.<br />
LR log<br />
-12 -10 -8 -6<br />
-4 -2 0 +2<br />
10 10 10 10 10 10 10 10<br />
LR in channel 1
The fundamental output voltage is scaled logarithmic. The voltage output<br />
ranges from 1 to 10 V with adjustable steps of 0,5 to 10 V per decade<br />
(Fig. 26)<br />
Fig. 26 Example of range of leak rate, log. 0.5 V/decade<br />
6.6.4.3 RS232<br />
� Main menu > Settings > Interfaces > RS232<br />
Softkey 2: Baudrate and end sign<br />
Settings for the baudrate selectable between 1200 and 19200, as well as<br />
endsign between CR+LF, CR or LF.<br />
Softkey 3: Data, Parity, Stop bits<br />
The settings for Data ( 7 or 8 ), Parity ( Even, Odd, None ) and Stop bits (<br />
1 or 2 ) can be selected<br />
Softkey 7: RS 232 Protocol<br />
The protocol from the RS 232 can be choosen between: L200 size, Diagnostic,<br />
L200 Leakware and ASCII code.<br />
The calibration function of Leak Ware is not suitable with the use of a<br />
Phoenix.<br />
6.6.4.4 Define PLC outputs<br />
� Main menu > Settings > Interfaces > Define PLC outputs<br />
The following relay outputs are available for further signal processing. The<br />
maximum rating for the relay contacts is 60V AC/1A.<br />
The contacts are numbered from bottom to top.<br />
Pin<br />
Assignment<br />
1 PLC in free selectable<br />
2 PLC in free selectable<br />
3 PLC in free selectable<br />
4<br />
0 1 2 3 4 5 6 7 8 9 10 V<br />
-3 -1 +1 +3<br />
10 10 10 10<br />
GND<br />
5 to 7 Digital out free selectable, 5 center contact, 6 normally open<br />
contact, 7 normally closed contact<br />
8 to 10 Digital out free selectable<br />
11 to 13 Digital out free selectable<br />
14 to 16 Digital out free selectable<br />
Head<br />
GA10218_0101 - 5/2002 ⏐ 72
Head<br />
73 ⏐GA10218_0101 - 5/2002<br />
Description of the operation mode of the Digital Out. The pin assignement<br />
for contacts 8 to 16 follows the same order as for pins 5 to 7.<br />
The actual pin setting can be seen under Info/View internal data/page 7.<br />
The following digital out signals are selectable.<br />
Trigger 1:<br />
Is open in case Trigger Level 1 is exceeded or the machine is not in condition<br />
of measuring.<br />
Trigger 2:<br />
Trigger Level 2 analog Trigger 1.<br />
Trigger 3:<br />
Triggerlevel 3 analog Trigger 1<br />
Zero active:<br />
Is closed in case Zero function is running.<br />
Ready:<br />
Is closed in case machine is ready for measurement (Emission on, no<br />
error).<br />
CAL active<br />
Closed when machine is in calibrating routine.<br />
CAL Request<br />
Is opend in case of calibration request. During external calibration a open<br />
output indicates that the external calibrated leak has to be closed.<br />
Fail<br />
Open when a error is shown.<br />
Warning<br />
Open when a warning is shown.<br />
Gas ballast<br />
Closed when gas ballast is active.<br />
Open<br />
Open all time.<br />
Close<br />
Closed all time.<br />
Recorder Strobe<br />
Closed in case recorder output is invalid. Only used when record output is<br />
set on „leak rate“.<br />
6.6.4.5 Define PLC inputs<br />
� Main menu > Settings > Interfaces > Define PLC inputs<br />
These inputs can be used to control the PhoeniXL with a programmable<br />
logic control (PLC).<br />
Pin<br />
Assignment<br />
1 PLC in free selectable<br />
2 PLC in free selectable<br />
3 PLC in free selectable<br />
4 PLC GND
Description of operation mode of the Digital In.<br />
The PLC inputs are working only if the correct location of control has been<br />
set (see 6.6.4.1)<br />
The actual pin setting can be seen under Info/View internal data/page8.<br />
Zero:<br />
Change from low to high: activate zero<br />
Change from high to low: deactivate zero<br />
Start:<br />
Change from low to high: activate START<br />
Stop:<br />
Change from low to high: activate STOP<br />
When this inlet is longer high than chosen in chap. 6.6.1.2 then ventilate it<br />
additionaly.<br />
Purge/gas ballast:<br />
Change from low to high: activate purge/gas ballast<br />
Change from high to low: deactivate purge/gas ballast<br />
Clear:<br />
Change from low to high: confirm error message<br />
CAL:<br />
Change from low to high:<br />
When machine is in stand-<strong>by</strong> mode: start internal calibration. In case<br />
machine is measurement mode: start external calibration. (Premise: external<br />
calibration test leak has to be open and leak rate signal is stable)<br />
Change from high to low:<br />
External calibration: approve that external test leak is closed and leak rate<br />
signal is stable.<br />
High means: U > 13V(approximately 7mA)<br />
Low means: U < 7V<br />
The level of the logic signals must not exceed 35V.<br />
CAL intern:<br />
The Machine starts an internal calibration independent from the mode the<br />
machine is running in.<br />
CAL extern:<br />
The Machine starts an external calibration independent from the mode the<br />
machine is running in.<br />
Signals at these inputs are only accepted if the location of control is set to<br />
„PLC“ or „Local and PLC“. Refer to Chapter 6.6.4.1<br />
Head<br />
GA10218_0101 - 5/2002 ⏐ 74
Head<br />
75 ⏐GA10218_0101 - 5/2002<br />
6.6.4.6 Scaling Recorder Output<br />
� Main menu > Settings > Interfaces > Scaling Recorder Output<br />
Here the scaling of the recorder output can be adjusted. This adjustment<br />
is possible with only when the signal LR lin or LR log is chosen.<br />
Softkey 2: Decrease the decade<br />
The decade of the upper leakrate can be decreased<br />
Softkey 3: Decrease scaling<br />
Decrease scaling of the previously adjusted value in steps of 0.5, 1, 2,<br />
2.5, 5, 10 Volt/decade. The complete array is covers 10 V.<br />
Softkey 5: ?<br />
Help text.<br />
DSoftkey 6: Increase decade<br />
The decade of the upper leakrate can be increased<br />
Softkey 7: Increase scaling<br />
Increase scaling of the previously adjusted value in steps of 0.5, 1, 2, 2.5,<br />
5, 10 Volt/decade. The complete array covers 10 V.<br />
Example:<br />
Upper limit value is adjusted to 10 -5 (= 10V)<br />
Scaled to 5 V /decade<br />
Lower limit value consequently is 10 -3 (= 0 V)<br />
6.6.4.7 PLC Sample Rate<br />
� Main menu > Settings > Interfaces >PLC Sample rate<br />
Softkey 2: Decrease the PLC sample rate of the PLC control<br />
Decreasing the PLC sample rate down to the minimum of 10 ms. This<br />
might be necessary if exchanging an L200 to the PhoeniXL to stay compatible.<br />
Softkey 3: Increase the PLC sample rate of the PLC control<br />
Increasing the PLC sample rate to the maximum of 100 ms.<br />
6.6.5 Miscellaneous<br />
� Main menu > Settings > Miscellaneous<br />
The actual date and time, the prefered language and the mains frequency<br />
can be set in this submenu.
Softkey 2: Time&Date<br />
See chapter 6.6.5.1<br />
Softkey 3: Language<br />
See chapter 6.6.5.2<br />
Softkey 4: Calibration request<br />
See chapter 6.6.5.3<br />
Softkey 5 Service interval fore pump<br />
See chapter 6.6.5.4<br />
Softkey 7: Service interval oil filter<br />
See chapter 6.6.5.5<br />
Softkey 8: Service message oil filter<br />
See chapter 6.6.5.6<br />
6.6.5.1 Time&Date<br />
� Main menu > Settings > Miscellaneous > Time&Date<br />
Date and time can be changed on two subsequent pages. Please refer to<br />
Chapter 4.1.2.7 Numerical Entries for the description of the entry.<br />
6.6.5.2 Language<br />
� Main menu > Settings > Miscellaneous > Language<br />
The prefered language can be selected. The default setting is english.<br />
Softkey 3: German<br />
The german language will be displayed.<br />
Softkey 7: English<br />
The english language will be displayed.<br />
Head<br />
GA10218_0101 - 5/2002 ⏐ 76
Head<br />
77 ⏐GA10218_0101 - 5/2002<br />
6.6.5.3 Calibration request<br />
� Main menu > Settings > Miscellaneous > Calibration request<br />
It can be selected whether the operator is reminded of the fact that a calibration<br />
may has become necessary or not. The default value is off.<br />
Softkey 3: Off<br />
The calibration request will be switched off.<br />
Softkey 5: ?<br />
Helptext<br />
Softkey 7: ON<br />
The calibration request will be switched on.<br />
If the calibration request is switched on, a corresponding message will<br />
appear when 30 minutes have elapsed after power on or if the temperature<br />
of the PhoeniXL has changed <strong>by</strong> more than 5 °C (9 °F) since the last<br />
calibration.<br />
6.6.5.4 Service interval fore pump<br />
� Main menu > Settings > Miscellaneous > Service interval fore pump<br />
Setting for the service interval of the fore pump. This setting depends on<br />
the use of the PhoeniXL but latest after 4000 running hours or one year<br />
the oil in the pump should be controlled. See also manual for the Trivac<br />
D2,5E which is included in the document folder. See chapter 9.1.1 also.<br />
This setting is possible for the PhoeniXL 300 only.<br />
Softkey 3: ↓<br />
The time for the service interval can be decreased in steps of 500 hours.<br />
Softkey 7: ↑<br />
The time for the service interval can be increased in steps of 500 hours to<br />
the upper limit of 4000 hours.<br />
6.6.5.5 Service interval exhaust oil filter<br />
� Main menu > Settings > Miscellaneous > Service Interval exhaust oil filter<br />
Here you can enter the service intervall for the oil filter. This setting is only<br />
possible for the PhoeniXL300 . This setting depends on the use and application<br />
of your PhoeniXL and therefor no recommendations can be given<br />
(see 9.1.1).
Softkey 3: ↓<br />
Decrease of the service intervall steps of within 500 hours. The limit is<br />
1000 hours<br />
Softkey 5: ?<br />
Help text<br />
Softkey 7: ↑<br />
Increase of the service intervall within steps of 500 hours. The limit is<br />
4000 hours.<br />
6.6.5.6 Service message exhaust oil filter<br />
� Main menu > Settings > Miscellaneous > Service message exhaust oil<br />
filter<br />
The exhaust oil filter must be maintained at regular intervals to ensure the<br />
correct function of the PhoeniXL. If the service message is activated, the<br />
PhoeniXL reminds you of the required maintenance.<br />
This setting is only possible for the PhoeniXL 300 .<br />
If the service messages are ignored and the exhaust is not replaced<br />
a risk for overheating the pump motor exists.<br />
Softkey 3: ↓<br />
The service message for the oil filter can be reduced to the min. 1000<br />
hours<br />
Softkey 7: ↑<br />
The service message for the oil filter can be increased up to the max.<br />
4000 hours.<br />
6.6.6 Parameter save / load<br />
� Main menu > Settings > Parameter save / load ><br />
Enables to save and load individual settings or reload the default settings.<br />
Softkey 2 to 4: The names of the current values can be saved under a<br />
free selectable name. The saving of 3 different sets is<br />
possible.<br />
Softkey 5: load default values<br />
The factory settings will be loaded again.<br />
Softkey 6 to 8: One of three saved parameter sets can be loaded.<br />
Attention<br />
Head<br />
GA10218_0101 - 5/2002 ⏐ 78
Head<br />
79 ⏐GA10218_0101 - 5/2002<br />
6.6.6.1 Load parameter set<br />
� Main menu > Settings > Parameter save / load > Load Para set<br />
Save the current parameter settings.<br />
Softkey 4: Edit a file name<br />
Rename the parameter set.<br />
Softkey 8: Sav<br />
Save the edited parameter set.<br />
6.6.6.2 Save parameter set<br />
� Main menu > Settings > Parameter save / load > Save as<br />
The settings of the selected saved parameter set will be displayed and<br />
can be reloaded.<br />
Softkey 6: ↑<br />
Upward to the previous screen.<br />
Softkey 7: ↓<br />
Downward to the next screen.<br />
6.6.7 Monitoring functions<br />
� Main menu > Settings > Monitoring functions<br />
Softkey No. 6: Pressure limit for vacuum mode<br />
See chapter 6.6.7.1<br />
Softkey No. 7: Pressure limit for sniffer mode<br />
See chapter 6.6.7.2<br />
Softkey No. 8: Maximum evacuation time<br />
See chapter 6.6.7.3<br />
6.6.7.1 Pressure limits for vacuum mode.<br />
� Main menu > Settings > Monitoring functions > Pressure limits vacuum<br />
mode<br />
With this function the default settings for the pressure limits EVAC -<br />
GROSS and FINE can be changed.<br />
This might be necessary if other gases than air will be pumped <strong>by</strong> the<br />
PhoeniXL. The pressure signal from the gas dependant inlet pressure (P1)<br />
will dump false signals. With changing the pressure limits this preformance<br />
will be adjusted.
Softkey No. 2: ↓<br />
Decrease change over threshold EVAC-GROSS<br />
Chosable between15-3 mbar (Default value 15 mbar)<br />
Softkey No. 3: ↓<br />
Decrease change over threshold GROSS-FINE<br />
Chosable between 0,2-0,05 mbar (Default value0, 2 mbar).<br />
Softkey No. 4 Adjustment for ARGON<br />
Selection between air or Argon<br />
Softkey No. 5: ?<br />
Help text<br />
Softkey No. 6: ↑<br />
Increase change over threshold EVAC-GROSS<br />
Chosable between 3 - 15 mbar<br />
Softkey No. 7: ↑<br />
Increase change over threshold GROSS-FINE<br />
Chosable between 0,05 - 0,2 mbar<br />
6.6.7.2 Pressure limits for sniff mode<br />
� Main menu > Settings > Monitoring functions > Pressure limits sniff<br />
mode<br />
This function is automatically activated in sniff mode. The pressure limits<br />
define an upper and lower limit of the inlet pressure P1. If the pressure is<br />
not in this range error messages are generated:<br />
P > upper limit: Capillary broken<br />
P < lower limit: Flow through capillary too low (Capillary blocked)<br />
Softkey No. 2: ↓<br />
Decreasing the maximum pressure, Upper limit is 0,15 mbar (default)<br />
Softkey No. 3: ↓<br />
Decreasing the minimum pressure<br />
Softkey No. 4: Setting for Quicktest<br />
Setting for use with the Quicktest<br />
Softkey No. 6 ↑<br />
Increasing the maximum pressure<br />
Softkey No. 7: ↑<br />
Increase the minimum pressure<br />
Lower limit is 0,05 mbar (default)<br />
Head<br />
GA10218_0101 - 5/2002 ⏐ 80
Head<br />
81 ⏐GA10218_0101 - 5/2002<br />
6.6.7.3 Maximum evacuation time<br />
� Main menu > Settings > Monitoring functions > Maximum evacuation<br />
time<br />
This menu item is used to define when the gross leak message is to<br />
occur. The gross leak detection process operates in two steps and the<br />
limits can be adapted as required.<br />
This menu item is particularly useful in series testing under the same conditions<br />
at all times.<br />
After pressing the start button the test sample is evacuated. If the pressure<br />
conditions (p1 < 100 mbar) are not attained, or if the pressure does<br />
not drop low enough within the periods of time specified here, the pumpdown<br />
process is terminated and the display will indicate a message (see<br />
8.2, W75 and W76).<br />
The periods which are selected in each case depend firstly on the desired<br />
reaction time for the gross leak message, and secondly on the volume of<br />
the test sample and the effective pumping speed.<br />
Caution: If the evacuation time was set to endless, the oil level of the<br />
mechanical pump should be checked more often.<br />
Softkey No. 2: ↓<br />
Decreasing maximum evacuation time until p1 < 100 mbar. Within this<br />
period of time the inlet pressure at the test flange must have dropped<br />
below 100 mbar. The duration may be selected freely between 1 second<br />
and 9 minutes or can be set to endless. The default is 30 seconds.<br />
Softkey No. 3: ↓<br />
Decreasing maximum time until measurement Within the period of this<br />
time the status of measurement readiness must have been attained, i.e.<br />
the inlet pressure must have dropped below 15 mbar. The duration may<br />
be freely selected between 5 seconds and 30 minutes or can be set to<br />
endless.<br />
Softkey No. 5: ?<br />
Help text<br />
Softkey No. 6: ↑<br />
Increasing maximum evacuation time until p1 < 100 mbar<br />
Softkey No. 7 ↑<br />
Increasing maximum time until measurement.
6.7 Information<br />
� Main menu > Information<br />
The Information Menu Fig. 27 enables submenus to select different kinds<br />
of information belonging to the PhoeniXL.<br />
Fig. 27 Display: Information Menu<br />
Softkey 2: View settings<br />
The current settings will be displayed on 5 pages, e.g. trigger levels, test<br />
leak mass, date and time.<br />
Softkey 3: View internal data<br />
Information on measured internal data is provided on 10 screens.<br />
Softkey 4: Vacuum diagram<br />
The vacuum diagram of the PhoeniXL is shown. Here you can see which<br />
valves are opend or closed momentarily. See chapter 4.1.1<br />
Softkey 5: View error list<br />
The list of occured errors and warnings will be displayed. See chapter<br />
8.2.<br />
Softkey 6: Calibration history<br />
The carried out calibrations will be listed.<br />
Softkey 7: Calibration factors<br />
The calibration factors for the different masses and the machine factor will<br />
be displayed.<br />
Softkey 8: Service<br />
6.7.1 Service<br />
� Main menu > Information > Service<br />
With the main menu special functions can be accomplished (e. g. manual<br />
switching of the valves). The access to the service menu is protected <strong>by</strong> a<br />
PIN. This PIN is not communicated with the delivery of the leak detector<br />
but after an adequate service training.<br />
Head<br />
GA10218_0101 - 5/2002 ⏐ 82
Head<br />
83 ⏐GA10218_0101 - 5/2002<br />
6.8 Access Control<br />
� Main menu > Access Control<br />
With this menu you can deny or allow access to specific functions of the<br />
PhoeniXL 300 .<br />
Fig. 28 Display: Access Control Menu<br />
Softkey 3 Access to Zero function<br />
See chapter 6.8.1<br />
Softkey 4: Access to CAL function<br />
See chapter 6.8.2<br />
Softkey 8: Change Menu-PIN<br />
See chapter 6.8.3<br />
6.8.1 Access to CAL function<br />
� Main menu > Access Control > Access to CAL function<br />
It can be selected whether the access to the calibration menu is restricted<br />
or not.<br />
Softkey 3: Off<br />
The calibration function is only available at the main menu. If the Menu-<br />
PIN (See Chapter 6.8.2) is activated you need this PIN to start a calibration.<br />
Default setting.<br />
Softkey 5: ?<br />
Help text<br />
Softkey 7: ON<br />
The calibration function is available at the main menu and in Stand-<strong>by</strong> and<br />
the measure mode. See Chapter 7.2
6.8.2 Change Menu-PIN<br />
� Main menu > Access Control > Change Menu-PIN<br />
The access to the menu can be restricted <strong>by</strong> entering or changing the personal<br />
identification number (PIN). No PIN will be checked if 0000 is<br />
entered.<br />
The default setting for the Pin is 0013.<br />
Please refer to Chapter 4.1.2.7 Numerical Entries for the description of the<br />
entry.<br />
6.8.3 Zero<br />
� Main menu > Access Control > Zero<br />
This setting enables (respectively disables) the ZERO button at the control<br />
panel. With „Zero at FINE“ (See Chapter 6.3), the ZERO functions executes<br />
automatically as soon as the measuring range FINE is reached for the<br />
first time after START. In this mode the ZERO function also can be executed<br />
manually via the ZERO button.<br />
Softkey 3: closed<br />
ZERO button disabled<br />
Softkey 5: ?<br />
Help text<br />
Softkey 6: Zero at FINE<br />
When reaching the FINE mode the ZERO function is started automatically.<br />
Softkey 7: free<br />
Softkey ZERO is selectable. Default setting.<br />
Head<br />
GA10218_0101 - 5/2002 ⏐ 84
Head<br />
85 ⏐GA10218_0101 - 9/2002<br />
7 Calibration<br />
7.1 Introduction<br />
The PhoeniXL can be calibrated in two different ways:<br />
� Internal calibration <strong>by</strong> means of a built-in test leak.<br />
� External calibration <strong>by</strong> means of an additional test leak which then is<br />
attached to the inlet port or the component under test.<br />
During the calibration procedure the mass spectrometer is tuned to the<br />
maximum helium or hydrogen signal and this signal is referred to the<br />
known leak rate of the internal or external test leak. Although the<br />
PhoeniXL is a very stable instrument a calibration is recommended every<br />
day with heavy use, or before using the PhoeniXL from time to time, to<br />
make sure that ambient temperature changes or dirt or other impacts<br />
don’t adulterate the measurements.<br />
To get an optimized calibration the machine has to warm up at least 20<br />
minutes before use, otherwise a warning will come up which might be<br />
ignored.<br />
7.2 The calibration routines<br />
The calibration routines can be started <strong>by</strong> pressing button CAL (Softkey 5)<br />
via 3 different locations:<br />
� main menu (Fig. 16)<br />
� Stand-<strong>by</strong> mode (Fig. 8)<br />
� measurement mode (Fig. 14 & 15)<br />
The access via Stand-<strong>by</strong> mode or measurement mode can possibly be<br />
blocked (see Chapter 6.8.1). In this case the softkey is not labeled.<br />
Default: Access on.<br />
Once the calibration mode is activated the user must choose between an<br />
internal and an external calibration. Please press the corresponding Soft<br />
Key Fig. 23.<br />
A calibration may be terminated at any time <strong>by</strong> pressing the STOP Button<br />
or using the Soft Key no. 1 (Cancel) Fig. 29.<br />
7.2.1 Internal Calibration<br />
Mass 4 must be selected (Default setting)<br />
Press Softkey nr. 4 Fig. 29 to start the calibration. Once this procedure is<br />
started the entire procedure is performed automatically. At the end (after<br />
about 25 s) a visual and audio signal is released. Thereafter the unit is<br />
ready for further use.<br />
7.2.2 External Calibration<br />
For an external calibration a test leak has to be attached to the part under<br />
test or the inlet port directly depending on the application.
After External Calibration ( Fig. 23, Soft Key no. 8) has been chosen the<br />
following messages are displayed and the described actions are required:<br />
� Check the leak rate printed on the test leak<br />
and compare it with the leak rate at the<br />
display. If the leak rates are not identical<br />
press Edit leak rate (Soft Key no. 4) and<br />
correct the value.<br />
� If the leak rates are okay press START (Soft<br />
Key no. 8).<br />
Fig. 29 Display: External Calibration, Step 1<br />
Fig. 30 Display: External Calibration, Step 2<br />
Fig. 31 Display: External Calibration, Step 3<br />
Fig. 32 Display: External Calibration, Step 4<br />
� Make sure that the<br />
correct mass is selected.<br />
� Make sure that the test<br />
leak is connected and<br />
opened.<br />
� No action required.<br />
� The bargraph display<br />
shows a signal which<br />
must not vary much. If<br />
so please press OK<br />
(Soft Key no. 8).<br />
� No action required.<br />
Head<br />
GA10218_0101 - 9/2002 ⏐ 86
Head<br />
87 ⏐GA10218_0101 - 9/2002<br />
Fig. 33 Display: External Calibration, Step 5<br />
Fig. 34 Display: External Calibration, Step 6<br />
Fig. 35 Display: External Calibration, Step 7<br />
� The bargraph display<br />
shows a signal which<br />
must not decrease<br />
any more. There might<br />
be a small fluctuation<br />
which is okay. If so<br />
please press OK (Soft<br />
Key no. 8).<br />
� When signal is stable<br />
confirm with o.k.<br />
� The PhoeniXL shows<br />
the old and new calculated<br />
calibration factor<br />
(see chapter 7.3 ).<br />
7.3 Factor of Calibration - Range<br />
of Values<br />
To avoid a faulty calibration the factor of calibration is tested for plausibility<br />
at the end of the calibration routine:<br />
When the new factor of calibration is not considerably higher or lower<br />
(< factor 2) than the previous factor of calibration the new factor will be<br />
accepted automatically. When the new factor of calibration diverges<br />
stronger from the previous factor the user can decide if he wants to<br />
accept it anyway (e. g. after changing the system configuration) or not (e.<br />
g. because of a maloperation).<br />
When calibration is started via SPS or RS232 no testing for plausibility is<br />
occuring.<br />
When calibrating internal it is also monitored if the newly calculated factor<br />
of calibration is higher than 10 or lower than 0.1. In this case a warning<br />
(see W81 resp. W82 in Chapter 8.2) is displayed and the calibration will be<br />
interrupted.
8 Error And Warning<br />
Messages<br />
The PhoeniXL is equipped with a comprehensive self-diagnostic facilities.<br />
If an error or warning condition is detected it is indicated via the LC display<br />
to the operator.<br />
An audio signal is generated when an error or warning occurs. The frequency<br />
changes every 400 ms from 500 Hz to 1200 Hz and vice versa so<br />
that the signal stands out well from ambient noises normally encountered.<br />
Error and warning messages are logged and can also be displayed at a<br />
later time through the menu information (Please refer to Chapter 6.7)<br />
8.1 Hints<br />
Warnings will be indicated<br />
� when the PhoeniXL detects an abnormal condition or<br />
� when it wants to remind the operator of something (e.g. a request for<br />
calibration or a service timer has expired).<br />
The PhoeniXL will indicate a message on the LC display and will remain in<br />
the Stand-<strong>by</strong> or the measurement mode.<br />
Warning messages will remain on the LC display until the warning has<br />
been acknowledged <strong>by</strong> pressing „OK“ (Key no. 8). After that the PhoeniXL<br />
can be used again (possibly with some restrictions). As long as a warning<br />
status exists the status line shows a warning triangle (5.4.3).<br />
Errors are events which force the PhoeniXL to interrupt its measurement<br />
operations. In this case the PhoeniXL closes all valves exept valve 2a<br />
(Stand-<strong>by</strong> mode).<br />
Error messages remain on the LC display until the message has been acknowledged<br />
<strong>by</strong> pressing „Restart“ (key no. 8). After that, the PhoeniXL<br />
restarts with a new run-up procedure. In some cases it may be helpful to<br />
check some settings or measured values before the PhoeniXL restarts.<br />
Therefore it is also possible to press „Menu“ (key no. 4 or Menu key) to<br />
enter the PhoeniXL menu. After leaving the menu the same error message<br />
will be displayed again.<br />
Under extrem conditions (unknown software errors, excessively high electromagnetic<br />
interference levels) the built-in „watchdog“ circuit will prevent<br />
uncontrolled operation of the PhoeniXL. This watchdog will cause the<br />
PhoeniXL to restart. After having done so, the instrument will be running in<br />
the Stand-<strong>by</strong> mode. No error message will be output.<br />
8.2 List of Errors & Warnings<br />
The following pages contain a list of all errors and warnings displayed at<br />
the control panel. Warning messages are indicated <strong>by</strong> numbers with a leading<br />
W. Error messages are indicated <strong>by</strong> numbers with a leading E.<br />
Warning Messages<br />
Error Messages<br />
No. Displayed Message Description and possible solutions<br />
W14 Exhaust oil filter service inter- The chosen service interval for the exhaust oil filter is expired.<br />
val expired<br />
Control and/or replace the exhaust filter insert.<br />
Head<br />
GA10218_0101 - 5/2002 ⏐ 88
Head<br />
No. Displayed Message Description and possible solutions<br />
W17 Forepump service interval The service intervall for the fore pump is expired.<br />
expired!<br />
Service the fore pump<br />
W21 EEPROM write time out EEPROM defective<br />
MC 68 defective<br />
W22 EEPROM parameter queue<br />
overflow<br />
Software problrem, please contact <strong>Leybold</strong> service.<br />
E23 24V for external output 1 is<br />
too high.<br />
E24 24V for external output 1 is<br />
too low.<br />
E25 Receded valve voltage too<br />
low (< 7V).<br />
E26 24V for external output 2 is<br />
too low.<br />
E27 24V for external output 3 is<br />
too low.<br />
W28 Real time clock reset! Please<br />
enter date and time!<br />
E29 24V supply for fans is too low<br />
(< 20V).<br />
E30 24 V of the remote control is<br />
too low (< 20V).<br />
W31 The offset voltage of the preamplifier<br />
is too high (> 5mV).<br />
W32 Preamplifier temperatur is too<br />
high (> 60°C).<br />
W33 Preamplifier temperature is<br />
too low (< 2°C).<br />
E34 24V voltage at MSV board is<br />
too low!<br />
E35 Anode-cathod voltage is too<br />
high!<br />
89 ⏐GA10218_0101 - 5/2002<br />
The 24 V voltage for the external output 1 is too high<br />
Check if an external voltage has been applied to the 24V output..<br />
The 24 V voltage for the external output 1 is too low.<br />
Fuse F2 on the wiring backplane has blown<br />
I/O board is faulty.<br />
MC 68 defective.<br />
The 24 V voltage for the external output 2 (RS232) is too low.<br />
Fuse F2 on the I/O board has blown<br />
The 24 V voltage for the external output 3 (optional) is too low.<br />
Fuse F1 on the I/O board has blown<br />
Battery at MC68 is discharged or faulty.<br />
MC68 had been replaced.<br />
Fuse F1 on wiring backplane has blown.<br />
Fuse F1 on the I/O-board has blown.<br />
The preamplifier is faulty.<br />
Ambient temperature is too high.<br />
Air filter dirty.<br />
Ambient temperature is too low.<br />
Temperature sensor is faulty.<br />
Signal MVPZN on the MSV board is active. 24 V signal voltage is too<br />
low, U < 18.3 V.<br />
– Fuse F1 on the MSV board has blown.<br />
– Reference voltage UREF on the MSV board XT7/1 is too high,<br />
U>5 V.<br />
– DC/DC converter on the MSV board is defective.<br />
– 24V power supply voltage of the main power supply is defective or<br />
stressed to much.<br />
Anode-cathod voltage is > 130 V<br />
MSV board is faulty.
No. Displayed Message Description and possible solutions<br />
E36 Anode-cathode voltage is too<br />
low.<br />
E37 Suppressor voltage reference<br />
value too high!<br />
Anode-cathode voltage is < 30 V.<br />
MSV board is faulty.<br />
Fuse F4 on MSV board has blown.<br />
Head<br />
Signal MFSZH on MSV board is active. Suppressor signal command<br />
variable is too high.<br />
– Suppressor voltage has a short circuit.<br />
– MSV is faulty.<br />
E38 Suppressor potential too high! Suppressor potential is higher than 363V.<br />
MSV board is faulty.<br />
E39 Suppressor potential is too Supressor potential is lower than 297V.<br />
low.<br />
MSV board is faulty.<br />
E40 The anode potential exceeds The actual anode potential exceeds its nominal value <strong>by</strong> 10%. The<br />
its norminal value <strong>by</strong> over nominal value can be displayed in the service menu.<br />
10%!<br />
MSV is faulty.<br />
MC 68 is faulty<br />
E41 The anode potential has drop- The actual anode potential has dropped below its nominal value <strong>by</strong><br />
ped below its nominal value 10%. The nominal value can be displayed in the service menu.<br />
<strong>by</strong> over 10%!<br />
MSV is faulty.<br />
MC 68 is faulty.<br />
E42 Nominal value of the anode Signal MFAZH on MSV board is active.<br />
potential is too high!<br />
Anode voltage has been short circuited.<br />
Nominal value of the anode voltage is too high. Anode voltage is<br />
limited to about 1,200 V.<br />
E43 Cathode current is too high! Signal MPKZH on MSV board is active. Cathode current is too high, I<br />
MSV Cat-Heater >><br />
> 3.6 A.<br />
MSV is faulty.<br />
E44 Cathode current is too low! Signal MPKZN on MSV board is active. Cathode current is too low, I<br />
< 0.2 A.<br />
MSV is faulty.<br />
Faulty ion source connector or cable.<br />
W45 Emission for cathode 1 can Signal MSIBE on MSV board is not active. Emission for cathode 1<br />
not be switched on! can not be switched on. PhoeniXL switches to cathode 2. Plesae<br />
order a new ion source.<br />
Cathode 1 is defective<br />
MSV board is defective<br />
W46 Emission for cathode 2 can Signal MSIBE on MSV board is not active. Emission for cathode 2<br />
can not be switched. can not be switched on. PhoeniXL switches to cathode 1. Order a<br />
new ion source.<br />
Cathode 2 is defective.<br />
MSV board is defective.<br />
GA10218_0101 - 5/2002 ⏐ 90
Head<br />
No. Displayed Message Description and possible solutions<br />
E47 Emission for both cathodes<br />
can not be switched on!<br />
91 ⏐GA10218_0101 - 5/2002<br />
Signal MSIBE on MSV board is not active. Emission can not be switched<br />
on. Exchange the cathode <strong>by</strong> changing the ion source. After<br />
having exchanged the ion source it must be possible to switch on<br />
both cathodes manually via the service menu.<br />
Replace ion source.<br />
MSV board is defective.<br />
E48 Anode heater is faulty! Signal MSAFD on MSV board is active. Anode heater fuse has<br />
blown.<br />
Replace fuse F2 on the MSV board.<br />
E50 No communication with turbo<br />
pump converter.<br />
Clock from the frequency converter has failed. No communication to<br />
the frequency converter.<br />
Fuse F4 on the wiring backplane has blown.<br />
Drive electronics Turbo Drive S is defective.<br />
E51 Unknown TMP error The frequency converter Turbo Drive S indicates an unknown error<br />
code. Inform <strong>Leybold</strong> service<br />
E52 TMP frequency is too low! TMP frequency is too low!<br />
Frequency converter is faulty.<br />
Turbomolecular pump is faulty.<br />
W53 Temperature at electronic unit Ambient temperature too high.<br />
is too high (>55°C)<br />
Ventilation failure.<br />
Air filter dirty and have to be changed.<br />
E54 Temperatur at electronic unit Ambient temperature is too high.<br />
is too high (>60°C).<br />
Internal ventilation has failed.<br />
Air filters are dirty and must be exchanged.<br />
W55 Temperature at electronic unit The temperature sensor on the wiring plane indicates T < 2 °C. Run-<br />
is too low (< 2°C)<br />
up time for the forevacuum pump will be longer.<br />
Temperature sensor is faulty.<br />
Ambient temperature is too low.<br />
E56 Inlet pressure p1 too low! Output voltage Pirani P1 U < 0,27 V.<br />
Pirani sensor P1 is defective.<br />
Pirani electronics on the I/O board is defective.<br />
E58 Foreline pressure p2 too low! Output voltage Pirani P2 U < 0,27 V.<br />
Pirani sensor P2 is defective.<br />
Pirani electronics on the I/O board is defective.<br />
E60 p2>10mbar after 5 minutes Run-up time of the forevacuum pump is too long.<br />
since power on<br />
Forepump is faulty.<br />
Valve V2 does not open.<br />
Leak in the high vacuum system.
Head<br />
No. Displayed Message Description and possible solutions<br />
E61 Emission fail. Emission could not be switched on. MSV subassembly indicates a<br />
fault. MENB emission current not within range.<br />
MSV board is defective.<br />
Both cathodes are defective, replace ion source.<br />
W62 Flow through capillary to low. In the sniffer mode the intake pressure of the sniffer line is controlled.<br />
If the pressure falls below the minimum limit, the flow through the<br />
capillary is too low (contamination) or the capillary is blocked (foreign<br />
objects, particles).<br />
The minimum limit can be set <strong>by</strong> the menu. Default value is 0.05<br />
mbar. 6.6.1.7.<br />
Filter in the tip is clogged.<br />
W63 Capillary broken In the sniffer mode the intake pressure of the sniffer line is controlled.<br />
If the pressure exceeds the maximum limit, the flow through the<br />
capillary is too high (no leak tightness, broken capillary).<br />
The maximum limit can be set <strong>by</strong> the menu. Default value is 0,15<br />
mbar. 6.6.1.7.<br />
The capillary is broken or has been torn off.<br />
E64 TMP error: Nomimal speed Nominal speed of the pump has been exceeded <strong>by</strong> over 10%<br />
has been exceeded <strong>by</strong> over<br />
10%<br />
EMC problems: Check connecting cable, insert it properly. Switch<br />
the power supply voltage off and then on again.<br />
Turbo.Drive S faulty: Inform <strong>Leybold</strong> Service<br />
E65 TMP error: Pass through time Max. time for passing through the critical frequencies has been<br />
exceeded<br />
exceeded.<br />
Forevacuum or high-vacuum pressure to high: see chapter 6.6.7.1<br />
to reduce the inlet pressure of the PhoeniXL<br />
Bearing defective: Inform <strong>Leybold</strong> service for repair<br />
E66 TMP error: Bearing tempera- Max. bearing temperature has been exceeded<br />
ture too high (>67°C)<br />
Forevacuum or high-vacuum pressure to high: see chapter 6.6.7.1<br />
to reduce the inlet pressure of the PhoeniXL<br />
Fan defective: Replace the fan<br />
Ambient temperature too high: Feed cooler air to the PhoeniXL<br />
Bearing defective: Inform <strong>Leybold</strong> service for repair<br />
E67 TMP error: Short circuit in Short circuit in the pump’s motor or the connecting cable<br />
TMP-motor or connecting<br />
cable<br />
Check to see if the connecting cable is undamaged, exchange if<br />
required.<br />
Inform <strong>Leybold</strong> service in case of short circuit in TMP motor<br />
E68 TMP error: temperature con- Maximum temperature for the converter has been exceeded.<br />
verter too high (>75°C)<br />
Ambient temperature too high: Feed cooler air to the PhoeniXL<br />
Fan defective: Replace the fan<br />
Forevacuum or high-vacuum pressure to high: see chapter 6.6.7.1<br />
to reduce the inlet pressure of the PhoeniXL<br />
GA10218_0101 - 5/2002 ⏐ 92
Head<br />
No. Displayed Message Description and possible solutions<br />
E69 TMP error: Runup timeout Max. time after which the pump must enter its normal operation<br />
mode has been exceeded.<br />
Forevacuum or high-vacuum pressure to high: see chapter 6.6.7.1<br />
to reduce the inlet pressure of the PhoeniXL<br />
Bearing defective: Inform <strong>Leybold</strong> service for repair<br />
E70 TMP error: TMP motor temperature<br />
too high (>90°C)<br />
93 ⏐GA10218_0101 - 5/2002<br />
Max. motor temperature has been exceeded.<br />
Forevacuum or high-vacuum pressure to high: see chapter 6.6.7.1<br />
to reduce the inlet pressure of the PhoeniXL<br />
E71 TMP error: TMP could not be<br />
Fan defective: Replace the fan<br />
Ambient temperature too high: Feed cooler air to the PhoeniXL<br />
Bearing defective: Inform <strong>Leybold</strong> service for repair<br />
Pump could not be identified or no pump is connected.<br />
indentified<br />
Pump not connected to Turbo.Drive S: Check connecting cable<br />
E73 Emission off (p2 too high) The emission is switched off as soon as the pressure P2 > 0.2 mbar<br />
or 1,5 mbar in the measurement mode. If after closing the inlet valve<br />
the pressure drops again, the leak detector will revert to the stand<strong>by</strong><br />
mode.<br />
Air incrush in the measurement mode.<br />
W76 Maximum of evacuation time Within the pre set evacuation time the pressure threshold of 100<br />
was exeeded.<br />
mbar was not reached.<br />
Test sample has got a GROSS leak.<br />
Wrong setting ( too short) of the max. time of evacuation.<br />
W77 Peak not in Range The signal maximum has shifted to mass range alignment limits.<br />
Signal of leak rate was instable during mass adjustment. Calibrate<br />
again.<br />
Check the basic setting for the anode voltage through the service<br />
menu.<br />
Check calibrated leak.<br />
W78 Differences of signal between The amplifier voltage difference between opened and closed calibra-<br />
test leak open and closed is ted leak is less than 10 mV.<br />
too low.<br />
Calibrated leak has not been closed properly.<br />
W79 Signal of test leak is too small Calibrated leak is too small or has not been opened. Preamplifier<br />
voltage < 10 mV.<br />
W80 Please calibrate machine The automatic request of calibration is activated (7.2.1) and has full-<br />
newly<br />
filled at least one of the conditions:<br />
30 minutes are passed since power on.<br />
Temperature of the pre-amplifier has changed more than 5°C since<br />
the last calibration.<br />
Massadjustments were changed.
No. Displayed Message Description and possible solutions<br />
Head<br />
W81 CAL Factor too low The calculated factor falls out of the valid range (10). The old factor is<br />
retained.<br />
Possible fault cause:<br />
The conditions for calibration have not been maintained.<br />
The leak rate of the internal calibrated leak which was entered is<br />
much too high or much too small.<br />
W83 All EEPROM parameter lost.<br />
Please check your settings.<br />
W84 EEPROM parameter initialized.<br />
Please check your settings<br />
W85 Lost EEPROM parameter!<br />
Please check your settings!<br />
EEPROM on back plane is empty and was initialized with default valves.<br />
Enter all parameters again.<br />
The EEPROM might be faulty when warning comes up again after<br />
power up.<br />
Software update has been installed<br />
Writing access was interrupted. Please check all adjustments.<br />
An software update was done. In this case the notice can be ignored.<br />
When warning comes up again after powering up the EEPROM<br />
might be faulty.<br />
GA10218_0101 - 5/2002 ⏐ 94
Head<br />
95 ⏐GA10218_0101 - 5/2002<br />
9 Maintenance<br />
9.1 LEYBOLD Service<br />
If equipment is returned to <strong>Leybold</strong>, indicate whether the equipment is<br />
free of substances damaging on health or whether it is contaminated. If it<br />
is contaminated also indicate the nature of the hazard. For this you must<br />
use a Declaration of Contamination form Fig. 1 which has been prepared<br />
<strong>by</strong> us which we will provide upon request or you may copy the form which<br />
is attached in the folder of documents. As well you can download this<br />
form from our homepage: www.leybold.com under „Support & Download“.<br />
Please attach this form to the equipment or enclose it with the equipment.<br />
This Declaration of Contamination is required to meet German Law and to<br />
protect our personnel. LEYBOLD must return any equipment without a<br />
Declaration of Contamination to the sender’s address.<br />
Before shipping fir the yellow screw-on seals on to the connections<br />
EXHAUST and GAS BALLAST.<br />
9.1.1 Maintenance Plan<br />
Maintenance work should be done on the PhoeniXL as required. This<br />
work will normally be limited to exchanging the oil in the Trivac D2,5E<br />
rotary vane pump and the built in air and oil filters.<br />
As a preventive measure it is recommended that you check the rotary<br />
vane pump once a month. Here note schould be taken of the oil level and<br />
the colour of the oil.<br />
Attention Only Arctic oil (Cat. no. 20028181) must be used in the TRIVAC<br />
D2,5E in the PhoeniXL.<br />
The monthly interval for the check is just a nominal period. If the PhoeniXL<br />
is used heavily, in particular in sniffer mode, then this check should be<br />
performed more frequently. The rotary vane pump is located on the side<br />
of the mechanical section at the bottom of the leak detector.
9.1.2 Opening the PhoeniXL<br />
2<br />
3<br />
Fig. 36 Backview of PhoeniXL<br />
1. Switch the PhoeniXL off.<br />
2. Pull the mains cord on the PhoeniXL.<br />
You can get an electric shock!<br />
1<br />
1: Openings for removal of the cover for the mechanical section<br />
2: Four screws for loosening the cover for the electronics section.<br />
3: Mechanical cover<br />
4: Electronic cover<br />
3. Separate the PhoeniXL from other vacuum components at the test port.<br />
4. Turn the PhoeniXL so that it is orientated in the same way as shown in<br />
Fig 36.<br />
5. Use two flat blade screwdrivers and insert these into the openings (Fig.<br />
36/1) and lever the cover for the mechanical section out at the bottom.<br />
6. In doing so, the cover should be moved somewhat to the front <strong>by</strong> the<br />
downward motion of the screwdrivers. The cover may be lifted up <strong>by</strong><br />
the upwards motion of the srewdrivers so that the cover is disengaged<br />
completely.<br />
7. Then pull the cover off the mechanical section up to its stop and<br />
4<br />
Caution<br />
Head<br />
GA10218_0101 - 5/2002 ⏐ 96
Head<br />
97 ⏐GA10218_0101 - 5/2002<br />
remove it to the front.<br />
8. Removing the cover for the electronics section <strong>by</strong> removing the four<br />
Phillips screws (see Fig. 36/2).<br />
9. Pull the cover over the electronics section back to the rear and place it<br />
aside.<br />
10. After completion of all maintenance work put the electronic cover<br />
back in place and screw it tighten. The cover of the mechanical section<br />
must engage properly in the openings at the bottom.<br />
9.1.3 Exchanging the filter mats<br />
The filter mats have been built in to filter the dust out the air which is taken<br />
in. In order to ensure that the filter mats will not throttle the air flow and so<br />
that sufficient cooling is possible at all times, the filter mats should be cleaned<br />
or exchanged as soon as these have attained a dark grey colour.<br />
Filter mats are used at three places within the PhoeniXL:<br />
a) at the ventilation slit of the electronic cover (only partly visible from<br />
the outside)<br />
b) on the face side on the back (only partly visible from the outside)<br />
c) at the fan of the turbomolecular pump (only partly visible from the<br />
outside)<br />
To exchange the filter mats remove the covers as described above.<br />
Filter mat a.) these filter mats are srewed to the electronic cover. Unscrew<br />
the screws and exchange the filter mats. (Cat. no. 20099025)<br />
Filter mat b.) This filter mat is located on the side together with a further<br />
metal grid an a recess. It can be exchanged without having to use any<br />
tools. (Cat. no. 20099025)<br />
Filter mat c) This filtermat is fixed before the fan with a plastic bracket.<br />
Take of the bracket and remove the filter, put on the bracket and fix it properly.<br />
(Cat. no. 200001366)<br />
Under certain circumstances a dirty mat may be cleaned <strong>by</strong> shaking the<br />
dust out or <strong>by</strong> using a vacuum cleaner so that the filter mat can be used<br />
again.<br />
9.1.4 Exchanging the oil<br />
Remove the cover of the mechanical section as described in Chapter<br />
9.1.2.<br />
Caution Before starting with any disassembly work on the pumps, pull<br />
the mains plug first. When the pump has been pumping hazardous<br />
substances, dertermind the kind of hazard first and ensure<br />
that suitable safety precautions are taken.<br />
Observe all safety regulations<br />
Attention When disposing of waste oil you must observe the applicable
egulations for the safety of the environment.<br />
The oil change procedure are described in the corresponding Operating<br />
Instructions GA 01.601 and these must be foolowed closely.<br />
As already stated in Chapter 9.1.1 only Arctic oil must be used for the Trivac<br />
D 2,5E pump in the PhoeniXL.<br />
After completion of all maintenance work the cover of the mechanical section<br />
must engage properly in the openings at the bottom.<br />
9.1.5 Cleaning<br />
The housing of the PhoeniXL is made of painted plastic parts. Thus for the<br />
purpose of cleaning, only such agents should be used which are generally<br />
also used for other painted or plasctic surfaces (mild household cleaning<br />
agents, for example). Normally a moistened peace of cloth will do. Never<br />
use any solvents which are capable of dissolving paint (like acetone, toluol,<br />
etc.).<br />
A soft brush or a vacuum cleaner is recommended for cleaning the ventilation<br />
slits.<br />
9.1.6 Exchanging the fuses<br />
Before exchanging the fuses you must disconnect the mains<br />
cord.<br />
1. Switch the PhoeniXL off.<br />
2. Pull the mains cord off the PhoeniXL.<br />
3. Use a screwdriver to fold out the lid of the mains socket from the right<br />
(the mains switch is not affected <strong>by</strong> this).<br />
4. The fuses can be removed <strong>by</strong> pulling the drawers out which are marked<br />
<strong>by</strong> the arrows. When reinsering these make sur that the arrows point<br />
downwards.<br />
5. In any cases two fuses of the same rating must be inserted. The required<br />
mains fuses are: T 10A slow blow (20x5mm dia.) for 100V...230V.<br />
6. After having exchanged the fuse(s) press the lid of the mains socket<br />
firmly back on.<br />
7. Insert the mains cord into the PhoeniXL and switch the instrument on.<br />
Beside these mains fuses several internal circuits are fused separately.<br />
These fuses are listed in the following table. See also Fig 37.<br />
In order to exchange these fuses you must proceed as follows:<br />
1. Switch the PhoeniXL off<br />
2. Pull the mains cord on the PhoeniXL<br />
3. Remove the cover for the mechanical and electronics section according<br />
to Chapter 9.1.2.<br />
Caution<br />
Head<br />
GA10218_0101 - 5/2002 ⏐ 98
Head<br />
Nr. 1 F1 on MSV<br />
Fuse rating: T 2A<br />
99 ⏐GA10218_0101 - 5/2002<br />
4. Exchange fuses<br />
Nr. 2 F2 on MSV Not in use.<br />
Nr. 3 F3 on MSV<br />
Fuse rating: T 1A<br />
Nr. 4 F4 on MSV<br />
Fuse rating: M 0,032A<br />
Nr. 5 F1 on I/O board<br />
Fuse rating: T 0,8A<br />
Nr. 6 F2 on I/O board<br />
Fuse rating: T 0,2A<br />
Nr. 7 F 1 on MB<br />
Fuse rating: T 0,8A<br />
Nr. 8 F 2 on MB<br />
Fuse rating: T 4A<br />
Nr. 9 F 3 on MB<br />
Fuse rating: T 0,8A<br />
Nr.<br />
10<br />
F 4 on MD<br />
Fuse rating: T 8A<br />
As can be seen in Fig 37, fuses 1, 2, 3 and 4 are located on the MSV<br />
board, fuses 5 and 6 on the I/O board and the fuses 7, 8, 9 and 10 are<br />
located on the wiring backplane under the MSV board.<br />
5. Finally re-install the covers for the electronics and mechanical section in<br />
the reverse order.<br />
24 V system voltage of the mass spectrometer supply.<br />
Loosen control panel (two Phillips screws). Loosen the panel which<br />
holds the MSV board in place (two Phillips screws).<br />
Pull the MSV board (the board at the back) up to the top. For this insert<br />
a screwdriver into the two recesses at the sides (top) one after the other<br />
and lever the MSV board out <strong>by</strong> resting the screwdriver on the STE<br />
board.<br />
For generating 24 V for DCDC-converter (+/- 15V / 5 V)<br />
Fuse for the anode voltage<br />
Protects the 24 V supply carried <strong>by</strong> the option socket<br />
Protects the selectable 24 V for RS 232 Interface.<br />
Supply voltage for the remote control<br />
Supply voltage 24 V for I/O board.<br />
Supply voltage 24 V for fans and motorrelay.<br />
Protection for the forevacuum pump.
TMP-converter<br />
TDS<br />
Fig. 37 assembly fuses<br />
10<br />
MSV<br />
STE board<br />
9.1.7 Exhaust Oil filter<br />
After using the machine for a longer time there can be oil accumulated<br />
from the pump. In this case please do the following:<br />
1. Switch off the PhoeniXL.<br />
2. Remove the mechanical cover according to Chapter 9.1.2<br />
3. The oil filter is located besides the rotary vane pump.<br />
4. Unscrew the plexiglas cabinet (direction is shown <strong>by</strong> an arrow on the filter).<br />
5. Clean or replace the filter (cat-no. 20028656)<br />
6. Screw back the plexiglas cabinet hand tight.<br />
7. Check the oil level of the rotary vane pump and fill it up when necessary<br />
(see instructions for rotary vane pump).<br />
8. Finally re-install the cover for the mechanical section.<br />
9.2 Turbo molecular pump<br />
For the <strong>Leybold</strong> turbo molecular pump TW 70 LS it is recommended to<br />
change the bearings after 20.000 running hours. For details please refer to<br />
the corresponding manual of the turbo pump ( GA 05156.0101) or contact<br />
your local <strong>Leybold</strong> service.<br />
9.3 Calibrated leak TL7<br />
9<br />
1<br />
3<br />
8<br />
I/O board<br />
The Calibrated leak TL7 with the helium reservoir is used for alignement of<br />
the mass spectrometer in the PhoeniXL as well as for calibration the leak<br />
rate indication.<br />
It is equipped with a solenoid valve which is actuated via the control electronics<br />
of the PhoeniXL.<br />
7<br />
4<br />
2<br />
6<br />
5<br />
Head<br />
GA10218_0101 - 5/2002 ⏐ 100
Head<br />
101 ⏐GA10218_0101 - 5/2002<br />
9.3.1 Tecnical Data<br />
Nominal calibration range 10 -7 mbarl / s<br />
Tolerance of nominal calibration range +/- 15 %<br />
Temperature coefficient < 0,5 % / °C<br />
Leak type Kapillare<br />
Filling Helium<br />
9.3.2 Factory Inspection<br />
Calibrated leaks are not subject to wear and the Helium loss of the calibrated<br />
leak TL7, being less than 2 % per year, is negligible. Nevertheless,<br />
the leak rate may change over years due to external influences. A factory<br />
inspection is, therefore, advisable once a year.<br />
A test certificate, if required for the Helium calibrated leak, can be obtained<br />
from our Cologne Works. In that case, the calibrated leak should be<br />
forwarded to us and will be returned inspected and recertified with the<br />
test certificate against charge.<br />
The helium flow stated on the main label is the actual leak rate of the calibrated<br />
leak.
Appendix<br />
A<br />
B<br />
C<br />
D<br />
F<br />
G<br />
I<br />
L<br />
M<br />
Ambient Conditions 14<br />
Autoranging 9<br />
Background in Stand-<strong>by</strong> 53<br />
Calibrated leak TL7 100<br />
Calibration 85<br />
Calibration request 77<br />
Control Panel 34<br />
Define PLC inputs 73<br />
Define PLC outputs 72<br />
Define recorder output 71<br />
fine 9<br />
gross 9<br />
Internal Calibration 85<br />
List of Errors & Warnings 88<br />
Maintenance Plan 95<br />
Menu 9<br />
MENU Button 36<br />
Mode 54<br />
N<br />
O<br />
P<br />
R<br />
S<br />
T<br />
V<br />
Z<br />
Appendix<br />
Numerical Entries 36<br />
Opening the PhoeniXL 96<br />
Partial Flow Method 39<br />
Partial flow setup 65<br />
Partial flow system 18<br />
precision 9<br />
Remote control 18<br />
RS232 72<br />
Settings 61<br />
Sniffer line SL300 17<br />
Sniffer Mode 39<br />
START Button 34<br />
STOP Button 34<br />
Trigger & Alarms 55<br />
Turbo molecular pump 100<br />
Vacuum ranges 64<br />
Vacuum settings 62<br />
Vacuum System 30<br />
ZERO Button 35<br />
GA10218_0101 - 3/2005<br />
⏐102
Head<br />
Abmaße PhoeniXL Familie in mm und inch. (in Klammern)<br />
Dimensions PhoeniXL family in mm and inches (in brackets)..<br />
Fig. 1 Dimensons Side View<br />
103 ⏐GA10218_0101 - 9/2002
Abmessungen PhoeniXL Familie<br />
in mm und inch. (in Klammern)<br />
Dimensions PhoeniXL family in<br />
mm and inches (in brackets)<br />
Fig. 2 Dimensions Side View<br />
Head<br />
GA10218_0101 - 9/2002 ⏐ 104
Head<br />
Abmessungen<br />
PhoeniXL 300 Modul in mm<br />
und inch (in Klammern).<br />
Dimensions PhoeniXL 300<br />
Modul in mm and inches (in<br />
brackets).<br />
Fig. 3 Dimensions PhoeniXL Modul<br />
105 ⏐GA10218_0101 - 9/2002
Fig. 4 Declaration of Conformance<br />
Head<br />
GA10218_0101 - 9/2002 ⏐ 106
Head<br />
107 ⏐GA10218_0101 - 9/2002
Head<br />
GA10218_0101 - 9/2002 ⏐ 108
Our world wide sales and<br />
service network<br />
Germany Europe Asia<br />
<strong>Leybold</strong> Vacuum GmbH<br />
Bonner Strasse 498<br />
D-50968 Cologne<br />
Phone: +49-221-347 1234<br />
Fax: +49-221-347 1245<br />
sales@leybold.com<br />
<strong>Leybold</strong> Vacuum GmbH<br />
Sales Area North/East<br />
Branch office Berlin<br />
Buschkrugallee 33<br />
1. Obergeschoss<br />
D-12359 Berlin<br />
Phone: +49-30-435 609 0<br />
Fax: +49-30-435 609 10<br />
sales.berlin@leybold.com<br />
<strong>Leybold</strong> Vacuum GmbH<br />
Sales Area South/Southwest<br />
Branch office Munic<br />
Karl-Hammerschmidt-Strasse 38<br />
D-85609 Aschheim/Dornach<br />
Phone: +49-89-357 33 90<br />
Fax: +49-89-357 33 933<br />
sales.muenchen@leybold.com<br />
service.muenchen@leybold.com<br />
<strong>Leybold</strong> Vacuum GmbH<br />
Sales Area West<br />
Branch office Cologne<br />
Emil-Hoffmann-Straße 43<br />
D-50996 Cologne-Suerth<br />
Phone: +49-221-347 1270<br />
Fax: +49-221-347 1291<br />
sales.koeln@leybold.com<br />
<strong>Leybold</strong> Vacuum GmbH<br />
Service Center<br />
Emil-Hoffmann-Straße 43<br />
D-50996 Cologne-Suerth<br />
Phone: +49-221-347 1439<br />
Fax: +49-221-347 1945<br />
service@leybold.com<br />
<strong>Leybold</strong> Vacuum GmbH<br />
Mobile after sales service<br />
Emil-Hoffmann-Straße 43<br />
D-50996 Cologne-Suerth<br />
Phone: +49-221-347 1765<br />
Fax: +49-221-347 1944<br />
kundendienst@leybold.com<br />
<strong>Leybold</strong> Vacuum<br />
Dresden GmbH<br />
Zur Wetterwarte 50, Haus 304<br />
D-01109 Dresden<br />
Service:<br />
Phone: +49-351-88 55 00<br />
Fax: +49-351-88 55 041<br />
info@leybold-dresden.de<br />
www.leybold-dresden.de<br />
Belgium<br />
Hotline<br />
Sales: +49-221-347 1234<br />
Service: +49-221-347 1765<br />
sales@leybold.com<br />
service@leybold.com<br />
<strong>Leybold</strong> Vacuum Nederland B.V.<br />
Belgisch bijkantoor<br />
Leuvensesteenweg 542-9A<br />
B-1930 Zaventem<br />
Sales:<br />
Phone: +32-2-711 00 83<br />
Fax: +32-2-720 83 38<br />
sales.belgium@leybold.com<br />
Service:<br />
Phone: +32-2-711 00 82<br />
Fax: +32-2-720 83 38<br />
service.belgium@leybold.com<br />
France<br />
<strong>Leybold</strong> Vacuum France S.A.<br />
7, Avenue du Québec<br />
Z.A. de Courtaboeuf, B.P. 42<br />
F-91942 Courtaboeuf Cedex<br />
Sales and Service:<br />
Phone: +33-1-69 82 48 00<br />
Fax: +33-1-69 07 57 38<br />
leybold-vacuum@leybold.fr<br />
<strong>Leybold</strong> Vacuum France S.A.<br />
Valence Factory<br />
640, rue A. Bergès - B.P. 107<br />
F-26501 Bourg-lès-Valence Cedex<br />
Phone: +33-4-75 82 33 00<br />
Fax: +33-4-75 82 92 69<br />
marketing.valence@leybold.fr<br />
Great Britain<br />
<strong>Leybold</strong> Vacuum UK Ltd.<br />
Waterside Way, Plough Lane<br />
GB-London SW17 0HB<br />
Sales:<br />
Phone: +44-20-8971 7000<br />
Fax: +44-20-8971 7001<br />
sales@leybold.co.uk<br />
Service:<br />
Phone: +44-20-8971 7030<br />
Fax: +44-20-8971 7003<br />
service@leybold.co.uk<br />
Italy<br />
<strong>Leybold</strong> Vacuum Italia S.p.A.<br />
8, Via Trasimeno<br />
I-20128 Milano<br />
Sales:<br />
Phone: +39-02-27 22 31<br />
Fax: +39-02-27 20 96 41<br />
sales@leybold.it<br />
Service:<br />
Phone: +39-02-27 22 31<br />
Fax: +39-02-27 20 96 41<br />
service@leybold.it<br />
Field Service Base<br />
Z.I.Le Capanne<br />
I-05021 Acquasparta (TR)<br />
Phone: +39-0744-93 03 93<br />
Fax: +39-0744-94 42 87<br />
service@leybold.it<br />
Netherlands<br />
P.R. China<br />
<strong>Leybold</strong> Vacuum Nederland B.V.<br />
Computerweg 7<br />
NL-3542 DP Utrecht<br />
Sales and Service:<br />
Phone: +31-346-58 39 99<br />
Fax: +31-346-58 39 90<br />
sales.netherlands@leybold.com<br />
service.netherlands@leybold.com<br />
<strong>Leybold</strong> Vacuum (Tianjin)<br />
International Trade Co., Ltd.<br />
Beichen Economic Development<br />
Area (BEDA), Shuanghai Road<br />
Tianjin 300400, China<br />
Sales and Service:<br />
Phone: +86-22-2697 0808<br />
Fax: +86-22-2697 4061<br />
Fax: +86-22-2697 2017<br />
Spain<br />
leybold@leybold.com.cn<br />
<strong>Leybold</strong> Vacuum España S.A.<br />
C/. Huelva, 7<br />
E-08940 Cornella de Llobregat<br />
(Barcelona)<br />
<strong>Leybold</strong> Vacuum (Tianjin)<br />
Equipment Manufacturing Co., Ltd.<br />
Beichen Economic Development<br />
Area (BEDA), Shuanghai Road<br />
Sales:<br />
Tianjin 300400, China<br />
Phone: +34-93-666 46 16<br />
Fax: +34-93-666 43 70<br />
sales.spain@leybold.com<br />
Phone: +86-22-2697 0808<br />
Fax: +86-22-2697 4061<br />
Fax: +86-22-2697 2017<br />
Service:<br />
Phone: +34-93-666 49 51<br />
leybold@leybold.com.cn<br />
Fax: +34-93-685 40 10<br />
Sweden<br />
<strong>Leybold</strong> Vacuum Scandinavia AB<br />
Box 9084<br />
SE-40092 Göteborg<br />
Sales and Service:<br />
Phone: +46-31-68 84 70<br />
Fax: +46-31-68 39 39<br />
info@leybold.se<br />
Visiting/delivery address:<br />
Datavägen 57B<br />
SE-43632 Askim<br />
Switzerland<br />
<strong>Leybold</strong> Vacuum Schweiz AG<br />
Leutschenbachstrasse 55<br />
CH-8050 Zürich<br />
Sales:<br />
Phone: +41-1-308 40 50<br />
Fax: +41-1-302 43 73<br />
sales@leybold.ch<br />
Service:<br />
Phone: +41-1-308 40 62<br />
Fax: +41-1-308 40 60<br />
America<br />
USA<br />
<strong>Leybold</strong> Vacuum USA Inc.<br />
5700 Mellon Road<br />
Export, PA 15632<br />
info@leyboldvacuum.com<br />
Sales:<br />
Eastern & Central time zones<br />
Phone: +1-724-327-5700<br />
Fax: +1-724-733-1217<br />
Pacific, Mountain,<br />
Alaskan & Hawaiian time zones<br />
Phone: +1-480-752-9191<br />
Fax: +1-480-752-9494<br />
Service:<br />
Phone: +1-724-327-5700<br />
Fax: +1-724-733-3799<br />
<strong>Leybold</strong> Vacuum (Tianjin)<br />
International Trade Co., Ltd.<br />
Beijing Branch:<br />
1-908, Beijing Landmark Towers<br />
8 North Dongsanhuan Road<br />
Chaoyang District<br />
Beijing 100004, China<br />
Sales and Service:<br />
Phone: +86-21-5064-4666<br />
Fax: +86-21-5064-4668<br />
leybold_sh@leybold.com.cn<br />
<strong>Leybold</strong> Vacuum (Tianjin)<br />
International Trade Co., Ltd.<br />
Shanghai Branch:<br />
Add: No. 33, 76 Futedong San<br />
Rd., Waigaoqiao FTZ ,<br />
Shanghai 200131, China<br />
Sales and Service:<br />
Phone: +86-21-5064-4666<br />
Fax: +86-21-5064-4668<br />
leybold_sh@leybold.com.cn<br />
Japan<br />
<strong>Leybold</strong> Vacuum<br />
Japan Co., Ltd.<br />
Head Office<br />
Tobu A.K. Bldg. 4th Floor<br />
23-3, Shin-Yokohama<br />
3-chome<br />
Kohoku-ku, Yokohama-shi<br />
Kanagawa-ken 222-0033<br />
Sales:<br />
Phone: +81-45-4713330<br />
Fax: +81-45-4713323<br />
<strong>Leybold</strong> Vacuum<br />
Japan Co., Ltd.<br />
Osaka Branch Office<br />
MURATA Bldg. 7F<br />
2-7-53, Nihi-Miyahara<br />
Yodogawa-ku<br />
Osaka-shi 532-0004<br />
Sales:<br />
Phone: +81-6-6393-5211<br />
Fax: +81-6-6393-5215<br />
<strong>Leybold</strong> Vacuum<br />
Japan Co., Ltd.<br />
Tsukuba <strong>Tech</strong>nical S.C.<br />
Tsukuba Minami Daiichi<br />
Kogyo Danchi<br />
21, Kasumi-no-Sato,<br />
Ami-machi, Inashiki-gun<br />
Ibaraki-ken, 300-0315<br />
Service:<br />
Phone: +81-298-89-2841<br />
Fax: +81-298-89-2838<br />
<strong>Leybold</strong> Vacuum GmbH<br />
Bonner Strasse 498<br />
D-50968 Cologne<br />
Phone: +49-221 347- 0<br />
vacuum<br />
Fax: +49-221 347-1250<br />
info@leybold.com www.leybold.com<br />
Korea<br />
<strong>Leybold</strong> Vacuum Korea Ltd.<br />
#761-4, Yulkeum-ri,<br />
SungHwan-eup, Chonan<br />
Choongchung-Namdo,<br />
330-807, Korea<br />
Sales:<br />
Phone: +82-41-580-4421<br />
Fax: +82-41-588-3737<br />
Service:<br />
Phone: +82-41-580-4419<br />
Fax: +82-41-588-0166<br />
<strong>Leybold</strong> Vacuum (Tianjin)<br />
Guangzhou Branch:<br />
Add: G/F,#301 Building,<br />
110 Dongguangzhuang Rd.<br />
Tianhe District,<br />
Singapore<br />
Guangzhou 510610, China<br />
<strong>Leybold</strong> Vacuum<br />
Sales:<br />
Singapore Pte Ltd.<br />
Phone: +86-20-8723-7873<br />
No.1, International<br />
Phone: +86-20-8723-7597<br />
Business Park,<br />
Fax: +86-20-8723-7875<br />
B1-20B, The Synergy<br />
leybold_gz@leybold.com.cn<br />
Singapore 609917<br />
Sales and Service:<br />
India<br />
Phone: +65-66652910<br />
<strong>Leybold</strong> Vacuum India Pte Ltd. Fax: +65-65668202<br />
A-125 Road No. 30<br />
vacuum@leyboldvac.com.sg<br />
MIDC Wagle Industrial Estate<br />
Thane(W) - 400 604 Maharashtra<br />
Taiwan<br />
India<br />
<strong>Leybold</strong> Vacuum Taiwan Ltd<br />
Sales and Service:<br />
No 416-1, Sec. 3<br />
Phone: +91-22-2581 2929<br />
Chung-Hsin Rd., Chu-Tung<br />
Fax: +91-22-2581 2626<br />
Hsin-Chu, Taiwan, R.O.C.<br />
ivt2004@yahoo.com<br />
Sales and Service:<br />
Phone: +886-3-5833988<br />
Fax: +886-3-5833999