

FL900 Series Flow Logger - Hachflow
FL900 Series Flow Logger - Hachflow
FL900 Series Flow Logger - Hachflow

You also want an ePaper? Increase the reach of your titles
YUMPU automatically turns print PDFs into web optimized ePapers that Google loves.
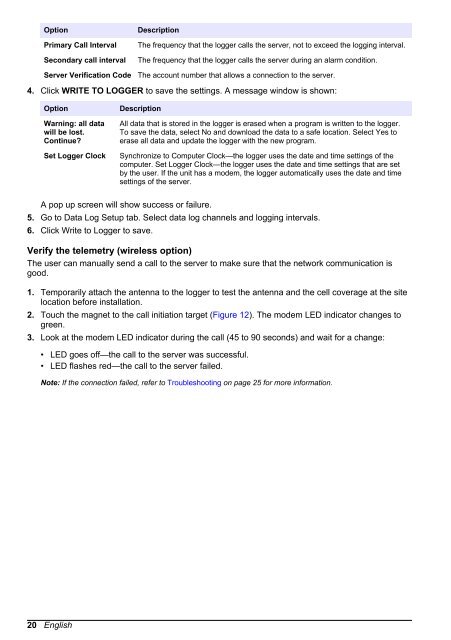
Option<br />
Primary Call Interval<br />
Secondary call interval<br />
Server Verification Code<br />
Description<br />
The frequency that the logger calls the server, not to exceed the logging interval.<br />
The frequency that the logger calls the server during an alarm condition.<br />
The account number that allows a connection to the server.<br />
4. Click WRITE TO LOGGER to save the settings. A message window is shown:<br />
Option<br />
Warning: all data<br />
will be lost.<br />
Continue?<br />
Set <strong>Logger</strong> Clock<br />
Description<br />
All data that is stored in the logger is erased when a program is written to the logger.<br />
To save the data, select No and download the data to a safe location. Select Yes to<br />
erase all data and update the logger with the new program.<br />
Synchronize to Computer Clock—the logger uses the date and time settings of the<br />
computer. Set <strong>Logger</strong> Clock—the logger uses the date and time settings that are set<br />
by the user. If the unit has a modem, the logger automatically uses the date and time<br />
settings of the server.<br />
A pop up screen will show success or failure.<br />
5. Go to Data Log Setup tab. Select data log channels and logging intervals.<br />
6. Click Write to <strong>Logger</strong> to save.<br />
Verify the telemetry (wireless option)<br />
The user can manually send a call to the server to make sure that the network communication is<br />
good.<br />
1. Temporarily attach the antenna to the logger to test the antenna and the cell coverage at the site<br />
location before installation.<br />
2. Touch the magnet to the call initiation target (Figure 12). The modem LED indicator changes to<br />
green.<br />
3. Look at the modem LED indicator during the call (45 to 90 seconds) and wait for a change:<br />
• LED goes off—the call to the server was successful.<br />
• LED flashes red—the call to the server failed.<br />
Note: If the connection failed, refer to Troubleshooting on page 25 for more information.<br />
20 English


