i nstallation - Cascade Corporation
i nstallation - Cascade Corporation
i nstallation - Cascade Corporation

Create successful ePaper yourself
Turn your PDF publications into a flip-book with our unique Google optimized e-Paper software.
I<br />
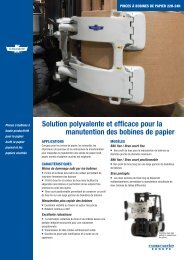
Follow the steps shown to install the Clamp on the truck.<br />
Read and understand all WARNING and CAUTION<br />
statements. If you don't understand a procedure, ask your<br />
supervisor, or call the nearest <strong>Cascade</strong> Service Department<br />
for assistance.<br />
1<br />
2<br />
NSTALLATION<br />
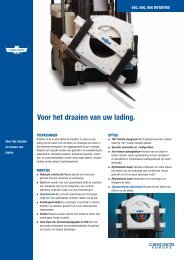
Attach overhead hoist<br />
A Remove banding, set Clamp upright on<br />
pallet. Use multiple chains to stabilize<br />
while lifting.<br />
B Remove bolt-on lower mounting hooks<br />
(if equipped).<br />
B<br />
A<br />
CL2610.eps<br />
Unlock quick-change lower<br />
mounting hooks<br />
A Remove pin and drop hooks into unlocked<br />
position.<br />
B Re-install pin in lower hole.<br />
Guide<br />
Pin<br />
A<br />
LH Lower<br />
Hook<br />
B<br />
16 mm offset on<br />
top provides<br />
max. hook<br />
clearance.<br />
WARNING: Make sure overhead<br />
hoist has rated capacity of at<br />
least 1600 kg.<br />
6033701 3<br />
A<br />
NOTE: Guides can be reversed to<br />
reduce hook-to-carriage clearance<br />
(See lower hook i<strong>nstallation</strong>, Step<br />
6).<br />
Tighten capscrews to<br />
225 Nm.<br />
CL0097.ill