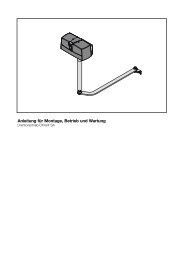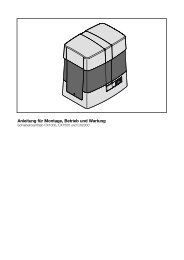
Template BA B168xh238 - bei Berner Torantriebe
Template BA B168xh238 - bei Berner Torantriebe
Template BA B168xh238 - bei Berner Torantriebe

You also want an ePaper? Increase the reach of your titles
YUMPU automatically turns print PDFs into web optimized ePapers that Google loves.
ENGLISH<br />
3 .7 .1<br />
▶ See Figure 6 .1<br />
▶<br />
Connecting an external radio receiver<br />
Connect the wires of the external radio receiver as<br />
follows:<br />
– Gn to terminal 20 (0 V)<br />
– Wh to terminal 21 (channel 1 signal)<br />
– Bn to terminal 5 (+24 V)<br />
– YE to terminal 23 (channel 2 signal for partial<br />
opening). Only with a 2-channel receiver.<br />
NOTE:<br />
the aerial wire of external radio receivers should not come<br />
into contact with metal objects (nails, bracing, etc.). the best<br />
orientation to achieve an optimum range must be established<br />
by trial and error.<br />
3 .7 .2 Connecting an external button*<br />
▶ See Figure 4 .1<br />
(*Accessory, not included as standard equipment!)<br />
One or more buttons with normally open contacts (volt-free),<br />
e.g. key switches, can be connected in parallel, max. lead<br />
length 10 m.<br />
Impulse control<br />
▶ First contact to terminal 21<br />
▶ Second contact to terminal 20<br />
Partial opening:<br />
▶ First contact to terminal 23<br />
▶ Second contact to terminal 20<br />
NOTE:<br />
If auxiliary voltage is needed for an external button, then a<br />
voltage of +24 V DC is available for this at terminal 5<br />
(to terminal 20 = 0 V).<br />
3 .7 .3 Connecting a cut-out to stop the operator<br />
(STOP or emergency-OFF circuit)<br />
A cut-out with normally closed contacts (switching to 0 V or<br />
volt-free) is connected as follows (see Figure 4 .3):<br />
1 . Remove the wire jumper inserted at the factory between<br />
terminal 12 and terminal 13.<br />
– terminal 12: StOp or emergency-OFF input<br />
– terminal 13: 0 V, allows normal function of the<br />
operator<br />
2 . Connect the switching output or first contact to<br />
terminal 12 (StOp or emergency-OFF input).<br />
3 . Connect 0 V (ground) or the second contact to<br />
terminal 13 (0 V).<br />
NOTE:<br />
By opening the contact, any travel cycles in progress are<br />
immediately halted and permanently prevented.<br />
3 .7 .4 Connecting a warning lamp*<br />
▶ See Figure 6 .4<br />
(*Accessory, not included as standard equipment!)<br />
A warning lamp or CLOSE limit switch reporting can be<br />
connected via the volt-free contacts on the Option connector.<br />
the voltage at the 24 V DC connector can be used for<br />
operation (e.g. warning signals prior to and during gate travel)<br />
with a 24 V lamp (max. 7 W).<br />
NOTE:<br />
A 230 V warning lamp must be directly supplied with power.<br />
3 .7 .5 Connecting safety/protective devices<br />
▶ See Figures 6 .5 – 6 .7<br />
Safety devices such as photocells/closing edge safety<br />
devices (SKS) or 8k2 resistance contact strips can be<br />
connected:<br />
SE1 In the opening direction, safety device with testing<br />
or 8k2 resistance contact strip<br />
SE2 In the closing direction, safety device with testing<br />
or 8k2 resistance contact strip<br />
SE3 In the closing direction, photocell without<br />
testing or dynamic 2-wire photocell,<br />
e.g. as a through-traffic photocell<br />
the functions selected for the 3 safety circuits are set via the<br />
DIl switches (see section 5).<br />
Terminal assignment:<br />
terminal 20 0 V (power supply)<br />
terminal 18 test signal<br />
terminals 71/72/73 Safety device signal<br />
terminal 5 +24 V (power supply)<br />
NOTE:<br />
Safety devices without a testing unit (e.g. static photocells)<br />
must be tested twice a year. they may only be used to<br />
protect property!<br />
3 .7 .6 Connecting a universal adapter print UAP1*<br />
▶ See Figure 6 .8<br />
(*Accessory, not included as standard equipment!)<br />
Connection option for the universal adapter print uAp1.<br />
4<br />
▶<br />
▶<br />
Putting into Service<br />
Before initial start-up, check that all the connecting leads<br />
are correctly installed at the connecting terminals.<br />
Make sure that all DIl switches are set to the factory<br />
setting (OFF) (see Figure 7), the gate is half open and the<br />
operator engaged.<br />
4 .1 Preparation<br />
Change the following DIL switches:<br />
▶ DIL switch 1: Installation direction (see Figure 7 .1)<br />
– to On, if the gate closes towards the right.<br />
– to OFF, if the gate closes towards the left.<br />
▶ DIL switches 3-7: Safety devices (see<br />
Figures 9 .6/9 .7/9 .8)<br />
– Set according to the connected safety and protective<br />
devices (see section 5.3 – 5.5). these are, however,<br />
not active during set-up mode.<br />
4 .2 Teaching in the gate's end-of-travel positions<br />
4 .2 .1 Recording the CLOSE end-of-travel position<br />
▶ See Figure 8 .1a<br />
the limit switch (reed contact) must be connected before<br />
teaching in the end-of-travel positions. the limit switch wires<br />
must be connected at the REED terminal.<br />
28 V1.0_D_I / C300_C800 RE / 10.2009