BS4790 إرﺷïºØ¯Ø§Øª اï»ïºïº¸ï»ï»´ï» AR - Ufesa
BS4790 إرﺷïºØ¯Ø§Øª اï»ïºïº¸ï»ï»´ï» AR - Ufesa
BS4790 إرﺷïºØ¯Ø§Øª اï»ïºïº¸ï»ï»´ï» AR - Ufesa
Create successful ePaper yourself
Turn your PDF publications into a flip-book with our unique Google optimized e-Paper software.
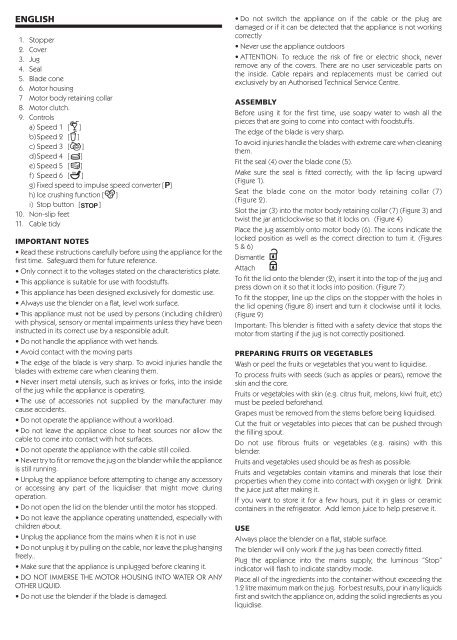
ENGLISH<br />
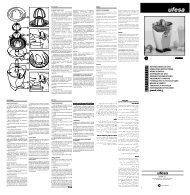
1. Stopper<br />
2. Cover<br />
3. Jug<br />
4. Seal<br />
5. Blade cone<br />
6. Motor housing<br />
7 Motor body retaining collar<br />
8. Motor clutch.<br />
9. Controls<br />
a) Speed 1 [ ]<br />
b) Speed 2 [ ]<br />
c) Speed 3 [ ]<br />
d) Speed 4 [ ]<br />
e) Speed 5 [ ]<br />
f) Speed 6 [ ]<br />
g) Fixed speed to impulse speed converter [ ]<br />
h) Ice crushing function [ ]<br />
i) Stop button [ ]<br />
10. Non-slip feet<br />
11. Cable tidy<br />
IMPORTANT NOTES<br />
• Read these instructions carefully before using the appliance for the<br />
first time. Safeguard them for future reference.<br />
• Only connect it to the voltages stated on the characteristics plate.<br />
• This appliance is suitable for use with foodstuffs.<br />
• This appliance has been designed exclusively for domestic use.<br />
• Always use the blender on a flat, level work surface.<br />
• This appliance must not be used by persons (including children)<br />
with physical, sensory or mental impairments unless they have been<br />
instructed in its correct use by a responsible adult.<br />
• Do not handle the appliance with wet hands.<br />
• Avoid contact with the moving parts<br />
• The edge of the blade is very sharp. To avoid injuries handle the<br />
blades with extreme care when cleaning them.<br />
• Never insert metal utensils, such as knives or forks, into the inside<br />
of the jug while the appliance is operating.<br />
• The use of accessories not supplied by the manufacturer may<br />
cause accidents.<br />
• Do not operate the appliance without a workload.<br />
• Do not leave the appliance close to heat sources nor allow the<br />
cable to come into contact with hot surfaces.<br />
• Do not operate the appliance with the cable still coiled.<br />
• Never try to fit or remove the jug on the blander while the appliance<br />
is still running.<br />
• Unplug the appliance before attempting to change any accessory<br />
or accessing any part of the liquidiser that might move during<br />
operation.<br />
• Do not open the lid on the blender until the motor has stopped.<br />
• Do not leave the appliance operating unattended, especially with<br />
children about.<br />
• Unplug the appliance from the mains when it is not in use<br />
• Do not unplug it by pulling on the cable, nor leave the plug hanging<br />
freely..<br />
• Make sure that the appliance is unplugged before cleaning it.<br />
• DO NOT IMMERSE THE MOTOR HOUSING INTO WATER OR ANY<br />
OTHER LIQUID.<br />
• Do not use the blender if the blade is damaged.<br />
• Do not switch the appliance on if the cable or the plug are<br />
damaged or if it can be detected that the appliance is not working<br />
correctly<br />
• Never use the appliance outdoors<br />
• ATTENTION: To reduce the risk of fire or electric shock, never<br />
remove any of the covers. There are no user serviceable parts on<br />
the inside. Cable repairs and replacements must be carried out<br />
exclusively by an Authorised Technical Service Centre.<br />
ASSEMBLY<br />
Before using it for the first time, use soapy water to wash all the<br />
pieces that are going to come into contact with foodstuffs.<br />
The edge of the blade is very sharp.<br />
To avoid injuries handle the blades with extreme care when cleaning<br />
them.<br />
Fit the seal (4) over the blade cone (5).<br />
Make sure the seal is fitted correctly, with the lip facing upward<br />
(Figure 1).<br />
Seat the blade cone on the motor body retaining collar (7)<br />
(Figure 2).<br />
Slot the jar (3) into the motor body retaining collar (7) (Figure 3) and<br />
twist the jar anticlockwise so that it locks on. (Figure 4)<br />
Place the jug assembly onto motor body (6). The icons indicate the<br />
locked position as well as the correct direction to turn it. (Figures<br />
5 & 6)<br />
Dismantle<br />
Attach<br />
To fit the lid onto the blender (2), insert it into the top of the jug and<br />
press down on it so that it locks into position. (Figure 7)<br />
To fit the stopper, line up the clips on the stopper with the holes in<br />
the lid opening (figure 8) insert and turn it clockwise until it locks.<br />
(Figure 9)<br />
Important: This blender is fitted with a safety device that stops the<br />
motor from starting if the jug is not correctly positioned.<br />
PREP<strong>AR</strong>ING FRUITS OR VEGETABLES<br />
Wash or peel the fruits or vegetables that you want to liquidise.<br />
To process fruits with seeds (such as apples or pears), remove the<br />
skin and the core.<br />
Fruits or vegetables with skin (e.g. citrus fruit, melons, kiwi fruit, etc)<br />
must be peeled beforehand.<br />
Grapes must be removed from the stems before being liquidised.<br />
Cut the fruit or vegetables into pieces that can be pushed through<br />
the filling spout.<br />
Do not use fibrous fruits or vegetables (e.g. raisins) with this<br />
blender.<br />
Fruits and vegetables used should be as fresh as possible.<br />
Fruits and vegetables contain vitamins and minerals that lose their<br />
properties when they come into contact with oxygen or light. Drink<br />
the juice just after making it.<br />
If you want to store it for a few hours, put it in glass or ceramic<br />
containers in the refrigerator. Add lemon juice to help preserve it.<br />
USE<br />
Always place the blender on a flat, stable surface.<br />
The blender will only work if the jug has been correctly fitted.<br />
Plug the appliance into the mains supply, the luminous “Stop”<br />
indicator will flash to indicate standby mode.<br />
Place all of the ingredients into the container without exceeding the<br />
1.2 litre maximum mark on the jug. For best results, pour in any liquids<br />
first and switch the appliance on, adding the solid ingredients as you<br />
liquidise.<br />
<strong>BS4790</strong>.indd 6 17/4/07 09:42:38


