
You also want an ePaper? Increase the reach of your titles
YUMPU automatically turns print PDFs into web optimized ePapers that Google loves.
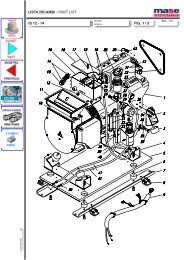
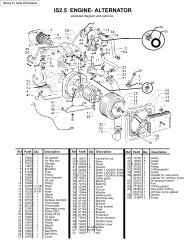
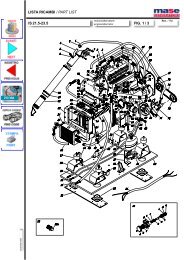
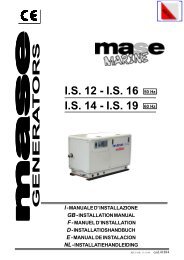
maseGBIS 9000 - 95003 USE OF THE GENERATOR3.1 Preliminary checksWhen first starting up the group, or after performing anytype <strong>of</strong> maintenance operation, it is good practice toensure:- That the oil level is correct, using the dipstick provided[fig. 3, ref. 1]. See the list <strong>of</strong> recommended oil types onpage 2.- That all the group’s anchor points are properly locked.- That all electronic users have been disconnected, toavoid starting up the group under load.- That the water and fuel lines are properly connected.- That all electrical connections have been correctlycarried out, and that none <strong>of</strong> the connectors are in apoor state <strong>of</strong> repair.- That the water tap [fig. 4, ref. 2] is open.- That the section <strong>of</strong> the water circuit leading from thepump to the valve has been filled manually if there isa non-return valve on the outboard water intake (asrecommended) [fig. 4, ref. 1].3.2 Removing air from the systemThe presence <strong>of</strong> air bubbles in the supply system is dueto incorrect operation <strong>of</strong> the motor or its inability to reachthe rated number <strong>of</strong> revs. Air can also penetrate into thesystem through a joint that has not been properly sealed(pipes, filters, tank) or when the fuel in the tank is at theminimum level. To eliminate the air bubbles in the supplycircuit you must first <strong>of</strong> all remove the cause <strong>of</strong> theinfiltration and carry out the following operations:1 - Loosen the bleeder screws on the fuel filter and onthe injection pump (see motor use and maintenancemanual).2 - Manually adjust the AC fuel pump lever [fig. 5, ref. 3]until all the air in the supply system has been expelledthrough the bleeder screws.3 - Tighten the bleeder screws again and start the motor.4 - Repeat the above operations if the motor is still notoperating properly.3.3 Start-upBefore starting the group, ensure that the preliminarychecks listed above under paragraph 3.1 have beencarried out.Proceed to start up by pressing the “ON” button on thecontrol panel [fig. 2, ref. 4]. All the indicator lights will lightup in a self-test for approximately 5 seconds. After thisthe panel on indicator [fig. 2, ref. 5] will remain lighted,along with the “GLOW PLUG” indicator, signalling thestart <strong>of</strong> operations for pre-heating <strong>of</strong> the glow plugs,which last about 10 seconds.INFORMATIONThe group cannot be started during pre-heating <strong>of</strong>the glow plugs.After this, start the group by pressing the “START”button [fig. 2, ref. 3], which must be held down and onlyreleased when the motor has started, taking care not tohold the button down for more than 10 seconds at a time.If the group is operating correctly this will be indicated bylight-up <strong>of</strong> the generator on indicator [fig. 2, ref. 6]. Whenthe above operations are performed, the group protectiondevices are automatically activated (see Chapter 4).CAUTIONRepeated unsuccessful attempts to start the groupmay cause an excessive build-up <strong>of</strong> water in thedrainage system, which may have a serious negativeeffect on the motor.Should there be any difficulty in starting the motorit is essential that the tap on the outboard waterintake be closed before making repeated and lengthyattempts to start the motor.3.4 Stopping the groupThe group is stopped by pressing the “OFF” button onthe control panel [fig. 2, ref. 2].Before stopping the generator group it is recommendedthat you operate it for a few minutes withouttaking <strong>of</strong>f any power, so that the motor and thealternator have time to cool down.4 PROTECTION DEVICESIS 9000 - 9500 is fitted with a series <strong>of</strong> protection devicesto safeguard against incorrect use or problems duringoperation.When the group stops because an alarm has beentriggered, details <strong>of</strong> the running hours will be displayedon the control panel, along with a code indicating thereason for stoppage <strong>of</strong> the generator group.The following table contains a list <strong>of</strong> these codes andtheir meanings:CODEE - 80E - 81E - 82E - 83E - 85E - 87battCAUTIONTABLE OF ALARM CODESREASON FOR ALARMNo power to gensetOil pressure lowMotor temperature highAlternator temperature highGenerator set overloadedAfter 30 s. from start-up, the gensethas not reached 80% <strong>of</strong> rated voltageBattery voltage low18