Jøtul C 21 / C 22
Jøtul C 21 / C 22
Jøtul C 21 / C 22
- No tags were found...

Create successful ePaper yourself
Turn your PDF publications into a flip-book with our unique Google optimized e-Paper software.
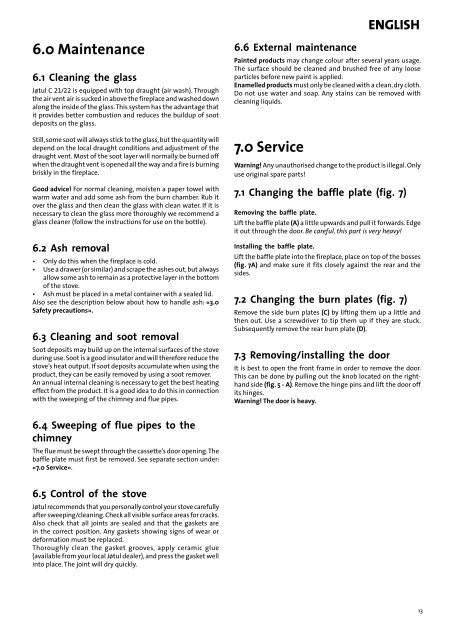
english6.0 Maintenance6.1 Cleaning the glassJøtul C <strong>21</strong>/<strong>22</strong> is equipped with top draught (air wash). Throughthe air vent air is sucked in above the fireplace and washed downalong the inside of the glass. This system has the advantage thatit provides better combustion and reduces the buildup of sootdeposits on the glass.Still, some soot will always stick to the glass, but the quantity willdepend on the local draught conditions and adjustment of thedraught vent. Most of the soot layer will normally be burned offwhen the draught vent is opened all the way and a fire is burningbriskly in the fireplace.Good advice! For normal cleaning, moisten a paper towel withwarm water and add some ash from the burn chamber. Rub itover the glass and then clean the glass with clean water. If it isnecessary to clean the glass more thoroughly we recommend aglass cleaner (follow the instructions for use on the bottle).6.2 Ash removal• Only do this when the fireplace is cold.• Use a drawer (or similar) and scrape the ashes out, but alwaysallow some ash to remain as a protective layer in the bottomof the stove.• Ash must be placed in a metal container with a sealed lid.Also see the description below about how to handle ash: «3.0Safety precautions».6.3 Cleaning and soot removalSoot deposits may build up on the internal surfaces of the stoveduring use. Soot is a good insulator and will therefore reduce thestove’s heat output. If soot deposits accumulate when using theproduct, they can be easily removed by using a soot remover.An annual internal cleaning is necessary to get the best heatingeffect from the product. It is a good idea to do this in connectionwith the sweeping of the chimney and flue pipes.6.6 External maintenancePainted products may change colour after several years usage.The surface should be cleaned and brushed free of any looseparticles before new paint is applied.Enamelled products must only be cleaned with a clean, dry cloth.Do not use water and soap. Any stains can be removed withcleaning liquids.7.0 ServiceWarning! Any unauthorised change to the product is illegal. Onlyuse original spare parts!7.1 Changing the baffle plate (fig. 7)Removing the baffle plate.Lift the baffle plate (A) a little upwards and pull it forwards. Edgeit out through the door. Be careful, this part is very heavy!Installing the baffle plate.Lift the baffle plate into the fireplace, place on top of the bosses(fig. 7A) and make sure it fits closely against the rear and thesides.7.2 Changing the burn plates (fig. 7)Remove the side burn plates (C) by lifting them up a little andthen out. Use a screwdriver to tip them up if they are stuck.Subsequently remove the rear burn plate (D).7.3 Removing/installing the doorIt is best to open the front frame in order to remove the door.This can be done by pulling out the knob located on the righthandside (fig. 5 - A). Remove the hinge pins and lift the door offits hinges.Warning! The door is heavy.6.4 Sweeping of flue pipes to thechimneyThe flue must be swept through the cassette’s door opening. Thebaffle plate must first be removed. See separate section under:«7.0 Service».6.5 Control of the stoveJøtul recommends that you personally control your stove carefullyafter sweeping/cleaning. Check all visible surface areas for cracks.Also check that all joints are sealed and that the gaskets arein the correct position. Any gaskets showing signs of wear ordeformation must be replaced.Thoroughly clean the gasket grooves, apply ceramic glue(available from your local Jøtul dealer), and press the gasket wellinto place. The joint will dry quickly.13