

Sony TA-VE800G - TA-VE800G Consignes d’utilisation Anglais
Sony TA-VE800G - TA-VE800G Consignes d’utilisation Anglais
Sony TA-VE800G - TA-VE800G Consignes d’utilisation Anglais

You also want an ePaper? Increase the reach of your titles
YUMPU automatically turns print PDFs into web optimized ePapers that Google loves.
Settings and Adjustments<br />
DEMO:<br />
This display mode activates a programme that explains<br />
the various functions of the amplifier. Please note that<br />
when the programme is running it replaces previously<br />
stored data (such as surround sound parameters) with<br />
data from the programme. Therefore, you should only<br />
use the DEMO mode when no data has been stored or<br />
when rewriting existing data does not matter.<br />
Click S<strong>TA</strong>RT to activate the programme. To stop the<br />
programme, click the button on the remote two or three<br />
times or turn off the amplifier.<br />
IR OUTPUT:<br />
When it is set to OFF, the IR signals are only output<br />
from the IR OUT jack on the rear panel. No IR signals<br />
will be output from the IR repeater on the front panel.<br />
When the IR OUTPUT is set to OFF, “IR OFF” appears<br />
in the main menu.<br />
Normally, IR OUTPUT should be set to ON.<br />
Adjusting the Position of the<br />
On-Screen Display<br />
The graphic position function (GRAPHIC POSITION)<br />
lets you make fine adjustments to the overall position<br />
of the on-screen display control panel.<br />
1 Click FUNCTION in the main menu.<br />
The FUNCTION SELECT menu appears.<br />
2 Click TV SET.<br />
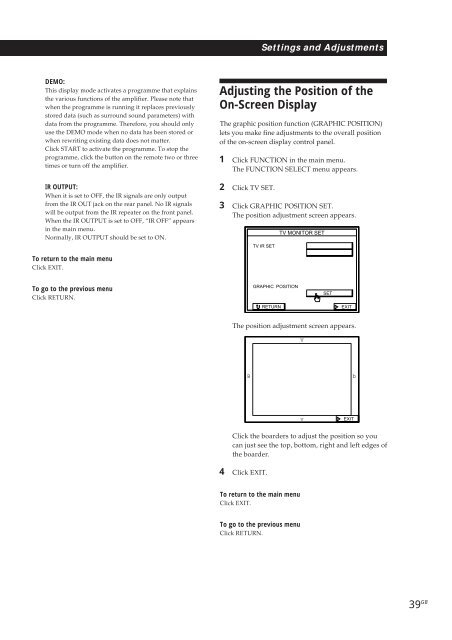
3 Click GRAPHIC POSITION SET.<br />
The position adjustment screen appears.<br />
TV IR SET<br />
TV MONITOR SET<br />
To return to the main menu<br />
Click EXIT.<br />
To go to the previous menu<br />
Click RETURN.<br />
GRAPHIC POSITION<br />
RETURN<br />
SET<br />
EXIT<br />
The position adjustment screen appears.<br />
V<br />
B<br />
b<br />
v<br />
EXIT<br />
Click the boarders to adjust the position so you<br />
can just see the top, bottom, right and left edges of<br />
the boarder.<br />
4 Click EXIT.<br />
To return to the main menu<br />
Click EXIT.<br />
To go to the previous menu<br />
Click RETURN.<br />
39 GB


