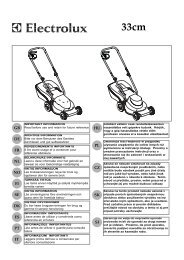
OM, Partner, P718 T, P722 T, 964831101, 964831301, 2007-06 ...
OM, Partner, P718 T, P722 T, 964831101, 964831301, 2007-06 ...
OM, Partner, P718 T, P722 T, 964831101, 964831301, 2007-06 ...

You also want an ePaper? Increase the reach of your titles
YUMPU automatically turns print PDFs into web optimized ePapers that Google loves.
E. START-UP AND STOPPING 1,4,5,6,7,8,9,11,12,13<br />
Start-up: grip both handles firmly, release<br />
the chain brake lever whilst ensuring hand<br />
is still on front handle, press and maintain<br />
the switch block (fig E1) pressed in, then<br />
press the switch (fig E2) (at this point the<br />
switch block can be released).<br />
Stopping: The machine will stop whenever<br />
the switch is released. In the case where<br />
the machine does not stop, activate the<br />
chain brake, disconnect the cable from the<br />
main line socket and take the machine to<br />
the Authorised Service Centre.<br />
F. BAR AND CHAIN LUBRICATION 3,6,7,8,9,12<br />
ATTENTION! Insufficient lubrication will<br />
provoke chain breaking and can cause<br />
serious and even fatal injury.<br />
Bar and chain lubrication is performed by<br />
an automatic pump.<br />
Refer to “Maintenance” for indications on<br />
ensuring that the chain oil is sufficiently<br />
distributed.<br />
Choice of chain oil<br />
Always use new oil only (special type for<br />
chains) with adequate viscosity: the oil<br />
must adhere well and guarantee good<br />
running properties in both winter and<br />
summer. If chain oil is not available, EP 90<br />
transmission oil can be used.<br />
Never use waste oil because this is this<br />
harmful to health, the machine and the<br />
environment. Make sure that the oil is<br />
suitable for the temperature of the<br />
environment where the tool will be used:<br />
For temperatures under 0°C certain oils<br />
become thicker, overloading the pump and<br />
causing damage. Contact your Authorised<br />
Service Centre for advice on oil choice.<br />
Filling oil tank<br />
Unscrew the oil tank cap, and fill the tank<br />
taking care not to spill any oil (if this occurs<br />
clean the machine carefully) and then<br />
screw the cap back on tightly.<br />
G. MAINTENANCE 1,2,3,4,5,6,7,8,9,12,13<br />
ATTENTION! In cases where work<br />
environments are particularly dirty or dusty,<br />
the operations described must be<br />
performed more frequently than mentioned<br />
in the instructions.<br />
Before each use<br />
Check that the chain oil pump functions<br />
correctly: direct the bar towards a clear<br />
surface at a distance of about 20<br />
centimetres; after the machine has run for<br />
about a minute, the surface should show<br />
clear traces of oil (fig.1).<br />
Check that excessive strength is not<br />
needed for activating and deactivating the<br />
chain brake. Also check that it is not<br />
activated too easily and that it is not<br />
blocked. Then check chain brake function<br />
as follows: release the chain brake, grip the<br />
machine correctly and start up the machine,<br />
activate the chain brake by pushing the<br />
front hand guard forward with the left wrist<br />
or arm but without removing the hand from<br />
the handle (fig.2). If the chain brake is<br />
working correctly, the chain should be<br />
stopped immediately.<br />
ENGLISH - 7<br />
Check that the chain is sharpened correctly,<br />
in good working condition and that the<br />
tension is correct. If the chain is irregularly<br />
worn, or if the cutting teeth are only 3 mm<br />
long, the chain must be replaced (fig.3).<br />
Clean the air vents regularly to prevent<br />
motor overheating (fig 4).<br />
Check that the switch and switch block<br />
function correctly (to be performed with the<br />
chain brake released): press the switch and<br />
the switch block and ensure that they return<br />
to idle position as soon as they are<br />
released; check that it is impossible to<br />
press the switch without activating the<br />
switch block.<br />
Check that the chain catcher and the right<br />
hand guard are in correct condition without<br />
any visible faults such as damaged<br />
material.