OS5851L-BR Manual de Instruções Modelo ... - Oregon Scientific
OS5851L-BR Manual de Instruções Modelo ... - Oregon Scientific
OS5851L-BR Manual de Instruções Modelo ... - Oregon Scientific

Create successful ePaper yourself
Turn your PDF publications into a flip-book with our unique Google optimized e-Paper software.
086L004968-026<br />
27/75<br />
REV:1<br />
• Remove battery if storing the phone for over 30 days.<br />
Make sure the telephone is off before you replace the battery.<br />
1. Sli<strong>de</strong> off the battery compartment cover.<br />
2. Disconnect the battery plug from the jack in the compartment and remove the battery<br />
pack.<br />
3. Insert the new battery pack and connect the cord into the jack.<br />
Note: Please refer to the pictures on page 7, “Battery setup” for gui<strong>de</strong>.<br />
4. Put the battery compartment cover back on.<br />
5. Place handset on the base to charge for 12 hours.<br />
Note: If the handset battery is removed for more than 5 minutes, the directory memory<br />
and caller ID memory will be erased.<br />
Charge the handset battery for 12 continuous hours prior to first use. The initial bat<br />
tery charge is important for best performance.<br />
Caution: To reduce the risk of fire or personal injury, use a NI-MH 3.6 V, 600mAh battery.<br />
EN<br />
POWER FAILURE<br />
When power is off, you will not be able to make or receive calls with the telephone.<br />
After a power outage, place the handset in the base for about 20 seconds to reset the<br />
digital security co<strong>de</strong>.<br />
HEADSET JACK AND BELT CLIP<br />
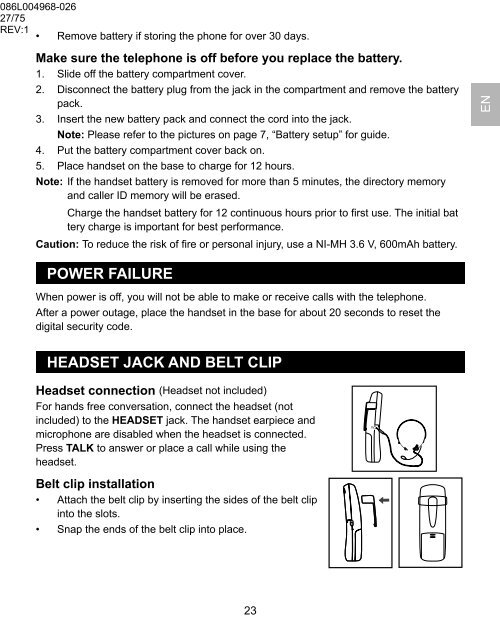
Headset connection (Headset not inclu<strong>de</strong>d)<br />
For hands free conversation, connect the headset (not<br />
inclu<strong>de</strong>d) to the HEADSET jack. The handset earpiece and<br />
microphone are disabled when the headset is connected.<br />
Press TALK to answer or place a call while using the<br />
headset.<br />
Belt clip installation<br />
• Attach the belt clip by inserting the si<strong>de</strong>s of the belt clip<br />
into the slots.<br />
• Snap the ends of the belt clip into place.<br />
23