OS5851L-BR Manual de Instruções Modelo ... - Oregon Scientific
OS5851L-BR Manual de Instruções Modelo ... - Oregon Scientific
OS5851L-BR Manual de Instruções Modelo ... - Oregon Scientific

You also want an ePaper? Increase the reach of your titles
YUMPU automatically turns print PDFs into web optimized ePapers that Google loves.
086L004968-026<br />
8/75<br />
REV:1<br />
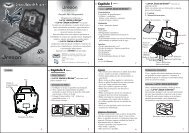
BATTERY SETUP<br />
EN<br />
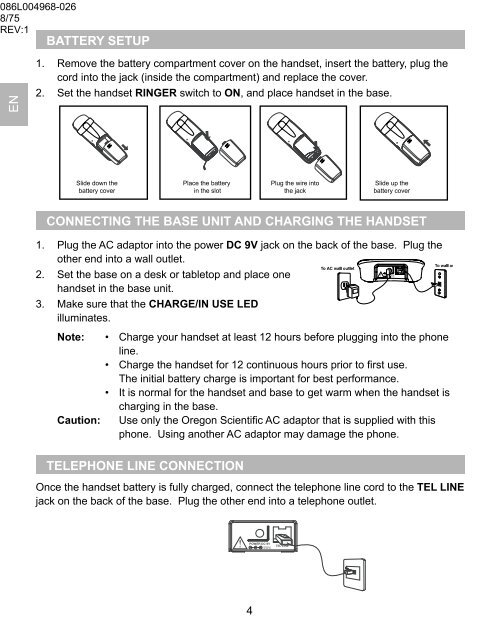
1. Remove the battery compartment cover on the handset, insert the battery, plug the<br />
cord into the jack (insi<strong>de</strong> the compartment) and replace the cover.<br />
2. Set the handset RINGER switch to ON, and place handset in the base.<br />
Sli<strong>de</strong> down the<br />
battery cover<br />
Place the battery<br />
in the slot<br />
Plug the wire into<br />
the jack<br />
Sli<strong>de</strong> up the<br />
battery cover<br />
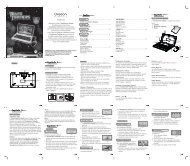
CONNECTING THE BASE UNIT AND CHARGING THE HANDSET<br />
1. Plug the AC adaptor into the power DC 9V jack on the back of the base. Plug the<br />
other end into a wall outlet.<br />
2. Set the base on a <strong>de</strong>sk or tabletop and place one<br />
handset in the base unit.<br />
3. Make sure that the CHARGE/IN USE LED<br />
illuminates.<br />
Note: • Charge your handset at least 12 hours before plugging into the phone<br />
line.<br />
• Charge the handset for 12 continuous hours prior to first use.<br />
The initial battery charge is important for best performance.<br />
• It is normal for the handset and base to get warm when the handset is<br />
charging in the base.<br />
Caution: Use only the <strong>Oregon</strong> <strong>Scientific</strong> AC adaptor that is supplied with this<br />
phone. Using another AC adaptor may damage the phone.<br />
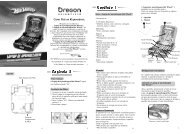
TELEPHONE LINE CONNECTION<br />
Once the handset battery is fully charged, connect the telephone line cord to the TEL LINE<br />
jack on the back of the base. Plug the other end into a telephone outlet.