DT-X7 CI - Radix
DT-X7 CI - Radix
DT-X7 CI - Radix

Sie wollen auch ein ePaper? Erhöhen Sie die Reichweite Ihrer Titel.
YUMPU macht aus Druck-PDFs automatisch weboptimierte ePaper, die Google liebt.
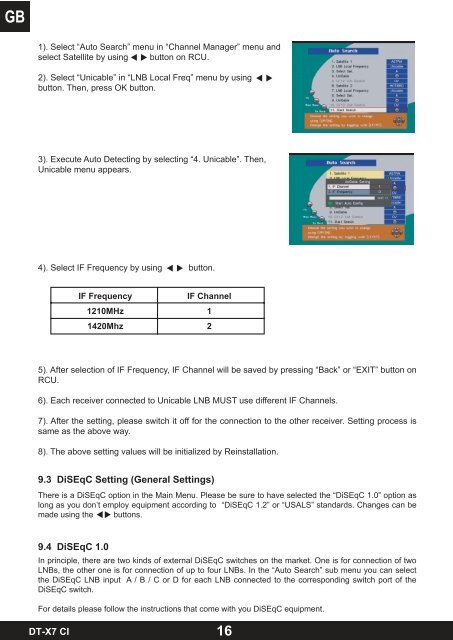
1). Select “Auto Search” menu in “Channel Manager” menu and<br />
select Satellite by using button on RCU.<br />
2). Select “Unicable” in “LNB Local Freq” menu by using<br />
button. Then, press OK button.<br />
3). Execute Auto Detecting by selecting “4. Unicable”. Then,<br />
Unicable menu appears.<br />
4). Select IF Frequency by using button.<br />
IF Frequency IF Channel<br />
1210MHz 1<br />
1420Mhz 2<br />
5). After selection of IF Frequency, IF Channel will be saved by pressing “Back” or “EXIT” button on<br />
RCU.<br />
6). Each receiver connected to Unicable LNB MUST use different IF Channels.<br />
7). After the setting, please switch it off for the connection to the other receiver. Setting process is<br />
same as the above way.<br />
8). The above setting values will be initialized by Reinstallation.<br />
9.3 DiSEqC Setting (General Settings)<br />
There is a DiSEqC option in the Main Menu. Please be sure to have selected the “DiSEqC 1.0” option as<br />
long as you don’t employ equipment according to “DiSEqC 1.2” or “USALS” standards. Changes can be<br />
made using the buttons.<br />
9.4 DiSEqC 1.0<br />
In principle, there are two kinds of external DiSEqC switches on the market. One is for connection of two<br />
LNBs, the other one is for connection of up to four LNBs. In the “Auto Search” sub menu you can select<br />
the DiSEqC LNB input A / B / C or D for each LNB connected to the corresponding switch port of the<br />
DiSEqC switch.<br />
For details please follow the instructions that come with you DiSEqC equipment.<br />
<strong>DT</strong>-<strong>X7</strong> <strong>CI</strong><br />
16