DT-X7 CI - Radix
DT-X7 CI - Radix
DT-X7 CI - Radix

Sie wollen auch ein ePaper? Erhöhen Sie die Reichweite Ihrer Titel.
YUMPU macht aus Druck-PDFs automatisch weboptimierte ePaper, die Google liebt.
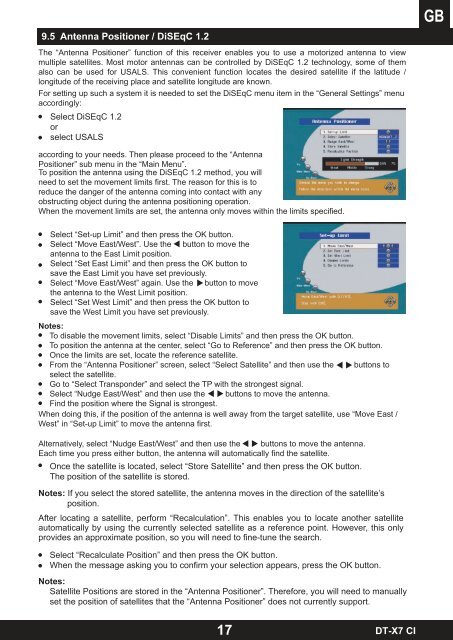
9.5 Antenna Positioner / DiSEqC 1.2<br />
The “Antenna Positioner” function of this receiver enables you to use a motorized antenna to view<br />
multiple satellites. Most motor antennas can be controlled by DiSEqC 1.2 technology, some of them<br />
also can be used for USALS. This convenient function locates the desired satellite if the latitude /<br />
longitude of the receiving place and satellite longitude are known.<br />
For setting up such a system it is needed to set the DiSEqC menu item in the “General Settings” menu<br />
accordingly:<br />
Select DiSEqC 1.2<br />
or<br />
select USALS<br />
according to your needs. Then please proceed to the “Antenna<br />
Positioner” sub menu in the “Main Menu”.<br />
To position the antenna using the DiSEqC 1.2 method, you will<br />
need to set the movement limits first. The reason for this is to<br />
reduce the danger of the antenna coming into contact with any<br />
obstructing object during the antenna positioning operation.<br />
When the movement limits are set, the antenna only moves within the limits specified.<br />
Select “Set-up Limit” and then press the OK button.<br />
Select “Move East/West”. Use the button to move the<br />
antenna to the East Limit position.<br />
Select “Set East Limit” and then press the OK button to<br />
save the East Limit you have set previously.<br />
Select “Move East/West” again. Use the button to move<br />
the antenna to the West Limit position.<br />
Select “Set West Limit” and then press the OK button to<br />
save the West Limit you have set previously.<br />
Notes:<br />
To disable the movement limits, select “Disable Limits” and then press the OK button.<br />
To position the antenna at the center, select “Go to Reference” and then press the OK button.<br />
Once the limits are set, locate the reference satellite.<br />
From the “Antenna Positioner” screen, select “Select Satellite” and then use the buttons to<br />
select the satellite.<br />
Go to “Select Transponder” and select the TP with the strongest signal.<br />
Select “Nudge East/West” and then use the buttons to move the antenna.<br />
Find the position where the Signal is strongest.<br />
When doing this, if the position of the antenna is well away from the target satellite, use “Move East /<br />
West” in “Set-up Limit” to move the antenna first.<br />
Alternatively, select “Nudge East/West” and then use the buttons to move the antenna.<br />
Each time you press either button, the antenna will automatically find the satellite.<br />
Once the satellite is located, select “Store Satellite” and then press the OK button.<br />
The position of the satellite is stored.<br />
Notes: If you select the stored satellite, the antenna moves in the direction of the satellite’s<br />
position.<br />
After locating a satellite, perform “Recalculation”. This enables you to locate another satellite<br />
automatically by using the currently selected satellite as a reference point. However, this only<br />
provides an approximate position, so you will need to fine-tune the search.<br />
Select “Recalculate Position” and then press the OK button.<br />
When the message asking you to confirm your selection appears, press the OK button.<br />
Notes:<br />
Satellite Positions are stored in the “Antenna Positioner”. Therefore, you will need to manually<br />
set the position of satellites that the “Antenna Positioner” does not currently support.<br />
17<br />
<strong>DT</strong>-<strong>X7</strong> <strong>CI</strong>