Einbauanleitung Snow Way
Einbauanleitung Snow Way
Einbauanleitung Snow Way

Sie wollen auch ein ePaper? Erhöhen Sie die Reichweite Ihrer Titel.
YUMPU macht aus Druck-PDFs automatisch weboptimierte ePaper, die Google liebt.
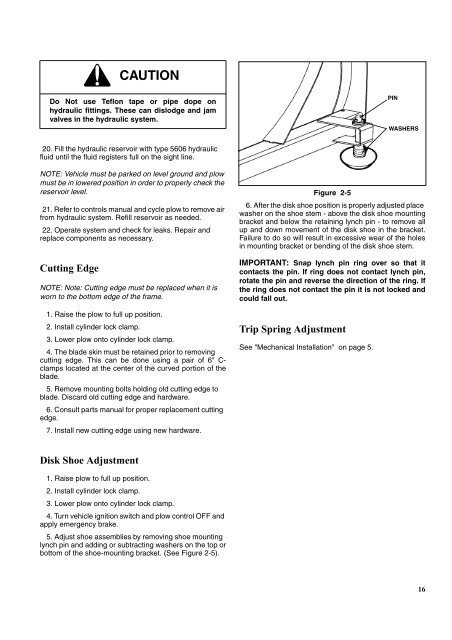
c CAUTIONDo Not use Teflon tape or pipe dope onhydraulic fittings. These can dislodge and jamvalves in the hydraulic system.PINWASHERS20. Fill the hydraulic reservoir with type 5606 hydraulicfluid until the fluid registers full on the sight line.NOTE: Vehicle must be parked on level ground and plowmust be in lowered position in order to properly check thereservoir level.21. Refer to controls manual and cycle plow to remove airfrom hydraulic system. Refill reservoir as needed.22. Operate system and check for leaks. Repair andreplace components as necessary.NOTE: Note: Cutting edge must be replaced when it isworn to the bottom edge of the frame.1. Raise the plow to full up position.2. Install cylinder lock clamp.3. Lower plow onto cylinder lock clamp.4. The blade skin must be retained prior to removingcutting edge. This can be done using a pair of 6" C-clamps located at the center of the curved portion of theblade.5. Remove mounting bolts holding old cutting edge toblade. Discard old cutting edge and hardware.6. Consult parts manual for proper replacement cuttingedge.7. Install new cutting edge using new hardware.Figure 2-56. After the disk shoe position is properly adjusted placewasher on the shoe stem - above the disk shoe mountingbracket and below the retaining lynch pin - to remove allup and down movement of the disk shoe in the bracket.Failure to do so will result in excessive wear of the holesin mounting bracket or bending of the disk shoe stem.IMPORTANT: Snap lynch pin ring over so that itcontacts the pin. If ring does not contact lynch pin,rotate the pin and reverse the direction of the ring. Ifthe ring does not contact the pin it is not locked andcould fall out.See "Mechanical Installation" on page 5.1. Raise plow to full up position.2. Install cylinder lock clamp.3. Lower plow onto cylinder lock clamp.4. Turn vehicle ignition switch and plow control OFF andapply emergency brake.5. Adjust shoe assemblies by removing shoe mountinglynch pin and adding or subtracting washers on the top orbottom of the shoe-mounting bracket. (See Figure 2-5).