installation an operation for sea tel model coastal 18 satellite tv ...
installation an operation for sea tel model coastal 18 satellite tv ...
installation an operation for sea tel model coastal 18 satellite tv ...

Create successful ePaper yourself
Turn your PDF publications into a flip-book with our unique Google optimized e-Paper software.
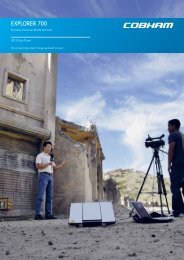
Coastal <strong>18</strong> Ku-B<strong>an</strong>d TVRO Installation<br />
4.2.1. Cutouts & mounting holes<br />
1 Using the radome template portion of drawing 1<strong>18</strong>092, mark the mounting holes <strong>an</strong>d cable<br />
passage cutout. Drill the mounting holes <strong>for</strong> the radome. A hole saw may be used to cut out<br />
the cable passage (<strong>for</strong> routing the cables into the base of the radome).<br />
2 Mark the mounting holes <strong>an</strong>d cutout area <strong>for</strong> the control p<strong>an</strong>el using the <strong>an</strong>tenna control p<strong>an</strong>el<br />
template portion of drawing 1<strong>18</strong>092. Cut out the marked area as shown on the template <strong>an</strong>d<br />
drill the mounting holes.<br />
3 If necessary, cut out sa<strong>tel</strong>lite receiver <strong>an</strong>d <strong>tel</strong>evision monitor mounting locations. Drill mounting<br />
holes <strong>an</strong>d cut out/drill cable routing holes.<br />
4.2.2. Cable routing<br />
1 Route the <strong>an</strong>tenna control cable from the <strong>an</strong>tenna radome location to the control p<strong>an</strong>el location.<br />
If necessary, disconnect the or<strong>an</strong>ge 8-pin screw terminal connector on the free end of the<br />
control cable to make cable routing easier. Adjust the cable routing so that 16 inches (40cm) of<br />
cable extends beyond the radome base-mounting surface <strong>an</strong>d at least 4 inches (10cm) of cable<br />
extends out of the <strong>an</strong>tenna control p<strong>an</strong>el mounting surface.<br />
2 Route the two, or four, RG-6 (or better) coax cables from the <strong>an</strong>tenna radome location to the<br />
appropriate matrix switch location(s). Adjust the cable routing so that 16 inches (40cm) of cable<br />
extends beyond the radome base-mounting surface <strong>an</strong>d <strong>an</strong> appropriate amount of excess cable<br />
extends from the matrix switch location. NOTE: You may w<strong>an</strong>t to color code, or number, your<br />
coaxes <strong>for</strong> proper connection to the matrix switch below decks.<br />
3 Route 16 AWG (1.29mm) or larger gauge wire (fused <strong>for</strong> 4 Amp or larger) DC power from the<br />
boats’ batteries or DC voltage supply to the <strong>an</strong>tenna control p<strong>an</strong>el location. Connect +12VDC<br />
to Pin 1 <strong>an</strong>d ground to Pin 2 of the or<strong>an</strong>ge 2-pin screw terminal connector on the <strong>an</strong>tenna<br />
control p<strong>an</strong>el (see figure 4-4 in paragraph 4.2.4). Adjust the cable routing so that at least 4<br />
inches (10cm) of cable extends out of the <strong>an</strong>tenna control p<strong>an</strong>el mounting surface.<br />
4 Route additional coaxes from the matrix switch location to the desired sa<strong>tel</strong>lite receiver locations<br />
as needed <strong>for</strong> desired configuration. Adjust cable routing <strong>for</strong> appropriate excess cable at each<br />
end.<br />
5 Route AC power to the sa<strong>tel</strong>lite receiver <strong>an</strong>d <strong>tel</strong>evision monitor locations as needed.<br />
4.2.3. Radome Mounting <strong>an</strong>d <strong>an</strong>tenna cable connections<br />
1 Refer to the Installation Arr<strong>an</strong>gement<br />
drawing. Remove the radome top by<br />
removing the four cap nuts from the bolts<br />
that thread up into the recess areas of the<br />
radome base. Set the radome top <strong>an</strong>d cap<br />
nuts aside <strong>for</strong> later re-use.<br />
2 Remove the 3/8-16 hex jam nuts <strong>an</strong>d<br />
washers (four places) from the under-side of<br />
the radome base. Gently lift the <strong>an</strong>tenna<br />
pedestal assembly out of the radome base.<br />
3 Have the mounting hardware (4 mounting<br />
studs, 4 fender washers <strong>an</strong>d 4 nuts) from<br />
the <strong>installation</strong> kit ready <strong>for</strong> use.<br />
4-3
![NC1147 (pdf 1.47 mb) Nitrogen Concentrator [OBIGGS] - Cobham plc](https://img.yumpu.com/51124104/1/190x245/nc1147-pdf-147-mb-nitrogen-concentrator-obiggs-cobham-plc.jpg?quality=85)