2907 Solve the Mysteries of Machine Quilting - Husqvarna Viking
2907 Solve the Mysteries of Machine Quilting - Husqvarna Viking
2907 Solve the Mysteries of Machine Quilting - Husqvarna Viking

Create successful ePaper yourself
Turn your PDF publications into a flip-book with our unique Google optimized e-Paper software.
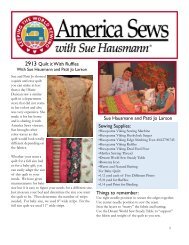
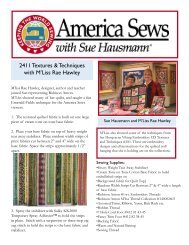
<strong>2907</strong><br />
<strong>Solve</strong> <strong>the</strong> <strong>Mysteries</strong> <strong>of</strong><br />
<strong>Machine</strong> <strong>Quilting</strong><br />
with David and Shelley Hooke<br />
Many people piece beautiful quilt tops only to fi nd<br />
it very challenging to decide what quilting designs<br />
will complement <strong>the</strong> pieced design or fi nd it so time<br />
consuming to quilt that <strong>the</strong>y never get <strong>the</strong>m quilted.<br />
David and Shelley Hooke <strong>of</strong> Liten Up joined Sue with<br />
tips on quilting your quilts including how to select <strong>the</strong><br />
quilting design and using <strong>the</strong> QBOT automated quilter<br />
on your studio frame and machine to make <strong>the</strong> quilting<br />
fast and easy.<br />
Shelley and her mo<strong>the</strong>r Carol have enjoyed quilting for<br />
many years and <strong>of</strong>fer quilt clubs through <strong>the</strong>ir company<br />
3CrazyLadies. David got involved in <strong>the</strong> quilting<br />
industry several years ago when Shelley began quilting<br />
on a Studio frame with a mid arm machine for home<br />
quilters and was not pleased with <strong>the</strong> result because her<br />
stitches were uneven. At <strong>the</strong> time David was working<br />
in <strong>the</strong> Aerospace industry and took his knowledge to<br />
a different level by inventing <strong>the</strong> fi rst stitch regulator<br />
for <strong>the</strong> studio quilting frame set up called <strong>the</strong> Quilter’s<br />
Cruise Control. Sue met <strong>the</strong>m when she was learning <strong>the</strong><br />
Mega Quilter and <strong>the</strong>y became business colleagues and<br />
friends.<br />
Shelley shared several things to consider when deciding<br />
how to quilt your quilt including <strong>the</strong> type <strong>of</strong> fabric in<br />
<strong>the</strong> quilt (detailed quilting designs can be lost in busy<br />
print fabric but will complement a solid or batik). Also<br />
consider <strong>the</strong> quilt pattern and how <strong>the</strong> design will look<br />
and fi t within <strong>the</strong> patchwork design.<br />
Sue Hausmann, Shelley and David Hooke<br />
Sewing Supplies:<br />
•<strong>Husqvarna</strong> <strong>Viking</strong> 18 x 8 Long Arm <strong>Quilting</strong> <strong>Machine</strong><br />
•INSPIRA Imperial Frame<br />
•QBOT Automated Quilter<br />
•QBOT S<strong>of</strong>tware<br />
•Warm and Natural Batting<br />
•Sulky 12 weight and 30 weight cotton thread<br />
•(Optional: <strong>Husqvarna</strong> <strong>Viking</strong> Mega Quilter with<br />
Studio Frame set up or <strong>Husqvarna</strong> <strong>Viking</strong> Sewing<br />
<strong>Machine</strong> set for free motion)<br />
It is important to also think about who will receive <strong>the</strong><br />
quilt and what will its purpose be? For example, will it<br />
be used on a child’s bed, washed <strong>of</strong>ten, played on or<br />
hung on a wall as an art piece?<br />
One <strong>of</strong> <strong>the</strong> ways to see how a quilting design will look<br />
on your quilt top is to print or trace <strong>the</strong> designs on clear<br />
template plastic or transparency. The designs in <strong>the</strong><br />
QBOT s<strong>of</strong>tware and that come with your QBOT can be<br />
1
printed with any ink jet printer. Place <strong>the</strong> transparency<br />
on your quilt top to see how <strong>the</strong> design complements<br />
your quilt top design.<br />
You can also take a picture <strong>of</strong> your quilt and input it into<br />
your computer. In <strong>the</strong> QBOT S<strong>of</strong>tware, <strong>the</strong> quilting<br />
designs can be pulled in and viewed on top <strong>of</strong> <strong>the</strong> image<br />
<strong>of</strong> <strong>the</strong> quilt. There are special tools that will show you<br />
how <strong>the</strong> stitching design will look on your quilt. You<br />
can fade out <strong>the</strong> quilt image to see <strong>the</strong> quilt design more<br />
clearly or you can also remove <strong>the</strong> background to see<br />
only <strong>the</strong> quilt design.<br />
The type <strong>of</strong> thread you use for quilting should also help<br />
you determine <strong>the</strong> quilting design. The thread type and<br />
color should complement <strong>the</strong> design. David likes to use<br />
Sulky 12 weight Blendable thread on top for quilting. Be<br />
sure to use <strong>the</strong> correct needle for your quilting machine<br />
and a larger size 100/16. Using <strong>the</strong> right needle is very<br />
important for your quilting success!<br />
Shelley and David brought a number <strong>of</strong> quilts to<br />
decorate <strong>the</strong> America Sews set and to illustrate some <strong>of</strong><br />
<strong>the</strong> principles <strong>of</strong> deciding on your quilt design.<br />
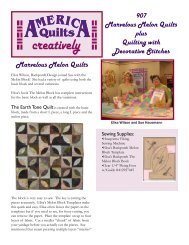
The quilt on <strong>the</strong> wall, uses motif designs, borders and<br />
edge to edge borders.<br />
Select <strong>the</strong> quilting area and QBOT will scale to fi t. You<br />
can fi ne tune <strong>the</strong> design placement if needed.<br />
This baby quilt wall hanging shows multiple design<br />
motifs which are highly visible thanks to <strong>the</strong> use <strong>of</strong> a 12<br />
wt. variegated thread.<br />
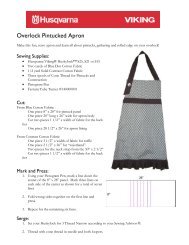
Below is a Four Patch quilt, using alternating pieced<br />
blocks with solid squares. <strong>Quilting</strong> a detailed design<br />
emphasizes <strong>the</strong> solid squares, and selecting a different<br />
design shows <strong>of</strong>f <strong>the</strong> pieced blocks. Blendable thread<br />
gives texture and depth to <strong>the</strong> quilting designs. The<br />
border has an intertwining, ribbon quilting design.<br />
2
Here is a Streak O’Lightning quilt. This particular one<br />
uses monochromatic batik fabrics which give a scrappy<br />
look, making <strong>the</strong> quilting choice an all-over, or edge-toedge<br />
dedsign.<br />
This Streak O’Lightning quilt is more traditional, using<br />
onefocus fabric for <strong>the</strong> background (<strong>the</strong> blue), and red<br />
and white for <strong>the</strong> “streaks.”<br />
The quilts discussed are available for kit<br />
purchase directly from LiTen Up, through <strong>the</strong>ir<br />
website www.3crazyladies.com or by calling <strong>the</strong><br />
shop at 847-918-8270. Specifi c fabrics may<br />
differ and areregularly updated with new fabric<br />
collections.<br />
3
2906 Quick Project<br />
Flat Felled Scarf<br />
with Denise Applegate-Schober<br />
Denise Applegate-Schober loves to create with her<br />
<strong>Husqvarna</strong> <strong>Viking</strong> Sewing <strong>Machine</strong> and was really<br />
excited to see <strong>the</strong> new 9mm Felled Foot. This new<br />
accessory foot makes it easy to create a fi nished top<br />
stitched seam just like you see in ready made projects<br />
and clothing on medium to heavy fabric. 9 mm Flatfelled<br />
seams are used to seam readymade denim jeans<br />
because <strong>the</strong>y are extremely durable and pr<strong>of</strong>essional<br />
looking. 9 mm fl at-felled seams are also used in home<br />
dec and will add a decorative touch when sewn with a<br />
contrasting thread. You will have <strong>the</strong> best results with<br />
<strong>the</strong> 9mm Flat Felled Foot when sewing medium to<br />
heavy weight fabrics.<br />
Denise used a medium weight linen to create her<br />
Fashion Scarf with fl at felled seams and rolled edge<br />
fi nish. The fl at felled seams were stitched with a<br />
turquoise color <strong>of</strong> Robison Anton 40 weight Rayon<br />
thread and <strong>the</strong> edges <strong>of</strong> <strong>the</strong> scarf were fi nished with a<br />
coordinating color <strong>of</strong> Robison Anton 40 weight Rayon<br />
Swirling Sensations in a coordinating color.<br />
Cut strips <strong>of</strong> fabric <strong>the</strong> desired length <strong>of</strong> <strong>the</strong> scarf and 3<br />
to 5” wide.<br />
Put in an Inspira Universal Needle size 90 and thread<br />
with Robison Anton thread on <strong>the</strong> top and <strong>the</strong> bobbin.<br />
You want to use a Robison Anton decorative thread on<br />
top and in <strong>the</strong> bobbin because <strong>the</strong> fl at felled seams will<br />
be seen on both sides and will be <strong>the</strong> decorative detail<br />
on <strong>the</strong> scarf.<br />
Snap on <strong>the</strong> Flat<br />
Felled Seam Foot and<br />
experiment on scraps<br />
with <strong>the</strong> different<br />
seam allowances and<br />
techniques below to<br />
create different widths<br />
<strong>of</strong> fl at felled seam.<br />
Then chose <strong>the</strong> one you<br />
want for your scarf seams.<br />
Sue Hausmann and Denise Applegate-Schober<br />
Sewing Supplies:<br />
•<strong>Husqvarna</strong> <strong>Viking</strong> Sewing <strong>Machine</strong><br />
•<strong>Husqvarna</strong> <strong>Viking</strong> Huskylock Serger<br />
•Robison Anton 40 Weight Rayon Thread<br />
•Robison Anton 40 Weight Rayon Swirling Sensations<br />
•Thread in coordinating color<br />
•Mettler Metrolock Serger Thread<br />
•Havel’s Blunt Bent Scissors<br />
•<strong>Husqvarna</strong> <strong>Viking</strong> Flat Felled Foot 9mm<br />
#413185545<br />
•Inspira Serger Needle size 90<br />
•Inspira Universal Sewing <strong>Machine</strong> Needle size 90<br />
•½ yard fabric for scarf (Denise selected a medium<br />
weight linen)<br />
Place <strong>the</strong> wrong sides <strong>of</strong> <strong>the</strong> fabrics toge<strong>the</strong>r but <strong>the</strong><br />
raw edges are not matching for this technique. Off set<br />
<strong>the</strong> raw edges using <strong>the</strong> red markings on <strong>the</strong> foot as a<br />
guide. The lower fabric should follow <strong>the</strong> marking along<br />
<strong>the</strong> right side <strong>of</strong> <strong>the</strong> foot and <strong>the</strong> upper fabric should<br />
follow <strong>the</strong> red marking on <strong>the</strong> right front edge <strong>of</strong> <strong>the</strong><br />
foot. (This method will<br />
result in a double row <strong>of</strong><br />
stitching on <strong>the</strong> right side<br />
<strong>of</strong> <strong>the</strong> garment which<br />
is what you usually see<br />
in fl at felled seams. If<br />
you want a single row <strong>of</strong><br />
stitching on <strong>the</strong> garment,<br />
stitch right sides <strong>of</strong> <strong>the</strong><br />
fabric toge<strong>the</strong>r.)<br />
4
Select Medium Woven, Seam on your Sewing Advisor<br />
or select straight stitch length 2.5. Stitch <strong>the</strong> two fabrics<br />
toge<strong>the</strong>r with a straight stitch. Press <strong>the</strong> seam allowance<br />
to <strong>the</strong> left<br />
Use <strong>the</strong> guides on <strong>the</strong> front <strong>of</strong> <strong>the</strong> Flat-Felled Foot to<br />
fold <strong>the</strong> wider seam allowance around <strong>the</strong> narrower<br />
seam allowance. Stitch in place using a straight stitch.<br />
Once you have decided on what seam to use for your<br />
scarf, seam <strong>the</strong> pieces toge<strong>the</strong>r with fl at felled seams.<br />
Finish <strong>the</strong> outside edges with rolled edge on your<br />
<strong>Husqvarna</strong> <strong>Viking</strong> Huskylock Serger. Thread <strong>the</strong> needle<br />
and <strong>the</strong> lower looper with Mettler Metrolock Serger<br />
thread. Thread <strong>the</strong> upper looper with Robson Anton<br />
Swirling Sensations 40 weight Rayon thread. Sew on<br />
scraps fi rst and adjust <strong>the</strong> tensions as needed so that <strong>the</strong><br />
upper looper thread wraps around <strong>the</strong> edge as it rolls <strong>the</strong><br />
edge. Follow <strong>the</strong> Huskylock Sewing Advisor advice for<br />
best results.<br />
For garment sewing with a 5/8” seam allowance, stitch<br />
<strong>the</strong> seam with a 5/8” seam allowance. Use your Havel’s<br />
blunt bent scissors to trim one seam allowance to ¼”.<br />
Fold <strong>the</strong> seam open and press <strong>the</strong> wider seam allowance<br />
over <strong>the</strong> narrow one. Place wide seam allowance in <strong>the</strong><br />
guide on <strong>the</strong> Flat Felled Foot and stitch.<br />
Denise showed a jacket<br />
she is creating. The black<br />
jacket features <strong>the</strong> wider<br />
fl at felled seam stitched<br />
in white thread for high<br />
color contrast detail.<br />
To stitch <strong>the</strong> wider fl at<br />
felled seam for <strong>the</strong> fi rst step, be sure your garment has<br />
5/8” seam allowances included in <strong>the</strong> pattern. In <strong>the</strong><br />
fi rst stitching step, when sewing <strong>the</strong> two layers <strong>of</strong> fabric<br />
wrong sides toge<strong>the</strong>r, place <strong>the</strong> raw edges toge<strong>the</strong>r and<br />
use <strong>the</strong> outer right markings on <strong>the</strong> Flat-Felled Foot as<br />
a guide for both layers. Cut <strong>of</strong>f 6mm from <strong>the</strong> top seam<br />
<strong>the</strong>n follow <strong>the</strong> instructions above to create <strong>the</strong> fl at<br />
felled seam.<br />
Sue’s tip is that when starting <strong>the</strong> second step <strong>of</strong> <strong>the</strong> fl at<br />
felled seam, instead <strong>of</strong> putting <strong>the</strong> wider seam allowance<br />
into <strong>the</strong> guide <strong>of</strong> <strong>the</strong> foot, she presses <strong>the</strong> fi rst ½ inch<br />
<strong>of</strong> <strong>the</strong> seam with <strong>the</strong> wider seam allowance pressed over<br />
<strong>the</strong> narrower one as it will stitch. Then place <strong>the</strong> seam<br />
under <strong>the</strong> foot with <strong>the</strong> needle in <strong>the</strong> stitching position<br />
<strong>of</strong> this seam. Stitch about 3/8” onto <strong>the</strong> fabric, stop<br />
with <strong>the</strong> needle down, and pull <strong>the</strong> wider seam allowance<br />
up and into <strong>the</strong> guide in <strong>the</strong> Flat Felled Foot. Continue<br />
stitching <strong>the</strong> seam.<br />
Thanks to <strong>the</strong> Underwriter<br />
<strong>of</strong> our Quick Project:<br />
www.robison-anton.com<br />
5
![[pdf] husqvarna viking sewing machine stitch comparison chart](https://img.yumpu.com/11869478/1/190x146/pdf-husqvarna-viking-sewing-machine-stitch-comparison-chart.jpg?quality=85)