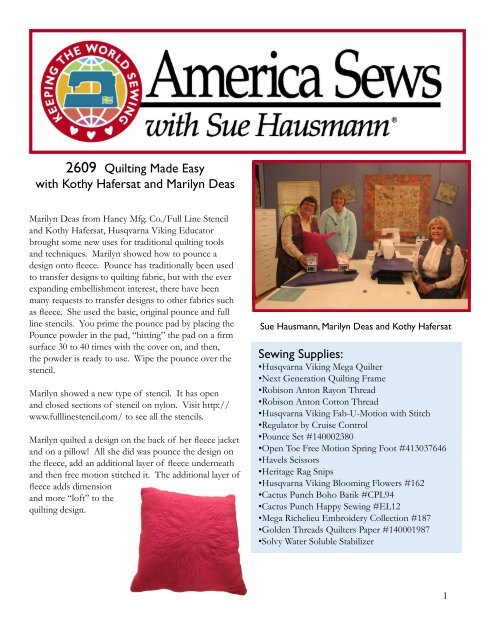
2609 Quilting Made Easy with Kothy Hafersat ... - Husqvarna Viking
2609 Quilting Made Easy with Kothy Hafersat ... - Husqvarna Viking
2609 Quilting Made Easy with Kothy Hafersat ... - Husqvarna Viking

Create successful ePaper yourself
Turn your PDF publications into a flip-book with our unique Google optimized e-Paper software.
<strong>2609</strong> <strong>Quilting</strong> <strong>Made</strong> <strong>Easy</strong><br />
<strong>with</strong> <strong>Kothy</strong> <strong>Hafersat</strong> and Marilyn Deas<br />
Marilyn Deas from Hancy Mfg. Co./Full Line Stencil<br />
and <strong>Kothy</strong> <strong>Hafersat</strong>, <strong>Husqvarna</strong> <strong>Viking</strong> Educator<br />
brought some new uses for traditional quilting tools<br />
and techniques. Marilyn showed how to pounce a<br />
design onto fl eece. Pounce has traditionally been used<br />
to transfer designs to quilting fabric, but <strong>with</strong> the ever<br />
expanding embellishment interest, there have been<br />
many requests to transfer designs to other fabrics such<br />
as fl eece. She used the basic, original pounce and full<br />
line stencils. You prime the pounce pad by placing the<br />
Pounce powder in the pad, “hitting” the pad on a fi rm<br />
surface 30 to 40 times <strong>with</strong> the cover on, and then,<br />
the powder is ready to use. Wipe the pounce over the<br />
stencil.<br />
Marilyn showed a new type of stencil. It has open<br />
and closed sections of stencil on nylon. Visit http://<br />
www.fulllinestencil.com/ to see all the stencils.<br />
Marilyn quilted a design on the back of her fl eece jacket<br />
and on a pillow! All she did was pounce the design on<br />
the fl eece, add an additional layer of fl eece underneath<br />
and then free motion stitched it. The additional layer of<br />
fl eece adds dimension<br />
and more “loft” to the<br />
quilting design.<br />
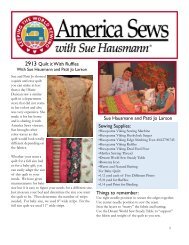
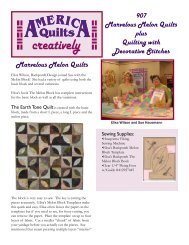
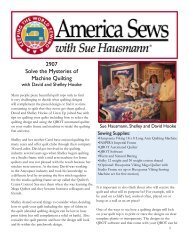
Sue Hausmann, Marilyn Deas and <strong>Kothy</strong> <strong>Hafersat</strong><br />
Sewing Supplies:<br />
•<strong>Husqvarna</strong> <strong>Viking</strong> Mega Quilter<br />
•Next Generation <strong>Quilting</strong> Frame<br />
•Robison Anton Rayon Thread<br />
•Robison Anton Cotton Thread<br />
•<strong>Husqvarna</strong> <strong>Viking</strong> Fab-U-Motion <strong>with</strong> Stitch<br />
•Regulator by Cruise Control<br />
•Pounce Set #140002380<br />
•Open Toe Free Motion Spring Foot #413037646<br />
•Havels Scissors<br />
•Heritage Rag Snips<br />
•<strong>Husqvarna</strong> <strong>Viking</strong> Blooming Flowers #162<br />
•Cactus Punch Boho Batik #CPL94<br />
•Cactus Punch Happy Sewing #EL12<br />
•Mega Richelieu Embroidery Collection #187<br />
•Golden Threads Quilters Paper #140001987<br />
•Solvy Water Soluble Stabilizer<br />
1
<strong>Kothy</strong> <strong>Hafersat</strong> joined Sue and Marilyn <strong>with</strong> quilting<br />
tips. She works on a Studio size home quilting frame,<br />
the Next Generation Quilt Frame. With the Mega<br />
Quilter, she is able to follow pantographs, or simply quilt<br />
free motion.<br />
She teaches at <strong>Husqvarna</strong> <strong>Viking</strong> stores and Quilt Guilds<br />
across the United States and has found a perfect project<br />
for beginners. To frame quilt a vest, she rolls enough<br />
yardage of quilt fabric <strong>with</strong> un-washed fl annel on the<br />
frame. She then lets the students quilt. They practice<br />
following a pantograph. After they have quilted the<br />
fabric, they then make it into a “shabby” vest!<br />
<strong>Kothy</strong> embroidered Mega Richelieu embroidery on the<br />
back of Sue’s vest She edited out the butterfl ies and<br />
embroidered them on the front.<br />
<strong>Kothy</strong> stitched reversible embroidery from Blooming<br />
Flowers on one by matching the bobbin and top thread<br />
at each color change.<br />
<strong>Kothy</strong> mentioned that she really likes the instructions<br />
and diagram for loading the Next Generation<br />
Frame that are on the <strong>Husqvarna</strong> <strong>Viking</strong> website,<br />
www.husqvarnaviking.com, under Education, Tips and<br />
Hints. Even though she loads it almost every day, she<br />
still keeps them on hand!<br />
<strong>Kothy</strong> showed to hold the laser light like a pen when<br />
stitching the feathers. She is on the handwheel side of<br />
the machine to use the Pantogram and the other side<br />
of the machine when stitching free motion <strong>with</strong>out a<br />
pattern or <strong>with</strong> a pattern stenciled onto the fabric.<br />
<strong>Kothy</strong> likes to use Robison Anton variegated thread for<br />
quilting. Any vest pattern that doesn’t have a dart will<br />
work well for this project.<br />
Trace your vest pattern on to the fabric on the frame.<br />
<strong>Kothy</strong> showed how to trace it onto Golden Threads<br />
quilting paper. Then , stitch through the paper on the<br />
line <strong>with</strong>out thread to perforate the paper. Then pounce<br />
the shape onto the fabric to be quilted. The Pounce<br />
powder will go through the holes in the paper creating<br />
the outline of the vest.<br />
Cut out vest and then sew together using a 1/2” seam<br />
allowances on the sides and shoulders. Topstitch <strong>with</strong><br />
5/8” seam guide around the front. Clip on an angle<br />
<strong>with</strong> rag snipping scissors into the seam allowance on<br />
seams and edges. Clip 1/8 to 1/4” apart.<br />
Wash vest to achieve a nice “ragged” edge. After the<br />
vest has been fi nished and washed, then embroiders<br />
it. She uses water soluble stabilizer so that it will be<br />
reversible, and winds matching bobbins. She has then<br />
washed her vest over and over and it looks like new!<br />
Thanks to our Underwriter:<br />
www.fulllinestencil.com<br />
2
<strong>2609</strong> Quick Project<br />
Pintuck and Felted Scarf<br />
<strong>with</strong> Lynn Lunoe<br />
A simple Sari Print sheer fabric can become a<br />
sensational accessory, using metallic thread, a twin<br />
needle and the Huskylock serger.<br />
Machine Set-Up:<br />
1. Wind a bobbin <strong>with</strong> Robison Anton Super Poly<br />
sewing thread to match the fabric and insert<br />
bobbin in bobbin case.<br />
2. Remove regular sewing machine needle and<br />
insert the twin needle.<br />
3. If your sewing machine has a twin needle safety<br />
setting, activate it in the Set Menu.<br />
4. The <strong>Husqvarna</strong> <strong>Viking</strong> Designer SE and<br />
Designer SE Limited Edition have a twin needle<br />
setting selection box in the Set Menu. Select the<br />
size twin needle you are using and the Designer<br />
SE automatically changes the width of the<br />
stitch to a safe setting for that size twin needle.<br />
NOTE: If you do not have a twin needle safety,<br />
be sure your stitch plate opening is wide enough<br />
to accept the twin needle for the stitch you have<br />
selected. Narrow the width as needed.<br />
5. Thread <strong>with</strong> two spools of Robison Anton<br />
Metallic thread on top and thread the twin<br />
needle. Consult your Users Guide for additional<br />
instructions.<br />
6. Snap on the 5 Groove Pin Tuck Foot.<br />
7. Slide the Quilt Guide into the hole on the back<br />
of the sewing machine ankle, behind the needle,<br />
so that the arm of quilt guide is 1” from the<br />
center of the two needles.<br />
Measure and Cut:<br />
1. Use the entire width of the fabric, selvage edge<br />
to selvage edge for the scarf length.<br />
2. Pull a thread across the width of the fabric,<br />
about 1” from the top cut edge, to mark the fi rst<br />
cutting line.<br />
3. Cut along that pulled thread.<br />
4. Measure down 15” and pull another thread. Cut<br />
along that pulled thread.<br />
5. Along the top and bottom selvage edge, mark<br />
1-1/2” in from one cut edge to mark your fi rst<br />
row of stitching.<br />
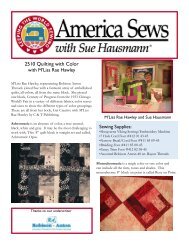
Sue Hausmann, <strong>Kothy</strong> <strong>Hafersat</strong><br />
and Lynn Lunoe<br />
Sewing Supplies:<br />
•<strong>Husqvarna</strong> <strong>Viking</strong> Sewing Machine<br />
•<strong>Husqvarna</strong> <strong>Viking</strong> Huskylock Serger<br />
•5-Groove Pintuck Foot #412369945<br />
•1/2 yard sheer Sari silk or polyester fabric<br />
•2 spools Robison Anton metallic thread<br />
•1 spool Robison Anton Super Poly sewing thread to<br />
match fabric<br />
•2 cones Robison Anton Serger thread to match<br />
fabric<br />
•3.0/90 Inspira Twin Needle<br />
•Quilt Guide (included <strong>with</strong> most <strong>Husqvarna</strong> <strong>Viking</strong><br />
Sewing Machines)<br />
Thanks to the Underwriter<br />
of our Quick Project:<br />
www.robisonantonthread.com
Let’s Sew:<br />
1. On the <strong>Husqvarna</strong> <strong>Viking</strong> Designer SE and<br />
Designer SE Limited Edition, select stitch E1:<br />
14, a serpentine stitch. If your sewing machine<br />
does not have a serpentine stitch, select a<br />
straight stitch.<br />
2. To make sure that whatever stitch you select<br />
can be safely done <strong>with</strong> the twin needle on your<br />
sewing machine, use the hand wheel to move the<br />
needle threough the stitch.<br />
3. Beginning at the plain selvage edge, line the arm<br />
of the quilt guide up <strong>with</strong> the cut edge of the<br />
fabric. Reduce machine speed slightly. Begin<br />
sewing, using the quilt guide along the cut edge<br />
to assure a straight line. If available, use the<br />
Start/Stop button instead of the foot control.<br />
4. When you reach the edge of the printed border<br />
at the end, select FIX to tie off. Use the Selective<br />
Thread cutter to cut threads. It pulls the thread<br />
ends to the under side of the fabric!<br />
5. To start the next row of stitching, go back to<br />
the plain selvage edge. Place the arm of the quilt<br />
guide along the fi rst row of stitching.<br />
6. Select “Stitch Restart” on the Designer SE<br />
Limited Edition or Sapphire 870 Quilt. The<br />
stitch pattern will reset to start in exactly the<br />
same place as the fi rst row of stitches.<br />
7. Sew a second row of stitching, using the fi rst<br />
row of stitching as your guide. Stop sewing at<br />
the decorative border and select FIX to tie off<br />
and use the Selective Thread cutter.<br />
8. Continue to sew parallel rows across the width<br />
of the scarf. The fabric will pucker slightly,<br />
adding texture and interest to the scarf.<br />
Rolled Edge:<br />
1. Once you fi nish all the rows of stitching, set the<br />
serger for a narrow three-thread rolled edge. Put<br />
Robison Anton Serger thread in the lower looper<br />
and needle, and use Robison Anton metallic<br />
thread in the upper looper.<br />
2. Serge a narrow rolled edge around all four<br />
edges of the scarf. Use seam sealant on all four<br />
corners.<br />
Wear it for fun and make more for your friends! It is<br />
sure to get compliments!<br />
Lynn did the same thing <strong>with</strong> fl eece! The resulting scarf<br />
was a great success! She added polka dots <strong>with</strong> roving,<br />
felted into the fl eece using her Huskystar ER10 Needle<br />
Felting machine. To make the fringe, cut 1/2” wide<br />
strips and pull to “curl” them!<br />
4
![[pdf] husqvarna viking sewing machine stitch comparison chart](https://img.yumpu.com/11869478/1/190x146/pdf-husqvarna-viking-sewing-machine-stitch-comparison-chart.jpg?quality=85)