2913 Quilt it With Ruffles Sue Hausmann and ... - Husqvarna Viking
2913 Quilt it With Ruffles Sue Hausmann and ... - Husqvarna Viking
2913 Quilt it With Ruffles Sue Hausmann and ... - Husqvarna Viking

Create successful ePaper yourself
Turn your PDF publications into a flip-book with our unique Google optimized e-Paper software.
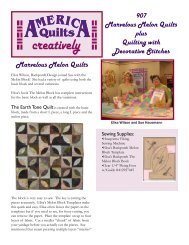
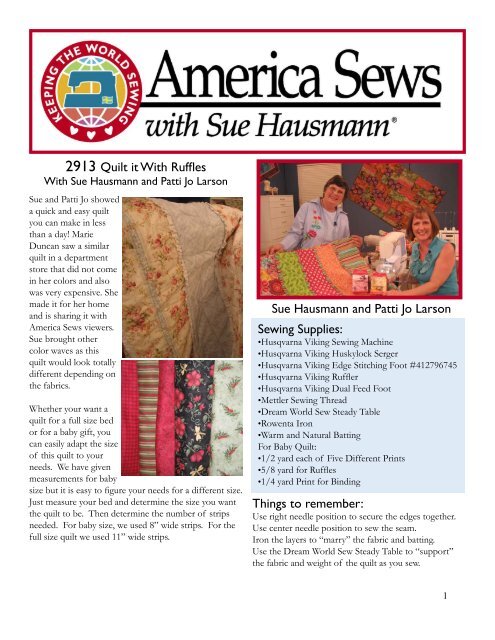
<strong>2913</strong> <strong>Quilt</strong> <strong>it</strong> W<strong>it</strong>h Ruffl es<br />
W<strong>it</strong>h <strong>Sue</strong> <strong>Hausmann</strong> <strong>and</strong> Patti Jo Larson<br />
<strong>Sue</strong> <strong>and</strong> Patti Jo showed<br />
a quick <strong>and</strong> easy quilt<br />
you can make in less<br />
than a day! Marie<br />
Duncan saw a similar<br />
quilt in a department<br />
store that did not come<br />
in her colors <strong>and</strong> also<br />
was very expensive. She<br />
made <strong>it</strong> for her home<br />
<strong>and</strong> is sharing <strong>it</strong> w<strong>it</strong>h<br />
America Sews viewers.<br />
<strong>Sue</strong> brought other<br />
color waves as this<br />
quilt would look totally<br />
different depending on<br />
the fabrics.<br />
Whether your want a<br />
quilt for a full size bed<br />
or for a baby gift, you<br />
can easily adapt the size<br />
of this quilt to your<br />
needs. We have given<br />
measurements for baby<br />
size but <strong>it</strong> is easy to fi gure your needs for a different size.<br />
Just measure your bed <strong>and</strong> determine the size you want<br />
the quilt to be. Then determine the number of strips<br />
needed. For baby size, we used 8” wide strips. For the<br />
full size quilt we used 11” wide strips.<br />
<strong>Sue</strong> <strong>Hausmann</strong> <strong>and</strong> Patti Jo Larson<br />
Sewing Supplies:<br />
•<strong>Husqvarna</strong> <strong>Viking</strong> Sewing Machine<br />
•<strong>Husqvarna</strong> <strong>Viking</strong> Huskylock Serger<br />
•<strong>Husqvarna</strong> <strong>Viking</strong> Edge St<strong>it</strong>ching Foot #412796745<br />
•<strong>Husqvarna</strong> <strong>Viking</strong> Ruffl er<br />
•<strong>Husqvarna</strong> <strong>Viking</strong> Dual Feed Foot<br />
•Mettler Sewing Thread<br />
•Dream World Sew Steady Table<br />
•Rowenta Iron<br />
•Warm <strong>and</strong> Natural Batting<br />
For Baby <strong>Quilt</strong>:<br />
•1/2 yard each of Five Different Prints<br />
•5/8 yard for Ruffl es<br />
•1/4 yard Print for Binding<br />
Things to remember:<br />
Use right needle pos<strong>it</strong>ion to secure the edges together.<br />
Use center needle pos<strong>it</strong>ion to sew the seam.<br />
Iron the layers to “marry” the fabric <strong>and</strong> batting.<br />
Use the Dream World Sew Steady Table to “support”<br />
the fabric <strong>and</strong> weight of the quilt as you sew.<br />
1
Cut:<br />
For a baby size quilt:<br />
Cut two pieces 8” x width of fabric from each of fi ve<br />
different prints.<br />
Cut fi ve pieces of Warm <strong>and</strong> Natural Batting 8” x 44”<br />
Nine 2” x width of fabric strips for ruffl e<br />
Make The Ruffl es:<br />
1. Thread w<strong>it</strong>h sewing thread top <strong>and</strong> bobbin.<br />
2. St<strong>it</strong>ch the 2” x width of fabric pieces right sides<br />
together, end to end to create one long strip.<br />
3. Fold in half lengthwise, wrong sides together<br />
<strong>and</strong> press.<br />
4. Snap on your Edge St<strong>it</strong>ching Foot. Select right<br />
needle pos<strong>it</strong>ion straight st<strong>it</strong>ch. St<strong>it</strong>ch the raw<br />
edges together aligning the edges w<strong>it</strong>h the fl ange<br />
on the foot. This will keep the raw edges from<br />
shifting as they go through the ruffl er.<br />
5. Attach your ruffl er.<br />
6. Adjust your ruffl er so that 10” ruffl es down to<br />
5”. We used the 6 setting.<br />
7. Ruffl e the long strip.<br />
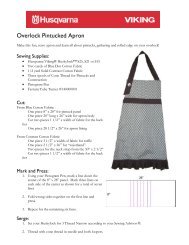
Make the <strong>Quilt</strong>:<br />
1. Arrange your strips in<br />
the order you like them.<br />
Number them 1 to 5 as<br />
shown.<br />
2. Select right needle pos<strong>it</strong>ion.<br />
St<strong>it</strong>ch a ruffl e to the right<br />
side along one long edge of<br />
strips 1, 2, 3 <strong>and</strong> 4 matching<br />
the raw edges.<br />
3. Make the combined strip #1. Place strip<br />
#1 (orange) wrong sides together w<strong>it</strong>h<br />
the other #1 (orange) strip w<strong>it</strong>h a strip of<br />
batting in between.<br />
4. Attach your<br />
Interchangeable Dual<br />
Feed w<strong>it</strong>h the st<strong>and</strong>ard<br />
foot attached.<br />
5. W<strong>it</strong>h right needle<br />
pos<strong>it</strong>ion selected, st<strong>it</strong>ch each<br />
long edge securing the layers<br />
together.<br />
6. Place a strip of batting on a<br />
fl at surface.<br />
7. Place strip #2 (green), no<br />
ruffl e right side up on top of<br />
the batting.<br />
8. Place your combined strip #1<br />
(orange) w<strong>it</strong>h the ruffl e up <strong>and</strong><br />
along right side (not left), on<br />
top of strip #2.<br />
9. Place strip #2 w<strong>it</strong>h ruffl e right<br />
sides together w<strong>it</strong>h combined<br />
strip #1. The ruffl e on strip<br />
#2 should be down <strong>and</strong> to the<br />
left <strong>and</strong> will not be caught in<br />
this seam.<br />
10. Select center needle pos<strong>it</strong>ion.<br />
11. St<strong>it</strong>ch along the right h<strong>and</strong><br />
edge.<br />
12. Open out the batting, bottom<br />
strip <strong>and</strong> top strip.<br />
13. Press.<br />
14. Select right needle pos<strong>it</strong>ion.<br />
St<strong>it</strong>ch along the right h<strong>and</strong> edge to<br />
secure the layers together.<br />
15. Continue adding the remaining strips.<br />
the same way as in steps 6-14 above.<br />
16. Trim the ends to even them up <strong>and</strong> cut<br />
off the selvages.<br />
17. Bind the quilt. for more information<br />
on binding your quilt go to<br />
www.husqvarnaviking.com, USA, Tips<br />
<strong>and</strong> Hints.<br />
18. We used F1:15 Width 1.0 Length 5.0.<br />
19. If your batting requires quilting closer<br />
than 11” or<br />
12”, attach<br />
your dual<br />
feed foot <strong>and</strong><br />
st<strong>it</strong>ch down<br />
the center<br />
of the strips<br />
as needed to<br />
secure the layers together.<br />
2
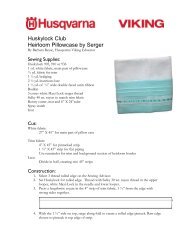
<strong>2913</strong> Quick Project<br />
Dress Shirt Remake<br />
W<strong>it</strong>h Patti Jo Larson<br />
Patti Jo Larson demonstrated a designer peasant blouse<br />
project. She had taken an ordinary wh<strong>it</strong>e shirt <strong>and</strong> created a<br />
trendy fashion blouse.<br />
Patti Jo likes to collect photos from magazines <strong>and</strong> catalogs<br />
for ideas <strong>and</strong> had collaged a number of blouse styles using<br />
lace <strong>and</strong> gathers. She started w<strong>it</strong>h a plain wh<strong>it</strong>e button up the<br />
front blouse or you could use a man’s shirt.<br />
Patti Jo was wearing a shirt inspired by a picture of a designer<br />
top in the newspaper.<br />
The embroideries were<br />
st<strong>it</strong>ched in the same<br />
color as the kn<strong>it</strong> top<br />
onto water soluble<br />
fabric stabilizer <strong>and</strong><br />
then<br />
3-D appliquéd around<br />
the front neckline.<br />
She embroidered<br />
design numbers 1, 7,<br />
<strong>and</strong> 8 from <strong>Husqvarna</strong> <strong>Viking</strong><br />
Embroidery Collection 188 Folk<br />
Art Collection by Kaffe Fassett,<br />
<strong>and</strong> designs 10 <strong>and</strong> 14 from<br />
Embroidery Collection 82.<br />
<strong>Sue</strong> <strong>Hausmann</strong> <strong>and</strong> Patti Jo Larson<br />
Sewing Supplies:<br />
•<strong>Husqvarna</strong> <strong>Viking</strong> Sewing <strong>and</strong> Embroidery Machine<br />
•<strong>Husqvarna</strong> <strong>Viking</strong> Huskylock Serger<br />
•<strong>Husqvarna</strong> <strong>Viking</strong> Endless Romantic Cotton Lace<br />
Embroidery Collection 208<br />
•Robison Anton Cotton 50 weight 100% Cotton<br />
Thread<br />
•Inspira Aqua Magic or Sulky Fabric Solvy Stabilizer<br />
•<strong>Husqvarna</strong> <strong>Viking</strong> ¼” Edge St<strong>it</strong>ching Foot Part<br />
#412914145<br />
•<strong>Husqvarna</strong> <strong>Viking</strong> Clear A Presser Feet K<strong>it</strong><br />
920237096<br />
•<strong>Husqvarna</strong> <strong>Viking</strong> Clear Piping Foot #413097145<br />
•<strong>Husqvarna</strong> <strong>Viking</strong> Braiding Foot Part #412554445<br />
•<strong>Husqvarna</strong> <strong>Viking</strong> Clear Open Toe Foot 412860645<br />
•Wh<strong>it</strong>e Blouse or Shirt<br />
•1/8” fl at elastic<br />
•Elastic Thread<br />
•Mettler Sewing Thread<br />
Thanks to the Underwr<strong>it</strong>er<br />
of our Quick Project:<br />
www.robison-anton.com<br />
3
First cut away the front edge where the buttons <strong>and</strong><br />
buttonholes are. Cut into a v at the front neckline. Cut off<br />
the collar just below the collar b<strong>and</strong>. The shirt must be a large<br />
enough size that when you cut off the front plackets <strong>and</strong> sew<br />
the front together w<strong>it</strong>h a seam you can still pull <strong>it</strong> over your<br />
head.<br />
Remove the patch pocket if any <strong>and</strong> cut away the lower hem<br />
<strong>and</strong> adjust the length as desired.<br />
Thread w<strong>it</strong>h Mettler Sewing Thread on the top <strong>and</strong> in the<br />
bobbin. Select Medium Woven, Seam on the Sewing Advisor<br />
or select a straight st<strong>it</strong>ch, length 2.5. Sew a ¼” seam down the<br />
center front of the blouse. Press the seam allowance open.<br />
Continue to st<strong>it</strong>ch w<strong>it</strong>h the Robison Anton 50 weight Cotton<br />
Thread in the Oatmeal color <strong>and</strong> snap on the Clear Edge<br />
Joining Foot. Select st<strong>it</strong>ch D3 which is a large open cross<br />
st<strong>it</strong>ch <strong>and</strong> place the fl ange/guide on the foot on the seam<br />
line. St<strong>it</strong>ch down the center front seam w<strong>it</strong>h the large cross<br />
st<strong>it</strong>ch.<br />
Thread your Huskylock serger for 3 thread rolled edge w<strong>it</strong>h<br />
Mettler Metrofl ock on the upper <strong>and</strong> lower looper <strong>and</strong><br />
Mettler sewing thread in the needle. Serge the rolled edge on<br />
all the raw edges (neckline, sleeve <strong>and</strong> hem edges) to fi nish<br />
them. St<strong>it</strong>ch a rolled edge on a fabric scrap for testing your<br />
crochet edge st<strong>it</strong>ch below.<br />
Now the fun begins. You will embellish your trendy blouse<br />
w<strong>it</strong>h lace, decorative st<strong>it</strong>ches <strong>and</strong> add elastic for gathers.<br />
Mock Crochet Edge Finish<br />
Begin w<strong>it</strong>h fi nishing the neckline sleeve <strong>and</strong> hem rolled<br />
edges w<strong>it</strong>h a crochet edge technique. Thread w<strong>it</strong>h<br />
Robison Anton 50 weight Cotton Thread on top <strong>and</strong> in<br />
the bobbin. Snap on your Clear Piping Foot because the<br />
rolled edge st<strong>it</strong>ch on the edges will feed in the groove<br />
on the underside of the foot. Select st<strong>it</strong>ch L15. Place the<br />
rolled edge under the Clear Piping Foot w<strong>it</strong>h the rolled<br />
edge in the groove <strong>and</strong> st<strong>it</strong>ch. Adjust the width of the<br />
st<strong>it</strong>ch to 3.5 so the st<strong>it</strong>ch sews right along the edge. Try<br />
this fi rst on your rolled edge scrap. Because the Clear<br />
Piping Foot guides the rolled edge, you can not “fall off<br />
the edge” <strong>and</strong> your st<strong>it</strong>ching will be perfect. If you wish<br />
to try other st<strong>it</strong>ches you can experiment w<strong>it</strong>h the St<strong>it</strong>ch<br />
Width, Length <strong>and</strong> the St<strong>it</strong>ch Pos<strong>it</strong>ioning until you have<br />
exactly the edge fi nish you desire.<br />
Ruffl e Sleeve Cuff Finish<br />
Select E35 <strong>and</strong> snap on your Clear Open Toe Foot. Place the<br />
fi nished edge along the edge of your st<strong>it</strong>ch plate so that your<br />
st<strong>it</strong>ching is approximately 1 ½” from the sleeve edge. St<strong>it</strong>ch<br />
the beautiful decorative st<strong>it</strong>ch w<strong>it</strong>h the Robison Anton 50<br />
weight cotton thread. Select a straight st<strong>it</strong>ch length 3.0. Snap<br />
on your <strong>Husqvarna</strong> <strong>Viking</strong> Braiding Foot <strong>and</strong> place 1/8” fl at<br />
elastic into the Braiding Foot <strong>and</strong> sewing from the wrong side<br />
of the sleeve edge, follow the center of the decorative st<strong>it</strong>ch<br />
<strong>and</strong> stretch the elastic as you st<strong>it</strong>ch <strong>it</strong> to the sleeve. This will<br />
create an instant ruffl ed cuff on your blouse.<br />
Back Waistline Gathers<br />
An easy way to make your blouse more fi tted at the waistline<br />
is to snap on the Buttonhole Foot C. This foot has a small<br />
“fi nger” at the back. Cut a length of elastic thread <strong>and</strong> loop<br />
<strong>it</strong> over the fi nger at the back of the foot w<strong>it</strong>h the two ends<br />
under the foot laying in the grooves on the underside of the<br />
foot. Select st<strong>it</strong>ch L3, the Double Ribbon St<strong>it</strong>ch, <strong>and</strong> st<strong>it</strong>ch<br />
from the wrong side of the blouse at the center back waistline<br />
area. You will want to be sure to have the same Robison<br />
Anton 50 weight thread on the top <strong>and</strong> in the bobbin because<br />
you will see the bobbin side on the fi nished blouse. Patti Jo<br />
st<strong>it</strong>ched 3”-4” on each side of the center back. Once you<br />
have completed the st<strong>it</strong>ching, pull up on the elastic threads<br />
<strong>and</strong> tie them off.<br />
Center Front Lace Embellishment<br />
Patti Jo embroidered design 5 from <strong>Husqvarna</strong> <strong>Viking</strong><br />
Endless Romantic Cotton Lace Embroidery Collection 208.<br />
This is a free st<strong>and</strong>ing lace design to embellish the front<br />
neckline area of her trendy blouse. These designs are dig<strong>it</strong>ized<br />
to be st<strong>it</strong>ched w<strong>it</strong>h Robison Anton 50 weight Cotton Thread<br />
for a very vintage lace result. Thread w<strong>it</strong>h Robison Anton<br />
cotton thread on top <strong>and</strong> in the bobbin. Hoop two layers<br />
of water soluble fabric stabilizer. These designs are dig<strong>it</strong>ized<br />
to be free st<strong>and</strong>ing which means<br />
once the water soluble stabilizer<br />
is dissolved away, the lace designs<br />
will st<strong>and</strong> alone. Some lace<br />
designs must be embroidered on<br />
a sheer fabric or tulle or they will<br />
fall apart when the stabilizer is<br />
dissolved away. You can st<strong>it</strong>ch the<br />
two lace designs in one hooping.<br />
Once you have st<strong>it</strong>ched the designs, remove them from the<br />
hoop trim away most of the stabilizer <strong>and</strong> soak the design to<br />
remove the rest of the stabilizer. In this case soak <strong>it</strong> well or<br />
wash <strong>it</strong> w<strong>it</strong>h some clothes so the lace is not stiff.<br />
Place the lace end along the neckline <strong>and</strong> turn under one<br />
point to make <strong>it</strong> match the angle of the neckline. Snap on the<br />
Clear Open Toe Applique Foot, select a narrow open<br />
zig zag st<strong>it</strong>ch A11 to appliqué the lace in place w<strong>it</strong>h<br />
the matching Robison Anton 50 weight Cotton 4<br />
Thread.
![[pdf] husqvarna viking sewing machine stitch comparison chart](https://img.yumpu.com/11869478/1/190x146/pdf-husqvarna-viking-sewing-machine-stitch-comparison-chart.jpg?quality=85)