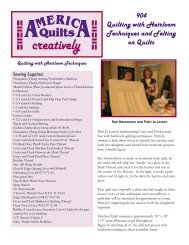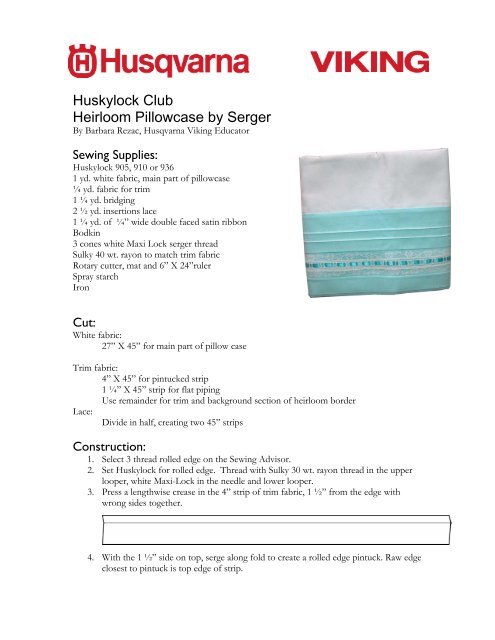
Heirloom Pillow - Husqvarna Viking
Heirloom Pillow - Husqvarna Viking
Heirloom Pillow - Husqvarna Viking

Create successful ePaper yourself
Turn your PDF publications into a flip-book with our unique Google optimized e-Paper software.
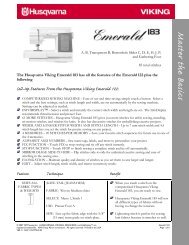
Huskylock Club<br />
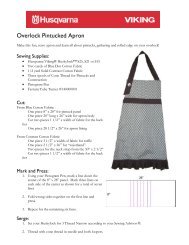
<strong>Heirloom</strong> <strong>Pillow</strong>case by Serger<br />
By Barbara Rezac, <strong>Husqvarna</strong> <strong>Viking</strong> Educator<br />
Sewing Supplies:<br />
Huskylock 905, 910 or 936<br />
1 yd. white fabric, main part of pillowcase<br />
¼ yd. fabric for trim<br />
1 ¼ yd. bridging<br />
2 ½ yd. insertions lace<br />
1 ¼ yd. of ¼” wide double faced satin ribbon<br />
Bodkin<br />
3 cones white Maxi Lock serger thread<br />
Sulky 40 wt. rayon to match trim fabric<br />
Rotary cutter, mat and 6” X 24”ruler<br />
Spray starch<br />
Iron<br />
Cut:<br />
White fabric:<br />
27” X 45” for main part of pillow case<br />
Trim fabric:<br />
4” X 45” for pintucked strip<br />
1 ¼” X 45” strip for flat piping<br />
Use remainder for trim and background section of heirloom border<br />
Lace:<br />
Divide in half, creating two 45” strips<br />
Construction:<br />
1. Select 3 thread rolled edge on the Sewing Advisor.<br />
2. Set Huskylock for rolled edge. Thread with Sulky 30 wt. rayon thread in the upper<br />
looper, white Maxi-Lock in the needle and lower looper.<br />
3. Press a lengthwise crease in the 4” strip of trim fabric, 1 ½” from the edge with<br />
wrong sides together.<br />
4. With the 1 ½” side on top, serge along fold to create a rolled edge pintuck. Raw edge<br />
closest to pintuck is top edge of strip.
5. Press pintuck so the right side of the stitching stays on top.<br />
6. Fold fabric about ¾” below previous pintuck and press in a crease. (This is on wider<br />
side, below pintuck.)<br />
7. Aligning the left side of the presser<br />
foot with the previous pintuck, serge<br />
a second pintuck.<br />
8. Rethread Huskylock with white<br />
Maxi-Lock thread in the upper looper and test tension.<br />
9. Lay the right side of the lace to the right side of the fabric below the pintucks<br />
aligning the left side of the lace with the second pintuck.<br />
10. Serge on row of lace to the<br />
bottom of the pintucked strip.<br />
11. Serge the second row of lace to the<br />
bridging, right sides together.<br />
12. Serge the lace that is attached to the pintucks to the other side of the bridging.<br />
13. With right sides together, serge the wide trim fabric strip to the bottom edge of the<br />
lace.
14. Press trim strip so about 1” of contrasting fabric shows beneath the lace. The<br />
remainder of the fabric becomes the background that shows through the lace.<br />
15. Trim pillow case border to desired width, approximately 5”.<br />
16. (Optional: ribbon may be woven into the bridging.)<br />
17. Press flat piping strip in half lengthwise, wrong sides together.<br />
18. With raw edges even, sandwich flat piping between the right side of the white fabric<br />
in the border above the pintucks, do not include the trim fabric in the seam and the<br />
main pillowcase section. (Hint: Spray starch helps hold everything in place.)<br />
19. Select 3 thread narrow on the Sewing Advisor.<br />
20. Serger “baste” the sandwich of border fabric, flat piping and main pillowcase fabric.<br />
21. Roll pillowcase tightly toward the border to form a “hot dog”.<br />
22. Wrap the border around the “hot dog” to form the “bun”, bringing the cut edge<br />
even with the “basted” seam and the right sides are together.<br />
23. Select 3 thread wide on the Sewing Advisor.<br />
24. Serge the seam with the 3 thread wide stitch.<br />
25. Carefully pull the “hot dog” out of the “bun” from one end. You will end up with all<br />
the seams inside the border.<br />
26. Fold the pillowcase in half, right sides together and raw edges even. Serger side seam<br />
and bottom of pillowcase.<br />
Turn right side out and you have created a beautiful heirloom pillowcase.<br />
These pillowcases make wonderful gifts and bazaar or craft sale items.
![[pdf] husqvarna viking sewing machine stitch comparison chart](https://img.yumpu.com/11869478/1/190x146/pdf-husqvarna-viking-sewing-machine-stitch-comparison-chart.jpg?quality=85)