907 - Marvelous Melon Quilts - Husqvarna Viking
907 - Marvelous Melon Quilts - Husqvarna Viking
907 - Marvelous Melon Quilts - Husqvarna Viking

You also want an ePaper? Increase the reach of your titles
YUMPU automatically turns print PDFs into web optimized ePapers that Google loves.
P.O. Box 458012<br />
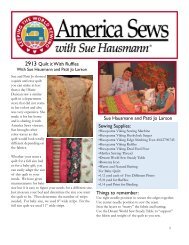
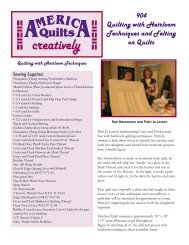
<strong>Marvelous</strong> <strong>Melon</strong> <strong>Quilts</strong><br />
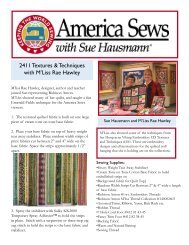
Elisa Wilson, Backporch Design joined Sue with the<br />
<strong>Melon</strong> Block! She had a variety of quilts using both the<br />
basic block and several variations.<br />
Elisa’s book The <strong>Melon</strong> Block has complete instructions<br />
for the basic block as well as all the variations.<br />
The Earth Tone Quilt is created with the basic<br />
block, made from a short L piece, a long L piece and the<br />
melon piece.<br />
The block is very easy to sew. The key is cutting the<br />
pieces accurately. Elisa’s <strong>Melon</strong> Block Templates make<br />
this quick and easy. Elisa often leaves the paper on the<br />
templates but if you need to see, for fussy cutting, you<br />
can remove the paper. Place the template on up to four<br />
layers of fabric. Cut a smaller “chunk” of fabric from<br />
your yardage before you actually cut the pieces. Sue<br />
mentioned that steam pressing multiple layers “marries”<br />
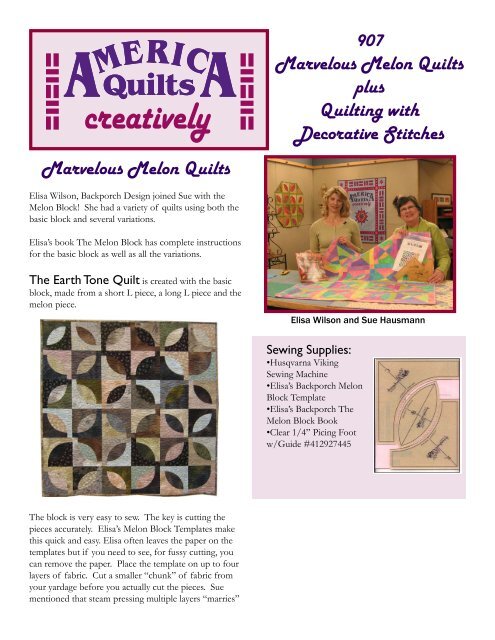
<strong>907</strong><br />
<strong>Marvelous</strong> <strong>Melon</strong> <strong>Quilts</strong><br />
plus<br />
Quilting with<br />
Decorative Stitches<br />
Elisa Wilson and Sue Hausmann<br />
Sewing Supplies:<br />
•<strong>Husqvarna</strong> <strong>Viking</strong><br />
Sewing Machine<br />
•Elisa’s Backporch <strong>Melon</strong><br />
Block Template<br />
•Elisa’s Backporch The<br />
<strong>Melon</strong> Block Book<br />
•Clear 1/4” Picing Foot<br />
w/Guide #412927445
the layers together for cutting. Elisa likes to use a<br />
rotating rotary cutting mat that turns, so that she can<br />
turn the mat and not lift the fabric.<br />
She holds the template in place<br />
and removes the fabric she has<br />
cut off. Then turns the mat<br />
and cuts the next cut.<br />
The templates don’t appear<br />
to fi t together, but when you<br />
match the seam allowances, they fi t perfectly.<br />
Tips for sewing them together. Elisa recommends a<br />
three pin method. Start with the small “L” and the<br />
melon. Fold in half to crease to fi nd the center along<br />
the seam lines of both pieces. Line up the center<br />
creases. Pin. You can also pin the beginning if desired.<br />
As you stitch, the melon needs to be on top because you<br />
are stitching an inside curve to an outside curve. Snap<br />
on your 1/4” piecing foot with guide.<br />
Press the seam to the outside. Press from the right side<br />
fi rst, then the wrong side. Then add the large “L” piece<br />
the same way.<br />
Watermelon<br />
Quilt:<br />
To cut the melon<br />
shape with two<br />
different colors in<br />
the melon, sew two<br />
pieces of fabric<br />
together and then<br />
place the melon<br />
template on top.<br />
Elisa added seeds with a fabric marker and used fusible<br />
bias for the rinds. She also made the end result an<br />
octagon instead of a square. This would be a great table<br />
cloth or wall hanging.<br />
Once you have pieced fabric, there are many different<br />
ways that you can lay the<br />
templates on to get different<br />
effects.<br />
The quilt on the table pictured<br />
close up to the right, looks<br />
very complex, but is cut from<br />
the same three<br />
templates. The free<br />
motion quilting<br />
with a variegated or<br />
Blendable thread,<br />
using an all over<br />
quilting design adds<br />
beautiful detail to the<br />
quilt. To achieve the<br />
four colored melon,<br />
fi rst piece a four<br />
patch. Then put the<br />
melon template on.<br />
fussy cut pieces like<br />
this in one layer only. The lines on the template, make it<br />
very easy.<br />
Different effects can be<br />
achieved by cutting two small “L”s and adding 2”<br />
squares in the corners.<br />
For complete instructions on the melon block variations,<br />
see Elisa’s book, the <strong>Melon</strong> Block Book.<br />
Thanks to our Underwriter:<br />
www.backporchdesign.com
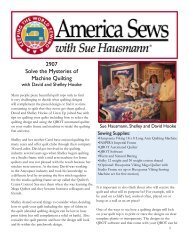
What’s New to Do - Quilting with Decorative Stitches<br />
Marinda Stewart representing Gutermann Threads<br />
joined Sue with tips for quilting with decorative stitches.<br />
She showed a variety of wall hangings that used free<br />
motion stitching and decorative stitches. Feather stitches<br />
and leaf stitches are perfect for creating movement<br />
in the borders. She carefully meandered around the<br />
border, creating swirls as she goes.<br />
She enjoys creating a background by fusing the<br />
background fabrics to a foundation fabric with Steam-<br />
A-Seam 2. She then embellishes with decorative<br />
stitches and specialty threads. The striped border was<br />
embellished with decorative stitches which looked just<br />
like they are part of the fabric.<br />
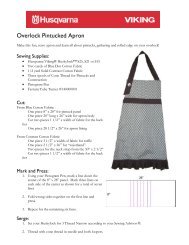
Fantasy Flower Fused Quilt<br />
Finished Quilt is approximately 21” x 27”.<br />
1/4” seam allowances allowed<br />
This quilt is designed to use up pieces of fabrics leftover<br />
from other projects as well as being an opportunity to<br />
experiment with specialty threads and decorative sewing<br />
machine stitches.<br />
1. Following Manufacturers instructions, place<br />
Steam-A-Seam 2 on the wrong side of the fabric<br />
scraps.<br />
2. To create the background, place the foundation<br />
fabric right side up. From the green background<br />
fabrics cut several random curved edge strips.<br />
Remove the paper backing. cut the strips into<br />
random shapes. Fuse the shapes onto the<br />
foundation, covering it completely. Overlap<br />
shapes as needed.<br />
3. Print the four pages of placement guides and<br />
patterns and tape together to form one large<br />
pattern piece, joining the dashed lines.<br />
4. Cut 3/8” wide bias strips of leaf green fabric<br />
(with Steam-A-Seam 2 on the back). Cut one<br />
bias strip 12 1/2” long, one 6 1/2” long, one 4<br />
1/2” long and one 2 1/2” long. Arrange and<br />
fuse on the background following the placement<br />
guide. Shape the curves of the stems as they are<br />
pressed in place.<br />
Marinda Stewart and Sue Hausamnn<br />
Sewing Supplies:<br />
•One 15” x 21” piece of muslin for foundation<br />
•Border #1 – 1/8 yard From stripe<br />
•Border #2 – 1/8 yard allover print<br />
•Border #3 – 3/8 yard striped fabric<br />
•Binding: 1/4 yard<br />
•Backing: 24” x 30”<br />
•Warm and Natural Cotton Batting 24” x 30”<br />
•Assorted Fabric Scraps:<br />
Background four assorted greens<br />
Flower and bud two bright pinks<br />
Flower center two golden yellows<br />
Leaves and stems two greens<br />
•Steam-A-Seam 2 Sheets or roll<br />
Specialty Threads:<br />
•Gütermann Variegated Cotton Thread<br />
•Gütermann Metallic Gold Thread<br />
•Gütermann Decorative Rayon Thread<br />
•Gütermann Clear Monofi lament Thread<br />
•Rotary Cutter, Mat and Ruler<br />
•Rowenta Steam Generator Iron<br />
•Safety pins<br />
•<strong>Husqvarna</strong> <strong>Viking</strong> Clear Stitch in Ditch Foot<br />
#412927447<br />
•Clear Open Toe Foot #413 03 19-45
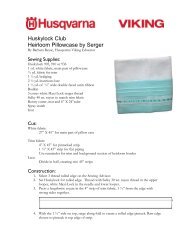
5. Cut the leaves and fl ower pieces out,<br />
following the patterns. Arrange the<br />
pieces in the following order. Begin<br />
with stems, then leaves. For the large<br />
fl ower, layer the smaller petal on top<br />
of the larger petal. Because you are<br />
using Steam-A-Seam 2, the fl owers<br />
will stick, without fusing, so you can<br />
rearrange as you work. Next add the<br />
stamens between the petals. The center<br />
is composed of four parts, the large<br />
circular shape, the star shape, the large center<br />
circle and the small one on top. Position these<br />
in the center of your fl ower. When you are<br />
happy with your arrangement, press with steam<br />
to fuse in place. Arrange the smaller fl ower with<br />
the petals fi rst, layering the small on top of the<br />
large, then the stamens and fi nally the calyx.<br />
Press with steam to fuse in place.<br />
6. Trim your quilt top to measure 13 1/4” x 19 1/<br />
4”.<br />
7. Cut border #1 fabric into two 13 1/4” x 1”<br />
strips. Sew to the top and bottom of the quilt.<br />
Cut two pieces 20 1/4” x 1” and sew to each<br />
side.<br />
8. Cut border #2 fabric into two 14 1/4” x 1” wide<br />
strips. Sew to the top and bottom of the quilt.<br />
Cut two pieces 21 1/4” x 1” and sew to each<br />
side.<br />
9. From border #3 fabric cut 3 1/2” wide strips.<br />
Sew to the top and bottom and side of each side<br />
of the quilt mitering each corner.<br />
10. Layer backing, batting and quilt top. Safety pin<br />
baste the quilt.<br />
The quilt will be quilted and appliquéd<br />
through all layers:<br />
1. Thread your machine with Gütermann<br />
Decorative Rayon threads, Gütermann Metallic<br />
threads or Gütermann Variegated Cotton<br />
threads on top and Gütermann Thread to match<br />
in the bobbin. Snap on your Clear Open Toe<br />
Foot.<br />
2. Stitch around the fl ower and leaf<br />
shapes with satin stitch or decorative<br />
stitches.<br />
3. In the striped border, stitch<br />
decorative stitches randomly<br />
along some of the stripes.<br />
4. Thread with Gütermann<br />
Monofi lament Thread and<br />
snap on your Clear Stitch in<br />
the Ditch Foot. Select straight<br />
stitch. Stitch additional<br />
quilting along the stripes on the<br />
border.<br />
5. Trim the quilt to measure 21” x 27”.<br />
6. Cut binding strips and bind the quilt.<br />
For information on binding a go to<br />
www.husqvarnaviking.com, USA, Education,<br />
Tips and Hints.<br />
Thanks to our Underwriter:<br />
www.gutermann.com
Bud A<br />
Cut 2<br />
Bud B<br />
Cut 1<br />
Bud A<br />
Calyx<br />
B-1<br />
Bud B<br />
Bud A
Flower Center #1<br />
Flower<br />
Center #2<br />
Flower Petal A<br />
Cut 9<br />
Flower<br />
Center<br />
#4<br />
Center<br />
#3<br />
But B-1<br />
Cut 1<br />
Calyx Bud<br />
Stamens<br />
Flower and Bud<br />
Large Leaf A<br />
Cut 5<br />
Flower Petal<br />
A-1 Cut 9<br />
Small Leaf A<br />
Cut 4<br />
Small Leaf B<br />
Cut 4<br />
Large Leaf B<br />
Cut 5
Fantasy Flower<br />
Template and patterns<br />
by Marinda Stewart<br />
for Gutermann of America Inc.<br />
c 2007
![[pdf] husqvarna viking sewing machine stitch comparison chart](https://img.yumpu.com/11869478/1/190x146/pdf-husqvarna-viking-sewing-machine-stitch-comparison-chart.jpg?quality=85)